Tokamak
-
Posts
61 -
Joined
-
Last visited
Everything posted by Tokamak
-
Oh, thank you for that information. I searched around, but apparently my search terms weren't well chosen to find this. Unfortunately, I've saved all of my working files, so I'm stuck with this version and just have to hope they fix it.
-
Using Affinity Designer for Windows Previously I could drag an image into my document from explorer, and the newly created layer would have the same name as the name of the file I imported. I could edit the name if I wanted. After updating to 2.6.0, this behavior is now different. The newly created layer shows the file name as its name, but the text is grey, and if I edit the file name, I am given a blank text box, prompting me to enter a totally new name. This is a nuisance, as I often have file names with a lot of information, like "wwba63 intro scene frame 10410.png", and now if I want to change that name slightly, I have to retype the entire name with whatever change I want to make, instead of just being able to edit the automatically created layer name to make a small change. If one wants to remove the file name from the layer name and make a new name, this new behavior saves simply pressing the backspace key...but if one DID want the layer to be named after the file, this behavior causes a lot of extra work. Is this a bug, or deliberate? And is there a way for me to get the old behavior back? Or at least a workaround of some kind? I'd prefer not to have to keep manually typing out entire layer names like "wwba63 intro scene frame 10410 (darkened)" when I really just want to add "(darkened)" to the existing file name. Thank you! (sorry if that was too much information, I just figured saying what I was actually doing was a good way to convey the issue)
-
Yeah...the way this works is confusing and non-obvious. But now that I know what it expects, I can work with it.
-
Oh! I feel silly for not seeing that. 😆 Thank you so much!
-
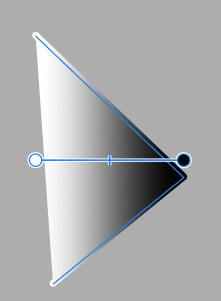
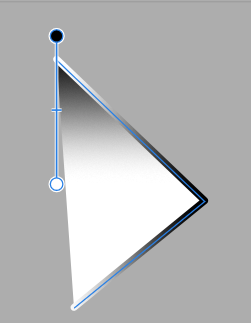
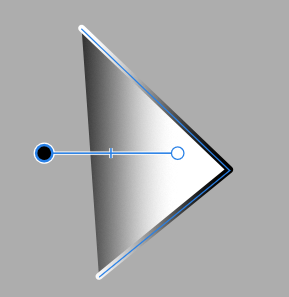
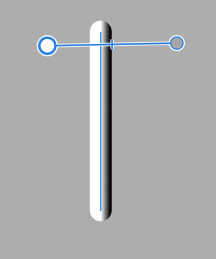
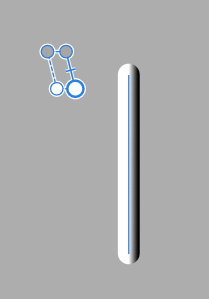
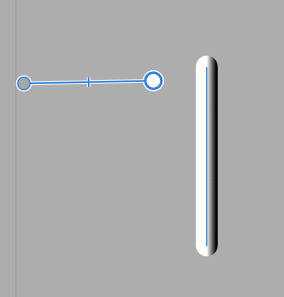
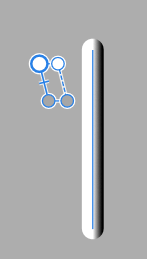
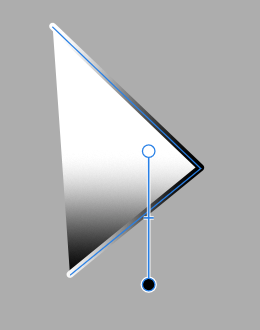
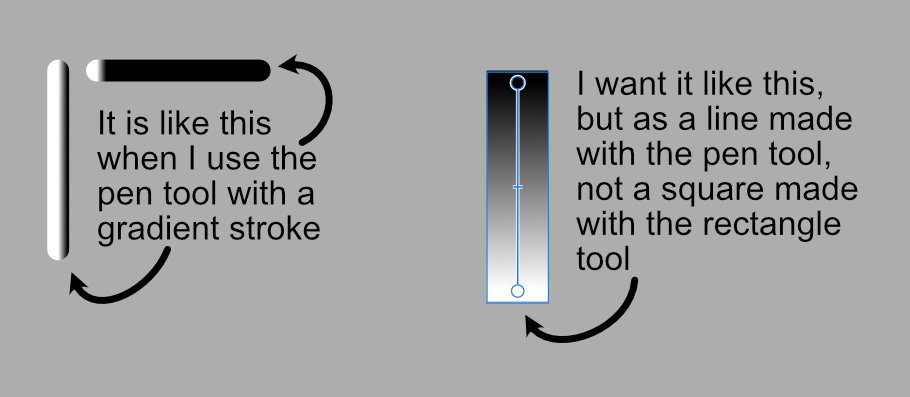
That rotates the gradient of the fill of the curve, if I have it set to be filled with a gradient, but it doesn't rotate the gradient of the stroke. If I make a curve with a gradient fill AND a stroke fill, using that function does this. And if it's just a line, with no fill, which is what I am trying to do...

-
I'm having trouble finding the answer I need with google. I want to change the orientation of a gradient when it is used as a stroke colour. Basically I need to have a vertical line that tapers from black to white *vertically*, but it always does it horizontally. Everything I can find is about using the gradient fill tool, which is not what I am looking for. Can someone help me out? I'd appreciate it.
-
Yay! Thank you.
-
It doesn't work that way for me. It keeps resetting to default. Sometimes I can make a few shapes with the same parameters, but it resets when I switch tools and do something else, and sometimes is seems to just reset immediately.
-
Ah! I didn't realize I could select and duplicate them like that. Thanks! All of these extra steps are kind of a nuisance when I have to do dozens of them, but it's doable. Odd design choice on their part, but it is what it is. Thank you all for all of the help!
-
I did not know about that feature. I can try that. I can also try that. It does seem kind of hacky, and it's weird that you can't just get it to repeat shapes with the same property by having it remember the shape you just made, but if I can get this to work, then that's the main thing. Thank you! I'm using them as masks, so I can't just duplicated them that easily.
-
Running Affinity Designer 2 v 2.3.0 for windows. Just as the title says. Whenever I use the rounded rectangle tool, it sets the starting values of properties to something I don't want, and I can't change the default. Example: make rounded rectangle. Curvature is set to proportional 25%. I change it to absolute size, 150px. I click "synchronize defaults from selection" Now I make another rounded rectangle, which usually comes out the way I set it. Then I do something else elsewhere, like use the text tool or whatever, and when I go back and make another rounded rectangle, it comes out as proportional 25% and I have to manually change it. No amount of setting values and hitting "synchronize defaults" stops this from happening. And it's not even that it's taking the value from the last thing I selected or something, because I don't have any rounded rectangles with any other values. Everything is set to absolute 150px. But this means that if I'm using a lot of them (and I am) I have to manually change every single one, which is really tiresome. Also, the thing that it wants to set things too sometimes changes. For a while it was setting all new rounded rectangles to 100% curvature,. which is basically a circle. What am I meant to do to fix this? This is making a LOT of extra work for me.
-
Hit a wrong key and everything disappears
Tokamak replied to Tokamak's topic in Desktop Questions (macOS and Windows)
That explains why I kept hitting that from muscle memory. -
That works, because I have literally never wanted to select a whole group from the main viewport. Thank you for the help!
-
Hit a wrong key and everything disappears
Tokamak replied to Tokamak's topic in Desktop Questions (macOS and Windows)
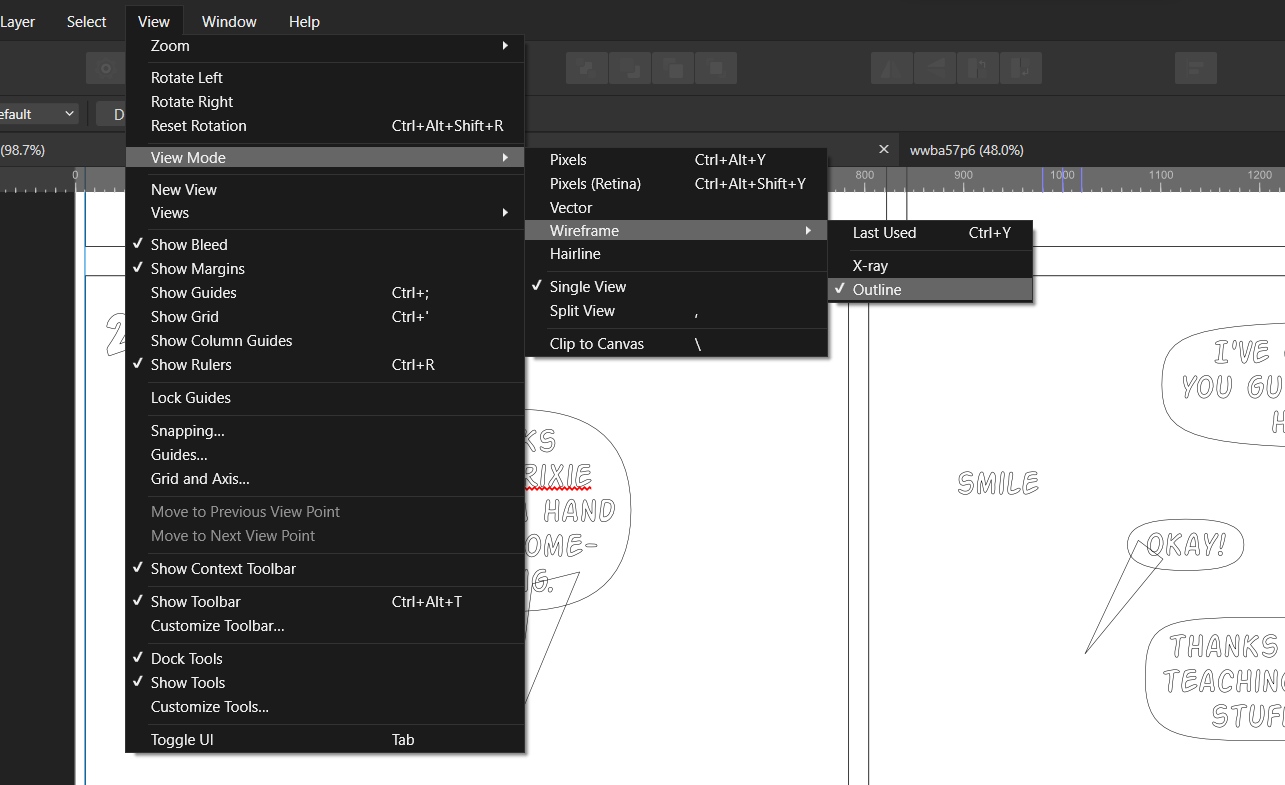
It happened again, and by carefully going through what you said, I figured it out. I was apparently going into "wireframe->outline" mode, which I didn't know was a thing. Apparently ctrl+Y must have been what I hit. Thank you for the help and moral support. I'll leave this here so that someone else having the same problem might find it.
-
Oh, that's useful! If I change "auto select" to "objects" then I don't have to ctrl-click, and the issue doesn't happen. That works too. I'll just have to retrain my muscle memory to not hold ctrl. Thanks! (Somehow I didn't see that option, but there's a lot in the toolbar XD )
-
Windows 11.
-
I'm using Affinity Designer 2 on windows, and a behavior is different from what I came to expect from Designer 1. I use Designer to lay out a comic, so I have a mix of images and polygons, and shapes and text, in a lot of nested groups. In Designer 1, I could ctrl-click on an object (with the move tool active) to select it. This worked for any object type. If I wanted to automatically switch to the text tool so I could edit text, I had to double click. Now when I do that to select a text object, *sometimes* it just selects the text object...and sometimes it automatically switches to the text tool, even though I am 100% certain I single-clicked, not double-clicked. When I'm moving around a lot of text objects, this gets very annoying. Instead of "ctrl-click, drag, ctrl-click, drag" I have to go "ctrl click, escape to exit text entry, hit V to go back to move tool, drag, ctrl-click on next object, escape to exit text entry, hit V to go back to move tool..." and so on. I can't tell why it sometimes works the way I'd like, keeping me in move tool mode, and other times auto-switches me to text mode. I *must* be doing something different, but I'll be damned if I can figure out what it is. This behavior, and more to the point the inconsistency of it, is really messing with my workflow. Can anyone advise as to what might be happening?
-
Hit a wrong key and everything disappears
Tokamak replied to Tokamak's topic in Desktop Questions (macOS and Windows)
Thanks! I shall follow all of this advice if/when it happens again, and post here, even if I resolve it myself, so someone who has the same issue can find it. -
Hit a wrong key and everything disappears
Tokamak replied to Tokamak's topic in Desktop Questions (macOS and Windows)
I will take note of those things and upload a screenshot the next time it happens. I'm frankly not really clear on what artboards even are. I started using photoshop (to do layout of comics...yes, I know it's the wrong tool), then switched to Designer, and I don't really know much about the designer specific features. -
Hit a wrong key and everything disappears
Tokamak replied to Tokamak's topic in Desktop Questions (macOS and Windows)
Undo didn't undo it, so I assumed it wasn't an action that would show up there, but I didn't actually look at the history. I'll at least check that next time. -
Using Affinity Designer 2 on windows 11. I use the keyboard heavily, and occasionally I will fat finger something and hit the wrong key, making everything in my document go white. All of my layers are there, they have 100% opacity, they are enabled...but the document is just blank whiteness. Undo does nothing. I have to reload the file from my last save. I have no idea what key combo I am accidentally hitting, because it always happens when I'm moving fast, and I can never replicate it by trying key combos near to what I was trying to hit. I can't find anything out of the ordinary (as far as I can tell) in the view menu. Obviously it's my dumb self doing this, but it's a pain and I cannot for the life of me figure out what I am causing to happen. Does anyone have any ideas what might be going on?
-
Still having trouble with masking in Designer
Tokamak replied to Tokamak's topic in Desktop Questions (macOS and Windows)
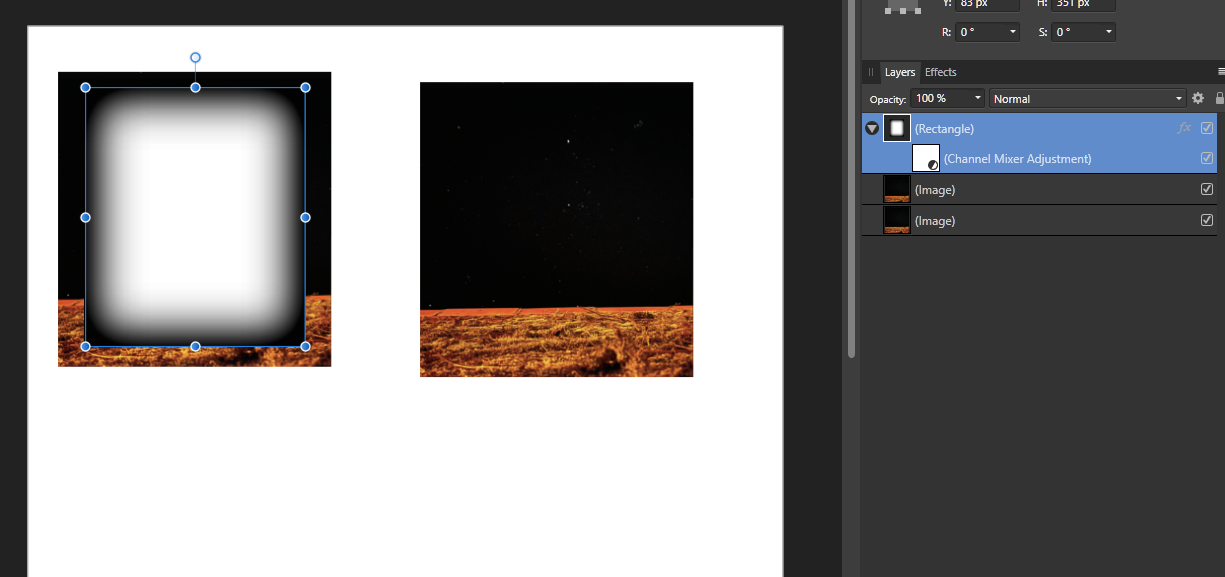
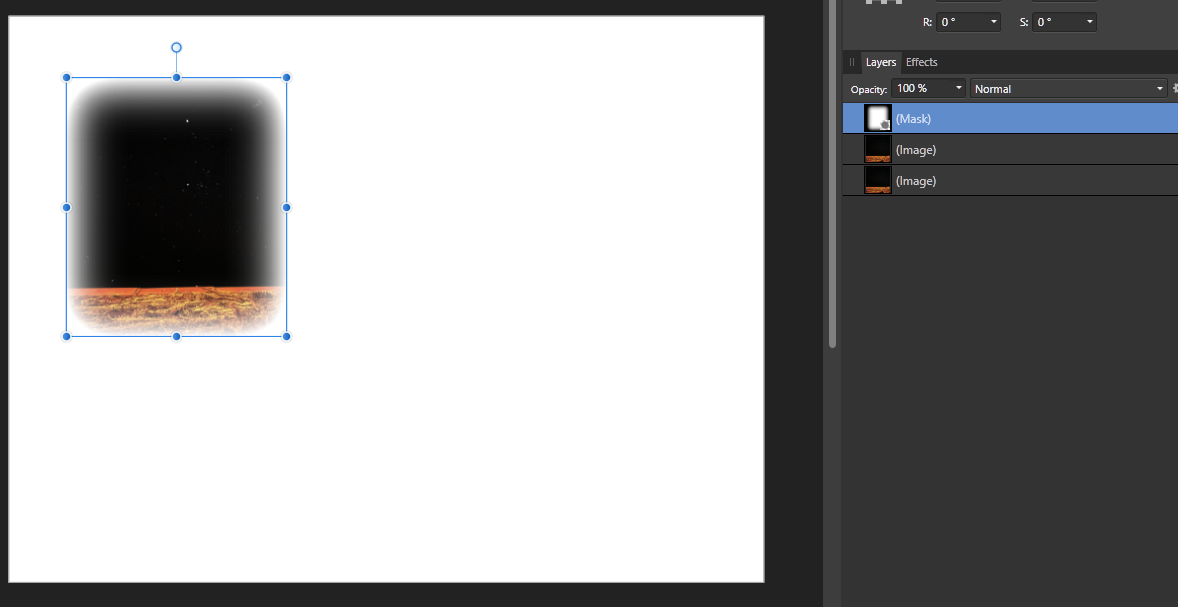
I'm clearly missing something or doing something wrong. I'm trying the first thing, with the channel mixer. I'm using Designer for Windows so it looks a little different, but I set it up like this... Then I right click on the thing I'm trying to use as a mask, and select "mask to below", and I get this...just a hard edged mask. And there is no longer a "channel mixer" icon blow it, like in your example. So I've also tried one of the other suggestions, "rasterize to mask", but then it masks out ALL panels, not just the one I want to mask. Basically, I need to have a number of comic panels, and each one needs its own soft edged mask. Here I made two "panels" just to show how it works. Before: After selecting "rasterize to mask": So the mask is working with the soft edge, but it's masking off BOTH panels, not just one, meaning the other panel is just invisible now. I need the mask to apply to just one image, not everything below it. I think I'm just fundamentally misunderstanding something about how all of this works. Like I said, I'm mostly familiar with photoshop, and I can get this effect in seconds with that, so I am apparently really confused as to how masking in Designer works, or something. I'm sorry if I'm missing something obvious...
-
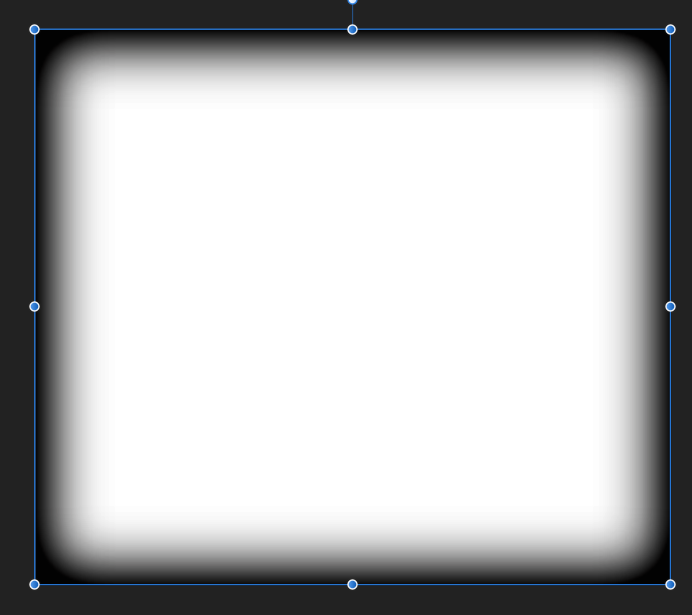
Designer Version 1.0.5 I'm making a comic, and I need to take full images, and mask out just part of them to make panels. I can do that easily enough with hard edges, but in this case I need soft edges. But masking isn't working the way I think it does. In photoshop, I'd make an object with black and white portions, where white is what I want to show and black is what I want masked off, when I use it as a mask. So I've made a mask object that looks like this: But when I use it as a mask, it just acts like a hard-edged rectangle. Rasterizing it doesn't change that. What am I doing wrong? How can I get the mask to look like you'd expect it to, from the object I'm using? (I can't use the gaussian blur trick, because that extends both inward and outward from the edge of the mask, and I need to have ahard limit on how far the mask goes out. I can explain the issue in detail if needed)
-
Crashes consistently when selecting font
Tokamak replied to Tokamak's topic in Desktop Questions (macOS and Windows)
To make it so anyone finding this doesn't have to follow a trail of breadcrumbs, here is the link that was being discussed: https://forum.affinity.serif.com/index.php?/topic/168223-affinity-publisher-crash-after-write-text-in-font-line/#comment-968334 Not authorized or approved by Serif, and at your own risk, but it seems to have worked for me.