jiff
-
Posts
14 -
Joined
-
Last visited
Everything posted by jiff
-
Creating scientific figures
jiff replied to jiff's topic in Pre-V2 Archive of Desktop Questions (macOS and Windows)
Again, thank you very much @v_kyr. It's working now! -
Creating scientific figures
jiff replied to jiff's topic in Pre-V2 Archive of Desktop Questions (macOS and Windows)
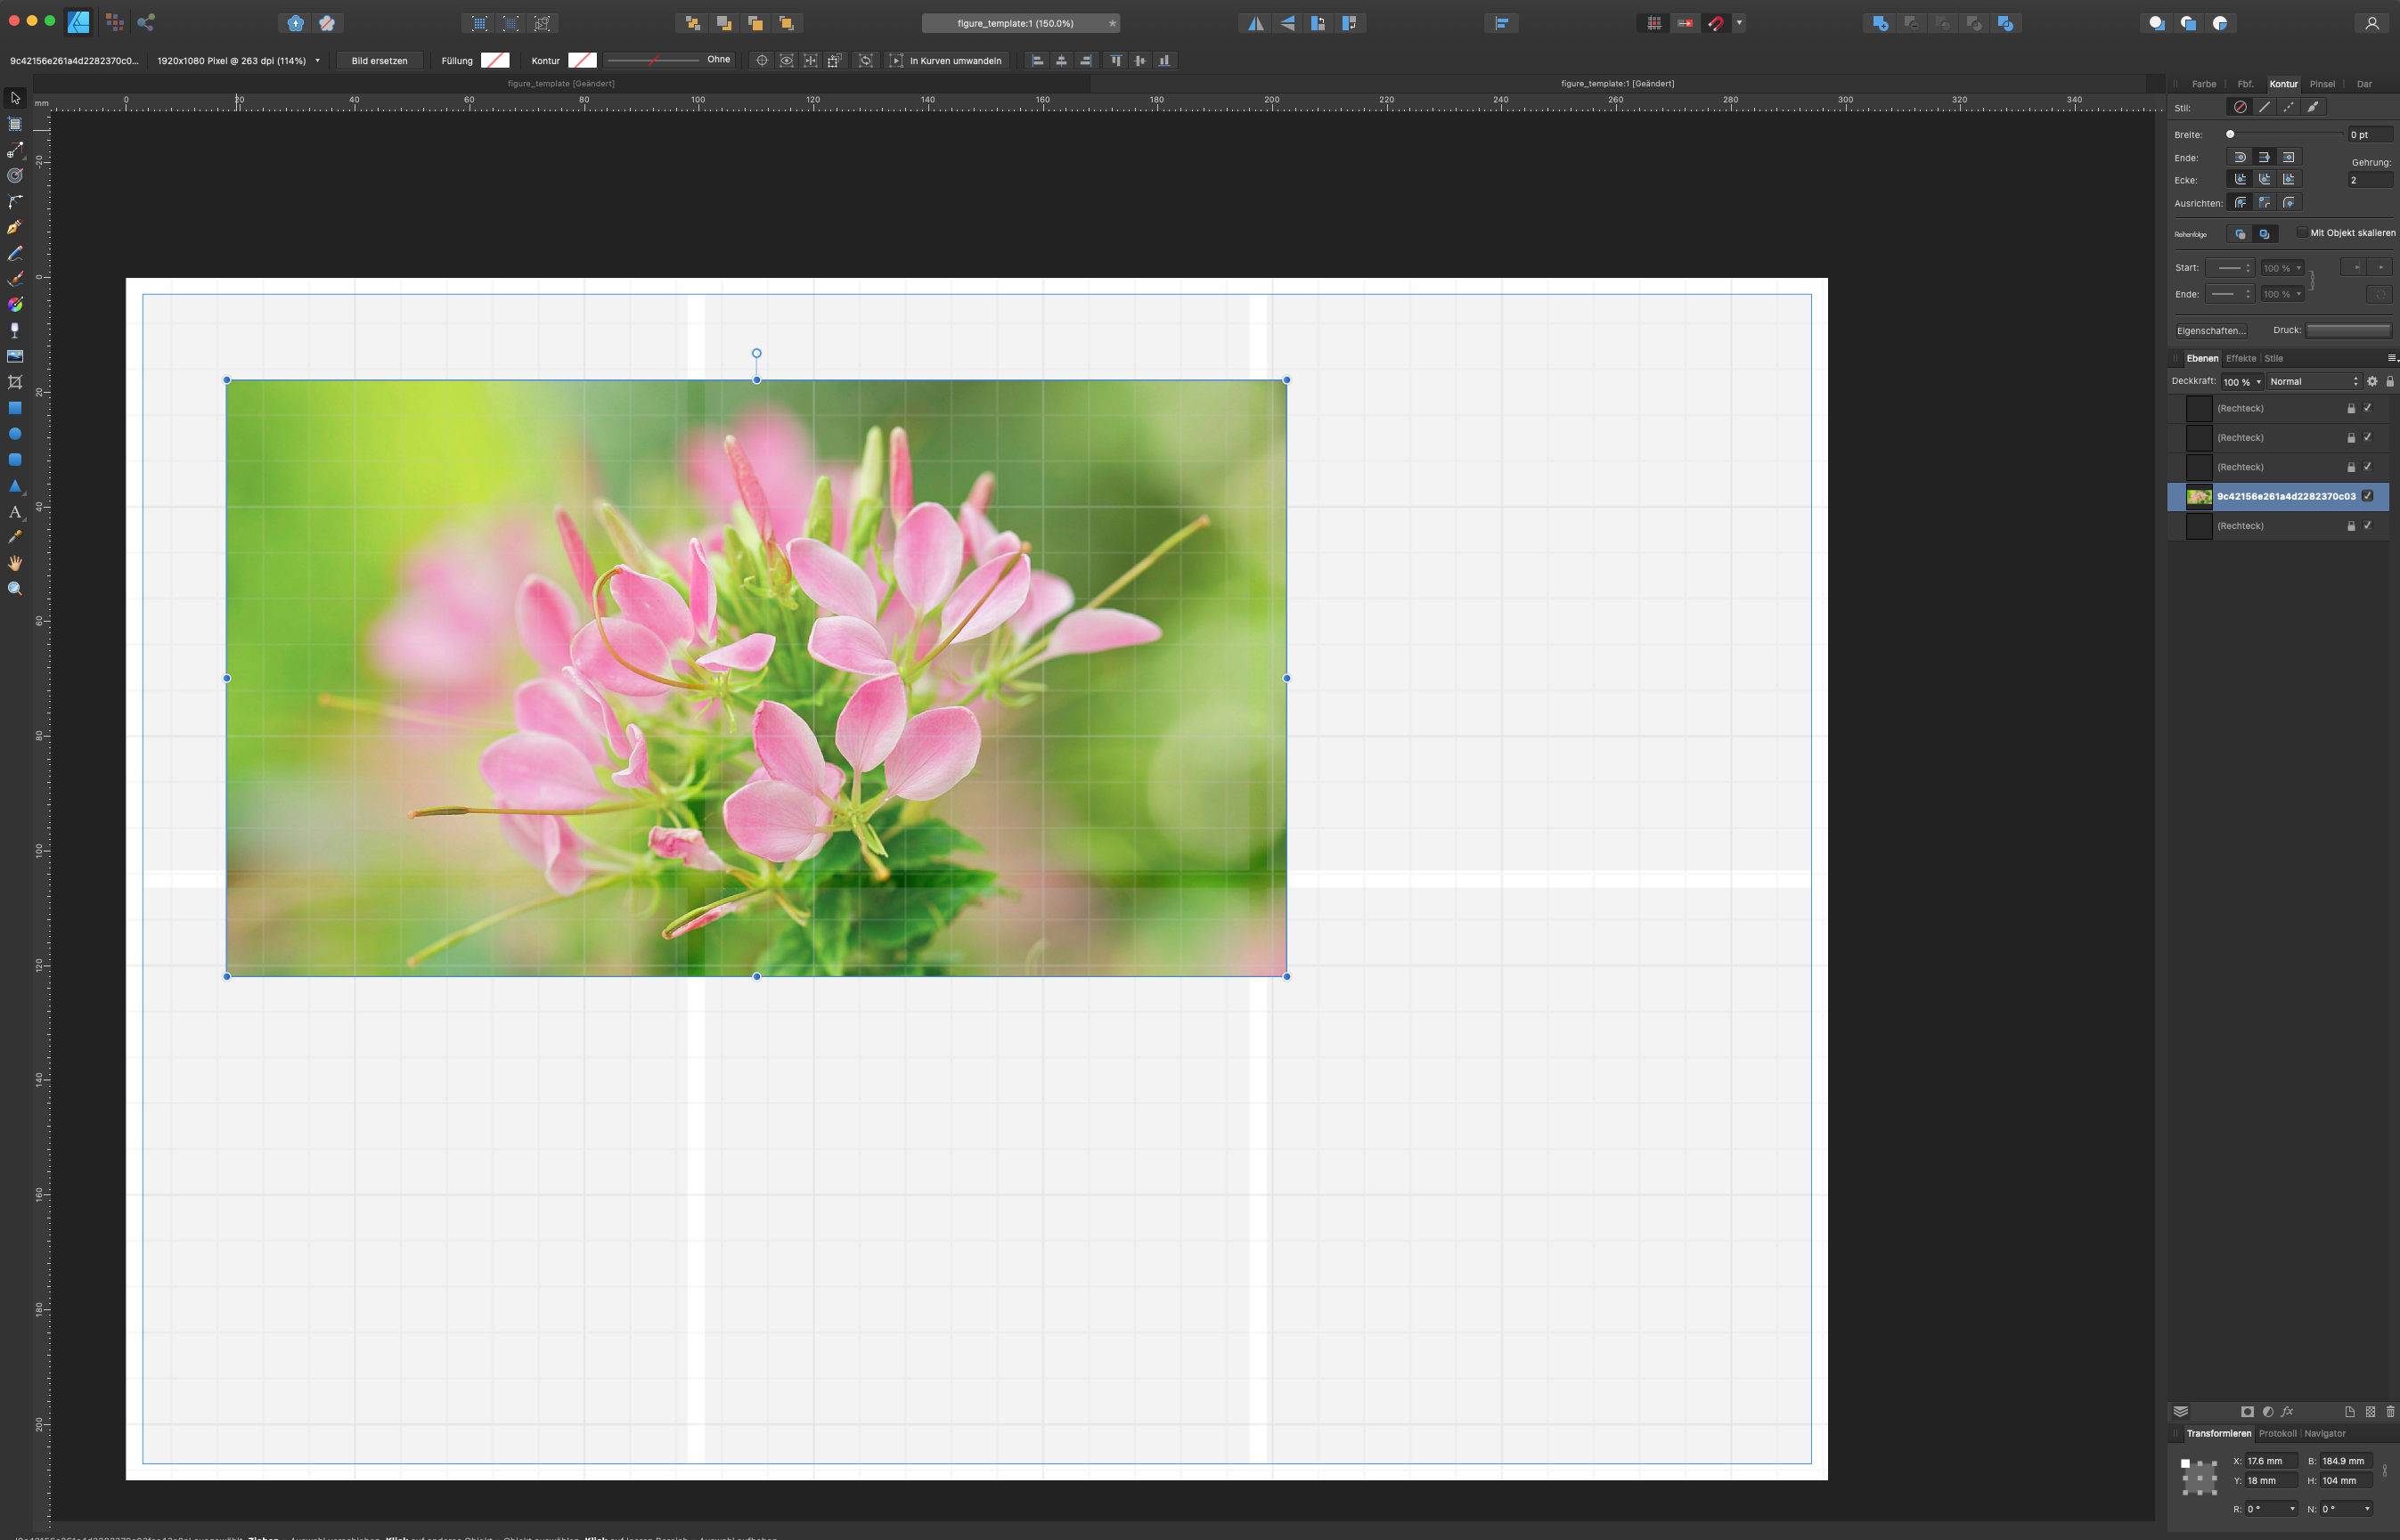
I really thank you for your help @v_kyr and @NotMyFault! I have now managed, thanks to the guide tool and the setting of a boundary, to align my (in this case) 4 rectangles. But now I have the problem that I do not know how to fill these 4 rectangles. Ideally, I would now load in an image and could move it under the shape to its proper spot (without it overhanging the guides and borders, or the other rectangles). I just want to fill the RECTANGLE. And that just for each rectangle individually. Do you have an idea how to do this?
-
Creating scientific figures
jiff replied to jiff's topic in Pre-V2 Archive of Desktop Questions (macOS and Windows)
Thank you @v_kyr! I get your points! In some way it is similar to your film design. But the question ist: How can I get this and change it to my need from scratch? Thanks in advance! -
Creating scientific figures
jiff replied to jiff's topic in Pre-V2 Archive of Desktop Questions (macOS and Windows)
Thank you @NotMyFault for your input: To your questions: how many images to process? (Per session / day)? Should be 4-6 images per session! all images have same aspect-ratio? The images in the end should all have the same aspect-ratio, the input files will be from different sources and therefore not in the same geometry. Any manually pre-processing required? Yes, manually pre-processing is done before, but this is ok for me. Perfect scenario: I bring my processed images in AD and bring them into a nice and clean compostion. which export format, resolution? Single page, multiple files of single page, or single file with multiple pages? Export format should be .tiff or .png, highest resoultion possible (publishing house will downscale it to 300 dpi anyway..). Output should be a single file with one page. Thank you in advance for your help! Looking really forward to streamline this process (and to stop doing it with PowerPoint..) -
Hi folks, I'm afraid I haven't found anything on this topic, but I would like your help in creating a workflow for making standardised compositions of high-resolution images. Specifically: How do I create a figure like the example below as quickly and cleanly (!) as possible? Ideally, I would have a white "template" with, for example, 6 "windows" in this case. I could then flexibly "fill" the windows, which are all the same size and equally spaced, with high-resolution images. My question: What is the fastest way to do this? So far I have always struggled to do this manually with powerpoint by creating a white line and putting it together and putting a white frame around it so that it looks something like this (but often there is an overhang or the individual "windows" were not exactly the same size...Does anyone have any ideas for me? How can I define such a "template" (e.g. by "fixed" distances between the individual "windows") and how can I then position the actual pictures in it? Is it possible to save such "templates", e.g. as a template? Please excuse my perhaps strange question! Thanks in advance!
-
Lines and dots
jiff replied to jiff's topic in Pre-V2 Archive of Desktop Questions (macOS and Windows)
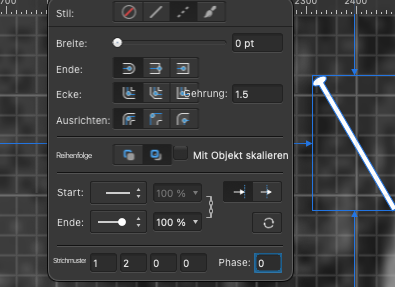
Thanks @firstdefence, I now just copied your settings, but it's still looks kinda wrong - do you have any special trick for me to make it "right"?
-
Lines and dots
jiff replied to jiff's topic in Pre-V2 Archive of Desktop Questions (macOS and Windows)
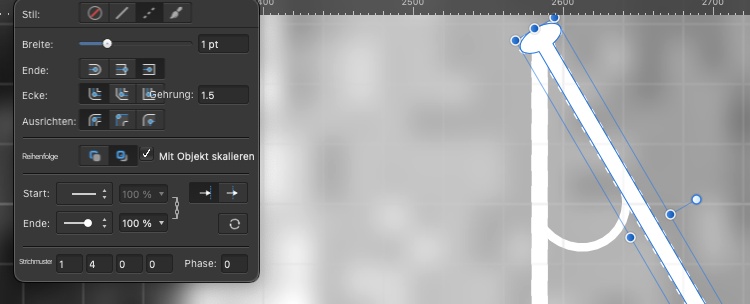
Thank you four your quick and good help @firstdefence One last question: Is it possible to see the dotted line even in small lines (attached image)?
-
Hi folks, sorry, beginner question here (but didn't found any sufficient answer via "search" yet): I want to draw lines as in the image attached (powerpoint style😅) Straight, dotted lines but also straight lines that end with points, for example. I would now have created separate lines and connected them. I would like to align them so that they have the same angle as if it were one line. Is this possible? Thank you guys in advance! Cheers! jiff
-
Outline selection in AD
jiff replied to jiff's topic in Pre-V2 Archive of Desktop Questions (macOS and Windows)
Ahh thank you very much @GarryPfor this detailed tutorial! This helped me alot! Nice to have persons like you in this community to help "newbies" like me! e: just one last question: ist it possible to make the vector you made a bit "smoother"? No hard "corners", more like a "floating" outline. You understand what I mean? -
Outline selection in AD
jiff replied to jiff's topic in Pre-V2 Archive of Desktop Questions (macOS and Windows)
Thank you very much @GarryP!! But one question I don't wanted to use the pixel persona...you can still see in your example the pixelated border: I want to make it antialiased! Do you know what I mean? Can I probably convert it into a vector?
-
Hi folks, short question from a beginner (couldn't find an answer via the search function) I want to outline some cells in an image, and and make the border e.g. 0,25 mm and in green colour. Important: I don't want to make it pixelwise (cause I dont want a "cubic" appearance a la minecraft of the outer line) Here you can see an image I would like to select and outline a few of the cells (& make the border in color). In general I find it hard to make some figures for scientifc need (am I the only one or is there some course for this affinity related?) Thank you guys in advance!
-
Putting .gif into static image
jiff replied to jiff's topic in Pre-V2 Archive of Desktop Questions (macOS and Windows)
Ok, thank you for this information..unfortunately I'm on Mac...:( Thank you for the video! Yes, exactly this kind of stuff I want to do, but with a static image! But ...AE ist Adobe...do you guys have an recommendations for not-adobe software? Thank you for your input! -
Putting .gif into static image
jiff replied to jiff's topic in Pre-V2 Archive of Desktop Questions (macOS and Windows)
Thank you for your quick response! Which is unfortunately very sad to hear that it is currently not supported. Do you know of a workaround for this, or are there any tips or program recommendations on this topic (which do not have Adobe in their name)? -
Hello folks, sorry for my beginner's question: I want to create an image consisting of a static image and a .gif (or .mp4) (which is running on a TV screen in the static part of the image) Is this possible in Affinity? And if possible I would like to reshape and angulate the "TV-Screen" so that it seems to be more realistiv perspectivewise.. e.g. like that I found on the web: https://giphy.com/gifs/3o7WTx7X5YfBT4lq8M/html5 I'm happy about any input, even if you would give me some workaround for it! Thanks in advance!