jenpren Posted April 17, 2018 Share Posted April 17, 2018 Hi, I'm rather new to Affinity Photoshop- I'm not amazingly experienced in Adobe Photoshop, but I'm way more familiar with that.... I recently began shooting color negative film and dislike the color correction in my scanners software and the Vuescan software and wanted to learn how to do it myself in photoshop. I found a tutorial online, however, I cannot figure out how to do the "Levels Clipping Mask," ...here is the tutorial: https://petapixel.com/2017/02/01/edit-color-film-negatives-photoshop/ Basically, I know from the Affinity help page that I can press the "alt" key when I'm adjusting the Black and White levels when I'm in specific colors such as red or blue, but it just turns my image either all black or all white, and I'm not sure how to make it actually work like it's supposed to? It seems to do the job when I do it on the Master for the RGB levels, but not any specific color? Am I doing something wrong? I hope this makes sense! Thanks! -Jenny Quote Link to comment Share on other sites More sharing options...
A_B_C Posted April 17, 2018 Share Posted April 17, 2018 Hi Jenny, welcome here … Pretty interesting that this function is available in Affinity Photo … I never realized that. But unfortunately, it doesn’t seem to work here as well. So I would also be interested in how this is intended to work. I can only confirm the behavior described. As soon as I use the clipping preview with the single RGB channels, the image either turns completely black or completely white, and moving the slider has no effect. Thanks, Alex Quote Link to comment Share on other sites More sharing options...
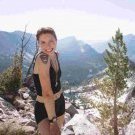
Staff Gabe Posted April 18, 2018 Staff Share Posted April 18, 2018 Hi @jenpren, Welcome to the forums. I managed to replicate the issue and I'm pretty sure this is not the normal behavior. I have logged it with our developers and we hope to get a fix in the future updates. In the meantime, you can turn the Scope on( View>Studio>Scope) and switch to RGB Parade. It would give you a bit more info about the clipped areas. It won't actually highlight the area, but you can at least get an idea where that clipped area. It's pretty easy to read a parade. The vertical scale will show you the intensity ( 0 bottom and 100 top), while the horizontal scale would be a representation of your image from left to right. If you have a look at my photo, you can see the spike in the middle of the Blue channel on the Parade, which represents the blue sky in the middle of the image, next to the sign. Hope this helps Thanks, Gabe A_B_C 1 Quote Link to comment Share on other sites More sharing options...
HVDB Photography Posted April 18, 2018 Share Posted April 18, 2018 Maybe try the HSL adjustment - Luminosity shift & saturation shift Quote Affinity Photo 2.3.1 Laptop MSI Prestige PS42 Windows 11 Home 23H2 (Build 22631.3007) - Intel(R) Core(TM) i7-8565U CPU @ 1.80GHz 2.00 GHz - RAM 16,0 GB Link to comment Share on other sites More sharing options...
Staff Gabe Posted April 18, 2018 Staff Share Posted April 18, 2018 @HVDB Photography , the levels adjustments work just fine on individual channels. The problem is that you cannot preview the clipping while holding down ALT. but the action itself of changing the parameters works fine. Quote Link to comment Share on other sites More sharing options...
OriginalBob Posted April 18, 2018 Share Posted April 18, 2018 (edited) Yes, interesting feature. When I adjust levels + ALT, I see this. When I move black level to left, then the preview turns black, showing no clipping, correct? Is this the expected behavior? AP v1.6.4.104 Bob Note - you must ALT + move the slider to trigger this mask view. Edited April 18, 2018 by OriginalBob add note Quote Bob Affinity Photo for Windows Link to comment Share on other sites More sharing options...
A_B_C Posted April 18, 2018 Share Posted April 18, 2018 Thank you for having a look! Quote Link to comment Share on other sites More sharing options...
Staff Gabe Posted April 18, 2018 Staff Share Posted April 18, 2018 Check below for the current behaviour: Quote Link to comment Share on other sites More sharing options...
John Rostron Posted April 18, 2018 Share Posted April 18, 2018 21 hours ago, jenpren said: I recently began shooting color negative film and dislike the color correction in my scanners software and the Vuescan software and wanted to learn how to do it myself in photoshop Interesting that Vuescan will not work for you. It works fine for me and my Nikon LS50 film scanner. What scanner are you using? It could be that you should try scanning in Vuescan, then polishing the scanned image in AP. Vuescan itself does offer a fair amount of image processing which would be worth investigating. It would help if you could post some sample scanned images so we can see where the problem lies. John Quote Windows 10, Affinity Photo 1.10.5 Designer 1.10.5 and Publisher 1.10.5 (mainly Photo), now ex-Adobe CC CPU: AMD A6-3670. RAM: 16 GB DDR3 @ 666MHz, Graphics: 2047MB NVIDIA GeForce GT 630 Link to comment Share on other sites More sharing options...
OriginalBob Posted April 18, 2018 Share Posted April 18, 2018 @GabrielM I see what you illustrate with the *.tif format file. Try it with the *.jpg format file! Or, copy & paste the illustration into AP. These work for me. B Quote Bob Affinity Photo for Windows Link to comment Share on other sites More sharing options...
- S - Posted April 18, 2018 Share Posted April 18, 2018 22 hours ago, OriginalBob said: @GabrielM I see what you illustrate with the *.tif format file. Try it with the *.jpg format file! Or, copy & paste the illustration into AP. These work for me. Is it possible that it's working for you because you're launching the Levels Adjustment Layer from one of the Levels Adjustment presets (I.E. Darken/Lighten) in the Adjustments Panel? Does it still work OK for you if you add a Levels Adjustment Layer from Layer > New Adjustment Layer > Levels Adjustment? The only way I am able to get levels to display clipping on the red channel is to add 0.4% to the 'Master' black level first (and 99.6% to the 'Master' white level). If the 'Master' levels are set to 0%/100%, I get the same result as GabrielM. Quote Link to comment Share on other sites More sharing options...
A_B_C Posted April 19, 2018 Share Posted April 19, 2018 The only way I am able to get levels to display clipping on the red channel is to add 0.4% to the 'Master' black level first (and 99.6% to the 'Master' white level). If the 'Master' levels are set to 0%/100%, I get the same as GabrielM. I have seen this too. But I found the results are not reliable enough … Quote Link to comment Share on other sites More sharing options...
OriginalBob Posted April 19, 2018 Share Posted April 19, 2018 Yes, @Sima, that is possible. Very strange behavior & I won't ask how you figured all that out ! B Quote Bob Affinity Photo for Windows Link to comment Share on other sites More sharing options...
jennifilm Posted January 8, 2023 Share Posted January 8, 2023 Kia ora! I'm still having this issue in Affinity Photo 2 - with the exact behaviour - S - has described. Setting master black level to 1% enables the clipping view within individual channels. Quote Link to comment Share on other sites More sharing options...
Recommended Posts
Join the conversation
You can post now and register later. If you have an account, sign in now to post with your account.
Note: Your post will require moderator approval before it will be visible.