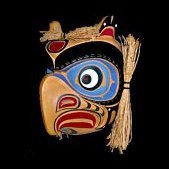
Tahunga Posted June 1, 2020 Share Posted June 1, 2020 I have tried to find a way to remove reflections caused by light on a wooden mask. None of the things I tried seemed to work really well. Any suggestions would be greatly appreciated. Here is the picture of the mask in question. Quote Link to comment Share on other sites More sharing options...
Old Bruce Posted June 1, 2020 Share Posted June 1, 2020 You are going to have to do some masking and then use the Highlights from the Shadows and Highlights adjustment layer to fine tune things, play with the blend mode of the adjustment layer try darker multiply and lower opacity. Or you can try using a pixel layer above the mask and paint using the colours of the mask with blend mode of Soft light or use lower opacity and hard light. Quote Mac Pro (Late 2013) Mac OS 12.7.4 Affinity Designer 2.4.1 | Affinity Photo 2.4.1 | Affinity Publisher 2.4.1 | Beta versions as they appear. I have never mastered color management, period, so I cannot help with that. Link to comment Share on other sites More sharing options...
Tahunga Posted June 2, 2020 Author Share Posted June 2, 2020 Hi Bruce, Thanks for all the good advice. I am playing with the various options you suggested and am making great progress. I only have one challenge: How do I "completely remove a mask" from an image. Deselecting just removes them from the image, but they seem to be still active. And to play with the options you suggested, as well as in many other cases, I would love to remove the mask's influence on all the tools. ....Tahunga Quote Link to comment Share on other sites More sharing options...
Old Bruce Posted June 2, 2020 Share Posted June 2, 2020 I am not certain what you are asking for exactly. You can check/uncheck the masks to turn them on/off by using the layers panel. You can select the mask and move it into the part you want to mask. This also applies to the builtin masks on the adjustment layers. Quote Mac Pro (Late 2013) Mac OS 12.7.4 Affinity Designer 2.4.1 | Affinity Photo 2.4.1 | Affinity Publisher 2.4.1 | Beta versions as they appear. I have never mastered color management, period, so I cannot help with that. Link to comment Share on other sites More sharing options...
Andy05 Posted June 2, 2020 Share Posted June 2, 2020 I hope this doesn't count as blasphemy, but there's a fresh photoshop tutorial on youtube, which takes care of manually removing glare from glasses. The techniques used can be used similar in affinity in order to solve your problem. Quote »A designer's job is to improve the general quality of life. In fact, it's the only reason for our existence.«Paul Rand (1914-1996) Link to comment Share on other sites More sharing options...
Tahunga Posted June 2, 2020 Author Share Posted June 2, 2020 Hi Bruce, as you can see from my attached picture, I tried to turn off the mask layer, but it still seems to be active. The reason for me to try and turn it off is that at the end of my editing process I wanted to refine a couple of areas by using the Clone Brush. But with the mask still being active, the clone leaves edges.... hope this makes sense. Quote Link to comment Share on other sites More sharing options...
Tahunga Posted June 2, 2020 Author Share Posted June 2, 2020 Andy, thanks for your suggestion. I will have to try that approach. My first attempt "went South" as I am using a VPN protected connection, and my VPN today ran via a server in Iceland. YouTube immediately thought I was in Iceland and as a result the video came in Icelandic (i.e. not the voice, but all the text and some of the pictures). 😁 Quote Link to comment Share on other sites More sharing options...
Lisbon Posted June 2, 2020 Share Posted June 2, 2020 Hi Tahunga! See if this helps. First set the "Colour picker tool" to: Source: global Radius: 3x3 px Second, set the "Paint Brush tool" to: Width: 80 px Opacity: 15% Flow: 100% Hardness: 0% Add a "New layer" and change the blend mode from normal to darken. With the "Paint Brush tool" selected when you press the Alt key and click on any area it will sample a colour. Sample colour (dont sample over a glare/reflection) Paint over reflection and after you release the mouse button, start again by sampling a different colour. Take your time... You should end up with something like this: Now mask the excess paint and add some noise (Filter > Noise > Add noise 12%) Quote Link to comment Share on other sites More sharing options...
firstdefence Posted June 2, 2020 Share Posted June 2, 2020 I think the frequency separation filter in combination with a coloured brush, selections and pixel layers would be a better option, this will retain some of the images textures. I used a watercolour brush to give a bit of texture to the paint. To retain more of the underlying texture in the original layer change the pixel layers blend mode to Average. this gives a more subtle matting effect, you can duplicate the pixel layers to get a stronger matting effect and also darken the colour a bit. appearsharmless and lacerto 2 Quote iMac 27" 2019 Somona 14.3.1, iMac 27" Affinity Designer, Photo & Publisher V1 & V2, Adobe, Inkscape, Vectorstyler, Blender, C4D, Sketchup + more... XP-Pen Artist-22E, - iPad Pro 12.9 (Please refrain from licking the screen while using this forum) Affinity Help - Affinity Desktop Tutorials - Feedback - FAQ - most asked questions Link to comment Share on other sites More sharing options...
Tahunga Posted June 2, 2020 Author Share Posted June 2, 2020 Hi Lisbon, thanks for the suggestion. I am amazed what I can learn from all you helpful Forum Members. Unfortunately I am still challenged by some things which don't seem to work as you suggest. Specifically: A: Following your suggestions I managed to cover most of the reflection, but although I "unclicked" the mask to make it inactive, it still seems to limit my paintbrush action to within the selected area. B: But even though I deselected this area and have the mask layer de-activated, my painting still seems to be restricted by where the mask "used to be", and therefore I seem to get clear borders. And although I find the step of adding noise very intriguing, it didn't seem to do anything for me. Which tells me that I am still doing something wrong. I will just have to try and try again ... Quote Link to comment Share on other sites More sharing options...
mrqasq Posted June 2, 2020 Share Posted June 2, 2020 Wouldn't it be easier to photgraph without glare in the first place ? 🙂 Quote Link to comment Share on other sites More sharing options...
Tahunga Posted June 2, 2020 Author Share Posted June 2, 2020 firstdefence, your advice sounds also very interesting. But as I am a Newbie, and you are an Affinity Jedi, our level of understanding is about as far apart as you and I are in our physical locations. Google Earth thinks that is about 7,800 km (or 4,850 miles) as the crow flies. I actually looked up the concept of the frequency separation filter in the Affinity Photo Workbook and find the concept quite interesting. But I will need to do a lot more studying before anything useful comes out of it. Thanks for trying to help. Quote Link to comment Share on other sites More sharing options...
mrqasq Posted June 2, 2020 Share Posted June 2, 2020 Looking on the harsh shadows below the first mask, I assume maybe you have used flash, and thus introduced glare on the surfaces. Using diffused lightning could save you much time in post. Just saying 😘 Quote Link to comment Share on other sites More sharing options...
Tahunga Posted June 2, 2020 Author Share Posted June 2, 2020 mrqasq, You are absolutely right. But a) that is often not possible, b) I like to use other's suggestions to work my brain cells, and c) I have the tool (Affinity Photo) so why not learn how to use it? mrqasq 1 Quote Link to comment Share on other sites More sharing options...
Lisbon Posted June 3, 2020 Share Posted June 3, 2020 Selections and layer masks are different things. Lets forget selections for a moment. I will show you the process without making a single selection. This was the starting point. Just a empty layer painted with green. To hide the excess paint i add a layer mask. Nothing hapen to the image, right? Now fill the mask with black and see what hapens. (Select the mask and go to Edit > Fill > Custom colour > Choose black > Apply When i say "select the mask" i mean click on it with the mouse) The mask became black and by doing that our layer painted with green became hidden. To reveal the parts we are interested paint with white on your mask. If you make a mistake Undo (Ctrl+Z) or paint with black on the mask. See, no selections required. Tahunga 1 Quote Link to comment Share on other sites More sharing options...
Tahunga Posted June 5, 2020 Author Share Posted June 5, 2020 Hi Lisbon, I took some time to follow your detailed instructions. As a result: I learned a lot, Managed to fix many of my pictures of native masks, Thanks for the detailed and very clear instructions. I truly appreciate your help. .....Tahunga Lisbon 1 Quote Link to comment Share on other sites More sharing options...
Lisbon Posted June 5, 2020 Share Posted June 5, 2020 Im glad i could help. Quote Link to comment Share on other sites More sharing options...
Recommended Posts
Join the conversation
You can post now and register later. If you have an account, sign in now to post with your account.
Note: Your post will require moderator approval before it will be visible.