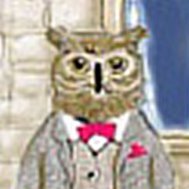
Engine44 Posted March 23, 2020 Share Posted March 23, 2020 What is this image border called and can it be done with AP? I don't mean the outer edge. I mean where the edge of the coloured image is jagged and fades unevenly into the background. Thanks Quote Link to comment Share on other sites More sharing options...
GarryP Posted March 23, 2020 Share Posted March 23, 2020 There are probably lots of ways of doing what you want but here’s one method you can try, see video. I’ve done it very quickly; to get a good effect you will need to be more careful and probably experiment with brushes etc. Hopefully someone can tell you what the effect is called so you can search for something better. 2020-03-23_14-39-14.mp4 Quote Link to comment Share on other sites More sharing options...
Engine44 Posted March 23, 2020 Author Share Posted March 23, 2020 59 minutes ago, GarryP said: There are probably lots of ways of doing what you want but here’s one method you can try, see video. I’ve done it very quickly; to get a good effect you will need to be more careful and probably experiment with brushes etc. Hopefully someone can tell you what the effect is called so you can search for something better. 2020-03-23_14-39-14.mp4 Thank you! Quote Link to comment Share on other sites More sharing options...
jmwellborn Posted March 23, 2020 Share Posted March 23, 2020 @Engine44 Here is a way that I have done this. (And a bit sloppy around the edges, because I left out step 6 for File One.) Not nearly as sophisticated as the method @GarryP has shown! Two separate files: File One: 1. Place image (either PNG or JPEG) on a new transparent document. 2. LAYER>New Mask Layer, and be sure that the mask layer is a child under the image layer. 3. Select the Brush Tool and a brush from the Textures category (I used Grunge pattern 01). 4. Paint with black around the edges of the image with whatever size brush you choose to remove all sharp edges, while bobbing and weaving to get the desired irregular look. 5. Use Crop Tool to bring the image down to a size that includes all of the brushed area, but eliminates as much of your unwanted canvas as possible. 6. Zoom in on the image layer and if you find any remaining hard edges, rasterize your image layer, then use the Erase Brush Tool and either with a soft round brush setting, or with your same Texture setting, carefully erase any bits and pieces of hard edges still showing. 7. Group all layers in the Layers Panel. 8. Export as PNG, Selection Without Background. File Two: 1. Create New Document. 2. Place the PNG created in File One. 3. Use the Rectangle Shape and draw a rectangle over the image layer. 3. On the Layers Panel, drag the rectangle layer underneath the image layer. 4. With the Move Tool, click on the rectangle layer and drag it to the correct size to frame your image. 5. Go to the Context Toolbar, click on Fill. 6. Select the color you want and optional noise. 7. In the Stroke box, choose the size you want for the stroke and any color you wish. (Or if you want a paper texture, you can use the Gradient Tool, go to "Type" on the Context Toolbar, select Bitmap, and locate one of your texture files.) 8. With image layer highlighted, go to Layer Effects (fx at bottom of layers panel) and choose Gaussian Blur to soften the edges between the image and the rectangle. 9. Highlight all layers in the Layers Panel. 9. Export as PNG without background. carl123 and GarryP 2 Quote 24" iMAC Apple M1 chip, 8-core CPU, 8-core GPU, 16 GB unified memory, 1 TB SSD storage, Ventura 13.6. Photo, Publisher, Designer 1.10.5, and 2.3. MacBook Pro 13" 2020, Apple M1 chip, 16GB unified memory, 256GB SSD storage, Ventura 13.6. Publisher, Photo, Designer 1.10.5, and 2.1.1. iPad Pro 12.9 2020 (4th Gen. IOS 16.6.1); Apple pencil. Wired and bluetooth mice and keyboards. Link to comment Share on other sites More sharing options...
Recommended Posts
Join the conversation
You can post now and register later. If you have an account, sign in now to post with your account.
Note: Your post will require moderator approval before it will be visible.