Search the Community
Showing results for tags 'visibility'.
Found 17 results
-
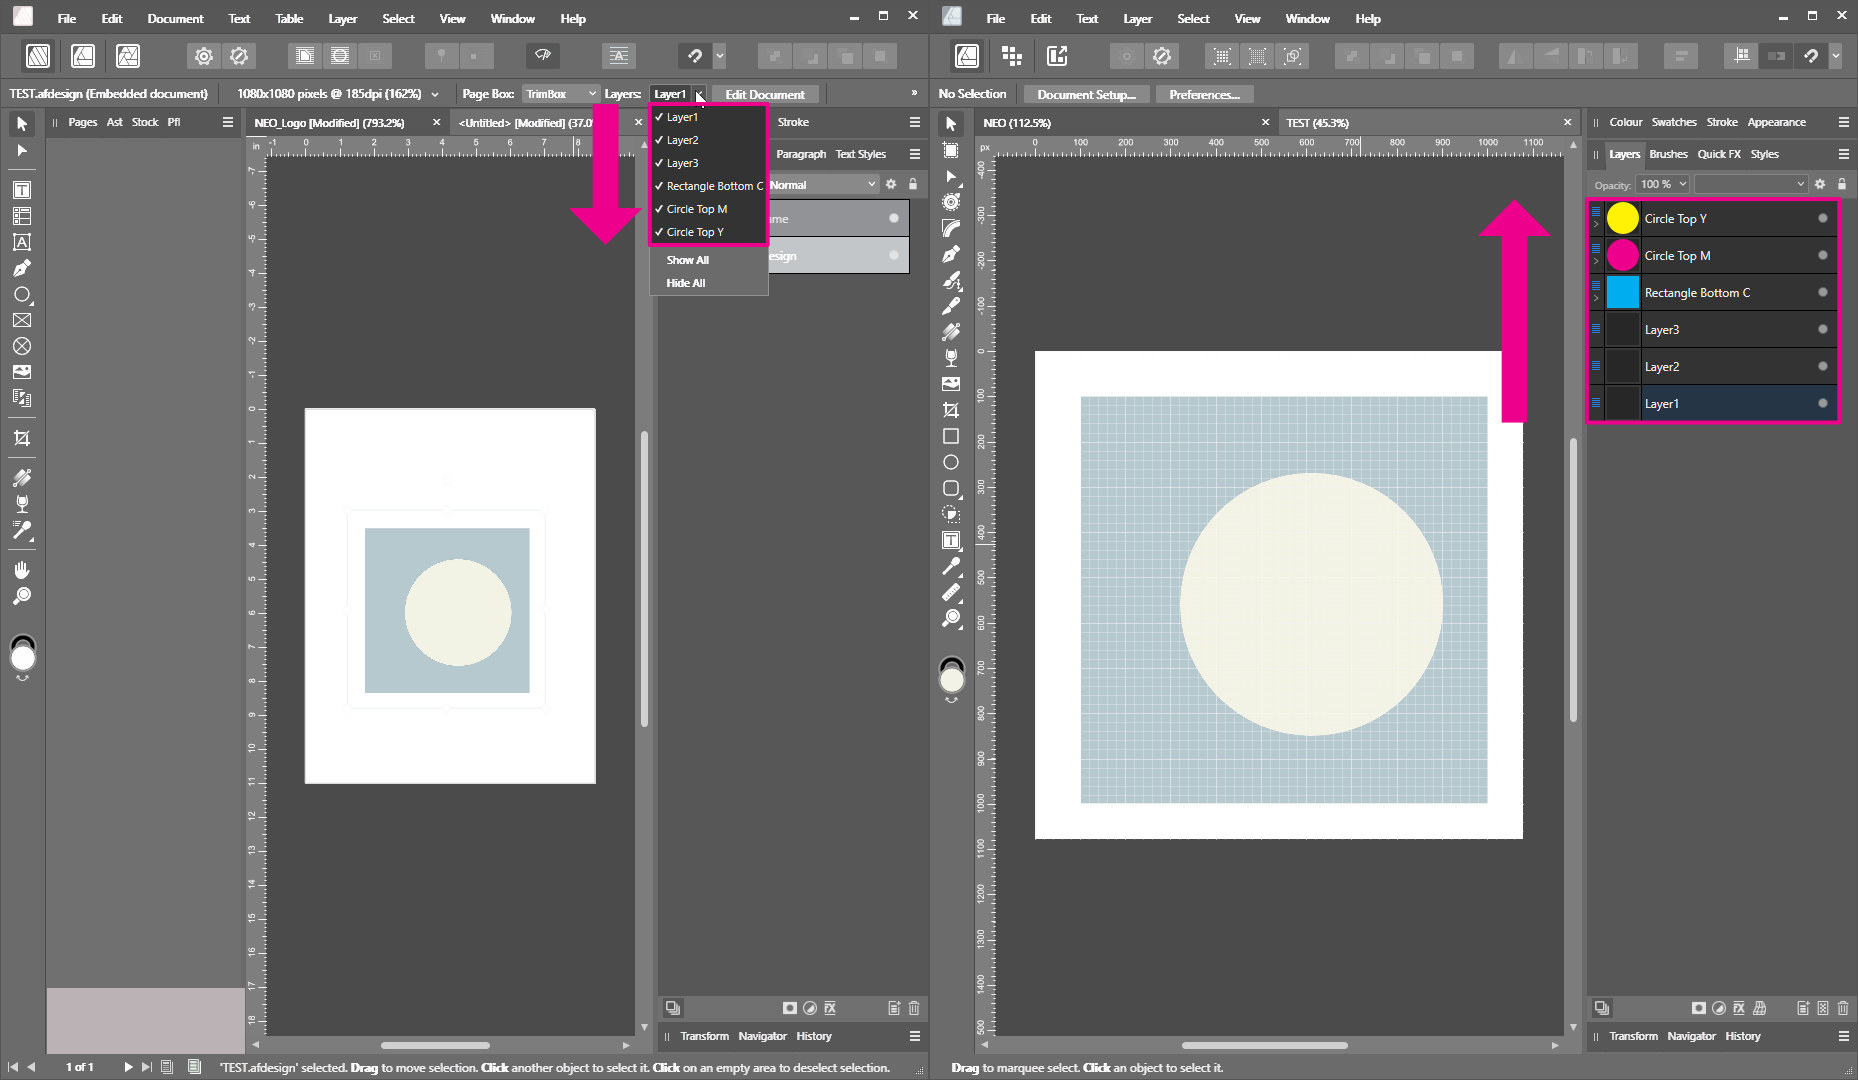
 Hey there, I came across the following question and bug while working on a document today. Initial situation: I want to link a Designer document with several differently named artboards, each containing between two or three layers that I want to show or hide separately while the document is linked in Publisher. I'd like to use the long awaited and now available "Layer Visibility Override" in Publisher. I was very excited to finally see it! Question/Possible minor bug: Why is the order of layers in Publisher reverse compared to the order in Designer? The lowest layer in Designer is shown first in Publisher and vice versa, the first layer in Designer is shown last in Publisher. I can't quite follow this logic and it seems a bit backwards in the most literal sense. (Sorry, the screenshot is meant to be read from right to left, because on the right side is the way I set up the layers first in Designer, before linking them second in Publisher on the left side). Bug (?): There is no other way to describe it than that it simply does not work. In my particular case, I'd like to switch between two layers, ticking one off, ticking one on. And it just doesn't work. Instead of switching between these two layers, a third layer is displayed which should remain invisible because I am not even touching it. Also, I'm not so much interested in workarounds for the problem, I know there are other and cleaner ways to set it up, like I could have opted for additional artboards (as I would eventually do once the client narrows down to one version). However, as there should be Layer Visibility Override in Publisher, I'd want to use it. Please see the clip attached. Perhaps someone can confirm this? Or maybe this issue is already known/reported? Cheers Dennis Layer_Visibility_Override_Bug.mp4
-
 I would like to have a layer visibility toggle that toggles layer states between show and hide. In complex layer structures, this helps to see the effect of the current layer. It would help to have a hotkey for this, so I won't have to leave the canvas. I also use Designer as a quick file viewer for large files that I link in. I then need to show/hide certain layers as way to compare and evaluate them. In that case two shortcuts for showing and hiding is not as efficient as a single toggle. Others requested this in support topics, which is why I create this feature request.
- 1 reply
-
- 1
-

-
- visibility
- show
- (and 4 more)
-
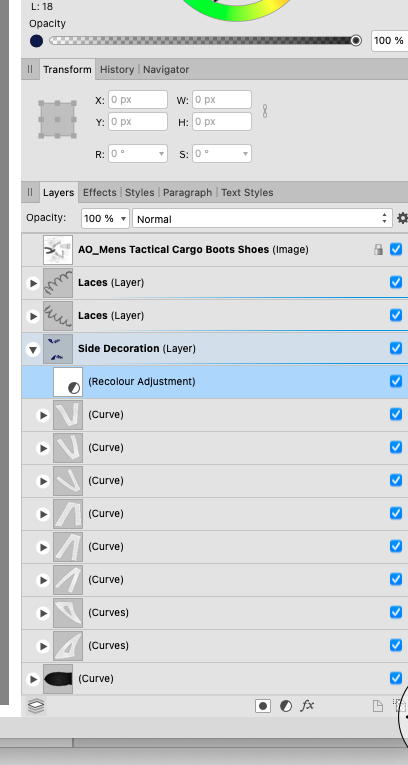
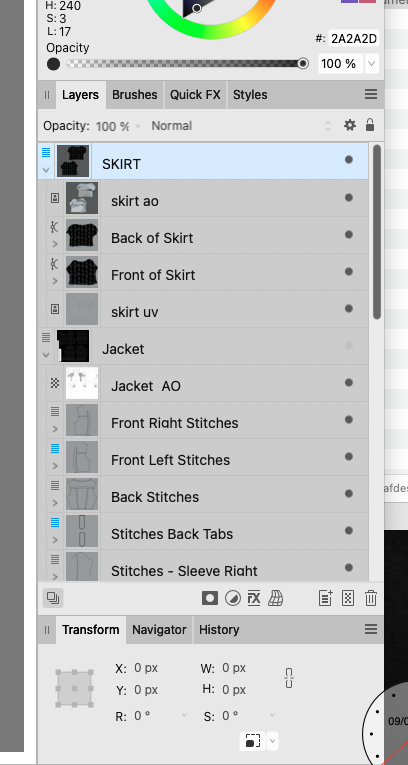
 Recently updated to Affinity Designer 2 and I love it except for one thing. It's very difficult to identify groups now and groups within groups now (which I have a lot of). This was so clear in Affinity Design 1. Could groups not be made bolder making them easier to identify? Have pasted 2 images to show the difference between the two.
-
If you have the layers panel to the right of the canvas, like in the default workspace, you need to move a larger distance to reach the layer visibility icon. Could they instead be moved all the way to the left when docked to the right hand side of the screen, so this distance is reduced?
-
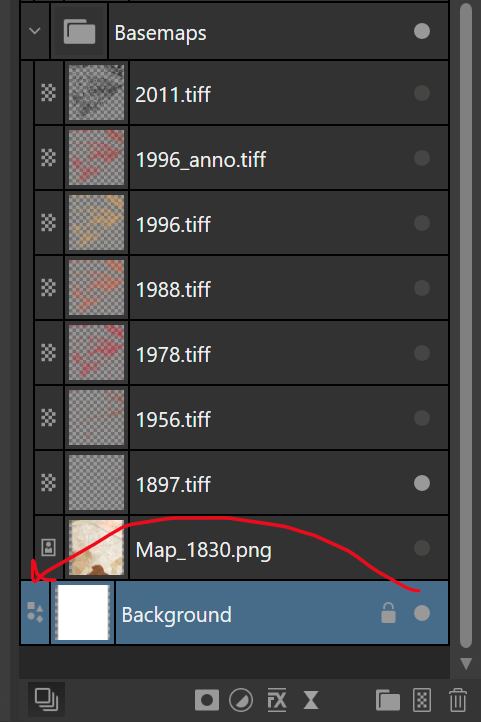
I would like to have linked layers like Affinity Photo has. This would be tremendously valuable for linking layer visibility and transforms in a complex document. I often work on complex city size drawings, which require me to work with one artboard due to performance issues. Given that I make multiple separate drawings on the same base maps, I would like to link their visibility (since layers and effects may be scattered across the layer tree) so I can more easily export the drawings individually.
- 14 replies
-
- 1
-
-
- linked layers
- transform
- (and 3 more)
-
When working on design presentations, I find it helpful to link in files, so that I can edit them and have the edits reflect in my presentation. This also allows me to keep the file-size manageable for large A0 and up posters. In Indesign, it is possible to change which layers are visible from linked Photoshop or Illustrator files. Thanks to this, I don't need to export five individual files that I need to manage separately. Each update to one file, means I have to relink multiple others (if I am not planning to overwrite them). So could we get the ability to change visibility states of linked Affinity files without having to edit the source file? A source file I have is 23 MB, whereas each of the exports is 10 MB as high quality JPEG (which is half the size of a compressed tiff). So this also helps reduce disk space.
-
Hi, I am using Publisher to make a presentation and one of the files I link into the presentation was made in Affinity Photo. I know from Indesign that I could adjust the layers for linked files, is this also possible with Publisher and linked Photo files?
-
 This is a ‘sister’ request of these (and probably others): https://forum.affinity.serif.com/index.php?/topic/37625-toggle-layer-visibility/ https://forum.affinity.serif.com/index.php?/topic/19818-keyboard-shortcut-preference-to-toggle-layer-visibility/ ...but with a slightly different theme. When I am attempting to trace a photo – usually badly – I often find myself having to toggle the visibility of the reference layer (the image) to check my work before continuing. However, this currently means that, on non-trivial drawings, I have to scroll the Layers Panel to find the reference layer – usually at either the top or bottom of the stack – then toggle it via the checkbox a few times, then scroll back to where I was working to continue. This extra scrolling can break the workflow and I often end up having to go back and do the same thing again just so I remember what I was doing. Also, when tracing, I often have many groups of layers which sometimes get in the way of the part of the image I am currently tracing. I think it might be nice if there was a way to toggle – via a shortcut key – the visibility of multiple layers that are tagged with a certain colour so I can set-up some kind of ‘visibility toggle groups’ to make tracing easier. For instance, at a very basic level, I could set a certain colour in the Preferences to be my ‘visibility toggle colour’ and set a keyboard shortcut to facilitate this. Then I can set my reference layer (or whatever other layers I want) to have the selected colour tag. Then, when I am tracing, I can use the keyboard shortcut to quickly toggle the visibility of that layer (or those layers) on and off without having to scroll the Layers Panel. If extended from this basic scenario, this could also be used by people who want to have different layers visible at different times in the same document. For instance, you could have a multi-lingual document where all of the red layers were the English text and all of the yellow layers were the Spanish text and the user could easily switch between the two. That’s maybe a step towards the far future but I definitely think a way for the user to say “When I press this button these layers should have their visibility toggled” would be a good and useful addition to the software.
 -
It's always "Is visible" regardless of whether the layer is visible or not.
-
 <RESOLVED! - look at next post> I will start from usual - love Photo Designer. Love it and use it on daily basis. It is one of a things that make my work in it so much less fluent: this is when I click on group - exactly what I expect, group is lighten up on layer mennu, just as it should. but I need something deeper. So I clicked more (on screen, because I see my object and I want to move it to another group, or see where it is hiding. Aaaaand... nothing, no idea. Sometimes it gives pale blue hue to parent group, but not always. Even if - it is bit too delicate to see. Should it or should it not open hierarchy and expose an object will be debatable (I wish it was, but think some people can disagree, but stronger feedback will be welcomed. Thanks!
-
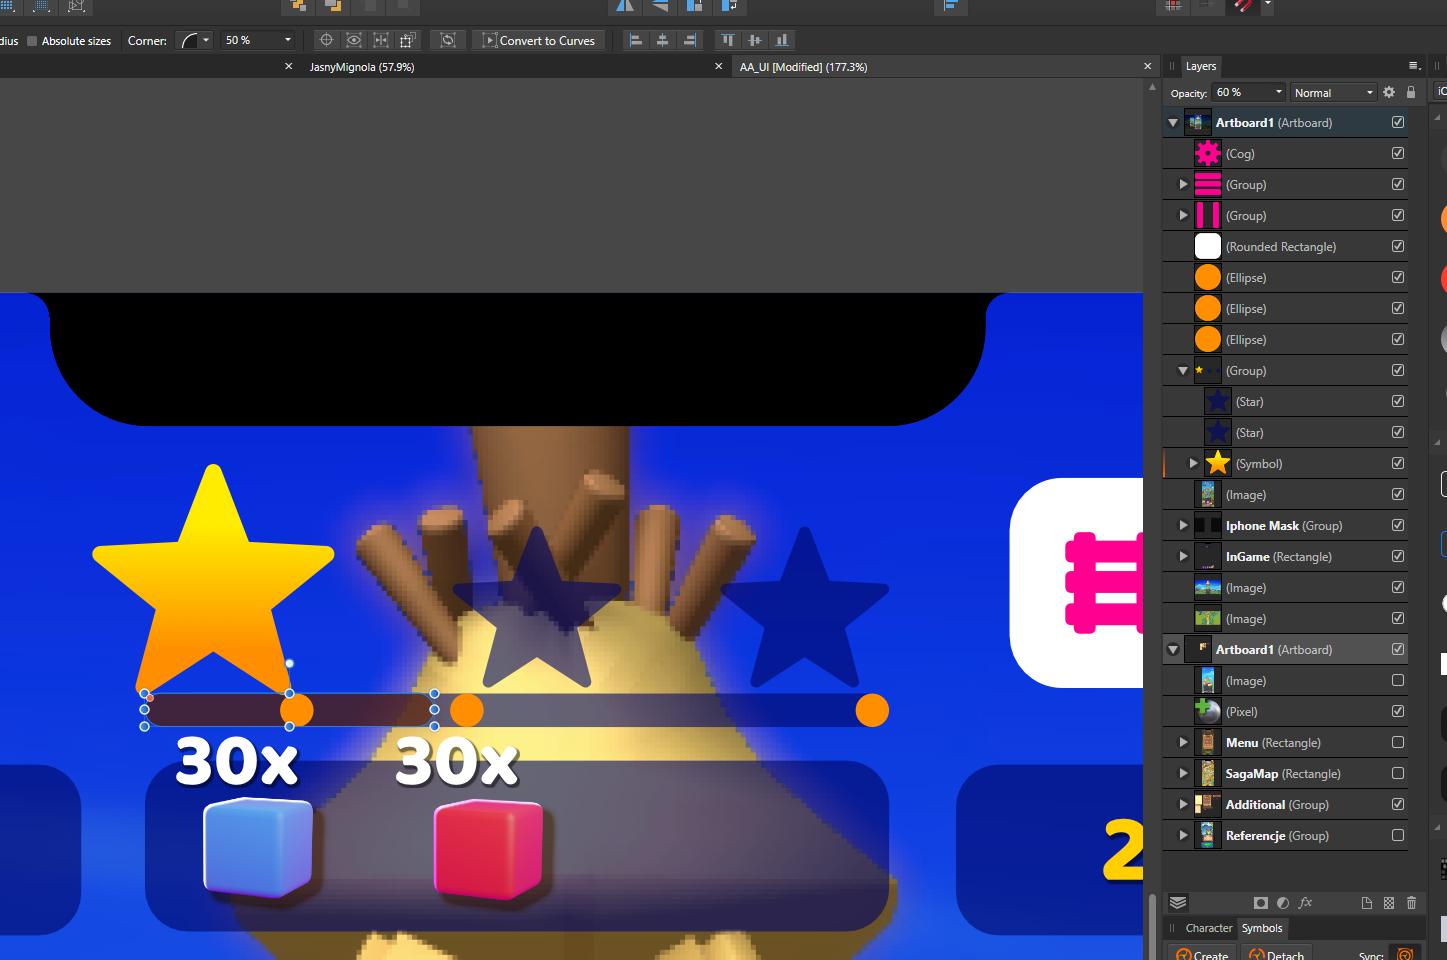
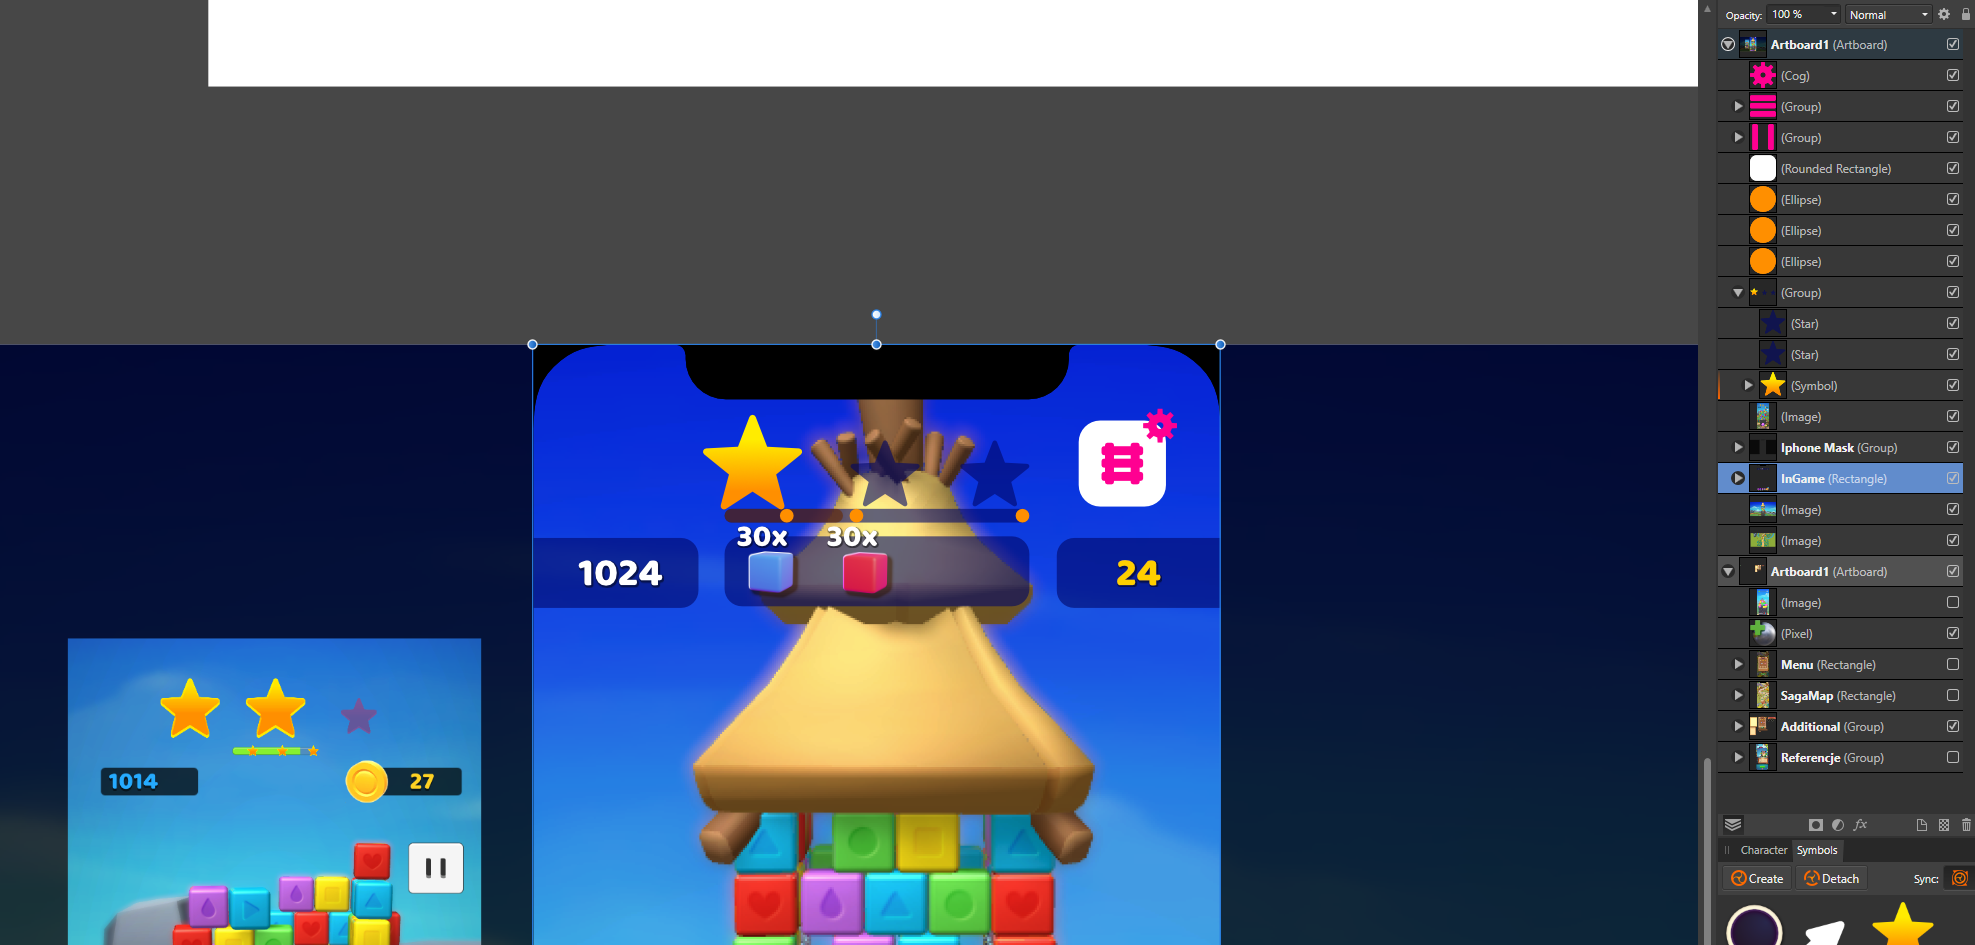
Windows 10 Home 1903, Designer 1.7.2.471. See attached GIF. When I have some symbol instances, setting one to be invisible makes all of the others invisible. However, de-syncing via the Symbols panel, setting some to be invisible and then re-syncing, allows me to make some invisible as a ‘set’ but the others can be made invisible individually. Is this expected behaviour, and if so why? Also, there’s no way for me to know - looking at the Layers panel - which symbols have been de-synced. It might be nice for a symbol to tell me - in the Layers panel - that it has been de-synced in some way (maybe a little ‘de-synced’ glyph or something). I know there is a little dashed orange bar to the left of the de-synced elements when I open the symbol but I don’t really want to have to open each symbol to check them.
-
 I didn't find a setting for that, so I'd like to ask You to add it: I often need to see which exact brush I have currently selected. I have many of them, some similar by icon, but different in behaviour.
 -
 Toggling the visibility of margins, guides and frame edges is something that designers working by eye need do be able to do easily. Publisher has a keyboard shortcut for guides, but this doesn't affect the visibility of margins (in ID, the same shortcut toggles both simultaneously). To toggle the visibility of margins requires a separate operation involving manual selection in the View menu. This seems unduly cumbersome, so it would be good if there were a keyboard shortcut for this. Having for years had the visibility of margins and guides governed by the same ID keyboard shortcut, I have never myself encountered any reason for them to be treated separately; a margin is, after all, a kind of guide. As for frame edges, which admittedly are something else, their visibility in Publisher seems to be governed only by the hand tool, which Publisher unusually calls the 'View tool' (when this tool is selected, frame edges disappear ). This can be activated with the tool palette shortcut keystroke-H, and deactivated with another toolbox shortcut, such as Keystroke-T (one of the text tools) or Keystroke-V (the 'Move tool' - dark arrow). But if you happen to be keying in or editing text in a text frame, you obviously can't use these simple alphabetic keystrokes - unless you come out of your editorial operation first, they will just add a T or a V to your text content, and the ESC key seems not to get you out of this for some reason. The combination of an alphanumeric key with a modifier key would be a more convenient way of toggling frame edge visibility. Louismac
 -
Is there any way that Select by luminosity of Layer can be recorded in a macro. E.g. Ctrl, Shift an left clicking the layer gives you a selection based on luminosity (the brightest pixels) However if you try to record this as a part of a macro you get a warning that states layer selections cannot be recorded as macro. Basically, we should be able to record every action we do in a macro as in Photoshop. Come on Serif this is a basic requirement. Cheers in anticipation
-
 I need to export my work with the guides SHOWING. Each time I export as a jpg, png, or other files, the guides are missing. Is there a way to make them visible in the exported image?
 -
 Dear Affinity Team, i tried to build a cube (2D-3D), with a stroke pt of 5. All my shapes are in white so that I can put on the transparency mode with ex. an conical type. After configuring my gradient and exporting the file I can't see all my strokes of the cube. I tried different gradients and types, but with no big different's. Is there a way to the configure the gradient so I can see all my strokes with an white transparency? Thanks a for the support and greetings from Berlin Max PS: I tried to upload a jpg 3-4mb, but with an error file. -200
 -
The white on grey preferences window LOOKS very cool but its harder to read. Same with tool bar. I would suggest white background with black text, possibly using apple's new system font, San Francisco