Search the Community
Showing results for tags 'tangent'.
Found 4 results
-
 I’ve shown one method to do this in my attached video (the text below isn’t a step-by-step guide, just notes on the video). “Enable Snapping” should be ON, “Snap to object bounding boxes” should be ON, and “Include Bounding box mid points” should be ON. Part A – The first circle If you are not using Designer, and therefore can’t use the Point Transform Tool, or you just want to do it quickly, then, instead of the instructions in this part, you can simply snap the left ‘side’ of circle B to the right ‘side’ of of circle A and then rotate all the circles to how you want them later. Draw a line from the centre of circle A to anywhere. Use the Node Tool to move the end of the line to get the angle you want. Use the Point Transform Tool to move and rotate circle B. Use the Point Transform Tool to translate circle B so that it touches circle A. Part B – The second circle The width of the first construction circle should be: width of circle A plus width of circle C. The width of the second construction circle should be: width of circle B plus width of circle C. If you aren’t using Designer (and can’t use the Point Transform Tool) you can draw a line from the intersection of the two construction circles (to anywhere, the end point doesn’t matter) and then use snapping with the Move Tool to drag circle C into place. Note: If you don't want circle B to be rotated after this then you can just double-click the rotation handle to reset it. Important: There may be tiny gaps between the circles but that’s because they aren’t perfect circles, and that’s because of the way the Affinity applications draw circles using bezier curves. I don’t think there’s anything we can do about this. 2024-02-04 08-50-06.mp4
-
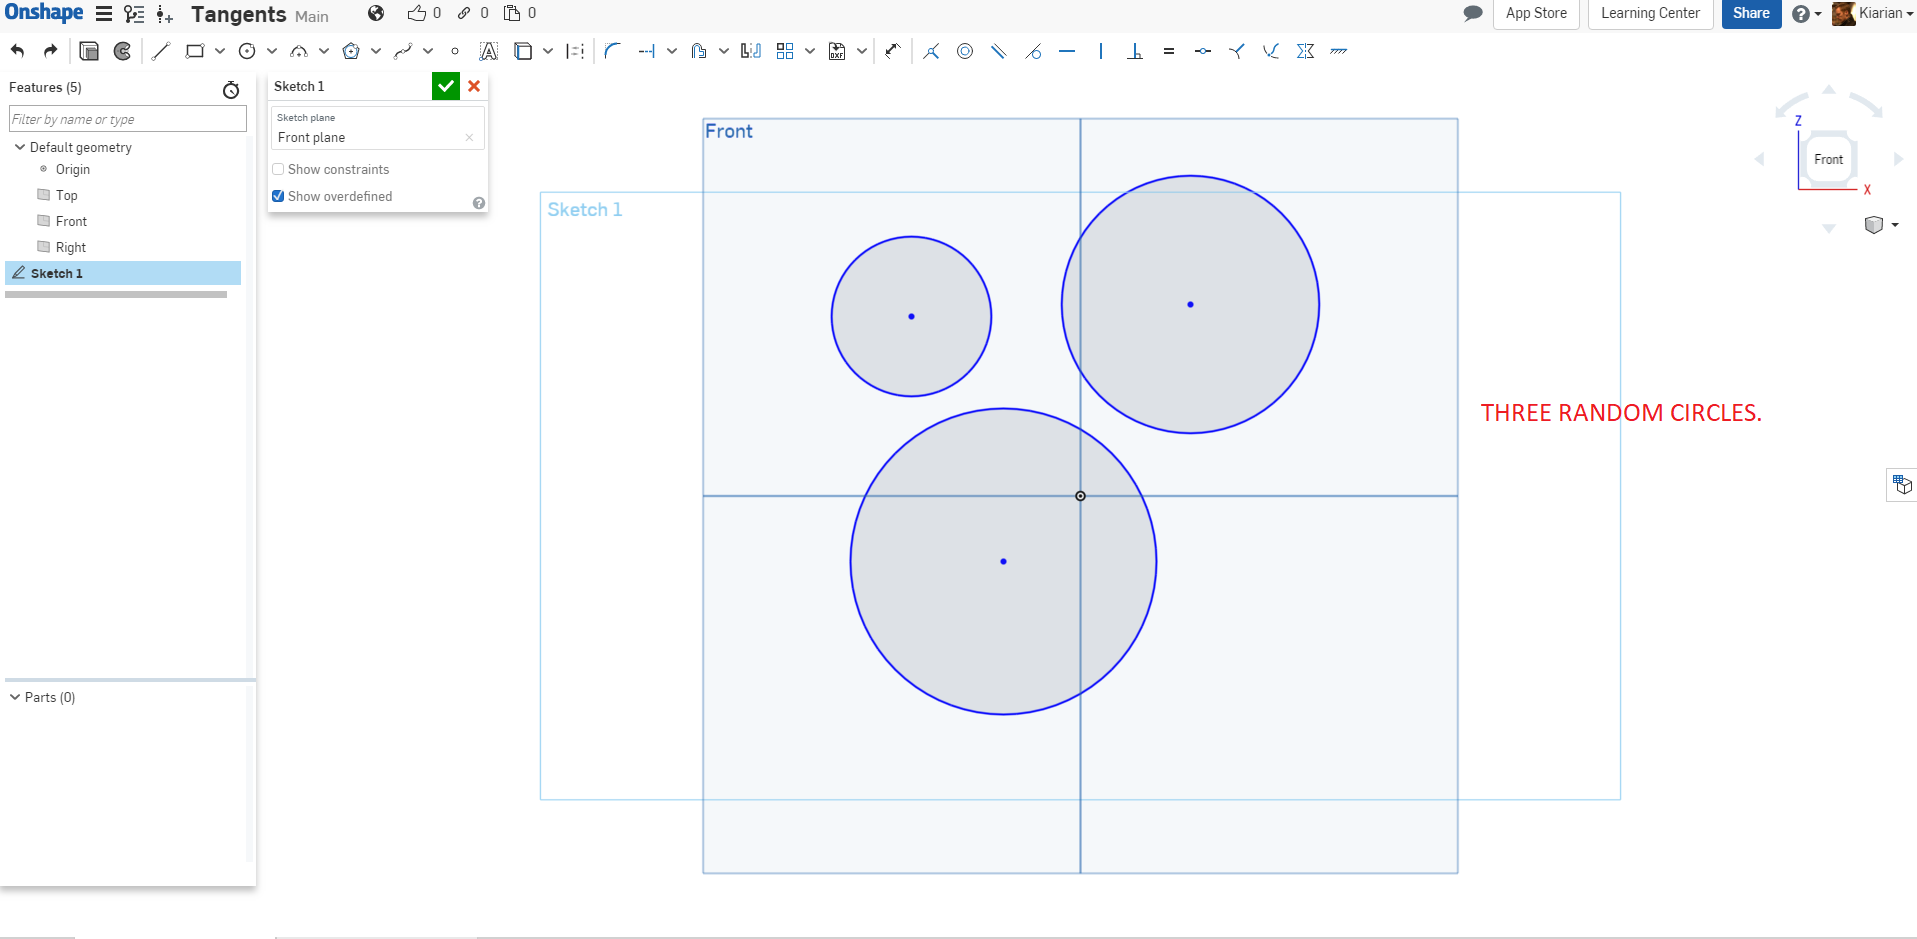
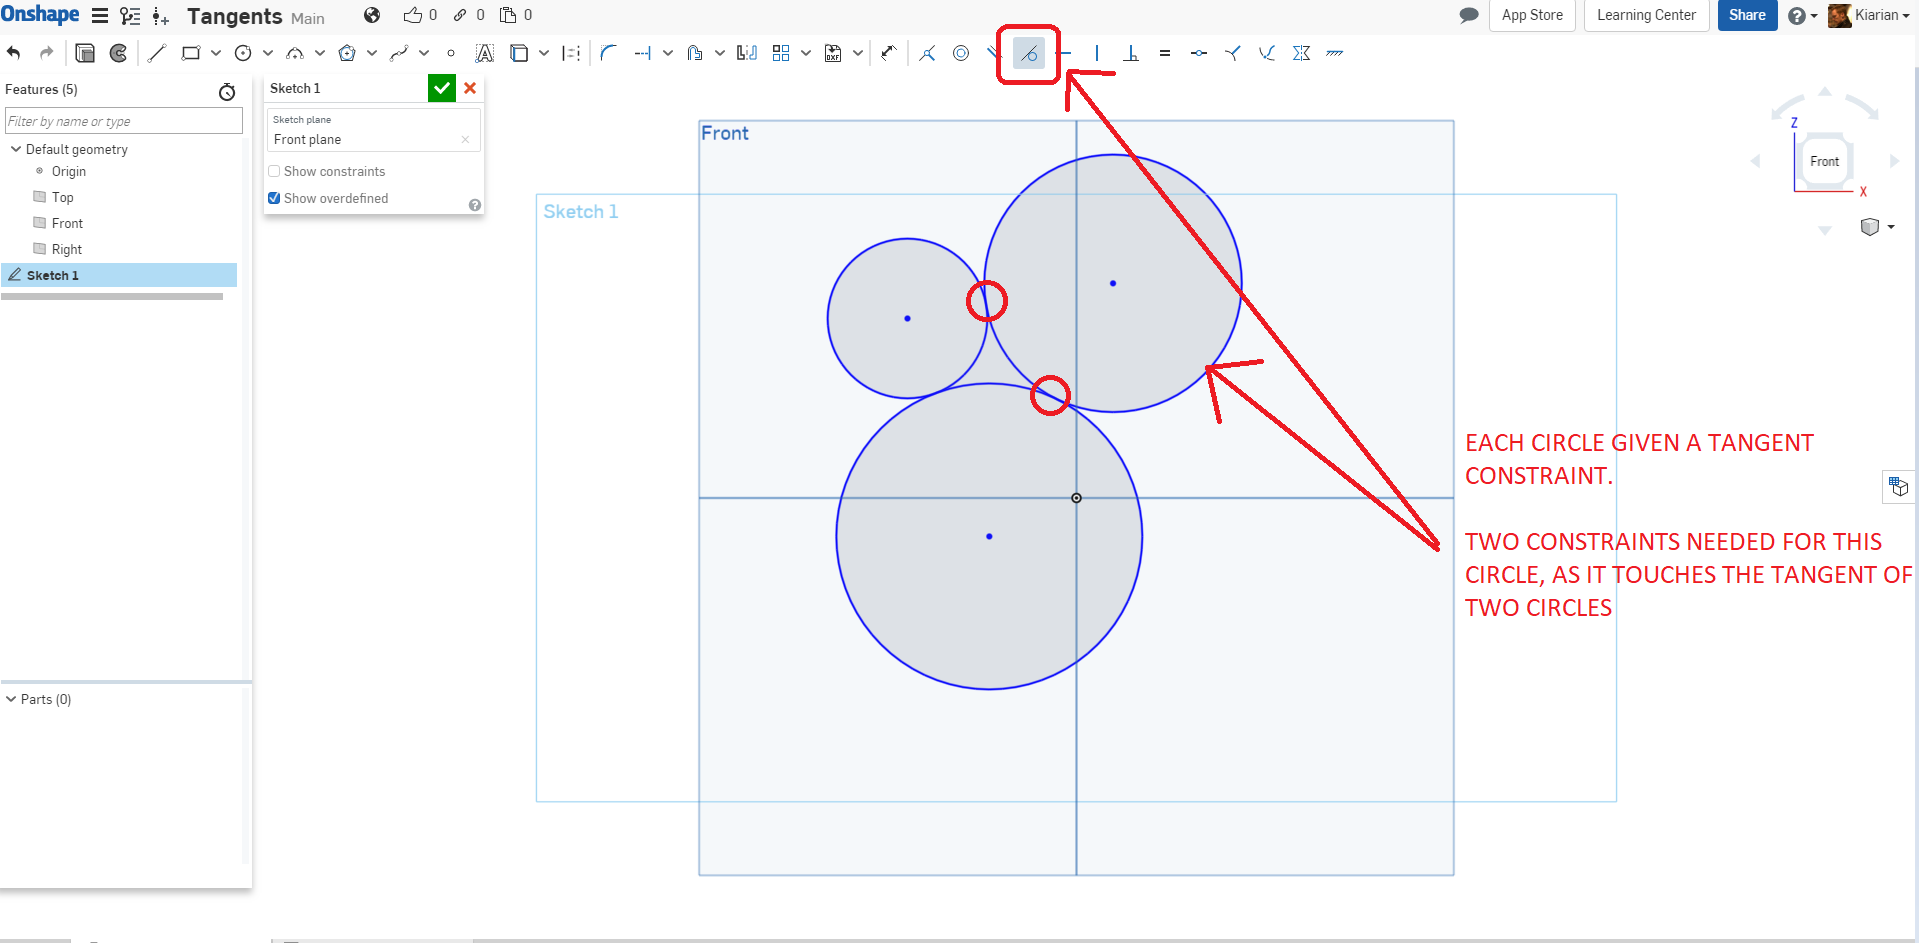
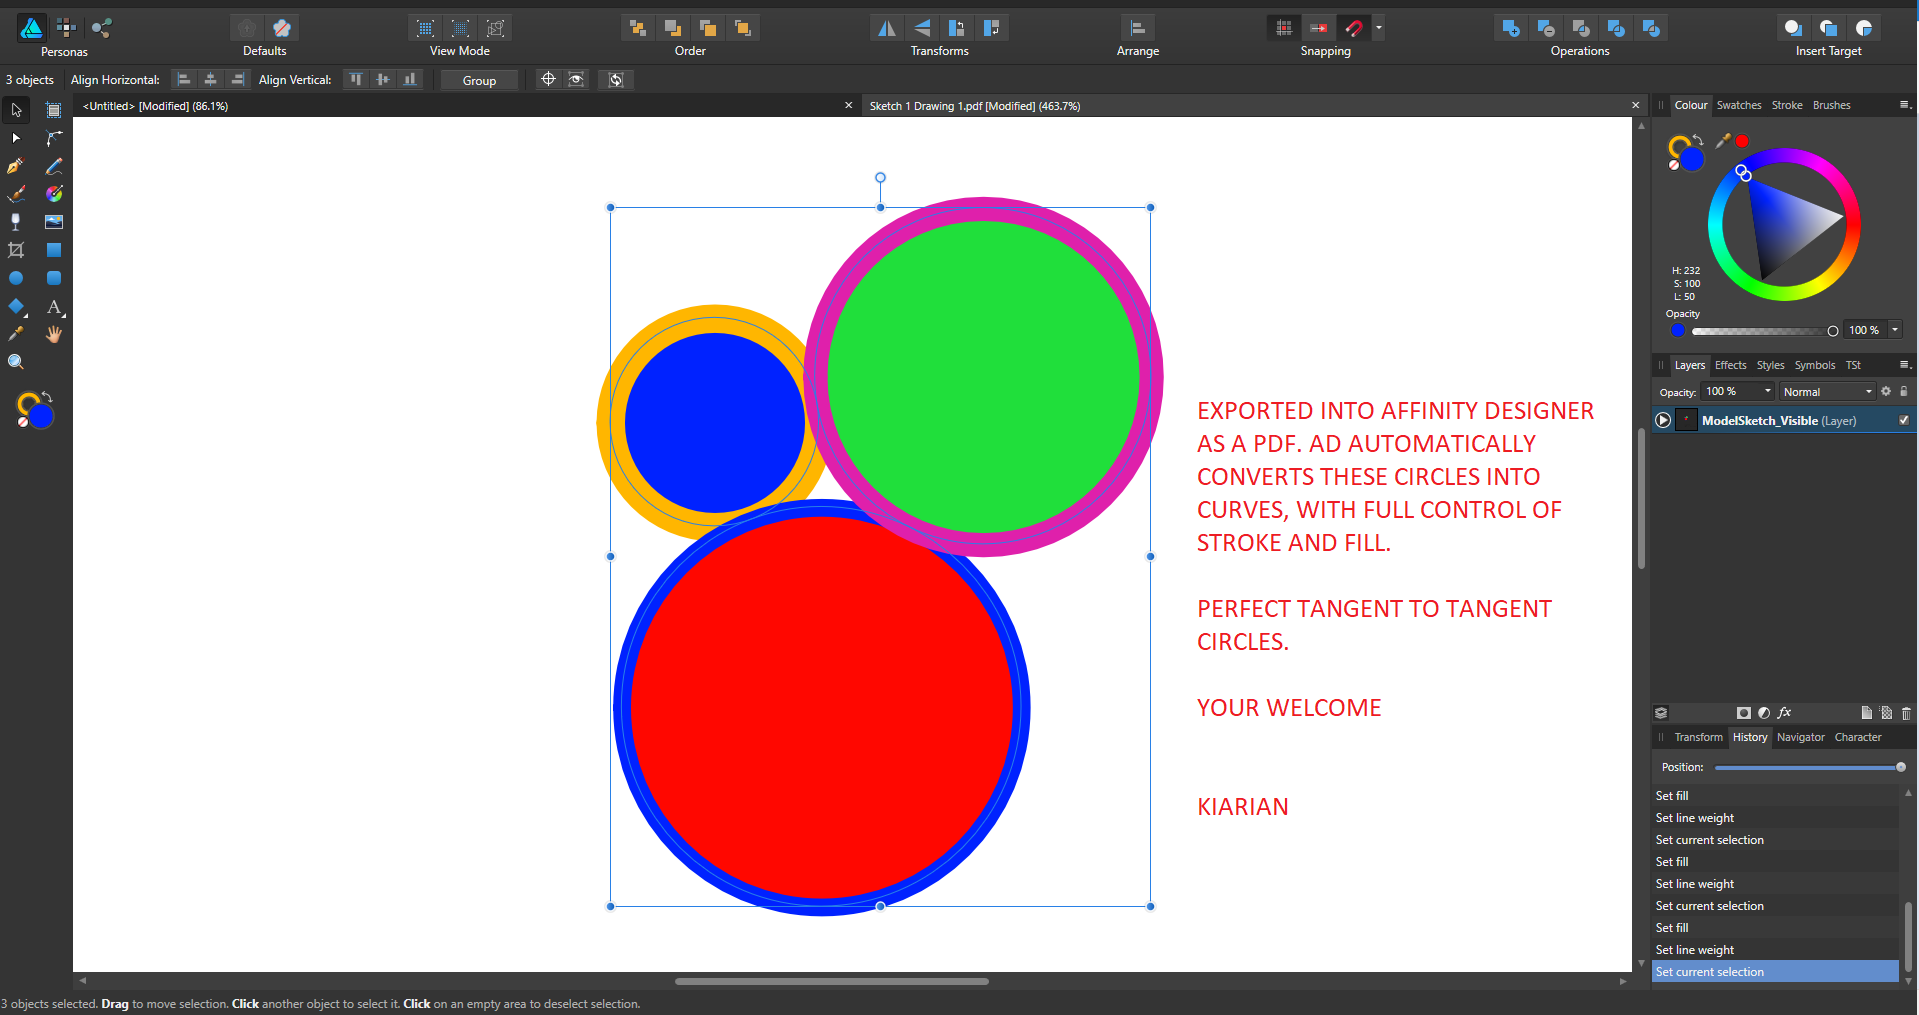
 I've been scratching my head trying to think of a workaround for this. As it stands Affinity Designer does not have a 'tangent to tangent' function for when you want to draw multiple circles, or lines to tangents, and make sure the lines and/or circles are perfectly aligned. Note: this is NOT the same as aligning a line to the quadrant of a circle. Here's my workaround. I use Onshape (free, cloud based technical drawing software) to sketch up the circles in Onshape, save as a drawing, then export as a PDF and bring into Affinity Designer as perfectly editable curves with fills. Perfect for logo design in particular.
- 4 replies
-
- 1
-

-
- tangent
- tangent to tangent
- (and 2 more)
-
 about 6 months ago i requested a way to use my tangent hardware to control affinity photo software. Any progress in that regard? thanks Jerry
 -
Hi I would find it really helpful to be able to draw lines and circles that are tangent to either 1 or 2 existing circles. I have a link here that shows what I am talking about - it is a program called AutoCAD https://www.google.co.uk/search?q=autocad+snap+to+tangent&ie=utf-8&oe=utf-8&client=firefox-b&gfe_rd=cr&dcr=0&ei=UpkJWsC7CebG8Aft1I-oAg#gfe_rd=cr&kpvalbx=1 Thanks Rob