Search the Community
Showing results for tags 'sharpening'.
-
 Not sure if this is a bug or not but it is very strange to say the least. Try this! Develop a RAW (CR3 in my case) image in the develop persona but DO NOT apply any sharpening, but apply Colour and Vibrance, contrast and Brightness, to taste, some noise reduction but nothing else. Then develop the image. In the Photo persona apply a high pass (live ) filter set to 0.5, monochrome ticked and choose Linear Light Then duplicate the live pass filter which gives you two 0.5 filters. You should see a clear sharpening taking effect. Keep the AFPHOTO file open Now export the resultant image in JPG. Then import the file you just exported back into AFPHOTO so you should have the original and the exported image showing in AFPHOTO. Set both images with Control Zero so they are the same size and compare the two, switching from one to the other. What I am finding is that the clarity and sharpness of the Exported image is noticeably less than the adjusted AFPHOTO image. I thought it was because I was using JPG but I tried TIFF with no compression and then again with ZIP but the result was the same, there is a difference and I just don't understand why? Shouldn't it save exactly the same sharpening that I am seeing on the screen? It doesn't appear to. Anyone got any ideas why?
 -
 I am trying AF v2 and see a lot of yellow clipping even with the slightest sharpening. Is there a way to turn it off, just as there is for the clipping of the highlights and shadows? Thanks, Martin
 -
 When I open a RAW file in Develop (Affinity Photo) one of the first things I adjust are the Detail Refinements, the sharpening tool. When I then click Develop at the top left, all my adjustments are saved except for the Details Refinements... Any changes made to e.g. exposure or color are developed, just not the sharpening. I'm new to Affinity so maybe I'm doing something wrong, but it seems odd anyway. Any suggestions?
 -
Affinity photo constantly crushing while working on png blender files. When i sellect parts of the picture by lasso tool and use HSL especially. It appears in the way that after I sellect things and do manipulations with the colours it suddenly stack, i do can click options - my mouse works, but can't really choose them nor come back, I cannot save the file in cuurent stage as well nor recover it later, it is really frustrating. Also I have noticed a lot of problems with rendering my raw files from SA73, when I adding some layers, adjustments - more advanced works especially with sharpening parts of the photo, in the software itself picture looks fine, but when exporting to jpg there is a lot of gliches, some strange colour full squars appears everywere. When i repeat rendering into jpg, the gliches appears again but in different parts of the picture.
-
 I recently switched from Photoshop and I somewhat have a problem with the selection tools. When I use the tools like freehand selection for example, I don't get a sharp edge. When I want to refine it I can change the sharpness of the edge, but that makes the edge more fuzzy. I am sure selecting with sharp edges must be possible - but somehow I don't find out how... ...does anyone have any suggestions? Thank you.
 -
I know there are lots of topics created by people requesting specific functionality from adobe PS. One thing that I particularly like and I do mis in nearly all other imaging editing software (including Lightroom) I've tried is smart sharpening. The sharpening algorithm leads to better results and you'll get blending options to prevent clipping due to sharpening. Of course you can apply this filter as a smart-filter so you'll keep a nondestructive work-flow. I would really like to see this feature in both the iPad and MacOS versions
- 8 replies
-
- 3
-

-
- sharpening
- smart sharpening
- (and 2 more)
-
 Hi guys, i've a serious issue: when i sharp a picture in RAW mode and then i develop, this lose my sharpening and become soft again. What's wrong???
 -
 Hi guys, just uploaded a new video about how to sharpen a blurry object in your photo. I hope you like it, thank you!
 -
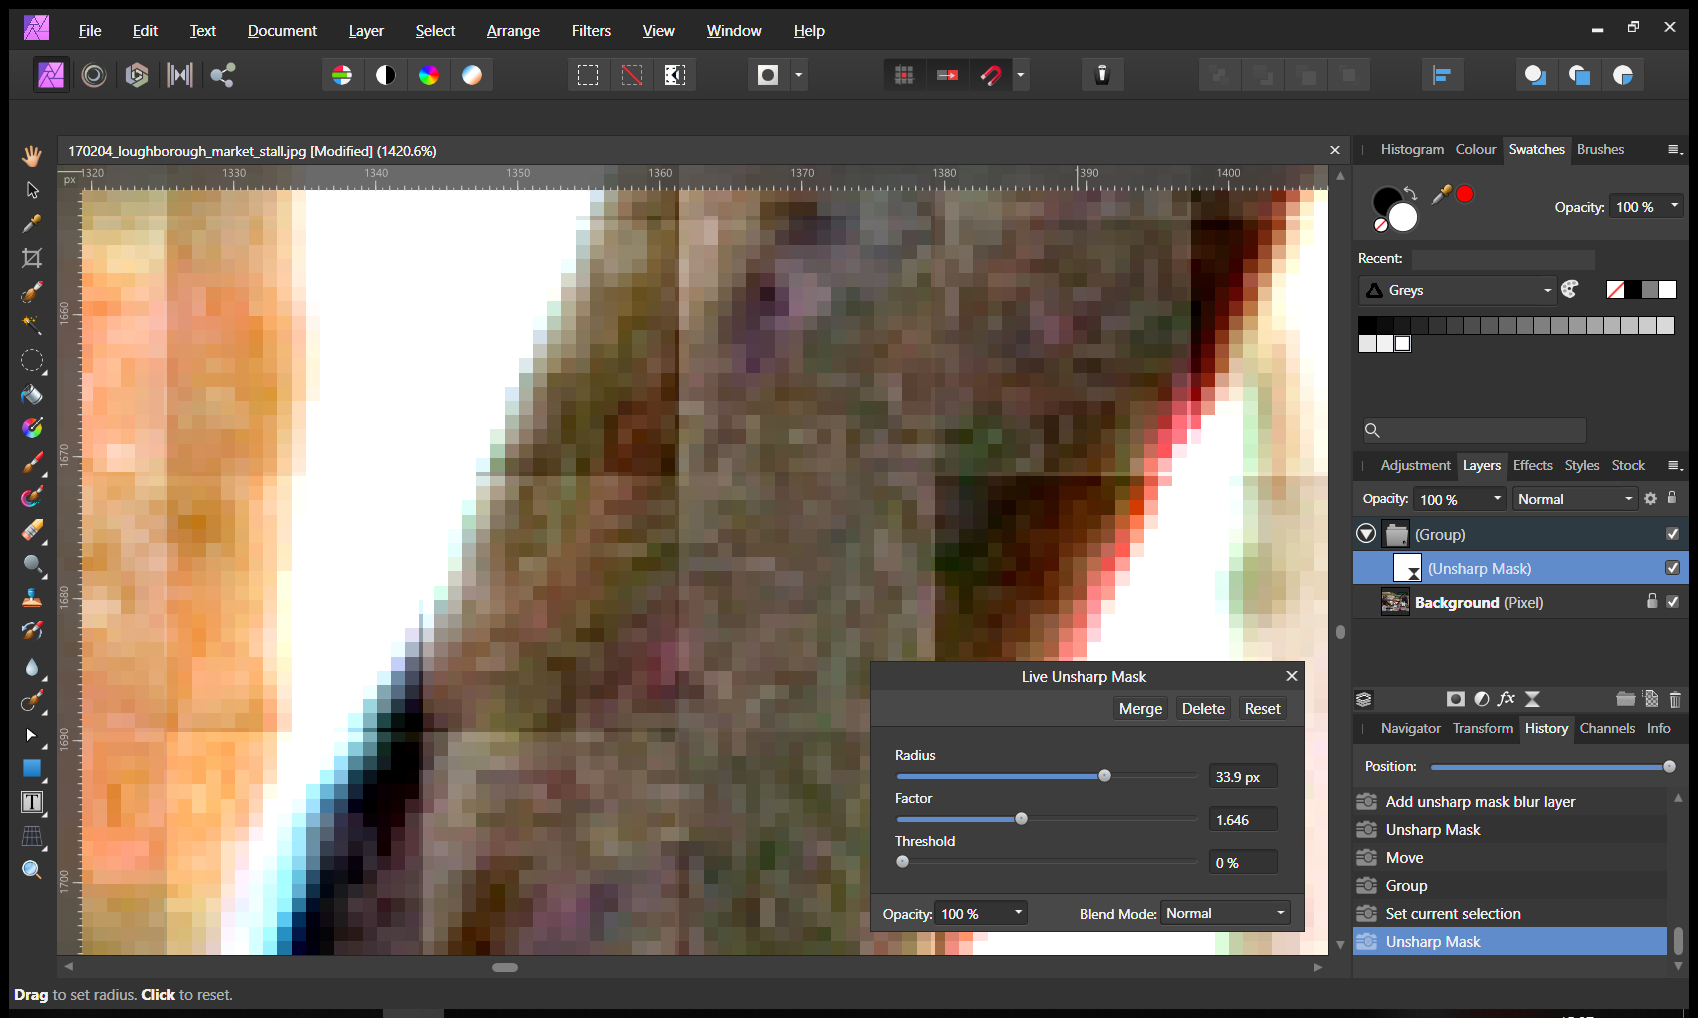
Take an image. Apply Blend Ranges and adjust transparency. Add live Unsharp Mask or High Pass sharpening. The moment the radius leaves zero, all transparency is lost on either and everything gets sharpened. I also tried this on an image with Alpha adjusted via a Procedural Texture algorithm and the same effect happened. What gives?
- 2 replies
-
- 1
-

-
- sharpening
- alpha
- (and 1 more)
-
 A way of sharpening is to add multiple high-pass layers, progressively reducing the radius and increasing the opacity. Attached is a macro to do this, including the ability to tweak adjustments. Please try it out and let us know here if you find any better adjustments. Apply it to a duplicate layer so you can switch the adjusted layer on and off to see the difference. This seems to be quite labour-intensive, including as it readjusts when you zoom in. It can hence be a good idea to merge the effect into one layer (turn off the original layer and layer/merge visible to do this). You can also try adjusting the opacity of the adjusted layer and even play with blend mode (eg. try Luminosity). Dave's 6-Layer High Pass Sharpening.afmacro
 -
Another experimental variant on sharpening (just playing about on a Sunday morning): Duplicate layer twice (so there are three layers). Top layer: Invert. Blend Mode: Vivid Light. Add Gaussian Blur (radius about 4). The effect looks a bit like a high-pass effect, so... Middle layer: Blend Mode: Hard Light (or Overlay or Soft Light, if you like).. There's an odd effect where colour patches appear in light areas. Increasing Gaussian blur can fix this but reduces sharpening effect. You can also add a mask to the top layer and paint them away. I suspect it's caused by the Vivid Light blend algorithm.
-
Here's an effect I'm finding: Zoom into a pixel layer so you can see the pixels. Add sharpening layer above Unsharp and HP both have same effect. I tried it with several other adjustments and it didn't happen. Group the sharpening layer (Ctrl-G) so sharpening is only layer in group. 'squares' appear, as below (only after the grouping Merge Visible makes them disappear, so presumably it's a rendering thing, but it makes non-destructive editing impossible.

-
 Hi I am trying to sharpen an image by using only the red channel as luminosity layer on top of the background layer. In PS its easy but with AP the image stays grey. Also in AP all the layers change to the red channel, while in PS the selected top luminosity layer is based only on the red channel and other layers keep their RGB colours. Hope it makes sense. Regards Antonius
 -
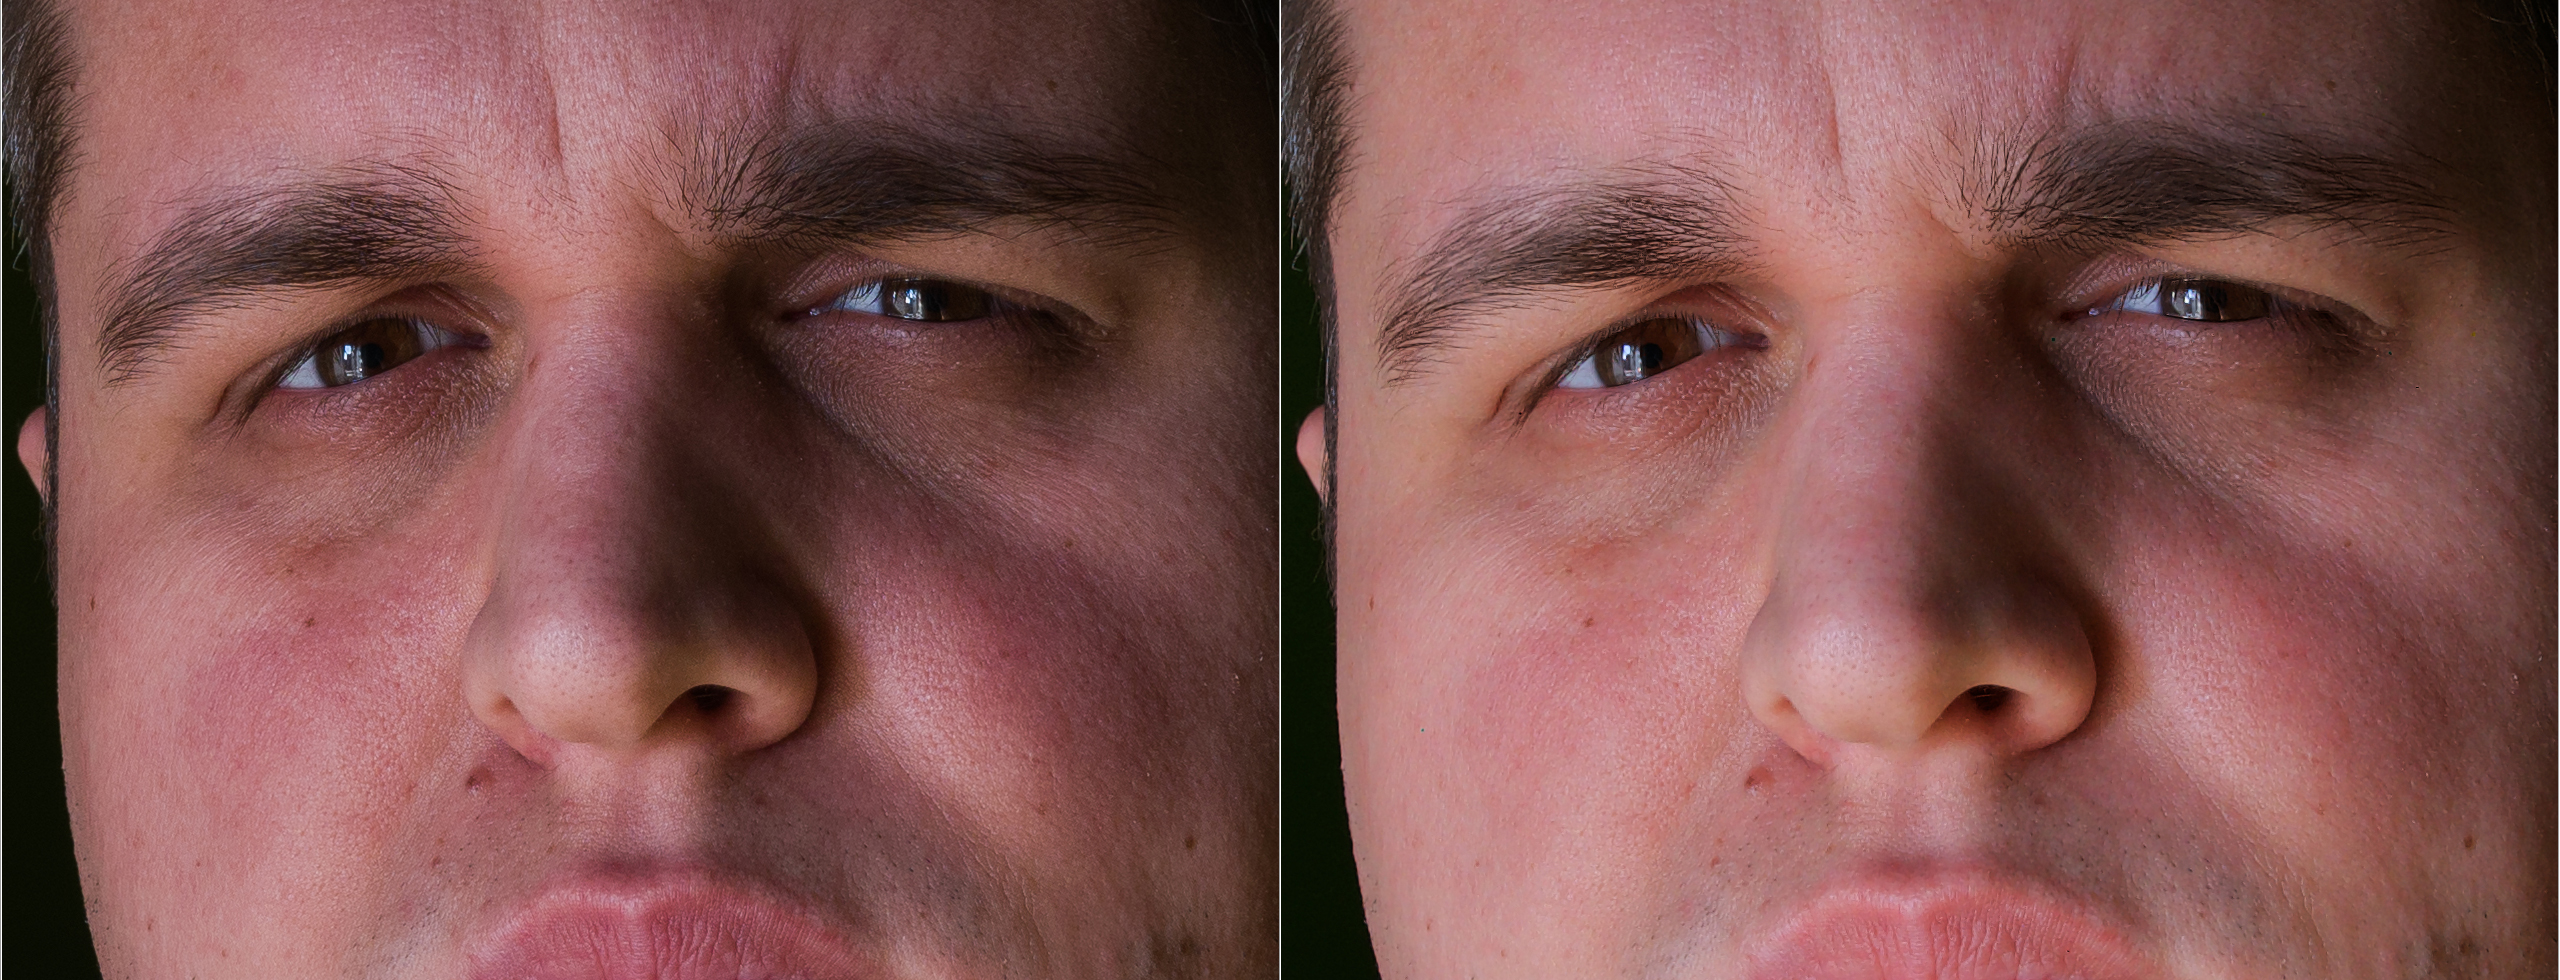
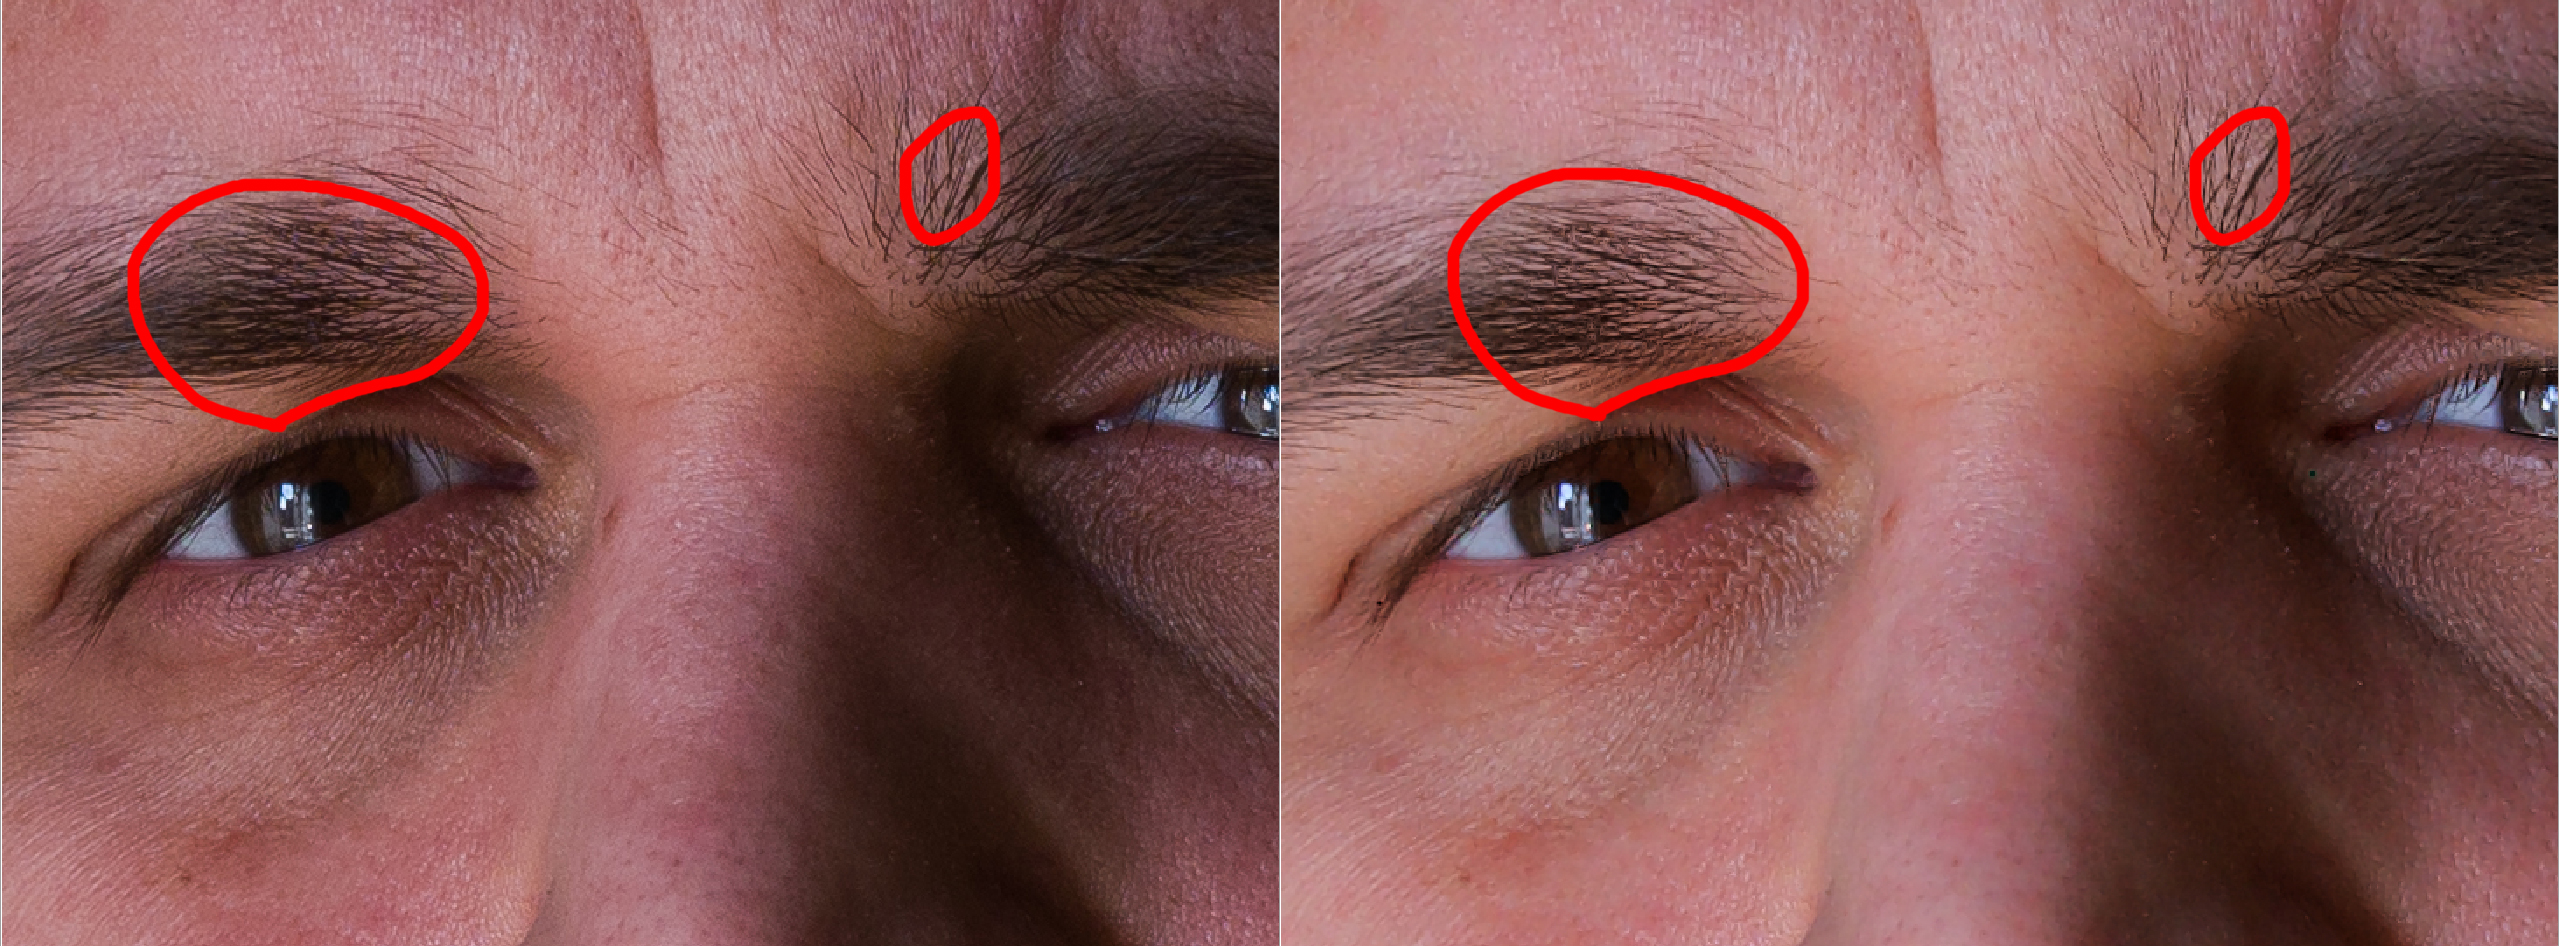
 I use Nikon D700 and Affinity Photo process my RAWs quite differ from Adobe Lightroom and Photoshop. Images are losing details and have incorrect tones and gamma. I did not find how to deal with it in Affinity. As a workaround, I can use Lightroom as RAW converter, then export to TIFF and can edit it in Affinity, which totally does not make any sense. Hope Affinity guys know this issue and working on that. See an example below. It is just opened RAW files without any additional settings implemented. You can see how much details I loose in lips and eyelashes.
-
 Hi there, I love using Affinity photo, but I am missing one point with Details Refinement. In Lightroom it is possible to press the ALT-key while changing the masking slider. This gives you a masking / kind of high pass view of the sharpening that is applyed. I can't find a method to do that in Affinity Photo. Is that function missing or am I missing something? Any plans for a feature like that. Besides that, what's your workflow with Detail Refinement (RAW development)? What values are you set fixed, what is variable afterwards? What are your indications for sharpening the image appropriately? Any tips are highly appreciated! Thanks and best, David
 -
 Please help me other problem I have a Panasonic GX80 camera. If I open it in Affinity Photo, I set the colors and set it to arm with the Unsharp Mask. Then I export the image quality will be bad. It is blurry, painted, and apparently much firmer than when I import it from Photoshop Express. What's the problem here? Because it's really a big deal. If only setting what's wrong? I tried everything. I attached an example. But it's much firmer than other pictures. I'm going to add something like that. the left hand side of Photoshop Express is perfect. On a full screen, blurred as a picture of Affinity Photo. There are also bugs that I have selected. There is no such thing as PS Express (the PS E. very Sharp). I do something wrong?
-
 In this tutorial I cover how to create a custom filter to extract details from your images. In this tutorial you'll also find the use of Macros and a bonus for you to use as you like... ;) https://www.youtube.com/watch?v=JdaySWNEpY0 The language in the video is portuguese with english subtitles. Hope you enjoy the video :) Pedro
- 11 replies
-
- 1
-
-
- affinity photo
- tutorial
- (and 6 more)
-
I would like to make adjustments on the selection, such as: 1) Make all partially selected pixels fully selected 2) Make all partially selected pixels not selected 3) "Unfeather" selection. For pixels more than 50% selected, make them fully selected, for pixels less than 50% selected, make them not selected. 4) Dim selection, for example everything that is X % selected, make it X/2 % selected All of this would be achievable if something like a Curves adjustment would be supported on the selection values themselves. I think the Edit Selection As Layer (also known as Quick Mask) mode would be a good place to add support for something like this. If you are editing the selection as a layer, it would be logical to be able to merge in adjustments into the selection layer. Something similar to 1) and 2) is achievable in Select -> Refine Edges -> Ramp. However the leftmost and rightmost position of the slider doesn't go far enough and still leave partially selected pixels. I understand that there is a workaround of creating a new pixel layer, filling the selected pixels, applying adjustments, select by luminosity and remove the temporary pixel layer. However this is pretty convoluted, which is the reason for Edit Selection as Layer to exist in the first place.
-
 Wow, Affinity Designer is awesome. I've bought it for both my Windows desktop machine and my Mac laptop. I love that you can apply curves, LUTs and blurs. They're really fast too! FEATURE REQUEST: Can you guys add Unsharp Mask to effects we can apply? Currently I have to replicate the Unsharp Mask with a complex set of steps - Duplicate the layer, invert it, blur it, set it to Multiply mode at 50%, then group it with the layer below and apply levels. I'm evaluating Designer as a tool for making pitch decks and having the ability to sharpen within the app instead of having to jump into a separate photo app would be amazing! I currently use a combo of InDesign, Keynote, Photoshop, Illustrator, After Effects, etc. I hate switching between InDesign and Photoshop just to adjust bitmap images, and then having to jump into Illustrator to do vector stuff. Affinity Designer with its blurs, LUTs, curves etc is already ahead. It's such a good app to think creatively in. I'm very interested in Affinity Publisher too and will buy it the moment it comes out. I hope you also allow us to do image adjustments in that app too! That would be a huge advantage over InDesign. Thanks! Bruce Allen
 -
Hi, I would like to be able to limit the effect of the Detail Refinement feature in Develop persona to relevant edges to avoid emphasizing noise in smooth areas. Please add option of edge detection with a slider to control edge strength in masking the sharpening effect. I understand something similar can be achieved in Photo persona with result of Detect Edges filter used as mask, but it requires Developing the image first (destructive step), and also the lots of steps required are cumbersome for a standard requirement against sharpening to avoid the noise.
-
Here's another variant on sharpening that uses the way that the Emboss filter creates mostly grey, like High-Pass. Just something to play with... Duplicate layer. Filters/Colours/Emboss… Set Monochrome checkbox on. Adjust Radius until fine edges just about appearing. Adjust Amount to accentuate sharpening effect (up to harden, down to soften). Apply To make all outlines dark (counteract the emboss light/dark edging): Duplicate layer. Invert. Blend Mode: Darken. Merge down. Blend Mode: Hard Light (or other contrast mode).
-
Here's a cute variation on sharpening that seems good for faces, based off the video here. It uses the Bilateral Blur, which is good at preserving edges while it blurs the rest of the image (eg. to stop sharpening skin). Duplicate layer Apply live Bilateral Blur filter to top layer. Adjust to soften image while preserving main edges. Apply live High Pass to top layer. Adjust to suit. Blend the top layer, for example with Hard Light (or other contrast mode). Using live filters means you can still play with the settings. You can also play with using other blur modes in step 2. Keep an eye on the greyed top layer (turn off bottom layer to see this). If you can't see any edge, you won't get any sharpening.
-
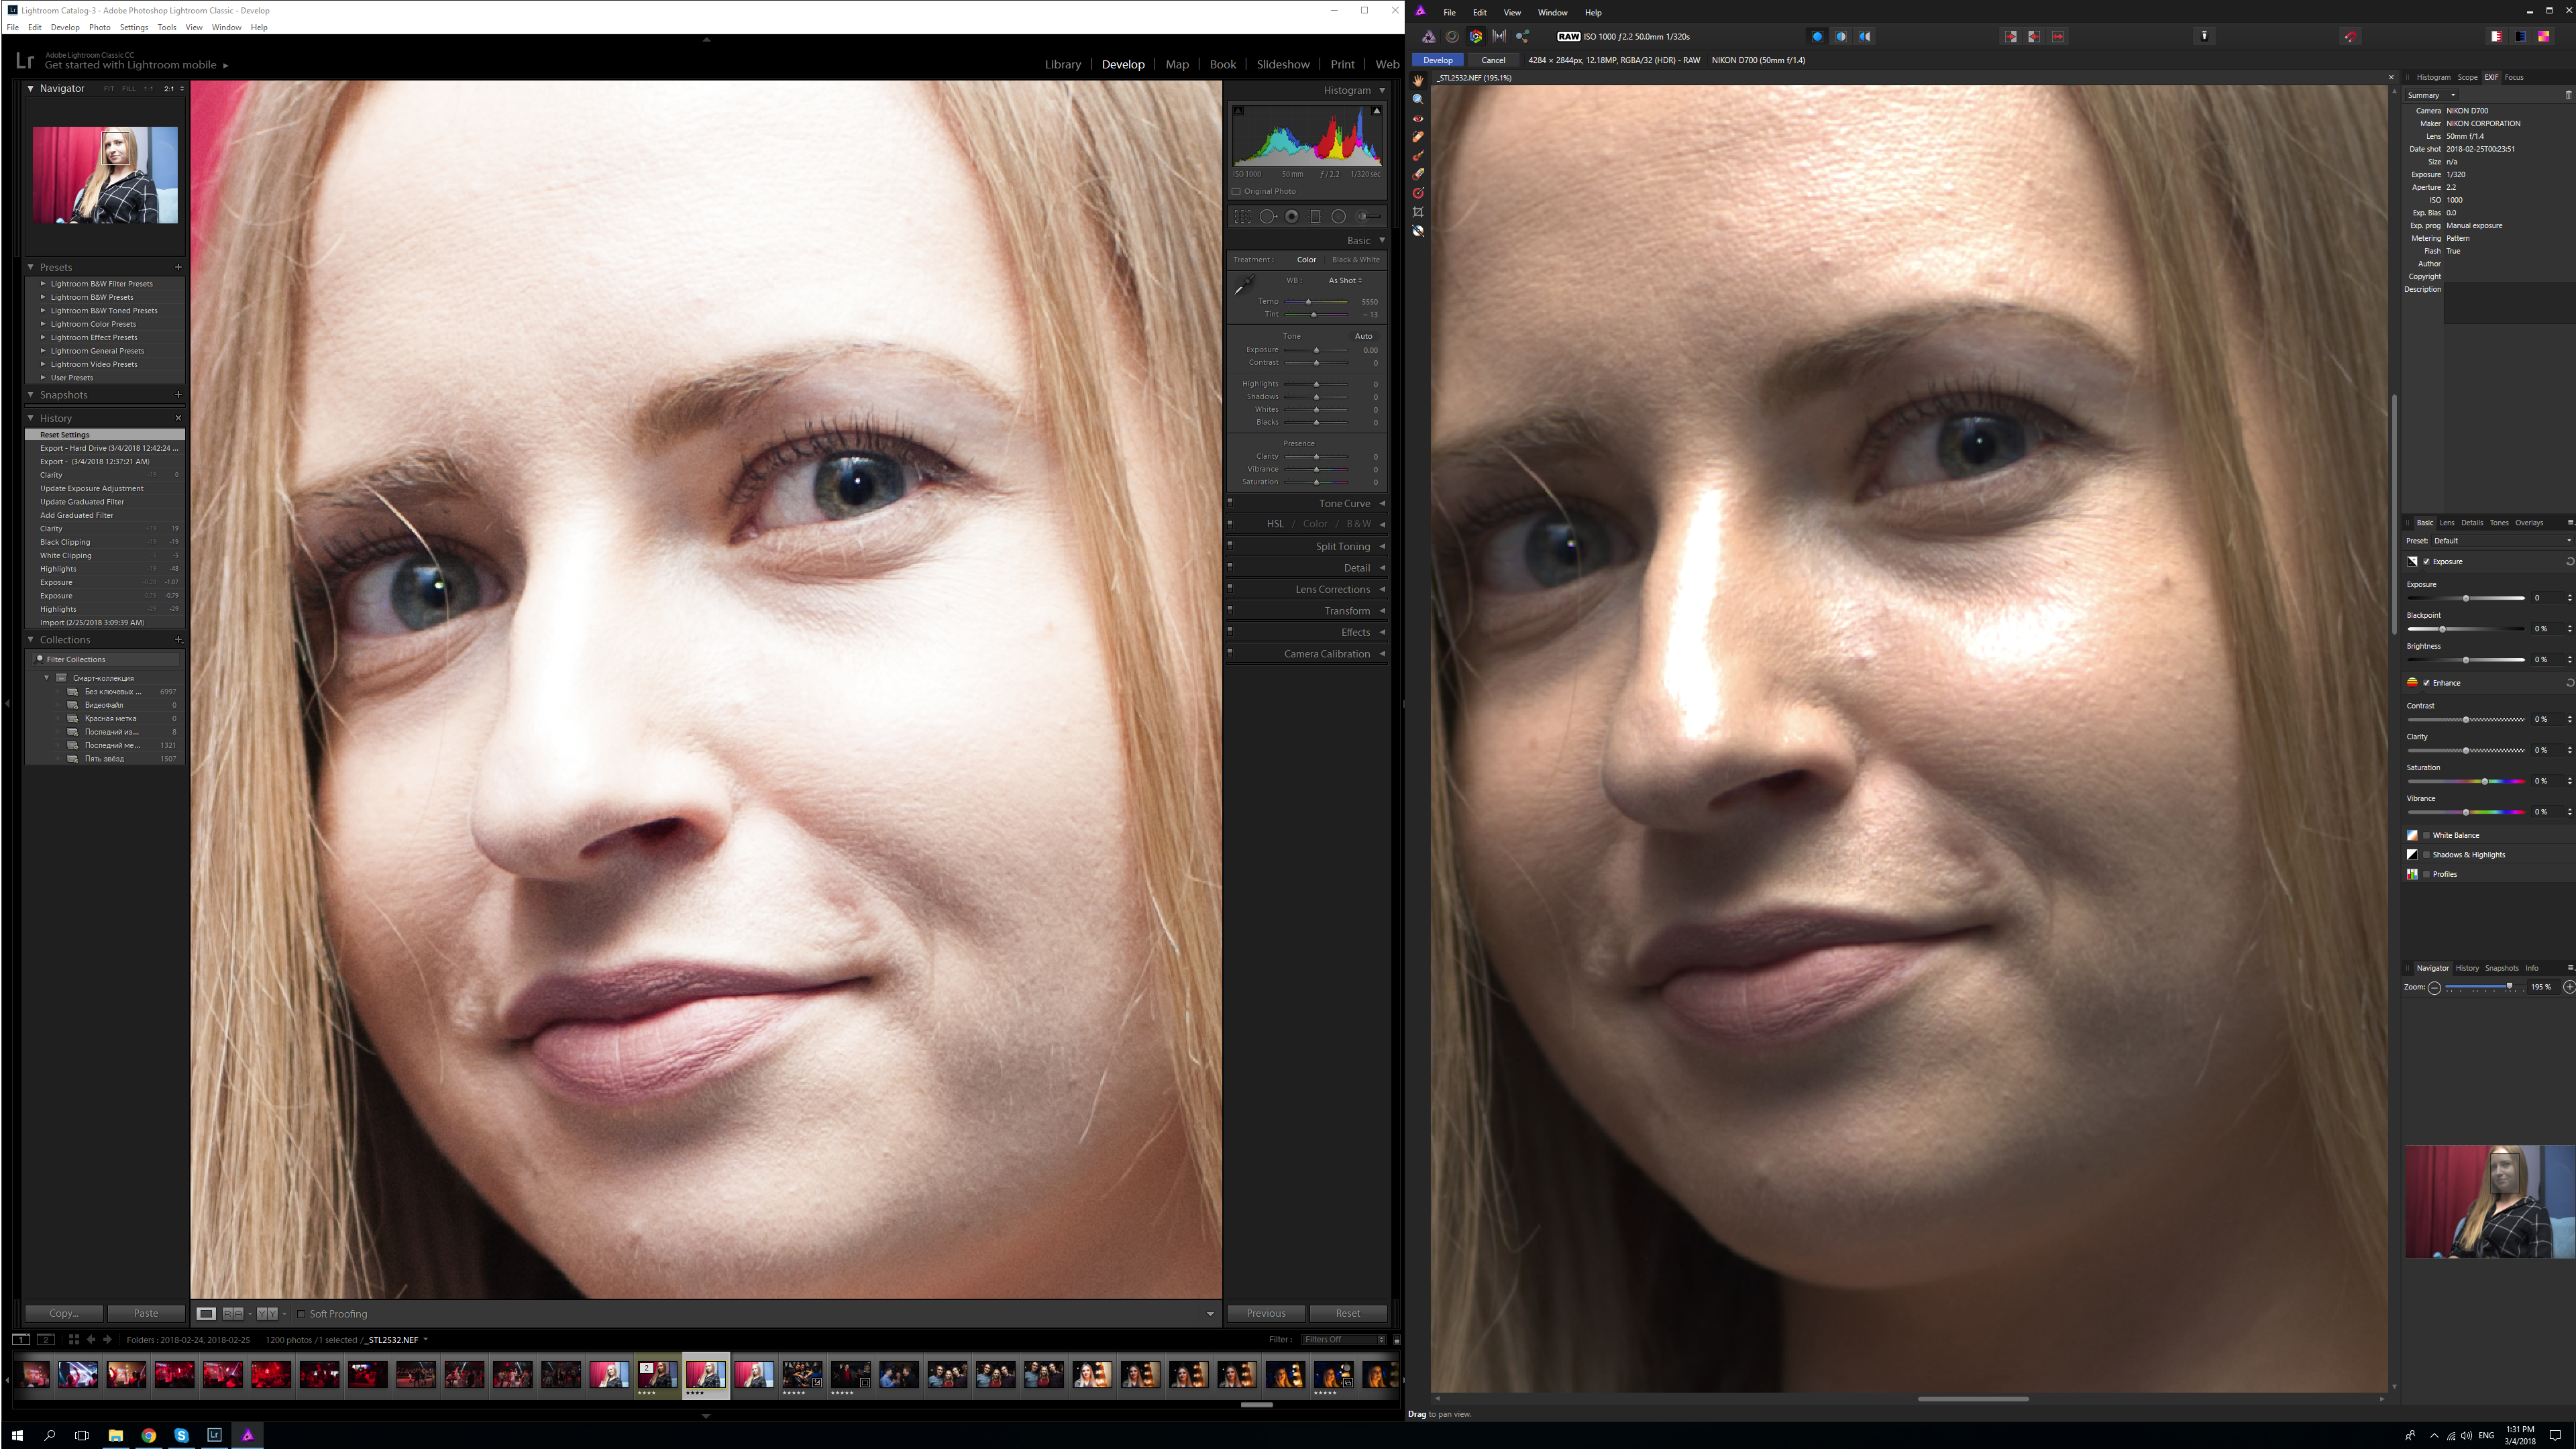
 I have my photos organised in LightRoom 5 and got Affinity Photo because PS was getting ridiculously expensive for my limited use. My RAW processing and basic adjustments are done in LR, and the majority of photos are just exported from there, I have a reasonable feeling of how to work with it. I then go into AP for things where more detailed work is needed, for example I did exposure stacking to make star trails. As I am hardly using the Develop Persona, how/where/when do you suggest I sharpen? Sharpening is a bit of a dark art to me...
 -
 Hi, I would like to ask if there's someone has a tutorial or know how to do high pass filter processing in affinity photo in iPad to sharpening my images? Thanks!
 -
One of the banes of sharpening, especially in landscapes, is that light lines appear around horizons, trees and so on, forcing you to scale back your sharpening efforts. This can be a nuisance when everythings' great, apart from those darned halos! A very simple solution: 1. Duplicate the pixel layer. 2. Sharpen away. Use Unsharp Mask and turn up the radius as far as you like. Ignore the light halos around things. 3. Here's the magic: Blend mode: Darken. Ole! The halos disappear! So what's happening? For those who are not saying 'but that's obvious': Sharpening finds edges and makes one side lighter and the other side darker to trick the eye into taking greater notice of the edge. In Darken blend mode, Affinity compares pixels in both the duplicate and original images and shows the darker pixel (not the lighter one). Any pixels which have been darkened will be in the sharpened, duplicated layer along edges, and will be shown. Any which have been lightened (on the other side of the sharpened line) will not be shown as the darker pixels from the original layer will be used. Any pixels not affected by the sharpening will be the same, so the blend has no colour-changing effect. Just like that. If there are parts of the picture where you want to keep the light edges in the sharpening, then of course all you need to do is add a white mask to the original layer (or between the original and duplicate) and paint black over the areas to keep this light edging. Note: You can use Difference blend mode to see the sharpened area and guide any masking. Add a temporary Invert layer at the top to make this easier to see, if you like. Corollary: If you blend with Lighten mode, you can probably use this one-sided sharpening to create a glow around things.