Search the Community
Showing results for tags 'rectangular'.
Found 8 results
-
 I would like to see a rectangular gradient fill being added so I can create gradients on rectangles that work from both horizontal and vertical directions. Designer crashed when zooming out after having created the mock-up, so will have to do with this large image 😅.
-
 Hi, I have a little Problem with Affinity Photo. I think the solution is simple but I can´t find it or understand it (not in the workbook, tutorial ?? where to find ? ) 1. I make a screenshot with the print key.on the keyboard. 2. Next I paste the screenshot created by Windows into Affinity Photo 3. Now I only need some parts of the screenshot. I want to make a rectangular selection and copy this part into i.E. word or another software. 4. Because the colors are very similiar (another Tools won´t work properly) , it is the easiest way to use a rectangular selection. Every time when I try to copy and paste the rectangualar selection it will always paste the whole screenshot. The rectangular selection isn´t copied at all. Is there any way to make a quick selection and copy this part of a picture into another software? At the moment I have to create layers and a background, next save this part of the screenshot, load it into another software. This Costs a lot of time. I don´t need to save these pictures on the harddrive. How can I do this in a quicker way? Is there any clue ? Regards, timbojones
 -
Hey guys, just a quick and clean Designer file: a round sticker mock-up for your … mock-upping needs. You can change almost everything and layers are named accordingly to their purpose: rotation, colour, outline. Also let me know if you need a rectangular version, so I’ll add one with the same style. Edit: Rectangular sticker added. Sticker.afdesign Cheers and have fun! MrDoodlezz
-
 I don't find about selection by Rectangular Margee Tool and then image crop this picture not Crop Tool. anybody can help me. I just buy this program. Thx
 -
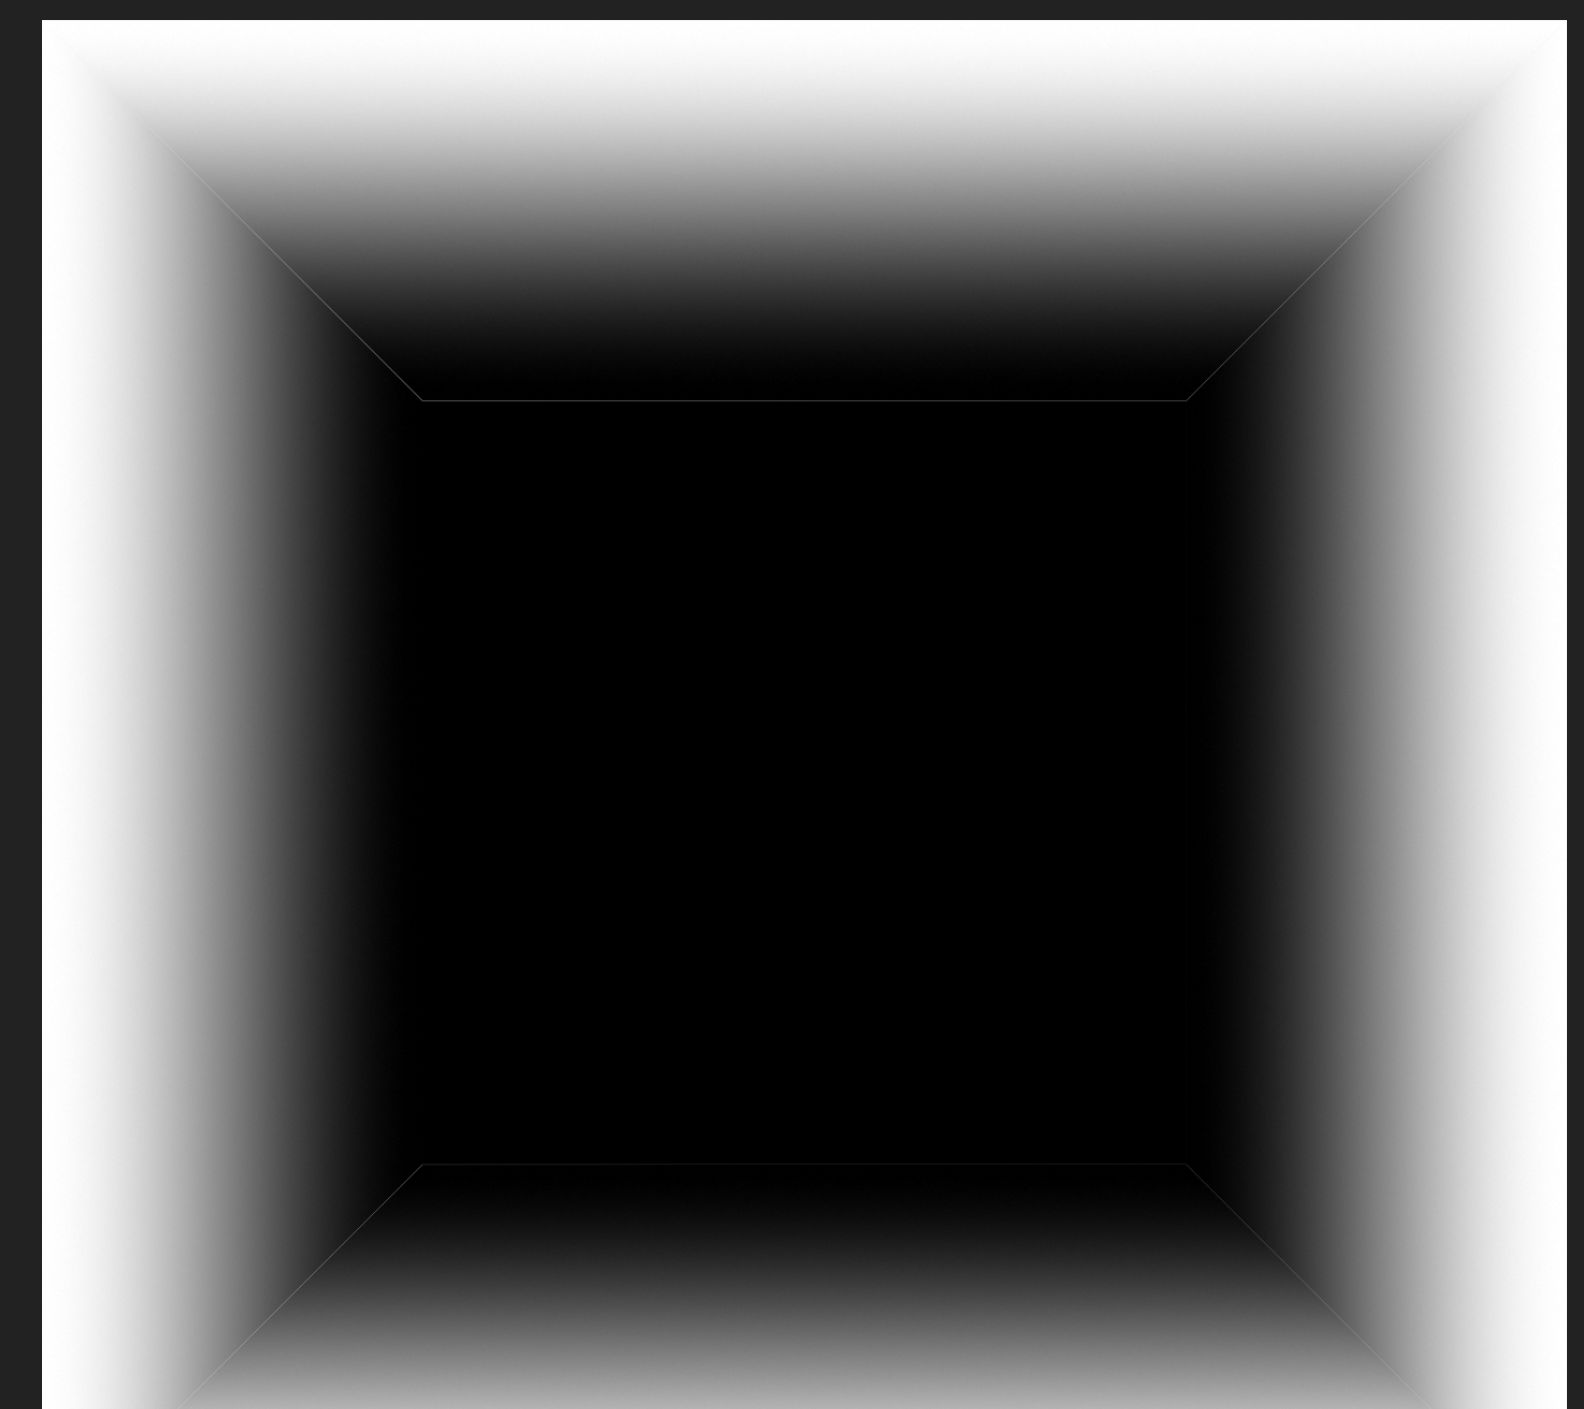
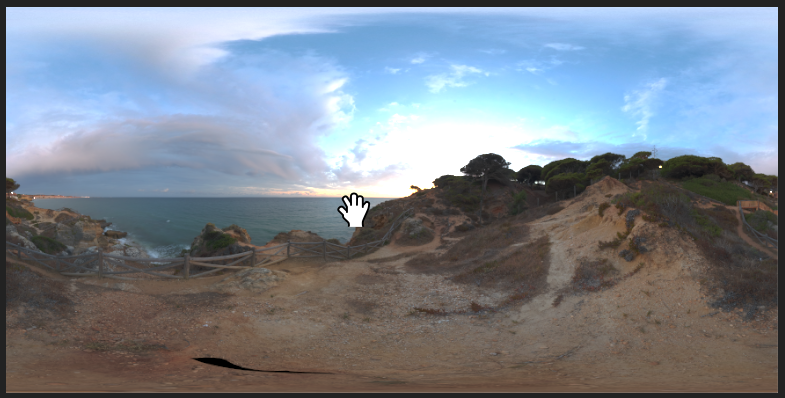
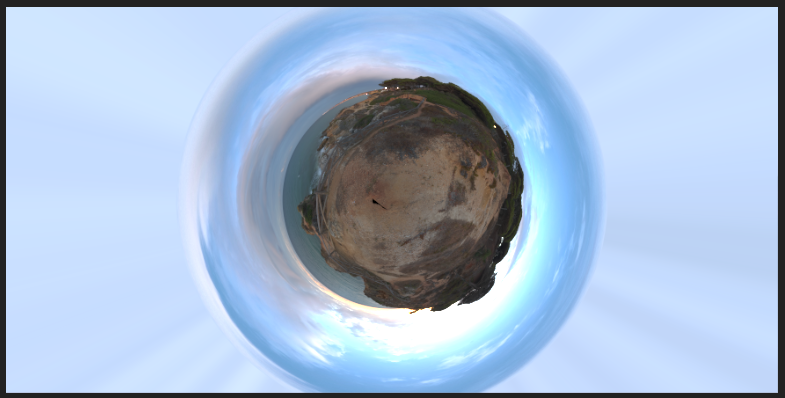
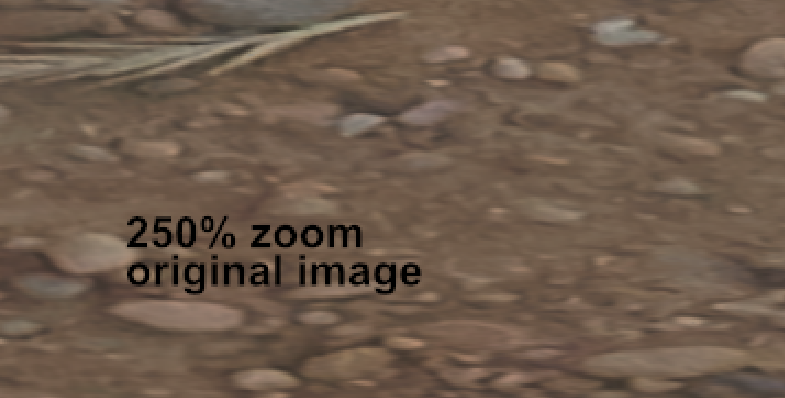
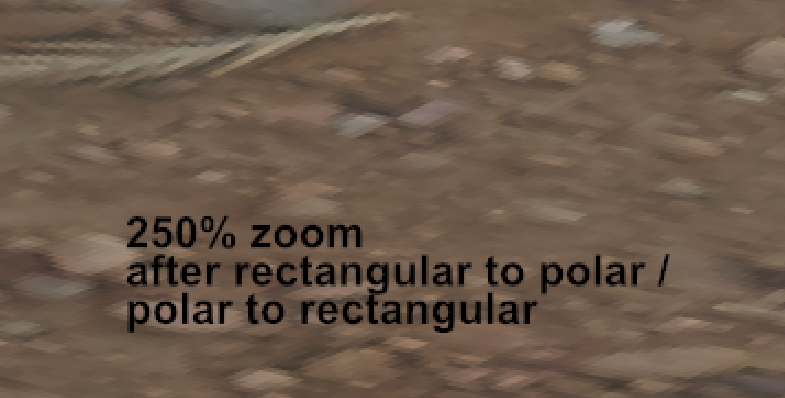
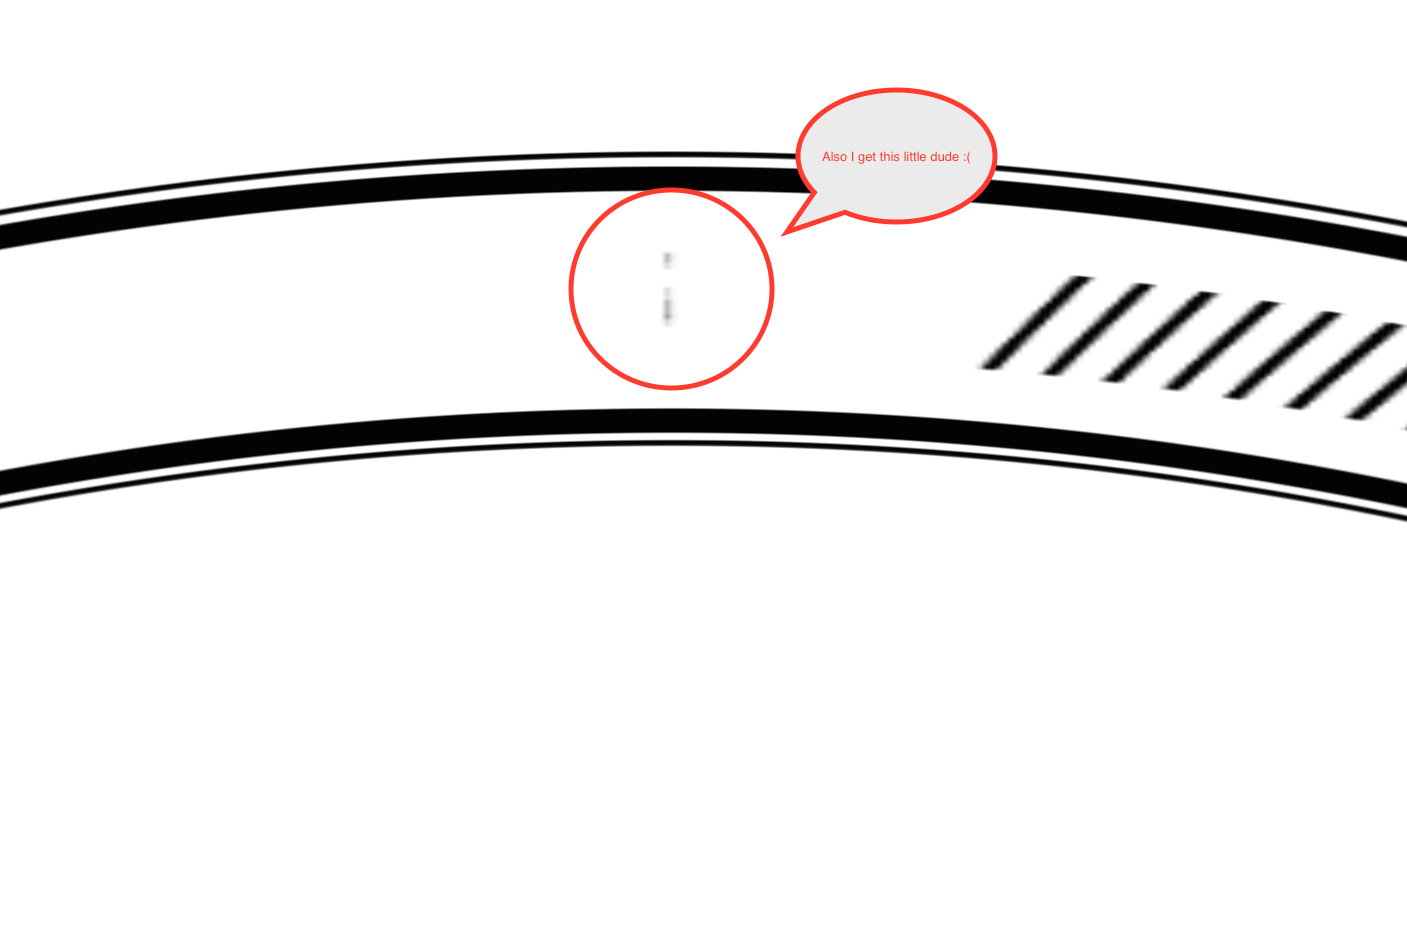
 Hello, First of all I have to say thank you for doing an alternative to photoshop (and illustrator) it is more than welcome! I am doing some 14k hdri panorama editing at the moment and found some things which unfortunately work not as well as in photoshop yet. Maybe there is a way to fix them!? The process: To get rid of the tripod in the picture it is necessary to do some clone stamping. So what you do is flipping the image vertically and then use the rectangular to polar filter to unstretch the floor. after clone stamping you use the polar to rectangular filter and flip the image vertically another time. The Problems: - after using the polar to rectangular filter the top of the image does a weird stretching (photoshop doesn't do that) what I do to avoid this is just making a mask and only paint in the edited (clone stamped) parts. Unfortunately the second problem is bigger: - after using the polar to rectangular filter the image is unsharp and has a weird jpeg like artifact pattern. First Problem (Stretching in the top of the image) Second Problem (Unsharp Artifacts) It looks similar to the artifacts in the following post: https://forum.affinity.serif.com/index.php?/topic/16741-rectangular-to-polar-good-results/ Thanks!
-
 The Rectangular Marquee Tool will not draw a box and the dotted lines do not show. The other 4 marquee tools work fine. Please tell me what I am doing wrong? Or do I have a faulty copy of the software? It is v1.5.1.54.
 -
 Hello together, first of all, thank you very much for your magnificent software, I'm working with the Beta for Windows now some days and it's very fun to do so. Nontheless I have a question regarding the Marquee pixel selection tools (e.g. elliptical marquee and rectangular marquee tool) and their modifier keys. I have consulted the help and found there are only two modifier keys, one which constrains the proportions (Shift) and on modifier key the removes ares from the current selection (Alt) and the possibility to drag with both left and right mouse button down) to add to a selection. I would ask if it is possible to add some more (from my personal experience) very useful modifier keys which would make it way easier to select circular shapes. A modifier key to draw the marquees from the center point rather than from the egde where the click at the begin occurred, for example holding the (Strg) key or another suitable one down Another modifier key I find very useful is, e.g. holding the (spacebar) key down to move the selection on the fly while it is still being drawn holding the mouse key down These are just some things I find really useful that make with selection these tools much easier to work with, I'm quite accustomed to such key modifiers as they are available in Photoshop CC. Thank you again and a wonderful week ahead. Kindest regards from Germany, Robert Christian Strasser
 -
 How do one get a good results with Rectangular to polar - No matter what I do I keep getting very poor antialiasing.