Search the Community
Showing results for tags 'pre-press'.
Found 3 results
-
 Today I went through Affinity Designer scouring for pre-press tools, there were none. No separations, no channel view. Only the workaround to freeze all layers in Affinity Photo and export each CMYK+ channel separately. Bit of a surprise. But since there's nothing there, here's what I wished were there. That and a decent printing dialogue. For the print simulation, I used to recommend Substance Designer (setup) + Marmoset Toolbag (presentation) for a while now. Not anymore though because I always end up doing the work. -_- Scope: A new persona for all apps to address basic pre-press that are currently unaddressed. Views: Toggle between several views for dedicated control options on each task. Some views can be combined to get a better idea about the end result. Noted with [separate] when one stands alone. Overprint Check View Show realistic rendering of how the overprint will look based on selected profiles for ink, printer (optional, based on PPD) and paper. Tools: Range Selector: Like a mix of UPoint + drag and move, for fixing and optimising ink trapping (live dilate/erode on vector and bitmaps). Coverage meter: Show where the ink coverage exceeds or meets 100% with a heat map overlay. A range selector then can be used to lower the ink as: lower total, lower c/m/y/k/+. Buttons could be used to control that: e.g.: [c] [m] [y] [k] for working on magenta and yellow at the same time. Output Image: Render the simulation output of a whole document to an image (or PDF for multi-page) Font Trapper: Local overrides on font trappings that didn't turn out as planned in the style and colour settings. Print Simulation A simple simulation for base paper types and the ability to create custom ones (folder with absorption values, reflectance and a texture image for example) would be great to give clients a feel for it before someone has to spend money. Tools: Moveable light source: (useful for checking special inks, embossing/debossing, foil stamping and UV coats) Review light: Choose between a set of standard review lights (e.g. Just Normlicht LED proofstation) to judge the print under various lighting conditions and help avoid ambiguous colour situations (like that dress). Output Image: Render the simulation output of a whole document to an image (or PDF for multi-page) Separation View [separate] View all separations in a gallery view with an option to overlay them to check whether they can be optimised further or whether they work as planned (how is the yellow faring with the black? Did the overprints turn out as desired in the OC view? Are all special ink channels present correctly?) Tools: Drag overlay: Drag a sheet onto another to see their interaction in the printing context. Print separations: Print dialog allowing output of separations on a standard laser printer. This allows for a final manual check and also is of sufficient quality for a lot of silk screen printers out there. Export to PDF: Save all/active/selected artboards/pages in separations to a multipage PDF ready for lightjet ripping
 -
 Since 1997 I’m a professional user of Adobe’s software, mainly Illustrator and Photoshop and since 1999 also of InDesign. At our company I’ve decided to stick with Adobe CS4 and some recent version of a GMG PDF Color and Proof Server because those will do what is needed for professional printing, later a Prinergy RIP will do what is necessary for CTP plates. End of workflow. Keep it simple, it’s all about some odd color separations. TBH, for private use at home Gimp, Raw Therapee, Inkscape and Scribus will do the job. And here we are, at the edge of the huge gap between Adobe and Open Source, but what puzzles me is what will be your future agenda, as you are directly adressing professional businesses on your web page (https://affinity.serif.com/business/). After playing with the Betas for a while I bought the Designer release last week to support the development and I will do so with Photo and with Publisher, of course. The price, let’s say, is more than competitive ;-), even the full price later on will be. I’ve watched most of the tutorial videos and read a lot in the forums. I could have written some threads myself but searching the forums showed that others already discussed these and similar topics: A lot of feature requests (some already from 2015) for professional pre-press, ranging from 1bit-images to basic trapping (yes, that is necessary from time to time), layered TIFF, channel view for Photo, separation view for Designer, selection of objects by attributes (productivity, cleaning a messy CAD file will be a nightmare without), different overprint/knockout options for stroke and/or fill of the same object (solved but not convenient for everyday use) and overprint view, to name just a few. For overprint and separation view - it was mentioned somewhere in a thread - we could use Acrobat. No, we don’t want to do that anymore because we are really willing to wipe Adobe from our hard drives completely and forever if somebody offers a serious alternative. Will that be you? On the German web page for professional businesses it reads: unbelievable performance, precision and professional tools … We’ll see what is coming. I know that Adobe has a very long history in development and a lot of manpower was used. What you’ve started is already astonishingly good and it really deserves time to grow and to get ready for the market, but think twice about which market that can be. From my personal point of view, there is no need for filling the gap because of two (2!) simple facts. Professionals will never migrate from Adobe to Affinity unless they get at least comparable professional tools Open source users will never pay a cent for Affinity because the Gimps and the like provides it for free Target the professionals (pre-press and raw development), you will get monstrous rich and all of us will be happy at the end. BTW, in addition to my personal licenses for home use we will support you next year with some business licenses, just for “keeping an eye on you” ;-) Keep up the good work! All the best, Stefan Bader
- 1 reply
-
- 2
-

-
- pre-press
- raw development
- (and 1 more)
-
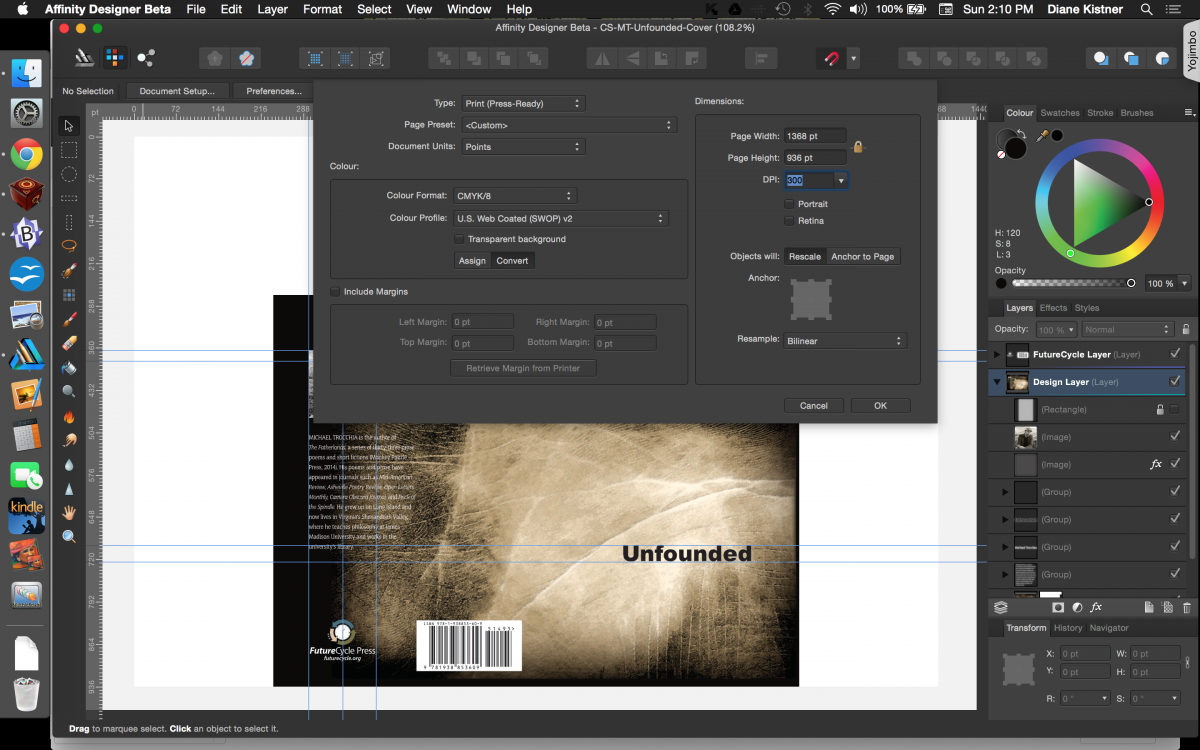
 I publish books. I have to submit a PDF file for the wraparound covers that is at least 300dpi to our print-on-demand printer, who then checks the proof and tells me if this condition is met or not. I had templates set up in Adobe Illustrator that were very clearly press-quality, and I never had difficulty with the printer bouncing my files. But now they are bouncing. I tried starting over and setting up a completely brand-new (in AD) template so nothing would be coming over from Adobe Illustrator, but I still haven't resolved my issues. I started with the BookCover6x9_BW_90.pdf file and set up the AD template (both attached). I am using the latest Beta version of AD. In Affinity Designer, I am never confident about what I'm going to get. I can go into Document Setup and change the dpi setting to 300, but it will go back to 72dpi as soon as the file is output. The same is true when I select Print (Press-Ready); it will pop back to Devices and doesn't save with the file. I'm used to working in pixels and know all the numbers I need, but I can't get anything to stay in pixels; it always goes to points, even though I tried to set up my preferences with pixels. I've called myself trying this using Rescale and Anchor to the Page (not understanding exactly how they work relative to dpi), and my template layout won't "hold" to how I set it up. Now, on my latest book, I've somehow wound up with everything output at 200dpi, which has bounced. I know this is just a matter of learning curve for me, but I just want to get a darned template set up that I can use over and over for all the books I do and know it's going to be press-quality when it's output. I'm losing too much time with these files bouncing. Will you please enlighten me? I love, love, love Affinity Designer, but if I'm not going to be able to control the output more easily, it's not going to work for me! BookCover6x9_BW_90.pdf CS-FCP-Cover-Template.afdesign