Search the Community
Showing results for tags 'pdstqa'.
Found 23 results
-
 HI first time here and i want to know what tool avalaible on illustrator and missing from Affinity Designer and any workarounds to get the same experience
 -
 I'm curious if there is a setting to define the "tolerance" or "sensitivity" for the selection brush? Currently the behaviour is quite "unsatisfying" See the example video. The brush is positioned in one of the lightest areas of the picture but it instantly selects the darkest parts even though there is a very clear border between light and dark and the brush is reasonably small. Since I did not find any parameter to configure the behaviour this might be a topic for improvement. Cheers, Timo Selection.mp4
- 3 replies
-
- 1
-

-
- selection brush tool
- sensitivity
- (and 1 more)
-
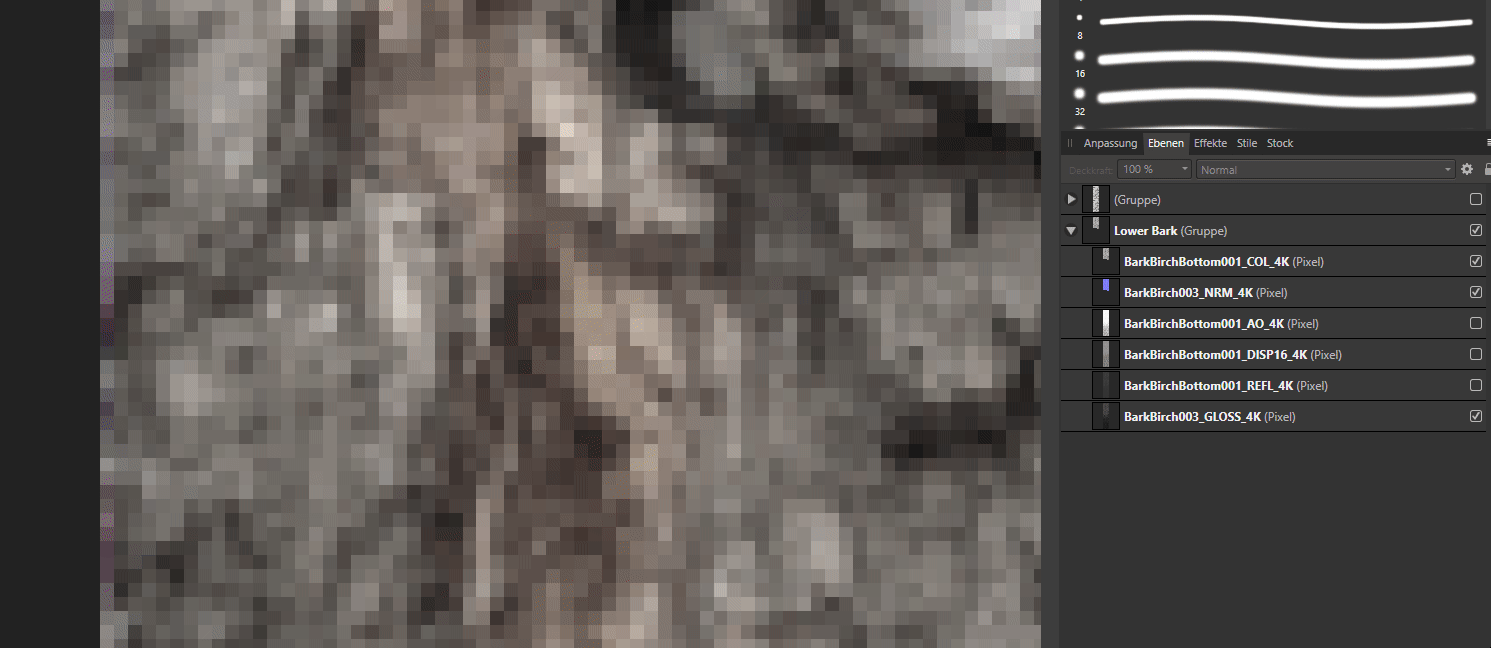
 Hello, I wanted to ask if it is possible to modify a brightness mask created through automatic macros so that I can decide which area to work on more and others less. I have seen non-affinity photo videos where the masks can be modified through levels of curves, levels etc. to vary the intensity of the mask and consequently the area of intervention
 -
1;使用马克笔的时候,用左手旋转画布后,画笔的旋转方向没有跟随手中的笔,而是跟随的画布 1;’When using the marker, rotate the canvas with your left hand, and the direction of rotation of the brush does not follow the pen in your hand, but the canvas 2;笔刷太快,尾部对流量的控制不是很好,在“流量”上甚至会有延迟 2;The brush is too fast, the tail does not control the flow very well, and there is even a delay in the "flow" 3;我的画笔不能按照我想要的顺序排列 3;My brushes can't be arranged in the order I want them to be 4;另外,我无法通过画笔里面的“动态”来轻松的设置我想要的笔刷,我希望有个完整的图文教程,或视频教程来说明 4;In addition, I can't easily set the brush I want by using the "dynamic" in the brush. I would like to have a full graphic tutorial or video tutorial to illustrate this
-
 Hello there, I've checked on the forums and haven't found a solution to this yet... When I am using the brush tool and want to quickly sample a new colour I frequently use the Alt + Drag shortcut to bring up the colour picker and select a new colour. However once I have picked a new colour (and released the Alt key), my brush seems to get 'stuck' using the colour picker tool. So each time I touch my tablet it brings back the loupe and selects a new colour rather than painting with the colour I've just selected. Sometimes even after I manually select a colour from the colour wheel the brush will still jump back to the colour picker tool. When the brush gets stuck on the colour picker I try pressing the Alt key again (kinda like a toggle) to try and disable it, but this doesn't seem to work either. I believe I am using the shortcut correctly, but would anyone be able to clarify if I am doing it wrong? Many thanks :) (I am on a Mac using an XP-Pen Deco01 v2 pad)
 -
 I don't seem to be able to find missing fonts with find/replace. I can select missing fonts in the "Find and Replace" panel with the ⚙︎>Format menu, but "Find" never actually finds the fonts. I can get "Find" to work with fonts that are not missing. Is there some step I haven't done?
 -
 I noticed that every time I export to PNG (PNG8 or PNG with palettized enabled) it generate some noise (in some blank area) on the image. Everything is ok if I export in normal PNG. See the examples. Am I doing something wrong? Affinity Photo 1.8.3.641 - Winwdows 10.
-
 After saving document and closing down iMac, next time I open, pics have been greyed-out or moved. Any ideas? Thanks.
 -
 Photoshop iPad now has curves but missing numerical inputs. Can affinity photo have numerical input first. And also highlight and shadow clipping in curves too
 -
 Is there a way to customize the palette order in the Swatches Panel for application launch? I want to set a certain custom palette ("cmyk ot") as default when an Affinity app gets launched and/or a document gets opened – instead the formerly default Gradients palette always has priority and is opened first, regardless of the selected palette when a document got saved or the app got closed.
-
 apologise if I'm missing something obvious, I've searched through the Affinity Photo online manual and the help forum and not found anything. UFABET Every graphics app I've used until Affinity has supported using multiple layers to constrain fills from the flood fill (paint bucket) tool - think of scanning in a line drawing, putting it on an upper layer, setting to multiply and using the line art to constrain fills on a layer or layers below. (I'm talking all pixel layers, BTW, no vector stuff). The flood fill tool has a control for tolerance and toggle for non/contiguous but no control to respond to single or multiple layers. Is there another way of doing this or is the feature not yet present?
 -
 Hello, the gif shows what I mean. Look at the border row of pixels on the left to see the issue. The layer settings are completely untouched. How can I fix this? Update: When using a layer filled with solid color the issue isn't reproduced. Update 2: When importing images through drag&drop they get a semi-transparent border, which vanishes when the edges are snapped to the borders of the canvas. Unfortunately I can't reproduce the exact steps that lead me to the situation of the gif, but somehow things got messed up.
-
 When I zoom in or out I get some marching ants around the text, and if I save as jpeg the marching ants stay on the image I export. It must be a bug or how do I avoid this? I captured screen of with and without for you to see
-
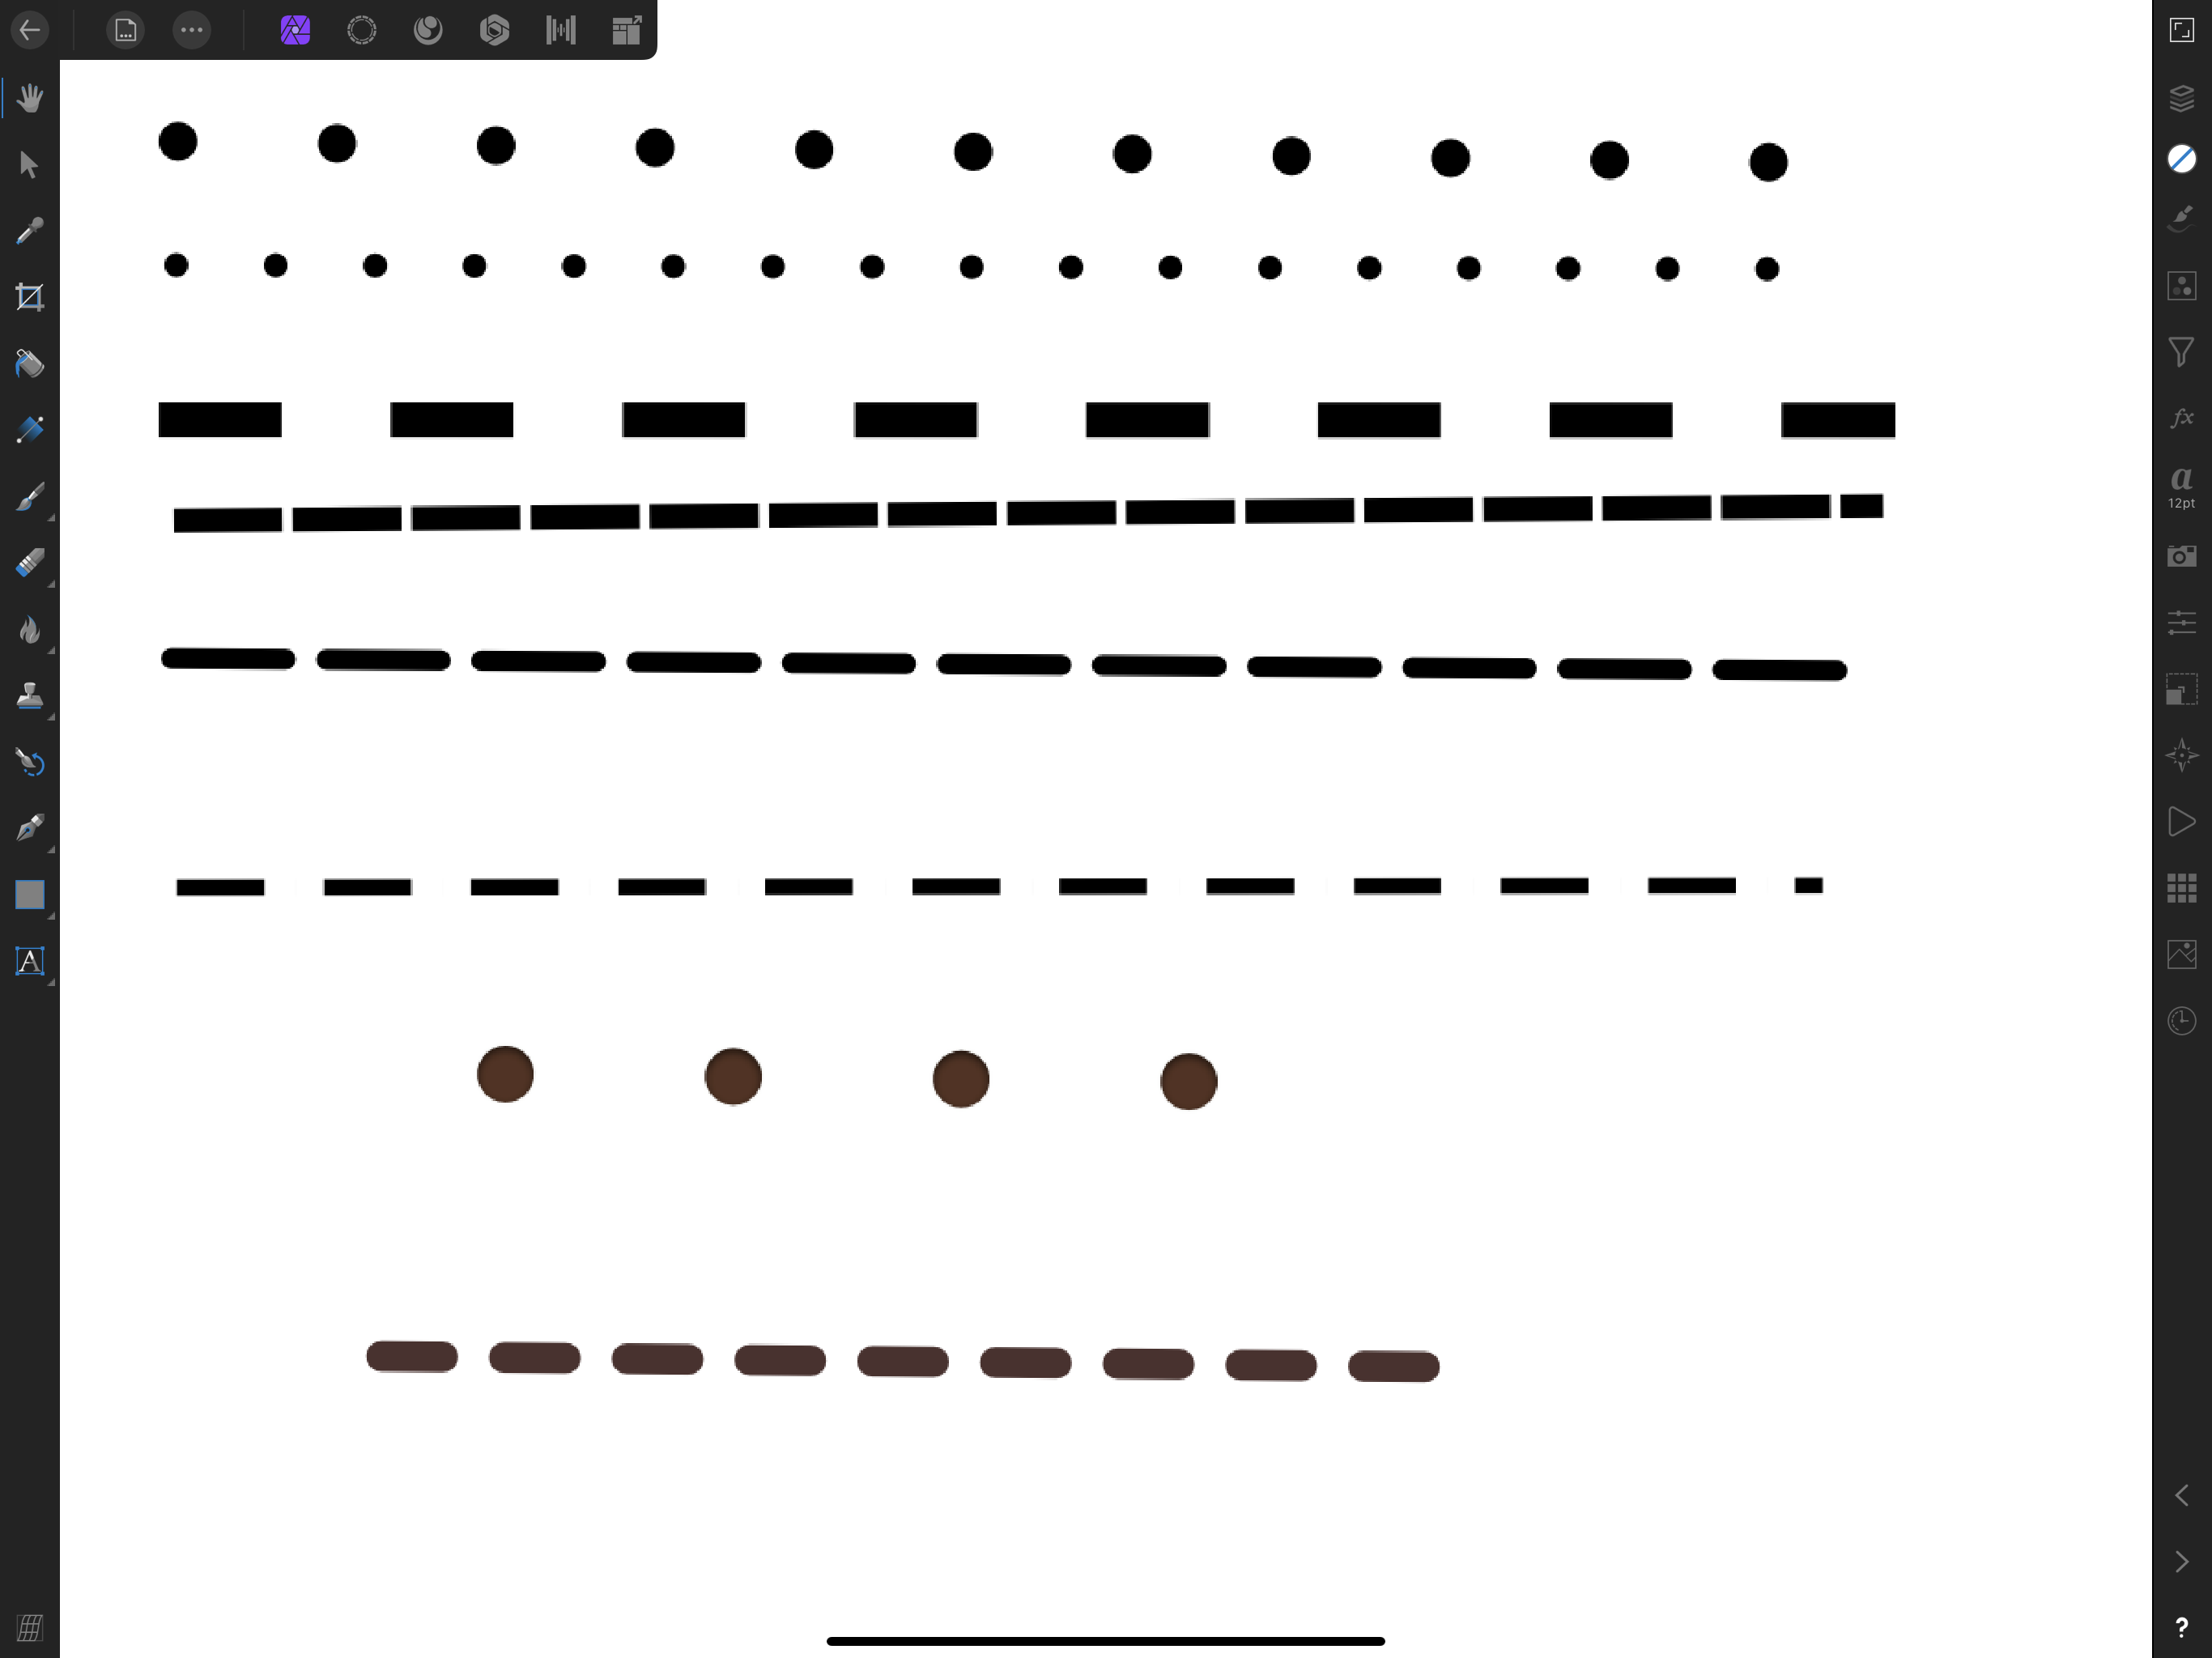
 Hi there, A while ago I asked if it is possible to have dotted lines in photo. I started playing with that myself and I made a file in designer with all the options in stroked lines, dotted lines etc. Saved it to the cloud and imported the file in Photo. I can use any of these lines and adjust them like a normal line. It is not 100 procent perfect but it does the job. would like to see if it is possible to have this standard in photo rgds Henk brouwer
-
 Estaba viendo un tutorial en YouTube Creación de códigos de barras ilustrados con Affinity Designer para iPad con Steve Simpson. ¿Dónde en Affinity Designer puedo crear un código de barra?
 -
 Hello! I find it very difficult to see which layer I selected with all artboards already "highlighted"... Is there a way to turn off automatic highlighting of artboards? Or augment the contrast between artboards and selected layers? Thanks!
-
 Hello, I am uploading an image on Affinity Publisher and the quality is being reduced even though I am not scaling the picture. I have tried all options. Rastarize at 600 dpi, separable, non-separable and so on but the picture is not good. What can I do please? Thanks for replying! Original: https://drive.google.com/file/d/1QZeG5PKDxJDEOTZvMZIae_NoYurA-88T/view?usp=sharing Low quality: https://drive.google.com/file/d/13r-OOT1Ee3g63mfNiKlz2CP6dSwYflsX/view?usp=sharing
 -
Hi there, in designer for the iPad I have the option to scale with object, meaning my lines will scale with resizing. in photo I cannot find this option, or is there another way for this. henk brouwer
-
 Bonjour lorsque j ouvre une photo en mode portrait elle s ouvre en 216/116 px au lieu de 4100/6100 en mode paysage pas de problème je ne vois pas d où ça vient si vous avez une idée
 -
 Hi hi, I am having issues with geometry options in AF publisher. When I add normal shapes and forms nothing goes wrong. Yet, when I try to add different text boxes together to create more interesting text boxes for in my documents... AF Publisher just completely shuts itself down. I think this might be worth looking into, as it at least is quite an annoying issue. Thanks in advance! Greetings, Nick
 -
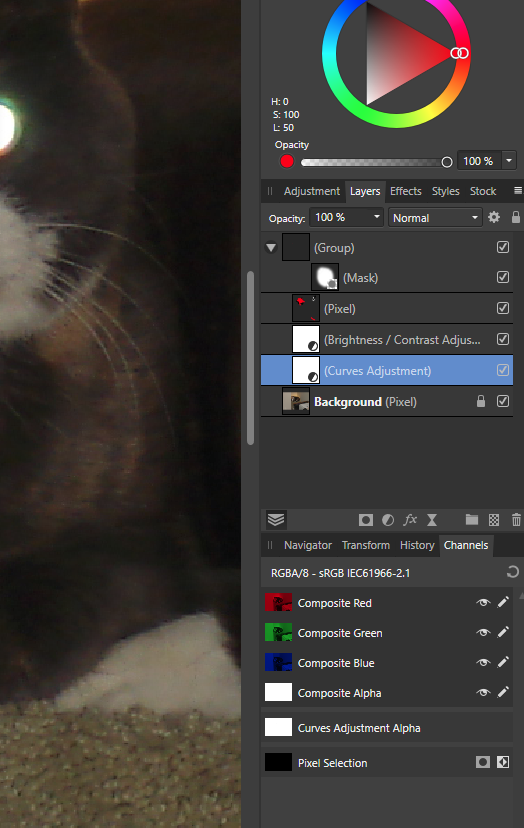
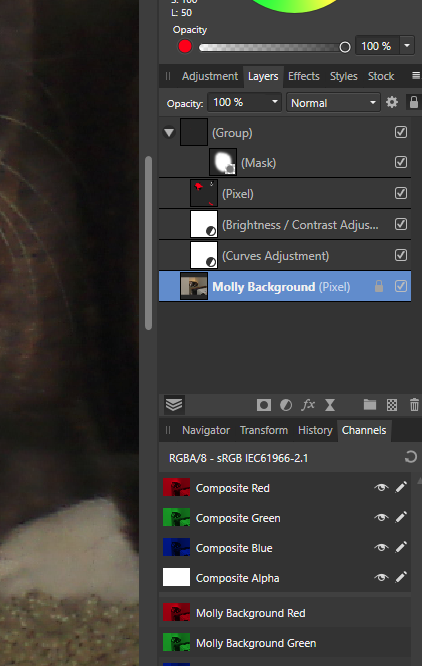
 I'm using Affinity 1.8.3 My goal is to learn a process for fixing "Pet eyes" I've stumbled through some attempts and watched a number of videos. I have had some success however I have some basic questions. BTW the pixel layer is there because I was playing. It seems in the photo I was working on the eyes are so bright that they are saturated at white, so no Adjustments can make much of a diffference. First I would like to state what I believe to be true about layers and perhaps someone can correct me. I think Mask's are easy. Black = not shown White = shown (perhaps gray might be partly shown) When combined in a group whatever else is in that group will only show through the "openings" (aka white) of the mask. It seems the structure in the layers window is important. Adjustments "below" the Mask will be applied to the layer below all (in my case "Molly Background") If I move "Molly Background" to above the mask group then the adjustments will be behind the background, basically useless. I only partly understand the subtleties of the layer structure and I don't understand the convoluted path to get where I am. It seems all the videos (example) I've seen start by adding a "curves layer" for no good reason except it appears to help creating the group the mask will control. Is there a way to create a group without this step? Also the layers "structure" seems non intuitive to me. The "group" is not indented at all. The Mask is indented two times The adjustment layers are indented one time The backgound is not indented It would seem the adjustment layers should be indented from the mask layer. Am I being picky or is there some logic I'm missing. Thanks John
-
 Hi, to check it wasn't an issue with the photo. I created a rectangle, used the freehand selection tool to create a select a a corner and pressed cmd J to create a new layer from the selection. Nothing happens except it copies the complete layer. Works fine on my iPad my not Mac. Mode selected is new. Am I doing something wrong. Thanks
 -
 Hi, so I ran into something I didn't expect. Ever since I discovered that you can adjust luminosity without changing the color in LAB mode, I've been in love with it. Today though I ran into a weird thing. For small Dodging and Burning changes I like to make a 50% gray layer, set blending mode to overlay or soft light and then D&B on that layer. Works like a charm, in RGB. However, in LAB mode the 50% gray layer in overlay or soft light visibly increases the luminosity of the entire picture. Why is that? I know I can use 2 curves layers for D&B but that's not the point here. I'm trying to understand why this works differently in LAB than in RGB. Does anyone here know why this happens?