Search the Community
Showing results for tags 'noise reduction'.
Found 14 results
-
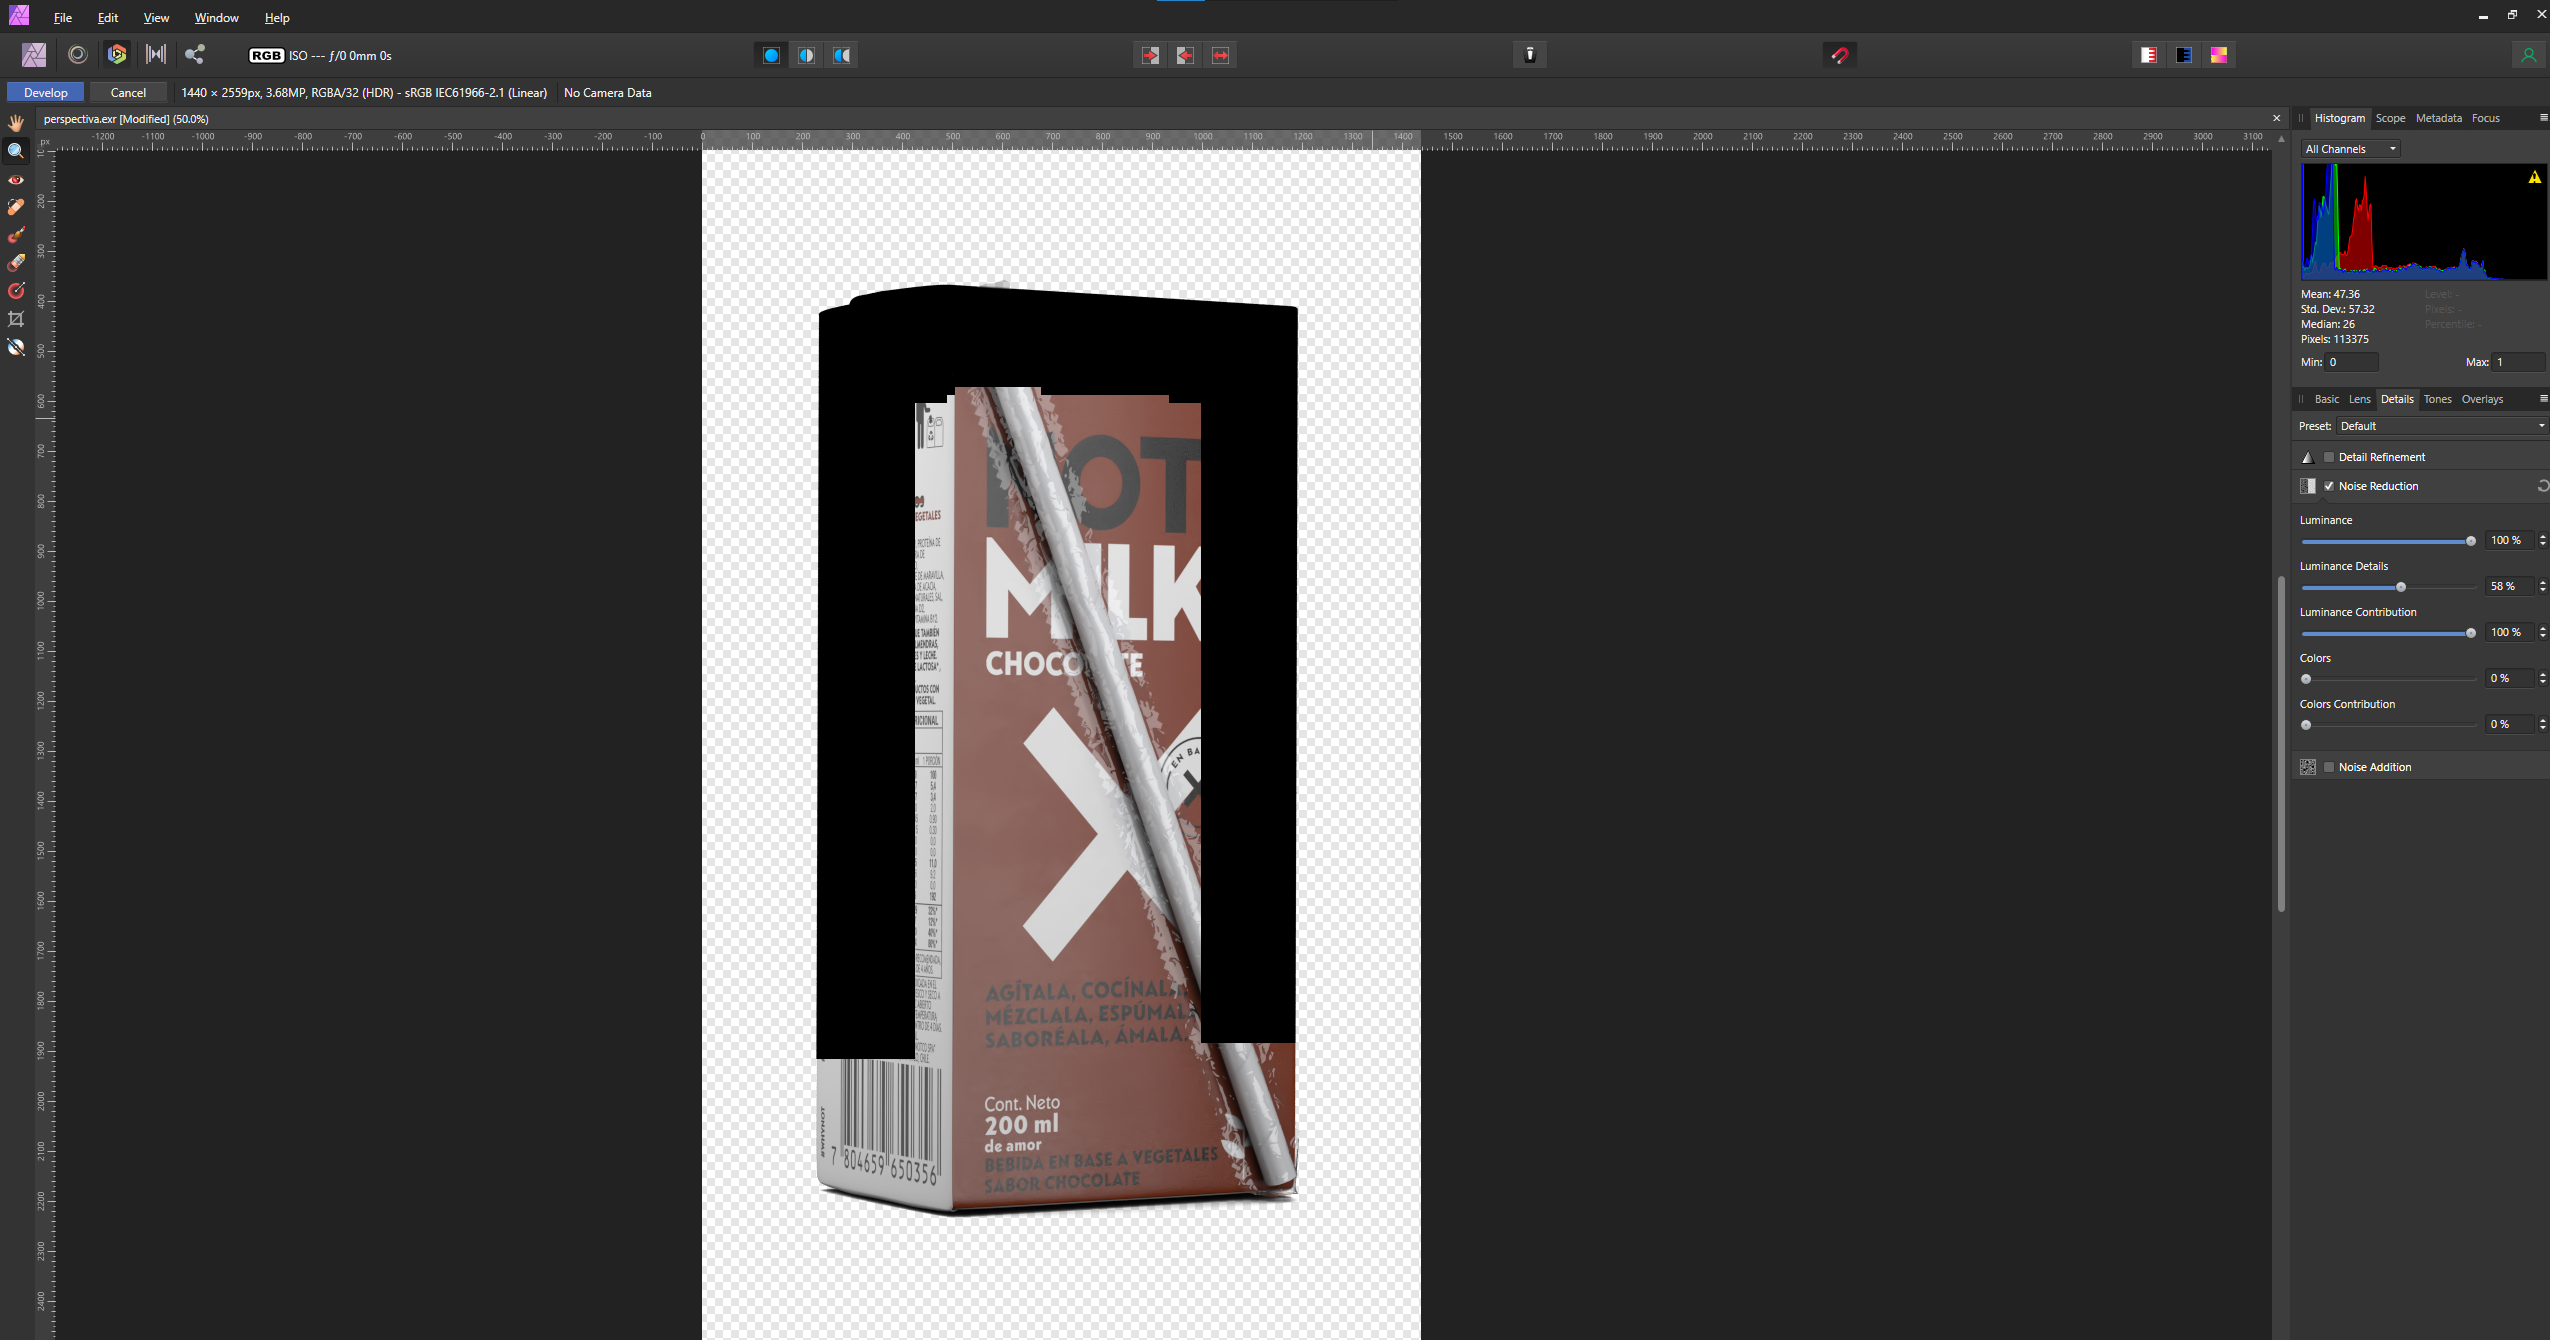
Hi i cant de noise my renders (32 bit exr), as they produce black areas that don't desapear. This will happen with other renders as well. my specs: Affinity Photo 1.9.2 win 10 (updated) geForce gtx 980 4GB (Latest Drivers) i7 9470k 32gb ddr3 perspectiva.exr

-
 I photograph and retouch rings and other jewellery. I've bought AP with the intention of getting rid of 12€/month Photoshop. However, while there are (more or less annoying and slow) workarounds for some of the missing features, there are a few things that AP simply can't do, which is rather infuriating because it means that I still have to keep paying Adobe to get them in PS. So here's a list: 1. A way to stroke a curve or at least to use it as a guide for a brush. Every now and then I end up with a photo that looks a bit too flat. To make the edges a bit more visible I create a path (curve) and then stroke it with a soft brush (20-30 % hardness) and then play with the opacity until it looks somewhat decent. AFAIK AP can render a curve but it does not have the ability to do that usng a custom brush. 2. Adding nodes to a path/curve without switching tools. I find AP's Pen tool to be more user-friendly than PS's version. but I'm missing the ability to add a node to an existing curve/path just by clicking on it without switching to a different tool. PS can detect when the cursor is hovering over a path to then create a node without connecting it to the end of the path. I'd therefore like to see the same feature in AP. 3. Double-click on a node to switch it from Sharp to Smooth and vice versa (like PS's Curvature Pen does). Yes, I know there's a keyboard shortcut for it, but it gets annoying when you have to do it every couple of nodes, and double-clicking on a node currently doesn't seem to do anything anyway, so why not use it for that? 4. Crop to selection, i.e. if the Crop tool is selected and a selection active, snap the crop box to it automatically. It's already possible to do this manually (by checking "snap to selection bounding box" and manually dragging the handles until they snap into place), so I don't see a reason why it wouldn't be possible to make this happen automatically. It would save people like myself who need to drop every photo like this a significant amount of time. 5. Fix saving tool settings. Even with synchronization enabled I still find myself having to switch the Inpainting Brush to sample from the layer below it every time I open a new photo. And before doing that I also need to Shift + J to get said Inpainting Brush instead of the Healing Brush. Why? 6. Limit the Exposure Adjustment layer's range. Nobody needs +/- 20 EV, especially when the minimum step on the slider is 1 EV. Make that +/- 5 EV or even less to get more resolution and make the slider actually usable. 7. Make the Noise Reduction more powerful. This is the exact opposite of the problem above. If I have a wristband or something like that with a lot of dust/scratches/fingerprints/etc., I use NR at maximum strength and minimum details to blur everything together on a new layer, then mask the edges and any details I want to keep to uncover the still-sharp layer below. Photoshop can get a decent amount of blur in one go, with AP I have to re-develop the layer 5 or 6 times to get the same result. All but 2 and 7 have been posted before (even 5+ years ago), and at least 4, 5 and 6 seem like they should be fairly easy to do, yet they're still missing. Why?
 -
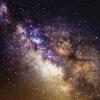 Can you please post a beginning-to-end video of the various processes for developing/editing a RAW photo of the milky way? There are many photoshop instructional tutorials for this process, but I can find none for Affinity Photo. I much prefer to use Affinity, and I'm still somewhat inexperienced with photo editing in general. I want to invest my time in learning Affinity directly, rather than learning photoshop and then translating that experience to Affinity. Thank you for your help. I am attaching a amazon cloud link (the file is too large to upload here, 27MB) to a RAW file for you to use in a tutorial, should you agree to help. I voluntarily relinquish all rights to the linked photo. It is now public domain. https://www.amazon.com/clouddrive/share/ELVNzIxUzNWFk1twdvVOaHCkD0xWV24wuMhGgUGldRR?ref_=cd_ph_share_link_copy Thank you James
- 11 replies
-
- 1
-

-
- noise reduction
- picker
- (and 4 more)
-
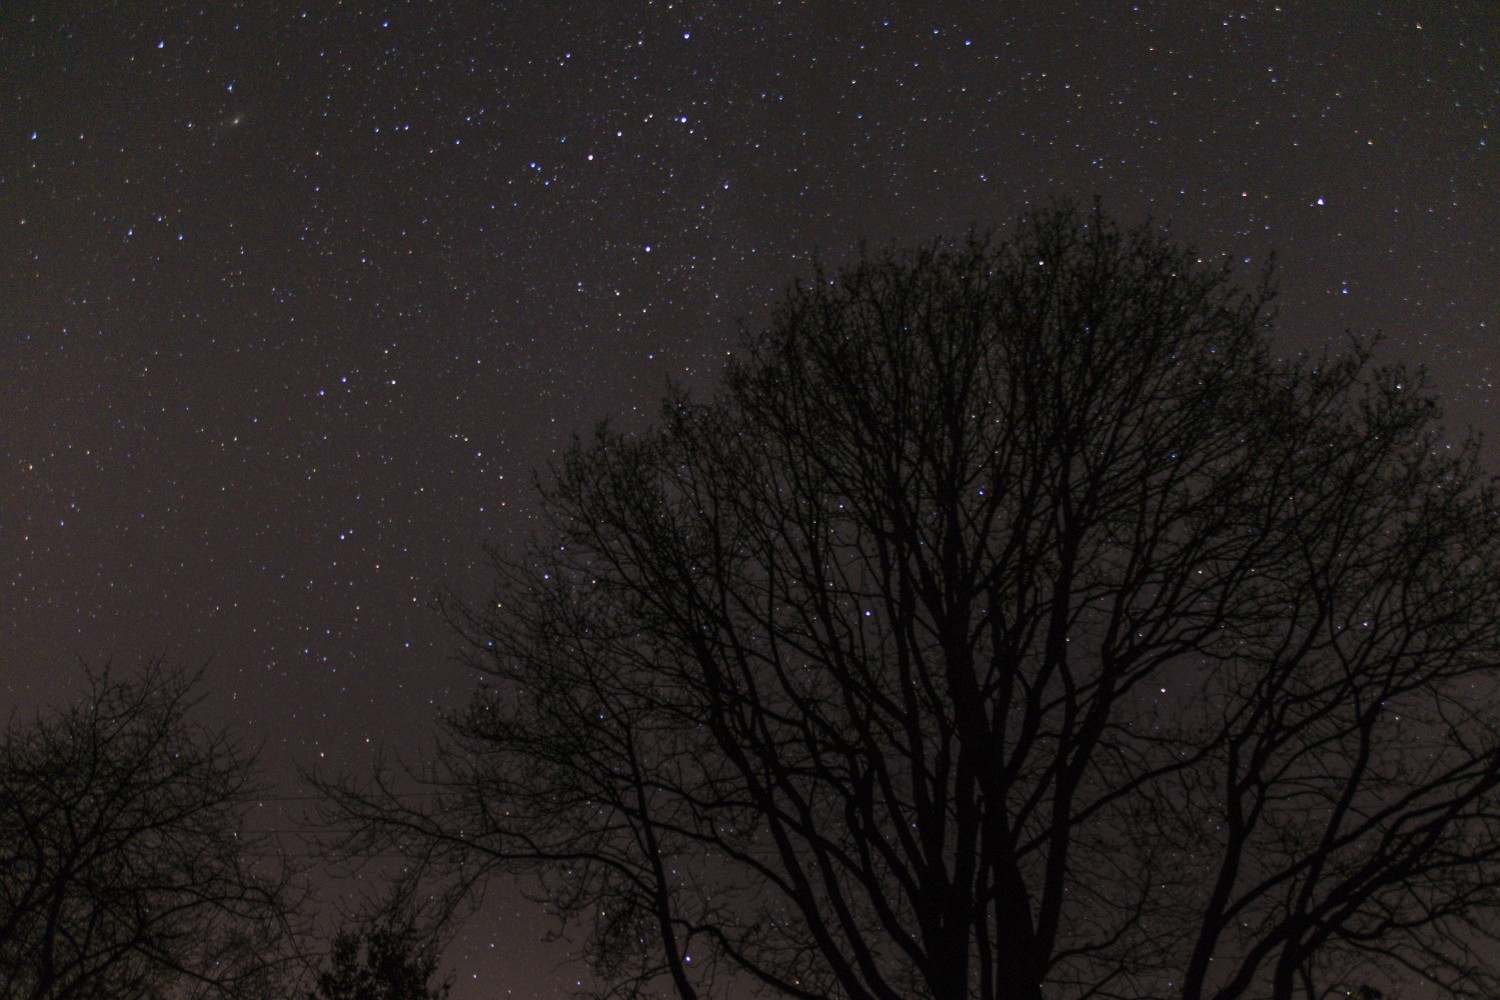
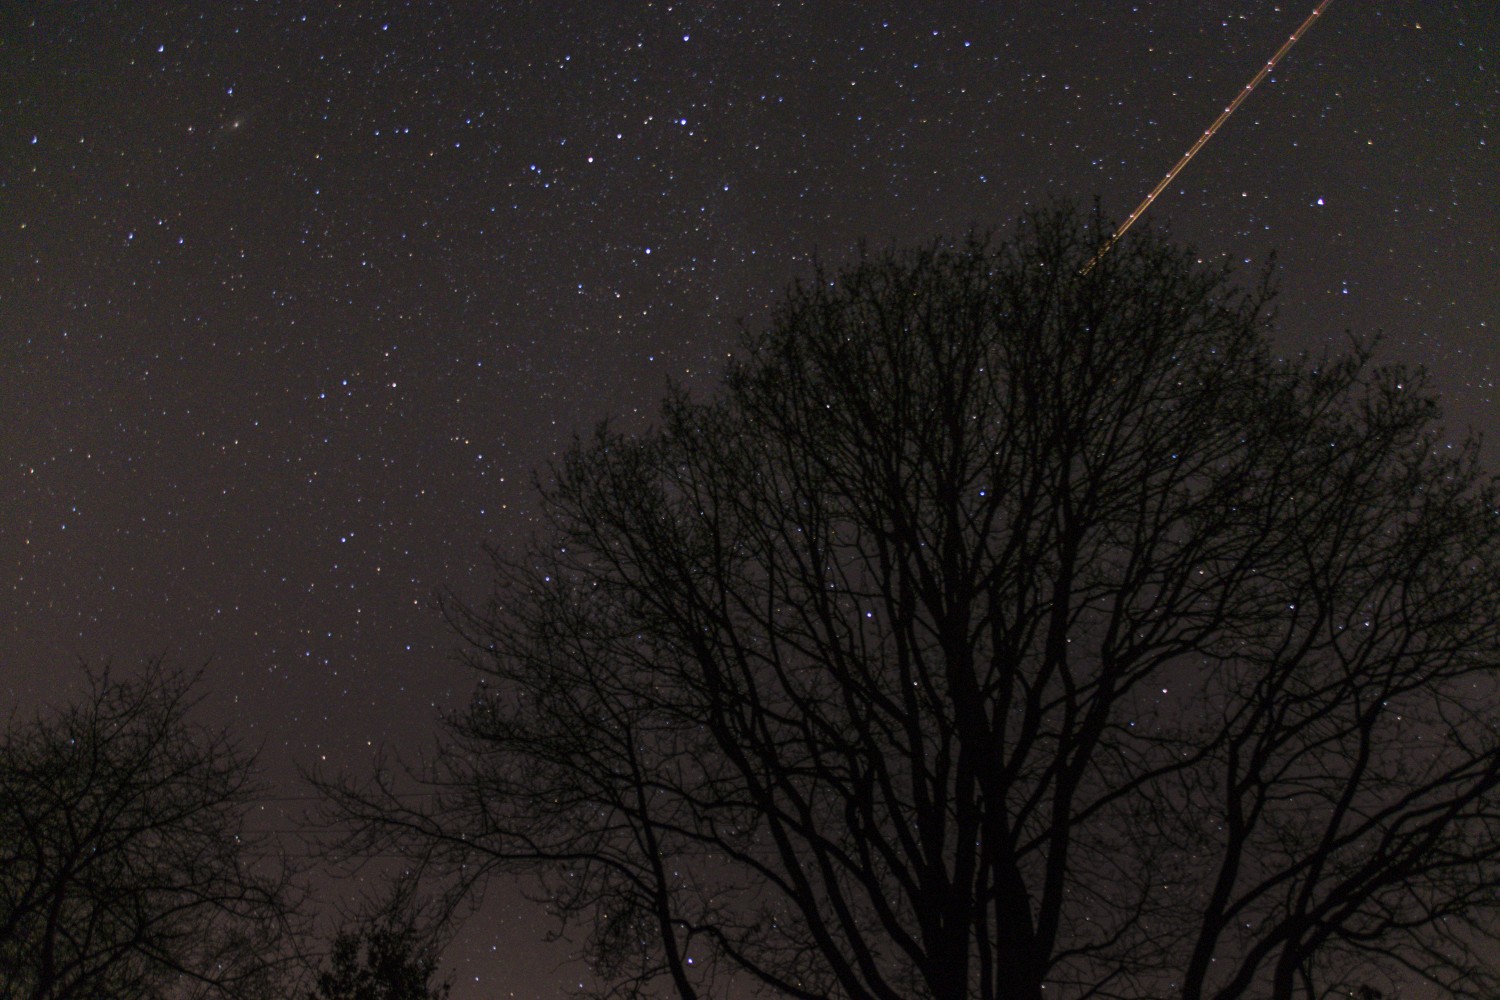
 Hi Affinity-Team, I have just downloaded the affinity photo demo (for Windows), watched some tutorials and tried a little bit for myself and have some questions. I like to take photos of starry landscapes like the ones I attached to this post. Now to reduce noise I'd like to stack them for which I am currently using a combination of Hugin for alignment and Image Magick to stack them. I let these tools create two stacked images one of the static foreground and one of the aligned background, after that I currently use Gimp to load both images and take only the sky portion of the aligned and stacked image for the final images sky and the stacked image without aligning for the foreground. I tried to convert this complete workflow to affinity photo using the "New stack" function. Unfortunately the program always aligns the images (I use a stack of 32x20 second exposures) using the trees in the foreground which leads to a blurry sky without any stars visible. Is there a way of alternating this behavior? I thought about (and tried) loading the images as stack, ungroup them, applying a layer mask which leaves only the stars visible and then regroup them using 'Arrange > Live Stack Group', however this doesn't (re-)align my images and the result is the same as when loading the images as stack. Is there any possibility for me to support my workflow in affinity photo, or is anything planned for future releases? Greetings and thanks in advance.
-
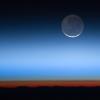
 I have a telescope and can photograph any number of nearly identical images in rapid succession. In each successive image the object I'm interested in may occupy only a few percent down to much less than one percent of the total image, in essence, a sub-image. Because of earth rotation and possible object movement through space, the desired object and sub-images may slowly drift and rotate across successive images. I want to use some or all of these sub-images in Affinity Photo to obtain an enhanced image of the object. The source and sub-images may also be captured and processed in RAW or DNG format, or similar high resolution formats that Affinity Photo can handle. The following is my idea of how this might be automated, possibly by programming and/or recording macros. I'll use a moon image as an example, but hopefully the process will apply to any object that does not distort as it translates and rotates, almost imperceptibly in successive images. The moon is about 382,000 km away, and its movement is nearly imperceptible to the naked eye. However, it can be seen to drift ever so slightly across successive digital images, but its size and shape remain constant. Because of such large distances, virtually everything observed in space does not distort but may slowly translate and rotate in successive images. Affinity Photo can easily handle these linear type image situations. It is well known that noisy, repetitive, linear signals can be greatly enhanced by linear averaging, if the noise is random. Small, clipped images from space, taken in rapid succession and aligned, act like noisy, repetitive, linear signals, and the resolution can also be greatly enhanced by averaging. But not all of the noise is random, pixelation being the main non-random noise component. I'll suggest how one might apply image interpolation at the right time to filter out pixelation noise without significantly degrading final image resolution. I would start by teaching Affinity Photo what object I want it to find by manually clipping out a sub-image from one image, intentionally leaving a small amount of space around the object on all four sides. Using this sub-image as a template, Affinity Photo would then locate and clip out that same sub-image in all other images. In the process it would align all sub-images, similar to what is done in the "New Focus Merge..." macro. At this point I could have Affinity Photo average the aligned sub-images into one final image, but that final image would look very pixelated when exported and expanded. I want to reverse the process. Let me instruct Affinity Photo to interpolate (by any one of its five methods) all clipped and aligned sub-images by #X where # is any reasonable number greater than one, such as 8 or 6.3. The larger the number the better, except that memory usage and processing time must be considered. Now, apply the averaging process to the magnified sub-images to obtain the final enhanced image. If Affinity Photo were instructed to generate many sub-images and expand them by interpolation, and there was no reason to save them for later use, then there would be no need to store all of them in memory during the averaging process. Exact averaging can be done by what I'll call the alpha or A method. Suppose I have five numbers, 3, 15, 27, 9, and 21 that average to 15, and suppose that the first four numbers have been averaged to 13.5. Now I want to use the A method to average 21 in with this previous average of 13.5 to get the final exact average 15. Let N=5, the total number of items averaged in this step. Then let A = 1/N and the new average is obtained from (1-A)*13.5 + A*21 = (4/5)*13.5 + (1/5)*21 = 15. This exact averaging method has two advantages: only two interpolated images have to be kept in memory at any time (the desired final image and the latest interpolated sub-image to be averaged in) and potential overflow associated with adding together many positive numbers and dividing is avoided. Furthermore, much higher precision RAW images could be used and the averaging accumulation process could be performed without losing anything until the final export process. Based on this progressive alpha averaging method, the process might even be made much better. Suppose I have captured 1000 images and have made them available to Affinity Photo in a single sub-directory. Do I need to tell Affinity Photo to process all 1000 of them or could I just let it run, generating and averaging in interpolated sub-image after interpolated sub-image until virtually no further final image enhancement is detected? Or maybe until I instruct it to stop because the zoomed-in, enhanced final image looks good enough to me or I can't detect any further improvements? Also, because Affinity Photo is now processing one interpolated sub-image at a time and accumulating a higher resolution average with each new interpolated sub-image, is it possible that this always up-to-date, high-resolution, running average image would make a better template for locating, transforming, and clipping the next successive sub-image? I think always using the most recent average as template may minimize drift biases. I would like to learn how to generate and record macros in Affinity Photo to carry out these processes or see it implemented as another Affinity Photo feature like "New HiRes Avg..." or something similar. Is this feasible and what are the next steps? What I described above doesn't look entirely like a "recording macros" process but getting down to the programming level. I have many years of programming experience in Fortran and C and less in Python, but I don't know what's used in Affinity Photo. I'm definitely not qualified to program Affinity Photo but I could work with others to help get this job done.
 -
 Hi, after some inversigation I found out, that the new Noise Reduction algorithm increases the develoging time more than three times (on my machine): #135: 4 seconds (default setting) #243: 13.5 seconds (default setting) also the new Lens Correction and the Lens Remove Vignette increases a bit the developing time. Without any settings the developing time is nearly the same: #135: bit less than 4 seconds #243: bit more than 4 seconds Is there any chance to improve this in the future or enable to toggle between the new and old noise reduction algorithm?
 -
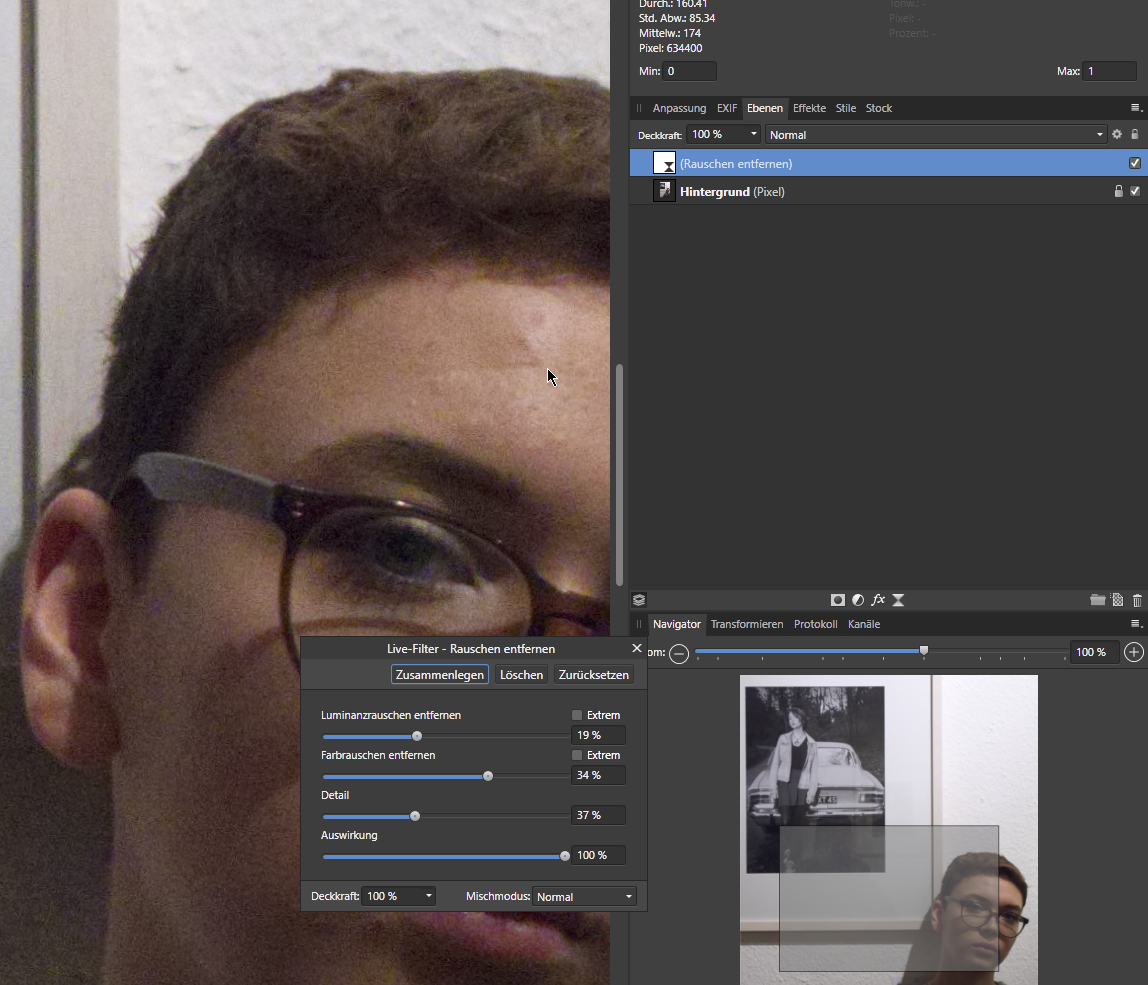
 Hi, any idea why i dont see any difference when i move the controls? Thanks Michael
-
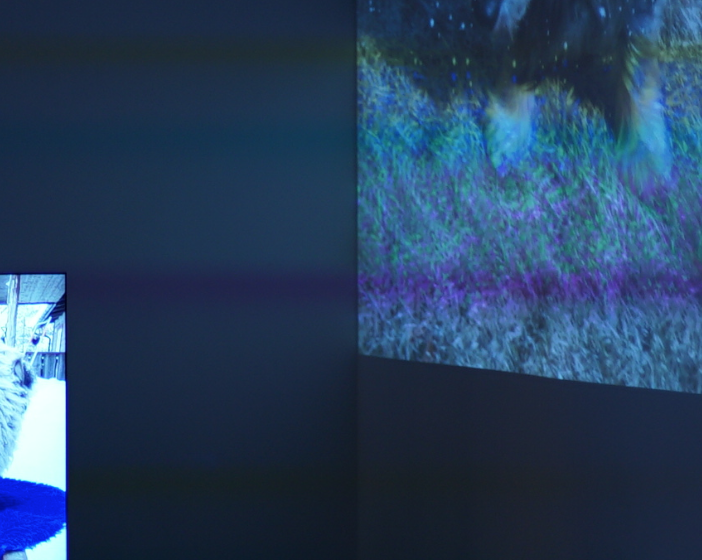
 Hello! I wanted to ask you if there is a magical tool, which can remove rainbow colour, stripe noise, if you take a picture of a projection. Perhaps I need to try to reduce that while taking picture but if there is a way to get rid of these afterwhile (raw or jpg), I´m more than super happy. Thank you in advance! Best
-
 hi folks. in PS, there is a method of stacking files of the same photo, to reduce shadow noise, in low light photos. is there a method that is simular in Affinity? thanks
 -
Good Morning. I am new to this Forum, but not to Affinity Photo which I use for a year now. I have recently shot this image (Olympus EM5 Mark ii - 16 Mp at 200 ISO F/11 at 1/1000th second - using the "Sunset" mode at end of day) and tried to edit it from a Raw file (attached). Sorry in advance if the below may seem trivial to most of you: I am disappointed because I can see quite some noise in the sky in the various attempts I have made to edit this picture... I followed the following workflow and wonder what is wrong: - In Raw: Added Luminosity and Saturation. Did not add more Clarity. In details: Added Luminance noise reduction (slider up to 40%). - Then I developed and used the "Remove Haze" filter which I very much like in general That's about it really... I would be very grateful if someone could help me better understand what I did wrong, and how to get to a better result (I have attached the Raw file for convenience)? Or am I too perfectionist? Many thanks, Fabrice P1140050.ORF
-
 Hello, How can I disable " noise reduction" when I open RAW images. It is always on and I have to turn it off manually everytime. Thanks. Alain
 -
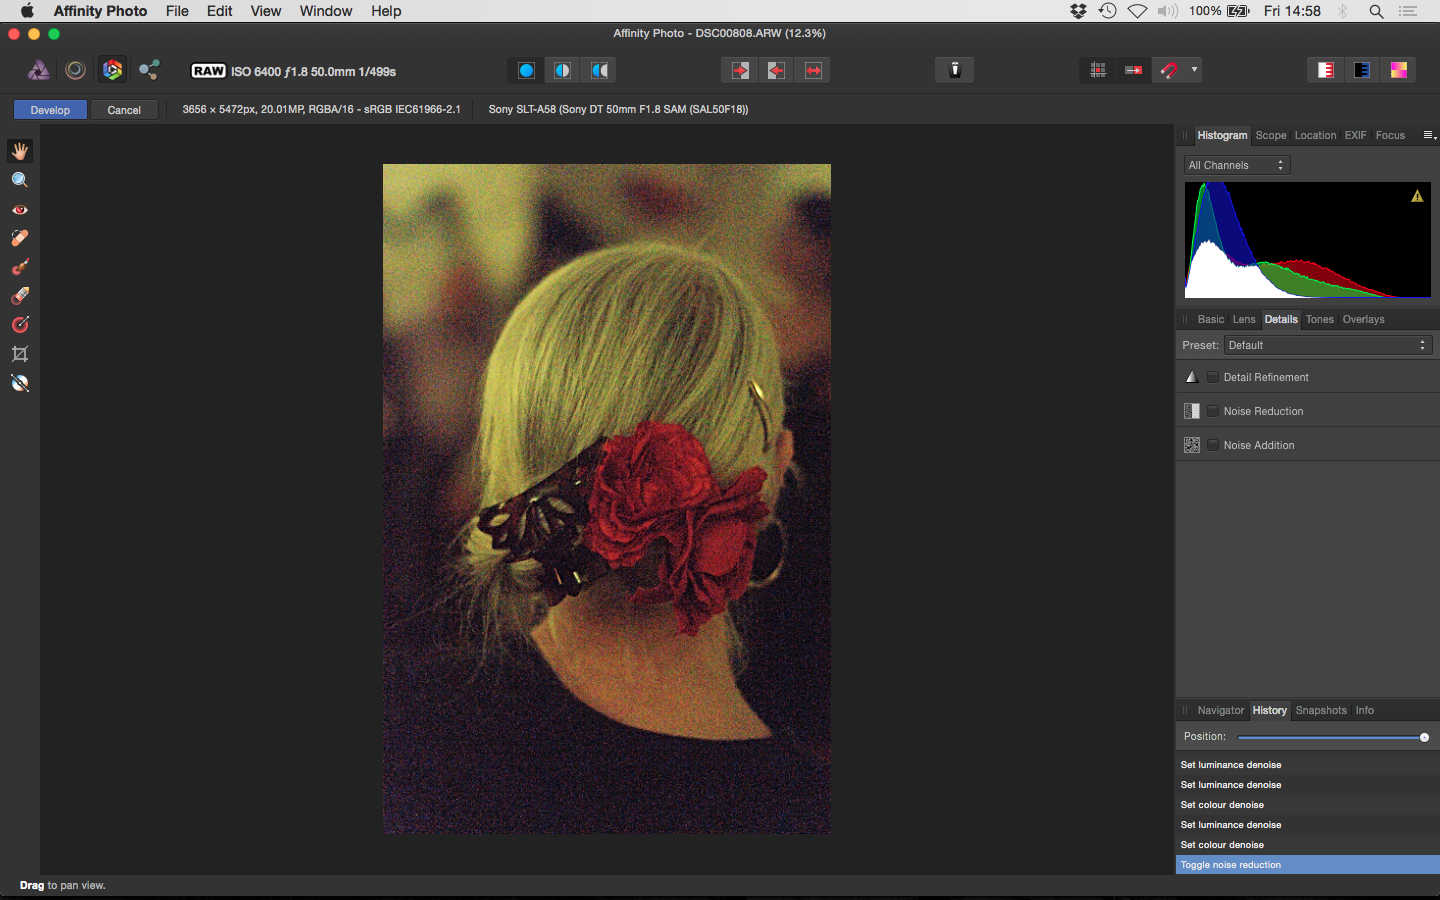
 Hi, I've just bought Affinity Photo after Pixelmator kept mangling my images, AP works absolutely fine with JPG images and I can set up some really nice noise reduction in RAW but this NR then seems to completely disappear as soon as click 'develop' and wait for the blue bar to disappear. So at the moment I'm getting nicer processing by using my JPG images than with RAW (I shoot RAW+JPG on a Sony SLT-A58) which can't be right :). Any ideas? Is it a bug? I've uploaded 3 screenshots to demonstrate the problem. Thanks for any help, Dan
- 14 replies
-
- 1
-
-
- noise reduction
- raw
- (and 3 more)
-
 Hey everyone, When I make my noise reduction changes while in the Develop persona, then click develop, they suddenly all go away. I've tried doing this while making other changes in Develop, as well as while making no other changes. I can see the changes happen, but they just don't translate when I go back to the Photo persona. Am I missing something?
 -
 In Affinity Photo 1.4, there is only a single noise reduction slider. I would wish that you have at least 3: - for highlights - for mid tone - for shadows The idea is to minimize unwanted noise reduction. Even better would be to set the treshhold between highlights, mid tone and shadows interactively. I'm sure Affinity Photo can already make it with some masks, but I could not figure out how. This would be a nice tutorial. However, having this condensed in the noise reduction dialog would significantly improve the noise reduction filter. Best regards BlauerClaus