Search the Community
Showing results for tags 'negative film'.
Found 4 results
-
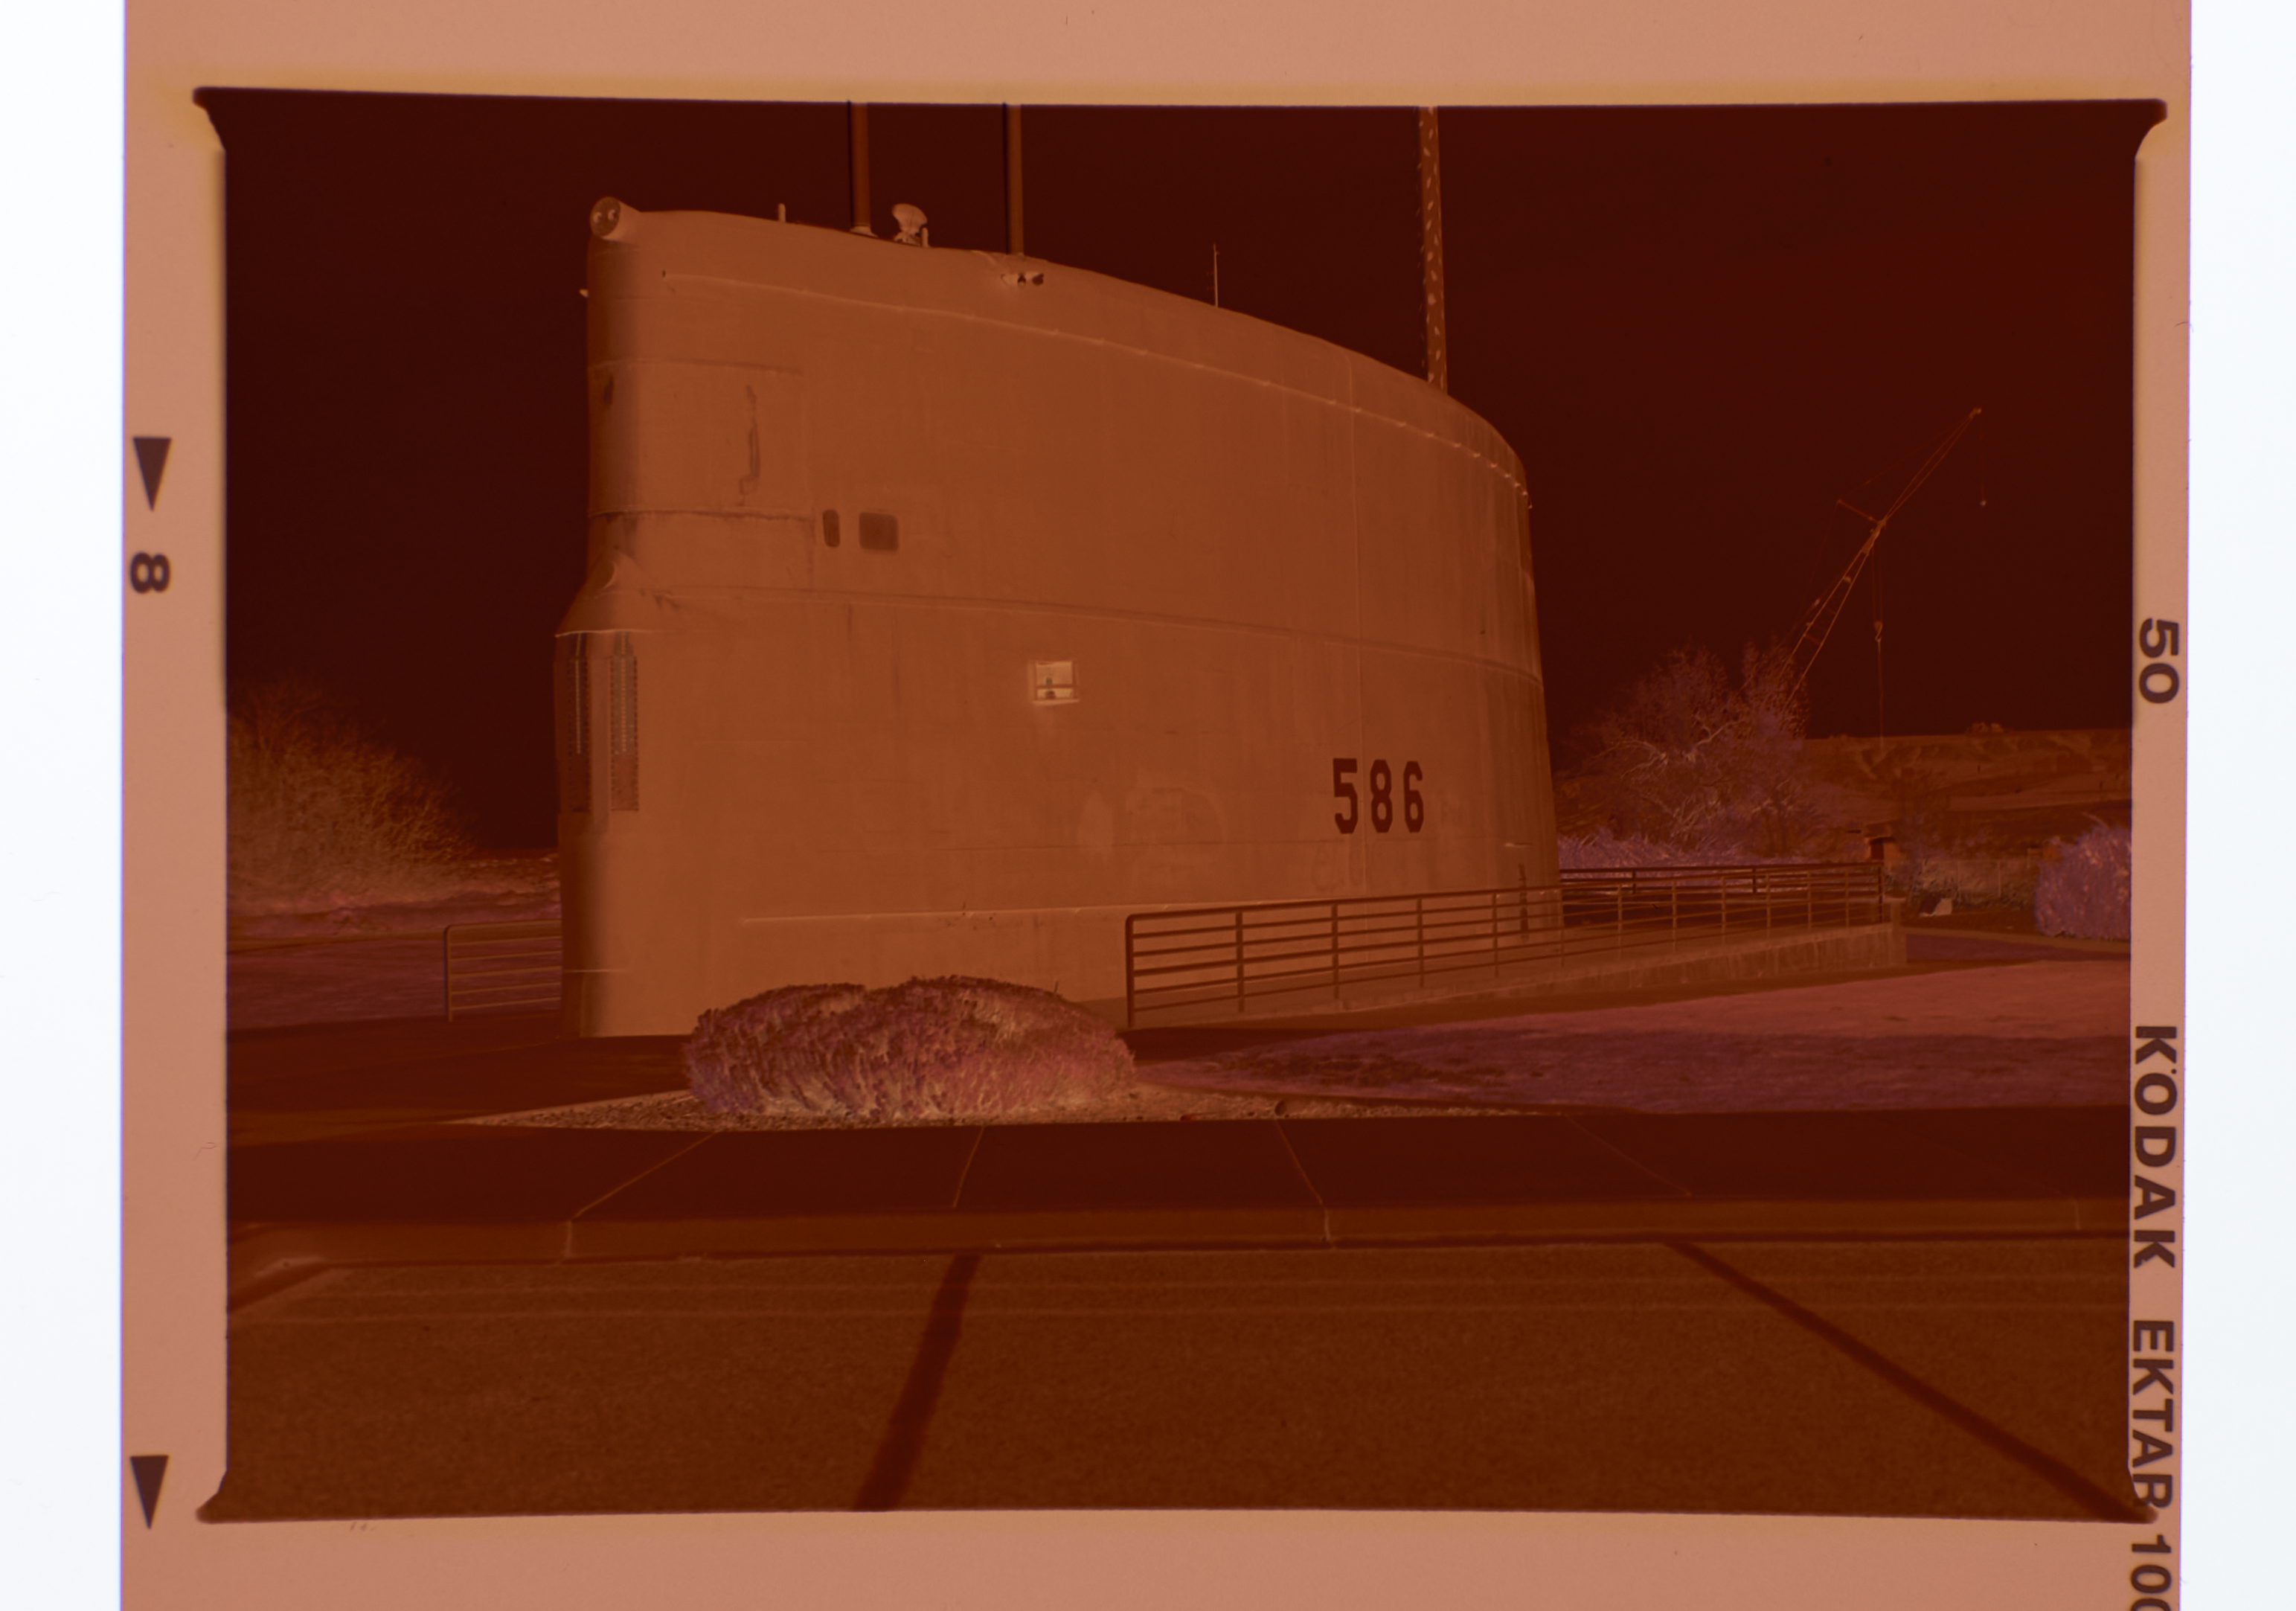
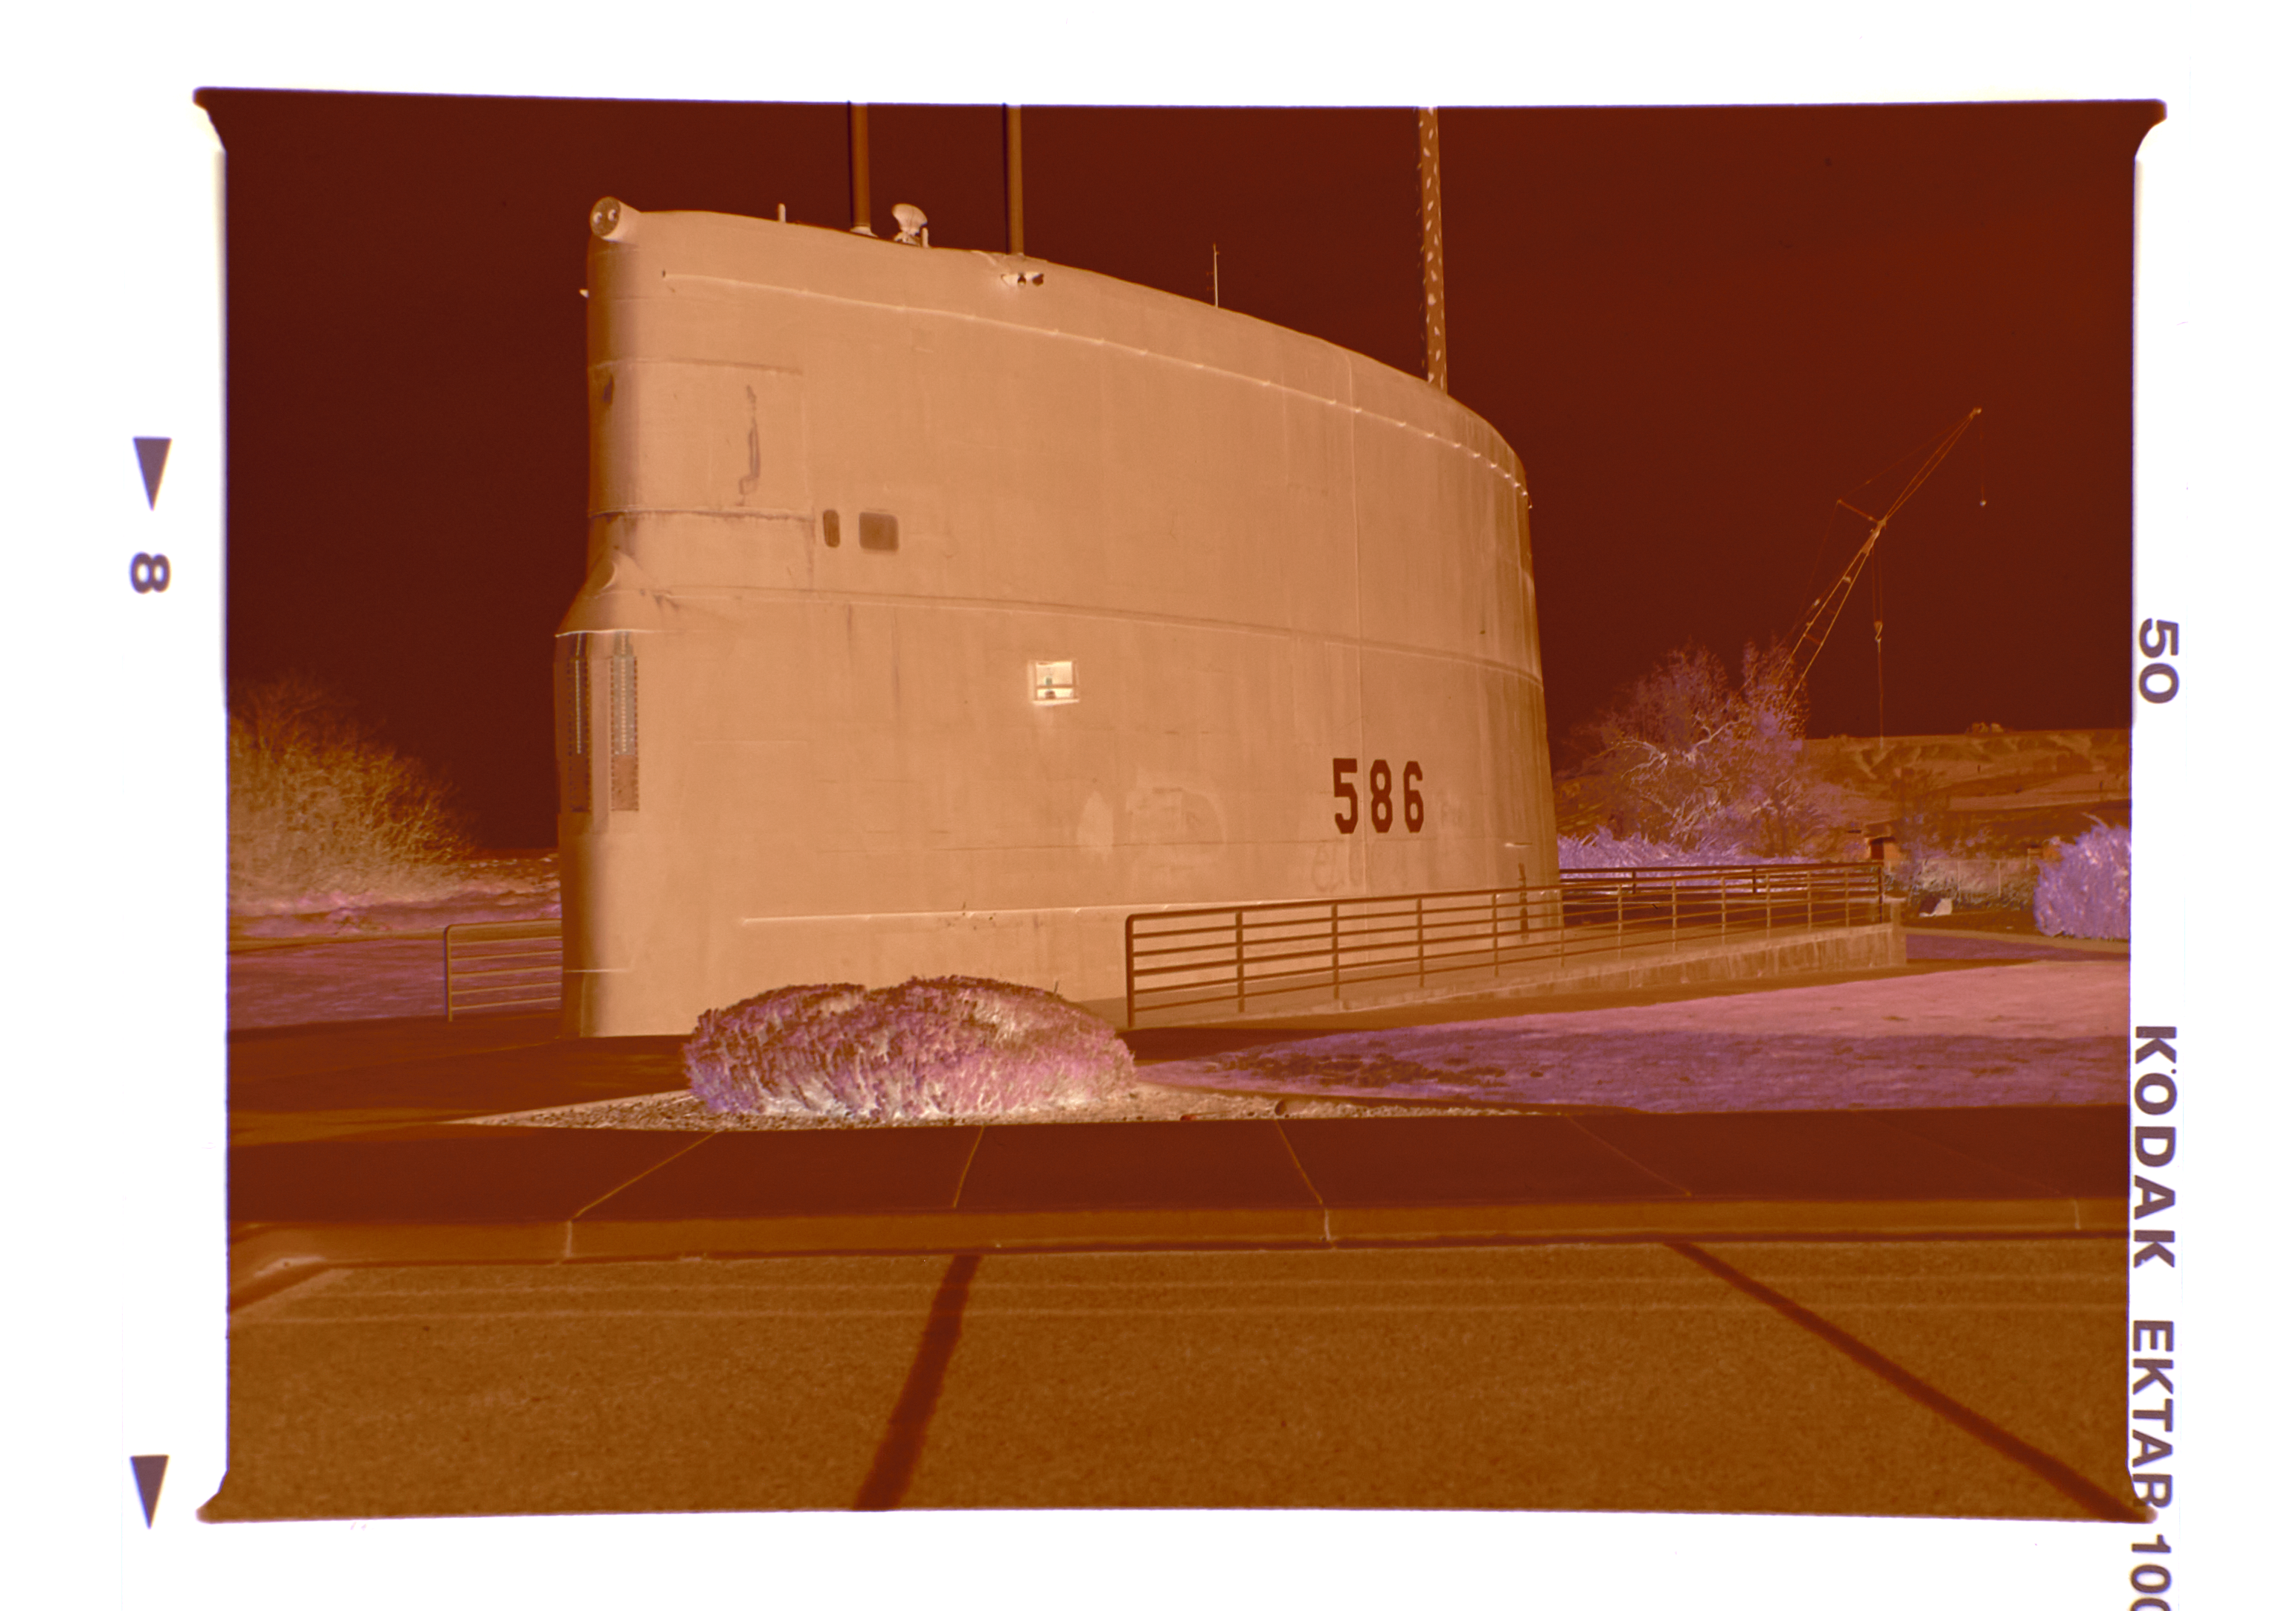
 Greetings all, I know the negative to positive conversion topic has been discussed ad-nauseam. But this is a bit different. Please stay with me on this one. Here are my first steps: 1. Bring in the color negative MF0226_Neg.png below 2. Sample the rebate color to remove the orange cast (MF0226_rebate) and create a fill layer filled with the rebate color. Then change the fill layer blend mode to divide which yields MF0226 Neg and Rebate below. The rebate has been neutralized leaving only a negative without the cast. 3. Then I use the Invert command from the Adjustment Layers which flip the neg to a pos (MF0226_Inverted). NOW here is the problem: I have an overall blue cast that cannot be balanced out. I did process this Ektar 100 film at home using CineStill chemistry. The chemistry was new and just mixed. I checked and rechecked my mixing volumes and temperatures - all OK. Any ideas?
-
 I have some Kodak Gold negatives that I want to scan, then develop in Affinity Photo. Is there any point in scanning these negatives so I can open them as 32-bit ROMM-RGB files? (My scanner is capable of producing 48-bit DNG files.) i.e. Would I get any more detail from such a file than from a 16-bit TIFF scan? In other words, I'm not sure how much dynamic range is in a colour negative.
 -
 Need some help please and I will be specific. Scanning C41 Negatives using my Nikon D600/D800 with a Sigma 105 1:1 macro lens to produce 6 stitched images of 4x5 C41 negative. Scanning with fluid, AN glass and a sheet of optical mylar, the set up is as follows. light source, raised AN glass (frosted side up) layer of fluid, negative emulsion side up, fluid, optical mylar. DSLR shooting through the optical mylar and using live view highly magnified, focusing on the film grain. Lens at f8. file produced as RAW. The results are stunning and we have compared the results to an Epson V750 and I have sold the Epson. The questions is this; Using Affinity Photo (Mac) how do I convert the C41 to colour without the orange cast? I guess somewhere you need to sample the border strip and convert it from orange to blue as it is the base layer but other than this I have tried a few things and gone around in circles. Black and white and E6 positives are obviously easy and no problem but this Orange Cast..... Thank you very much for anyones time who replies. kind regard Graham.
 -
 Hi guys, I do this in Photoshop to normalize the R, G, and B curves for the negative film (yes, I scan 35mm film) : - Create a new 'Curves' layer. - Click the little arrow at the top right of the Curves properties window, and select "Auto Options...". - Click "Enhance Per Channel Contrast" and "Snap Neutral Midtones", and set the shadow and highlight clipping to "0.01". - Click "Save as Defaults" and then "ok" out of the Auto Options window, and now click the "Auto" button. What I've just done is to normalize the R, G, and B curves for the negative film. A little background: essentially, negative film has characteristic curves for R, G, and B light. But these are not coincident with each other. If you were to take a photograph of a neutral grey patch and look at the histogram of the negative, you'd find that the blue channel would have the highest intensity, followed by green, and then red. What you need is, for a neutral grey patch, to ensure that R = G = B (that, indeed, is the RGB *definition* of "grey"). So in this curves layer, you're correcting for this R, G, B curve offset by forcing the histogram for each colour to use the entire histogram range (that is, you are enhancing the per channel contrast...as per the Auto Option box you checked above). I need to do the same using the Affinity Photo that I have just bought it :) Any way to do this ? Thanks