Search the Community
Showing results for tags 'hsl adjustment layer'.
Found 2 results
-
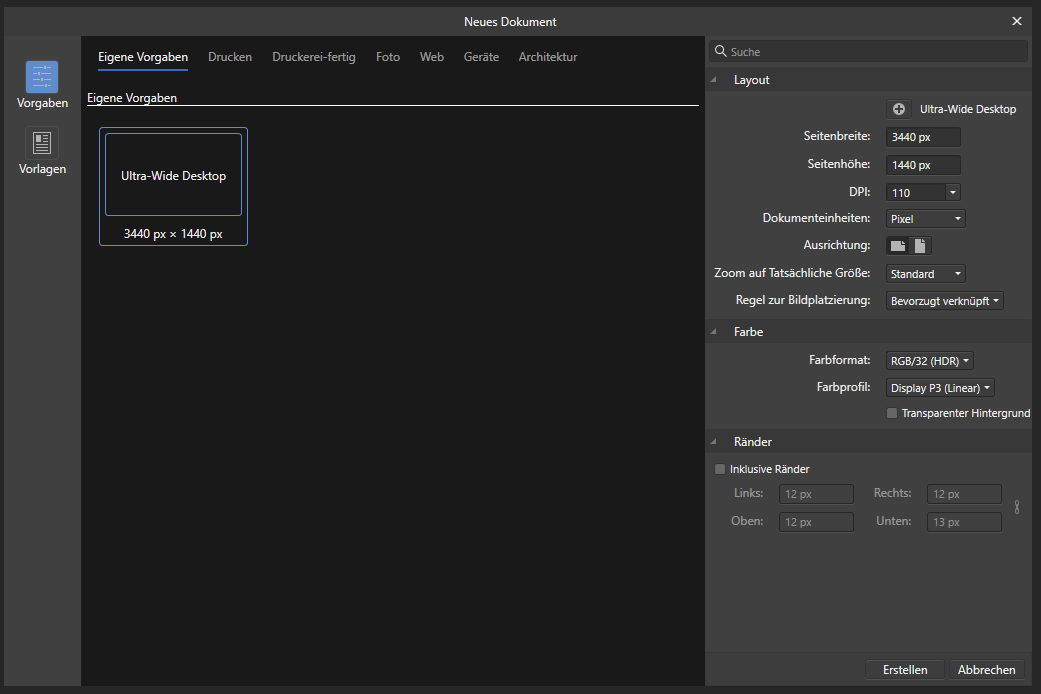
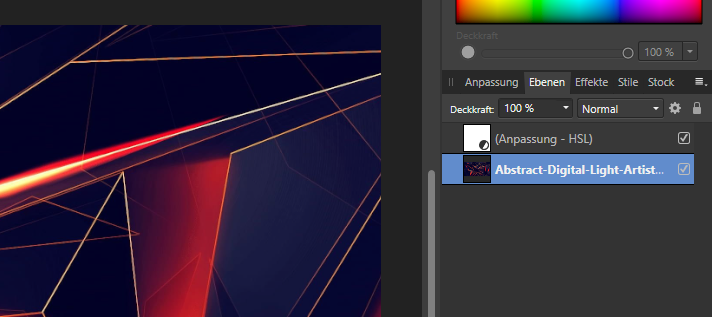
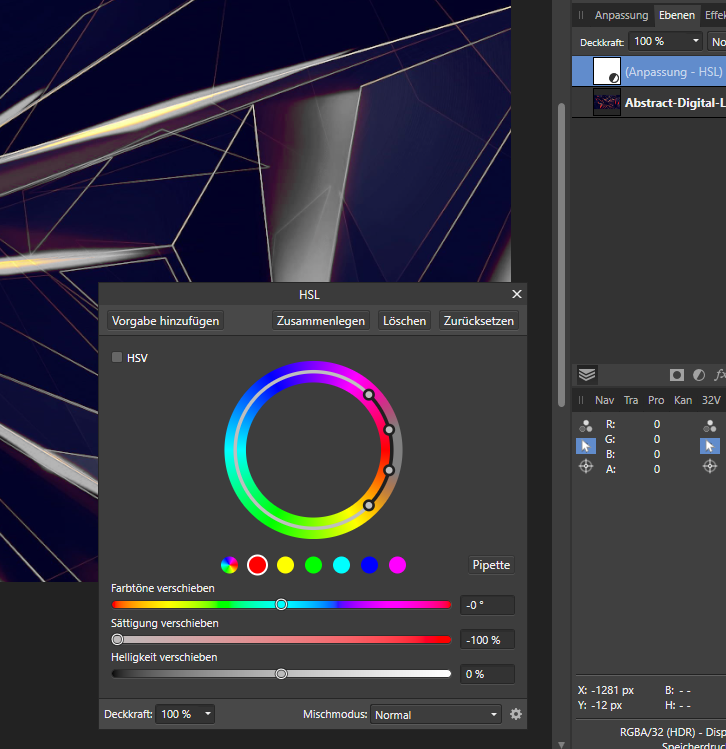
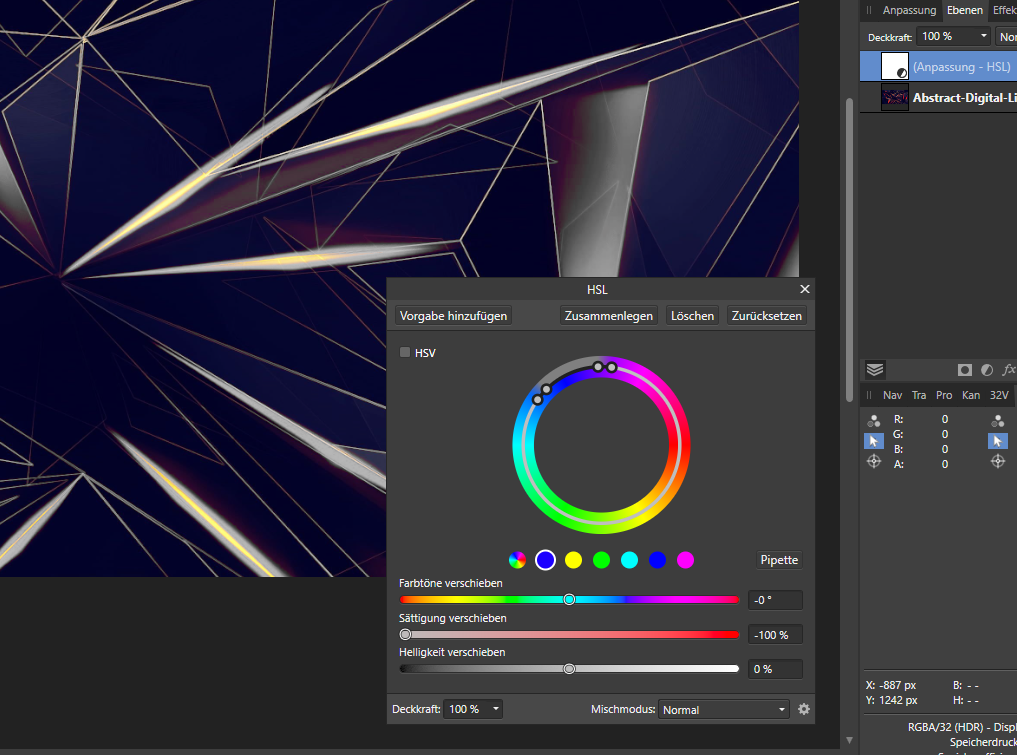
 Hello everybody, the following error already occurs since version 1.x of Affinity Photo and was already described in the respective forum and declared as a bug. When applying an HSL adjustment layer to a 32-bit RGB file, the hue selection does not work correctly. The bug can be reproduced. I am running Affinity Photo 2.0.3 on Windows 10 Pro x64 22H2. Hardware acceleration is active, but the error occurs even if it is disabled. The following step-by-step guide can be used to reproduce the bug and for details about it. The screenshots are from version 1.x of Affinity Photo, but the procedure is the same for version 2.x as well. Start Affinity Photo. Go to "File" --> "New...". Create a new file with the following properties: Place a new image (from file) by going to "File" --> "Place..." on the background. Add a HSL layer. The work area should look like this: Now open the HSL adjustment layer and pick one of the six predefined colors. Since I want to change the red and yellow colors I pick the red dot. Now decrease the saturation to 0 %. First of all, it seems everythings works fine: Now drag the four color dots to another color like blue. The expected behaviour would be that the red colors get saturated again and the blue colors get gray. Since there are no blue colors in the picture the picture should look like the original again. But what is happing actually is, that the red colors are still unsaturated and although the outer ring of the color wheels shows gray "blue" colors nothing has happend in the picture: It does not change anything if you try to use the "Pipette" instead of draging the four dots. When working with an 8 or 16 bit RGB file, the HSL adjustment layer works just fine and as expected. The original posted bug was found on MacOS. I guess the MacOS version is still affected. Feel free to ask me for more information. I hope my findings provide some information on how to deal with this issue and find a solution to it for me, as well.
-
 I would like to have an easy way to change ALL the specific hues in the photo, not just in a given area using the HSL adjustment layer. In Photo as in Photoshop I can use the HSL adjustment layer (Hue/Saturation in Photoshop). In Photoshop I can pick from 6 colors but I can extend or restrict the color range, or use the eyedropper tool to pick the correct starting point. In Photo, I can only manipulate the six set colors, and no eyedropper tool and seemingly no ability to extent/restrict the range. What I can do in Photo is select Select Sampled Color and then apply an HSL adjustment - but I just can't seem to fine tune as easily. In your Black and White adjustment layer you have a Picker. I would like something like that in Photo, or at least a method to duplicate what I do in Photoshop - see attached photo.