Search the Community
Showing results for tags 'flood selection tool'.
Found 4 results
-
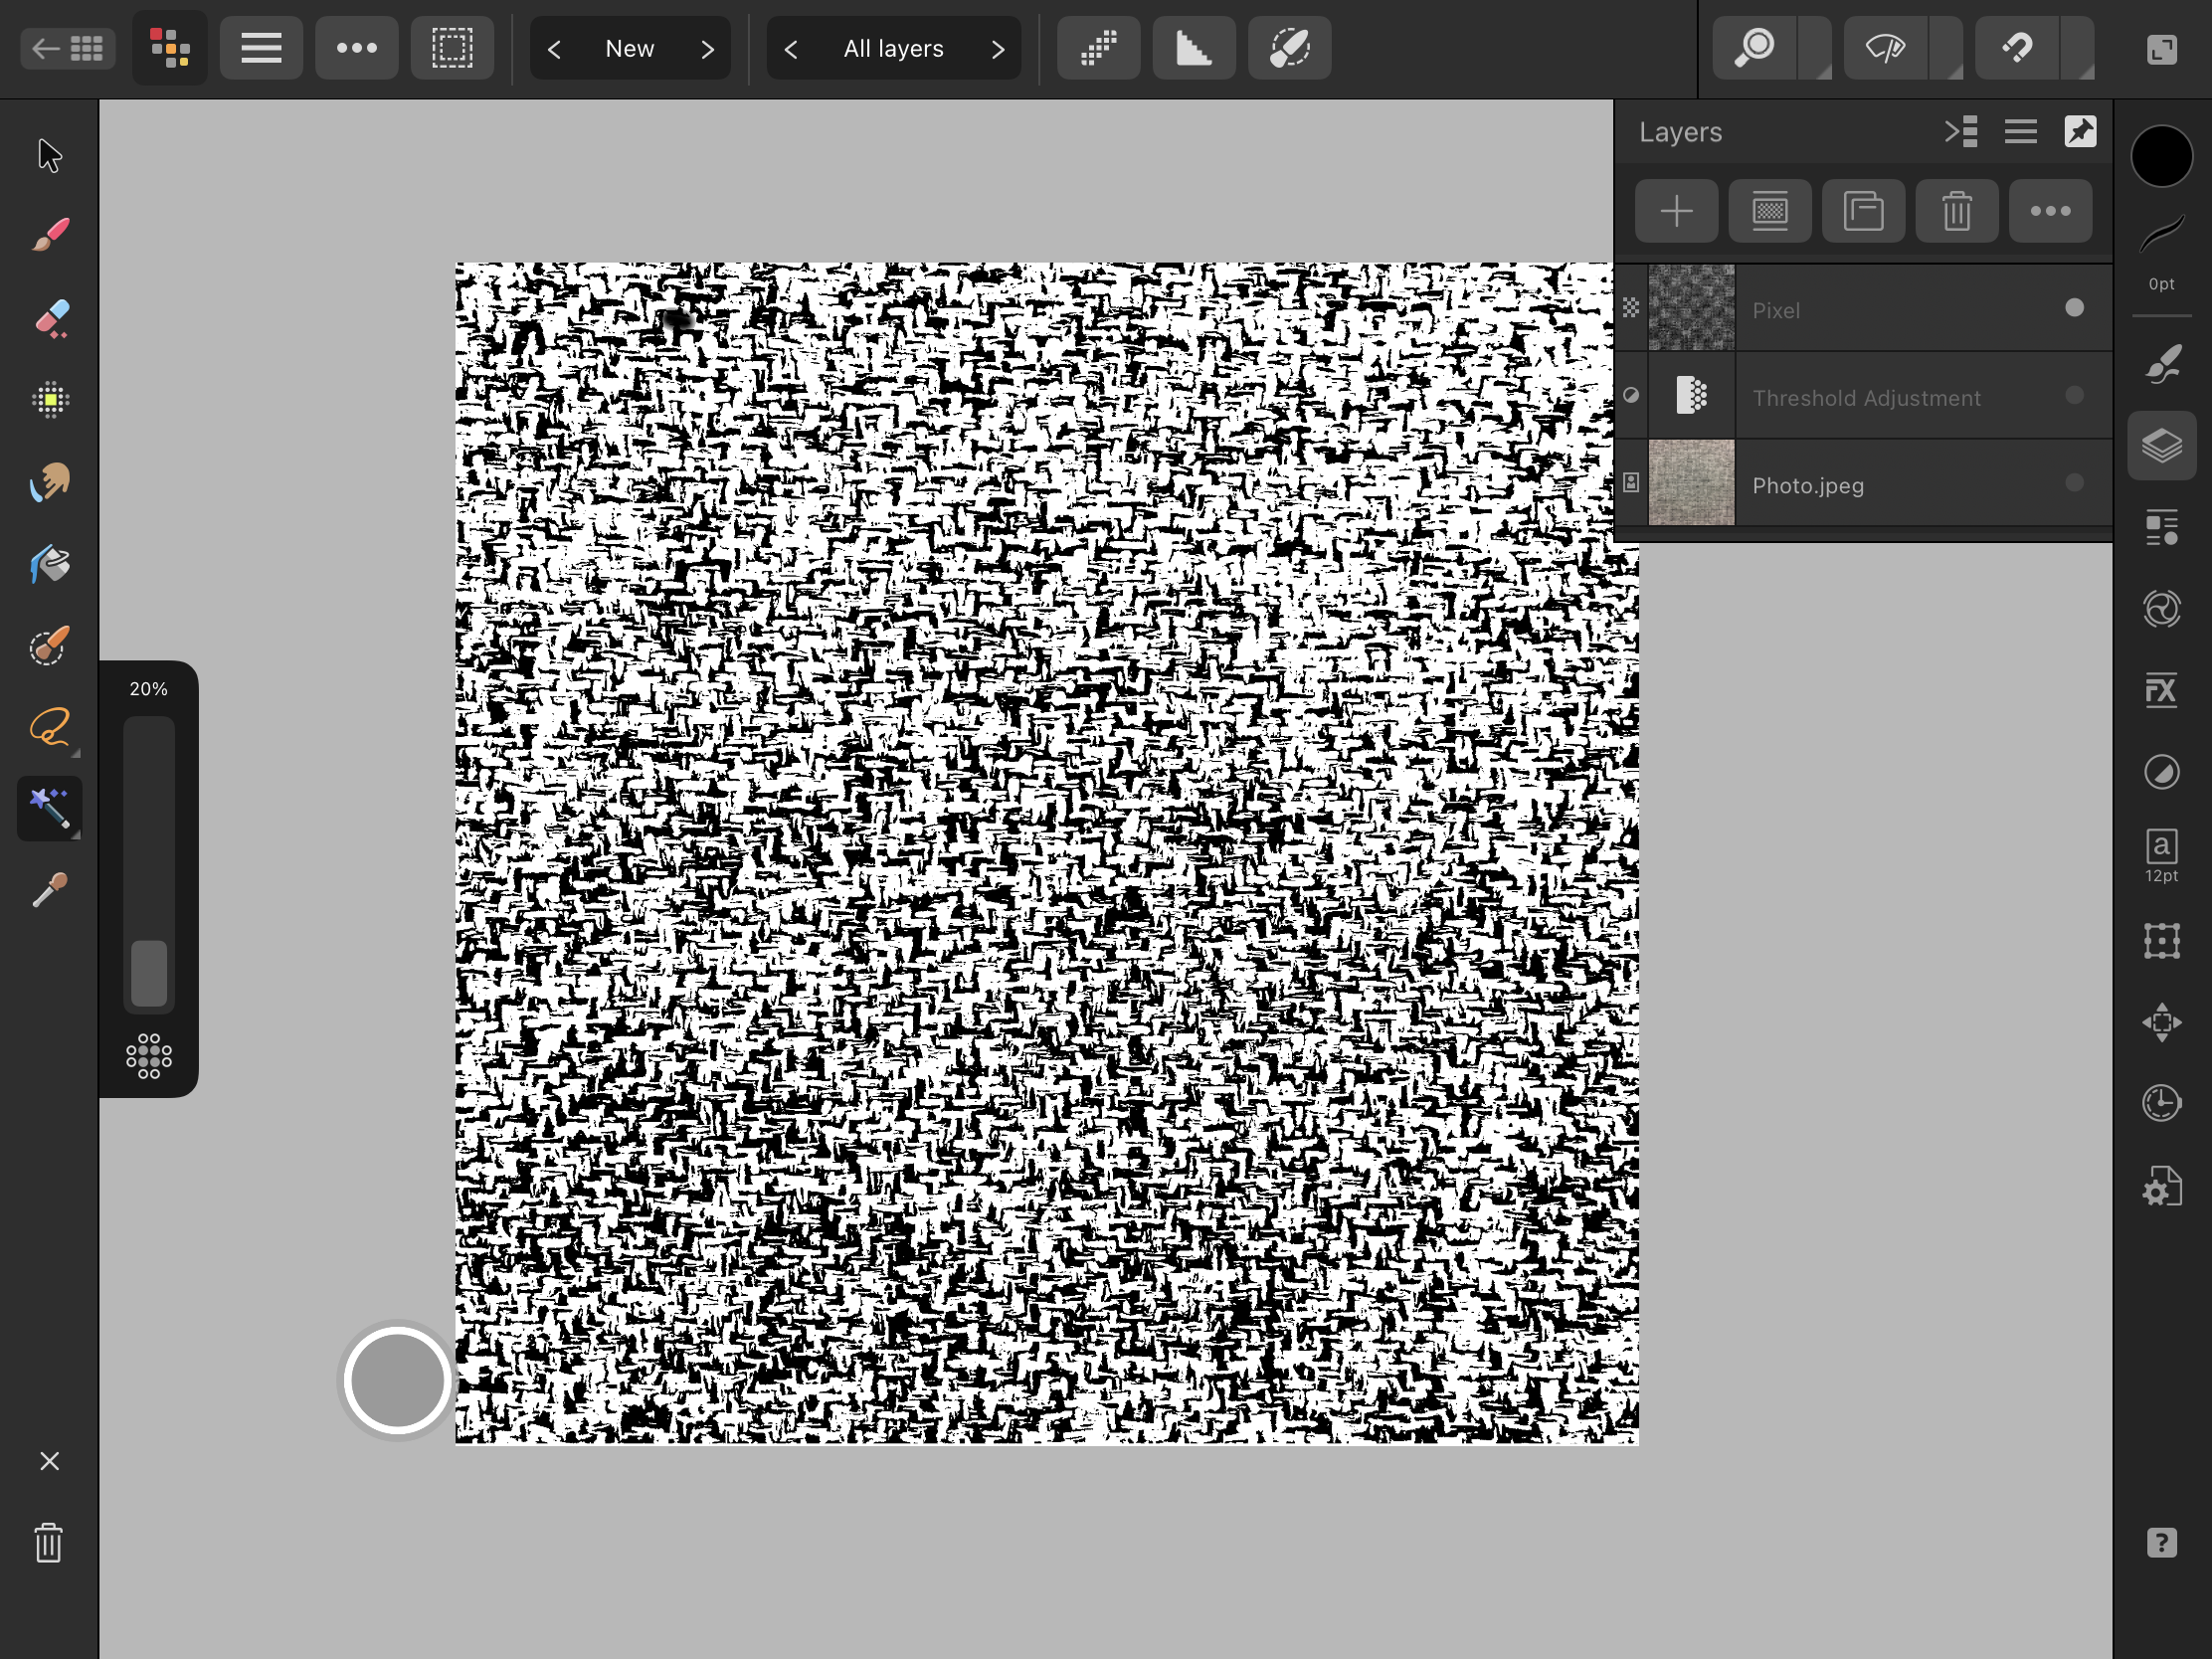
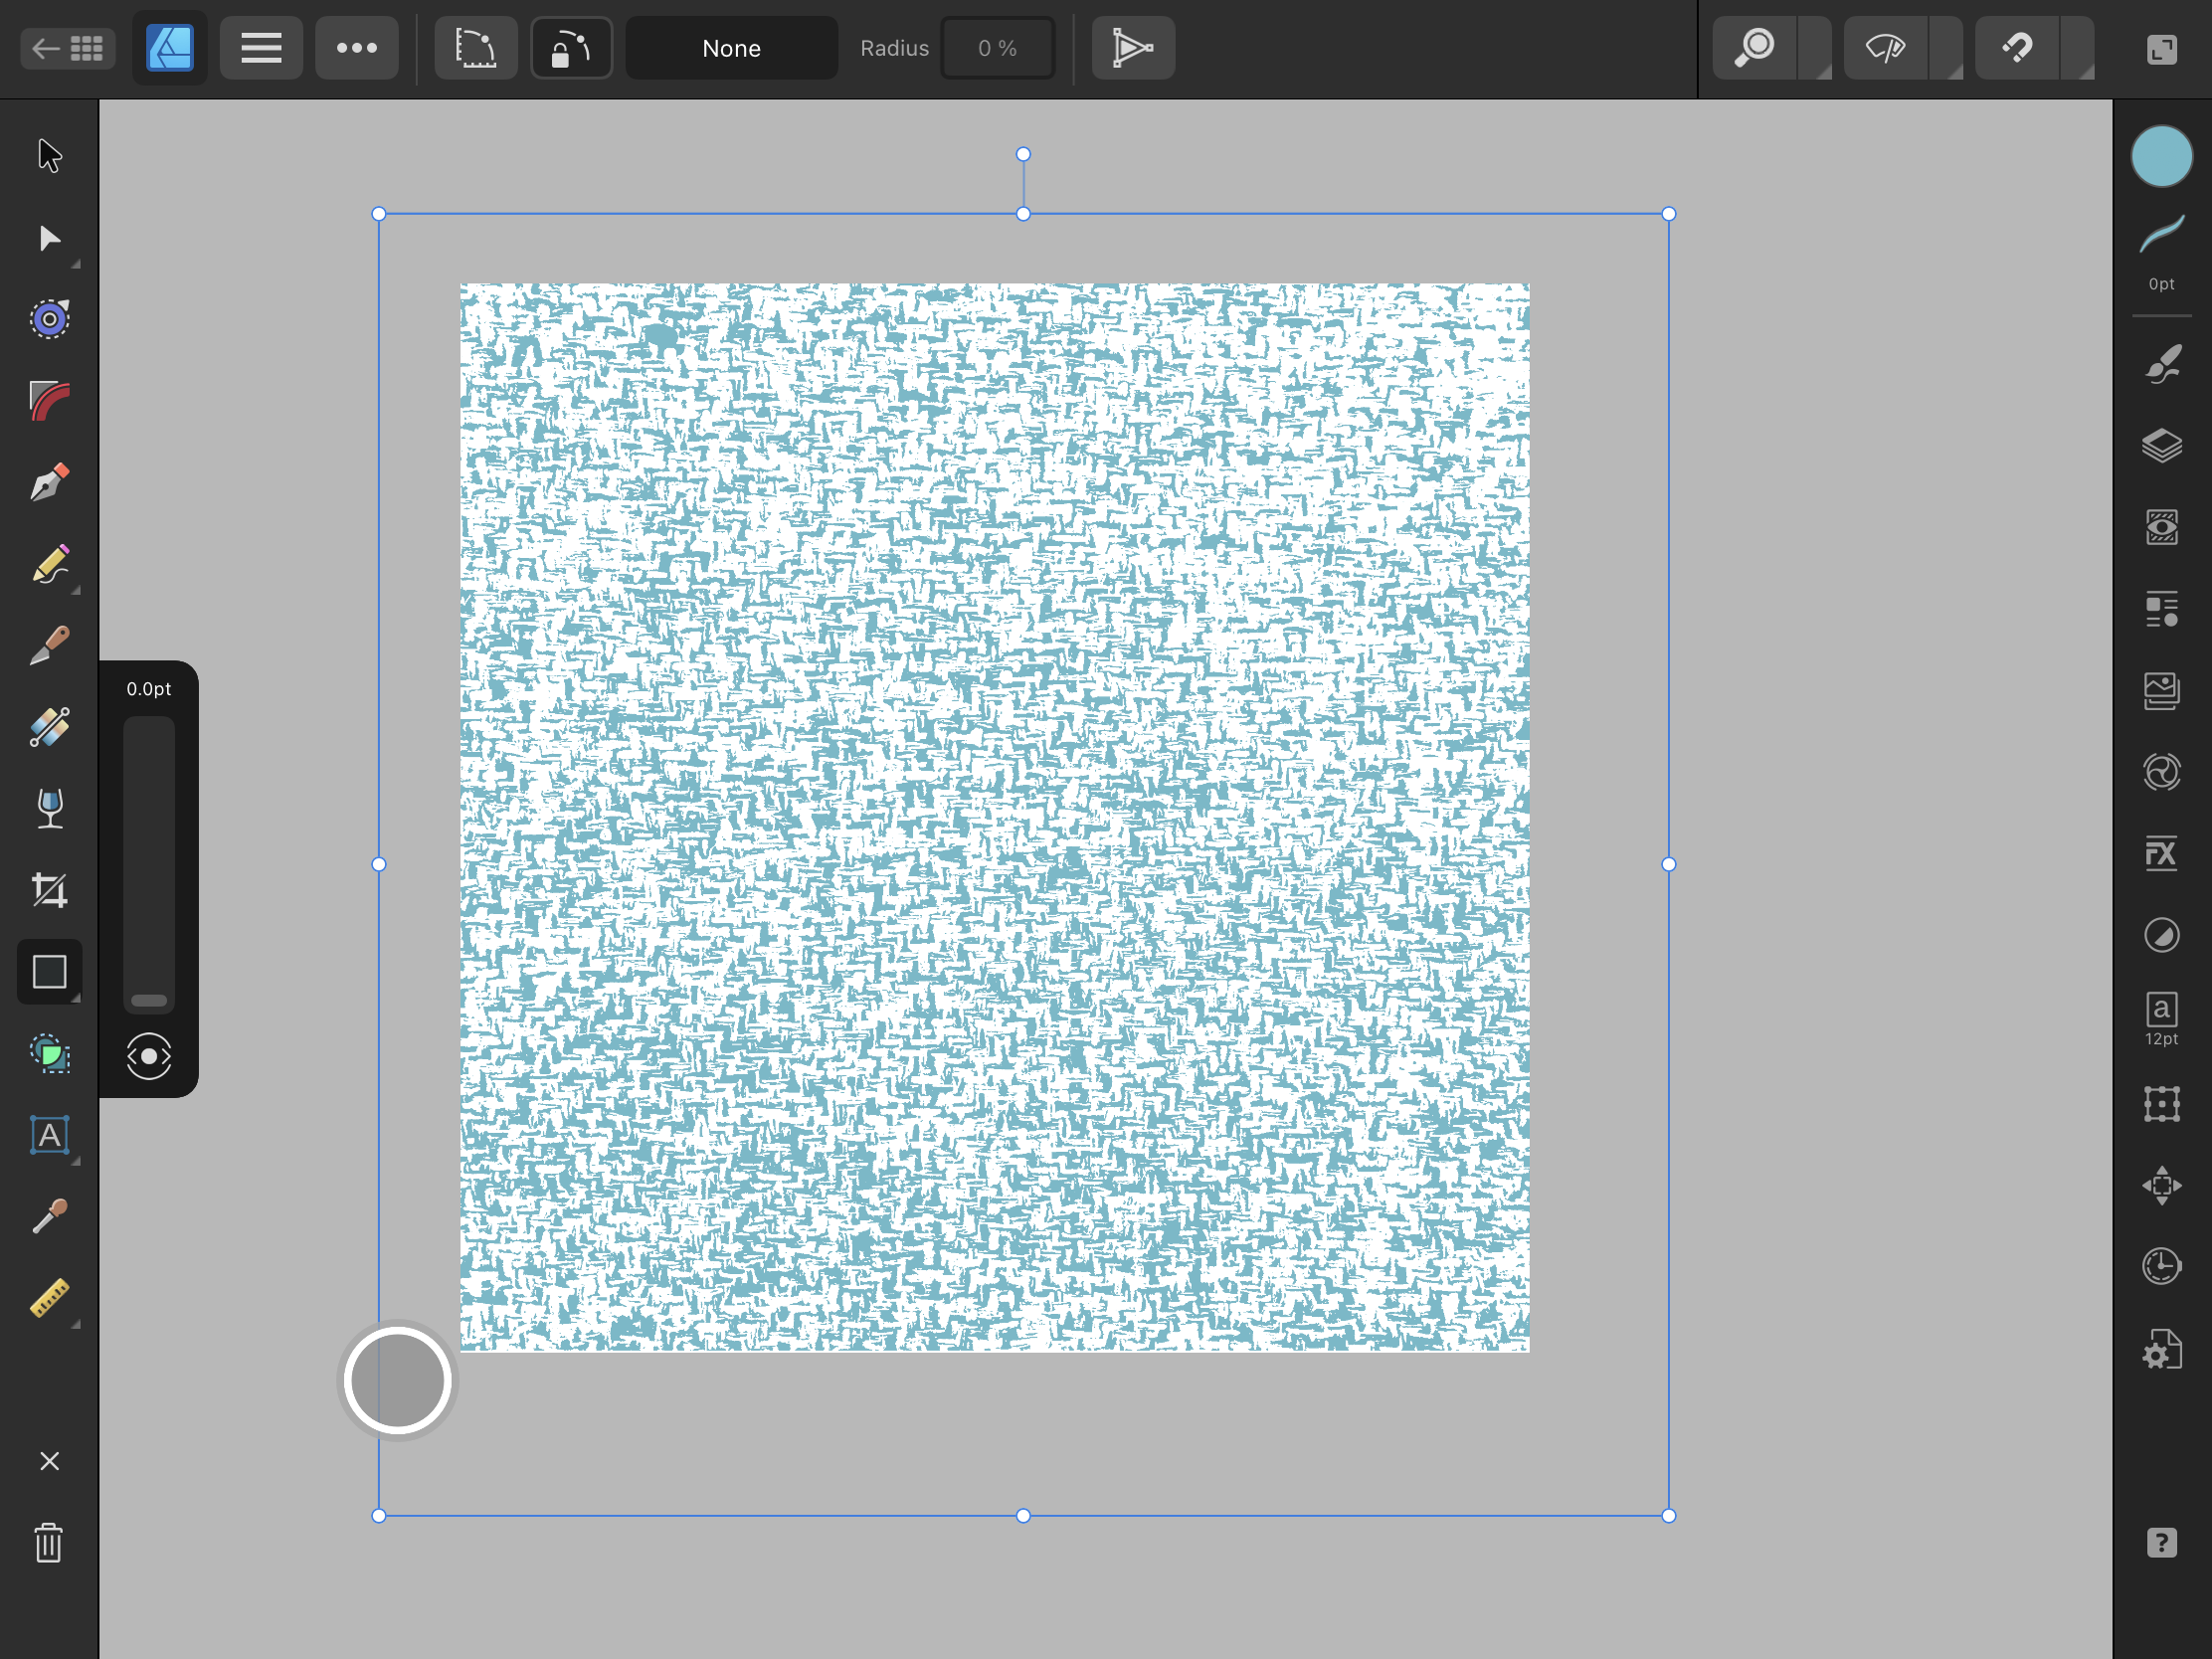
 I'm having issues with the Flood Selection Tool in the Pixel Persona. I'm taking a class in surface pattern design, and had to upload an image then use the Threshold option to make it how you see in Image 1. In Image 2 I'm go into the Pixel Persona, select the Flood Selection Tool, deselect Contiguous in the top menu, then select the white in the image. I've zoomed in as you can see so that I only select white. The image starts to move and then I'm supposed to hit the trash can, which is supposed to remove the white (I'm told in my class video that I'll see the image change in the layers panel). The trash can doesn't seem to do anything, so I tried three-finger swipe and pressed delete in the menu that pops up. Nothing changes in the image in the layers panel. The next step is to go back to the Designer Persona, pick a colour other than white or black, create a new vector layer, place this under the pixel layer, then draw a rectangle across the image and the white is supposed to change to the colour. However as you can see in Image 3, the black is changing to the colour I picked, not the white. I've been back and forth with someone from the class but they've just told me to keep trying again. I've tried 5 or 6 times now with no luck. Am I doing something wrong, is the class taught wrong or is there a bug? I'm new to Designer and my class is being taught in V1 so it's been a struggle as it is.
-
 Hey guys, I‘ve just startet working with Affintiy Photo and I‘m wondering if there is any option to feather the selection by using the smart oder the flood selection tool. There is an option for the freehand selection tool but I couldn’t find it for the others named. Sorry if you already discussed this topic. I couldn’t find an answere yet. Thanks for your help. Cheers, Leo
-
 I am using the Afinity Photo desktop version to replace a sky in a photo that has evergreen trees. Everything goes fine, EXCEPT, the border between the masked sky and the picture has white ghosting, looks like frost. I have used the refining tool, but to no avail. I am stumped. I have attached the file for a look. Does anyone have an idea what is causing this issue and how to fix it? I would appreciate any help.
-
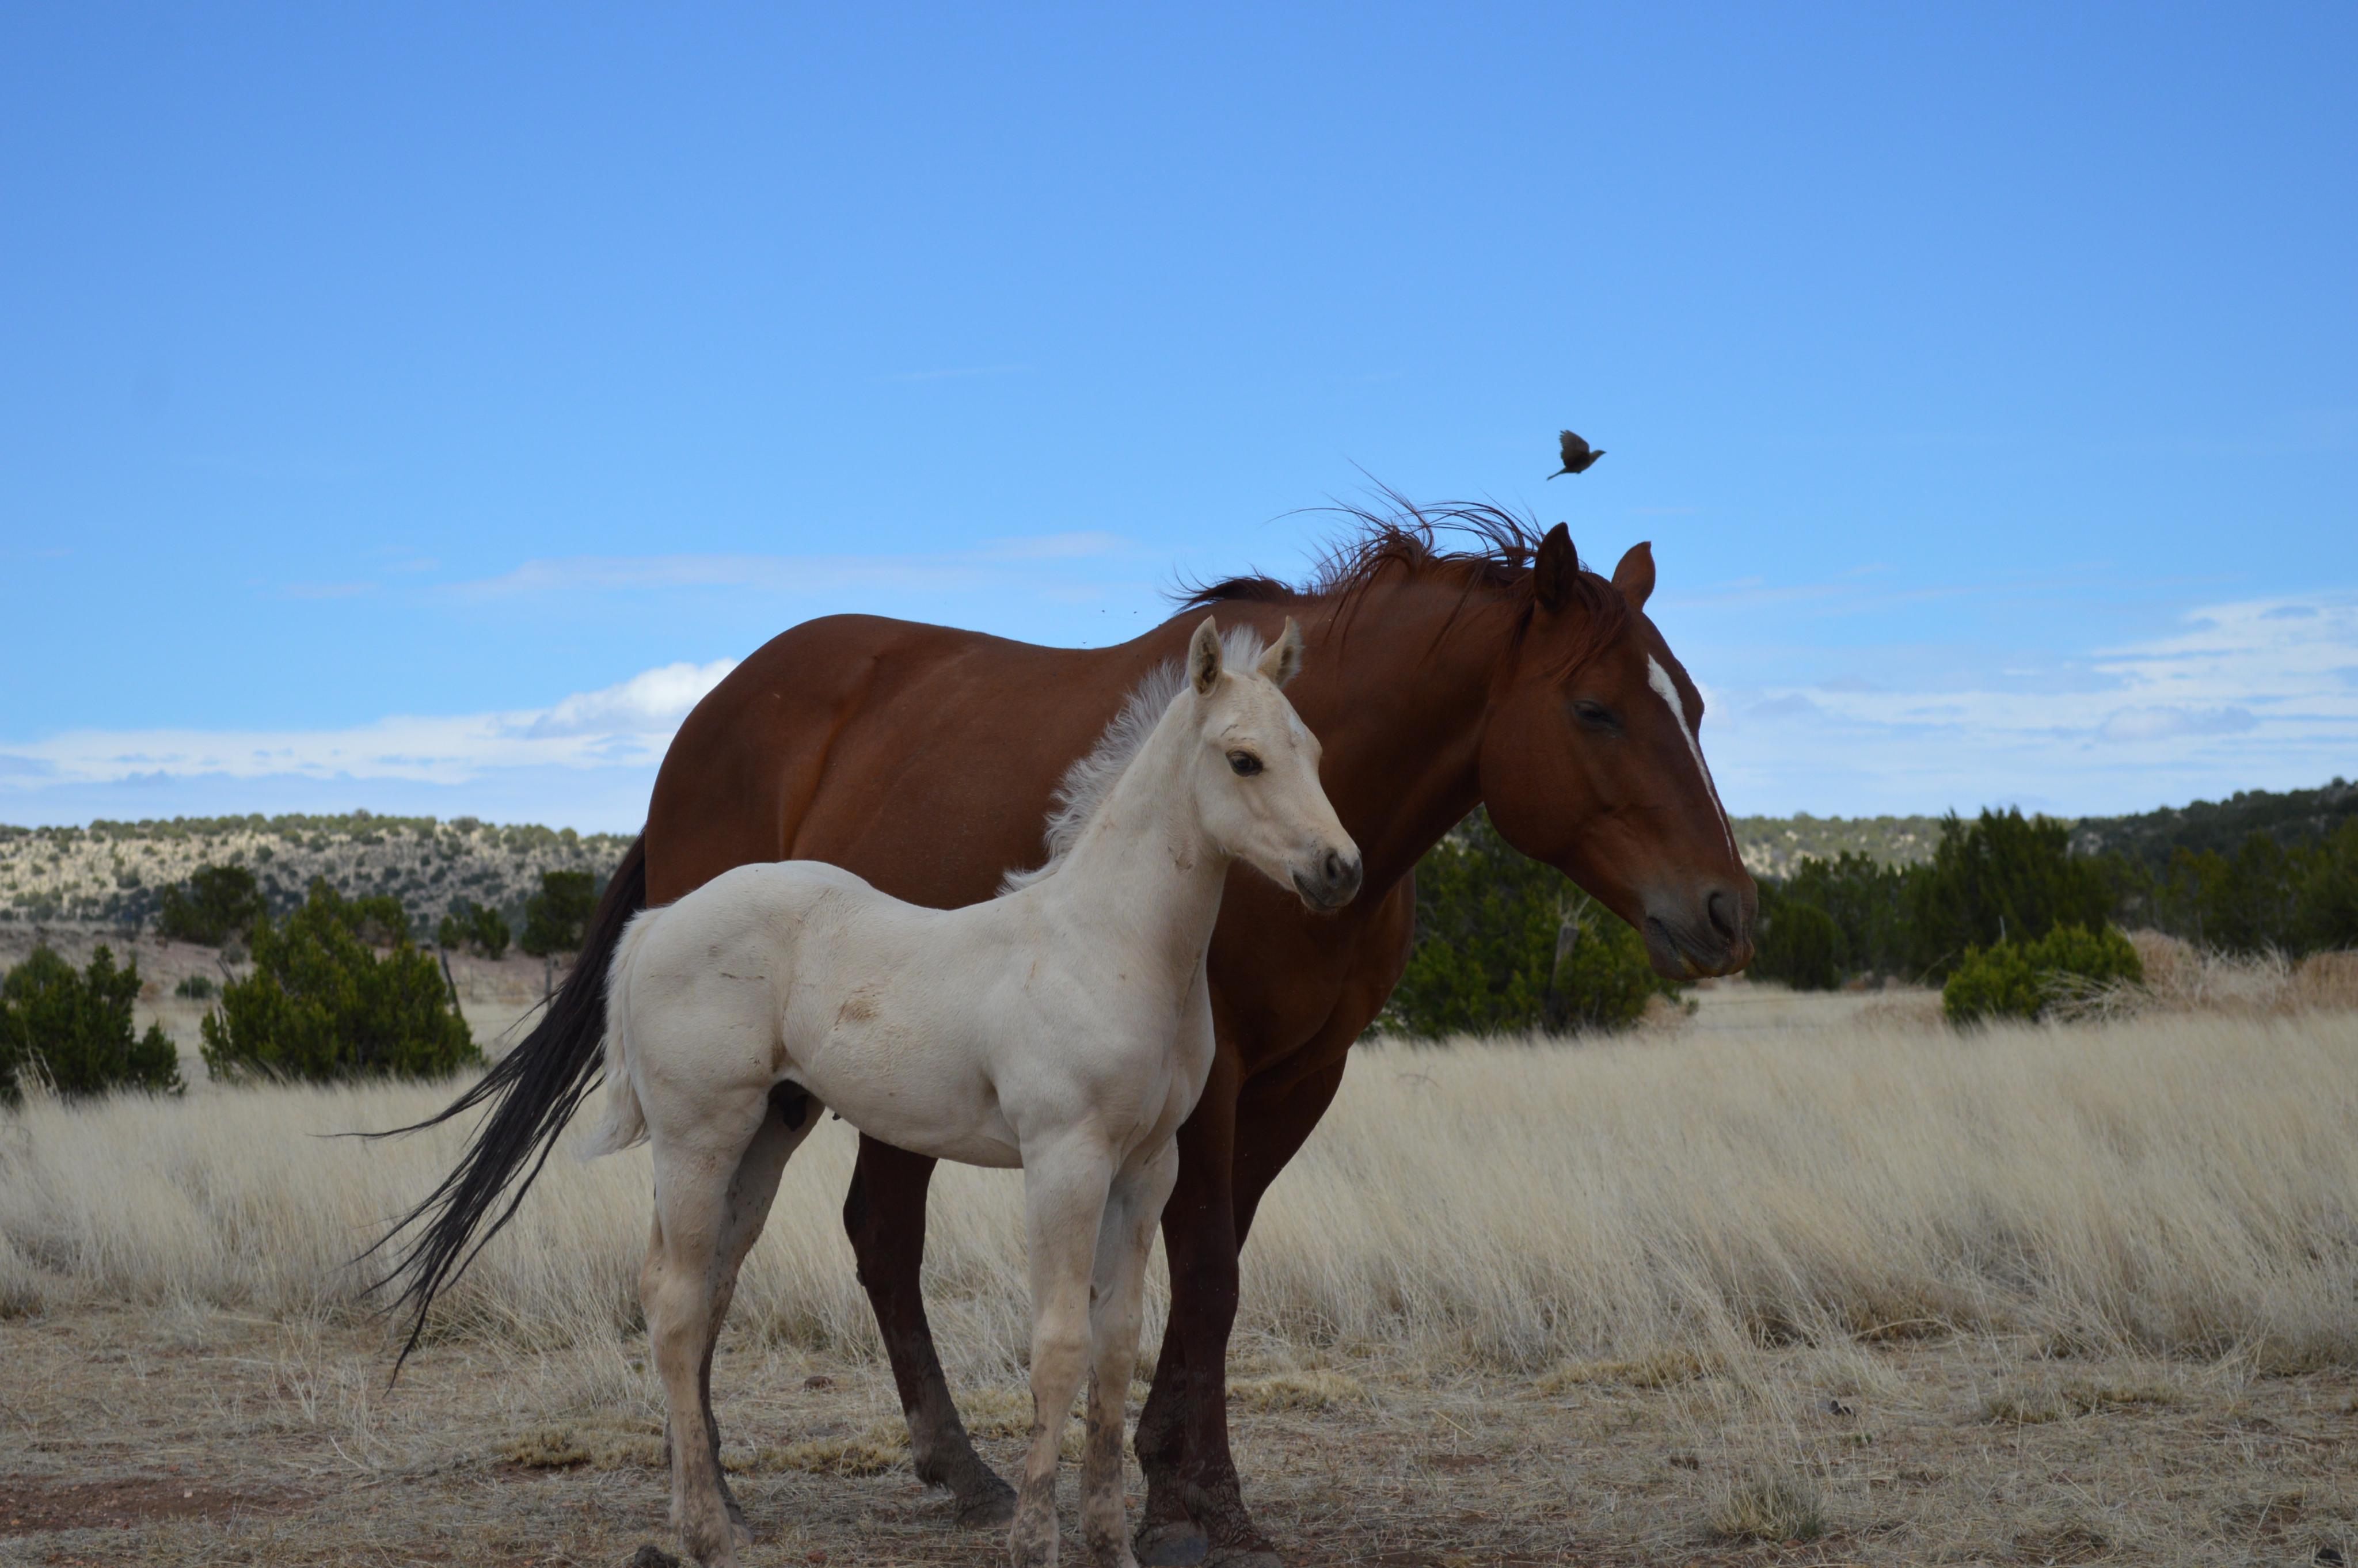
I can't figure out the tool to use or the settings for a tool to select anything with fine edges. I can't capture edges even when there is quite a distintion in colors.I attach a photo of two horses: what tool and what setting should I use to select either (or both) horses? These should be easy photos for Affinity with big color contrasts. If there isn't a major distinction in colors, it seems hopeless in Affinity. I note in Paint Shop Pro, one can select what characteristic to select for: (See photo Below). Using PSP, one can say, do a selection in a photo with little color difference, even in a Black and White photo, which Affinity does very poorly. I would appreciate your advice regarding how to use these tools.