Search the Community
Showing results for tags 'equirectangular projection'.
Found 9 results
-
 Hello, I am trying out Affinity for the first time because I'm looking for a new software to edit 360 images with Photoshop phasing that out. Everything I see tells me to a choose Live Projection from the Layers menu but I cannot seem to find that. I don't know if there's a preferences tab or a specific persona I need to have selected. I cannot seem to find an answer.
-
 I am trying to work with Affinity Photo for the first time for editing 360 equirectangular images in the live projection mode. I want to cover a poster on the wall with a new graphic, however the poster exceeds the size of the vertical FOV, so the corners of the new layer fall outside the viewport. I cannot pan the live projection with both layers retaining their positions relative to each other (only the equirectangular pans, but the graphic layer stays still). I can only pan again with both layers after merging down the new graphic onto the equirectangular into a single layer (is this correct?). But when I exit the live projection, the corners of the new graphic that fell outside the viewport are cut off. I could only get the corners to fit in the viewport if I use the straighten tool and turn by 30 degrees. But after merging down and exiting live projection, the image is no longer straight. If I use the straighten tool and turn by negative -30 degrees, then exit, it's not exactly as straight as before, and the yaw/pitch are not exactly the same. Is there some way to get the corners to fit into the viewport, or expand the vertical FOV, without messing up the projection with the straightening tool?
 -
 Hi everyone, First time user, love the Affinity layout and UI, really impressed with the speed and ease of use. I'm working on a bunch of 360 photos in the Equirectangular Projection mode. I've been asked to add 20-30 location markers and text to 4-5 photos, but the client keeps coming back with numerous changes in terms of specific locations or text changes. Currently my process has been to add the graphical elements and then Merge Down each one, thus flattening the image before I can Remove Projection and then export out a 360 image. However, this is a destructive method and I can't go back and make any changes to that layer (eg moving it more to the left, changing the text). If I need to make any changes I have to re-start the entire photo which obviously isn't time-efficient as some photos have 20-30 elements in it. I'm sure there's a better process here but I can't find any information about working with non-destructive layers while in the Equirectangular Projection mode. Does anyone know of any alternatives to the Merge Down method so I can go back to my edits at a later point if I need to make adjustments to my graphical layers without having to do a complete re-edit of each photo? So so thankful for anyone who can help out or point me in a more efficient direction!
- 5 replies
-
- 1
-

-
- 360 photos
- equirectangular projection
- (and 4 more)
-
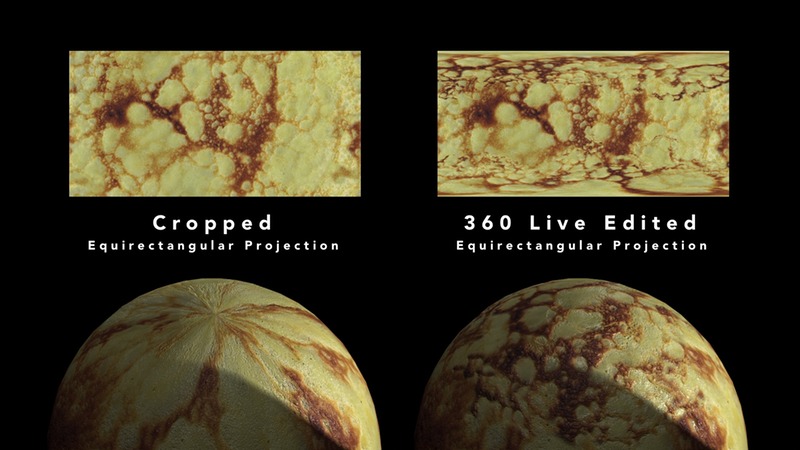
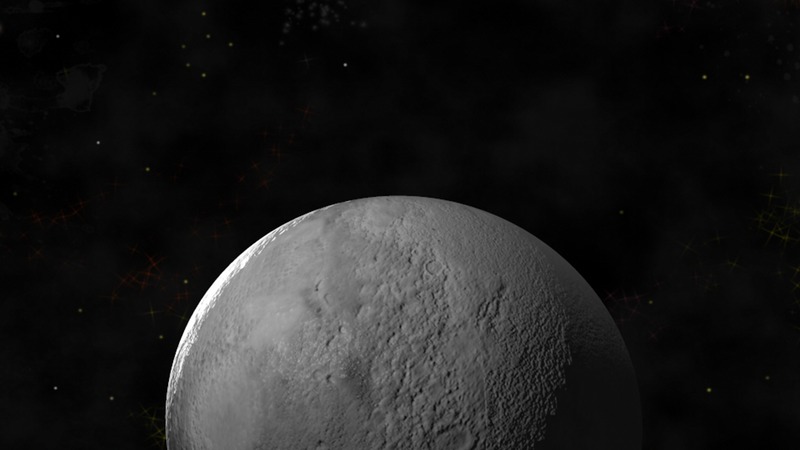
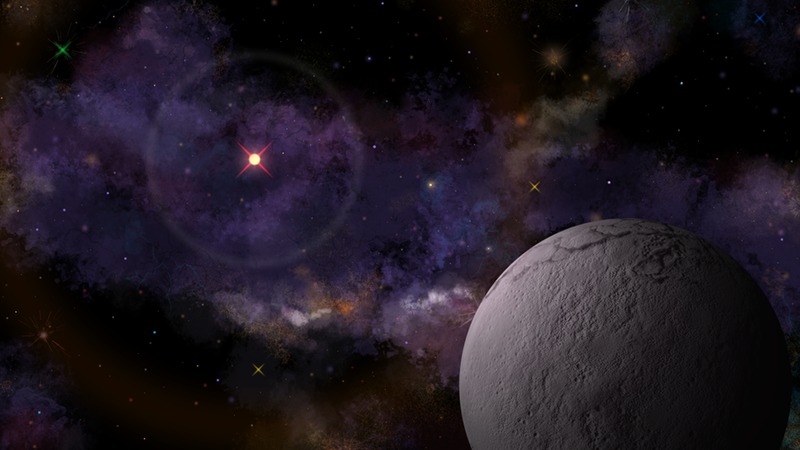
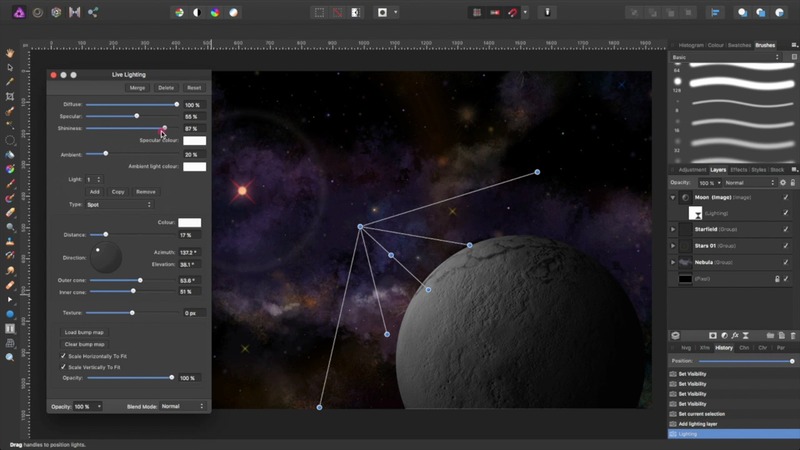
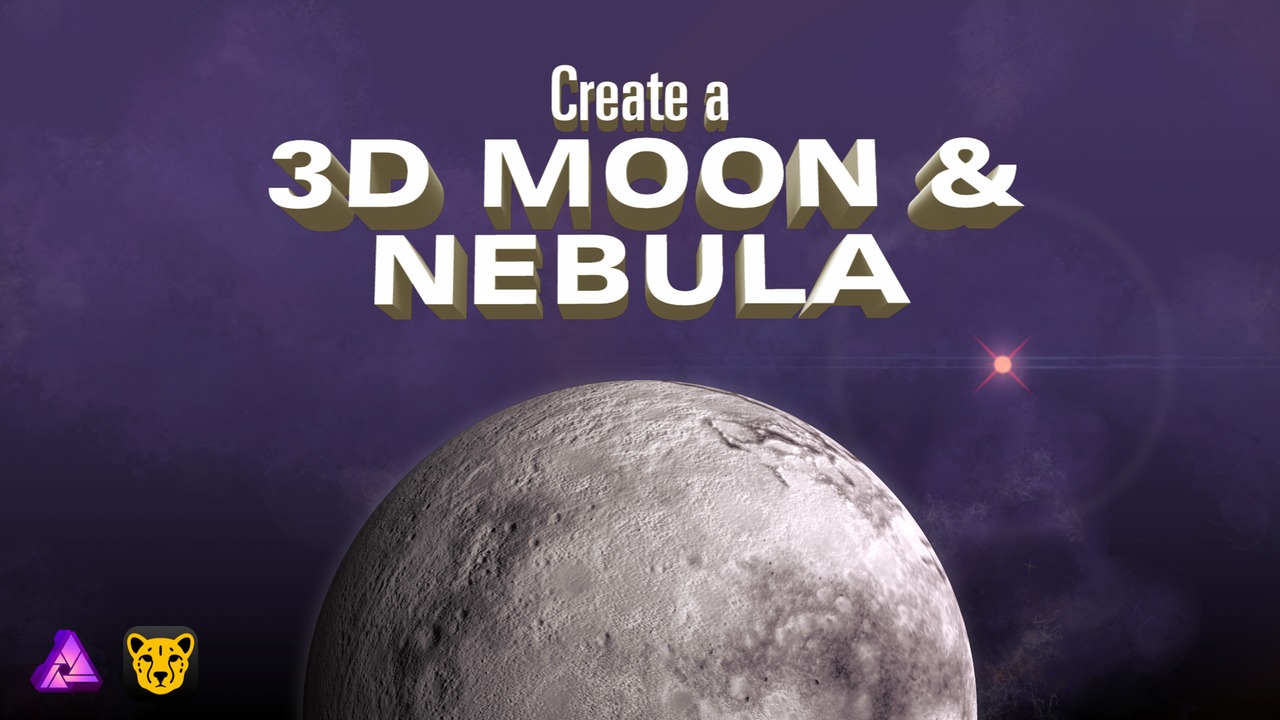
 Now on Skillshare here: http://skl.sh/2GjWV8q Note: I have renamed this class. It was "Create a Space-Themed Illustration". This class covers a range of easy to master skills, from cooking, to 3D rendering, to digital painting. Part 1 – The Pancake Moon In Part 1 of the class, you will learn how to: make pancakes in your kitchen using Affinity Photo, make equi-rectangular projection texture and bump maps out of the pancake's cratered surface using Cheetah 3D, wrap the texture and bump maps around a sphere, and render your pancake moon. We will be using Affinity Photo to create our texture and bump maps, and Cheetah 3D to render the pancake moon. Part 2 – Painting a Starry Nebula With Affinity Photo, you will learn how to: use shapes to create stars and simple lens flares use the standard set of Affinity Photo brushes to paint star fields and a nebula composite your moon with your starry nebula, and fine tune the lighting of your moon. Here is the permanent link to the class: http://skl.sh/2ooIWa9 Note: This link requires a subscription to Skillshare. Please use this link if you already have a subscription, or you are intending to sign up to Skillshare. I'm not sure what the current deal is, but Skillshare sometimes offer free access to all their classes for a limited time. Links to other space-themed classes by the following Skillshare teachers are available from this class. But wait, there's more... Free Access Link: http://skl.sh/2ogF9L2 Note: This free access link is limited to the first 12 people who use it and is valid up until the 28th of February 2018. It only provides free access to this class. You may need to sign up, and it's free. It's best viewed on a desktop browser or tablet. I hope you enjoy the class. Disclaimer: I have no affiliations with Serif nor Cheetah 3D. This is not an official Serif nor Cheetah 3D class. Permission was obtained for using the Affinity Photo and Cheetah 3D logos for the purpose of class promotion.
-
 My team and I work on 360 video content and often are required to do complex masking and removals on certain 360 equirectangular shots. Previously, we have utilised Photoshop's '360 Spherical Panorma' tool to do these removals. However, upon inspection, have realised that even when using 8K source images, Photoshop seems to drastically downsample the image quality in areas we have patched and corrected to the point that details become indistinguishable. This drastically reduces the image quality in shots and is very noticeable. Does the same issue occur in Affinity, or is image quality retained when applying patches/cleanup in the 360 Live Editing Tool? Any answers would be greatly appreciated
 -
 Newbie query... Does Affinity Photo for iPad work with 360 photos taken with Samsung Gear 360 (original model - 2016). When I tried opening the pictures, it was showing up as 2 images like in a binocular. And there was stick marks and other artefacts when I tried using the Equirectangular projection mode.
 -
 Hi Just downloaded a trial version of Affinity Photo. Mainly interested in editing equirectangular images for 360 VR work. I was wondering if there is a way to precisely place guides while in the equirectangular projection mode? I need to remove the tripod and place a logo at the nadir. Only just downloaded so have only used for about 15 minutes and appears to be a very easy to use program, similar to photoshop but with a great 360 editing feature and so fast. Steve
 -
 Hello Everyone, I'm new here and to Affinity and also to working with a 360 camera. I have a "Ricoh Theta S" and I will be using it for Real Estate, motorsports..etc but I want to be able to add ANY 360 file and work with it. Do I just use the Live Equirectangular Projection layer, do my editing with inpainting..etc and then save? Then use another program online to view? What if I need to correct a stitching line? Or any blurry objects close to a stitching line? I do have a photo that on the stitch line I see a double head? Anyway to merge them to make one? Want me to upload it? Thanks
 -
 Hello, I am photographer specialized in the panoramic photo 360 °. The possibility of retouch in a modified projection would be of a big help in my work. It would make economy of the additional conversions (equirectangular / cubic / equirectangular) and would facilitate the retouch of nadirs or of zones that covers 2 cubic faces in the same time. The promise of this feature was the main cause of my purchase of Affinity Photo. Unfortunately there is a bug in this function (version 1.5.CR). Please analyze screenshots in attached files. I repeated the experience 4 times with the same result. I use iMac Retina 5K, 27-inch, Late on 2015, with memory of 8 Go + AMD Radeon R9 M390 2048 Mb, macOS Sierra 10.12. Screen 1 I opened with Affinity Photo a panorama 360° saved as the equirectangular projection. Screen 2 I changed the display of the projection (equirectangular to the rectilinear) and I chose the centring to visualize the zone to be retouched. Screen 3 The routouche was made but I lost the possibility of navigation inside a sphere 360 ° (impossible to make the next centring and next retouch), my panorama 360 °/180 ° became a simple, rectilinear picture, reframed during retouching process. To get back the whole equirectangular panorama, I decided to leave the rectilinear projection. Screen 4 I noticed on the equirectangular panorama: - My retouch was made. - 2 strips extracted from my panorama were placed by the top (in the same layer). Kind regards, Hubas