Search the Community
Showing results for tags 'blend ranges'.
Found 17 results
-
 Dear Affinity Users, I'm heavily struggling to combine 3-off images consisting of a focus merge, a dark exposure for the sky and a stack to smooth the water in the final image. I created the focus merge and the stack separately. The dark exposure for the sky is a single image. I managed to create a prelim image using blend ranges but I'm losing sharpness in the foreground. I would like to maintain the sharpness in the foreground. Is there any clever method on how to combine a focus merge and a darker exposure for the sky? I tried it manually as well with manual image alignment and masking but the result was not satisfactory. All images were shot with the camera on a tripod. Thanks in advance for any help, Regards, Michael
 -
 In the Photo Help page for Blend Ranges it says "On the Layers panel, select a layer and then click Blend Ranges". But the Layers Panel does not have an entry for Blend Ranges. John
 -
The blend ranges tool is, for me, one of the top three affinity photo tools. With all the virtues it has, it still has two defects that in my workflow suppose a few thousand extra clicks every month, which I would like to save myself: 1.- Presets. Is it technically impossible to create the option to save three or four defined curves, which in the end are the ones I use 95% of the time, so that I don't have to adjust them a hundred times a day? 2.- It is extremely annoying that every time you open the tool it appears in the center of the screen, covering the image you are working with. The box should appear by default in the lower-right side of the screen, or at least appear where you left it the last time you used it. I hope to see these improvements that would undoubtedly make our work more fluid in some of the next updates. For the rest, great work and congratulations, very happy with the software. Thank you.
-
 Still the same in 1.8.0.585 and Beta 1.8.1.611:
 -
Start with a colour wheel image, add HSL adjustment, then turn saturation half-way down and luminosity half-way up. Now add Blend Ranges and pull down left node of right-hand chart. Colours like yellow are strongly affected but blue and red are hardly affected at all. Why is this happening? My guess is that lightness conversion in Blend Ranges uses luminosity perception, where yellow is seen as a brighter colour and blue a darker colour. However HSL luminosity is value-based and so shows the same amount of greyness. Hence we have a conflict in the treatment of luminosity. I don't know if it is a bug, but it is certainly bugging me as it clogs an effect I was trying to create. At the very least it is a usability defect as it easily causes confusion. Maybe one way to address it is with a checkbox on Blend Ranges that switches between perceptual (as current) and value-based luminosity variation. Thank you for your kind consideration and have a nice day.
-
 When you hit Reset on Blend Ranges, it only resets the current graph. This includes channels, so for example if you change R, G and B, then hit Reset it will only reset the visible graph, which can be rather confusing. A 'Reset All' button would be nice. Tx
 -
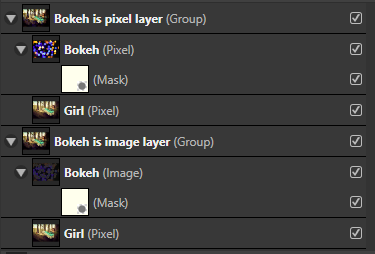
I came across a strange behaviour concerning image layers vs. pixel layers. In the attached file there are two groups each with the same layers: Well, actually there is a little difference between the groups: in the lower group the bokeh image is an image layer, in the upper group the image layer was rasterized to an pixel layer. Both bokeh layers have the same blend ranges: The mask layers in both groups are completely white. When the mask is switched off, in both groups the resulting images are completely the same. But when the mask is switched on, although as an empty mask it should not have any effect, in the image layer group the resulting image differs from the "unmasked" version. This looks like a bug to me. AP behaves as expected when blend ranges are reset. It looks as if the "white color" of the mask layer has some effect because of the setting in the source layer ranges. Well, only in the image layer group. Strange.... AP 1.7.3.481 Windows 10 GirlWithBokeh_Mask.afphoto

-
 Blend ranges are both easy and powerful. I would like to see a way to make the blend ranges a function of color (or hue). I have attached two different mockups. Option 1—the one with the curve like how blend ranges work now—would probably need (1) an option to pin the leftmost and rightmost points together to easily enforce periodicity of the curve, and (2) a way to shift what color is in the center. I used "color" in my mockups, but perhaps "hue" would have been a better choice.
-
Using layer blend ranges is an easy and powerful way to accomplish luminosity masking. I have seen discussions on the forum for how to accomplish saturation (and vibrance) masking. I propose adding saturation as a "channel" in the layer blend ranges, which would be a lot easier. I mocked it up:
-
 Hi everyone, I put up a blog post about using blend ranges in the way people often use luminosity masks. You can check it out here: http://theeagerlearner.com/blog/ Hope it's of some use to you & cheers, Simon
- 7 replies
-
- 4
-

-
- affinity photo
- blend ranges
- (and 1 more)
-
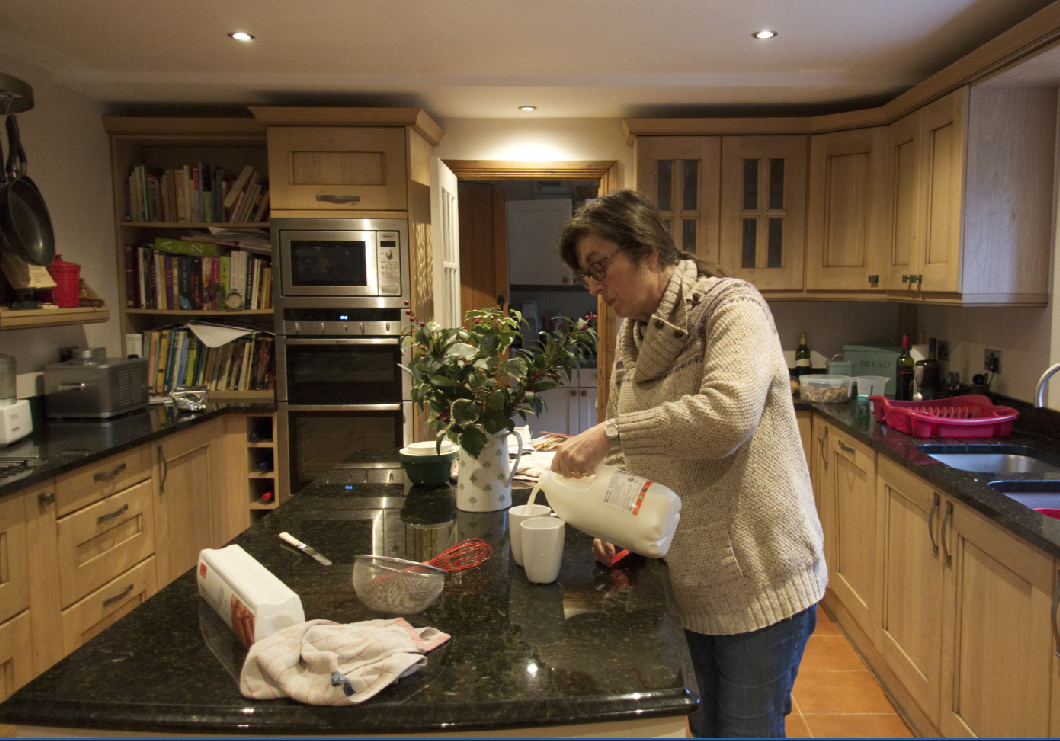
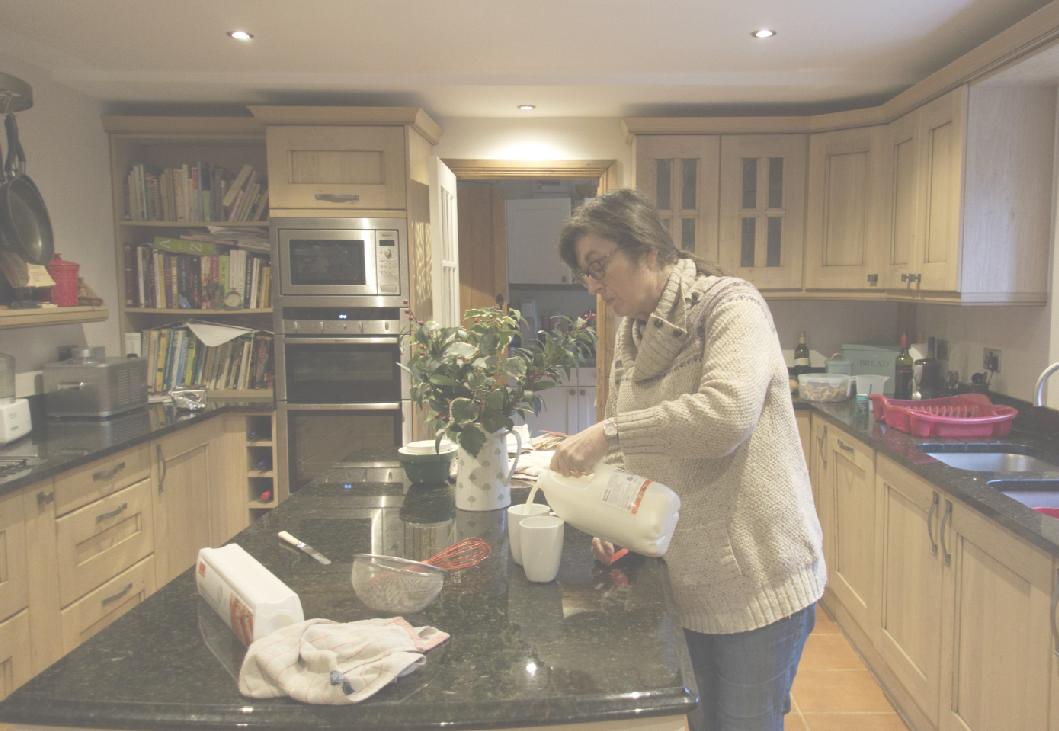
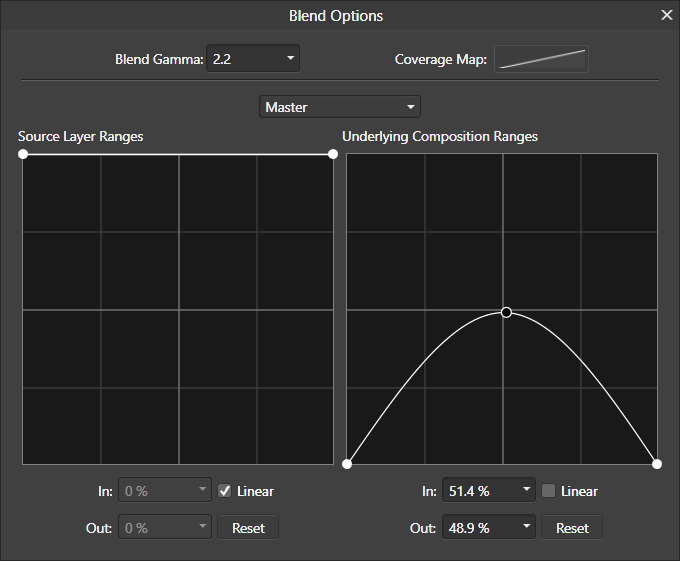
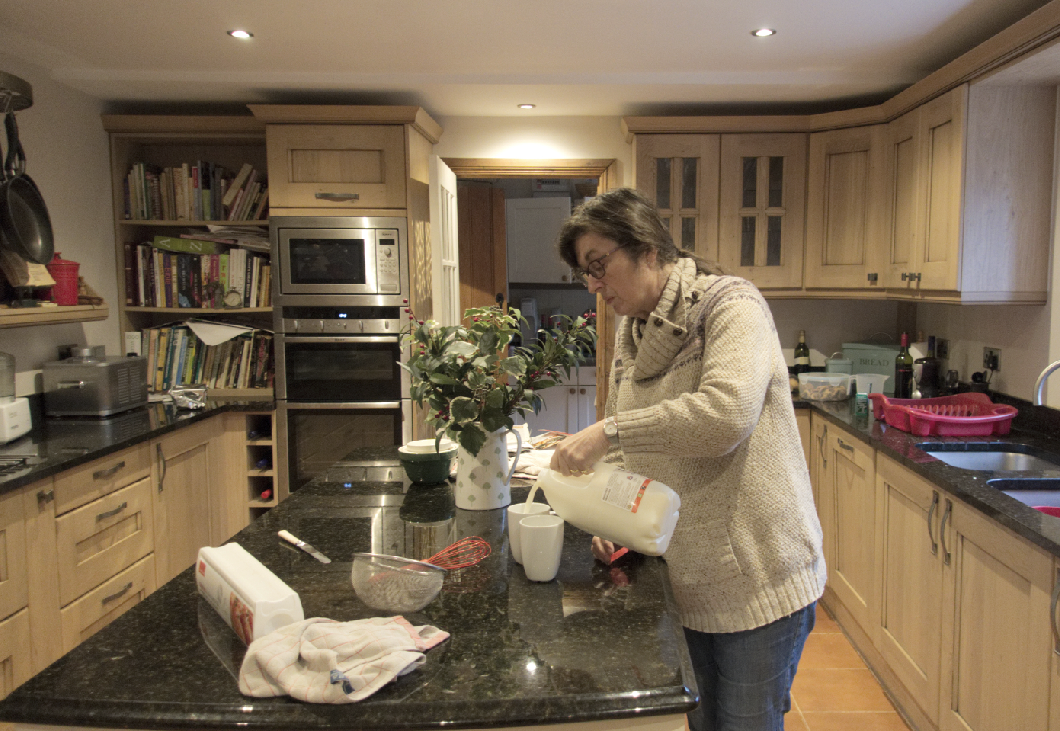
Here's a tweak I've just been playing with for working with adjustments. The general problem is that when you are applying an adjustment, you often don't want it to be applied as much in the darks and lights. For example here's a picture of my wife making coffee: Now if I add an HSL adjustment layer (Layer/New Adjustment Layer/HSL Adjustment) and slide up the Luminosity to make the picture lighter, it kind of goes hazy: A trick here is to use Blend Ranges. Click on the cogwheel in the bottom right corner of the HSL panel. Then drag both ends of the right-hand graph to the bottom. Uncheck the 'Linear' checkbox. Now grab the middle of the graph line and drag it up. This applies the adjustment more to the mid-tones and lets it drop off towards darks and lights. The result is much more pleasing. You can play with the shape of the curve (click and drag to add more points) as well as the adjustment. For example in the HSL panel you can drag up the Saturation to strengthen the colour. The same principle can be applied to any of the non-destructive adjustments. Isn't Affinity wonderful?
-
Affinity Photo includes an awesome "Blend Ranges" feature that I use to accomplish exposure blending with my photographs. It takes a little practice, but this tool is more flexible than Photoshop's "Blend If" sliders (because it supports customizable and non-linear luminosity feathering), and more efficient than Luminosity masks (smaller file size). I would love to see the efficiency of this feature further improved by the addition of presets within the blend ranges panel to create common blending curves, which would save me the trouble of frequently recreating similar curves over and over again. Presets such as "highlights only", "midtones only", "shadows only" or combinations of these would be a real time saver. It would also be great to see the histograms of the current layer, and composite histogram of the layers below, drawn behind the respective curve graphs in this panel. Without histograms it's hard to visualize how the luminosity information is distributed across the current layer and the layers below, and creating the blend curves becomes a bit more of a trial-and-error process to find the right spots in the X-axis to start or end your curve. Photoshop users have plugins like Raya Pro and Lumenzia that make exposure blending easier, although they suffer from poor UI and other issues. It would be great if Affinity Photo put some more effort into fleshing out the Blend Ranges feature for photographers who want to do manual exposure blending.
- 2 replies
-
- 5
-
-
- feature request
- blend ranges
- (and 3 more)
-
Following on from a previous post, I've created three sets of macros for selecting a part of an image based on five Blend Ranges 'luminosity' curves (nominally called Blacks, Shadows, Mid-tones, Highlights and Whites). You can download the zip file here (the forum doesn't seem to like zip files, so I put it on my website). A few points of note (more in the included .pdf file): The 'Preview' set just cuts out the selection so you can see exactly what is being selected. It also lets you inspect the Blend Ranges curves. The 'Select' set turns this into a selection in the image. The 'Blend' set does the same for adjustments and filters. Curve overlaps are deliberately symmetrical so together they should sum to 100%. All sets include all contiguous combinations, such as 'Blacks+Shadows'.
- 7 replies
-
- 6
-
-
- luminosity
- selection
- (and 1 more)
-
When you´re working frecuently with the blend ranges, it´s a little annoying that the window open always in the center of the image, you have to move it every time in order to fully aprecciate the effect of the changes you make.
-
 Hi there. I'm trying to find a workflow for combining several (5-7) bracketed images with brightness masks in landscape photography. Something similar to the Tony Kuyper panel in PS. The hdr module, for the moment, does not provide acceptable quality results. I've sailed through the meager material about using Blend Ranges to replace brightness masks. Lots of potential, and plenty of empty space yet. I would appreciate sharing your experience, your workflow, or some useful tutorial video on this topic. Many thanks in advance.
 -
 Do the devs know the equivalent formula of AD/AP blend options versus PS Blend options with their sliders? I want to believe there is an equivalent solution to make them match just not sure how to do it YET.
 -
One of the most effective tools in layers and masking, in photoshop is the blend-if section, hidden in the layers. I love the Blend ranges section, located prominently in the top gear icon above the layers! Wonderful. It really reduces the amount of work it would've taken if we had to mask instead of blending. Believe it or not, the Blend if tool you have in Affinity was my deal breaker for sure. Thanks! My only concern was how to use the liquify tool. I'm using it but cannot see it as I'm using it, before I hit Apply. I'm sure there's a tutorial for that. I will dig in the forum.

.png.2bdd4bd5519e9306690d4e15e24c4e62.png)
.png.f87fd08908a77289a060b1aed7fb64c3.png)