Search the Community
Showing results for tags 'workflow'.
-
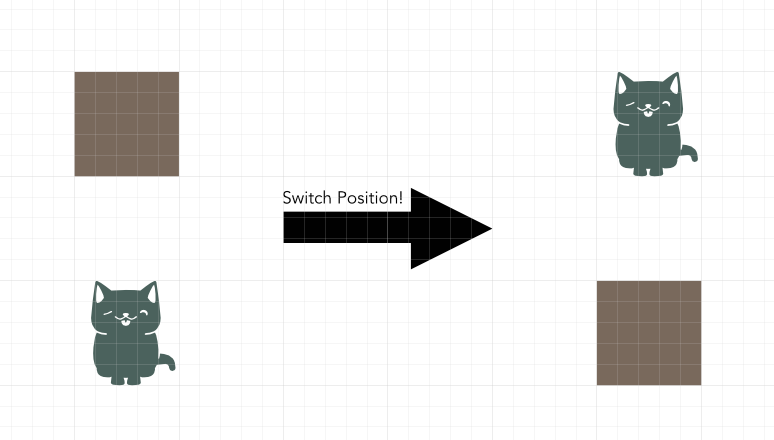
 When doing page layout work or screen design, it is extremely common that two objects on a page need to exchange places. The manual approach is rather tedious: Select one of them, drag it out of the page (or on top of the other), select the second object, move the second object exactly into the position of the firast object, and then to select the first object again and move it to exactly the same position that the second was in before. In some cases, even temporary guides or helper objects will be involved to ensure accurate positioning. A simple menu command or keyboard shortcut that just swaps the XY position of two objects would make this common task much quicker. Just select two objects, press a key and they are exchanged. Similar options could be created to swap the contents of two picture frames or to swap objects while maintaining the boundary rectangle by scaling them to occupy the same space.
-
I'm conscious this has been asked before but there seem to be no recent updates here in the forums. On the iPad, can we please have a meaningful default filename when exporting images? I am using Affinity on an iPad Pro, it is fully up to date. I have tried a number of methods to import my images in the first place, but the one that seems most efficient is via the iPad SD card reader which is reasonably quick (once it has built tons of thumbnails... every time), where the Photos app imports the files. My source images are RAW files, sometimes paired as RAW & JPG (Olympus OMD camera). I have seen on the earlier threads on this subject the comment that "Photos doesn't retain the filename on import." That may once have been true but certainly is not true now and hasn't been since before the last Affinity iOS update. Both FileBrowser and in Lightroom Mobile can see the exact original filenames, same as if I had imported to my laptop. Affinity has been left behind and insists on "Untitled.jpg" as the only default option, so I have to open one of those other apps up to remind myself what the exported jpg filename actually should be (if I want to be able easily to recognise later where the export came from, which I do). Terrible workflow, and gets in the way of processing a batch of photos. An enhancement would be also to add (insert, replace) other standardised filename stubs - personally I like to prefix the capture date, others might like to add an album name when working on a bunch of photos. Any chance of an update?
-
 Is it possible for a bitmap to follow a path? For example, I have a vector of a 2D string and I need a repeat logo to follow it as a path. I'm not sure how I can do this without manually editing the perspective of each logo, which I don't have time for. I'm really hoping this is can be done via bitmaps, but any suggestion is welcome!
 -
 I have bought the Universal license. Individually each program working so well but the connection between other Affinity products confused me comparing to other programs. so my question is if I am making a story book(which requires all 3 products) how to use all of affinity products efficiently? what is the suggested workflow in general? if there are videos for that I really appreciate it. to clarify, here are some questions: when do you jump between affinity designer to photo OR to pixel persona? how should I prepare my files for linked file workflow (instead of embedded) how to do a good project folder for all 3 products. AFP and AFD has pen tools but the usage is slightly different. Does AF products pushes me to use them in order ( do vector first then go to photo and paint for example) and so on... so I am open for any advice. please tell me how do you use AF products and what for? technical? painting? designing? because all of them should have different workflow.
 -
 Hey @Ash getting some additional transparency tool presets or the ability to add our own presets would greatly enhance my workflow. I find I am recreating the same setup all the time and the ability to either have or create and save a preset would be awesome. Currently I have created assets of the few I use often but the ability to create and save a preset to have it in the context toolbar would be nice. Examples would be linear with transparent ends with a solid centre or elliptical with solid edges and a transparent centre... or linear dashed, eg solid, transparent, solid, transparent.
 -
 Back in 2020 I suggested having more than one column of palettes either side of the main work area on Mac and was wondering if this is something which is coming to v2? One of the replies showed that this is available, but only on Windows. Is there a reason its available on Windows but not Mac? With an external 27" monitor connected to my Macbook and any Affinity app full screen, I have more than enough space for working, but my palettes are all crammed together because I also need to use it on my Macbook. I prefer having my palettes a click away rather than floating. I know my work area will be reduced on the Macbook, but I can hide/tab my palettes when working so I don't see it being that much of an issue. This feature is available on Adobe apps, and its the only thing I think really needs adding to make workflow even better. Any sign from the devs of this being added?
 -
 As mentioned in several Forum Posts already, Copy and Pasting Parts of Curve Nodes (selections of a single or several nodes of a larger curve) is not possible. This would make many workflows more intuitve and faster in my opinon. Here are some post discussing the issue:
 -
 I have used Adobe software for my photography for over a decade. I hate paying the subscription for it, but it does work very well for my purposes. I started using Affinity a year or two ago in hopes it would be a replacement but it didn't meet my requirements. Apart from the way Affinity "develops" RAW files, I can cope with any other differences between Photoshop and Affinity. I was looking forward to the v2 update in hopes that it would introduce a more intuitive way to "develop" my RAW photos but the workflow is still significantly lacking - or I don't understand to replicate my current workflow. My current process is as follows: Shoot photos. This could be a handful or a few hundred in a single shoot. Copy photos to PC. Drag-and-drop photos into Photoshop. This opens ALL of the photos in CameraRAW. Make adjustments. This is typically white balance, exposure, contrast, shadows, highlights, texture, clarity, dehaze, saturation, vibrance, color mixing, color grading, details, curves, and more. At this point, I can also quickly apply any of the dozens of presets I have created over the years. Once I am satisfied with the edits, I can quickly apply the same settings to the ENTIRE shoot. Now I can quickly sift through the images and rate them, apply color tags for sorting, and mark "bad" images for deletion. Save all "good" images as JPEG. Make further adjustments per image in Photoshop, such as cropping, object removal, retouching, etc. I am not suggesting a 1:1 replica of Photoshop's process with Lightroom or CameraRAW, but something very close would be perfect and allow me to completely replace their software. Is there a way for me to almost completely replicate the above workflow in v2? I've been watching the YouTube tutorials but they only seem to develop multiple RAWs when they are focus-stacking or merging.
 -
 Serif guys, I am a technical writer/business analyst, and love Serif Affinity applications. Too often companies use Microsoft Word for designing and publishing documents. Many would argue Word is not the right tool ─ I agree. However Word provides a significant advantage... Everyone uses it. It's not about familiarity or convenience, that resistance is relatively low. It's about document portability. Usually one person or a small team is responsible for integrating content and desktop publishing. However, often documents must be passed to managers or SMEs (Subject Matter Experts) for input and technical accuracy refinements. Affinity Publisher has no mechanism for supporting that workflow. Therefore it is not practical to use Affinity Publisher in this massive market. I believe two things would facilitate this workflow: Create a comment/revision mechanism in Affinity Publisher, similar Track Changes in Microsoft Word, or Document Review in Corel WordPerfect. Develop Affinity Publisher Lite. Purpose: provide extremely simplified Affinity Publisher capability for text and color editing, comment annotation, and other tools designed around the needs of document contributors. This simple application should not provide page layout, typography, photo, or vector editing capability. Other enhancements could be incorporated later: 'Mark Section for Editing' that locks all other sections, preventing unauthorized or accidental changes Cloud based synchronization of edits (syncs only rich text and comments) Collaborative editing ─ similar to Google Docs or Word 365 Basic Edit (or Lite) Persona in Affinity Publisher that provides only Affinity Publisher Lite functionality, preventing unwanted changes This capability is also beneficial for design studios and freelancers, for collaboration and approval with their clients. Thank you for considering my suggestion.
 -
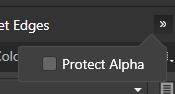
 An accessibility improvement such as a hotkey for the "Protect Alpha" option would cause a great improvement in digital painting workflow as this option is used many times throughout the process of a single digital painting in most techniques. In Photoshop it is possible to assign a hotkey for this as far as I know. In AP the only way to do this is by clicking the button that hides in a dropdown menu (shown on the attached pic) when using Affinity on a laptop (which has smaller screen than desktop monitors - on a big desktop monitor the option is normally showing in the same toolbar). There should also be the option to customize the tools in the said context toolbar. When it comes to the brush context toolbar, the customization option would allow me to hide the "Symmetry" and "Mirror" tools since I hardly ever use them and make space on the screen for the "Protect Alpha" tool that I use all the time. I've seen someone on the Affinity Photo forum raise tha case of "Protect Alpha" hiding in a dropdown menu. I believe that the customizable context toolbar would help not only digital painters often needing to toggle "Protect Alpha", but also users across variety of disciplines to improve their workflow in Affinity software.
-
 Working on a hard bound full color book for a client that is looking to turn this 8x10 into eBook formats. I don't see a path forward at the moment. Searches here come up pretty limited, web searches say to copy/paste to Word..... Reddit's got nothing yet.. There has to be some workflow for doing this and please don't say export to PDF because that hard sets margins and creates basically a flip image book.
 -
 In short: Slices ought to be retained in Data-merge generated files and propagated in generated pages. Scenario: User sets up a work file using Publisher and Designer tools. Using Publisher, 'Data Merge' is essential to position and populate the file with variables. Using Designer, slices are set up in the same file so that, once data merge file is executed, files can be exported quickly. Data is imported, looks fine, user executes 'Data Merge manager' -> 'Generate'. Generated file looks fine at first but in Designer slices setup is gone! Replaced with UID-looking whole-page slice. Slices cannot be copy/pasted (not clear why, when it could save time in setups and dimensioning), User has to come up with workarounds. Workarounds will increase possibility of error and timewaste. Why is this a problem? This behaviour is detrimental for user since it: results in unnecessary loss of user data and time, requires generation of slices for each future data-merge generated file, requires potentially problematic workarounds. Expected behaviour: Slices are retained in data-merge generated file. This behaviour would be then coherent with retention of text-styles, master pages, swatches, preferences, and other user-set file characteristics and assets in data-merge generated files.
 -
 As a landscape photographer I take a lot of exposure bracketed photographs. For a while I used to blend these exposures using HDR software, until I learned that there's a better way that produces a more natural-looking result and gives the photographer more control: manual exposure blending. Affinity Photo includes an awesome "Blend Ranges" feature that I use to accomplish this task. It takes a little practice, but this tool is more flexible than Photoshop's "Blend If" sliders (because it supports customizable and non-linear luminosity feathering), and more efficient than Luminosity masks (smaller file size). However, the process of actually setting up multiple exposures as layers ready to be blended in Affinity Photo is currently pretty manual and tedious. You have to open one or more of your files, and then drag the others in to create additional layers, or create a new stack and then cancel the stack to unstack the layers. I do this frequently enough that it's irritating that this isn't more efficient. Since switching to Affinity, I really miss the streamlined workflow from Adobe Lightroom, where I can select multiple images and choose "Open As Layers In Photoshop," which takes care of all of the setup for blending multiple exposures, with the added bonus of also not creating multiple intermediate PSD or TIFF files. Now, obviously Adobe has no incentive to support an "Open As Layers in Affinity Photo" option for Lightroom out of the box, but perhaps an enterprising developer could write such a plugin for Lightroom if only Affinity Photo would actually support the ability to open multiple files / data streams from a RAW processor as layers in a new file... In my dream workflow, it would be really neat if Affinity Photo integrated directly with Phase One's Capture One PRO, for a similar workflow to how Lightroom integrates with Photoshop. Perhaps Phase One would be receptive to such a collaboration... I suppose the gist of my feature request is that Affinity Photo is a fantastic program, but sorely lacking in some workflow/efficiency areas that matter quite a lot for people working with lots of images. Adobe, for all their faults, seem to have figured this out, and their ecosystem of products that work together is a great strength of their offering. In the absence of a similarly large suite of complementary apps, Affinity would do well to offer some basic hooks into Affinity Photo that developers can use to create a better round-trip experience when users are working with multiple apps in concert to catalogue and edit their photos.
- 11 replies
-
- 1
-

-
- feature request
- improvement
- (and 1 more)
-
 HI, I'd like to better understand how to best implement an ACES workflow in Photo for 3D still EXR renders. My goal is to be able to work in the expanded colorspace that ACES provides for editing and be able to export my images for print (with an AdobeRGB profile) and web (sRGB). I'm currently using Octane as my render engine which at this time will only render to the sRGB primaries in linear EXR format. ACES is planned for the upcoming release however so I'd like clarification on 2 scenarios. If anyone has deeper insight into this I'd really appreciate the feedback. I watched the Affinity Photo OpenColorIO video (https://affinity.serif.com/en-gb/tutorials/photo/desktop/video/329071149), but trying to apply this process with ACES just added more confusion. @jamesritson this would be a great topic for another video! (also thanks for creating all of the tutorial videos, they're well done and very helpful!) Scenario 1: Converting a linear (sRGB) EXR render to ACEScg for editing and then exporting either an sRGB for screen or an AdobeRGB image for print As far as I understand it, there are three components to this process: Setting your color preferences OCIO config file to the ACES config (I'm using the latest 1.0.3) The 32-bit Preview panel Display Transform The OCIO Adjustment layers For the 32-bit Display Transform, what do I need to set it to in this scenario? With ICC it looks exactly as it did in my IPR in Octane. Following along with the video this would seem to be the right approach, but in the video he's using Filimc Blender which I behaves differently from ACES and I'm wondering in this case if this same approach (ICC display) works properly when converting and editing in ACES. With the 32-bit Preview OCIO Display Transform set to sRGB (view transform) and ACES (device transform) it looks darker and more green. (my screen is calibrated to sRGB), though the exposure adjustment behaves completely differently for OCIO / ACES and is much smoother as I would expect than when the DT is set to ICC. I'm assuming that the green tint is due to the fact that I hadn't added an OCIO adjustment layer. When I add an OCIO Adjustment as Source: lin_srgb, Destination: acescg the tone balances out, but the overall image is darker. I'm assuming that this is the look of the ACES transform on a linear sRGB image, but I'm not certain I'm setting this up correctly. For the OCIO Adjustment layers what would be the correct setup? From what I understand I need one OCIO layer to specify the input source type and destination type which I set as lin_srgb and acescg respectively. Then for the output I would create another OCIO layer and set it to the reverse?.. Source: acescg, Destination: lin_srgb? How would I export to AdobeRGB or another space like ROMM in this scenario? Scenario 2: Opening a linear EXR ACEScg render for editing and then exporting either an sRGB for screen or an AdobeRGB image for print I'm just future proofing here and bloating this post, but assuming that Octane updates this year with an ACEScg render option would I just append an 'acescg' siffix (my_render-acescg.exr) to the file and open it in Photo? Do I need to add an import transform OCIO layer to specify that it's ACEScg or do I just create an out transform layer? Finally 2 last questions: I'm assuming that all of my image adjustment edits will be done between the input transform OCIO layer and the output OCIO layer, please correct me if I'm wrong.. If I open a multi-layer EXR with multiple render passes, do I need to create an OCIO Adjustment layer for each pass layer or will one at the top be enough? Thanks for bearing with the 1000 questions here and I greatly appreciate any insight I can get on setting this all up correctly!
 -
 I've been using the Affinity Photo application for some time now, and I find it extremely useful for a great many tasks. Consequently, I recently purchased Publisher and am learning how to use the software; again, I'm very pleased with both products. Recently, I have decided to use Publisher to prepare PDF files for Blurb, etc. Now, I have a simple question about workflow: Is it better to export my photographs as JPEGs (most, if not all POD sites require JPEGS, sRGB, etc.) with the exact dimensions that I have provided for my Picture Frames within the Publisher document, using the resampling algorithm provided by Affinity Photo, or should I just export the JPEGS full-sized, and depend upon Publisher's toolbox to perform the scaling, resampling, applying whichever algorithm it uses (bicubic, etc.)? I apologize if this is a simple question, but I make photographs not photo books (although I like learning new things). Thanks for any helpful responses/suggestions. Tom R
 -
Sometimes it seems to be valid to remind Affinity that moving a million objects in Lightspeed (what is absolutely great!) is the problem of fewer people than beeing able to use the programs in an effective way. I'd like to bring up the handling of windows to program managers attention. Just to clarify the issues in a visual way I'd like to demonstrate how it could be done effectively in comparison to Affinity products - using PS 6 as an example. Just a simple "undocking" of a window - PS doesn't change the zoom factor, builds the new window neatly around the resulting window and places it within the working area: PS vs AP 1.mp4 Next example - Zooming in and out PS leaves the content in the center of the window - regardles wht the zoom factor is so you can instantly go on working on the document - unlike AP. The document is moved out of the center and after movin in it can't be found any more ... plenty of additional steps necessary to go on working. PS vs AP Center 3.mp4 3rd example - Resizing of windows as long as there's space (this is an feature in the PS preferences - would be nice and save a lot of additional keystrokes in Affinity): PS vs AP Windows Resize .mp4 As well you can see that the toolbar in PS is roughly 60% of the toolbar in AP ... would be nice to get a smaller toolbar as well and increase workspace... If one of the abouve mentioned features should be available in Affinity I could not find it - and I'd be happy if someone could point it out to me 🙂 Cheers, Timo
-
- 1
-
-
- workflow
- windows handling
- (and 1 more)
-
 Hello designers! I have a new Affinity Designer tutorial for you. This one is all about the pen tool & node tool. It's a long one and goes from beginner to advanced and I cover pretty much everything possible. I also go over the corner tool and there are a bunch of exercises. Enjoy! https://www.youtube.com/watch?v=3iowyjv8ezA
-
- 2
-
-
- affinity designer
- pen tool
- (and 5 more)
-
 As a capture one user, I am having trouble smoothly integrating AP into my workflow. I can easily export a tiff file and have AP open it for editing. However, when I finish, there does not seem to be a way to safe the file in a manner that C1 recognizes. A "save" write an AP file. "Export" writes a file but C1 doesn't pick up on it. So far I have to export the file as a tiff or jpg, then import it back into C1. This is a real pain since I have to retype the name the folder in C1 to put the edited film into carefully or the image will end up in the wrong place. Any way to make this work smoothly, like I assume it would for LR or Aperture?
 -
 Hello everyone! I'm new to the Affinity scene and love it so far. I've been a Lightroom user for years and decided that it's time to put the presets and sliders aside for a while and really take control of my editing. Enter Affinity. The purpose of this thread is to discuss workflows used when editing multiple photos from a photoshoot. I can't seem to figure out a truly effective way to edit 50+ photos without creating a mess. Any pointers, videos, web articles, or books are welcome. Thank you all for the support and I look forward to reading your responses.
 -
 Hi there. Just found out that you are restricted in terms of file location on iPad. Is there a logical reason why Designer and Photo do not support locations like Google Drive? Why is a proper exchange / sync workflow only allowed within the Apple ecosystem? Even iOS now lets you use Chrome as your default browser
 -
 Hello, (Sorry if my english is not perfect, not my first language) When i'm digital painting, I often need to switch between the brush and the eraser very quickly while keeping the same brush style, size and opacity. It's really annoying to just want to erase a tiny mistake, switch to the eraser and realize your eraser brush is in a completely different style and having to change all its settings just for one click. With the pixel tool, you can just press Ctrl to quickly erase, it's so perfect, I wish it was the same on the paint brush. It's one of the most awesome feature in Krita, the "eraser mode" which does exactly that (keeps your current brush setting) when you press E, and you can kind of do it in Photoshop with the "Eraser" blending mode of the brush. This goes for the brush tool in the Pixel persona of Affinity Designer, but also for the brush tool in Affinity Photo. I would love to see this feature go in, it's a tiny change but it makes a huge difference in the painting workflow Feel free to tell me if there's another way to have the eraser keep your paint brush current setting, i'm new to the software ! Thanks for the awesome software and the great price ! Alexandre
 -
 Recently I had to open an Adobe account for work reasons. The biggest thing I noticed while making the move is how much thought has went into the UI of Affinity products. Simple tasks are a lot easier in Affinity and overall it's a nicer platform to work in. Affinity does lack in features, especially Vector warping, distorting, etc. Overall Affinity continues to impress and I think it wont be long until they catch up. In terms of working experience, Affinity is already ahead.
 -
 I LOVE this editor, and I still can't believe I picked it up for 25 bucks! It's a very powerful piece of software and I'm overall very satisfied. The one issue I have is, I struggle to organize my photos when using this Application. Viewing photos with just the windows file manager because I shoot in RAW + JPEG, and the Windows photos app does not offer easy access to tools like histograms or exif data. I could just open the file in affinity one by one, but clicking through hundreds of photos and having to exit out of each of them every time would be far too slow. I could also use other programs like Lightroom or some other raw viewer but having it all in one piece of software would greatly increase my workflow, as well as not costing 20 bucks a month. Is it possible to make a raw catalogue persona or something similar? You'd scroll through your photos and clicking on them, you could easily see all of the tools you would in the develop persona, including things like over and underexposed areas. The only difference is, you wouldn't be able to edit the photos until you choose one to take into the actual develop persona. Also, affinity would automatically hide the JPEGs, but attach them to the RAW file equivalent if copying is needed for stacking, panoramas, etc... (of course you could change it to not attach the JPEG, or show JPEGs along with the RAW files, or other options). I don't know if many people would care for this but I really wanted to throw this out there because I think that's the only thing that really holds this astounding application back.
 -
A very plain wish: When the focus is on the "Pages" panes ... it would feel natural to me to scroll through the pages with the cursor keys ... but by the looks of it there is absolutely no way to use keys to proceed to the next or previous page. Even enabling the "End" and "Pos1" key would be nice. Maybe this functionality could even be active if the the main window is active, you have the "Move" tool selected and there is no frame selected ?! Aside that I find it very hard to recognize what is the currently active page. This thin frame marking it is hardly visible - even harder, when the content of various pages is layoutwise pretty similar. So it always takes this extra-extra effort to find out on what page you are on in the page panel. Cheers, Timo
- 8 replies
-
- 1
-
-
- pages panel
- workflow
- (and 1 more)
-
 I want to deliver uncompressed 16-bit TIFF files to a client (unfortunately, I don't know the specifics on how they will be printed, like size, paper stock, etc..,) so I would like to give them the best image I can, then they can do what they need to on their end to meet their print needs. So I'm trying to work out the best workflow. There are 12 images I need to deliver, so I was going to batch process them into 16-bit TIFF files (from the RAW files), then open them in Affinity Photo to edit. Keeping in mind that AP can't export uncompressed TIFFs, what's the best workflow from this point? Open in AP, edit, save as TIFF with layers, then flatten, and deliver as is? Assuming that the TIFF I'm working with is uncompressed. Or , edit, save as TIFF with layers, then open in Preview and save as an uncompressed TIFF? Is there anyway to work with the photo in AP's file format, then get it back to an uncompressed TIFF? Not sure if I'm over complicating things, but all I really want to do is Take my RAW file, edit in Affinity Photo, and deliver an uncompressed TIFF. (The client actually requested a EPS file, because they will use Illustrator at some point, but that's not my problem lol.) Thanks for the help.