Search the Community
Showing results for tags 'warp'.
-
I'd like to share a labor with you all. I welcome your thoughts and critiques (and tips for next time too), my friends are either non-photographers or are too nice to tell me what they think. My unit has 24-hour operations so it's near impossible to get everybody together at once. Instead of waiting for a down-day, we just took photos at different times on different days and would splice them together. We had the option of doing sun-sync and trying to catch the shadows at the same angle each time, or just "storm the beaches of danger" and take the photos at wildly different times (my idea, to my regret at times during this project). My intent was to get a sunset, early morning, and mid-day shot for maximum contrast, but instead I only got about a 5-hour spread represented. Taken with a budget D3400 using kit 15-55mm lens and a borrowed D810 using 35mm prime. Sky replacement was done by the plug-in "Uplift - Epic Skies". I had to warp the photos (the left side crazily so) to get them to line up. Masks and adjustment layers on each. The folks and the hangar behind them were also taken separately from different photographs (one with the hangar roof visible and one with just their bodies/faces for clarity (except the right panel, I couldn't zoom in since I was using the prime lens that day), so five photographs (not counting the skies). I also had to clone the sides and ground because I didn't have enough coverage for an 8x10. Biggest errors I see are (1) it's not centered--that's my bad, I was focusing on the doors when I took the photographs and didn't realize the doors aren't centered on the roof (agh!); (2) the formation isn't straight (I'm thinking I could have done a last perspective shift after the entire thing was composed to level out roof horizontally and the formation horizontally at the same time); (3) many of the door windows don't line up; (4) the roof is masking-clipped, especially on the left (all that warping did a number and I wasn't careful on the cleanup). All told, 11 hours of work (I'm very... very slow at doing this)... 2.5GB file size (still can't figure out why, I think all the adjustment layers and masks maybe?)

-
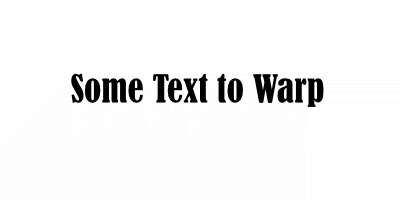
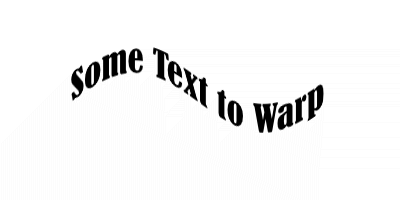
Some time ago I presented a formula to plug into Equations to warp text along a wavy baseline. I promised to create a macro to perform this, but never got round to it. Well here is that macro and a library containing it. Wavy Text.afmacro Wavy Text.afmacros The transformation is just a sine/cosine curve: y=y-(h*a/3)*(b*sin(360*x/w/c)+(1-b)*cos(360*x/w/c)) The a parameter determines the amplitude. The default is a=0.5, which creates a wave that reaches about half way to the top and bottom of the layer. The b parameter shifts the position of te wave along the horizontal axis. The c parameter affects the wavelength. Reducing c gives more waves along the x-axis. If you start with a text layer such as: and apply the macro with the default parameters, you get: The macro is designed to operate on a text object on a background. It needs the background to give it room. It begins by rasterizing the text to a pixel layer. It uses the height and width of the background layer to determine the amplitude and wavelength, not the height and width of the text itself. To use this, I would suggest creating a new document of a size to hold the text, then warp it, then place or copy it into the target document with an appropriate blending mode. John
-
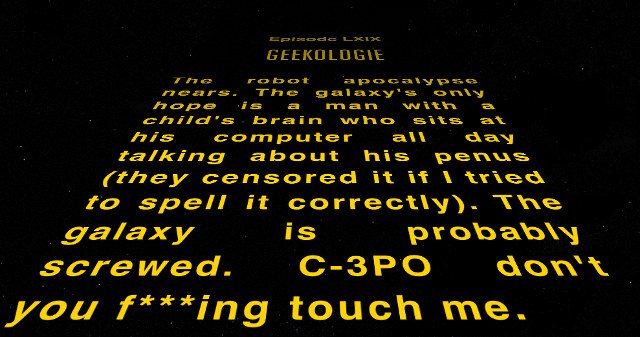
 I need to warp text like they do in the Star Wars intro. I can’t figure it out. See the example. Howwwww?
-
 I'm sure its been asked a thousand times but is there any chance of a similar function to Inkscape's path effects being added to 1.7.0 << if it were to happen I would be more than happy to pay for the upgrade from 1.6 A very simple example is shown in this video: https://www.youtube.com/watch?v=aotGj9iJB4U
 -
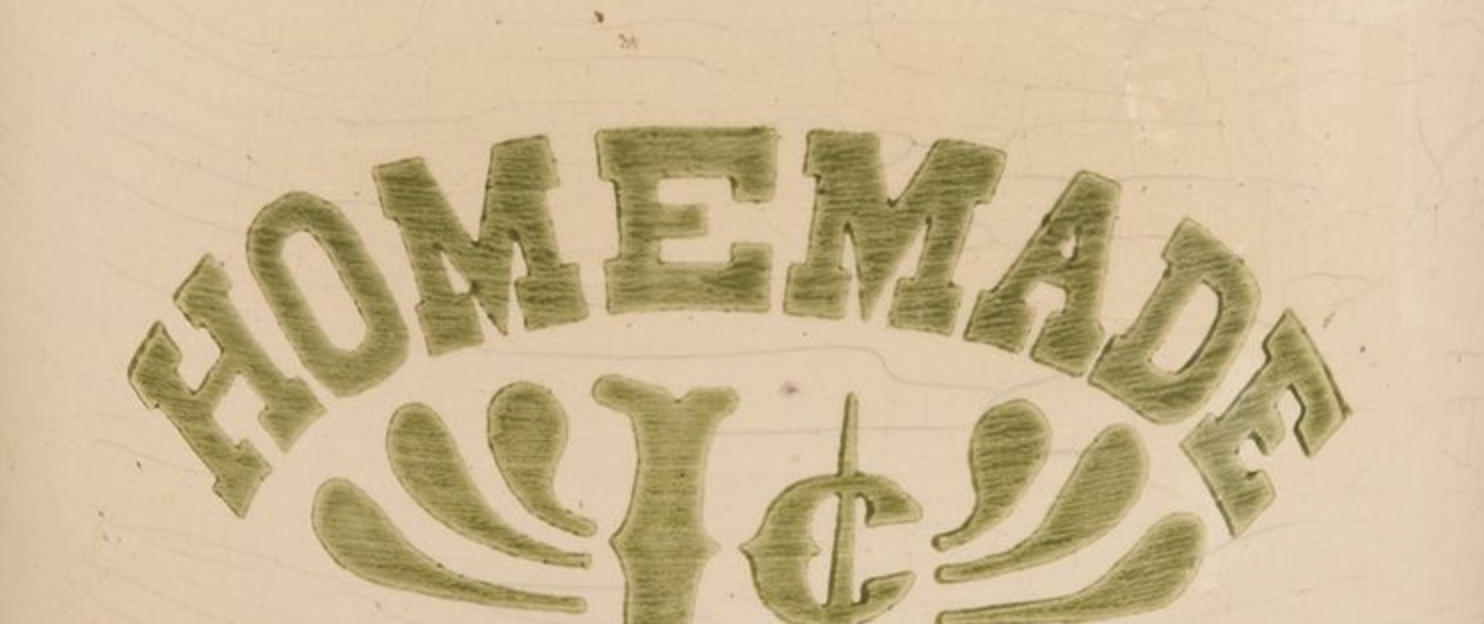
I am trying to warp or manually curve a type design. I am baffled that a vector design program doesn't have this feature...it's a critical tool for any vector design. Type on path is NOT what I want because that tool does not address the bending perspective that warp creates. (see homemade type solution) any suggestions or advice?
-
 I took a photo recently of two skyscrapers that are close to each other. I took the photo at 28 mm on my Canon T7i. The buildings do not appear straight and I tried to use both the single and dual plane perspective tool and cannot seem to solve the problem. I have attached the image. The file is 10.9 Mb and uploads are failing. Can you provide me with another method by which I can provide you the file?
 -
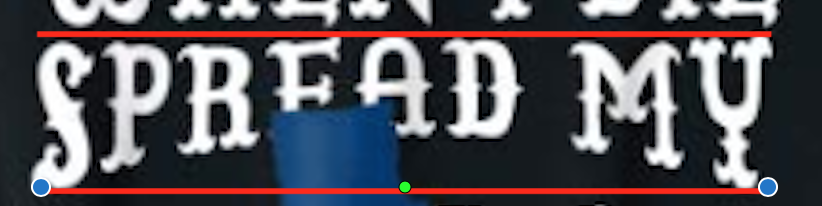
 I attached a screenshot below. My question is - how do I manipulate text like the picture to curve/warp only the bottom or top part of the text? I understand that I would likely have to convert the layer to curves. But after that, what would I do to keep the top of the text on a line, and and curve the bottom of the text as it looks in the picture. The red lines are added to emphasize what I mean. Thanks!
-
.thumb.jpg.dabc15530a2a67d371244c9bef26f8da.jpg) I'm trying to make some sporty text logo and was wondering how best to do the warp effect where the top is straight but the lower edge/baseline of the text is curved. In illustrator you go to Effects > Warp > Arc lower, but was wondering if Designer has something like this?
I'm trying to make some sporty text logo and was wondering how best to do the warp effect where the top is straight but the lower edge/baseline of the text is curved. In illustrator you go to Effects > Warp > Arc lower, but was wondering if Designer has something like this? -
Include ‘ from contextual toolbar. Select source instead of destinatiion and be sure to show grid is selected ‘ see Jsmes Ritson tutorial Panorama Disortion Correction Https:/Vimeo.com/170633074
-
 Oh dear ... seeing the amount of excellent stuff that has been created on the site, I'm almost embarrassed to ask my question. Almost. It's quite simple, really, but it's just about driving me mad. Imagine - Draw a rectangle to simulate a long banner which is going to hang from a wall, with three eylets, top & bottom. Superimpose text. Now, when a real banner is hung, it will distort and droop where it is unsupported - ie. in between the eyelets. The text, of course, will distort with the banner. How do I do that in Designer? I can get the banner background itself to do it (sort of), but how about the text? Can't find anything in the tutorials which would help. I just KNOW I'm going to feel foolish when I'm told, but, at the moment, I'm willing to risk it !! Oh - just in case you haven't already guessed, this is my first outing with Designer.
 -
 Hello, How to distort text like in Adobe Illustrator like a flag or arch ? How to distort horizontly or verticaly ? Thanks for advices.
- 5 replies
-
- 1
-

-
- artistic text
- designer
- (and 2 more)
-
 Any Distortion, Warp, or Perspective distort features soon? This year? Any date release? I need to know if I need to change apps. What is everyone else doing to get around not having Distortion or Perspective distorts in Affinity Designer? Any tips?
- 241 replies
-
- 26
-
-

-
- distortion
- warp
- (and 3 more)
-

Distort / warp feature affinity designer
Guest posted a topic in Feedback for Affinity Designer V1 on Desktop
Dear serif. I am a logo designer. I bought affinity designer for logo designing. Every logo designer needs mockup But affinity designer doesn't have warp effect so you can't have mockups. The only way to use mockups is by buying affinity photo (50$). Dear serif. Be sure that i won't pay another $50 And if i didn't get the warp tool in the next update be sure that i will leave this program -
 I have traced logo in Affinity Designer. I have object open book cover. I want simply put logo adjusted to cover. Idea ilustrate sample picture: On X and Y axis is simple - click on object, put value in navigator or move by Move Tool [V]. Using small circle I can rotate object. I want distort object to achieve effect similar to circle with shape on the left before text Dodo Case - it is what I mean by adjust in Z axis. Normally I would use distort or mesh tool but in AD is not available. I try select object and use Node Tool [A] to make this, but I'm not very happy with result. I have logo with man with a lot of points and adjusting this is quite troublesome (I have two groups - first is a complicated shape and second are bunch of simple circles). I try use S in Navigation to shear object and is at this time the best option for me. So then only available option is use Node Tool or S in navigation to achieve adjustation on Z axis or maybe can you sugest me another and better aproach?
 -
 Firstly, I wanted to take a moment to thank Serif and their programmers for making such a wonderful piece of software. I'm looking forward to one day eventually making the jump from Adobe but I thank you for giving me hope. I already purchased and strapped in for the ride as I know that you lot are going to accomplish amazing things. This is all just constructive criticism and feedback from someone who wants to be able to use your product in a regular and professional way. A feature you really need to put towards the top of the update pile is the Shear/Skew tool for text and objects. Shearing and Skewing fonts and objects are things I do a lot of when I'm working with Adobe Illustrator. It's not a matter of "if" I use it because I always end up using it to some degree at one point or another when I'm working on different projects. For those who might not know the tool by name but know it in function. Shearing/Skewing Shapes Tutorial Shearing/Skewing Fonts Tutorial This is a type of feature I would need to have included in the Affinity package if I were to ever make the jump from Adobe. The tool is simply too valuable for me as a designer. This being said, Affinity DOES include a transform menu (props where earned) within their software which gives you slight adjustment to what objects and font you're working with. The problem is it simply does not work in a way which is smooth and freeform like it exists in Illustrator. I cannot use transform in the same way I can use Shear or Warp. I've included the above links to give the programmers and the other members of the community the level of functionality I am looking for with regards to a Shear/Skew tool for the Affinity Designer. I would hope this is something which is actively being pursued as it's certainly something that would be essential. Thank you in advance for reading my thoughts and concerns and I wish you all success. All The Best, -Copernicus
 -
 Is there a way to warp an object into a certain shape in Affinity Designer?
 -
 Is there a way to distort vector artwork along a defined shape? Is there a way to simulate tilting it backward into space, skew or warp the artwork?
 -
 Hello again. This time I want to provide another round of suggetions for Affinity Designer Pixel Persona or for Affinity Photo for Windows: Important: - Clonning stamp/healing tool - Save selections for later use - Twist/Warp objects and textfields (like to fit a label in a bottle) - Content aware (to fill empty spaces with pixels from an image) - Effects (liquify, crystalize, clouds, etc.) - Create an editable shape from a selection and save the shapes - Dotted stroke style - Animator Persona (GIF) - Distort and Skew Tools - Save document settings (width, height, paper format, resolution, color mode) Optional: - 3D Persona (import and edit 3D models, .collada specifically from Blender) - Knife tool to cut shapes in a half - Numeric stepper or slider for the font size box - Polygonal Lasso/Selection Tool - Channels (R,G,B,Alpha, and delete/duplicate channels and making selections from them) I'm ready to purchase both AD and AP for Windows when they are released!
 -
 Hi, i would like to create a logo like the well-known one from "Everlast": I tried with an eclipse and text to path: As you can see it doesn't look like the original and i'm not sure if it's even possivle to recreate the in this way. Maybe create TWO eclipes, overlay them, do an invert or something? Do i really just need a shape like the Everlast-logo? Or does the "text to path" only apply on the bottom line of a shape and not also on top? Thanks! NBG
 -
 Just came across an interesting challenge: I was trying to warp an object that was positioned almost diagonal (about 35º). This emerged as a challenge for the current warp system (or quite possibly my understanding and use of it): it's exclusively aimed at horizontal and vertical warping. When you set warp points, they form a grid that has a mainly horizontal and vertical focus which meant fudging to get the distortion I was looking for. Instead of being able to rotate the warp grid basis and just tweak what I wanted, I had to rotate the image first, warp what I wanted and then rotate it back. I know that warping and mesh are mainly aimed at perspective corrections (hence the horizontal/vertical focus), but adding some form of rotation of that base orientation could offer interesting new possibilities. (and yes, I'd love to see this in AD too, but one thing at a time ;) ).
-
- 1
-
-
- warp
- mesh.rotation
- (and 2 more)
-
 Is there a way of wrapping text around an object? In Adobe Illustrator its referred you can adjust the warp?? PLEASE HELP!!!
 -
 Anyone know of any out there?
 -
I was wondering if anyone has made a suggestion to a warp feature. Adobe Illustrator has one where you can warp text and objects with arches, arc, upper and lower arc, flag wave, fish eye, inflate, etc. I believe this would be a very welcome addition to the features that Affinity Designer can offer.
-
 I was wondering if it was possible to warp text in Designer. I attached an image with what I am trying to accomplish.
-
 Hi, I was wondering if Designer has anything like the warp feature in Illustrator. I have been using Designer for a project and I can't seem to locate it in any of the menus. I figured I am probably missing it somehow. If it doesn't exist I hope that it is planned in the future. Also, when I created a new document I saw that you could include a margin but no bleed. Will that feature be added at some point? REally enjoying your program so far. If I can figure out how to implement the two features I mention above this will be a nice replacement for Illustrator for me. Thanks!