Search the Community
Showing results for tags 'vector' in content posted in Share your work.
-

-
The Wall Affinity Designer | 1840 x 800mm 300dpi | Mixed raster and vector but mostly vector! Used Untamed: 'Planetary Toolkit' of for the Sky
-
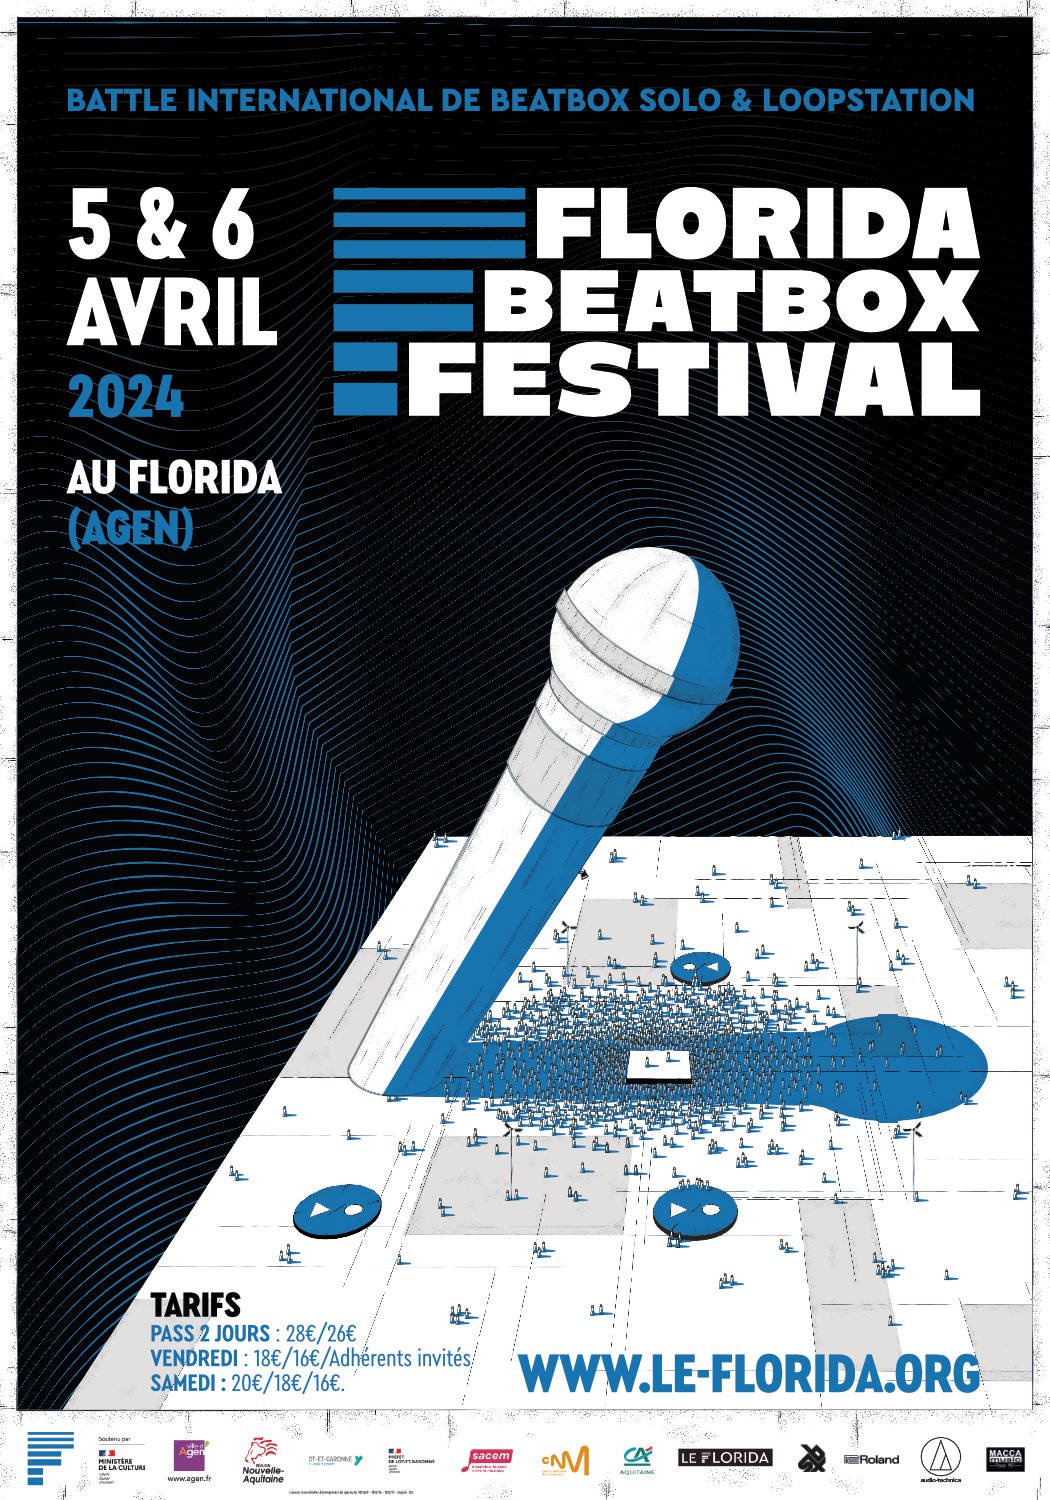
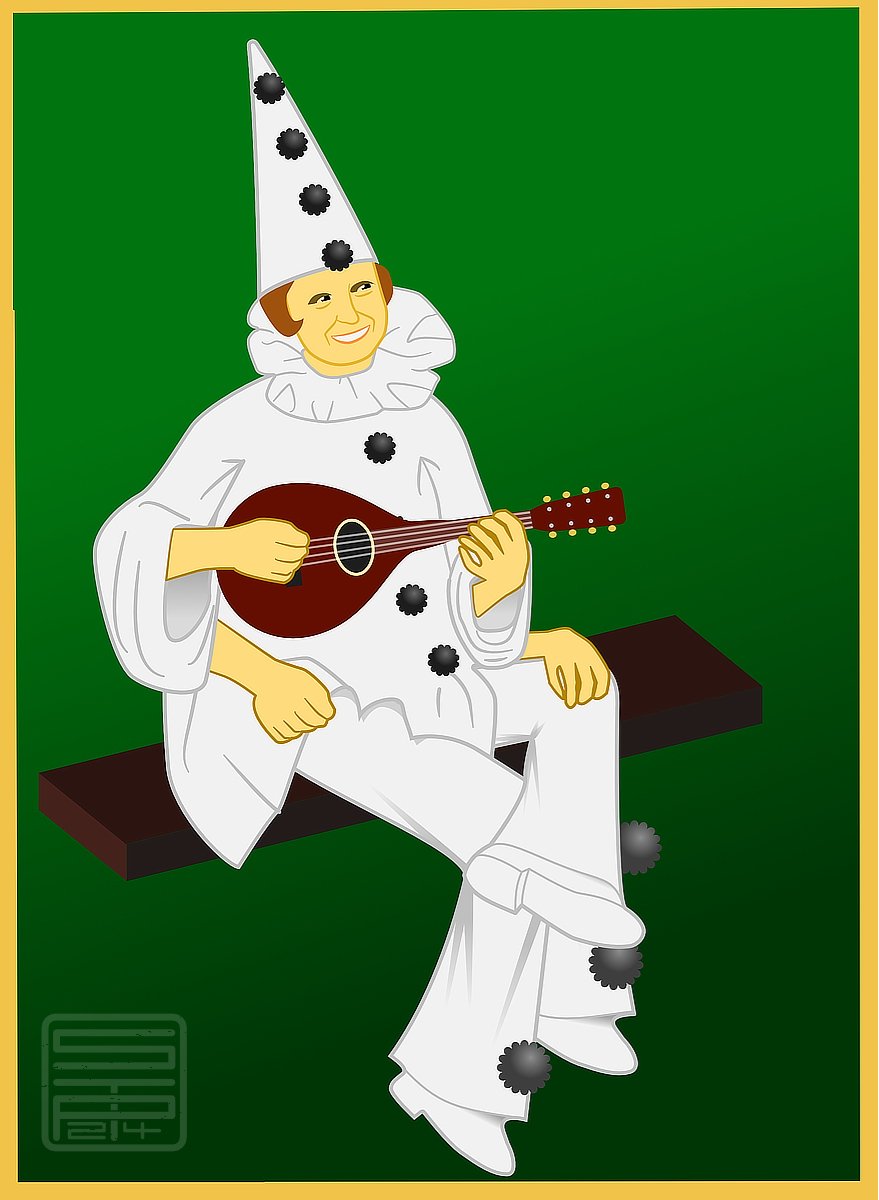
I made this for a french festival using mix of vector & pixels with few time to do it. (Using affinity suite since V1, I will never come back to Adobe suite. Evreything is quicker, easier and fits my needs perfectly : focusing on creativity and not struggling and wasting time to make things work as it should.)
-
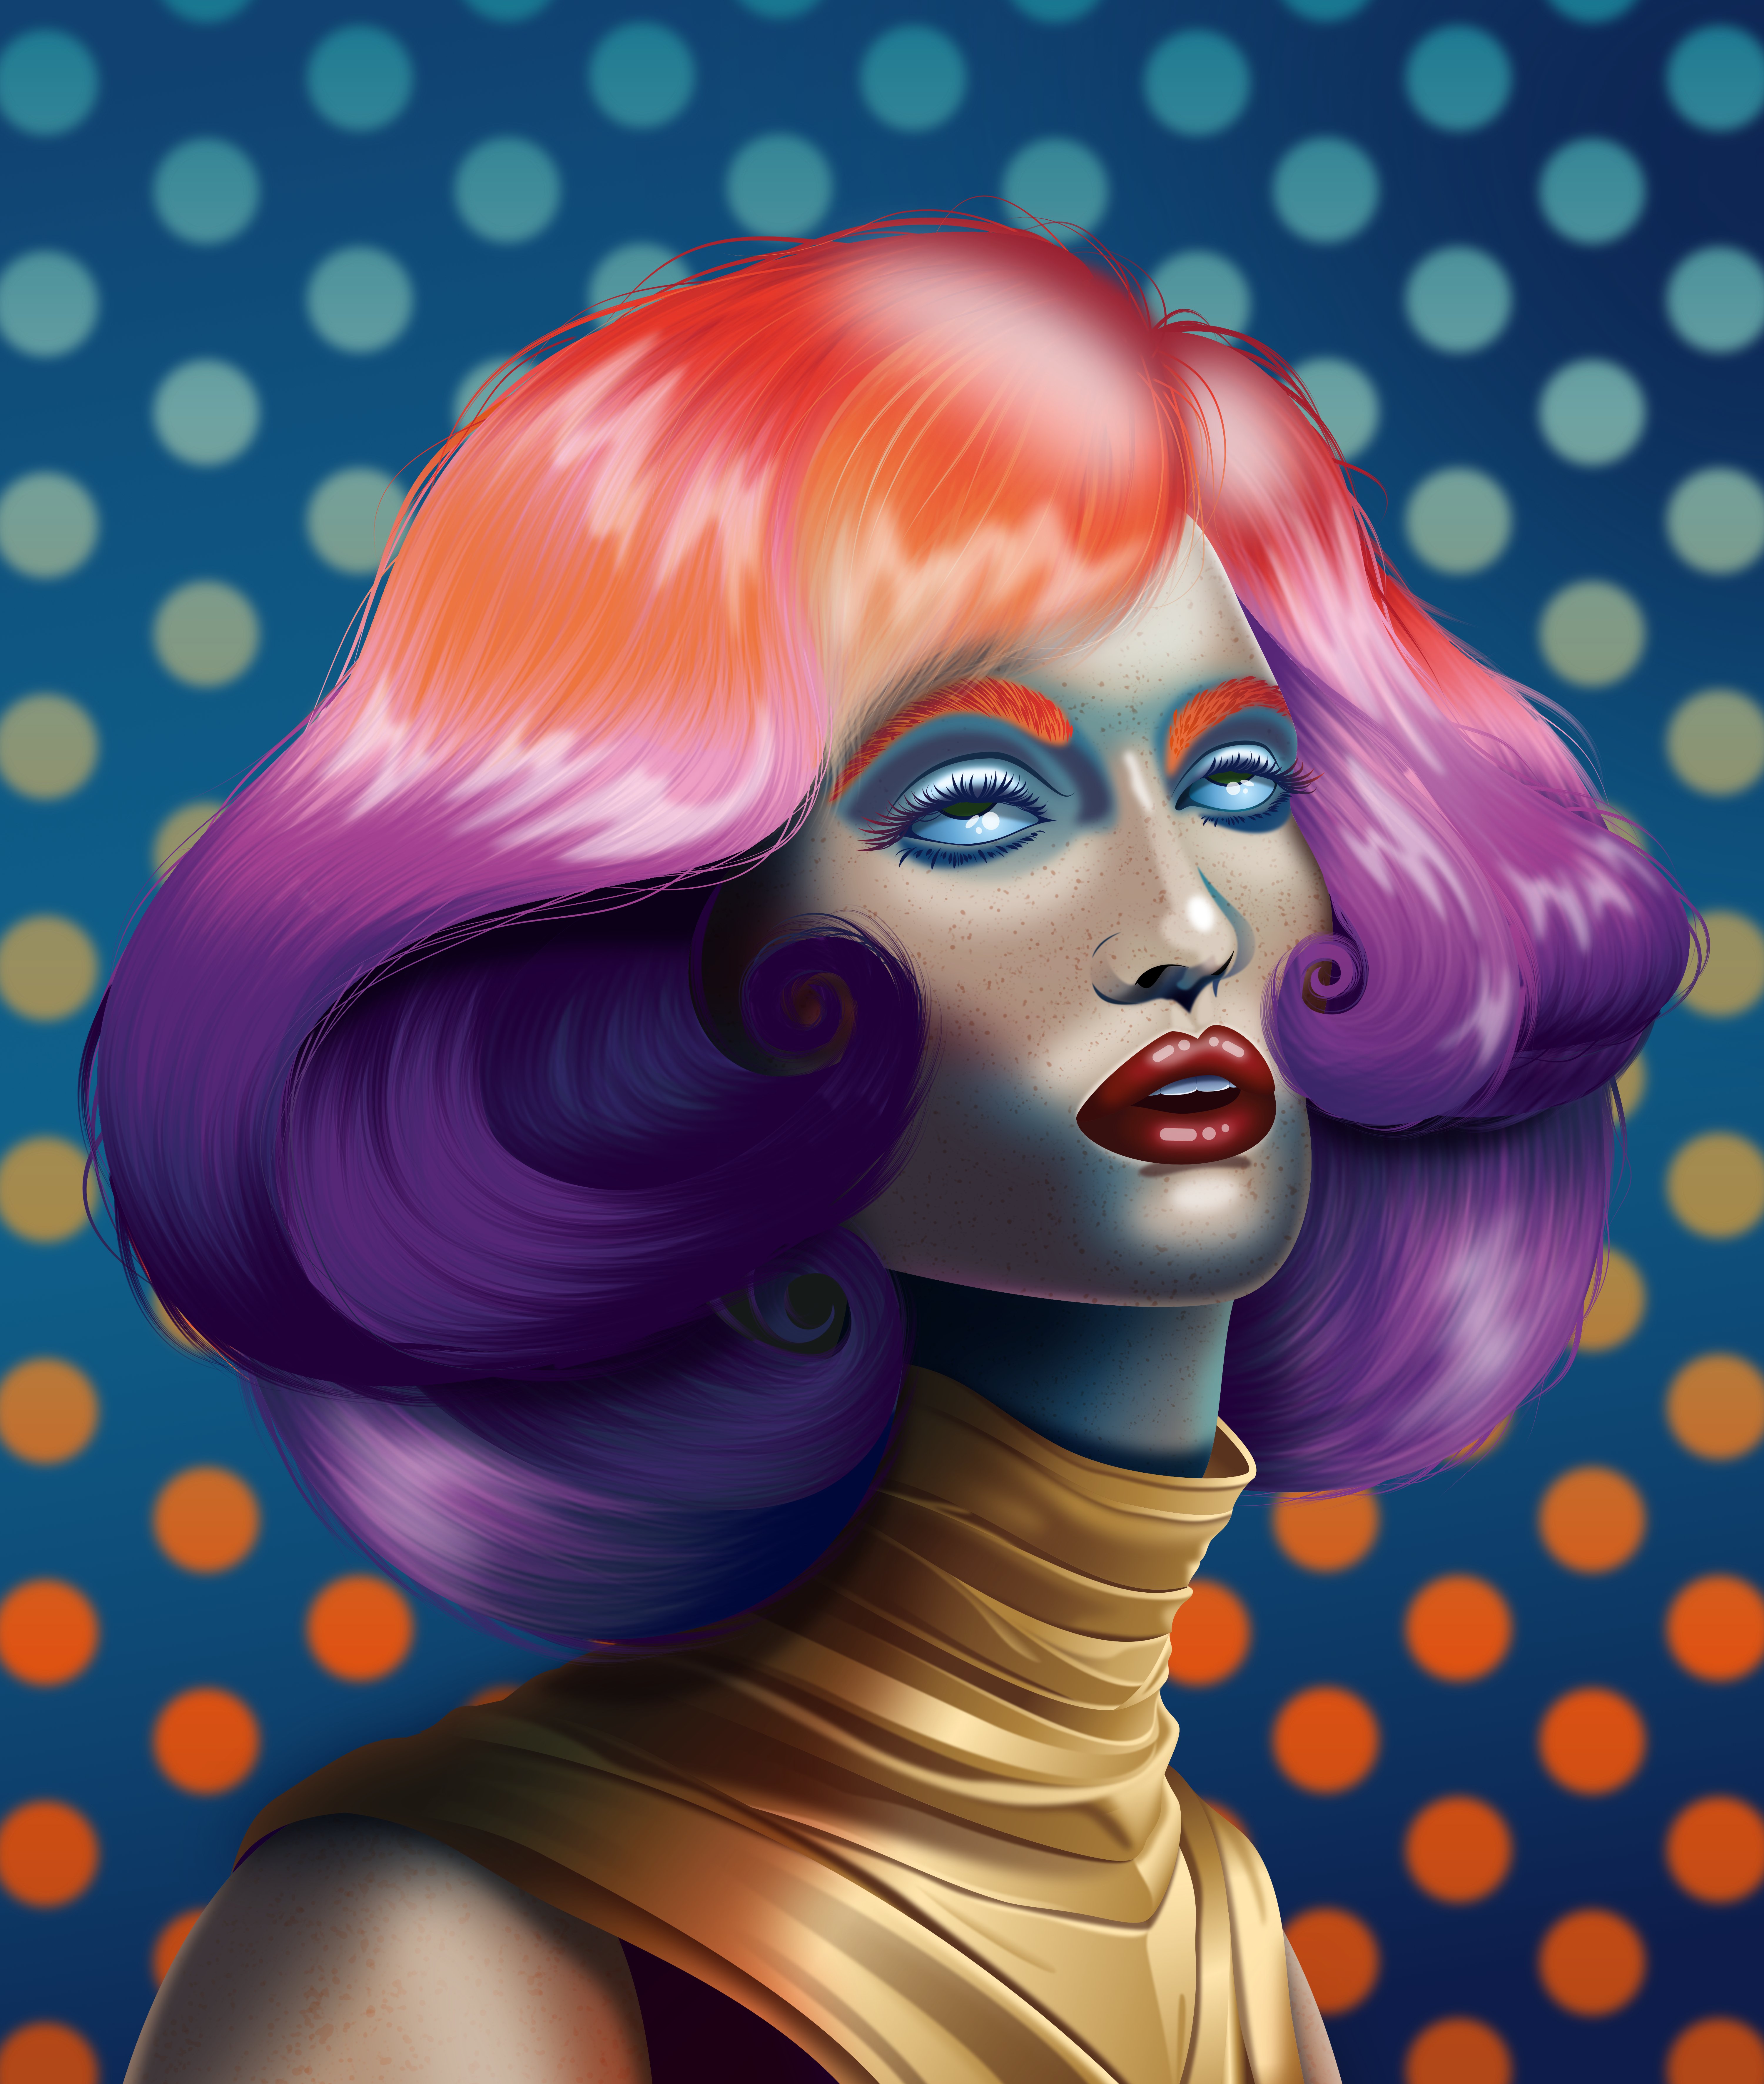
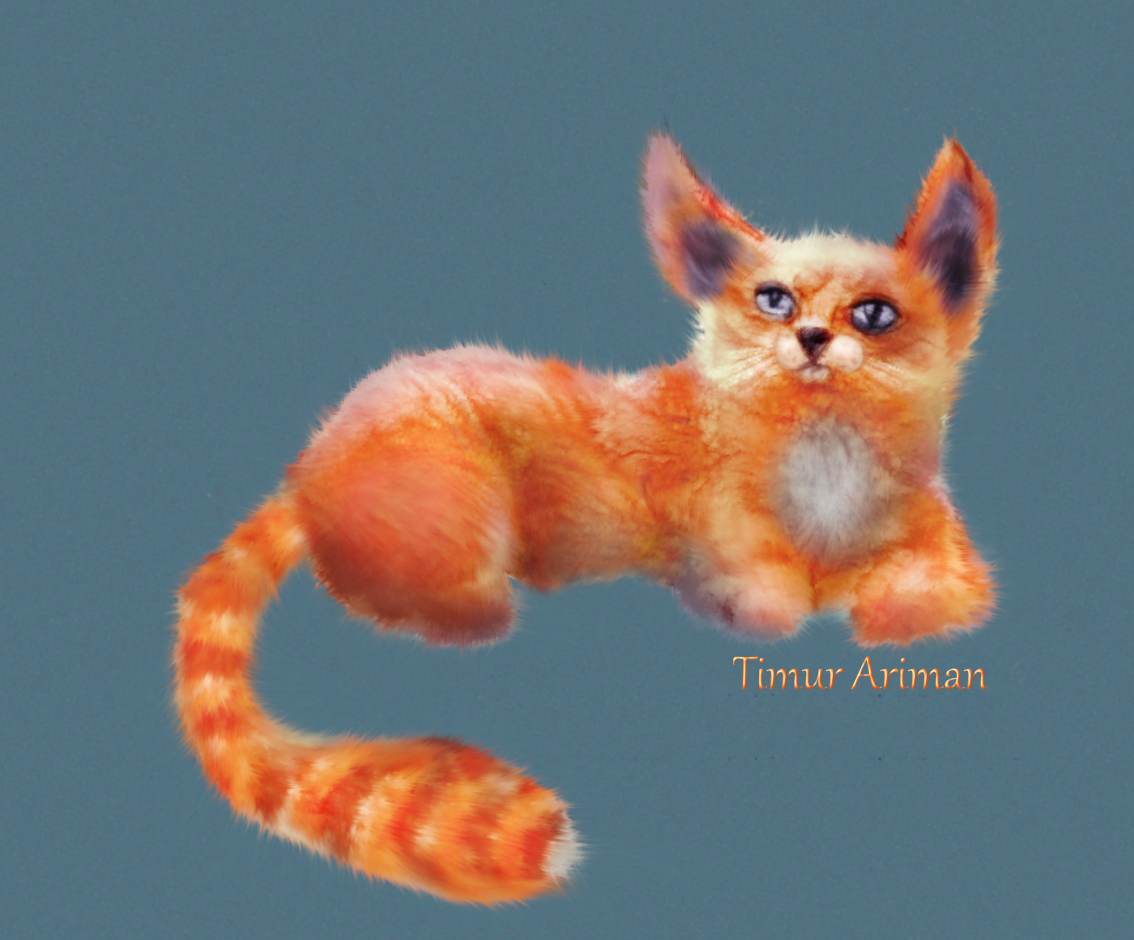
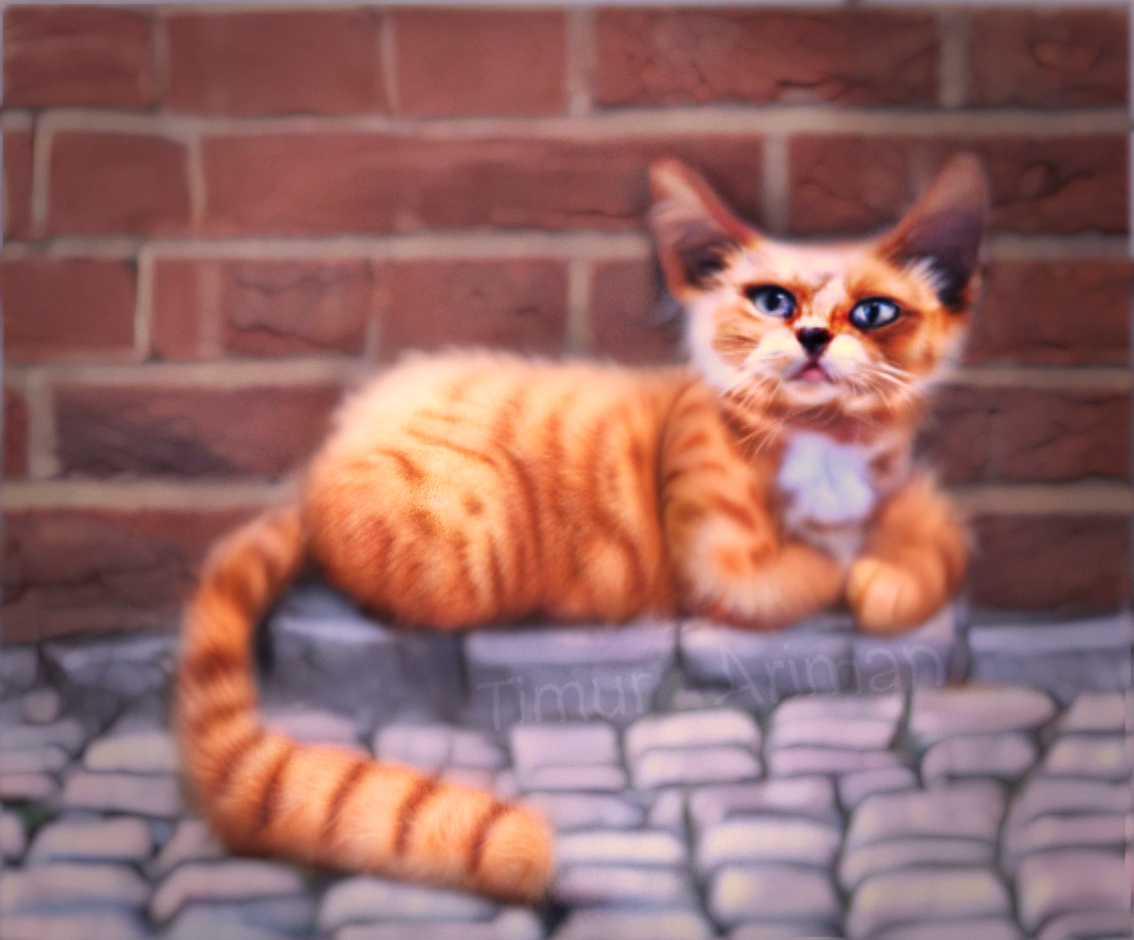
This started off life as a quick colour study for an oil painting I’ve been planning and wasn’t meant to be anything more, but - as usual - I started getting obsessed with adding the detail, and so here we are. I’ll still work on the painting, but I’m really happy with the vector version so thought I’d share. Hope you like her!
-
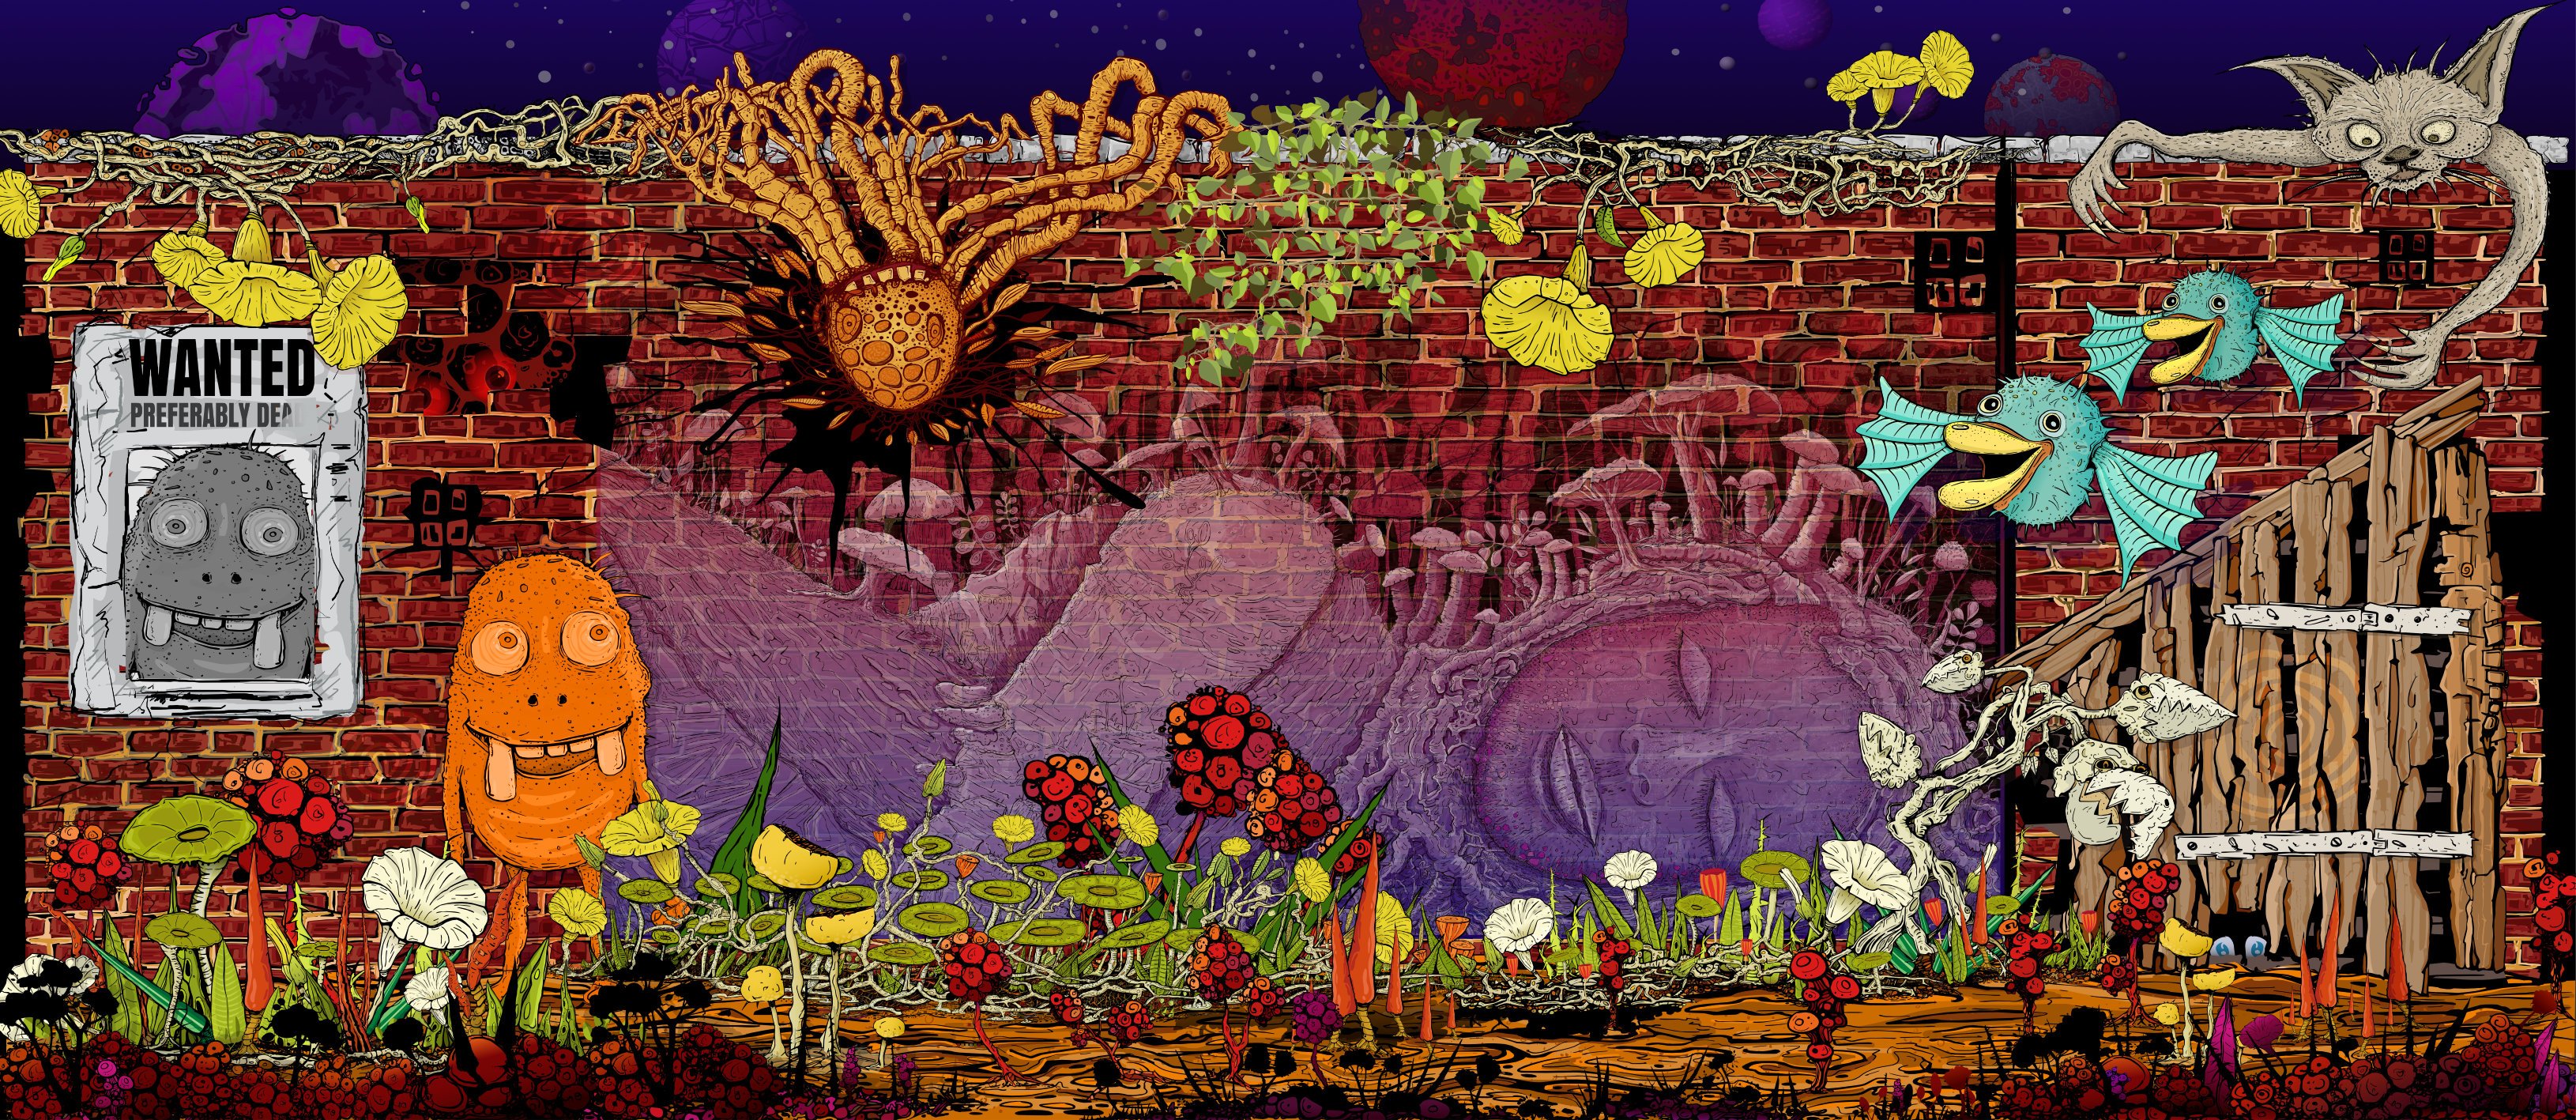
I could have called this Many hands (and feet) make light work. We're all getting browned off with Artificial Intelligence stealing copyright works. I thought it was time I made a stand and made my own AI image. In this case, it probably means Astonishing Inaccuracies.
- 16 replies
-
- 18
-

-

-

-
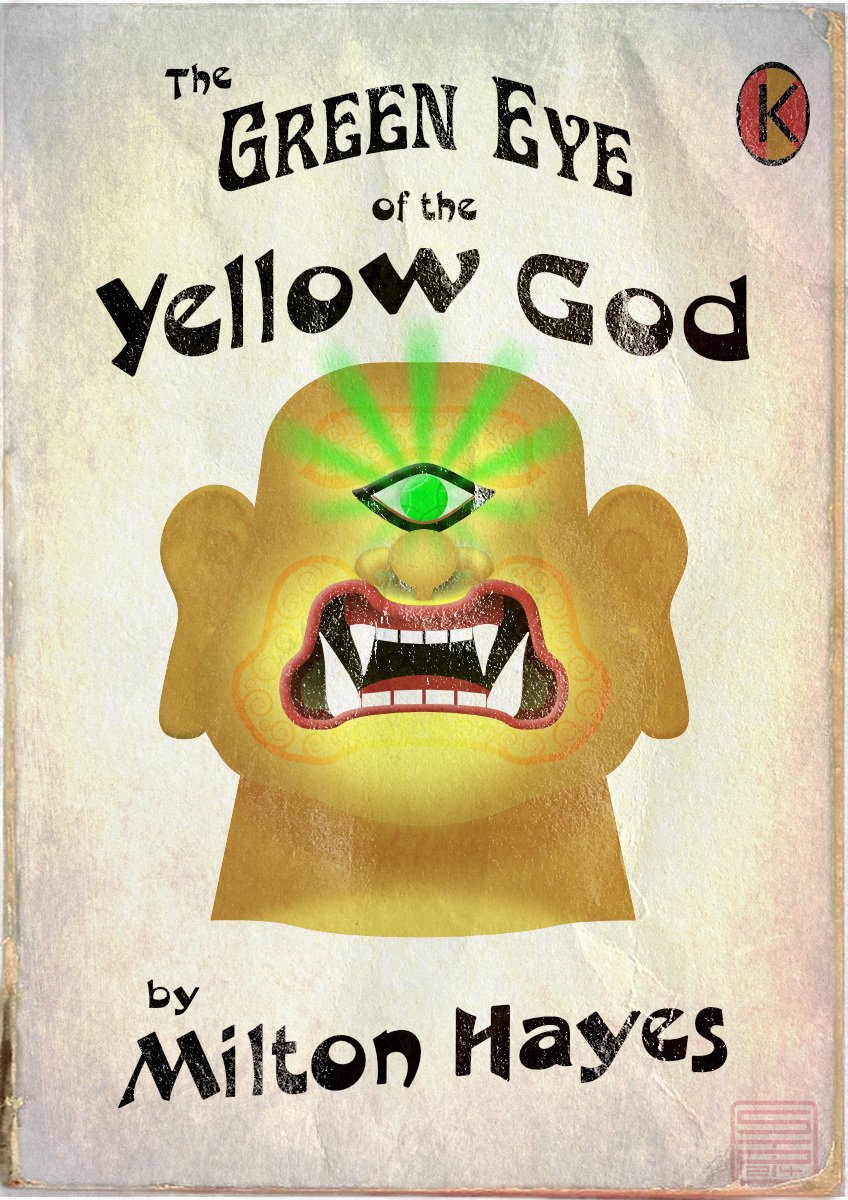
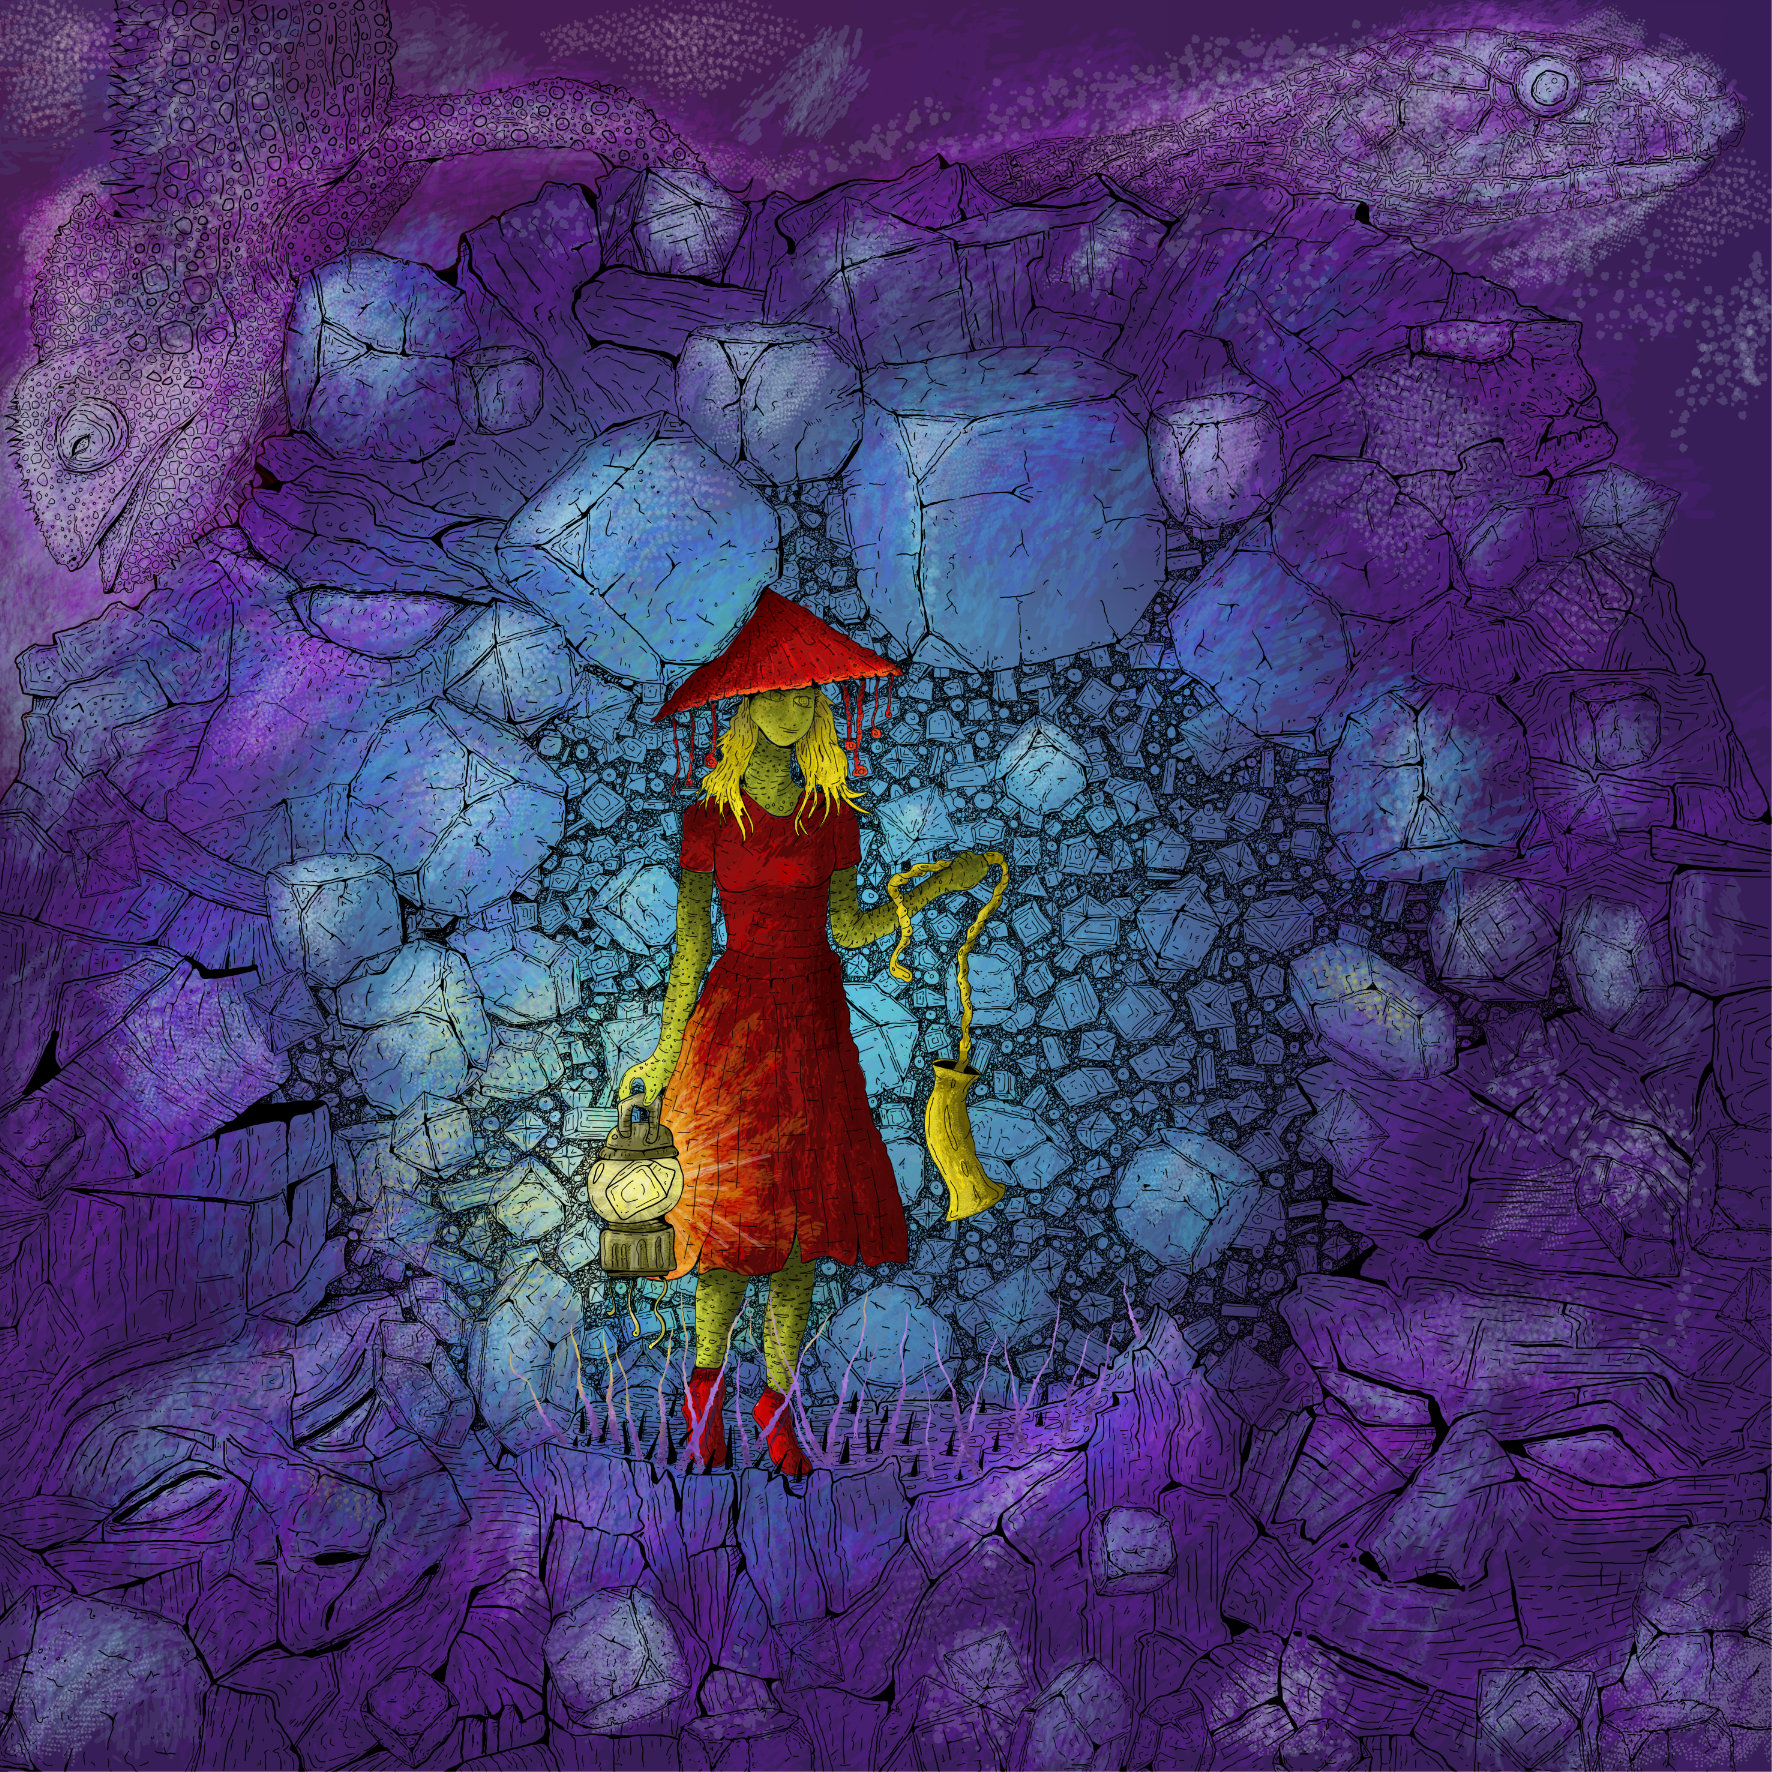
The Green Eye of the Yellow God, aka The Green Eye of the Little Yellow God, is a dramatic monologue written in 1910 by J Milton Hayes. Despite one or two comic parodies, it's still a Ripping Yarn if delivered straight; you can look up the words, or a recitation on YouTube. Meanwhile, I thought it would make a good subject for a 1960s-style pulp paperback cover (though it would be a very short book, as it will fit on a single page). Made in Designer, with a couple of pixel texture layers.
-
Hi everyone! This marks the start of my sketchbook. EDIT; here is the optimized version with shadows, thanks for the tip!@MBWanderer
- 8 replies
-
- 8
-
-
- affinity photo
- drawing
- (and 5 more)
-
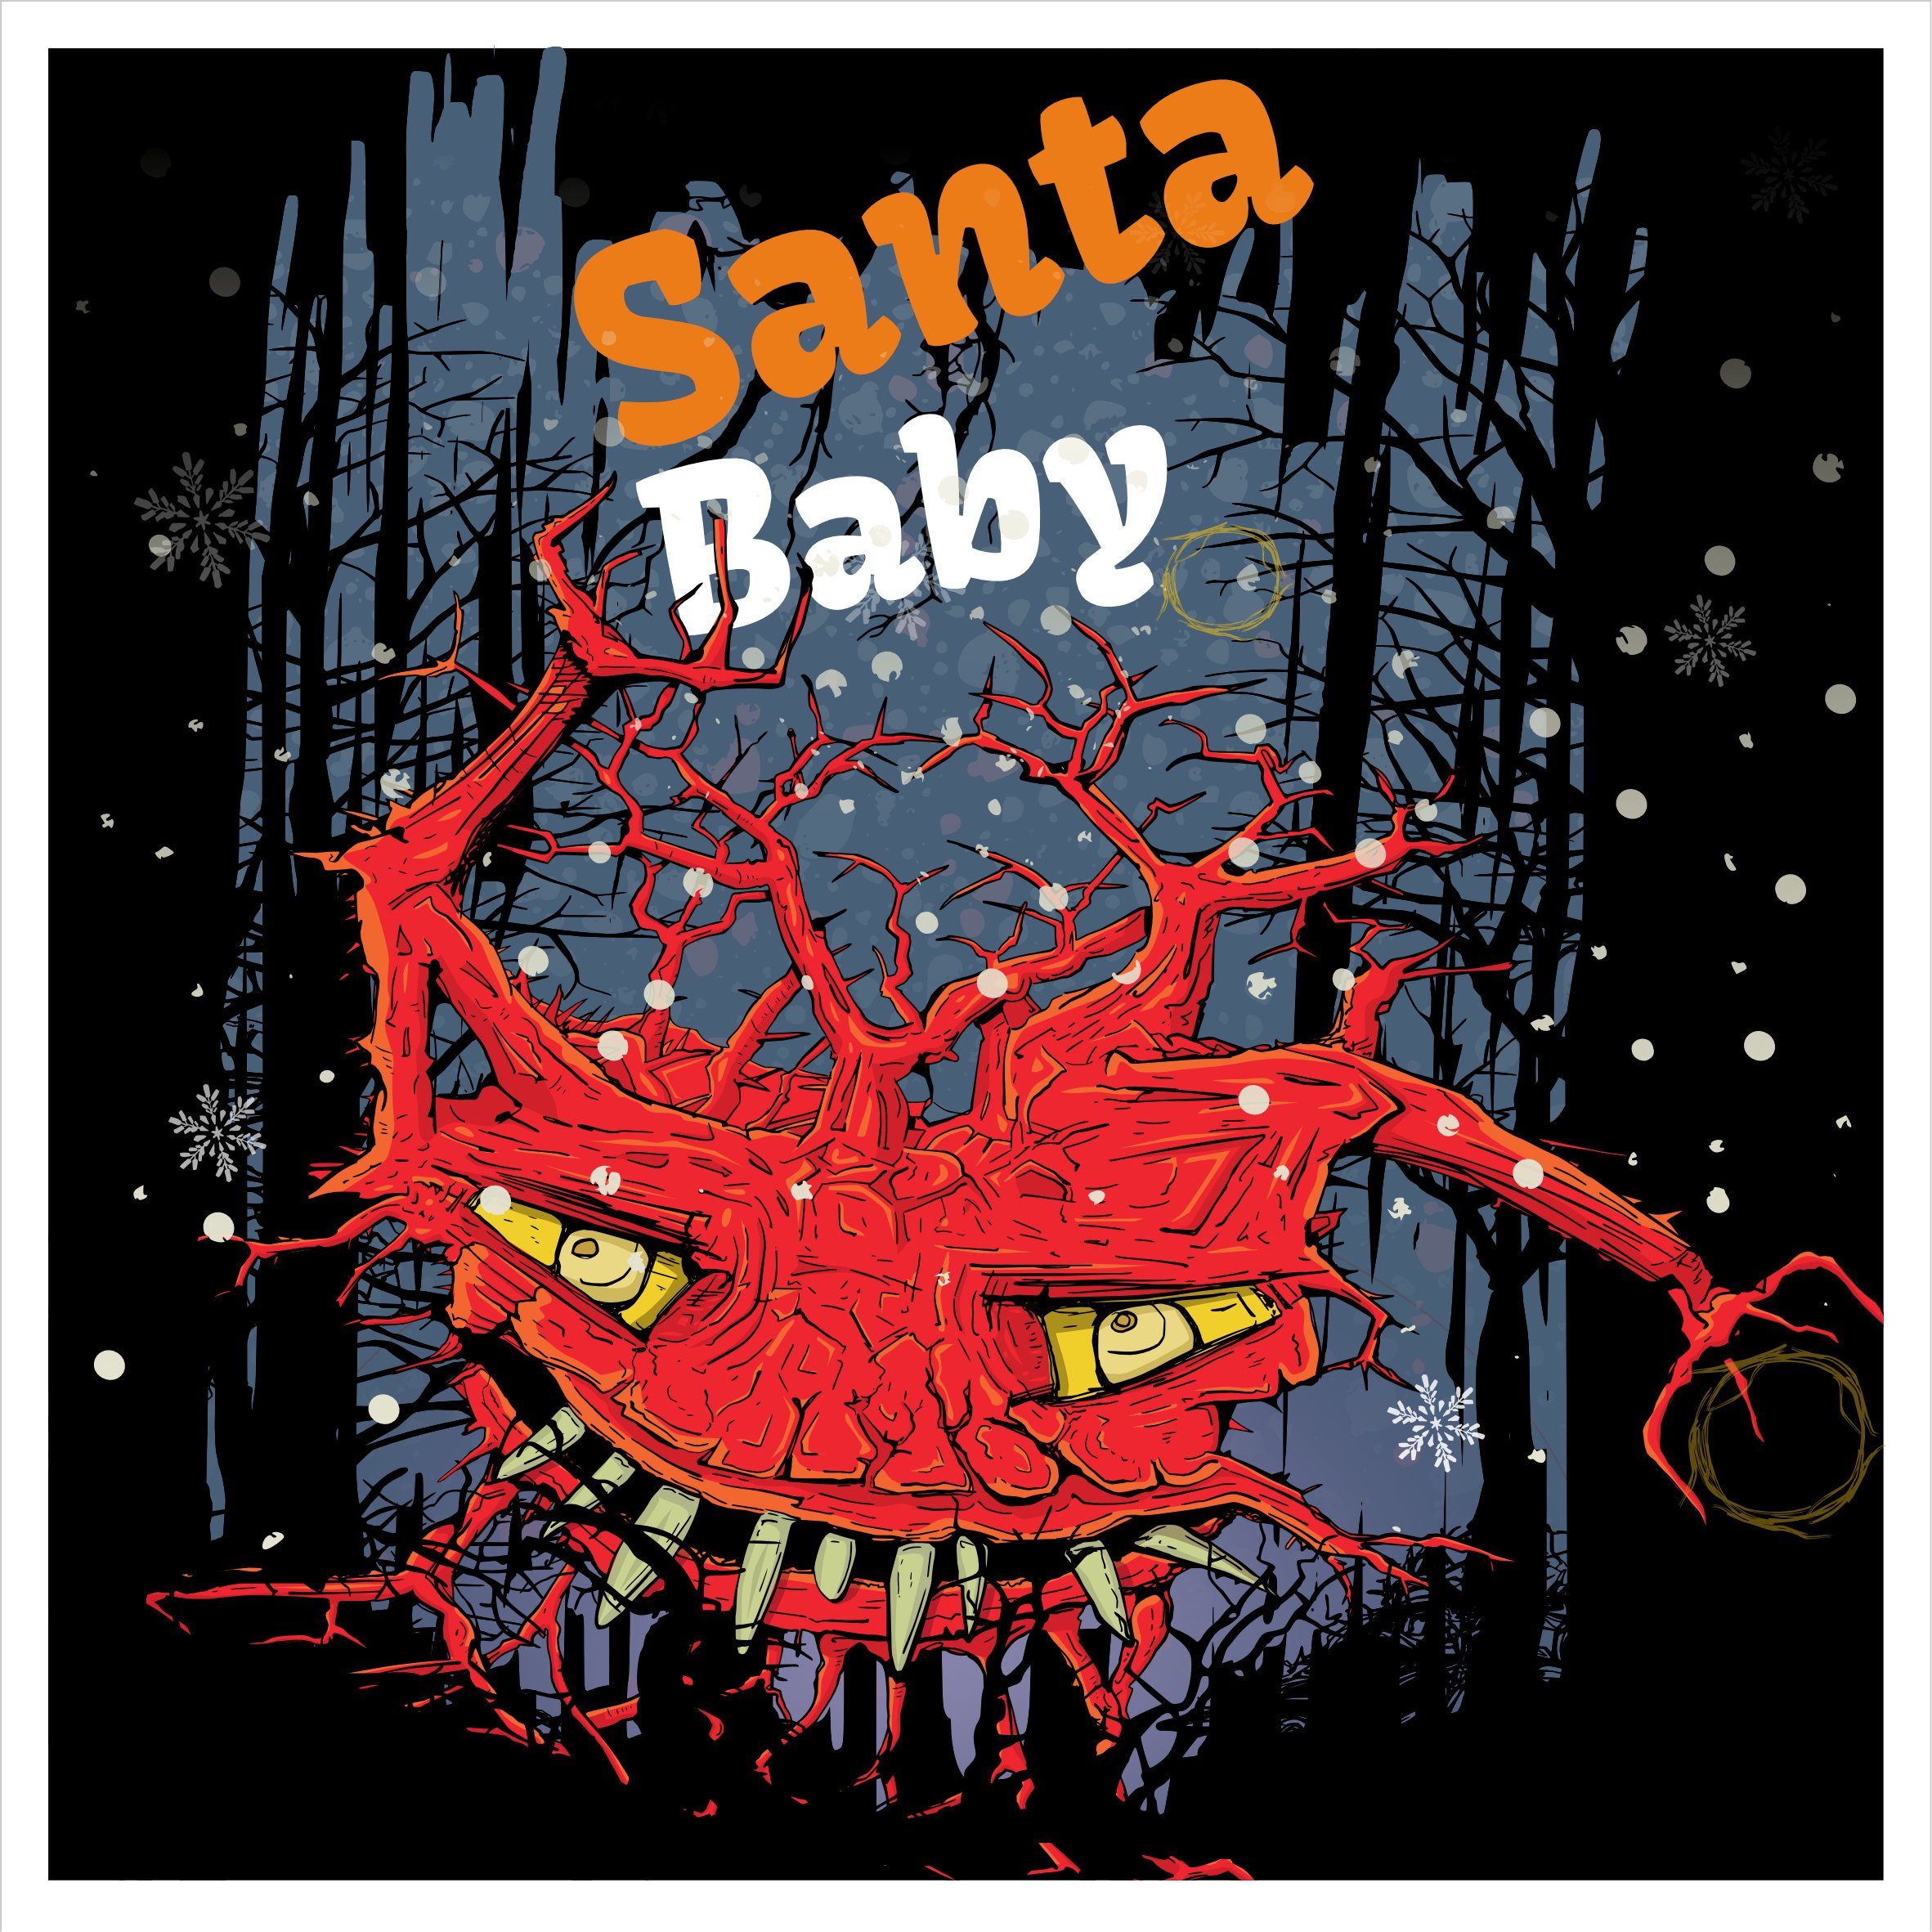
A little Monster
-
Some of this year's reduced tree motives which I use on xmas cards ... If you need some last minute xmas tree resources take a look under the forum resources at ... Xmas Trees Assets Xmas Trees Xmas Silhouettes ... generally take then a look at the xmas stuff under ... Retrospective of resources contributions Have a contemplative and peaceful Christmas time!
-
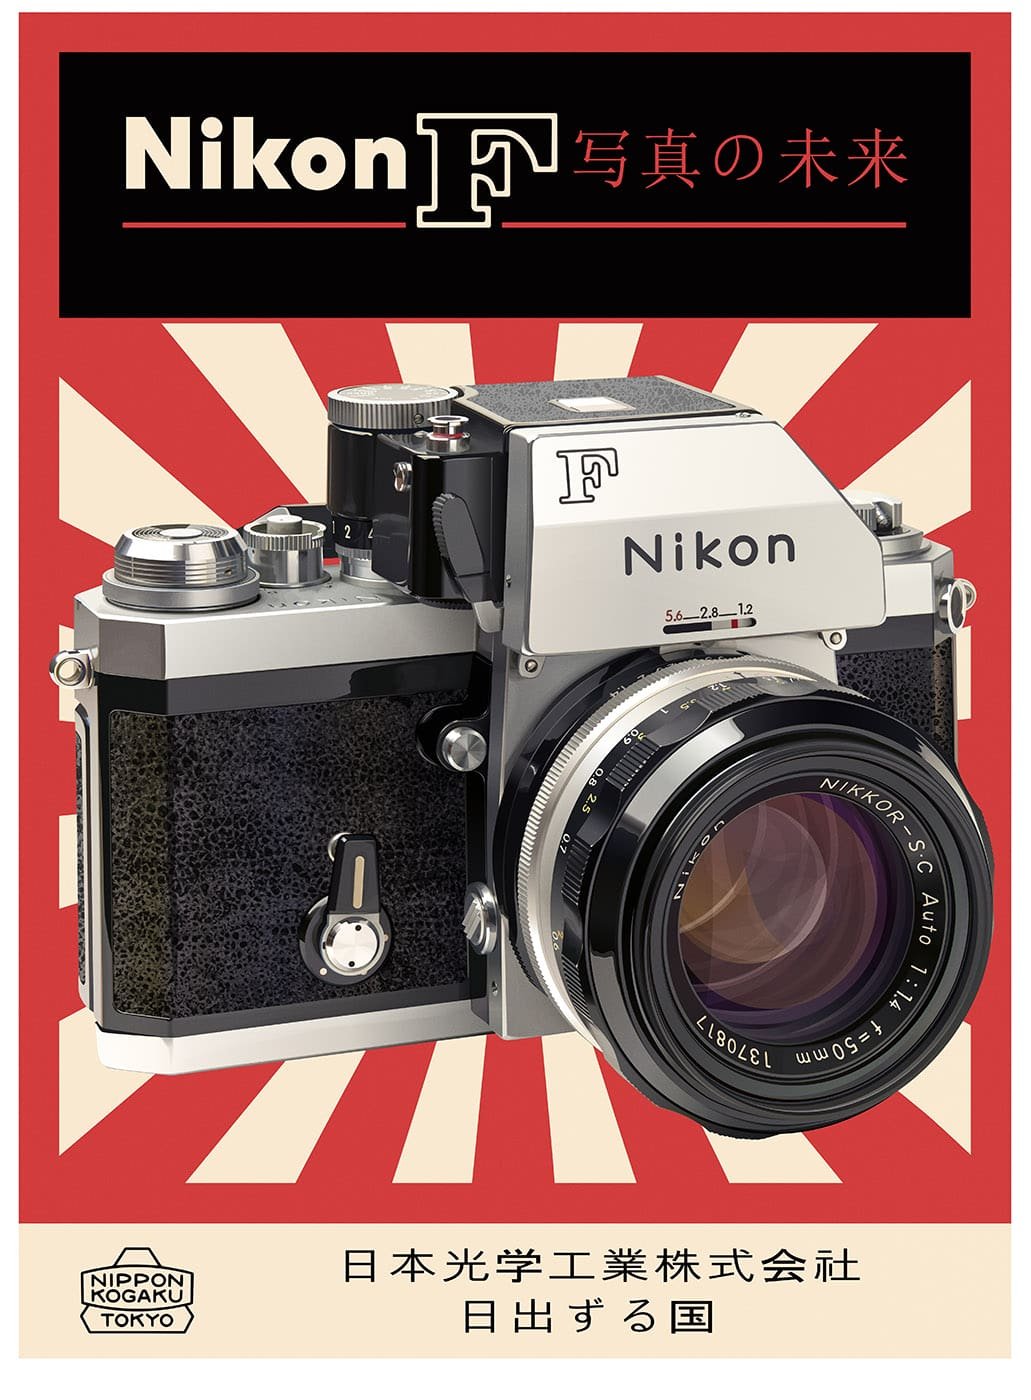
Decided to do this without blurs again whilst trying to keep it realistic. It made some things trickier but saved the time in not having to set a million blurs. Used AD v2 for the warped text.
-
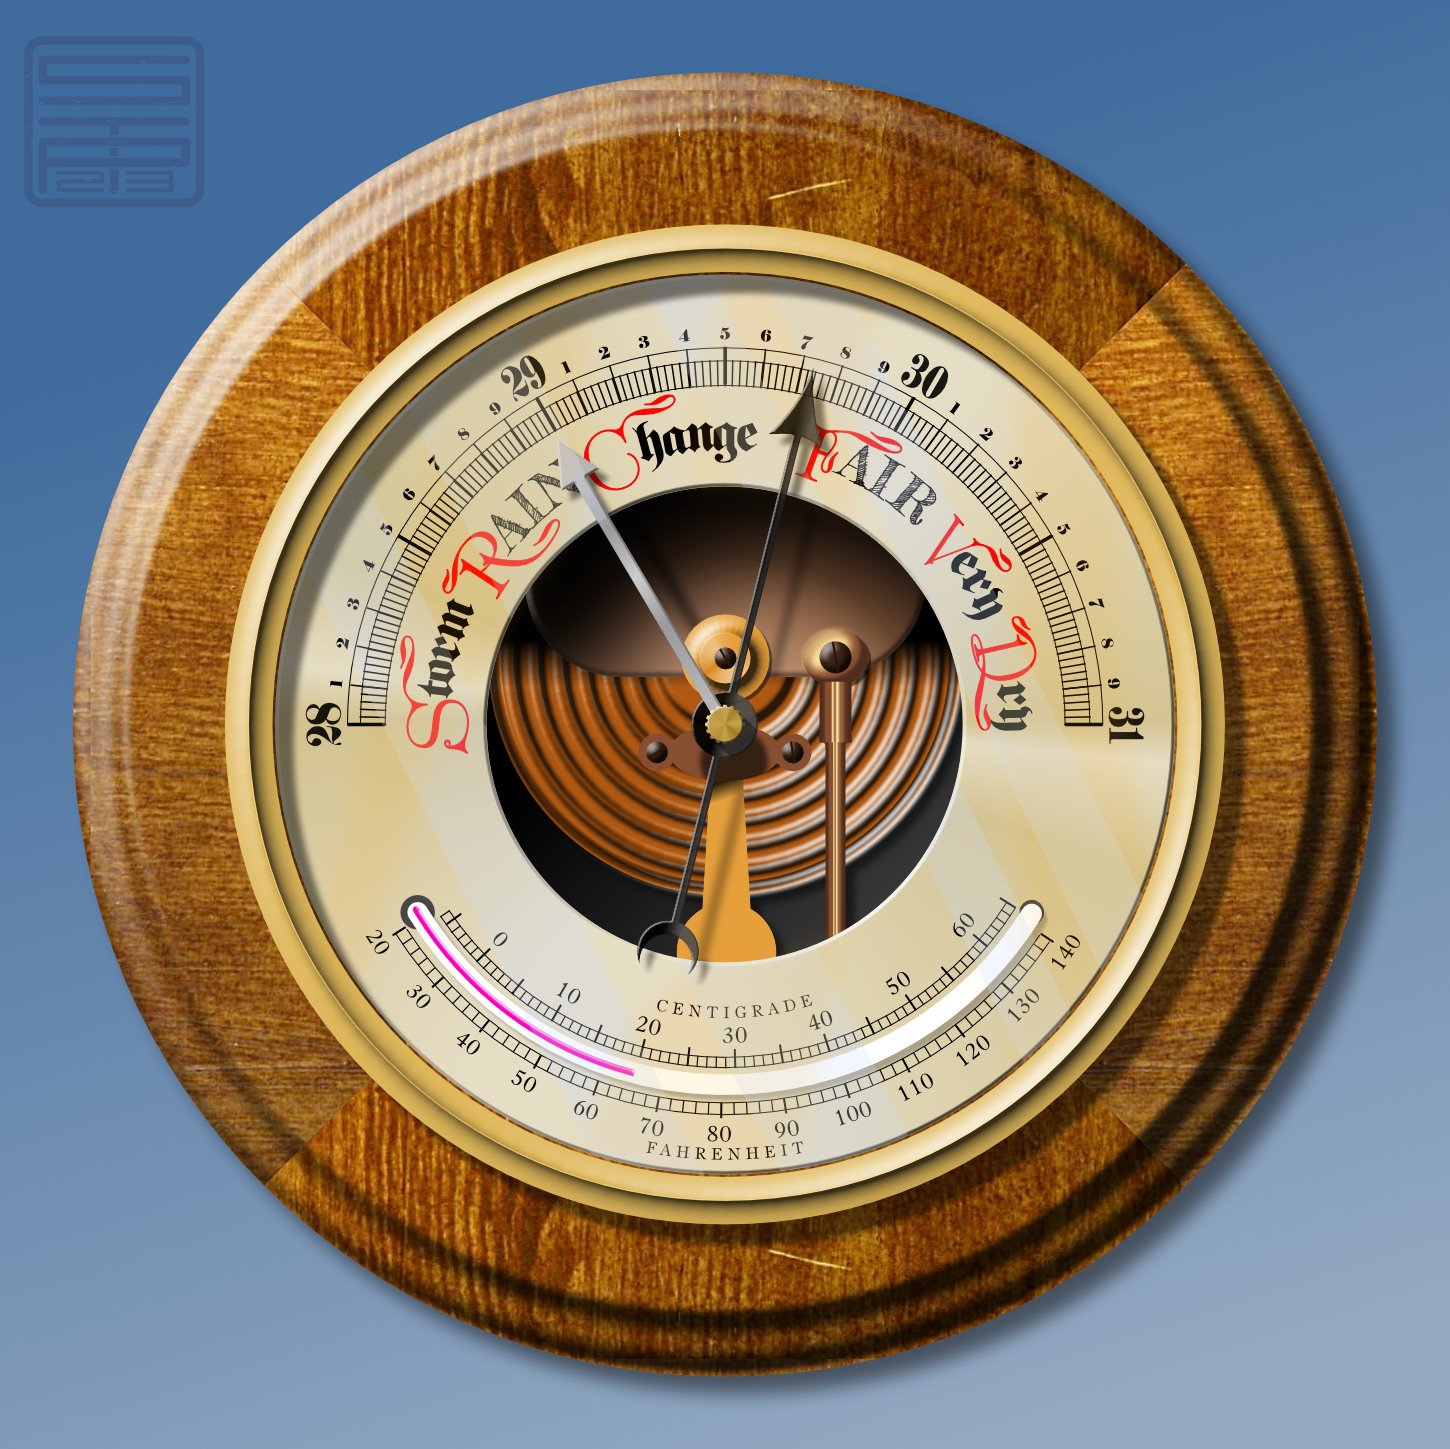
I made a picture of an old-fashioned barometer because . . . well, because I can! Who needs an excuse? I discovered quite a while ago that I enjoy making things with scales and pointers, for some reason; and the Version 2 Duplicate dialogue makes it so much easier to make circular scales. The woodwork is created from a stock photo of a piece of wood, which I sawed into quarters and turned a profile edge (digitally, that is ). All the rest is made from vectors, using three photos for reference and picking out the best features. (There were some curlicues on the thermometer scales, but I forgot to do them! ) The red letters are from a freebie font called Great Victorian, which has plain and swashed cap forms.
-
Created in Affinity Designer iPad v2. Hope you like it!
- 1 reply
-
- 7
-
-
- affinity designer
- affinity 2
- (and 1 more)
-
This isometric illustration project was probably one of the most difficult I've ever worked on but absolutely worth all the effort in the end. Big shout out to Kevin House for taking the time to provide the walk-through and resources to get it completed 💪
-
- 10
-
-
- affinity suite
- illustration
- (and 6 more)
-
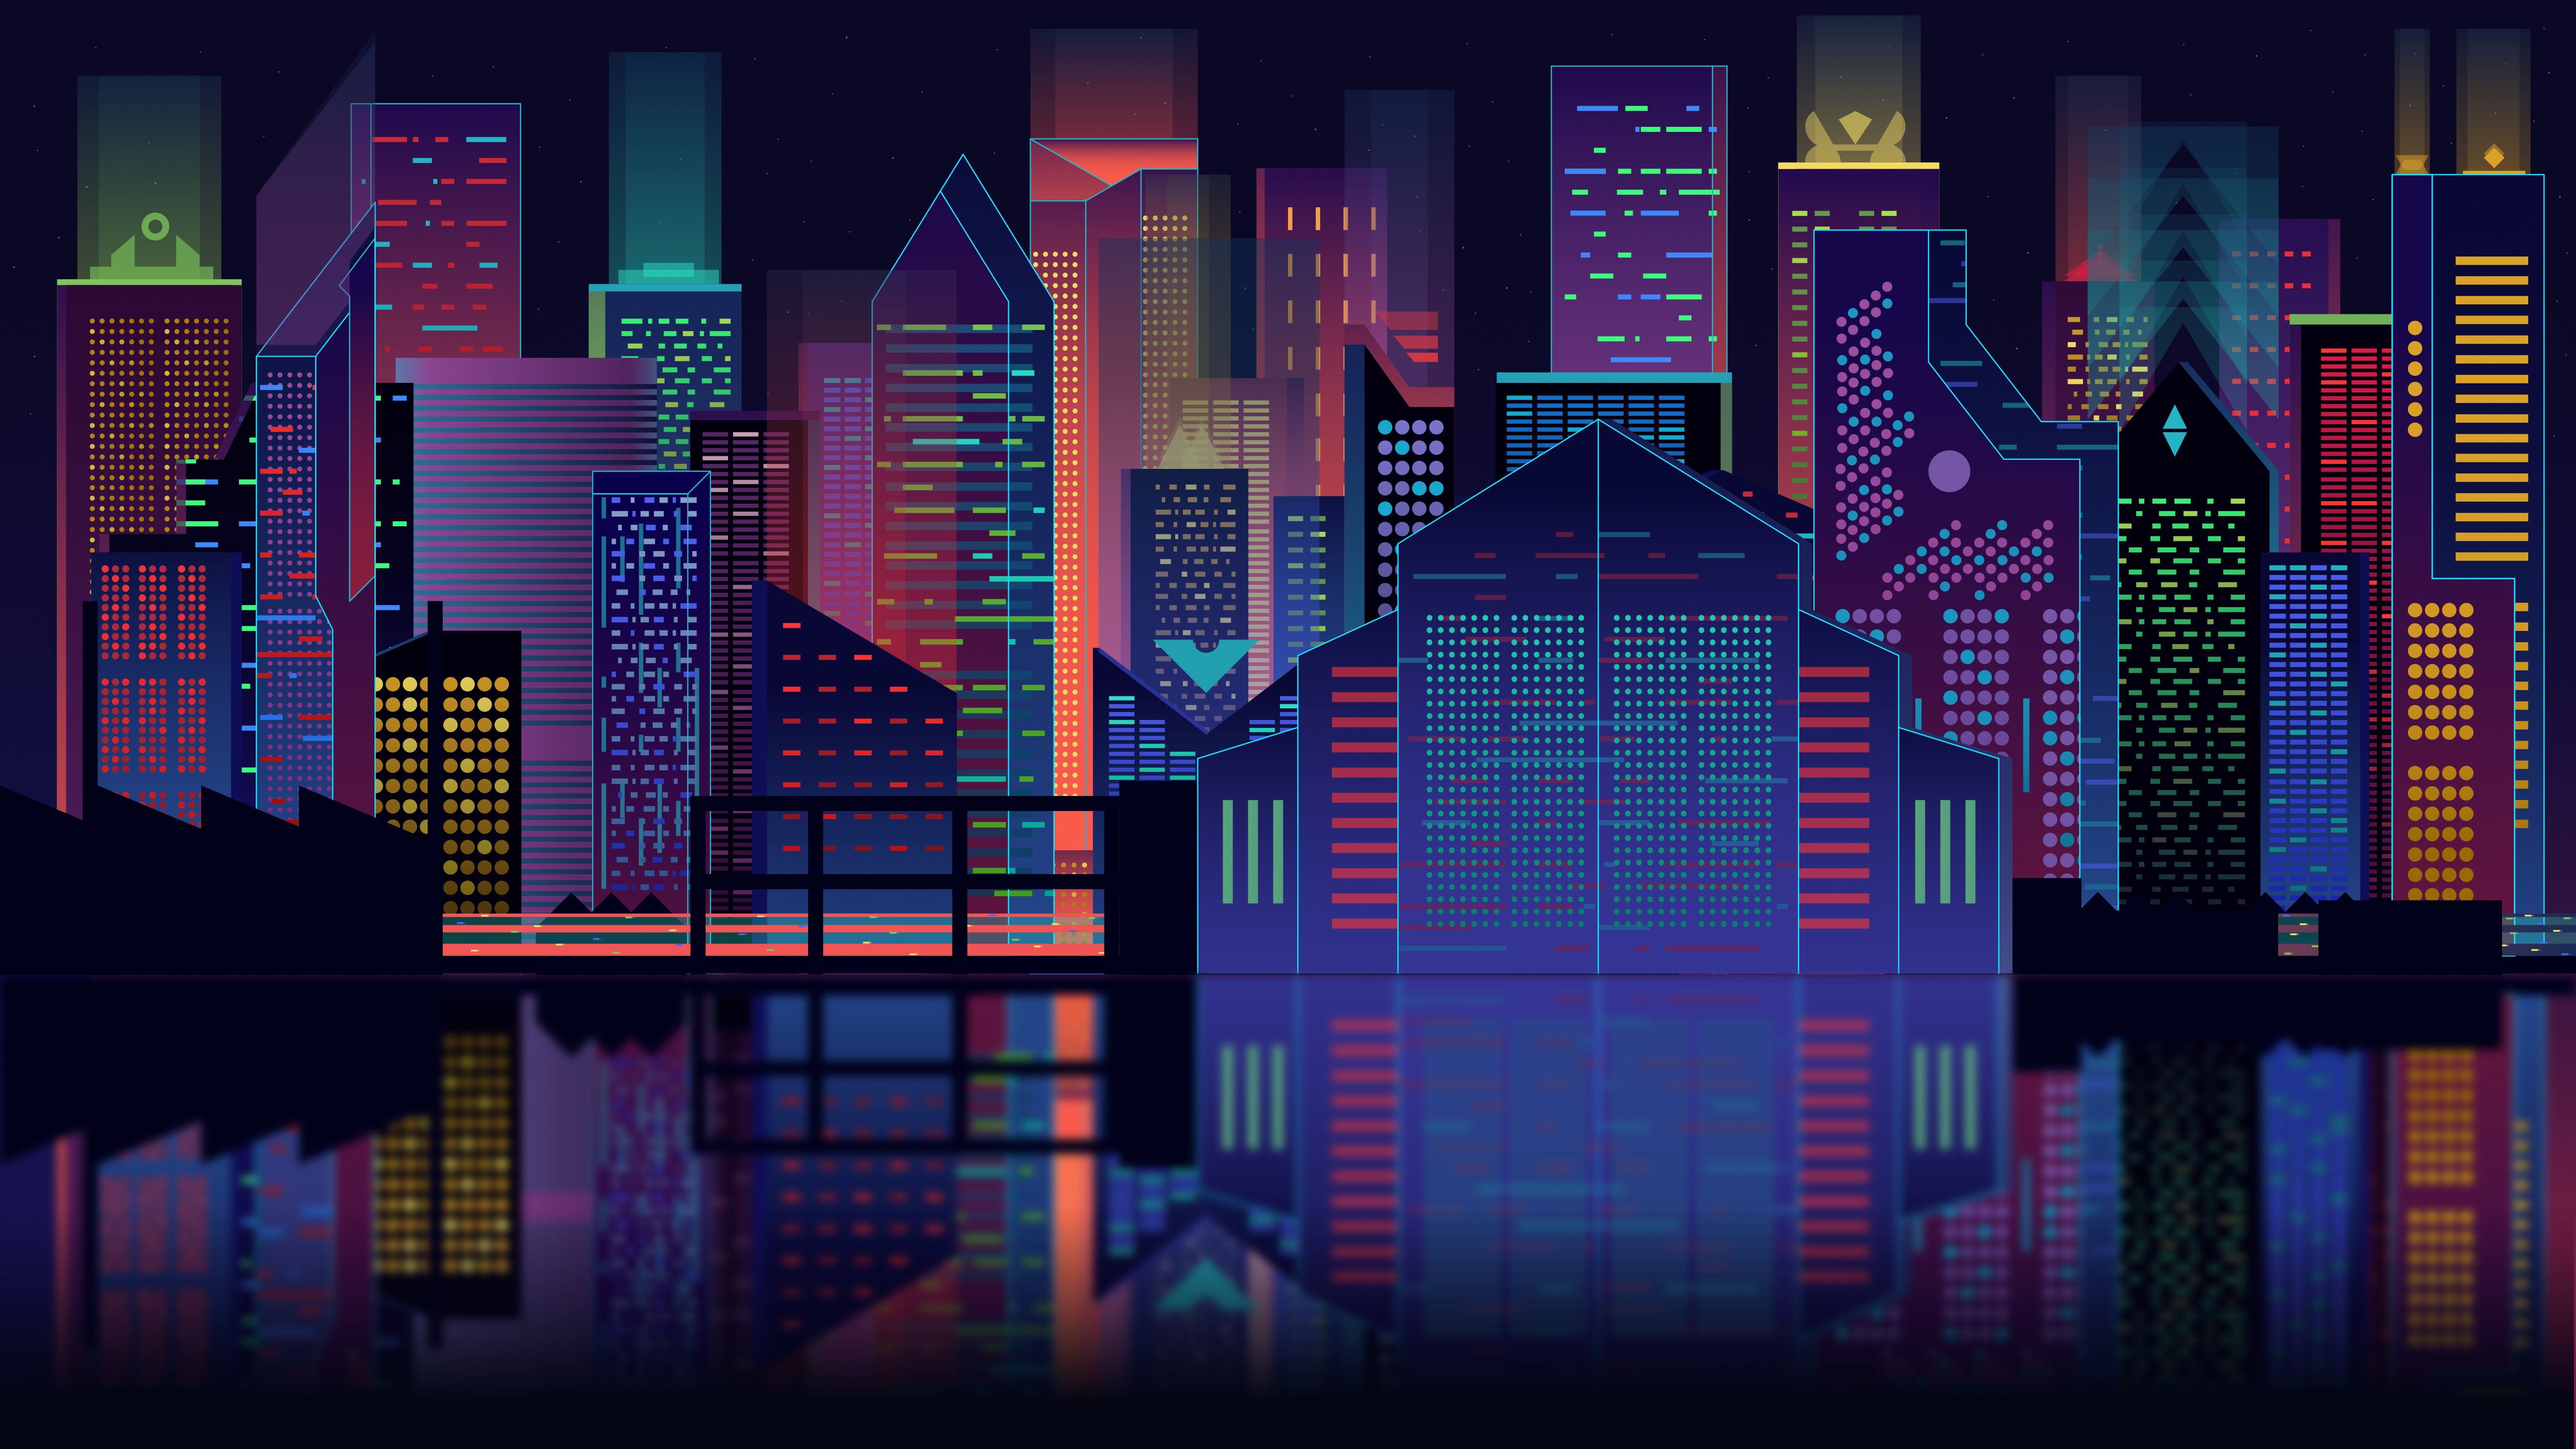
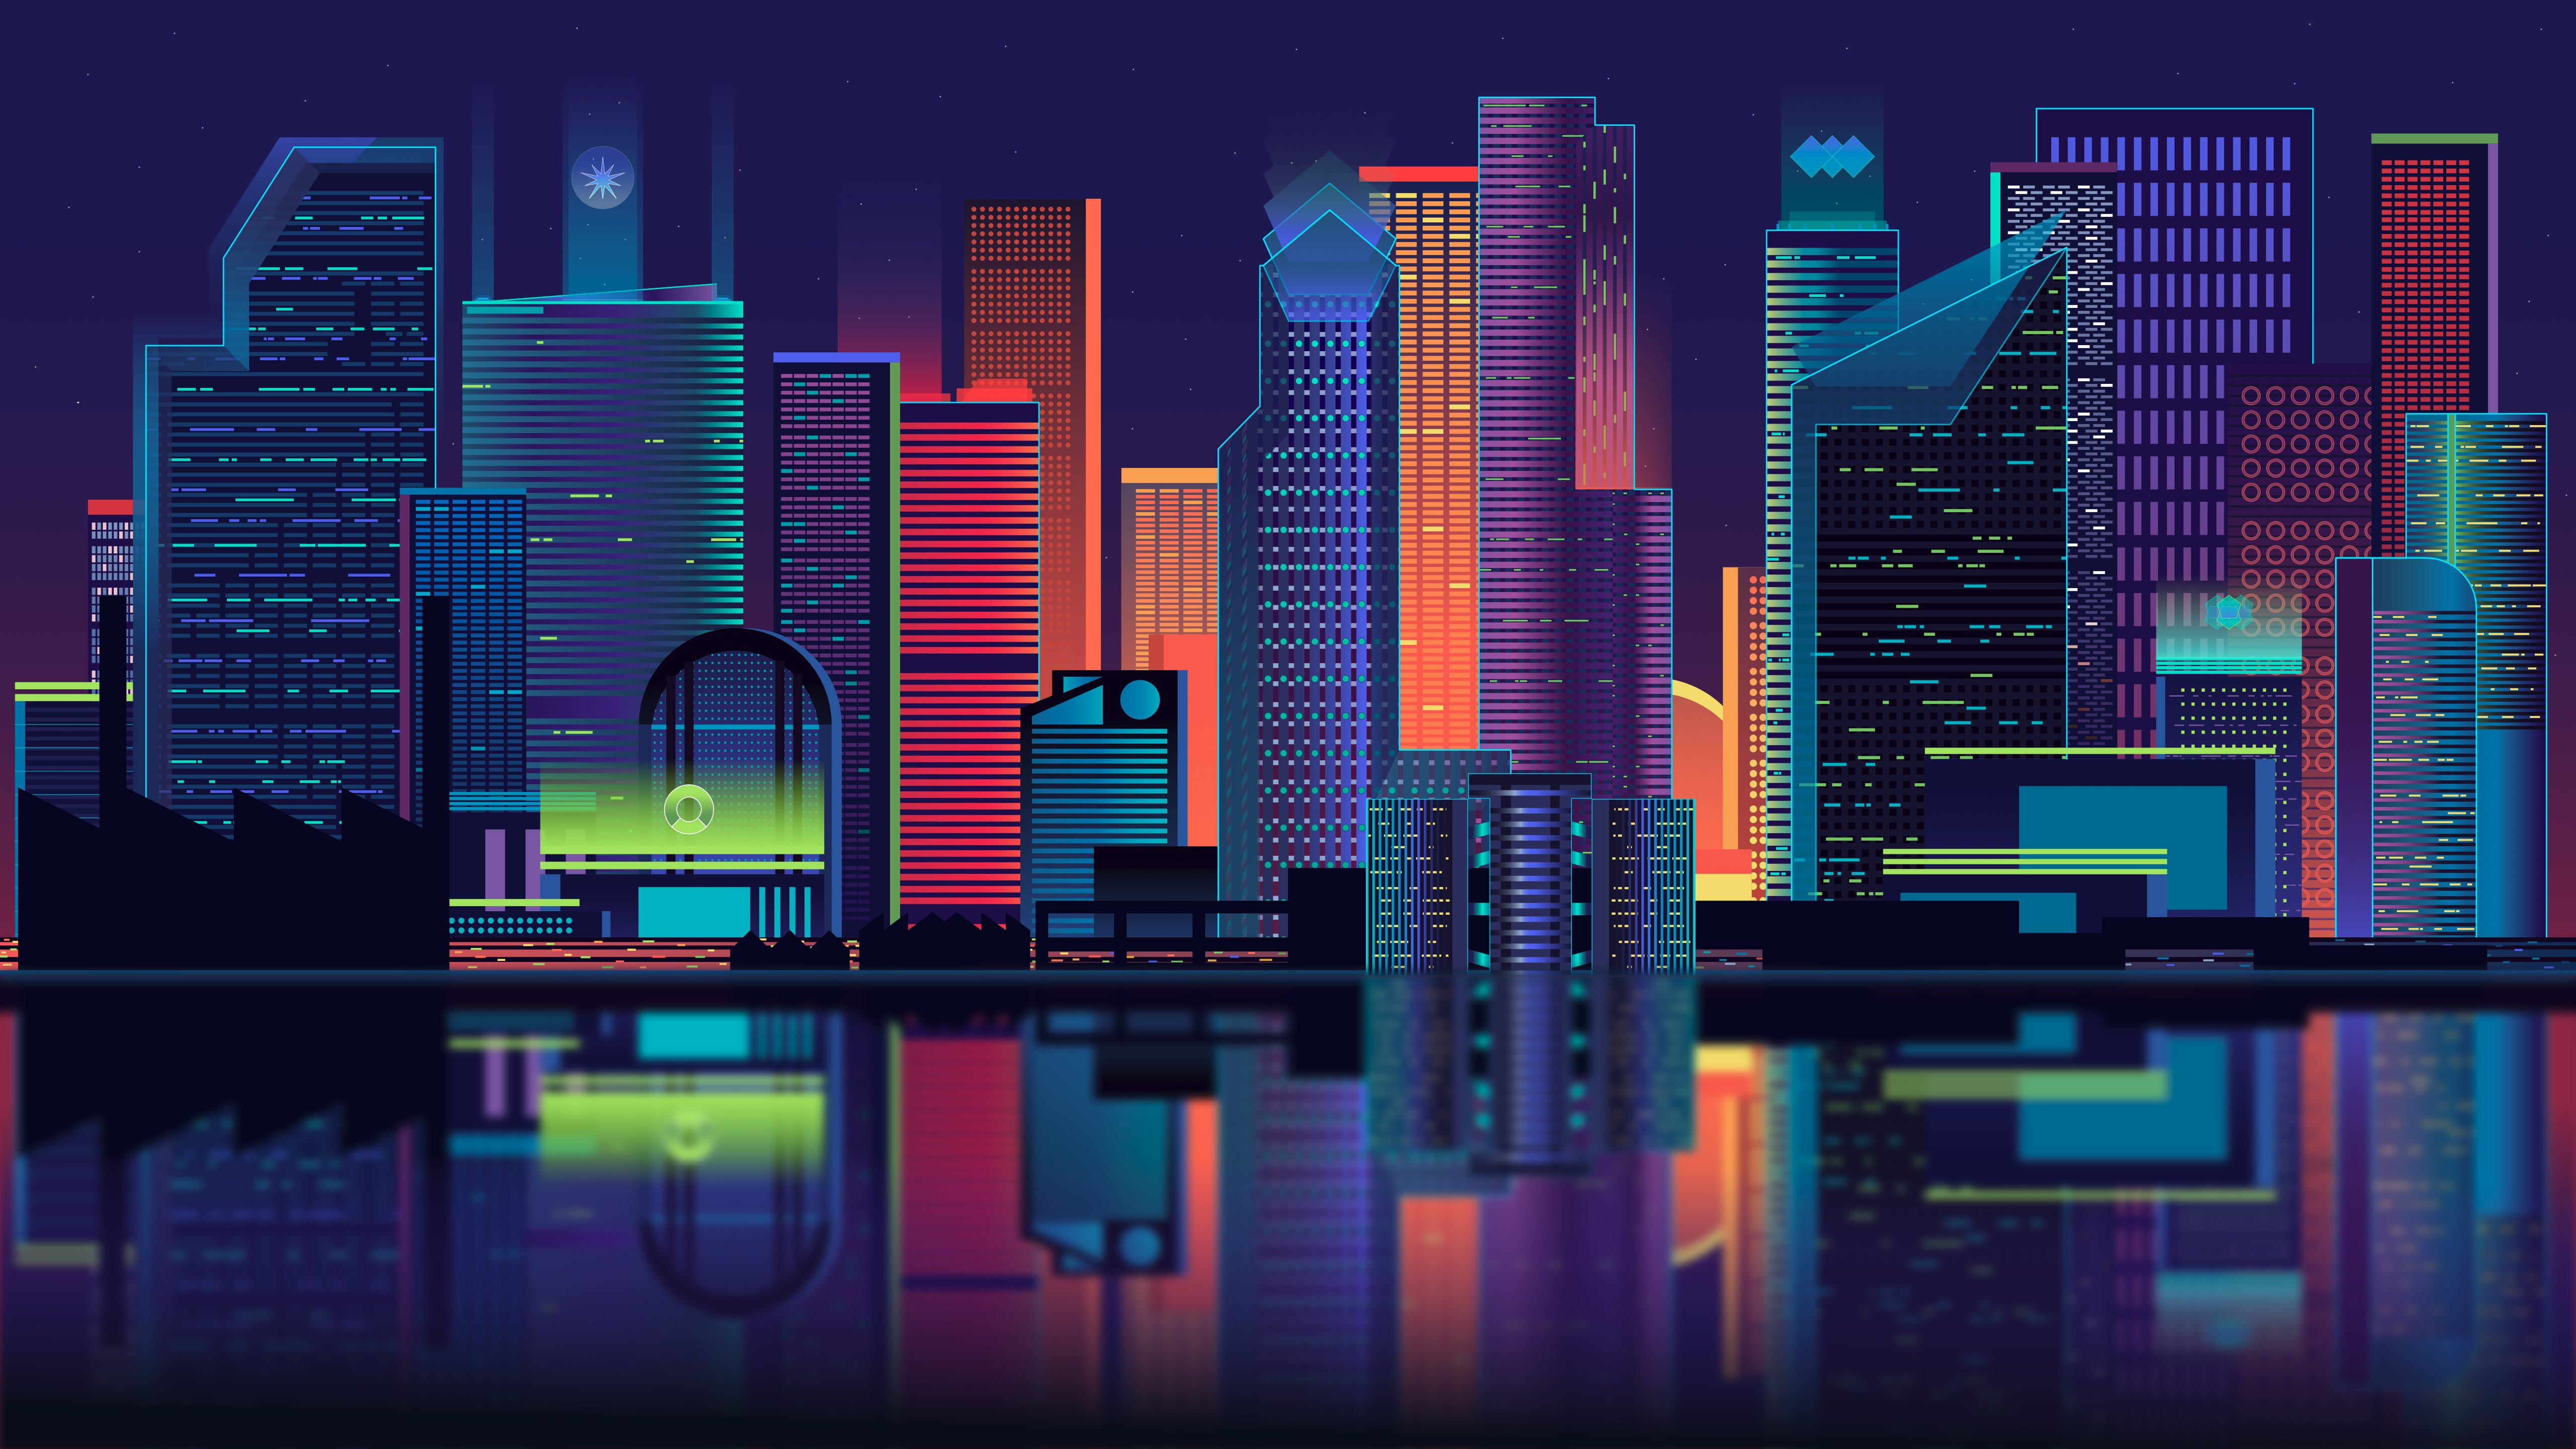
Here are my two attempts at the "Reflected Skyline" illustration project from the Affinity Designer Workbook. Hope you guys enjoy! Any feedback is much appreciated V1: V2:
- 8 replies
-
- 7
-
-
- affinity v1
- affinity v2
- (and 7 more)
-

affinity designer New work - Our Lady of Brighthelmstone
Greggry P posted a topic in Share your work
New work - Our Lady of Brighthelmstone. This was my recent submission for a call to artists put out by a new gallery opening in the city of Brighton & Hove - sadly rejected. The theme was metamorphosis, so I painted the city morphed into a fabulous drag queen, in the style of an Uber-kitsch religious painting (taking “Our Lady of Guadeloupe” as my main inspiration - Brighthelmstone is the old name for the city of Brighton). There are a total of 33 visual “easter eggs” contained within the picture, some architectural, some cultural. If any of you are familiar with the place, have fun spotting them! (Created on Affinity Designer 2 for iPad)
-
I don't know where these ideas come from, nor why they pick on me. But there we are; more unsolicited nonsense made flesh (digitally speaking). Mostly vectors with a few Effects here and there. First off: a mock-Tudor house, a style popular between the Wars, and the Lombardy poplars that were also all over the place. City gent in his working clothes and housewife in her posh frock. Next, the balcony of Buck House (that's Buckingham Palace to you) with a warm sunny queen and a damp soggy king. I have an idea or two more, which I'll post when I get round to them.
-
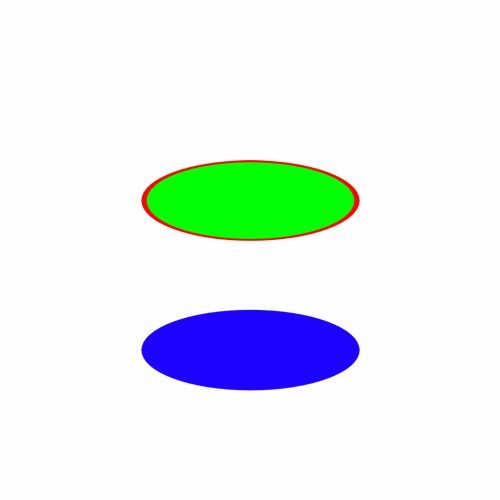
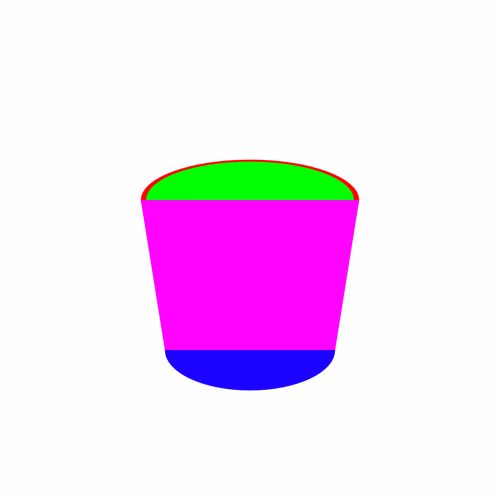
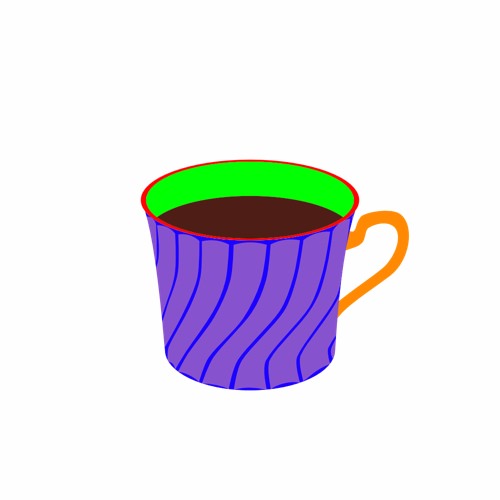
“Coffee Time” I’m really not very good with hand drawing (stick figures only!) so I really like the concept of vector drawing in which I can make changes after the fact and tweak to my hearts content. To learn how to use Affinity Designer (I have played with some vector stuff before in Inkscape but nothing much at all), I decided to make something look as real as I could that wouldn’t need too much raw drawing skill and I came up with “Coffee Time” : 100% created from scratch vector drawing (no brushes or pixel layers except for the use of the fx “Layer effects"). I did use a photo for reference but I didn’t do any tracing or anything. I’m really, really happy how it turned out. I tried out all sorts of things and learned a lot but it was a lot of fun :) As this is a "Learn and Share” forum, I thought I’d share exactly what I did (see the other other attached pictures). It’s not perfect and I’m a beginner, but hopefully others might be able to learn something, too Enjoy! :) My Process: 01 Create 2 sets of circle shapes to represent the top and bottom of the cup. Squish the top and the bottom with the move tool. The top circle has a smaller one on top to remove later to make a lip for the cup. I deliberately used bright colours to make the shapes easy to distinguish from each other. 02 Join the circles with the corners of a rectangle shape to form the side of the cup. 03 Shape the rectangle with the node tool. Add a handle. Clone the top circle and move it down to make the surface of the coffee. 04 Create a set of “shading shapes” to put on top of the side of the cup. These will then be given a gradient colour and transparency to give the illusion of a bumpy surface. 05 Create some circles and overlay some shading shapes . I used the the smart duplicate function to repeatedly rotate duplicates of the shading shape easily. 06 Squish the saucer with the move tool and move into place under the saucer 07 Change the colours to something closer to the final version and play with gradients and transparencies. I also blurred it to make it blend more naturally. Once I got something that looked good, I made a style of it and then applied it to the others and then hand tweaked each one. 08 Do the same to the saucer. Also added some detail (reflection of the inside of the cup and blurred it) to the coffee. 09 Add a background with a gradient. I used the noise slider to give it some texture. I also added some steam with just a hand drawn shape. 10 Add a shadow. I just duplicated the cup and saucer, blacked them out and then put them in place underneath everything and used the shear tool to project it out. I also added some fine detail on the edge of the side of the cup to add to the bumpiness illusion. Made the lip a nice shiny gold with a slightly tweaked version of the built in “metal” style. Added some self shadowing to the saucer and further deformed the circle shape it to give a more 3D look to it. 11 Added reflections and spectral highlights to the cup and saucer. Now it looks nice and shiny. For the final version, I also added some bubbles to the coffee (lots of circle shapes) and the text, converted to curves and then given a steam like style (actually the same one I used for the shading shapes!) and then each character rotated and scaled to make it look like steam from the coffee.
- 10 replies
-
- 13
-
-
- coffee cup
- vector
- (and 3 more)
-
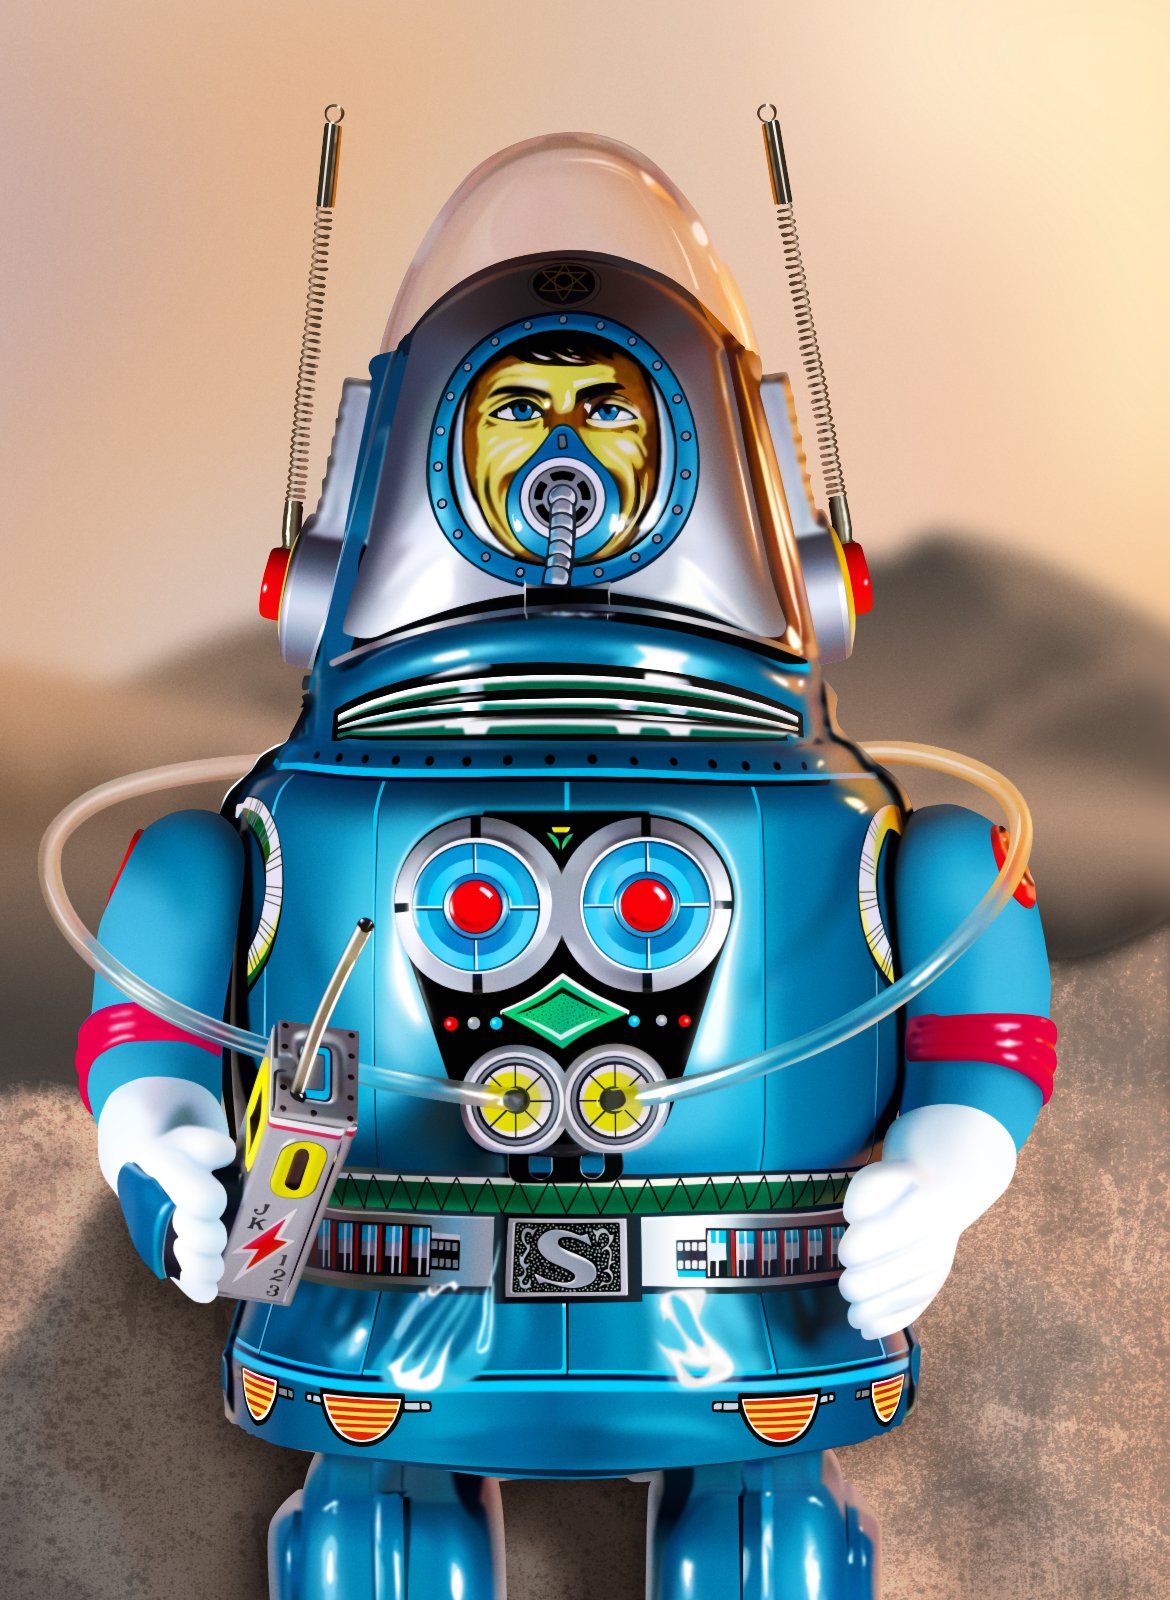
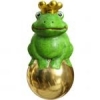
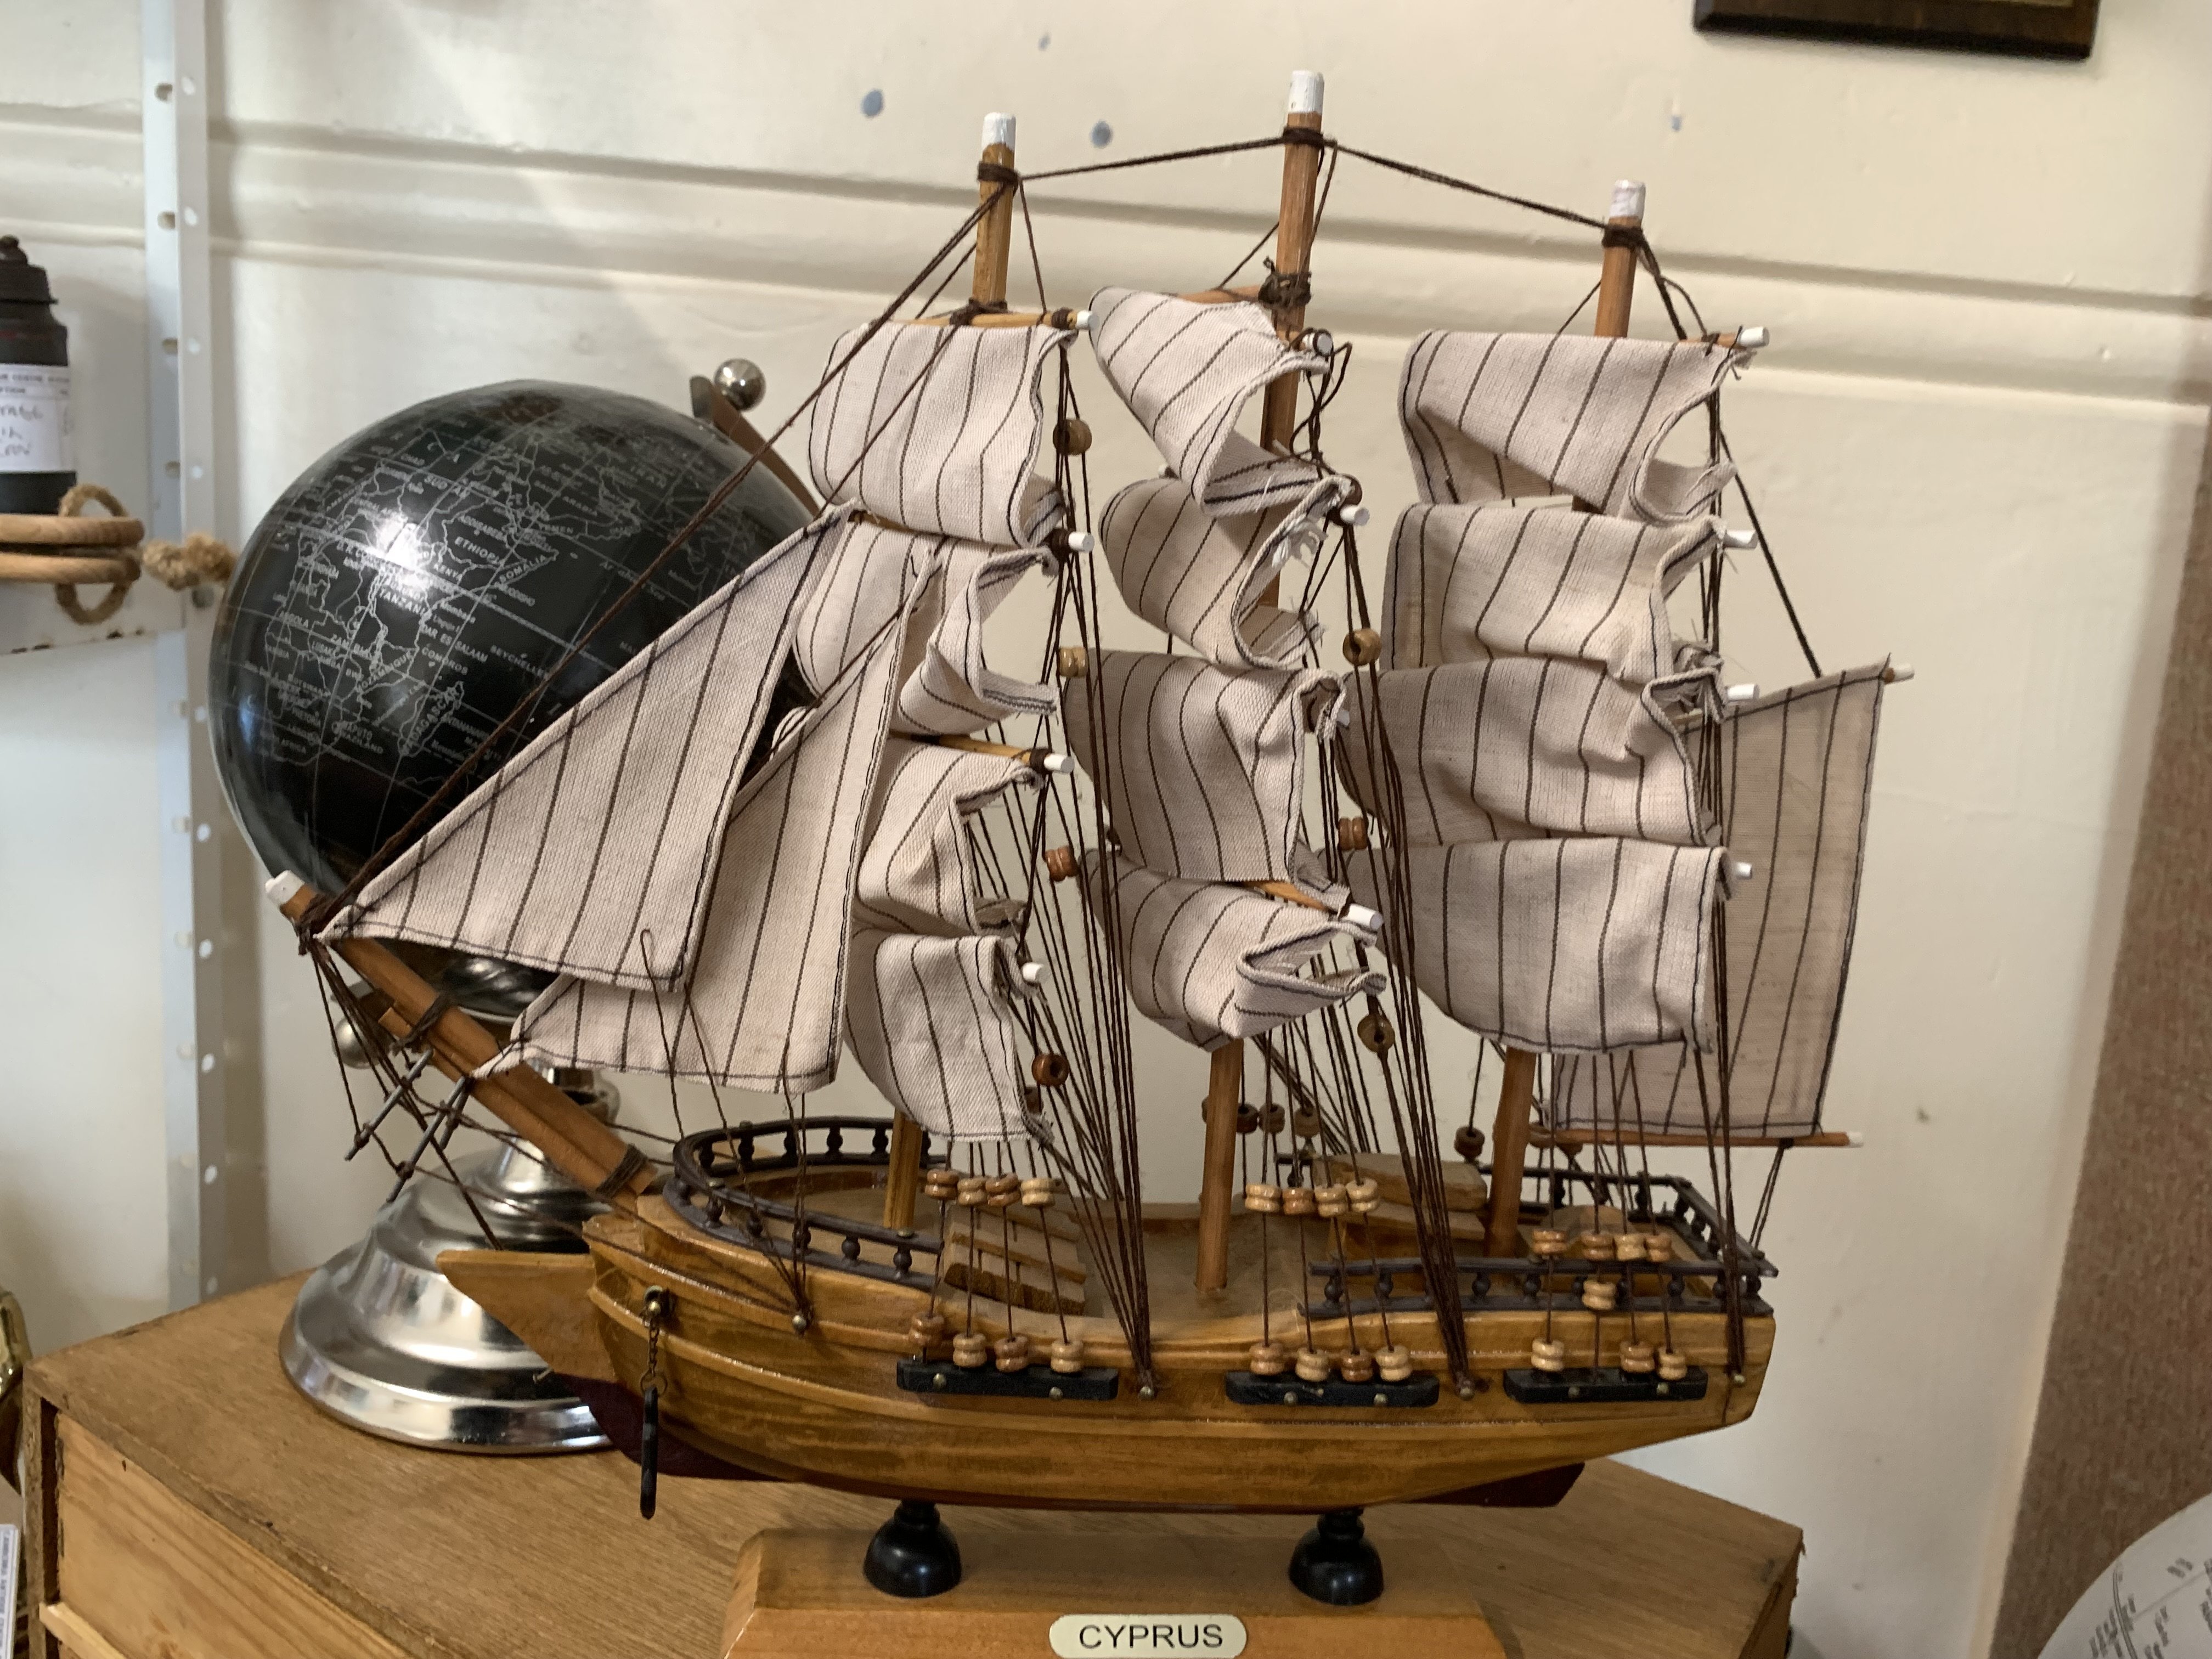
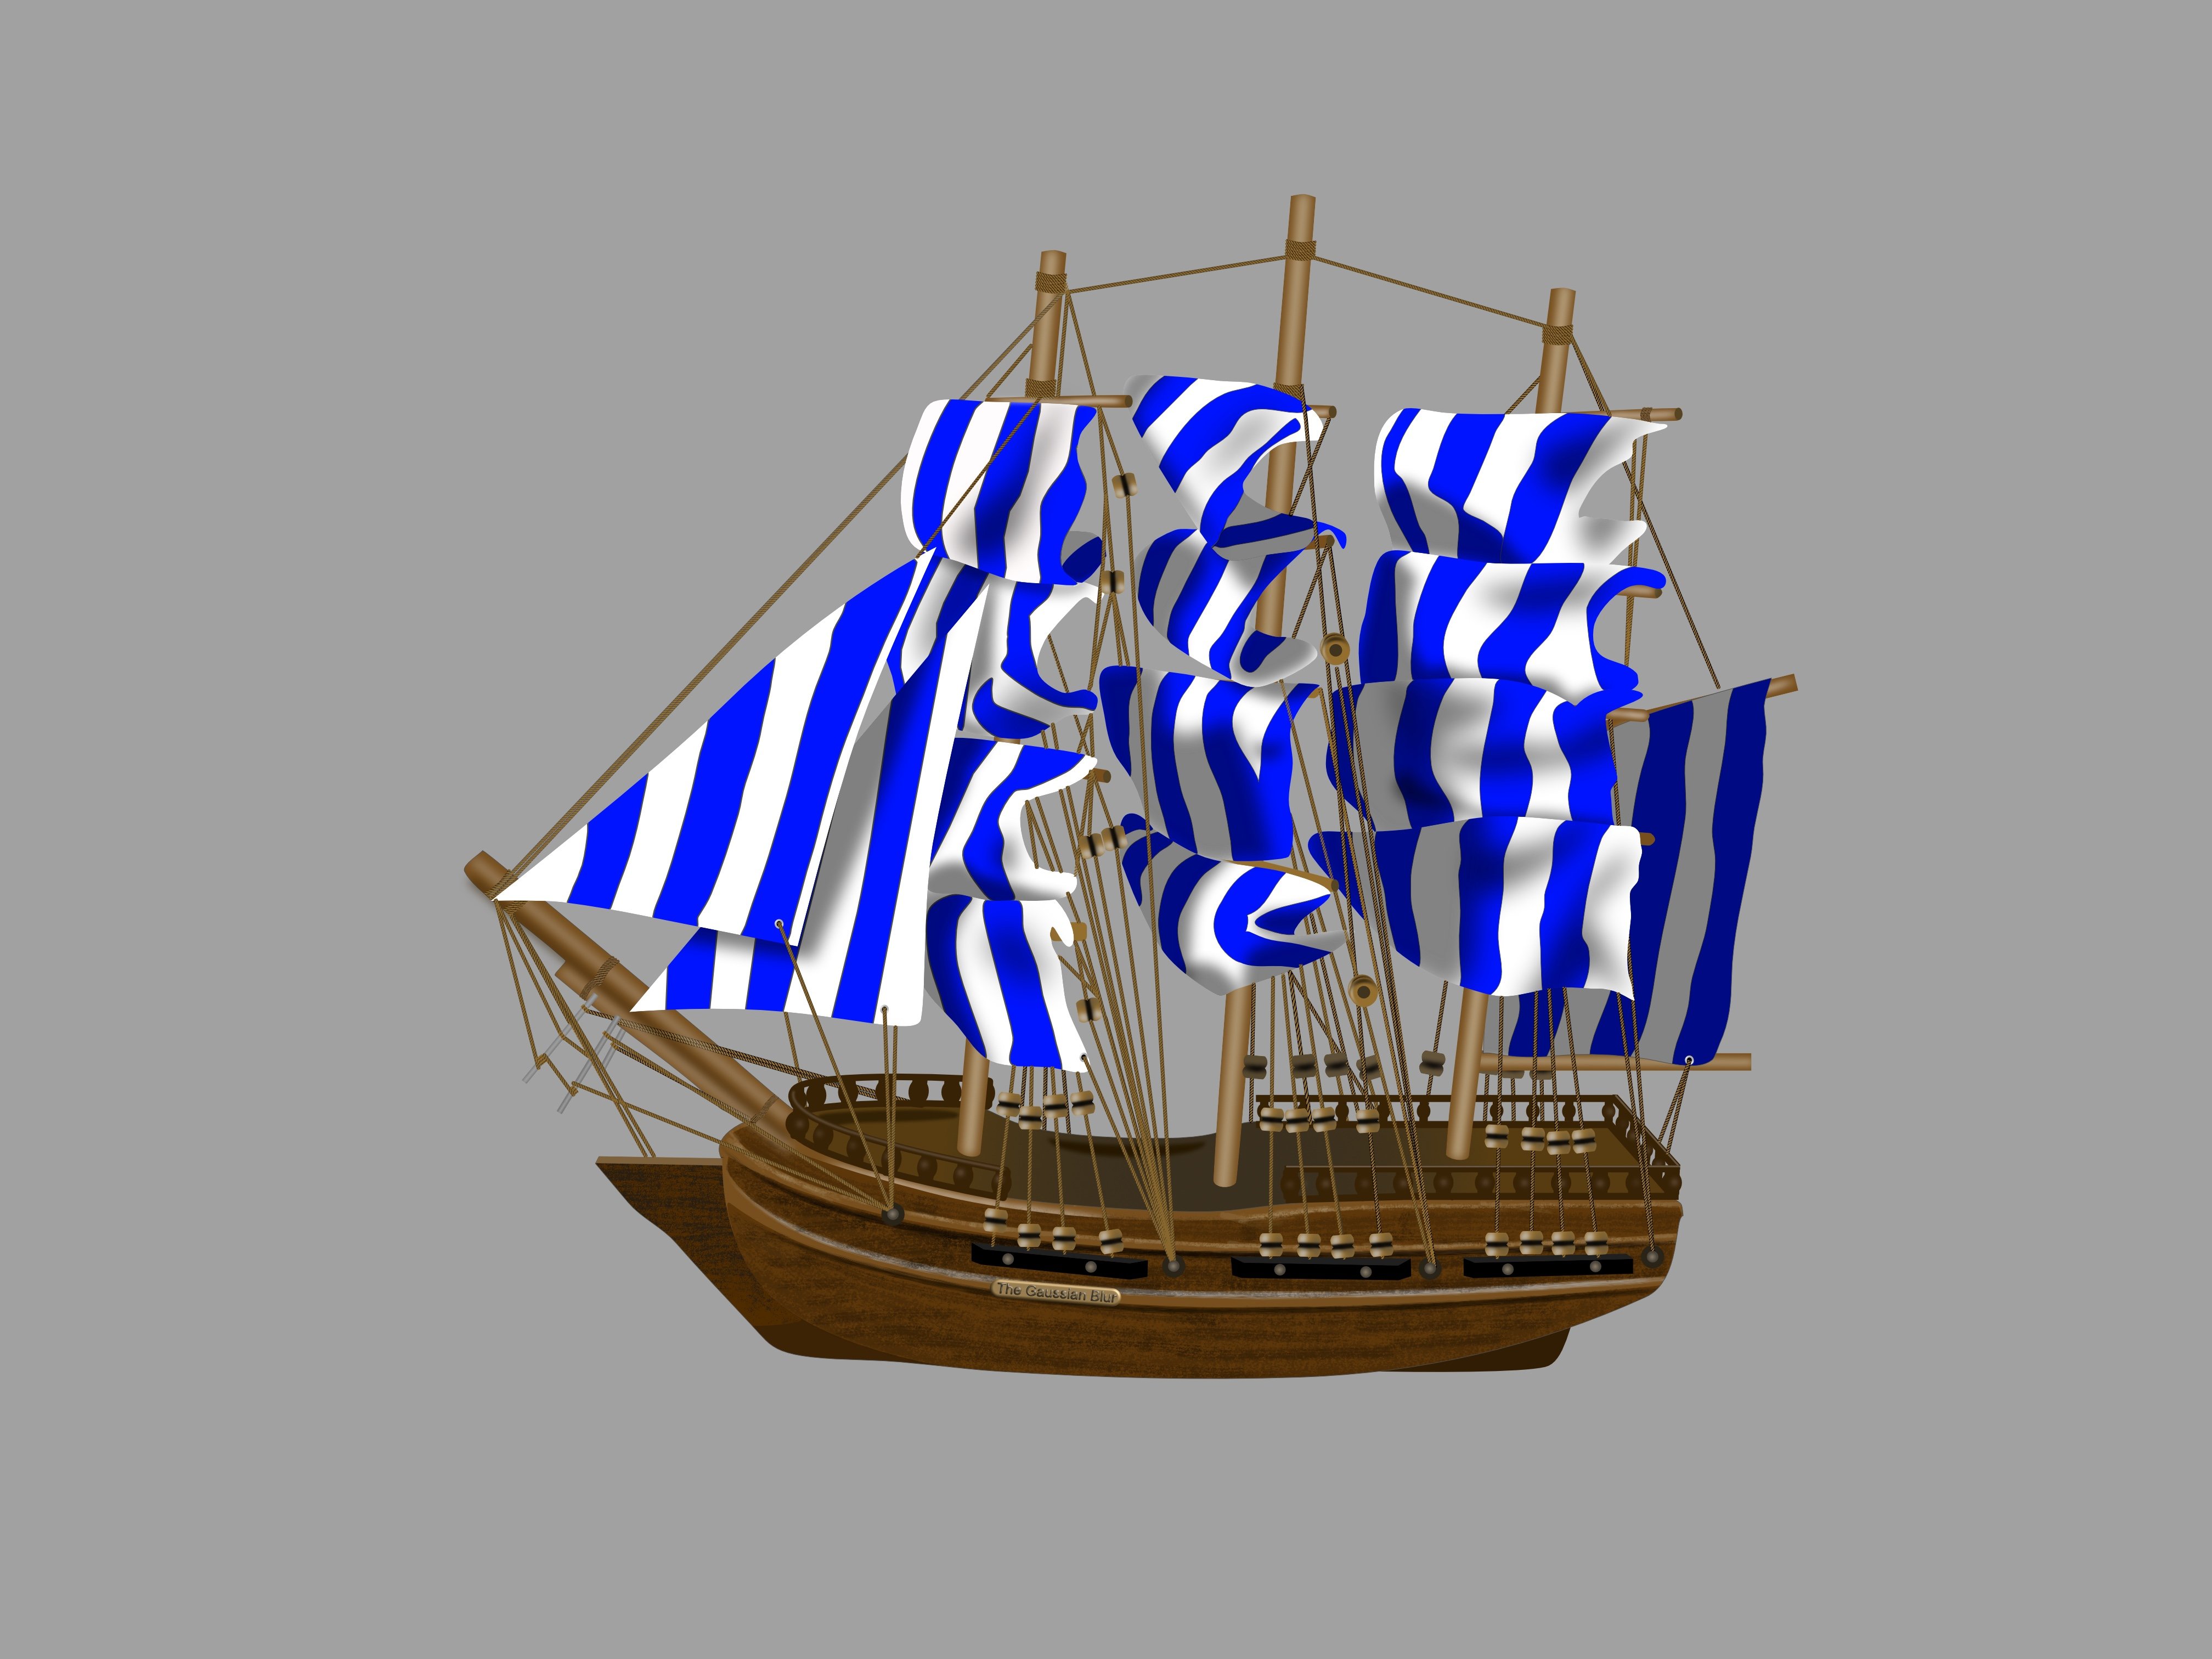
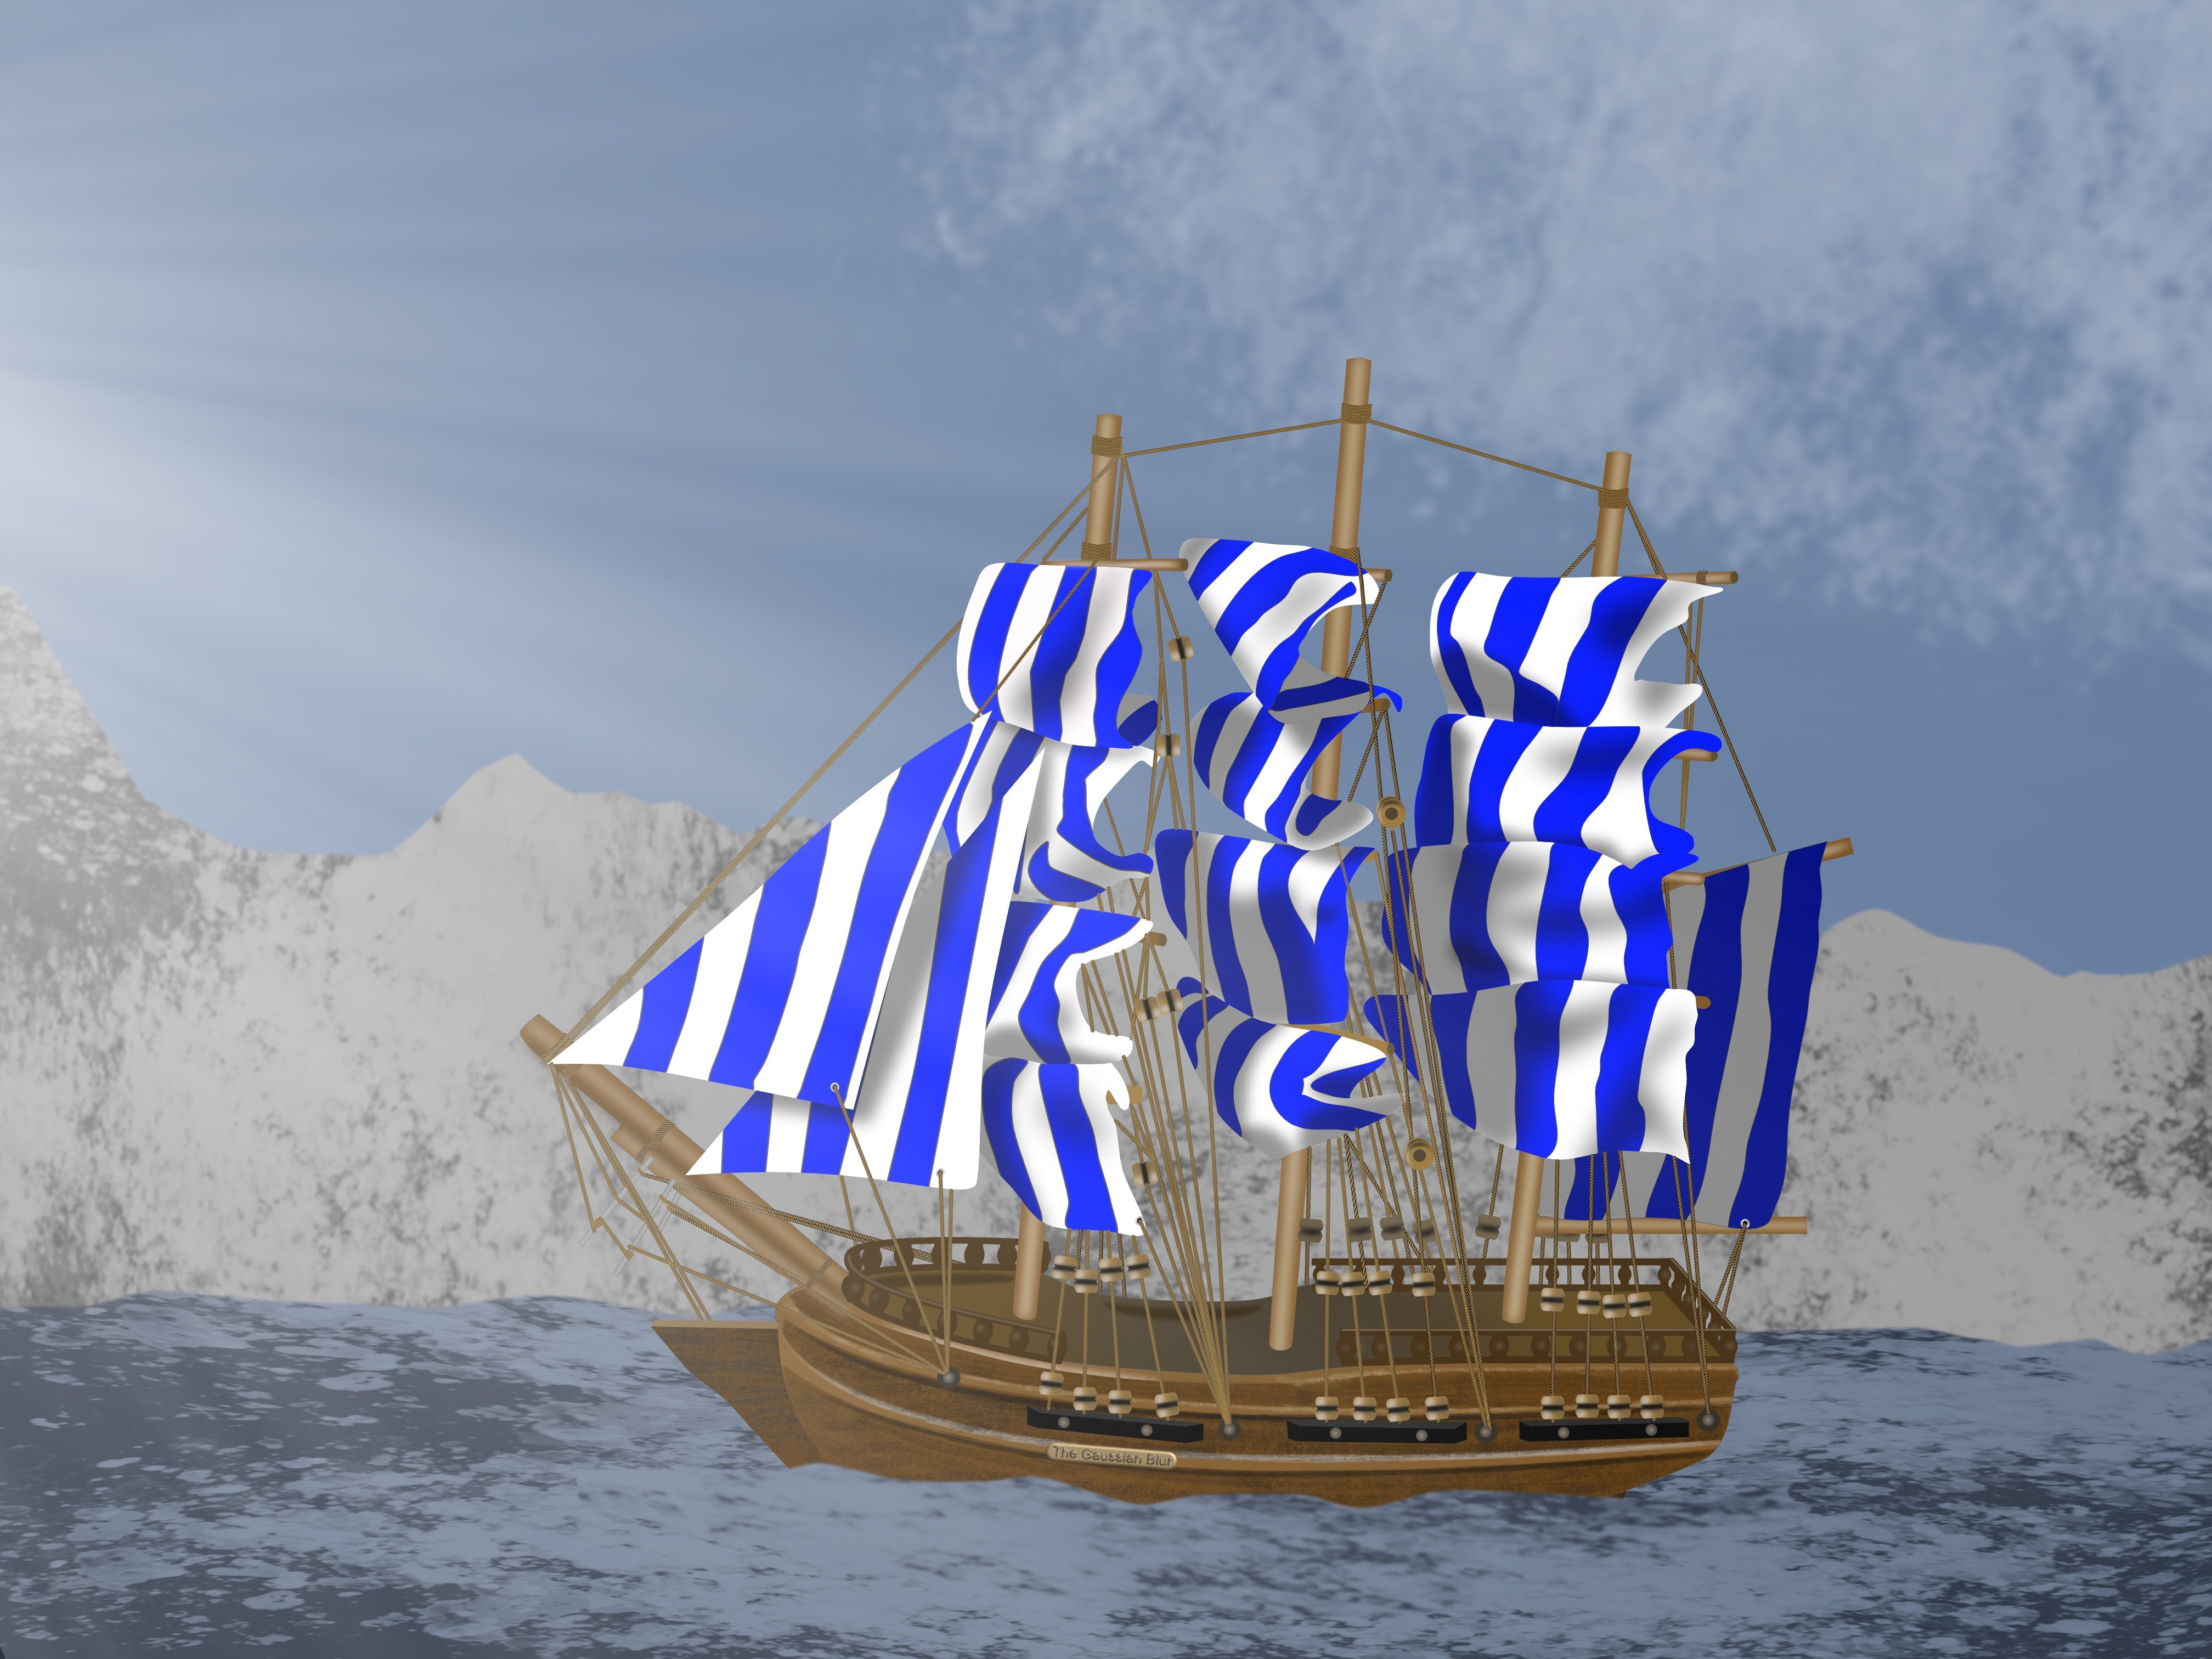
I saw this model in an antique shop, and thought it would be a good challenge to do in vector. It wasn’t until I took a better look, and started vectoring, that I realised how much work must have gone into the model, for what was probably a cheapish souvenir.
-
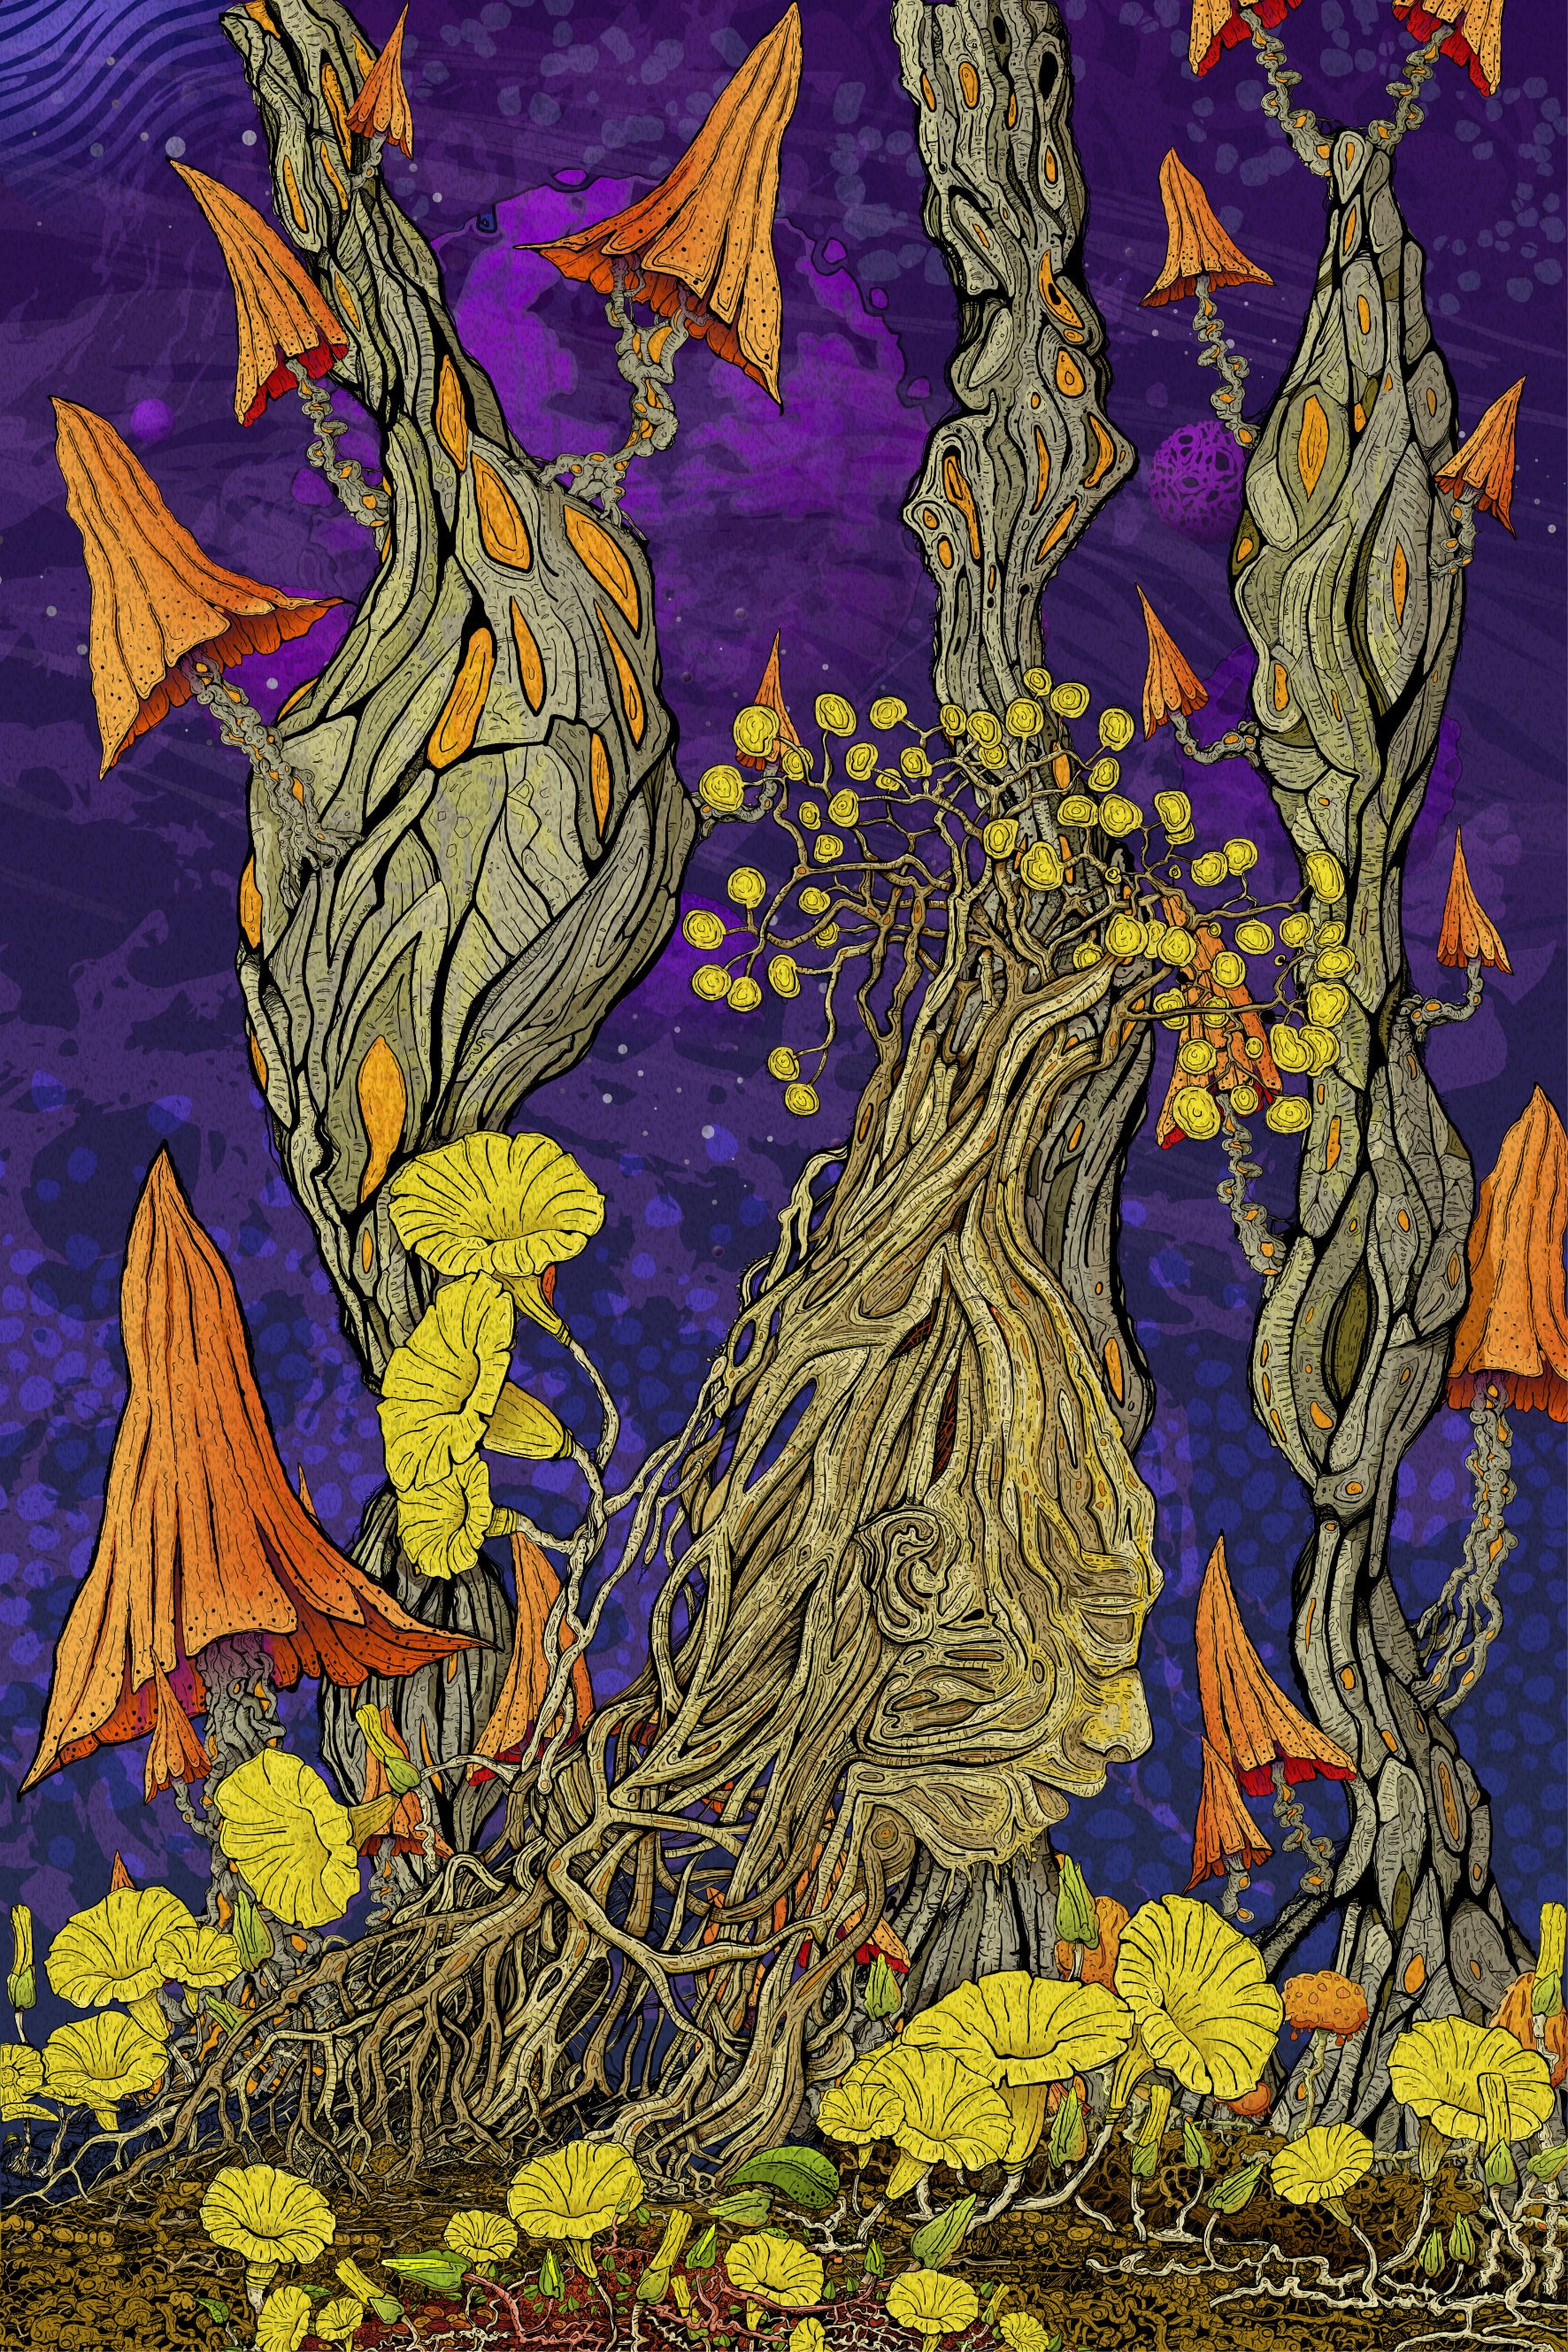
Bindweed 500 x 750 mm | 300dpi Affinity Designer Part of the 'Untamed Project' and a mix of Raster and Vector drawing Raster Outlines with Vector Backgrounds Coloured Version with Texture Overlay using the new 2.1 Asset to Fill Feature Tinted Version using Hue Overlay and without dot texture
-
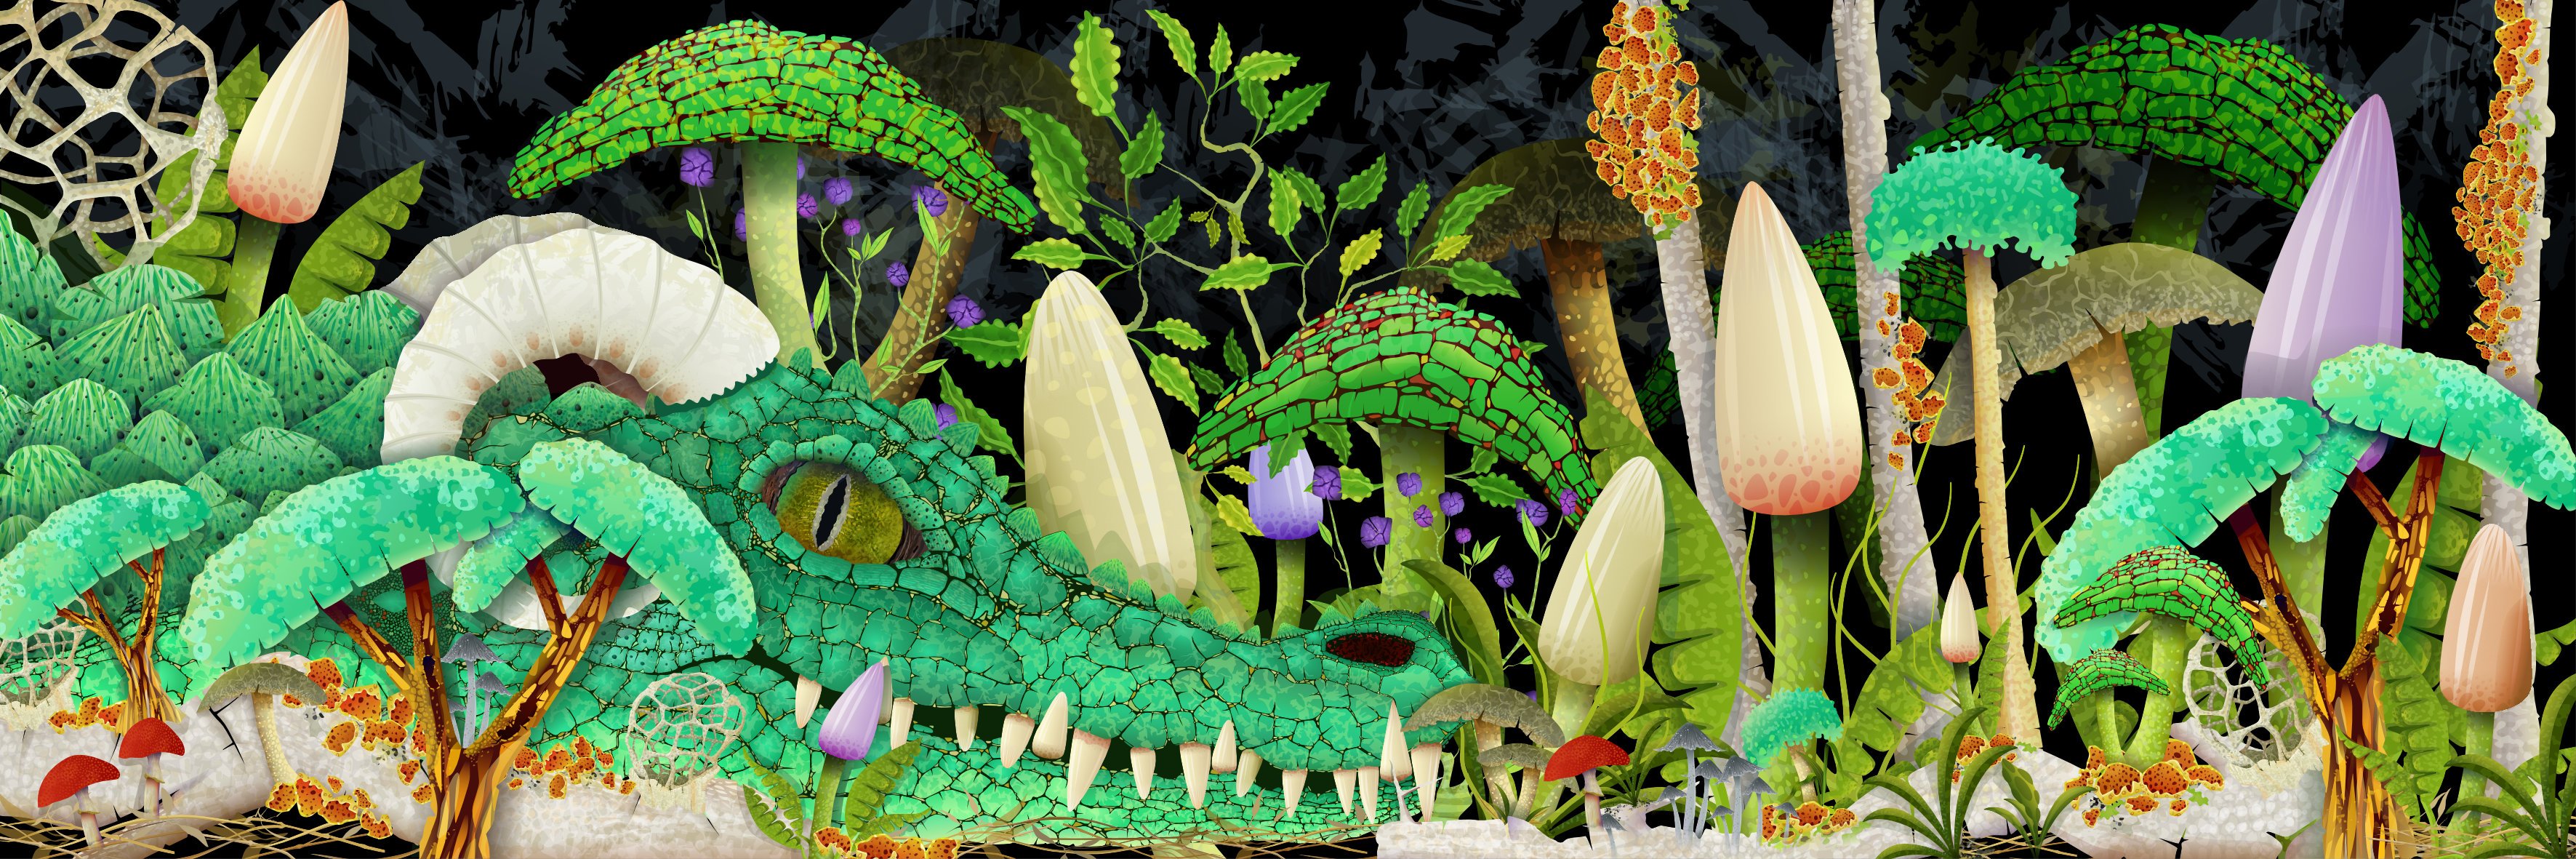
Camouflage II Finally finished the second Camouflage Vector Drawing. Completed in Affinity Designer 1.7 with a little help from the 1.8 Beta. Continued with same theme as Camouflage I but with a completely new set of vector objects. Original size 1500 x 500mm 300dpi Uploaded at 3543 x 1181 jpg Eight layer Composite Embedded file set
- 40 replies
-
- 24
-
-
It's that time again!... Year 6! Using the new brush sets this year 1. Project Brush 19 Inker (2 sets Inker and Pattern) 2. Project Brush 21 Scribble and Scratch 3. Project Brush 25 Outline Inkers Set 2(Fine Liner Set!) and my new favourites!... 4. Project Brush 26 Distressed Erase and Distressed Pattern Image Palettes Added image palettes palettes.zip Inker Brush set Resources 01 Crystal Original: 500mm x 500mm 300dpi raster Upload: 1772 x 1772 px
- 60 replies
-
- 20
-
-
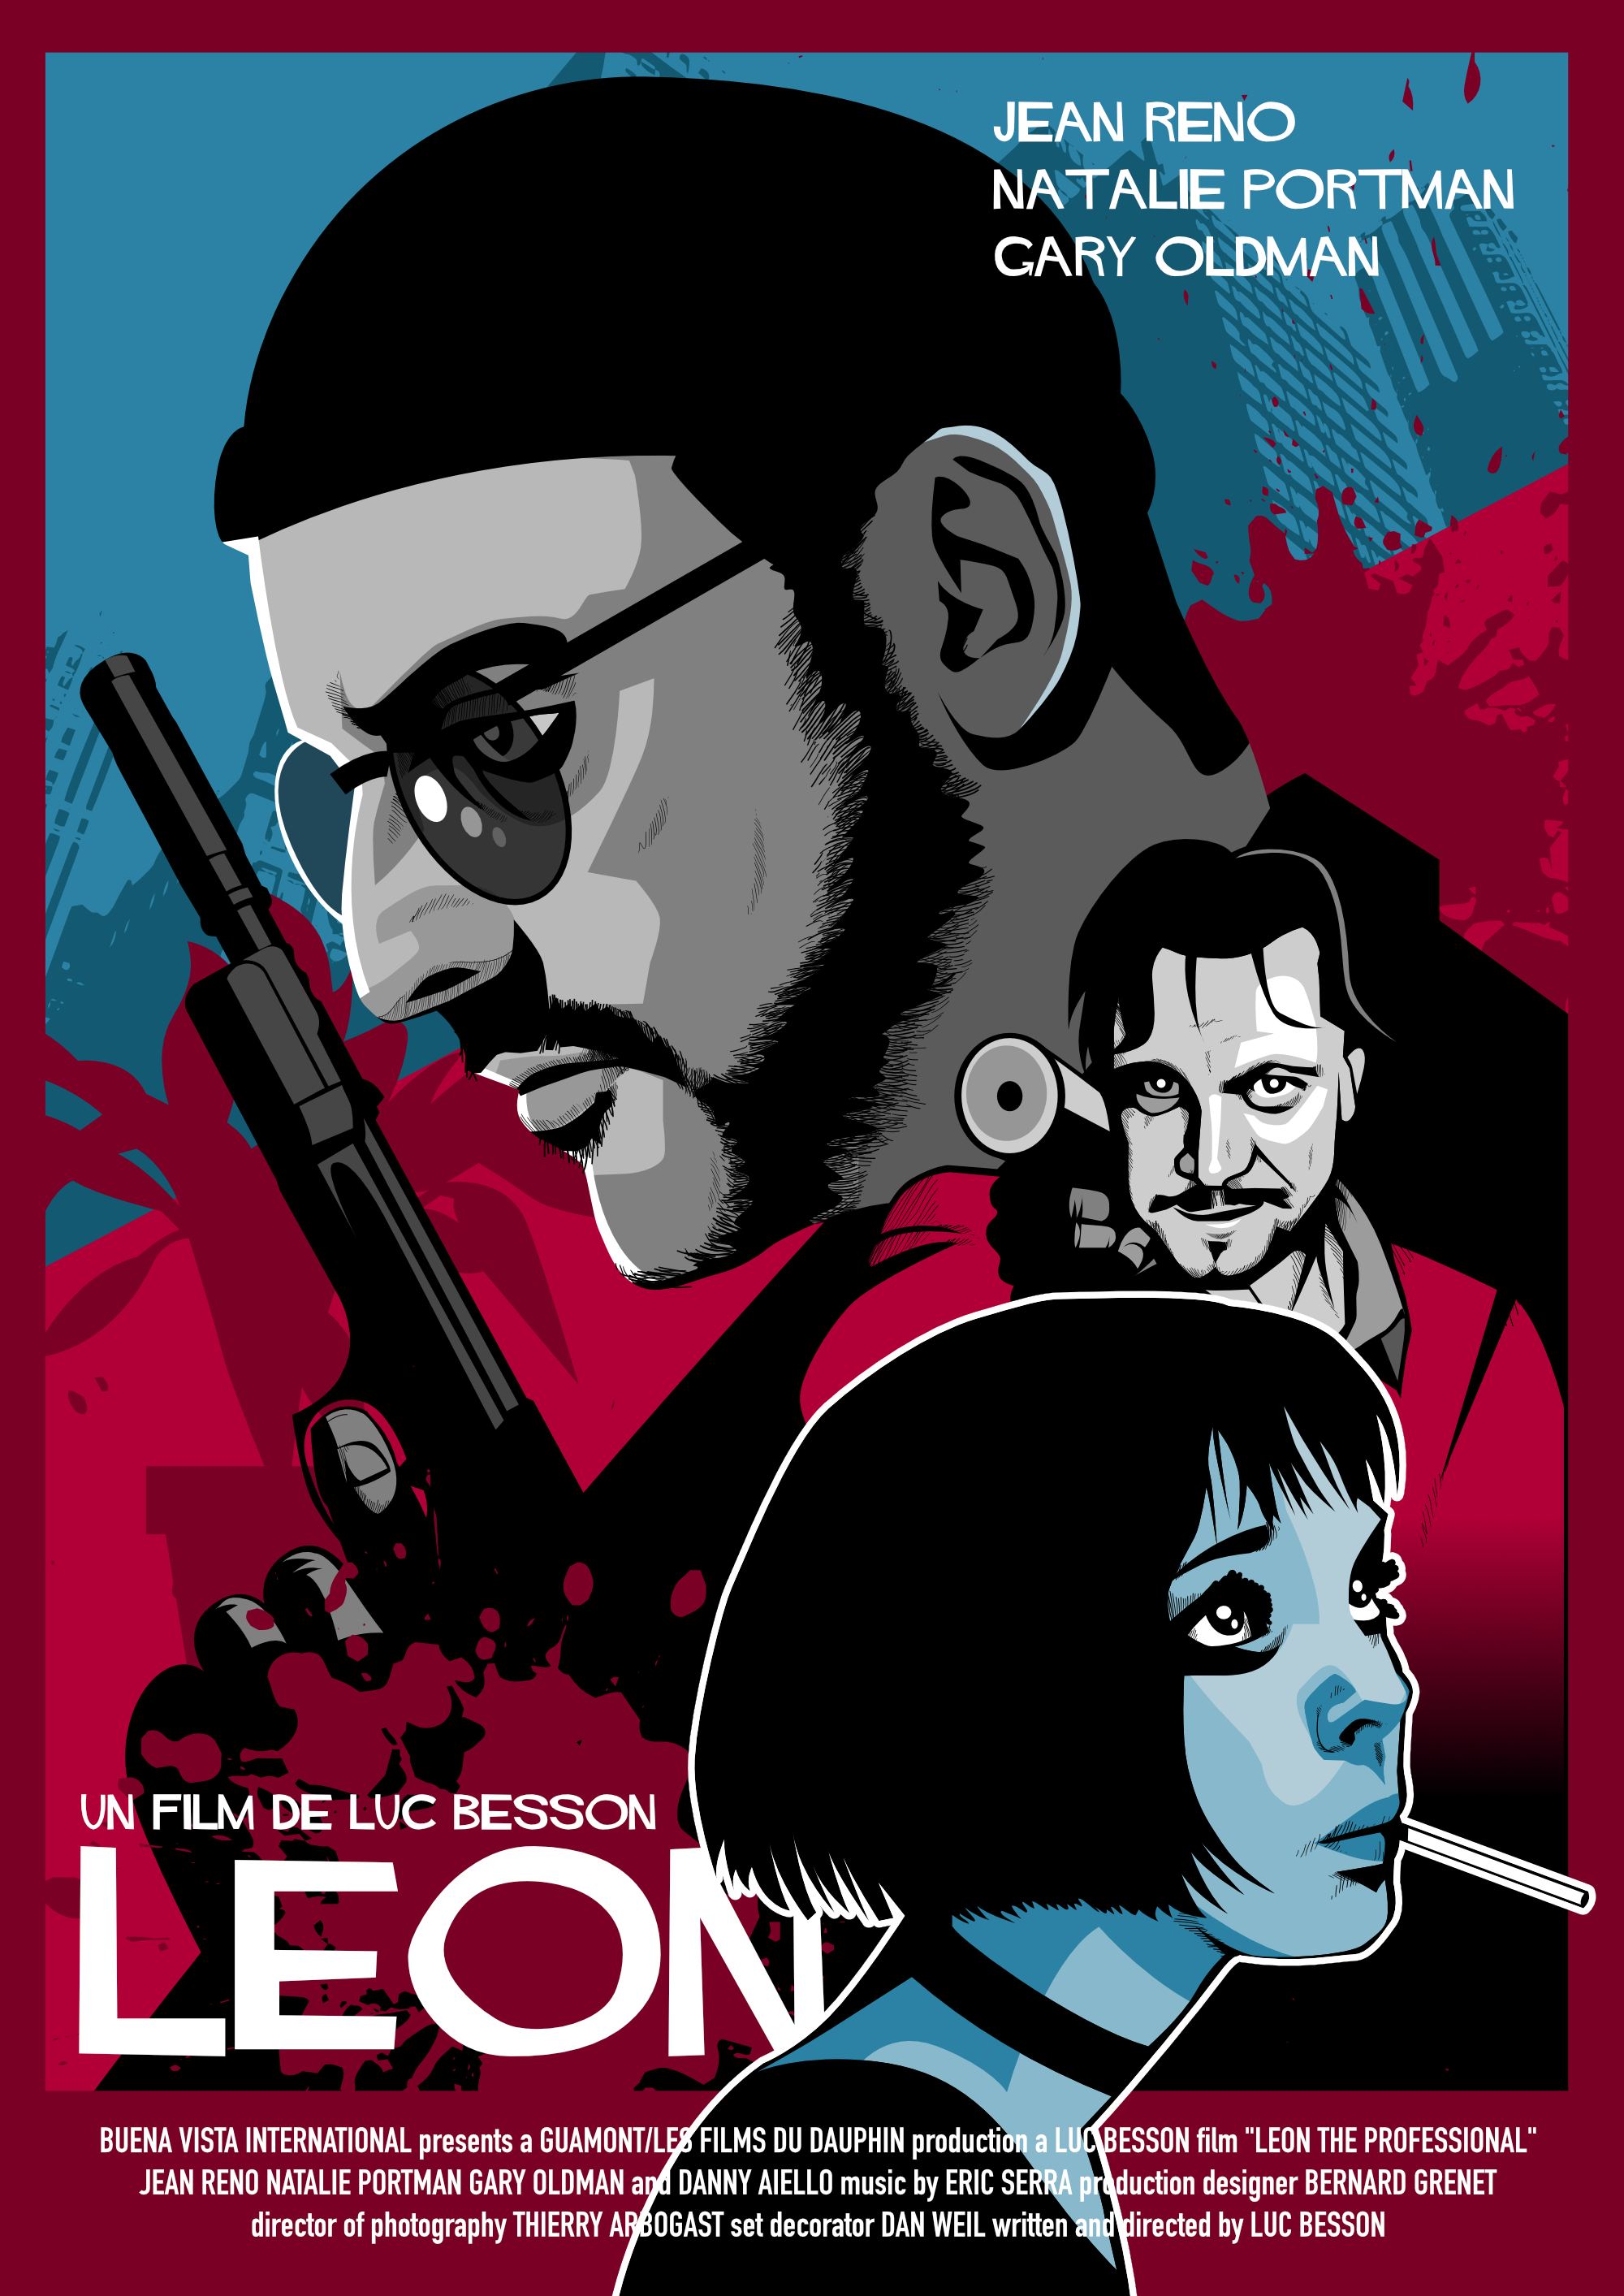
Another of my occasional movie posters. This one took a bit of redrafting (and rewatching) before it came together.
- 2 replies
-
- 16
-
-
- illustration
- movie
- (and 2 more)
-
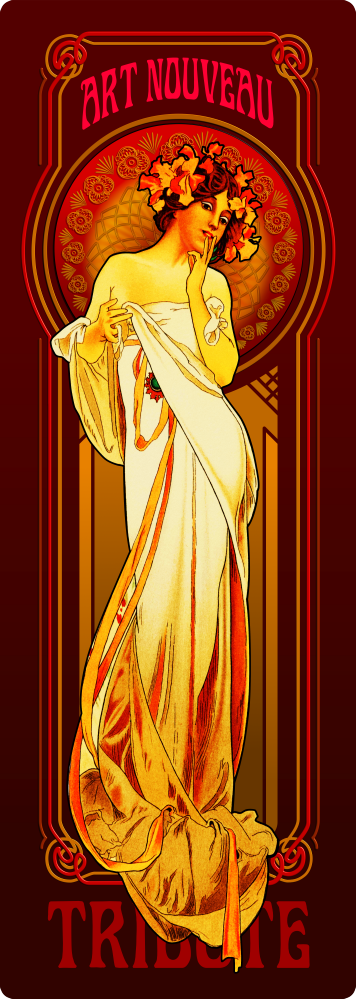
I've always been attracted to Art Nouveau imagery, particularly that of the brilliant Alphonse Mucha, who is largely accredited for starting that appealing type of graphic art. I wanted to wrap my mind around the specific aspects of the craft of which this practice drawing is the first attempt. I plan to do more Art Nouveau all vector drawings in the future, unlike this image that contains both vector and bitmap embedded files. Technically this image is some sort of blend of Art Nouveau and Art Deco, the latter being the successor of the first art movement, I guess. More on Mucha and Art Nouveau in my portfolio blog: https://communicats.blogspot.com/2022/11/art-nouveau-practice-drawing-01.html
- 12 replies
-
- 27
-
-
-
- art nouveau
- vector
- (and 1 more)
-
Kheyyy... I was wondering how long it would take to make a vector portrait. Answer: a lot. Introducing my friend Nathalie: ... and wireframe preview: