Search the Community
Showing results for tags 'vector shapes'.
Found 4 results
-
 I am trying to cut and leave behind the shape within the circle? I've tried all Geometry tools, but none seems willing to do that The only one that seems to come close is the Intersect tool
-
 This is a response to a question by user SunRiseMoon on July 02. 2019. A quick basic drawing lesson. As of this writing, shapes in Affinity designer have 2 attributes, the stroke and fill. Those are defined by vector curve(s). To be filled, those curves can be either open or closed, as long as they surround a 2D area. But if they are open, any "boolean" operation, such as add or divide, will close the curves between the end point of each. This often produces unusable shapes. In Affinity, shapes ar made frome a series of nodes, each one connecting to only those adjacent in the series. The nodes cannot connect to more than 2 other nodes. There is no branching of a curve object. In order to get filled areas of color, if the shape is to be made from the curves that are already there, the curves must be selected, and thru the node tool, joined, and then closed. Sometimes one may need to duplicate existing curves, and cut out sections w. the node tool. These can then be used to create an area that meets shapes that are already there. *** In the owl face example, various strokes were given varying thicknesses by manipulating the pressure curve. Those were "expanded," and added together to form ink like strokes. 3 of the original vector strokes were closed, and so those pen lines could have a fill assigned to them, and for smooth continuous areas of color. Other lines were unclosed shapes positioned either above of below the closed shapes. When the shapes were filled, most were below in the layer hierarchy, and so were hidded by the fill. I selected the "beak" line. See the copies go thru these steps. The line is closed. The closing line is extended upwards for a more natural appearance. A fill is assigned, and the stroke set to "none." the unclosed curve is then matched to the filled curves position, and given a varying line weight. At a reduced size, the beak group was placed over the face. OwlHeadStart.afdesign
 -
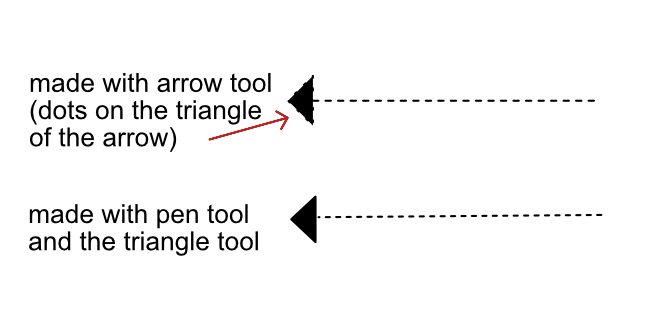
I usually use arrows in my designs and i have a problem when i want a doted arrow because dots are also applied to the triangle of the arrow. Thanks !
-
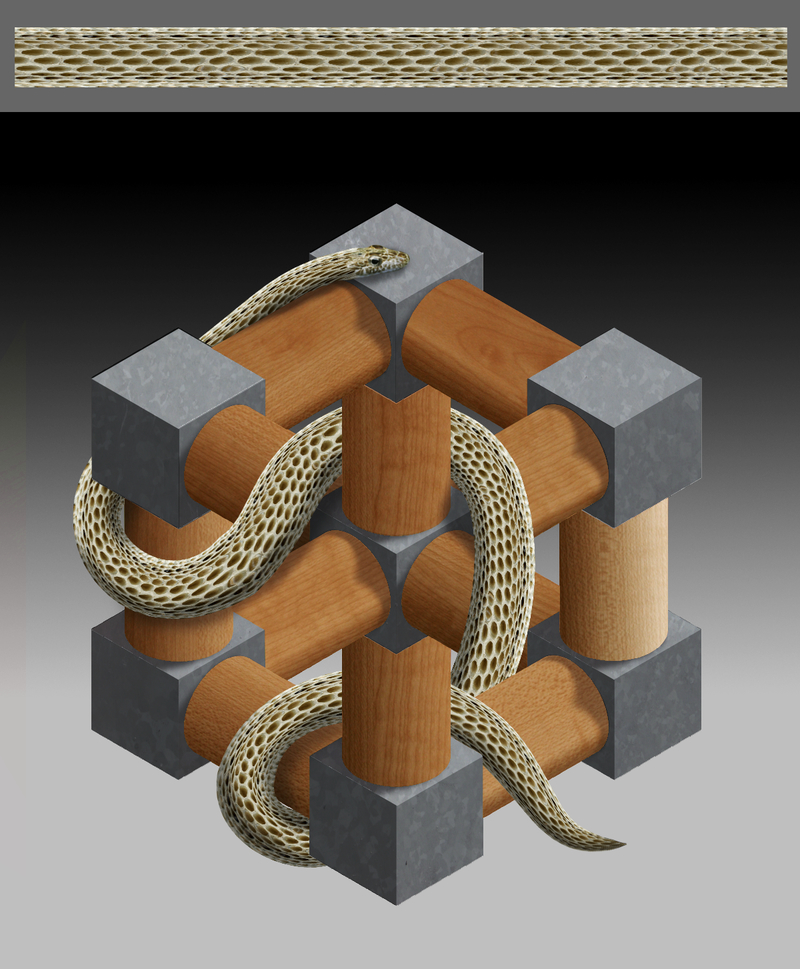
This is my second full image produced with Photo. Once again it is quite simple and, once again, it is focused on familiarising myself with a small set of specific tools. My previous image (the egg) focused on pen and brushes. This image focuses on vector shapes, boolean operations, fills and mesh warping. The snake was created from the rectangular texture shown in the inset above. I used the wonderful Mesh Warp Tool. This is an amazing tool!! The ability to define where you put the mesh grid yourself is just terrific. Whoever developed this gets my five star award ...... so if someone from Serif is reading this please pass this on to them. :) I also played with the Deform Filter but failed utterly to comprehend its workings and got hopelessly lost. So I shall have to hope that there is a tutorial on this later. :unsure: This really is a great app! :) :)