Search the Community
Showing results for tags 'tutorials'.
-
I just finished Parts 1 & 2 of my AP User Guide - workspace & editing skills. I'm moving on now to Part 3, Editing Examples. An aside. The completed User Guide is here in the forum's Resources section per a forum moderator's request. I'm going to put the associated Tutorials section here as well for that reason, but it seems to me that both are tutorials. When is a forum post a Tutorial instead of a Resource. I'm just curious. This example illustrates masks (mostly) - AP User Guide Part 3 OOF.pdf The example isn't something often seen. It's an image that appears to extend beyond a framed photo's matte opening.
-
.thumb.jpeg.6f143e8223547aba974205ef53397036.jpeg) Hey all, I'm really happy to announce that I've just released the first few videos of my passion project, the Shooting Series! What it's about I love photography and video - I'll often go out and shoot specific material for use in the Affinity Photo tutorials to demonstrate certain features, and this has fed into my desire to cover a mixture of well-known and esoteric shooting techniques. It's my goal, then, to produce a video series that looks at all kinds of weird and wonderful photographic techniques - from shooting for stacking (long exposure simulation, noise reduction) to light painting, "big stopper" effects, portrait panoramas, focus stacking landscapes.. the list goes on. I'm constantly gathering material and planning/scripting videos, but I've just put the finishing touches on a few of the videos and felt it was about time to share them. Where applicable, I'll also be providing sample materials to download. Additionally, I've also put accompanying articles up on my website that provide some additional tips and insights. Long Exposure Water - Watch on YouTube - Read article In this video we're looking at the popular technique of using long exposure times to create shots with blurred motion; in this particular case, we're focusing on water. When you shoot water with long exposures, it takes on a smoother, "flowing" and sometimes ethereal appearance. In the video, I cover the use of both variable and fixed Neutral Density filters, as well as square filters with a filter bracket. Burst Stacking - Watch on YouTube - Read article - Download sample images Here we're exploring the use of stacking in post to create a long exposure look from a burst of images. It's a very esoteric technique, but can prove very useful in certain circumstances: you could, for example, find yourself in a situation where you want to achieve a long exposure look to some water, but don't have either a means of stabilisation or any ND filters to cut down the light for a slower shutter speed. I've also provided a ZIP archive with image samples for two of the compositions so you can stack them and see the effect. Big Stopper - Watch on YouTube - Read article - Download sample images In this video we're taking a look at setting up the camera for a "big stopper" effect with landscapes, as well as exploring stacking in post production to both enhance and emulate the effect. Also provided is a ZIP archive with image samples for two of the examples so you can experiment with stacking them. Polarisers - Watch on YouTube - Read article In this short and sweet video we're taking a look at polarisers, examining their benefits and caveats. Portrait Panoramas - Watch on YouTube - Read article Check out how to capture more vertical space in your panoramas by shooting in portrait orientation. --- Hope you find them interesting and useful!
Hey all, I'm really happy to announce that I've just released the first few videos of my passion project, the Shooting Series! What it's about I love photography and video - I'll often go out and shoot specific material for use in the Affinity Photo tutorials to demonstrate certain features, and this has fed into my desire to cover a mixture of well-known and esoteric shooting techniques. It's my goal, then, to produce a video series that looks at all kinds of weird and wonderful photographic techniques - from shooting for stacking (long exposure simulation, noise reduction) to light painting, "big stopper" effects, portrait panoramas, focus stacking landscapes.. the list goes on. I'm constantly gathering material and planning/scripting videos, but I've just put the finishing touches on a few of the videos and felt it was about time to share them. Where applicable, I'll also be providing sample materials to download. Additionally, I've also put accompanying articles up on my website that provide some additional tips and insights. Long Exposure Water - Watch on YouTube - Read article In this video we're looking at the popular technique of using long exposure times to create shots with blurred motion; in this particular case, we're focusing on water. When you shoot water with long exposures, it takes on a smoother, "flowing" and sometimes ethereal appearance. In the video, I cover the use of both variable and fixed Neutral Density filters, as well as square filters with a filter bracket. Burst Stacking - Watch on YouTube - Read article - Download sample images Here we're exploring the use of stacking in post to create a long exposure look from a burst of images. It's a very esoteric technique, but can prove very useful in certain circumstances: you could, for example, find yourself in a situation where you want to achieve a long exposure look to some water, but don't have either a means of stabilisation or any ND filters to cut down the light for a slower shutter speed. I've also provided a ZIP archive with image samples for two of the compositions so you can stack them and see the effect. Big Stopper - Watch on YouTube - Read article - Download sample images In this video we're taking a look at setting up the camera for a "big stopper" effect with landscapes, as well as exploring stacking in post production to both enhance and emulate the effect. Also provided is a ZIP archive with image samples for two of the examples so you can experiment with stacking them. Polarisers - Watch on YouTube - Read article In this short and sweet video we're taking a look at polarisers, examining their benefits and caveats. Portrait Panoramas - Watch on YouTube - Read article Check out how to capture more vertical space in your panoramas by shooting in portrait orientation. --- Hope you find them interesting and useful! -
 Quick and Easy Paper Cutout Vector Effect. This Affinity Desiner Tutorial will show you how to make a realistic Paper Cut effect. Support me on Patreon: https://www.patreon.com/sarikas Follow me on: https://www.facebook.com/sarikastutorials https://www.instagram.com/sarikasat/ Join us on Reddit: https://www.reddit.com/r/AffinityPhotoTuts/
 -
 I need assistance or enlightenment in working on the Discovery project. No problem in making the Mid, Foreground, Element and Astronaut layers. Creating the light beam, Pen Tool (selected Element layer) no problem. Renamed the curve layer to Light beam. Select Paint Brush Tool, painted white 69% Opacity. Clip the brush layer to Light beam’s layer, no problem. As stated, to give smoke natural look, change the blend mode to Overlay. This is my first problem, totally removes all visible smoke. I had to return to Normal mode to see any smoke. Second problem, instructions state use Ease Brush tool, using same brush to give natural look; however, this adds a Mask layer, not to be found in instructions. I will attach screen shot of progress and mask layer. As seen, I changed from Overlay to Normal blend mode to see color. Thank you for any info, corrections or user error in following Workbook instructions.
-
 DEPRECATED THREAD The Photo tutorials listed below have been refreshed and moved. Please see this new thread or use the Affinity site Photo Desktop tutorials webpage In support of our fantastic photo editing app, please use this comprehensive and structured set of videos for accelerated learning! The video tutorials are available on Vimeo and YouTube via these links: Vimeo - http://affin.co/PhotoVids YouTube - http://affin.co/photoyt We now have a specific Beginners Series of videos tailored to absolute beginners, with a more manageable pacing and focus on concepts and straightforward procedures. They all include subtitles to aid understanding. The tutorial set includes: Beginners Series Opening & Saving - YouTube / Vimeo Layers - YouTube / Vimeo Adjustments - YouTube / Vimeo Filters - YouTube / Vimeo Exporting - YouTube / Vimeo Introduction Discover Affinity Photo Getting Started Technical Benefits Basics Document Setup Layer Concepts Layers Overview Live Filter Layers Scaling and Transforming Cutting Out Understanding DPI Accessing Help Transforming Document/Image Resizing Canvas Resizing Cropping: Practical Cropping: Aesthetic Straightening Images Cropping: Golden Spiral Cropping: Options Aligning Images Selections and Masking Making Selections Refining Selections Pixel Selections from Layers Quick Masks Mask Layers Exposure Merging Clipping vs Masking Vector Masking Using Adjustment Layers on Masks - YouTube / Vimeo Correction Adjustment Layers Levels Curves Shadows/Highlights Split Toning and Selective Colour LAB Colour Mode Defringing and Chromatic Aberration Live Perspective Haze Removal FFT Denoise Removing Lens Flares Changing Eye Colour Graduated ND Filter Effect Salvaging Underexposed Images Dual Perspective Correction Perspective Skew Correction - YouTube / Vimeo (New: 20th April) Retouching Cloning Inpainting Frequency Separation Liquify: Retouching Vector-Based Retouching Enhancing Landscapes/Architecture Vector Architecture: Worked Example Enhancing Camera Phone Photography Making Images Pop Revealing Sky Detail Bringing Out Water Detail Quick Inpainting Crooked Horizons - YouTube / Vimeo RAW Development Raw: Discover Develop Raw: Developing Images Raw: Overlays Raw: Redeveloping Images Raw: Noise Reduction Maximising Raw Latitude Custom Tone Curve Raw Development Quality 32-bit Raw Development - YouTube / Vimeo Raw Colour Quality Automatic Lens Corrections Raw: Recovering Overexposed Highlights Raw: Exposure Bias Getting Creative Lighting Creative Gradients Creative Black & White Sepia Images Brushes Blend Modes Blend Ranges Liquify Persona Sky Replacement Adding Borders Text: Branding/Watermarking Diffuse Glow Displacement Circular Bokeh Swirling Bokeh Simulating Ambient Occlusion Texturing with Blend Modes Creating Atmosphere Creating Light Beams Vector Lighting Simple Gradients Technicolor Emulation - YouTube / Vimeo Creative Painting Colour toning with shapes Infrared Emulation Radial Blur Regular Tone Mapping Compositing Landscapes Adding Extended Borders Creating Photo Collages Abstract Ideas #01 Abstract Ideas #02 Enhancing Low Light Trails Light Painting Compositing Tone Mapping Portraits HSL Tonal Separation - YouTube / Vimeo Orton Effect - YouTube / Vimeo Design Aids Snapshots Modifiers Designer/Photo Interworking Pixel Accurate Design Placing Documents Useful Keyboard Shortcuts Non Destructive Inpainting and Cloning Layer Creation Behaviour Layer Nesting Exporting 3D LUTs LUTs for Tonal Adjustments View Points Global Cloning Subtle Toning Multiple Colour Formats Scopes Curves Picker Non-Destructive Dodge & Burn Flexible Defringing Edge Detection for Masking Split & Mirror View Batch Processing Clone Sources Pixel Art Resize Direct PSD write-back (round tripping) Freehand Selection Tool Undo History Importing .abr Brushes Undo Brush with Snapshots Quick Toggling Panels - YouTube / Vimeo Light UI - YouTube / Vimeo Brush Stabilisation - YouTube / Vimeo Channels Channels Channels for Alpha Masking Channels: Creating/Storing Selections Editing Single Channels Channels: Greyscale Blending Channel Packing Filters Live Filter Layers (Also in Basics) Apply Image Apply Image: Equations Equations Filter Dust & Scratches Filter Halftone Scanlines Effect Mirror filter Diffuse Glow Filter Defeating Filter Limits Panoramas Panoramas Tricky Panoramas Panorama Distortion Correction HDR (High Dynamic Range) HDR: Merging & Tone Mapping HDR from one exposure - YouTube / Vimeo HDR: Tone Map Presets HDR: Panoramas HDR: Preprocessing HDR: Advanced Editing HDR: Ghosts Removal HDR: 32-bit Editing Focus Merging (Focus Stacking) Focus Merging Focus Merge Retouching Focus Merging Bracketed Exposures Live Stacking Maximum Stacking Big Stopper Effect Light Painting Blending Stacking: Long Exposure Simulation Stacking: Noise Reduction Stacking: Object Removal Stacking: Exposure Merging Stacking: Star Trail Effect Live Projections (360 editing, perspective projection) 360 Live Editing - YouTube / Vimeo 360 Advanced Editing 360 Retouching 360 Multiple Views 360 Roll Correction - YouTube / Vimeo Live Perspective Projection OpenEXR/32-bit OpenEXR Multichannel Import/Export OpenEXR Import Options Editing 32-bit 3D Renders OpenEXR: Using Alpha Channels & Association 3D Render/Texture Work Seamless Textures Clone Sources: Texture Creation Enhancing 3D Renders #01 Enhancing 3D Renders #02 Tone Mapping 3D Renders 3D Relighting with Normal Map Passes - YouTube / Vimeo Colour Management OpenColorIO Setup OpenColorIO Adjustment Soft Proofing Printing on Mac Printing on Windows Wide Colour Profiles vs sRGB - YouTube / Vimeo Macros Macros Macros: Equations Macros: Layer Behaviour Batch Processing with Macros Finishing Off Sharpening Selective Sharpening Exporting Export Compression Efficiency Plugins Installing Nik Plugins (macOS) Installing Nik Plugins (Windows) Installing & Using Nik Dfine Projects Nature Portrait Supermoon Product Shot Retouching #01 Nighttime Architecture Workflow - YouTube / Vimeo Portrait Retouching Workflow - YouTube / Vimeo Bonus Content Uplift Epic Skies (1.6 Bonus Content) - YouTube / Vimeo Windows Workflow videos In addition to the regular tutorials, we've also got some workflow videos shot on the Windows version of Photo that cover using a variety of features to edit an image to completion. These tend to be released on a more informal basis. Hadrian's Wall Tiled Building Portrait Retouching Monochromatic Architecture Canary Wharf Banded Demoiselle Please let us know about areas you think need covering, have problems with, don’t understand, or just tell us if we’re on the right or wrong track. Simply reply to this pinned topic. Have fun with Affinity Photo! Best wishes from the Affinity Documentation Team!
 -
A more recent set of tutorials for 1.7 (and above) is available via affinity.serif.com or from Designer's Welcome screen. The legacy tutorial set, also available on YouTube, includes: 1. Getting Started • Discover Affinity Designer • For Beginners • For Beginners Too • Using the Help System • CMYK Setup • Designing from a Sketch • New from Clipboard • Actual Size Zoom • Editing PDF Text • Using the Grade UI Kit 2. Artboards • Artboards: Basics • Artboards: Exporting and Printing • Artboards: Colour and Opacity • Artboards: From Content • Artboards: Design Aids 3. Drawing Lines and Shapes • Pen Power • Shapes • Convert to Curves • Corner Tool • Drawing Perfect Triangles • Stylish Strokes: Textured Lines • Stylish Strokes: Dashed Lines 4. Colour and Opacity • Complex Gradients • Adjusting Noise and Opacity in Fills • Transparency Tool • Changing Colours • Blend Modes • Colour Picker Tool • Colour Palette from Document • Colour Palette from Image • Pantone Colours • Global, Spot and Overprint Colours • Quick Opacity Setting 5. Layer control • Layers Panel • Lock Children 6. Object control • Selecting, Finding and Isolating Objects • Rotation Point: Overview • Rotation Point: Worked Example • Vector Scaling Options 7. Symbols and Assets • Symbols (1.5) • Assets (1.5) 8. Painting • Shading Using Raster Brushes • Adding Raster Texture 9. Text • Artistic, Frame and Shape Text • Text on a Path: Overview • Text on a Path: Worked Example • OpenType Typography 10. Media • Using Raster Images in a Composition • Film Noir Style Illustration 11. Saving, exporting and sharing • Save History • Soft Proofing • Exporting • Exporting: Layers • Exporting: Slices • Exporting: Continuous • Exporting: Automatic Directory/Folder Creation • Exporting: Multiple Outputs from a Single Slice • Exporting: Transparent and Coloured Backgrounds • Exporting User Settings and Keyboard Shortcuts 12. Design Aids • Constraints: Overview • Constraints: Worked Example for Web Design • Snapping and Dynamic Guides • Snapping: Candidates • Snapping: Object Creation • Snapping: UI and Web Design • View Modes and Split View • New View • View Points • Grids: Icon Design • Grids: Floor Plans • Isometric Grid Drawings: Part 1 (Single Planes) • Isometric Grid Drawings: Part 2 (Multiple Planes) • Isometric Grid Drawings: Part 3 (Layers and Compounds) • Grids: Coloured Lines
- 133 replies
-
- 63
-

-

-
Easy LUT tutorial. Learn very powerful tricks on how to use LUTs and what to do with them. These are 5 amazing tricks to get more out of your LUTs. Use them for more than just Color Grading Get 10 FREE LUTs Here: https://gumroad.com/l/XYASM OR get 25 for only 3$ https://gumroad.com/l/kqeTc OR get 45 for only 5$ https://gumroad.com/l/XjwRt OR get 80 for only 10$ https://gumroad.com/l/kLGTh OR SPECIAL 35% OFF Packs Collection: https://gumroad.com/l/JKpVs Support me on Patreon: https://www.patreon.com/sarikas Follow me on: https://www.facebook.com/sarikastutorials https://www.instagram.com/sarikasat/ Join us on Reddit: https://www.reddit.com/r/AffinityPhotoTuts/
-
Hi, It would be really great if you could make it so that Vimeo videos on https://affinity.serif.com/en-us/learn/ would play with third-party cookies blocked. Thanks.
-
 I am excited to share with you the official announcement of my new Affinity Designer course on Lynda.com. Many of you have been asking for this for some time now since you already have subscriptions with Lynda.com. and this is the first of many to come are now available. The content found here is new and reflect the updates found in the Affinity Designer 1.4 Update. Thank you all so much for your support. I hope you enjoy the content as much as I enjoyed creating it for you! CLICK HERE TO VIEW THE COURSE Course Description: Looking for a compelling alternative to Adobe Illustrator or CorelDRAW? Affinity Designer is a powerful and affordable vector-design application mixed with pixel-based texture and retouching tools—all in one easy-to-use interface. It was created with the professional-level features that any artist, designer, or illustrator needs to execute high-quality results. Here Ronnie McBride introduces new students to the workflows and tools required to get them up to speed with this fast, powerful, and professional application. He shows how to work with Affinity Designer's workspaces, called personas; use the drawing tools; and create custom brushes. After completing this course, students will feel more confident and proficient at using Affinity Designer in their own work. Topics Include: Creating a new document Setting up margins, guides, and grids Drawing vector lines and shapes Using the Pen tool Creating and editing text Scaling and rotating objects Selecting areas and color ranges Using layer masks Adding layer effects and adjustment layers Creating new brushes Exporting your work Duration: 2h 37m
 -
 I'll be the first to admit, I am NOT an accomplished photo artist. In fact, I would put myself at a "3" or "4" on a 1 - to - 10 ability scale. Therefore, I am always looking for more and more lessons to increase my skills and enhance my talents. In doing so, I hope to gain the most from the Affinity tutorials, given I'm a registered user of all three apps. And therein lies the frustration. In short, when I attempt to watch the Affinity tutorials, the presenter starts by introducing the subject, and then proceeds to open an image, and in doing so, nearly always opens up a series of layers he has already created. Unfortunately, he has also renamed them, so those of us who are learning, have no (grrrrrr) clue of how or why he created them. Therefore, HOW ARE WE EXPECTED TO KNOW WHAT, OR HOW HE IS PROCEEDING? It's obvious he is 'assuming' we all can successfully guess what the hell he has done, why, and with which tools. (Beyond frustrating; more importantly, it is a terrible representation of Affinity.) Specifically, these tutorials are high on the 'frustration menu': Blend Modes (https://affinity.serif.com/en-us/tutorials/photo/desktop/video/310319088/). He calls them 'render passes'. No definition of 'render passes', (I can interpret such a term in a number of ways given it's out of context. I spent the better part of any hour searching for 'render passes' without luck.) Layers (https://affinity.serif.com/en-us/tutorials/photo/desktop/video/311178905/). Even in this video covering basic layering, he begins with a highly populated list of layers. HE KNOWS WHAT THOSE LAYERS ARE, WE DO NOT! How can we get a strong, integrated understanding (i.e. without obvious questions popping up such as, "What are those layers, why did he chose them, and how did he create them?") It would only take a few minutes to explain them and build the lesson from the beginning instead of beginning the tutorial at some arbitrary point along a learning curve. At the least, reference those tutorials which provide the lessons for creating the components he is utilizing. The list of other similar examples is long. The solution is to include the steps he has left out prior to his video starting point. PLEASE, make videos for the audience, not the perspective of the presenter. If you are going to start with pre-created elements in support of a subject, take the time to explain them. You know what they are, but if you expect us to get value from the tutorial, you have to explain yourself so we are on the same page as you. Thank You.
 -
 Hi Since the new version arrived there seems to be far less tutorials available In particular there was one on using the perspective tool (I know because I've viewed it before). It's now missing or else hidden away somewhere. Any suggestions?
 -
Change Eye Colour - Affinity Photo Tutorial iPad Pro https://youtu.be/82uQkrSolxU
-
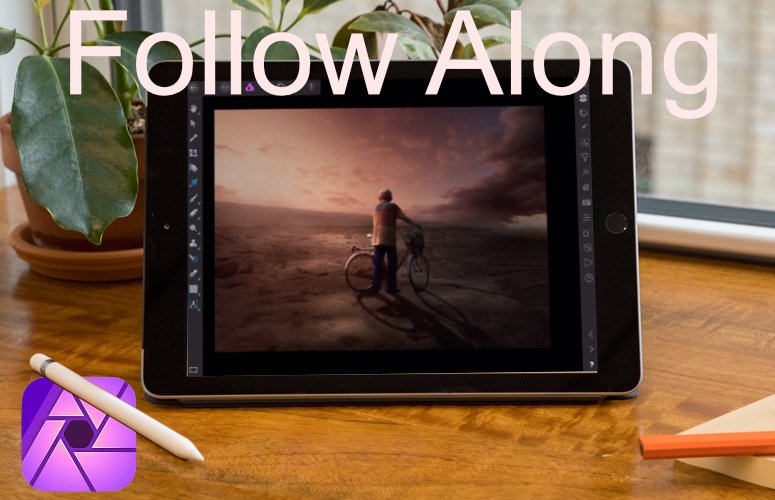
 Follow Along: Affinity Photo Tutorial iPad Pro https://youtu.be/C_WI-cODQ0M
-
Perfect Blending - Affinity Photo Tutorial iPad Pro https://youtu.be/Z7ncNbCKLWk
-
None Destructive Dodge and Burn - Affinity photo tutorial iPad Pro https://youtu.be/12IYIbzhR2Q
-
 is it possible to deliver your books in Italian? Thanks
 -
 I have come across a you tube channel named "InAffinity" which covers free tutorials for affinity photo. https://www.youtube.com/channel/UCOnLUmyPHr2rayOHVHWsHVw/videos What makes this channel unique from others is that the information is provided at moderate pace with logical and scientific reason behind each step. The moderator is to the point and explains every thing in easy to understand language. I thought I should share it with everyone and hopefully you will enjoy learning from these tutorials. If you also know about some thing similar, please share it in the forum. Thanks
- 12 replies
-
- 1
-
-
- affinity videos
- free tutorials
- (and 2 more)
-
 Hello, Sorry if I appear a bit lame, and possibly posting the wrong forum, but I wanted to know if there was a way to filter the tutorials by software eg: only designer or publisher. Sometimes tutorials don't even mention which software they cover (most of the tutorials seems to be for APhoto, which I don't own). I can't find a way to filter by tags (even though most posts don't have the software as a tag, it could help). I find searching a bit tedious a a result, but there is search feature I may have missed? This is bizarre because other forums are separated by "Photo", "designer", "Publisher", and then separated by platform. As it stands, the tutorials sub-forum is a bit of a mess Let this small puzzlement not distract from the fact that I am very grateful to those who publish tutorials
 -
 I just want to share with you, that I have just launched an Affinity Photo Workflow Video Course. I have for a long time felt a lack of training videos, that tie the features of Affinity photo into one professional workflow. So, I have created a course, that: Allows you to begin to use Affinity Photo like a PRO with confidence. Explains a Start-to-Finish Affinity Photo workflow. Get to know all the post-processing steps: from opening a RAW file to publishing or printing the finished image. 140 minutes of video content, including explanations of key processing techniques and case videos. Includes 3 bonus workflow macros included. Specially designed for this video course. Gives you everything you need to establish your own non-destructive workflow using Affinity Photo. There is already a lot of great videos about how to use Affinity Photo, however with this new course, I think that many photographers can improve their understanding of Affinity Photo and establish their own editing workflow. By the way, as a thank you to Serif for giving photographers a great product, all interested users in this forum can use the coupon: forum.affinity.serif at check out get an extra 15% discount on the video course. I hope you welcome it into the growing pile of professional training material for Affinity Photo. Cheers, Peter Dam
 -
 Can the photo work book be purchased through the likes of Chapters or Coles here in Canada ?
 -
 I going to spend 10hrs in a airplane and would like to spend that time in a useful manner. Learning from the excellent tutorials on Vimeo would be a great idea, I think. I cannot download them, so I hereby request to buy them so I can view them offline
 -
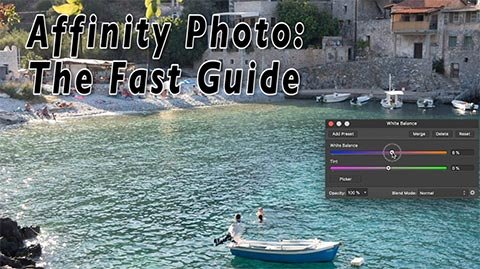
 Hi Everyone, So, you want to enhance your photos but you're in a hurry? Aren't we all! So my new course, Affinity Photo: The Fast Guide is designed especially for you. It’s a brand new course, so here’s your new course coupon - AFFINITY_FAST . Apply the coupon to get the course for a massive discount. This coupon lasts until the end of November 30th. Everything you need and nothing you don't, all in one 3.5 hour course that gives you pro level techniques in record time. What's more, I provide you with a PDF containing summaries of all the lessons, along with screenshots to help. So you don't even have to make notes because I've done it for you! Well actually, there's two PDF files. The main one contains bullet points of the main points covered in all the lessons, complete with an index so you can search for a particular word or tool. In addition, I'm also including a PDF all about the different layer blend modes available in Affinity Photo complete with descriptions plus a screen shot for every mode so you can really nail down your knowledge. This course has been designed to fit in with various other Affinity Photo courses I offer here at Udemy so you if you want to further your knowledge after this course, I've got you covered. This course may be for people in a hurry. But I still bring the same philosophy to this course as I do to all my courses. Knowing what a tool does is not enough. You have to know why and when to use it. That way you gain skills as well as knowledge. I'll give you both in record time. So click on the link above and enrol today. Professional instruction, delivered in record time! Thanks for your time, Simon
-
 Hi, Wondering if there is a tutorial on how to adjust bright light coming into a room through a window. Thanks!
-
 The listed video tutorials just give a grey screen in Safari 11.1.2, MacOS 1013.6 when I click on the thumbnails. Do I need a plugin?