Search the Community
Showing results for tags 'thickness'.
Found 4 results
-
 Greetings, I have been using Affinity for quite some time now and have never had an issue with this before - it suddenly showed up with the most recent update and persists in all affinity programs - photo, designer and publisher. The issue is that when I export text as curves into PDF, letters like "I" and "l" (L) become thicker than they should be. As far as I know this doesn't mean that it'll be like that when printed, it is simply shown like this in the PDF. Some suggest to disable certain options within their PDF viewers, but this isn't a real solution as certain PDF's are shared among clients and various other people and having to let them know every time "hey, you should disable/enable option X" isn't efficient. The solution to this issue was finally presented in this very old article : https://www.underconsideration.com/speakup/archives/004301.html Adding additional anchor points made everything work and show correctly. I have been using the same method all the time within Affinity software as well and it worked perfectly - since the last patch that is. Now, I always get thick lines no matter how many anchor points I add and now matter what option I enable or disable in my viewer. I have even tried adding a very small rounded stroke around the letter i (I) and L (l) to avoid this idea of it being a simply thin rectangle with only 4 anchor points : But it didn't help. Even worse, the letter was even more thick than before! 😱 Since this issue didn't exist prior to the latest patch and it suddenly appeared, I posted it here on the forum in hopes that someone might know what option perhaps needs to be enabled in the new version, or if it actually truly is a bug. I repeat, this isn't just a PDF viewer issue anymore, adding anchor points is completely ignored during export and the resulted exported PDF even loses all added anchor points, which means the following is happening now : You can open a brand new document in designer Type anything consisting of letters I, for example "I need this to work" Convert the text to curves Add additional anchor points to "I" Export for print PDF with no rasterization of any type. Check up, just in case, convert text to curves Open exported PDF in designer again The letter "I" is not a curve anymore, while everything else is This could potentially cause problems with printers who deliberately ask for text in curves This should mean that there seems to exist a new bug during export to PDF. 😭
 -
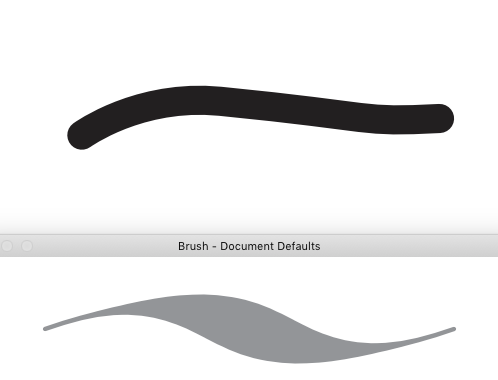
 Hi, In Stroke properties, both in Publisher and the Designer app, the settings for a stroke and be make think - thick - thin yet the results in a stroke do not show as such. As this photo below. Settings, bottom yet the top, which is the line I'm working on stays fat. Oddly enough this is also true in my iPad Designer app. What am I doing wrong or is this a quirk?
-
 Is it possible to create a shape from an outline in Affinity Designer? For example if I have a straight line with a set stroke width of 12px which isn't a "closed shape" like it's needed for certain printing techniques: is there some way to create a closed shape from a line with stroke, in this simple case 2 points (line from A to B), to have a shape without outline, with 4 points and a width of 12px? Without doing that completely manually? Edit: Ok, forget it. Found the option in the layer settings via the upper menu. At first I looked in the context menu of the layer, which didn't help much.
 -
 I'm a veteran Illustrator user who recently purchased AD. I am now comparing "Stroke" features between the two apps. Here are my questions: 1) Sketch a rectangle and give it an opaque color, then sketch a second rectangle above it and give your second rectangle X% Opacity. Now tick / Enable "Stroke" in the Effects. Slowly move the Radius to the right and you will then suddenly see your X% Opacity become complete Opaque. Why? 2) In Illustrator I can put a Stroke on a rectangle and then make that stroke to be Centered or Inside or Outside. But AD is very different. When I sketch a rectangle in AD and then when I add a "Line" to it, I am presented with a large number of options, but the ability to move that Line to the Outside or Inside is mysteriously absent. So I was thinking to myself, well, maybe the developers of AD want me to use the "Stroke" Effect instead. And truly, when I apply a Stroke, I have the 3 options available (Center, Inside, Outside). But the disadvantage to using Stroke is that the corners are always curved. Why is that? 3) Stroke does not seem to be a replacement for Line. Try this. Sketch a rectangle but set Fill and Line to NONE. Now tick/Enable Stroke and expand the Radius. Nothing appears on screen at all! But as soon as I give it a fill color, then the Stroke magically appears. It seems a bit strange. If Line would give me the option to have Center or Inside or Outside, this wouldn't matter as I could then use Line instead. 4) Illustrator empowers me to add multiple strokes to the same object, and when I set those strokes behind the fill, I can then do some pretty interesting things. I cannot seem to find a way to do this in AD. 5) It seems that AD only allows me to add a gradient to a Stroke but not to a Line. This is unfortunate because I cannot seem to create a Stroke WITHOUT rounded corners. 6) Illustrator CC has some powerful new Corner features for Strokes. For example, I can sketch a rectangle and then give it a 5pt stroke and then I can grab any one of the 4 round tabs and drag inward to give all 4 corners the same roundness. Furthermore, I can use Illustrator's Direct Selection tool to draw a selection rec around only on of the corners, which will enable me to round that one corner independently of the others. How can I accomplish the same in AD? 7) Dashed lines and Arrowheads are very common in my work but such features appear to be absent in the current version of AD? 8) In Illustrator, I can sketch a line or Stroke a box and then have "Width Profile" that I can choose in the Stroke panel. This can be very useful at times. For example, in Illustrator, if I sketch a line that is 26pt thickness and then give it Width Profile 4, the 26pt thickness decreases linearly to zero, giving it the shape of a spike. Can such be done in AD? 9) Another tool I always use in Illustrator when dealing with Strokes and Objects is the CUT tool. I can't seem to find it in AD. How do I sketch a rectangle and then cut pieces out of it? Sorry for all the questions, but Strokes and Corners and Cutting are the biggest part of what I do in Illustrator, and such is what I intend to do in AD as well. Thanks.