Search the Community
Showing results for tags 'text'.
-
 Only two months into using Affinity Designer here. Starting at some point through the progress of my project, any time I create and type new Artistic Text, a purple highlight appears behind it. I don't remember messing with any settings to make it appear. I've tried to look very carefully at the color options on the Artistic Text object but I can't find anything. What am I missing? This hasn't happened to me during other projects until after the 1.9 update, so there's the possibility of a bug or new feature/setting that I'm not aware of yet. I also attached what the problem looks like in Affinity Designer. The text color was intended to be white, and the color shows as white in the Color tab.
-
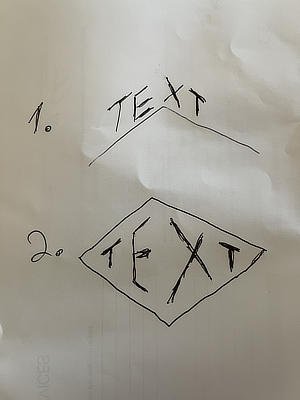
 Hi there, I'm trying to add text on path in 2 ways and don't know how to do it: 1. Add text on path on the top of diamond shape, but keep all the letters pointing straight up. 2. Shape the text in diamond (starts short, tallest in the middle, then short at the end). Please help, i couldn't find any tutorial for that online. Thanx.
-
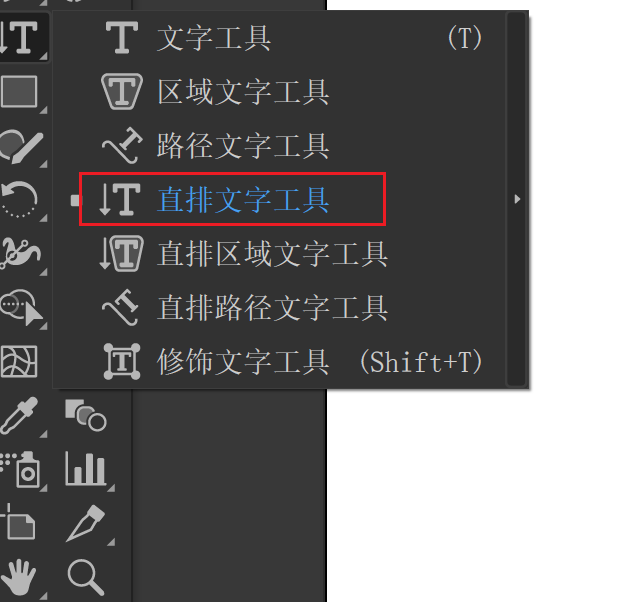
 I know it can now be done with border text. But large paragraphs of text can be cumbersome. This kind of typesetting is very common in Eastern countries, such as Japan, South Korea and China. I wonder if you could consider adding this function, just like Adobe Illustrator.
-
 Hello, i used CorelDraw X7 until now. I know, there are different ways to export files to edit them in Affinity Designer. I'm having a problem importing text. Some text is importted as text, but other parts are imported as vectors. This means, i can't edit this text any more. This happens in any file format like PDF or SVG. Any idea, how i can import all text as text? Thanks.
 -
 If a text is Bottom Aligned, by default, it is placed exactly on the line/outline of the selected area. This not happens when the same text is Top Aligned. How to perfectly align text to the top? text is Bottom Aligned here text is Top Aligned HOW TO ELIMINATE THIS GAP?
-
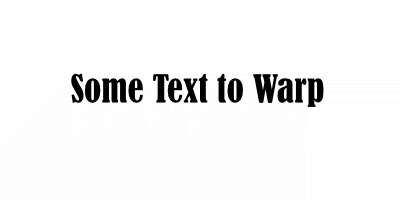
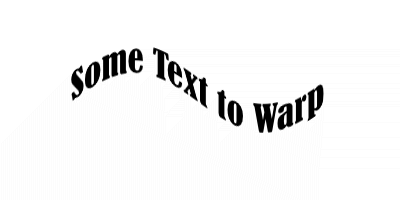
Some time ago I presented a formula to plug into Equations to warp text along a wavy baseline. I promised to create a macro to perform this, but never got round to it. Well here is that macro and a library containing it. Wavy Text.afmacro Wavy Text.afmacros The transformation is just a sine/cosine curve: y=y-(h*a/3)*(b*sin(360*x/w/c)+(1-b)*cos(360*x/w/c)) The a parameter determines the amplitude. The default is a=0.5, which creates a wave that reaches about half way to the top and bottom of the layer. The b parameter shifts the position of te wave along the horizontal axis. The c parameter affects the wavelength. Reducing c gives more waves along the x-axis. If you start with a text layer such as: and apply the macro with the default parameters, you get: The macro is designed to operate on a text object on a background. It needs the background to give it room. It begins by rasterizing the text to a pixel layer. It uses the height and width of the background layer to determine the amplitude and wavelength, not the height and width of the text itself. To use this, I would suggest creating a new document of a size to hold the text, then warp it, then place or copy it into the target document with an appropriate blending mode. John
-
 I have a hexagon. The points are top and bottom. I want them left and right, so I turn it either by the turn handle or by the toolbar. Now I add text to create shaped text. No matter what I do, the text aligns from the points, so instead of reading left to right, it reads from bottom to top. How do I correct this ?
 -
 When I have a text box selected in my layers and tap on the group button the text reverts to 85pt. It seems to be ok if I create a group with something else then drag the text box into the group. I’m running Designer 1.9.3 on iOS 14.4 and my iPad is 6th gen. Model # A1893
 -
 Hi everyone ! Just a quick question/request as there are numerous topics in the older forums already over the last 3+ years (moved my question as I've noticed that the other forum is deprecated, the old post can be deleted): Is there any news about importing editable text in *.eps files? I've bought Affinity Designer a few days ago and now searched the forums after struggling with the non-editable text in those files... If not: That would make a great feature request😂 Affinity Designer is really an awesome tool but this is a core thing (in my opinion) as most of the *.eps templates we're working with require text editing 😕 Thanks and best regards 😊
 -
I have a weird bug in the latest version of Designer. In the attached file, when I group the two objects (circle and text box), the text scales up a little bit. 247 365.afdesign
-
 In designer 1.9, when you group a text frame and a form with transparency gradient, the final text size is larger than the original if the text frame has been resized previously. Steps to reproduce result: Create a text frame and write some text Enlarge the text frame dragging the resize handler (The one that enlarges both frame and text) Create a form and apply a transparency gradient to it Group the text frame and the form. Text gets enlarged in the same proportion that it was enlarged before. Note that this only happens when grouping (with menu, contextual menu or command+G), but it does not happen if you manually place the text frame into the group moving its layer, so the error is in the group action itself and the resize being reapplied to the text..
- 2 replies
-
- 1
-

-
- transparency
- text
- (and 1 more)
-
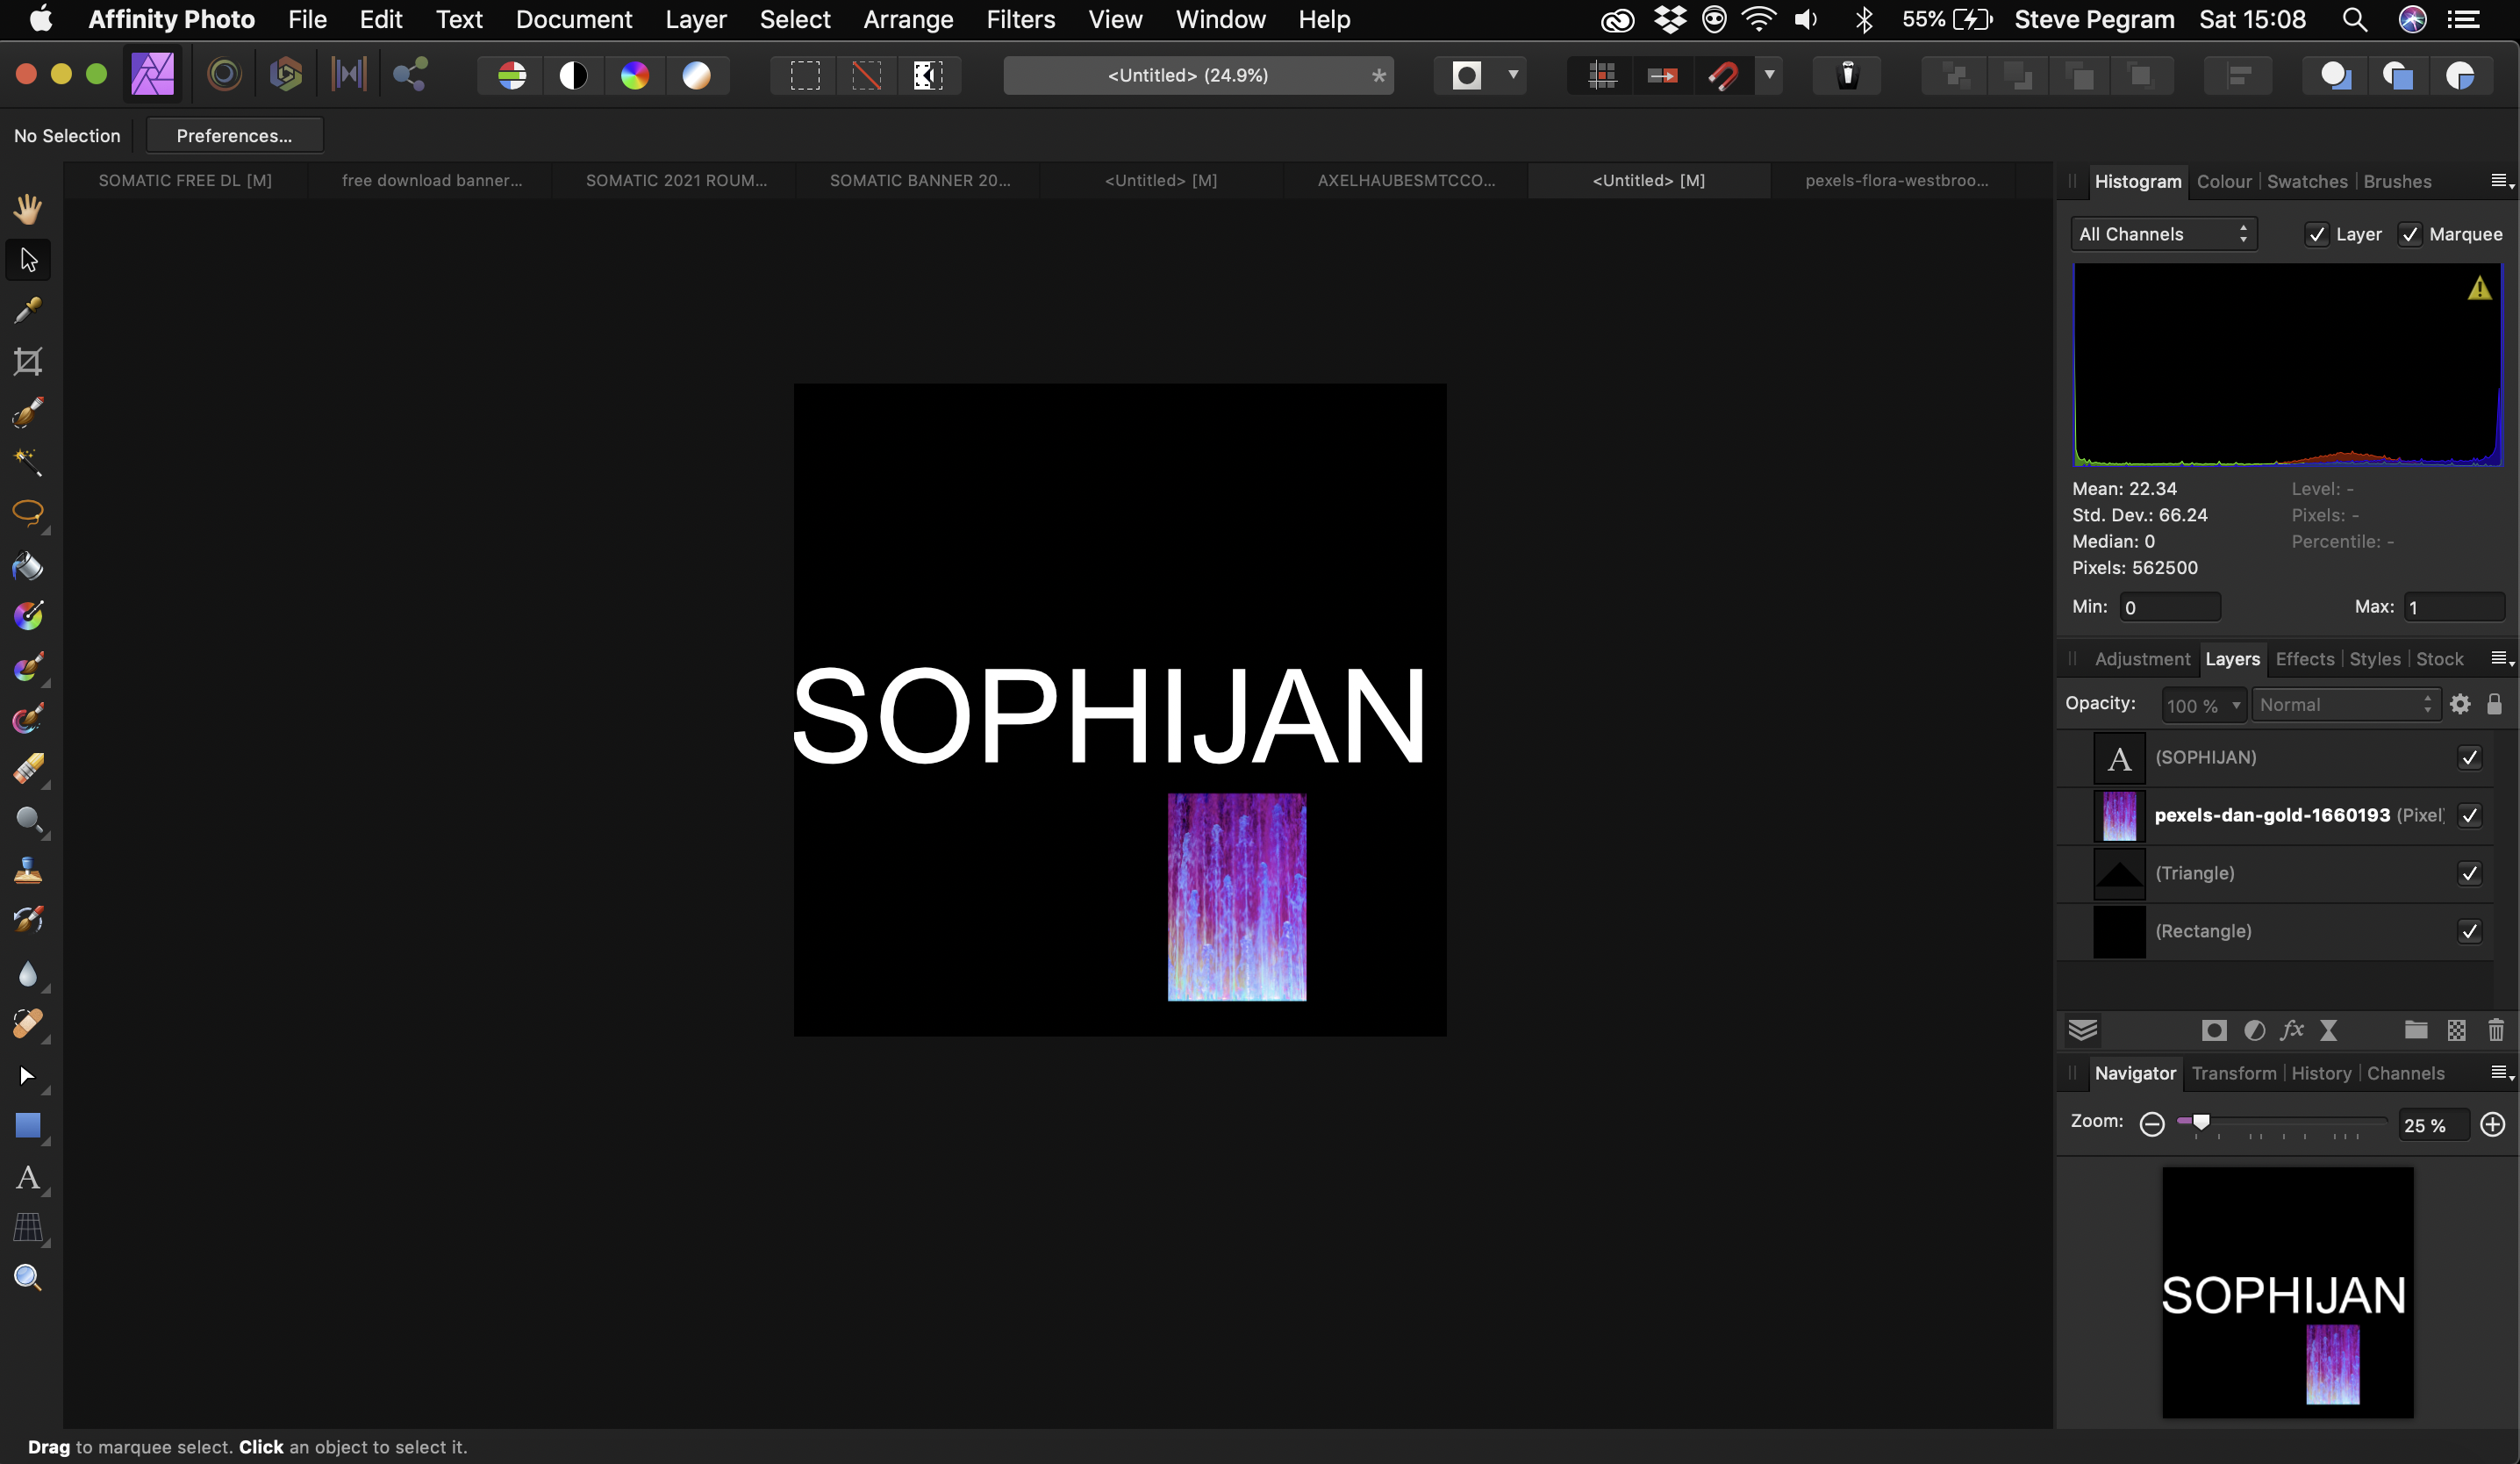
 I have of text objects that I want to group (first screen shot). When I group them, the point size changes (2nd screen shot). Is this a bug?
-
 Hi, it would be very useful to be able to link text area content to external files (such as .txt or .md or else) so that when the external file is updated, text area content will be updated too. Is this something we can achieve with Affinity Publisher? Thanks, Francesco
 -
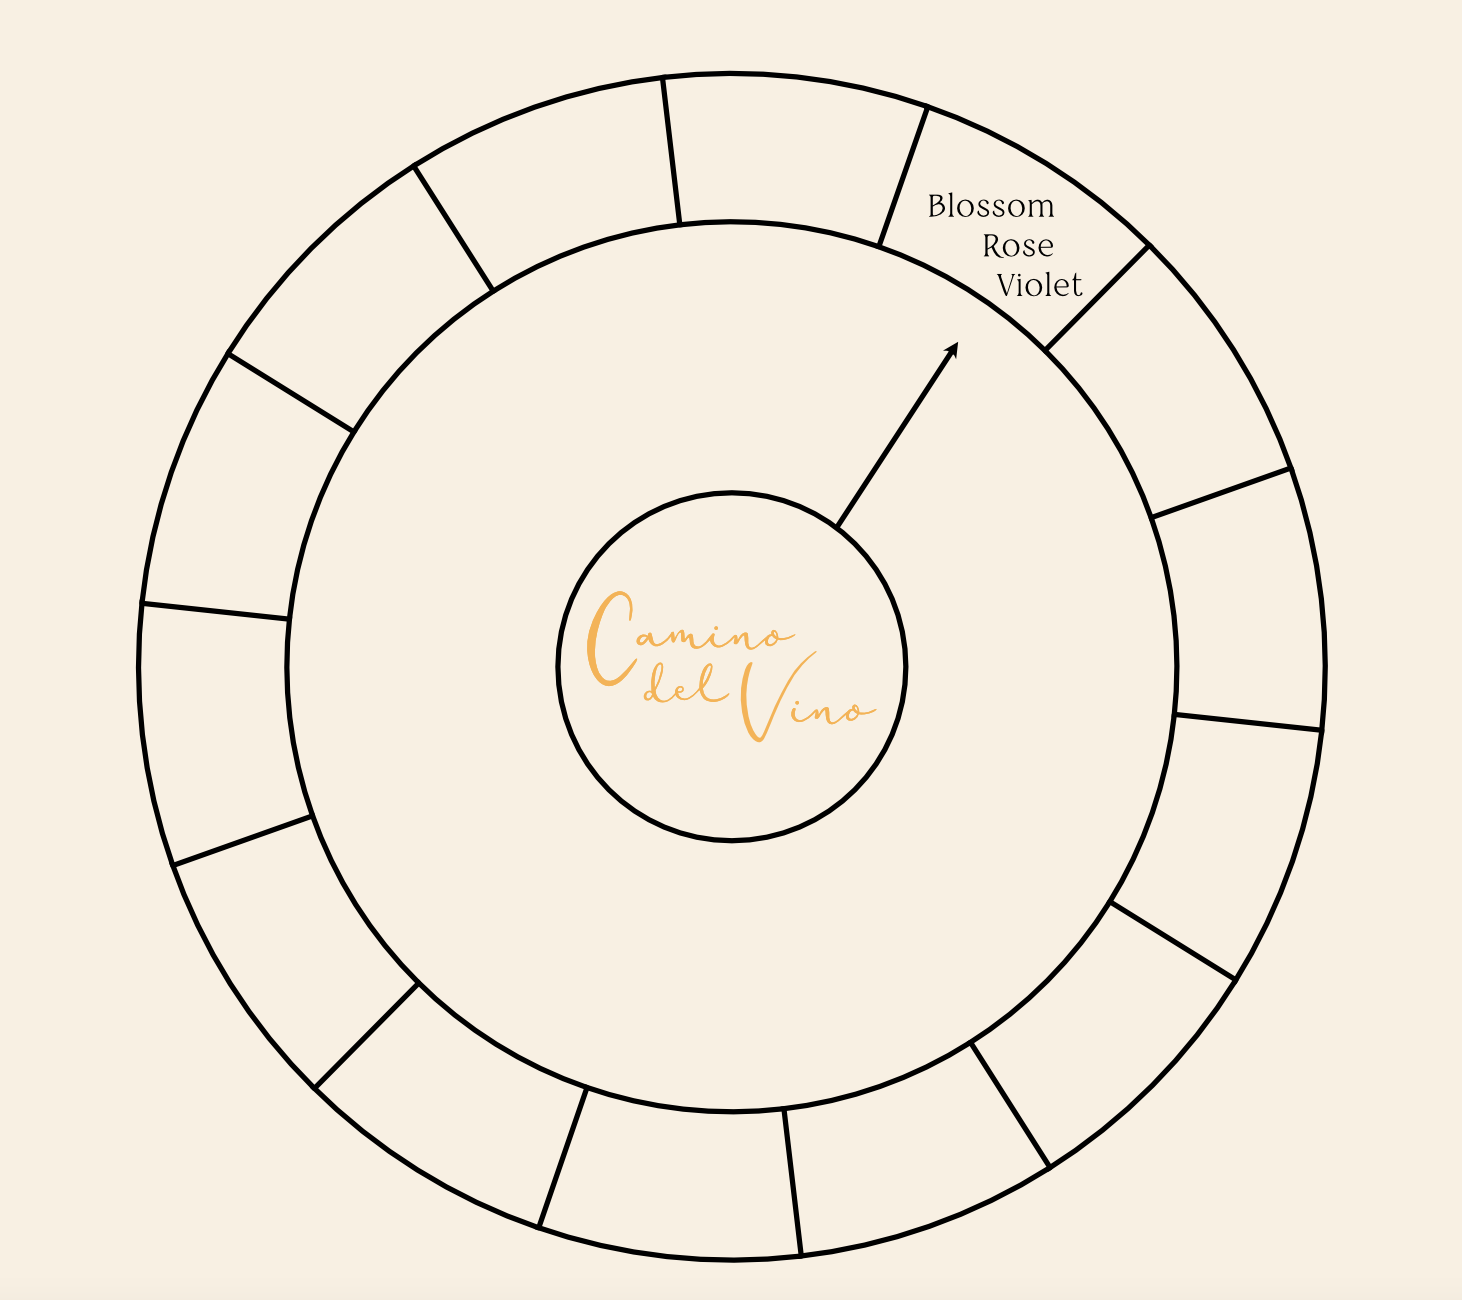
 Hi Affinity Community, This question has probably been asked before but is it possible to align text in a shape once it's been converted to text frame? I have segmented a donut and would like the text to align as if there were invisible lines pointing away from the centre of the doughnut - essentially a fan of words going around the wheel. The arrow in the attached photo is an attempt to try an illustrate the direction of said invisible lines. Thank you!
-
 Hi, was wondering if it's possible to create a compound path of NOT overlapping elements like outlined text in Affinity Designer? In Illustrator the layers look like that after the command - reduced to one layer Rather than that in Affinity Designer - every letter is a layer
-
 Hi all, I'm a complete noob to Designer so was looking to pick your brains as to how I would go about recreating the attached logo? Any tips or ideas would be gratefully appreciated.
-
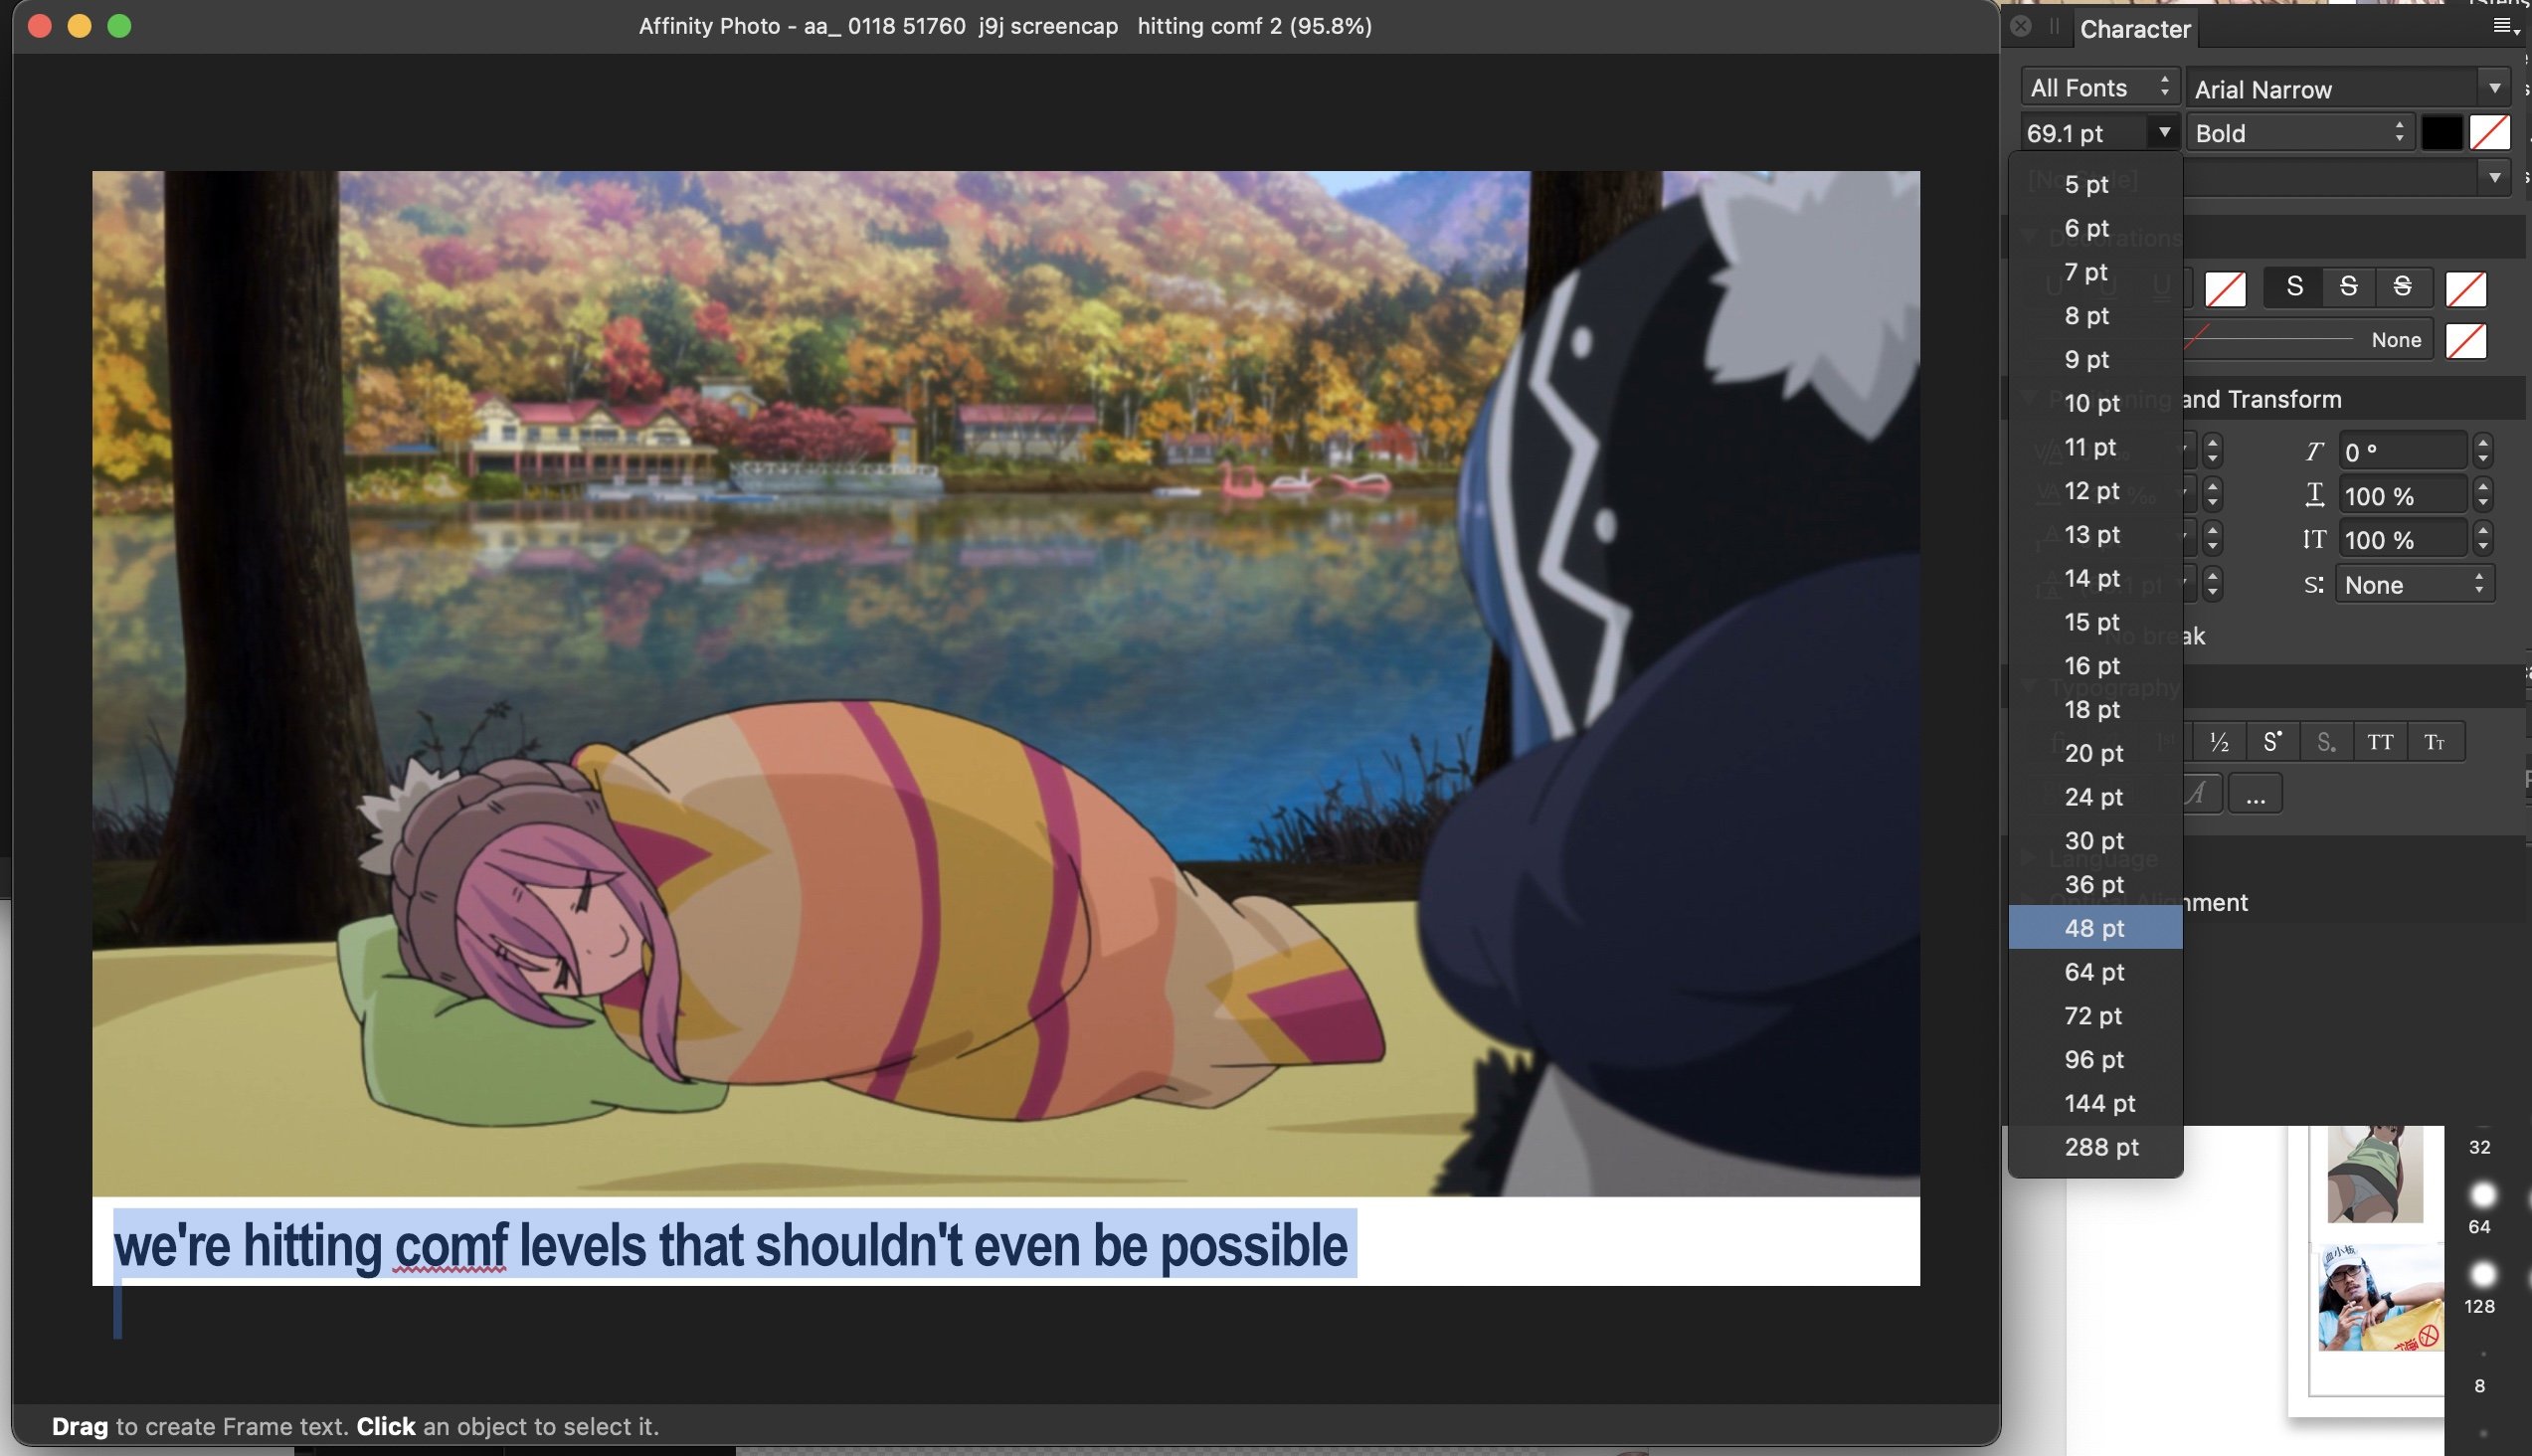
 Affinity Photo brings many welcome changes in how we work with text, and I'm enjoying learning the app. I found a minor issue that could be improved. While it's nice that I can enter some text then grab the text size box and have highlighted text immediately jump to show us what the new size will look like in our image, with each point size causing the text to resize itself immediately, I noticed that, while hitting the up or down arrow inside resize box changes the number up or down for us (very convenient if we want to bump size up just a little), it doesn't preview this size for us with each arrow press up or down, but only when we hit enter To recreate, enter some text in a text frame, highlight the text, and then click into the size selector inside the Text palette. We can increase or decrease the text point size with the keyboard arrow keys, but we cannot see the size in action until we hit return. It seems that since the intention of the programmers is to let us see the text easily if we use the pull-down menu with the mouse, we should also have the new size be previewed when using the arrow keys to select text size. Thanks for considering my request!
-
Please!!
-
 I'm running into a lot of difficulty in setting which side of a curve the text on a path feature chooses. I've linked a video, as I feel it's probably easier to demonstrate. https://youtu.be/SluRwNK3bUk I have a curve and I'm trying to type on the inside of it to hug the ellipse above it, but no matter where I seem to click near the curve, the text wants to go on the outside. As you can see I manage to make it work with the pen tool curve above the main piece, but the curve that I want to use isn't performing in the way documented from the help page. Is there something wrong with the path that needs to be addressed, or what am I doing wrong in this instance? Feature request to the developers: A handle allowing people to easily switch the side of the curve the text is on would be helpful. Thanks ahead of time for all the input provided!
 -
 Hello. I created a diploma design for my school and was wondering how I could add all the learners names. Every page needs to have a different name as it is an diploma for another learner. The trouble comes when I need to insert hundreds of names and what the different diplomas goes for. That could take hours. Is there a way to automate this? Is there a way to have all the names of the learners and what they get diplomas for in a list, like in excel, and then automatically import them (line 1 goes to page 1, line 2 goes to page 2 ........ line 159 goes to page 159 etc.)?
 -
 I have some text that I snapped to an isometric grid. Now I want to make that text horizontal again. How do I do that? I can't seem to get it off the isometric grid even if I create a flat grid. Win 7, Aff Designer 1.8.5.703
 -
Hey all. I'm using Affinity Designer beta 1.9.0.11 - am I correct in only being able to find the Text Frame Panel by clicking the button in the Context Toolbar when I have a Path Text object selected? It seems to be a proper dockable panel, shouldn't it be in the VIEW > STUDIO menu list? I can't even locate the panel in App store version 1.86. ...It's late here, maybe I need sleep... At the very least I would think that it should be in the Context Toolbar when a Text Frame is active? The Panel I am referring to is attached. Thanks for any insight. 🙂
-
 Really need some help & i know its something simple i am not doing or have turned off. I cant seem to insert art into my text - I havent had any issues for over a year with this so im guessing i have turned something off? Your help would be greatly appreciated
-
 Hi, I've had Affinity for about a week now and as an /affordable/ piece of software, I am loving it. Also bringing back memories of work experience several years ago at Wilford industrial estate... ;) but anyway, on to the problem.... Having a little bit of trouble with the full justify option - it just doesn't do anything attractive for my layout at all. Expecting it to space out my words nicely stretching across the full width of the frame and instead it's just adding a massive gap between the last two in the text frame! Not sure if there are settings to correct this or if the tool simply doesn't work as expected. Can anyone clarify what's going on with this one? Thanks.
 -
 Help! I created a logo using mismatched font sizes for a custom upper/lower case mix. I converted the text to curves, then manipulated using stroke weight to even out the marks. I was working away on white background and client has approved (and loves) this design based on seeing jpgs. I need to reproduce it as clean vector art and now discovered I'm in a mess of trouble. When I turn the stroke to "none"/invisible, the text bloats out. I'm stuck, any pointers or tips? Many thanks. -Karen


.png.0cc71ebcad9431a47d8730e0338b311e.png)