Search the Community
Showing results for tags 'stroke'.
-
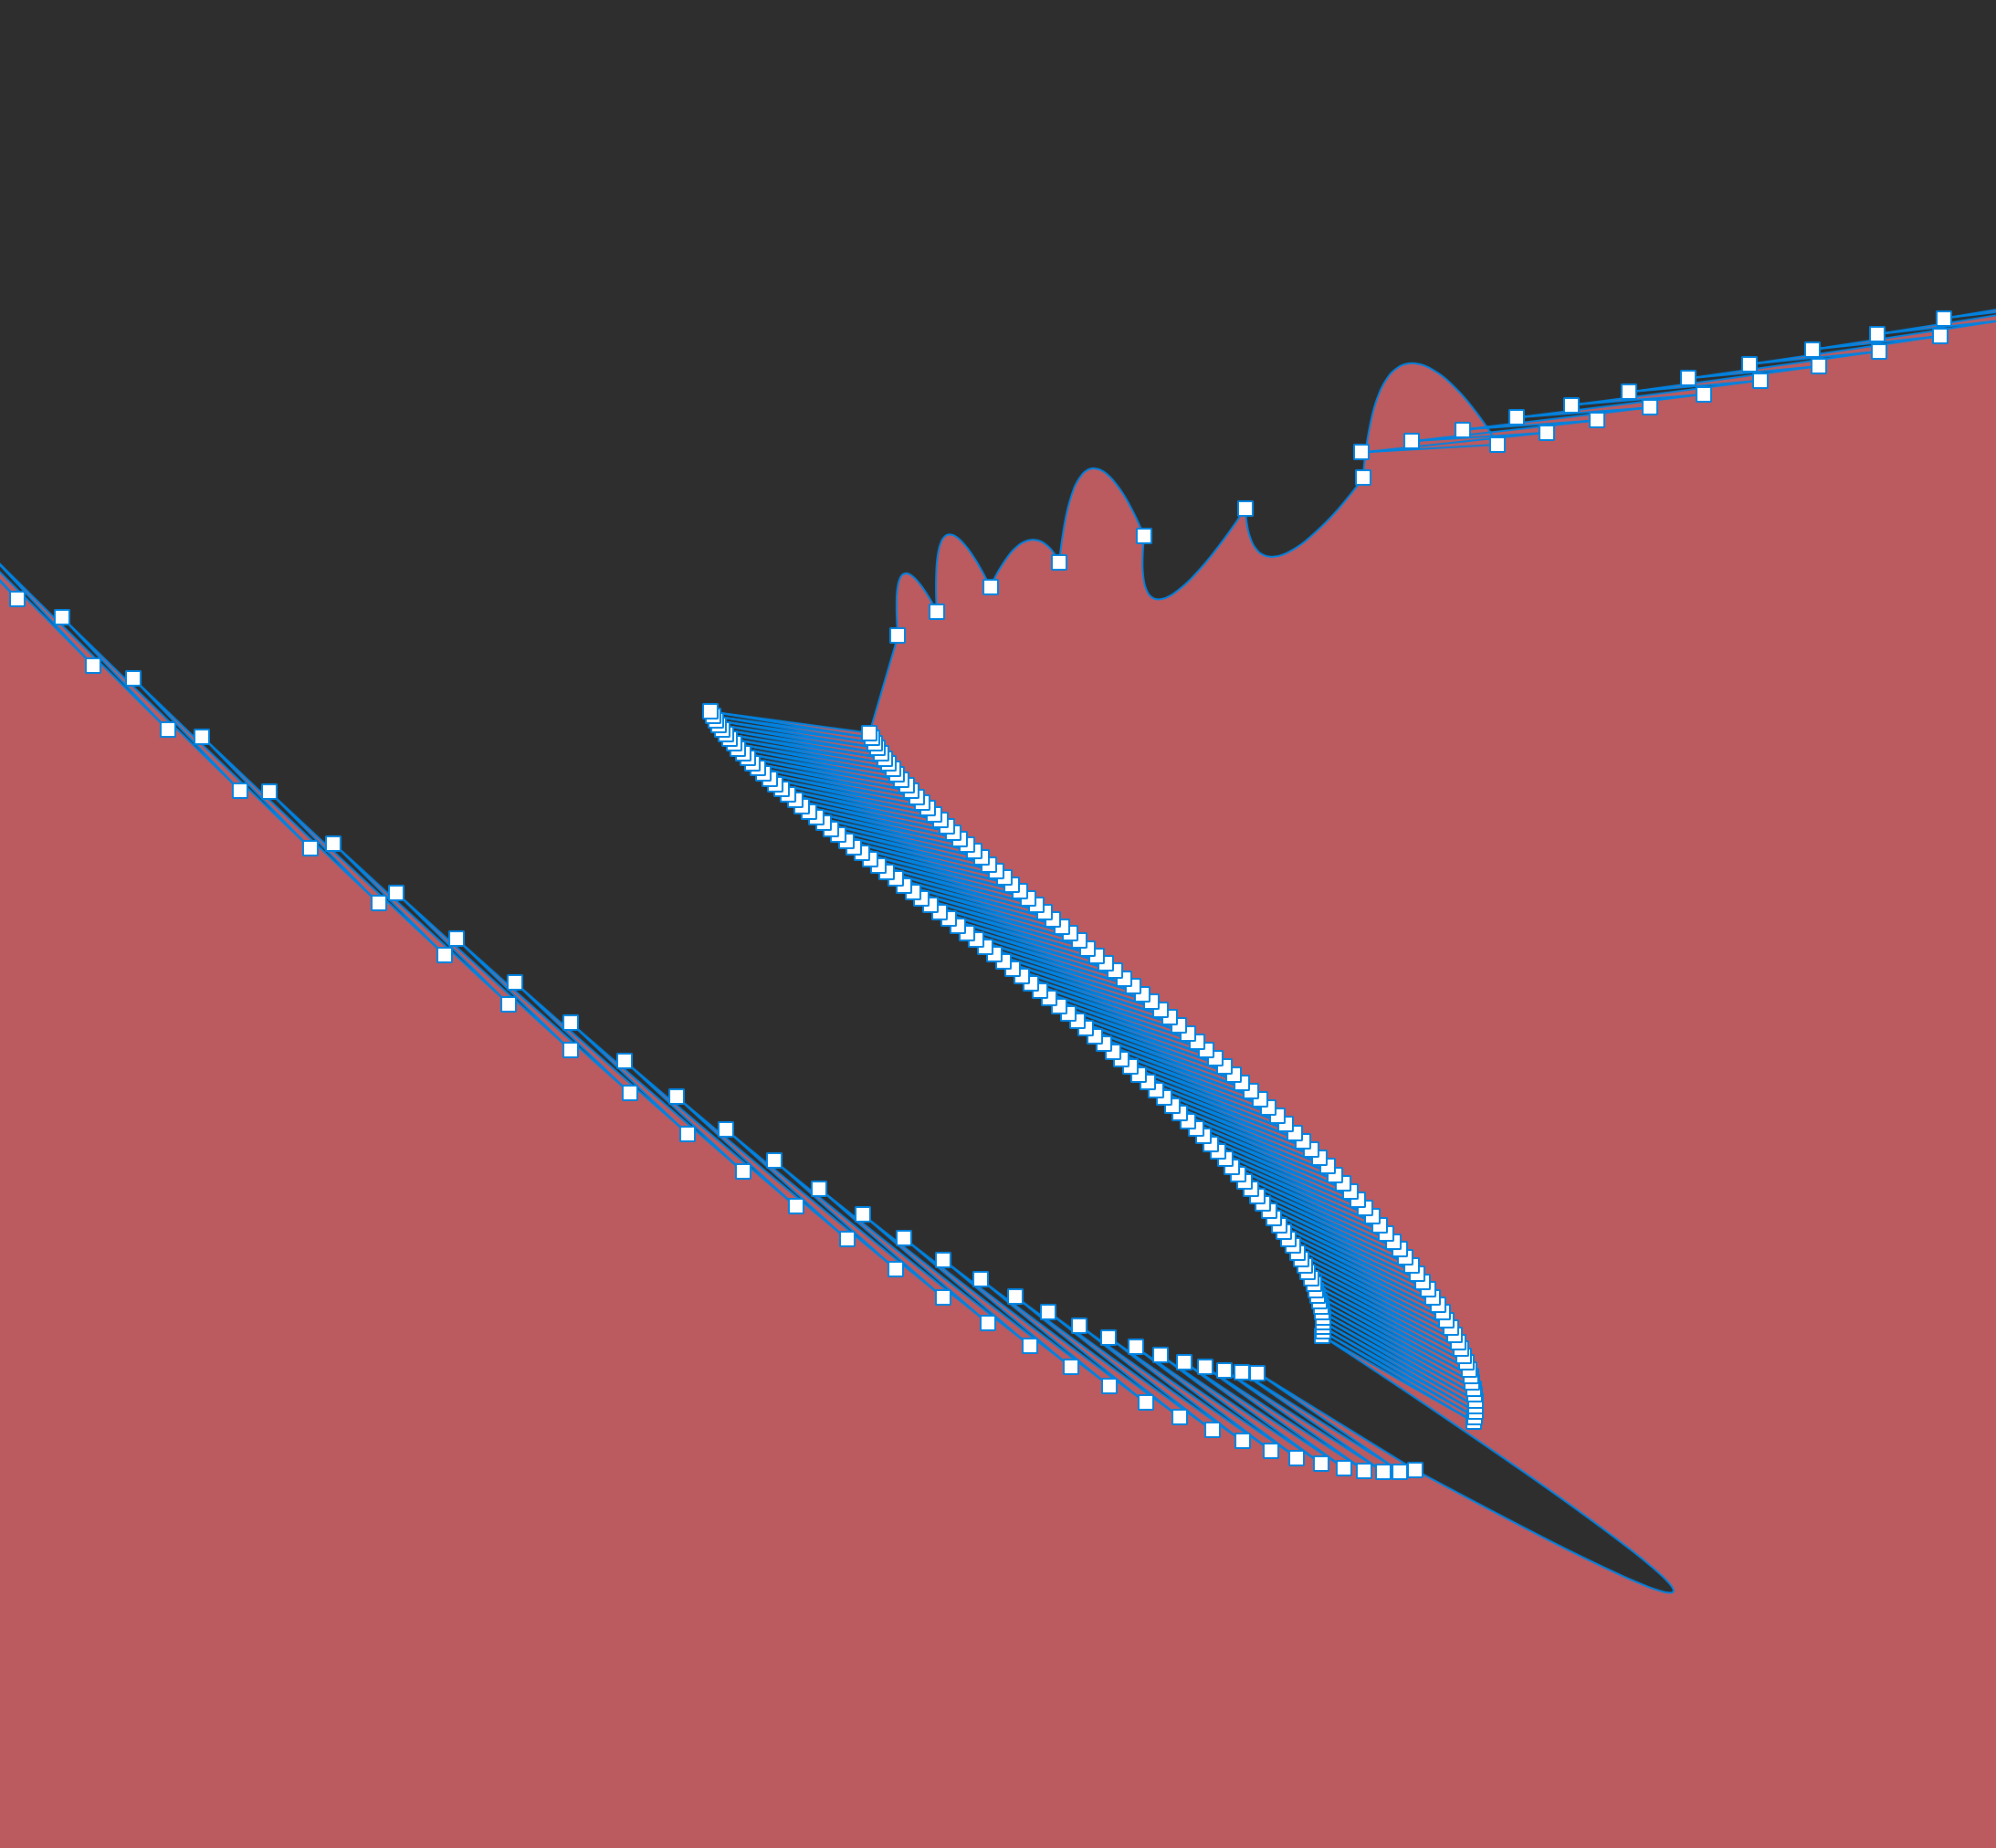
 So I'm using pressure on a stroke. I was having issues with it distorting when using "Expand Stroke" (where smooth curves were changed to chunky edges). In another post on this forum, someone suggested enlarging the object and then expanding the stroke. In doing so, I discovered this super bizarre bug. See the attached images I show when I zoom in to one of the corners. I also show the expanded stroke and all the countless nodes. This is unusable if I ever want to expand this kind of stroke. Am I doing something wrong?
-
 In the Affinity Photo Stroke Panel, it says ' Style—Select a line style button to change how the line is drawn. Choose from None, Solid Line Style, Dash Line Style, and Texture Line Style, respectively. The last option applies the currently selected brush in the Brushes panel to the stroke. ' I'm having trouble getting the Pen tool to use the Texture option in using the current brush. Any tips? Thanks.
 -
.thumb.png.c1e412a4e3384d171b58a9b378322141.png) If you align stroke other then to middle while rendering there will be some graphic artifacts. Fill color will show up there it should not. Or there will be transperent gap between stroke and fill. That makes stroke alignment feature unusable for quality export graphic. Is there a way to fix this?
If you align stroke other then to middle while rendering there will be some graphic artifacts. Fill color will show up there it should not. Or there will be transperent gap between stroke and fill. That makes stroke alignment feature unusable for quality export graphic. Is there a way to fix this?
-

Align Stroke to ... doesn't work
maxen posted a topic in [ARCHIVE] Publisher beta on Windows threads
None of the three align modes have any effect in Publisher. Stroke is aligned center, no matter wich mode is selected. -
 I wanted to expand the stroke made from some imported brushes, but it doesn’t expand. When I try some of the pens which came with the app, it works. And I’m in the Vector Persona all the time. So how do I know which pens work expanding or not?
 -
 This is weird. Did not test out at other places where the slider is used for the width of a stroke. Look at the video and try yourself if you are able to move the slider to value 0. After all the value IS 0, but this is irritating. textframe-stroke.mp4
 -
 In a table the stroke of multiple selected table cells often doesn't change and update accordingly. When I select all cells of a table in order to set their stroke to none and stroke size to 0, only few cells (randomly) are affected and updated. Many cells still do show a stroke there, even when afterwards the settings of some individual selected/active cells do show "none stroke" and "size 0" there is still a visable none removed stroke. One always has to reclick and retouch the stroke size slider of such cells in order to get them updated and to show up no stroke at all.
 -
 I'm trying to draw this tree (PSD attached) and you can see that the branches and dark grey area are clipped into the orange layer. I used a vector brush stroke to create the branches and after I export them to Photoshop, they're rasterized. Is it because of the masking or is it because it's a stroke? Also, not sure why the dark grey area rasterized as well. Are there other ways I could have done this differently? Sorry if it's not my best description - I'm just confused. Untitled (1).psd
 -
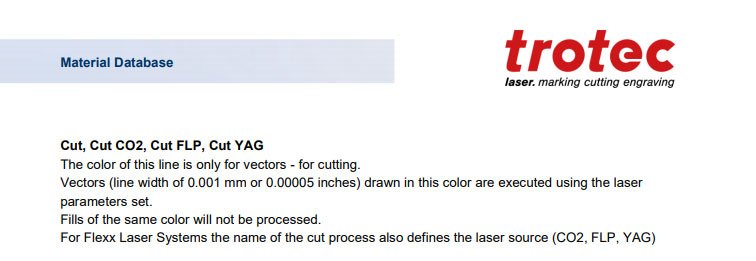
 When defining a stroke width, Affinity Designer (and Publisher) currently converts decimals more than one place to tenths. It is important to have the ability to specify decimals in the stroke width of a line up to four decimal places so that the software can be used to define vector cut lines in laser engraving software. Case in point - the users manual for Trotec Job Control states that for vector lines to cut with a laser, you must set them at a width of "0.001 mm or 0.00005 inches" (see attached screenshot). You currently cannot do that with Affinity Designer/Publisher, if you type in a width of "0.0036pt" (equal to 0.00005 inches) as the stroke width, the software will convert 0.0036 to zero. Actually anything less than 0.1 will get rounded down to zero. This is important functionality if we were to completely replace Illustrator & InDesign. Thanks.
-
 Dearest forum members I fell in love with affinity photo and -designer and am getting a lot of work done. Thank you devs. There is an issue with my way of thinking and I'm sure I'm just one little step aside. I scanned a ink splatter and wish to create a outline of it to print only the outline. The selection is easy and even giving it a stroke, but the moment I deselect the selection area, the artboard is empty. I tried to rasterize, tried to create a new layer with the selection selected and created a stroke but again, the moment I deselect, the artboard is empty. It's like I'm just doing some little mistake but can not find out what it is. The forum post show that a lot of designer wish to stroke a selection and some tips are not bad, but none of them work. I created a "style" but again, the stroke will not remain . Please help. Kindest regards Urs
 -
 You’re propose your app as a tool for work in vector. This is not true. You can add a lot of elements easily, work with color, blur etc. But once you need to scale the vector object you’ve created YOU SHOULD MANNUALLY GO TO EACH OBJECT AND SET “SCALE WITH OBJECT” Could you please set as priority ticket for your developers add a SCALE FUNCTION when you can just click on the object, click in Edit Menu “scale”, set ratio or percentage and you will get scaled option of your image. In addition your export feature need so much power from my Macbook that comparing it to the Illustrator. I’d better avoid all of those coll things you’re proposing just to get scalable and adopted vector file.
-
Hello team, I hope you are well. Thank you for the effort you make every day. Attached a video that I just recorded where I verify that the error in "Expand stroke" is still present. I hope you have it in mind in the roadmap for the final version 1.7. Keep rocking. Best regards. Grabación de pantalla 2019-01-28 a la(s) 2.17.19 p. m._IG.mp4
-
 Can anybody tell me how to add a border to a photo in Affinity Photo? In Photoshop it's simply:- Select / All Edit / Stroke
 -
 Greetings, while researching another issue I came across an issue I've been struggling with in the stable release for quite a while: When selecting a shape tool (pen tool, rectangle tool, circle tool, etc.) and immediately changing the colors and then drawing a shape, the colors (and stroke settings) will actually apply to the previously selected object instead of the newly drawn. This goes even further for the pen tool whereas you have to at least draw two nodes to be able to adjust color and stroke for the current shape. In my mind when I have a shape tool selected the context sensitive bar (which is actually changing depending on the selected tool, NOT the selected object, so there's an ergonomical issue, as well). should reflect settings to the shapes I am ABOUT TO DRAW. If, on the other hand, I select either the object selection (V) or the node selection (A) tool, I would expect the context sensitive bar to reflect options and functions corresponding to the SELECTED object. For me it is important to pre-set color and stroke to accurately visualize the design I am making. Right now I am forced to painstakingly readjust the shape (sometimes each node in a complex shape seperately ) if something doesn't fit. I hope I could bring my point across, and why I think this should be adressed from an ergonomical point of view. I attached a video illustrating the issue both in the beta (where I'd expect the change to be more reasonable than in the stable release), as well as in the release version (where the affected object even is the artboard which I very, very rarely change settings like color or stroke, if at all - do artboards even have a stroke?) I wonder, if other people found this to be an issue in their workflow. I am also aware, that this is a matter of workflow and taste, so I would suggest adding an option rather than changing it completely. Thank you for reading! Shape Tools Color.mov
 -
 I can add stroke just fine. I suppose I should build a scenario. I make a text, I convert this text to curves then add a stroke to make the text appear more bold and appear the way I want it to, but then when I export the file (to .svg format) and send that file over to another software for another use, the text (already converted to curves and with stroke) appears without any stroke. I've checked on the .svg file when exported and it's fine, but when the other software reads the file it only reads the curves not the stroke. I understand you can't change the way another software reads an .svg file. My question is if there is any way for me to add the stroke as part of the actual curve itself on Affinity. I've gone around this by tracing the entire stroke around the text (converted to curves) itself on other projects, but its very time consuming. This process more than triples my the time I have to work on each project with this problem. So any help is appreciated, thank you
 -
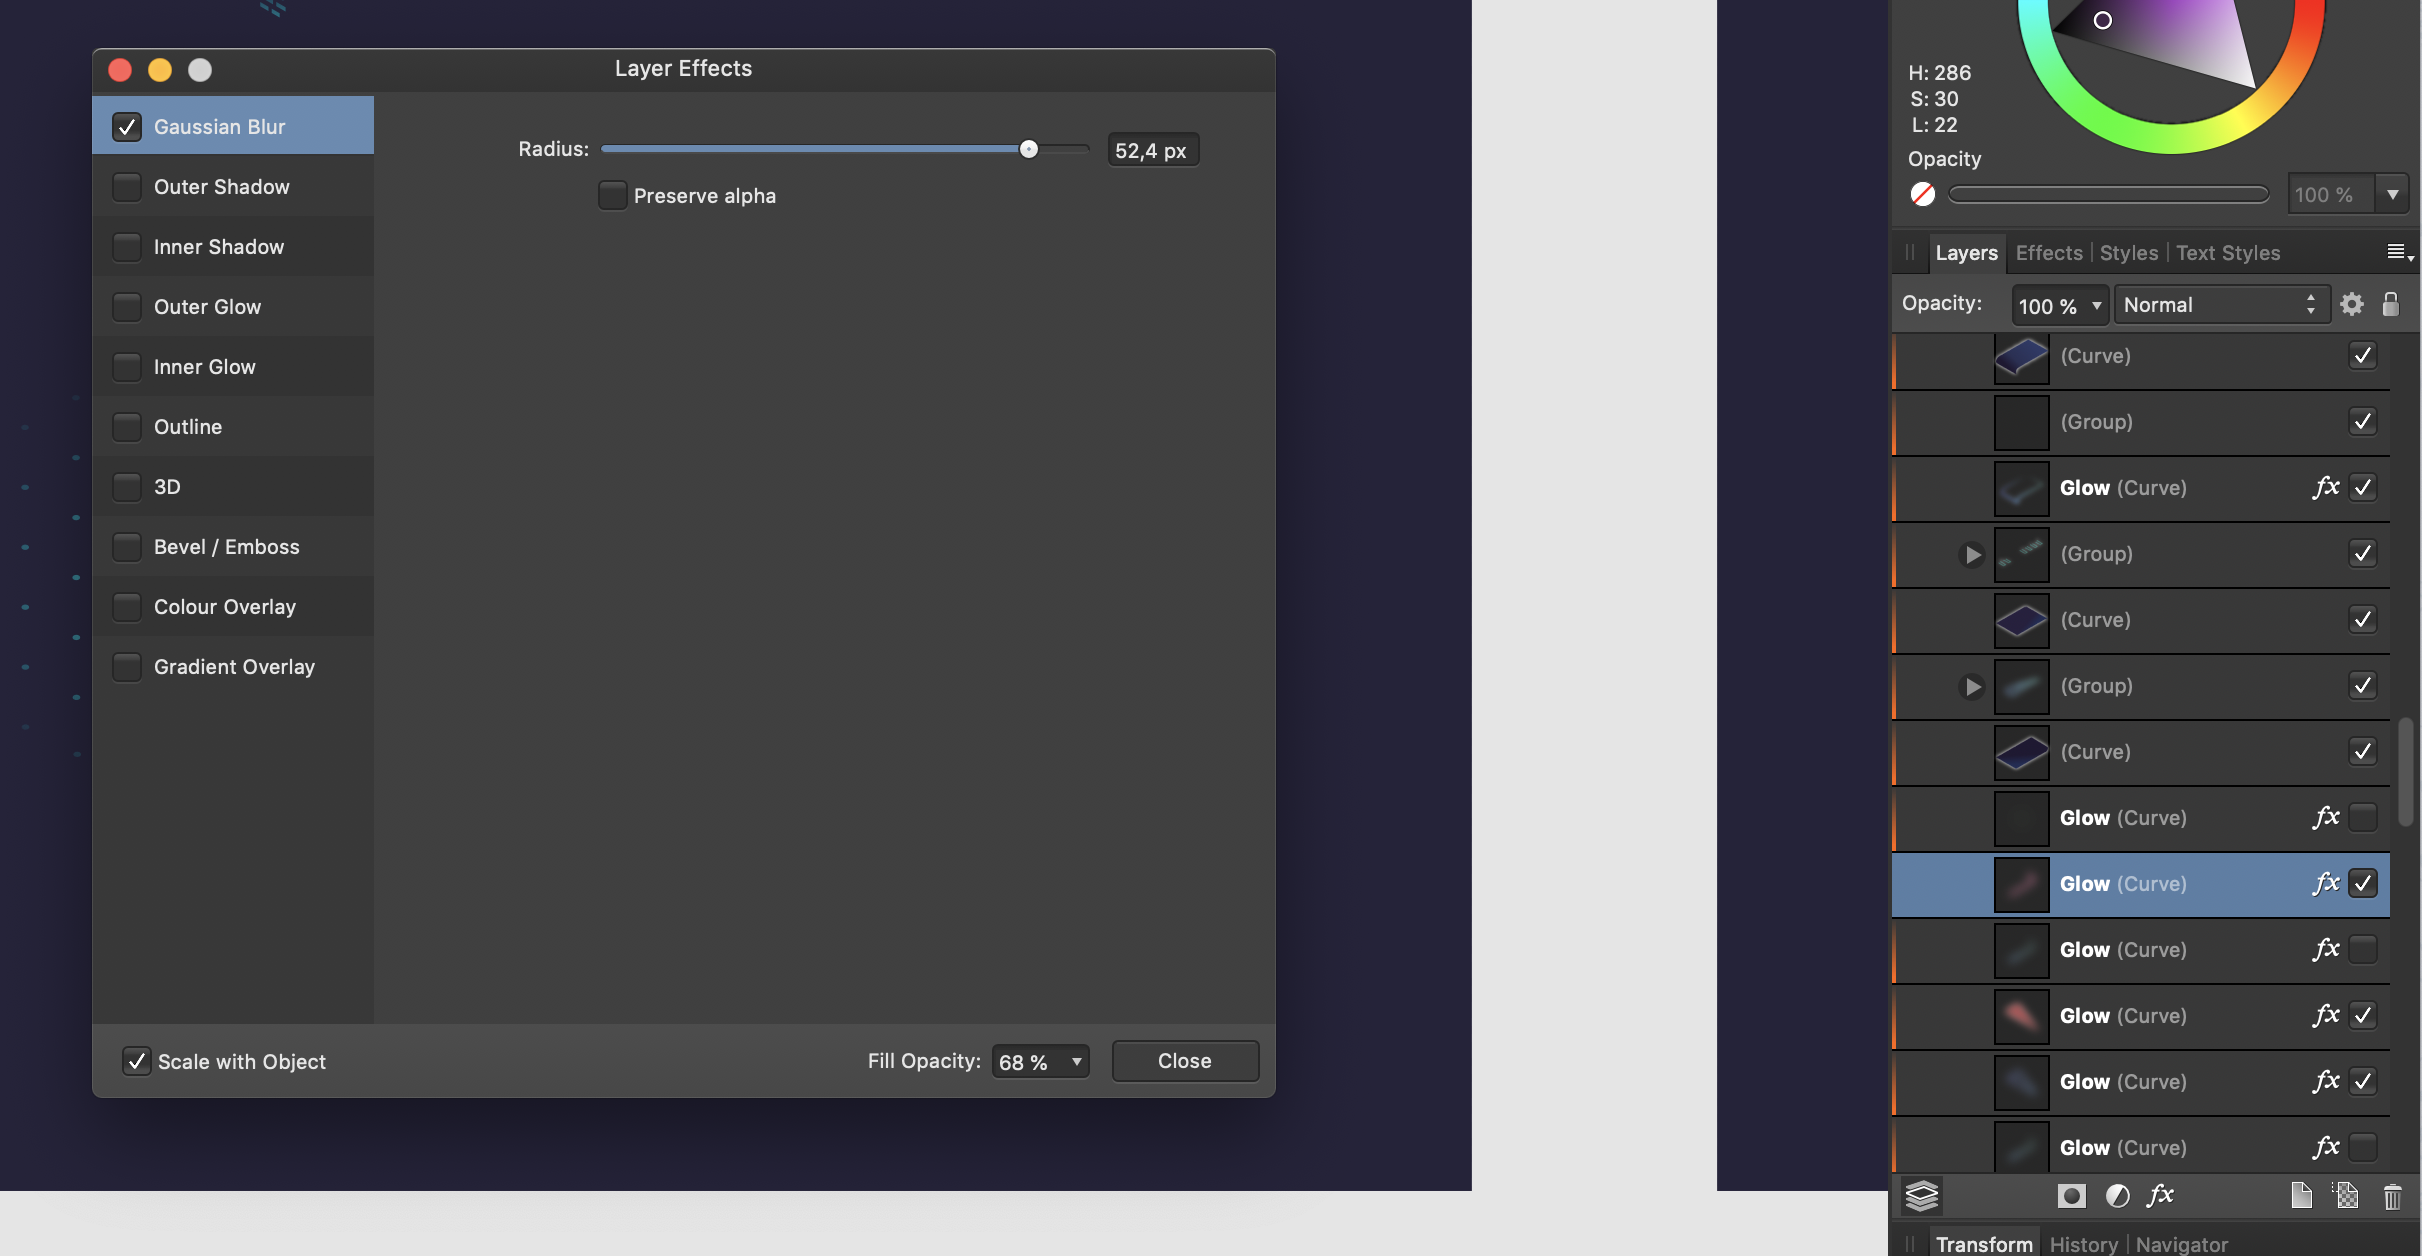
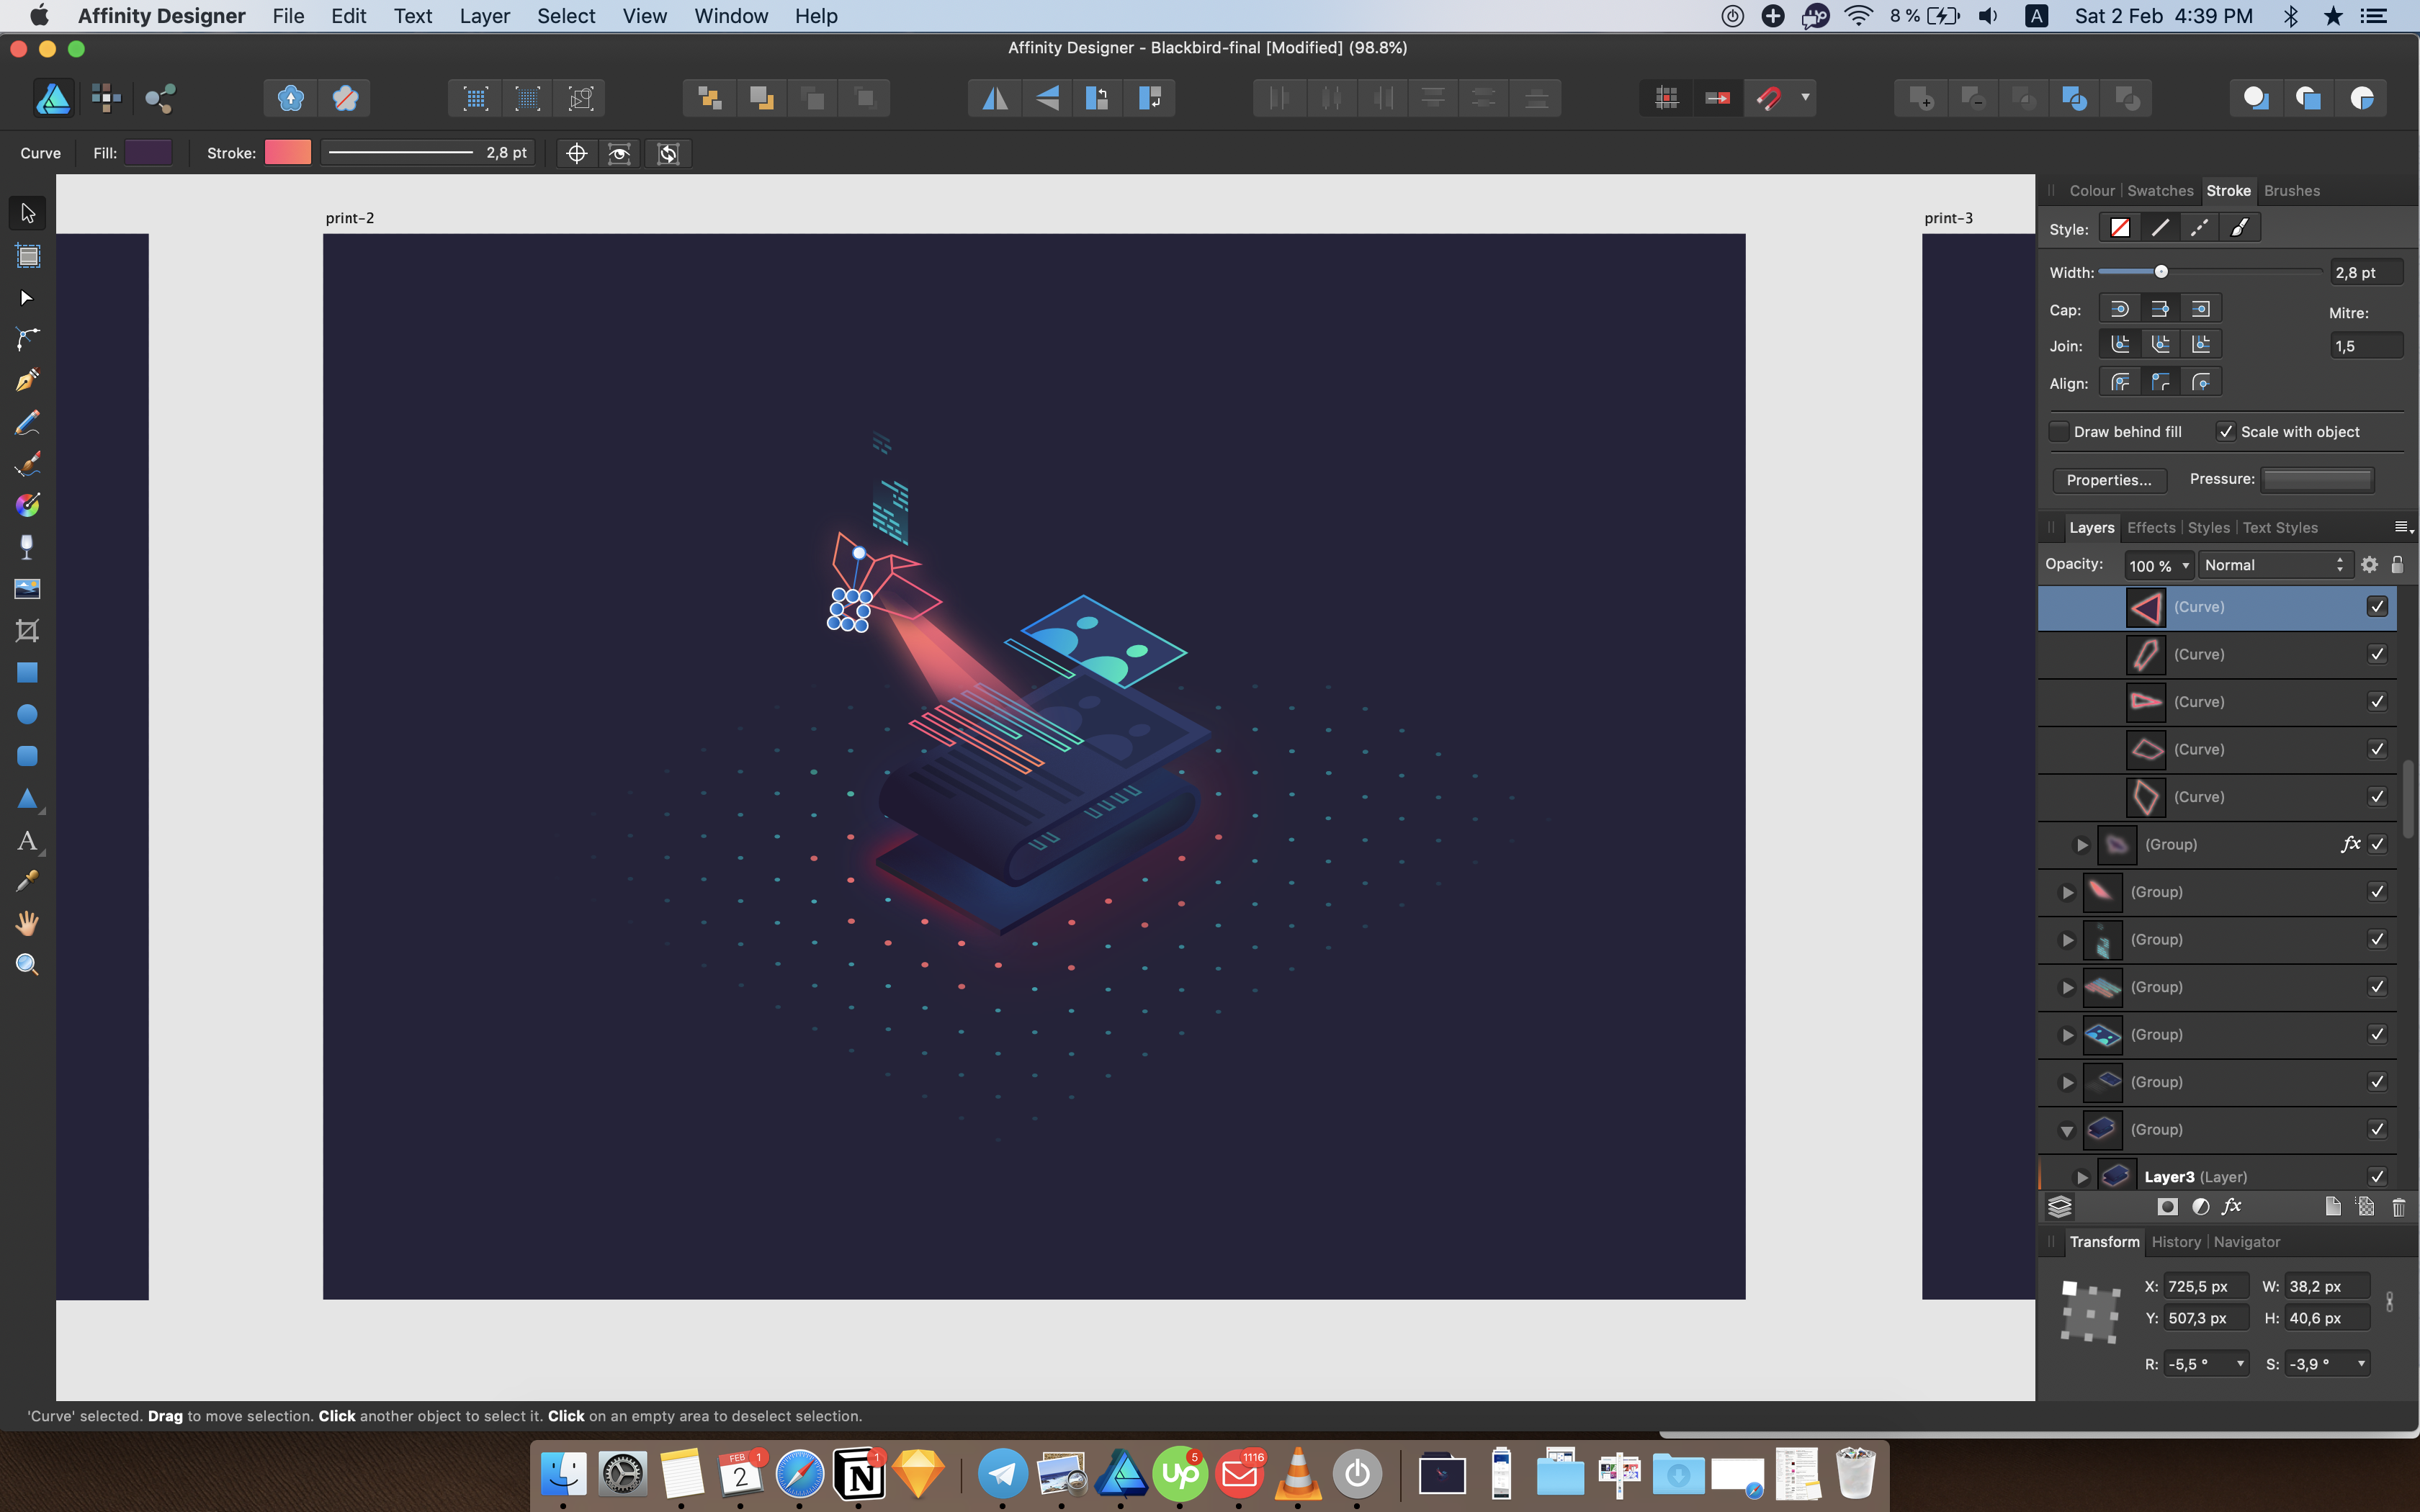
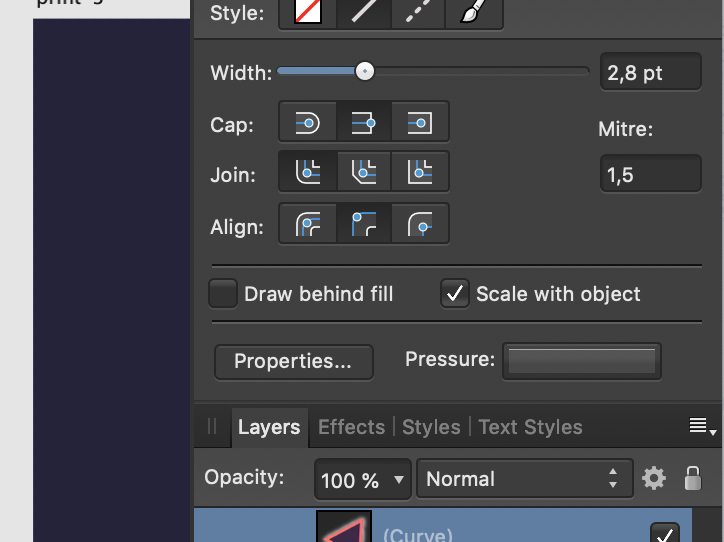
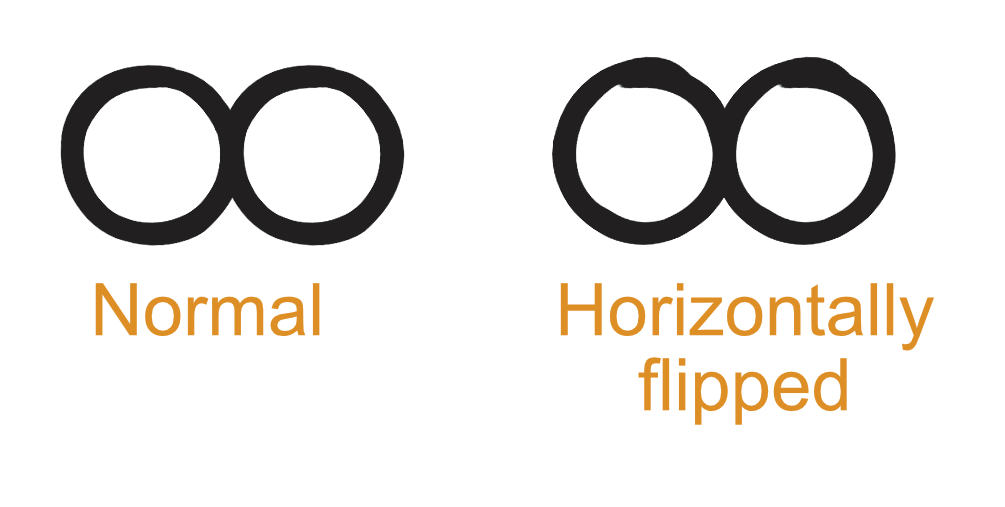
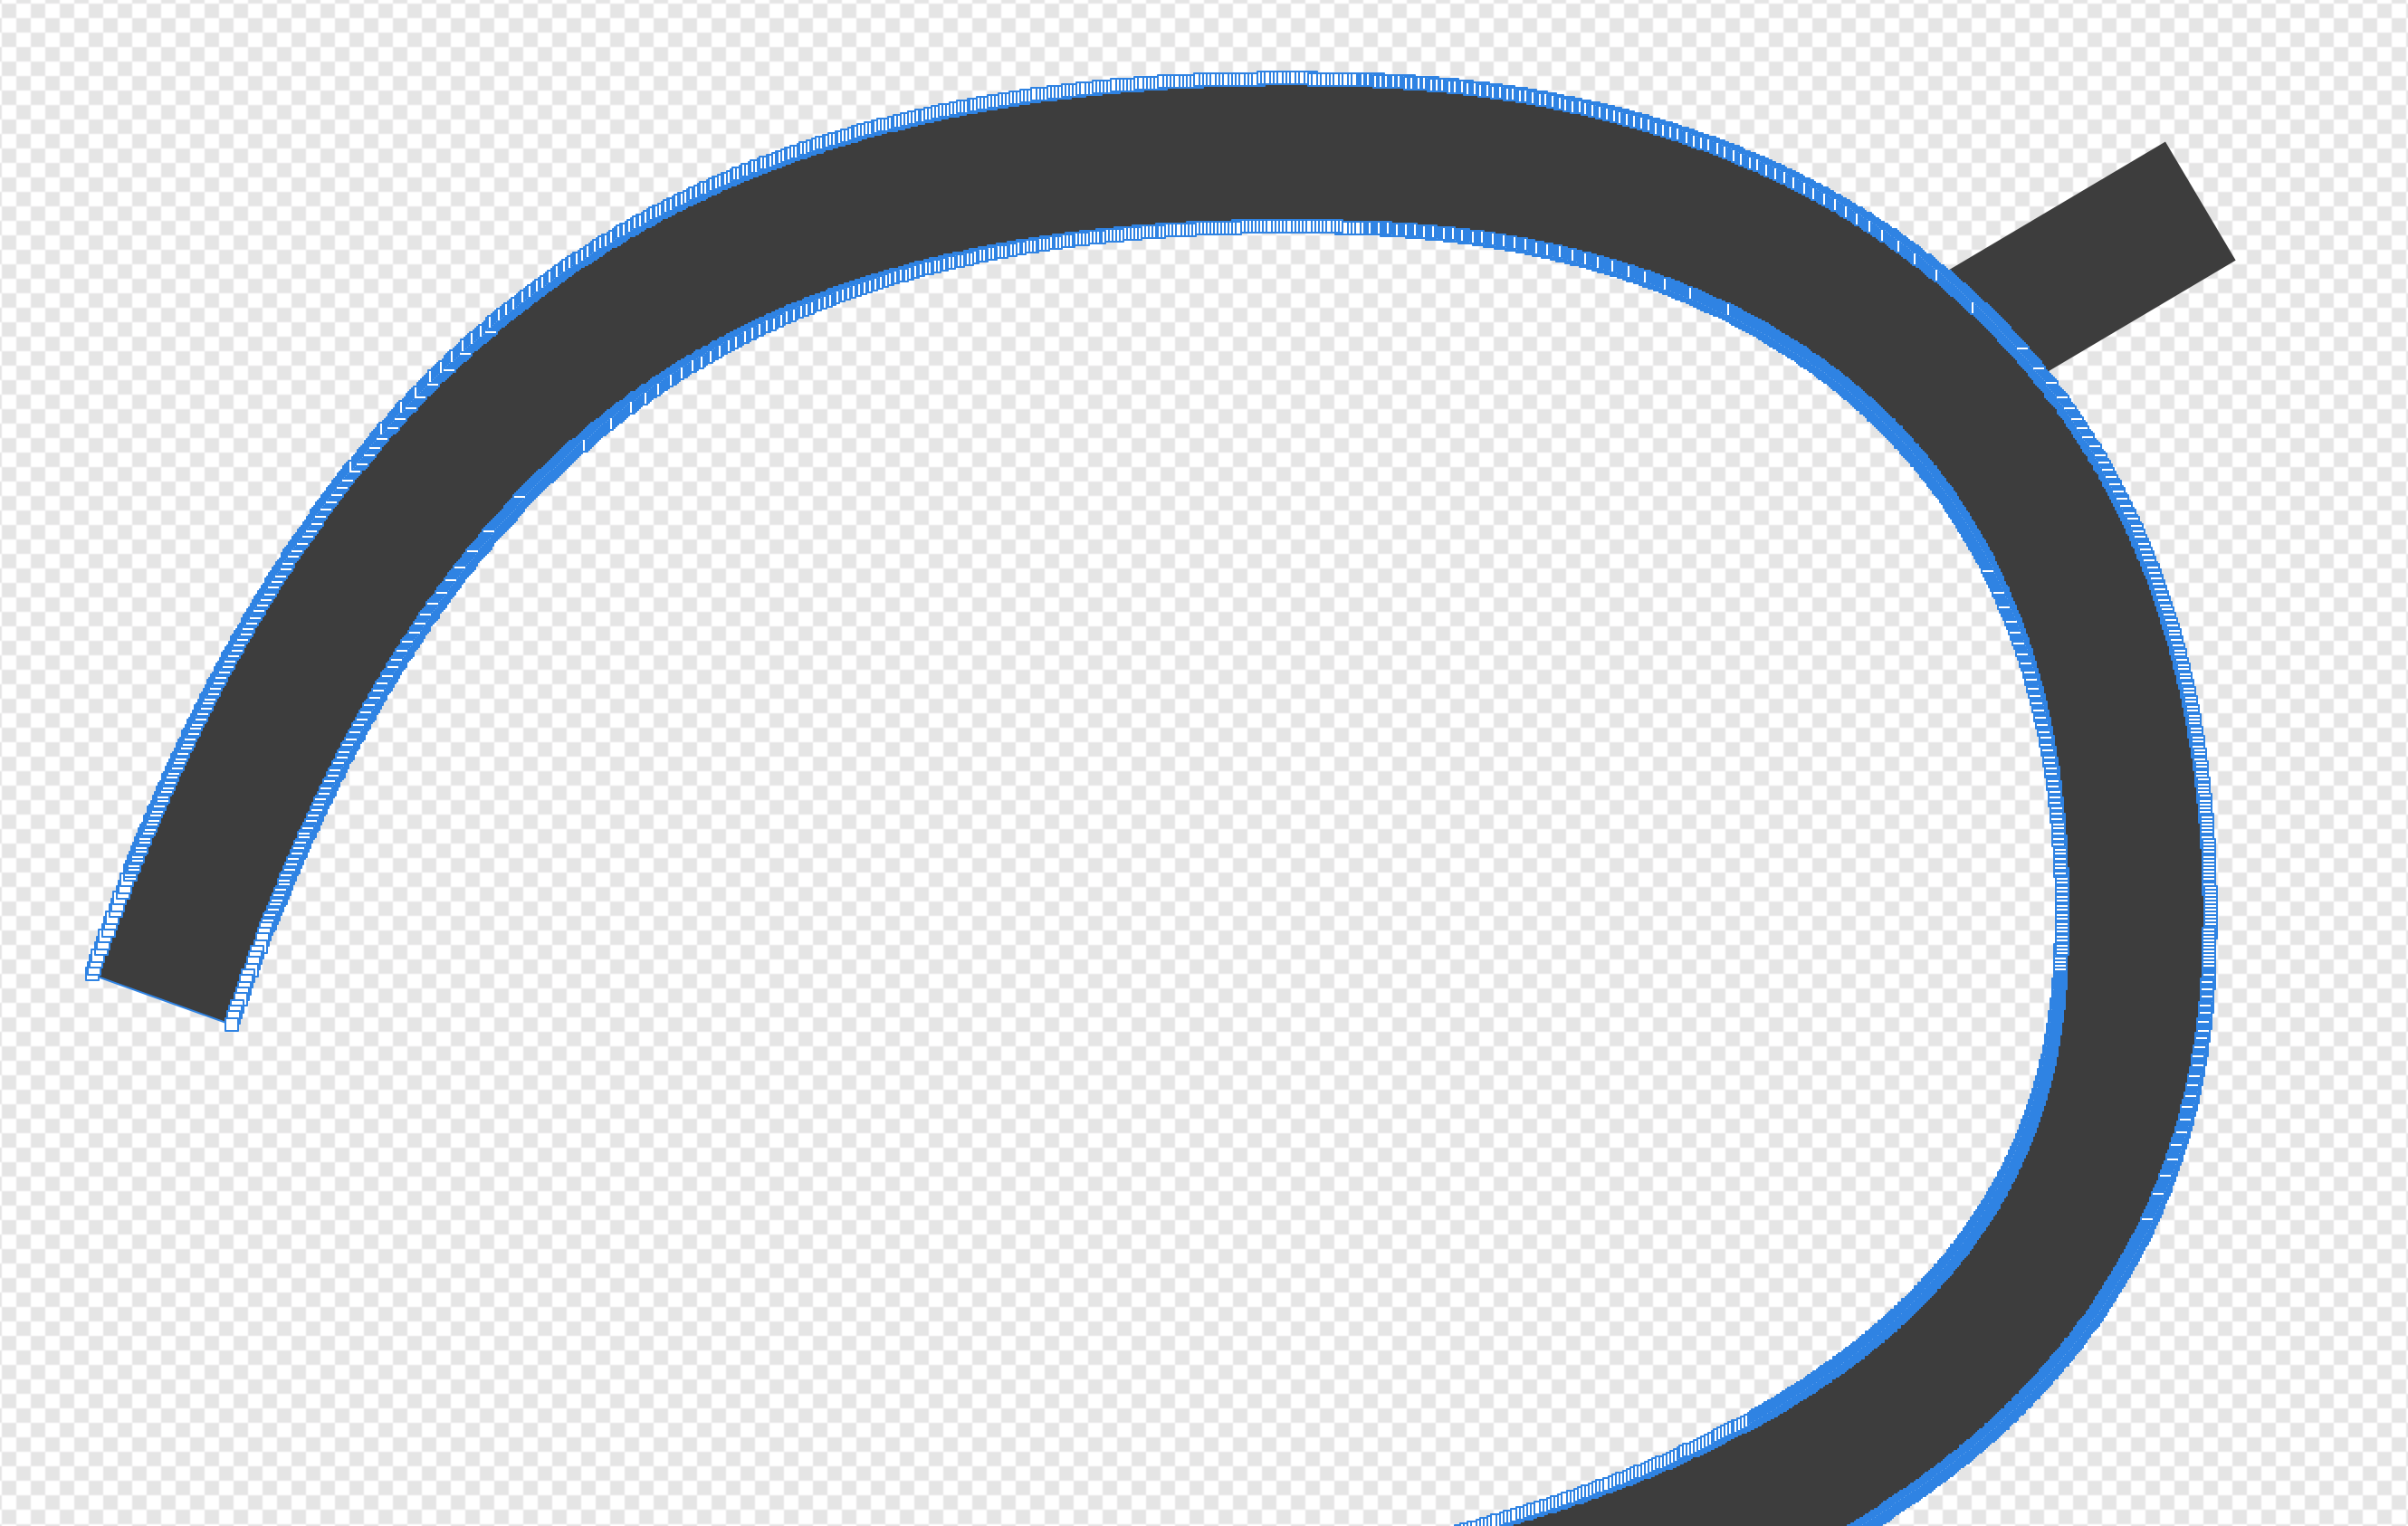
 I've got some textured brushes which look awesome but when the curves are flipped, the lines become 'off'. The points are clearly flipped but it's as if the way the texture flows down the curve is not flipped. I know the solution would just be to expand the curve to be a fill but I need the stroke widths to remain editable. I want to flip the 'artwork' not just the mathematical points which make up the artwork. Is this something which could be looked at in the 1.7 beta?! Any advice would be greatly appreciated. Richard
-
 Sorry about this post. I went back and did this again, and it works. I must have done something that I can't reproduce. There is no problem to report. I have selected multiple lines at one time and I want to change them from dashed line to solid line, but this does not work. I can change color and stroke size of multiple selections, but not stroke style.
 -
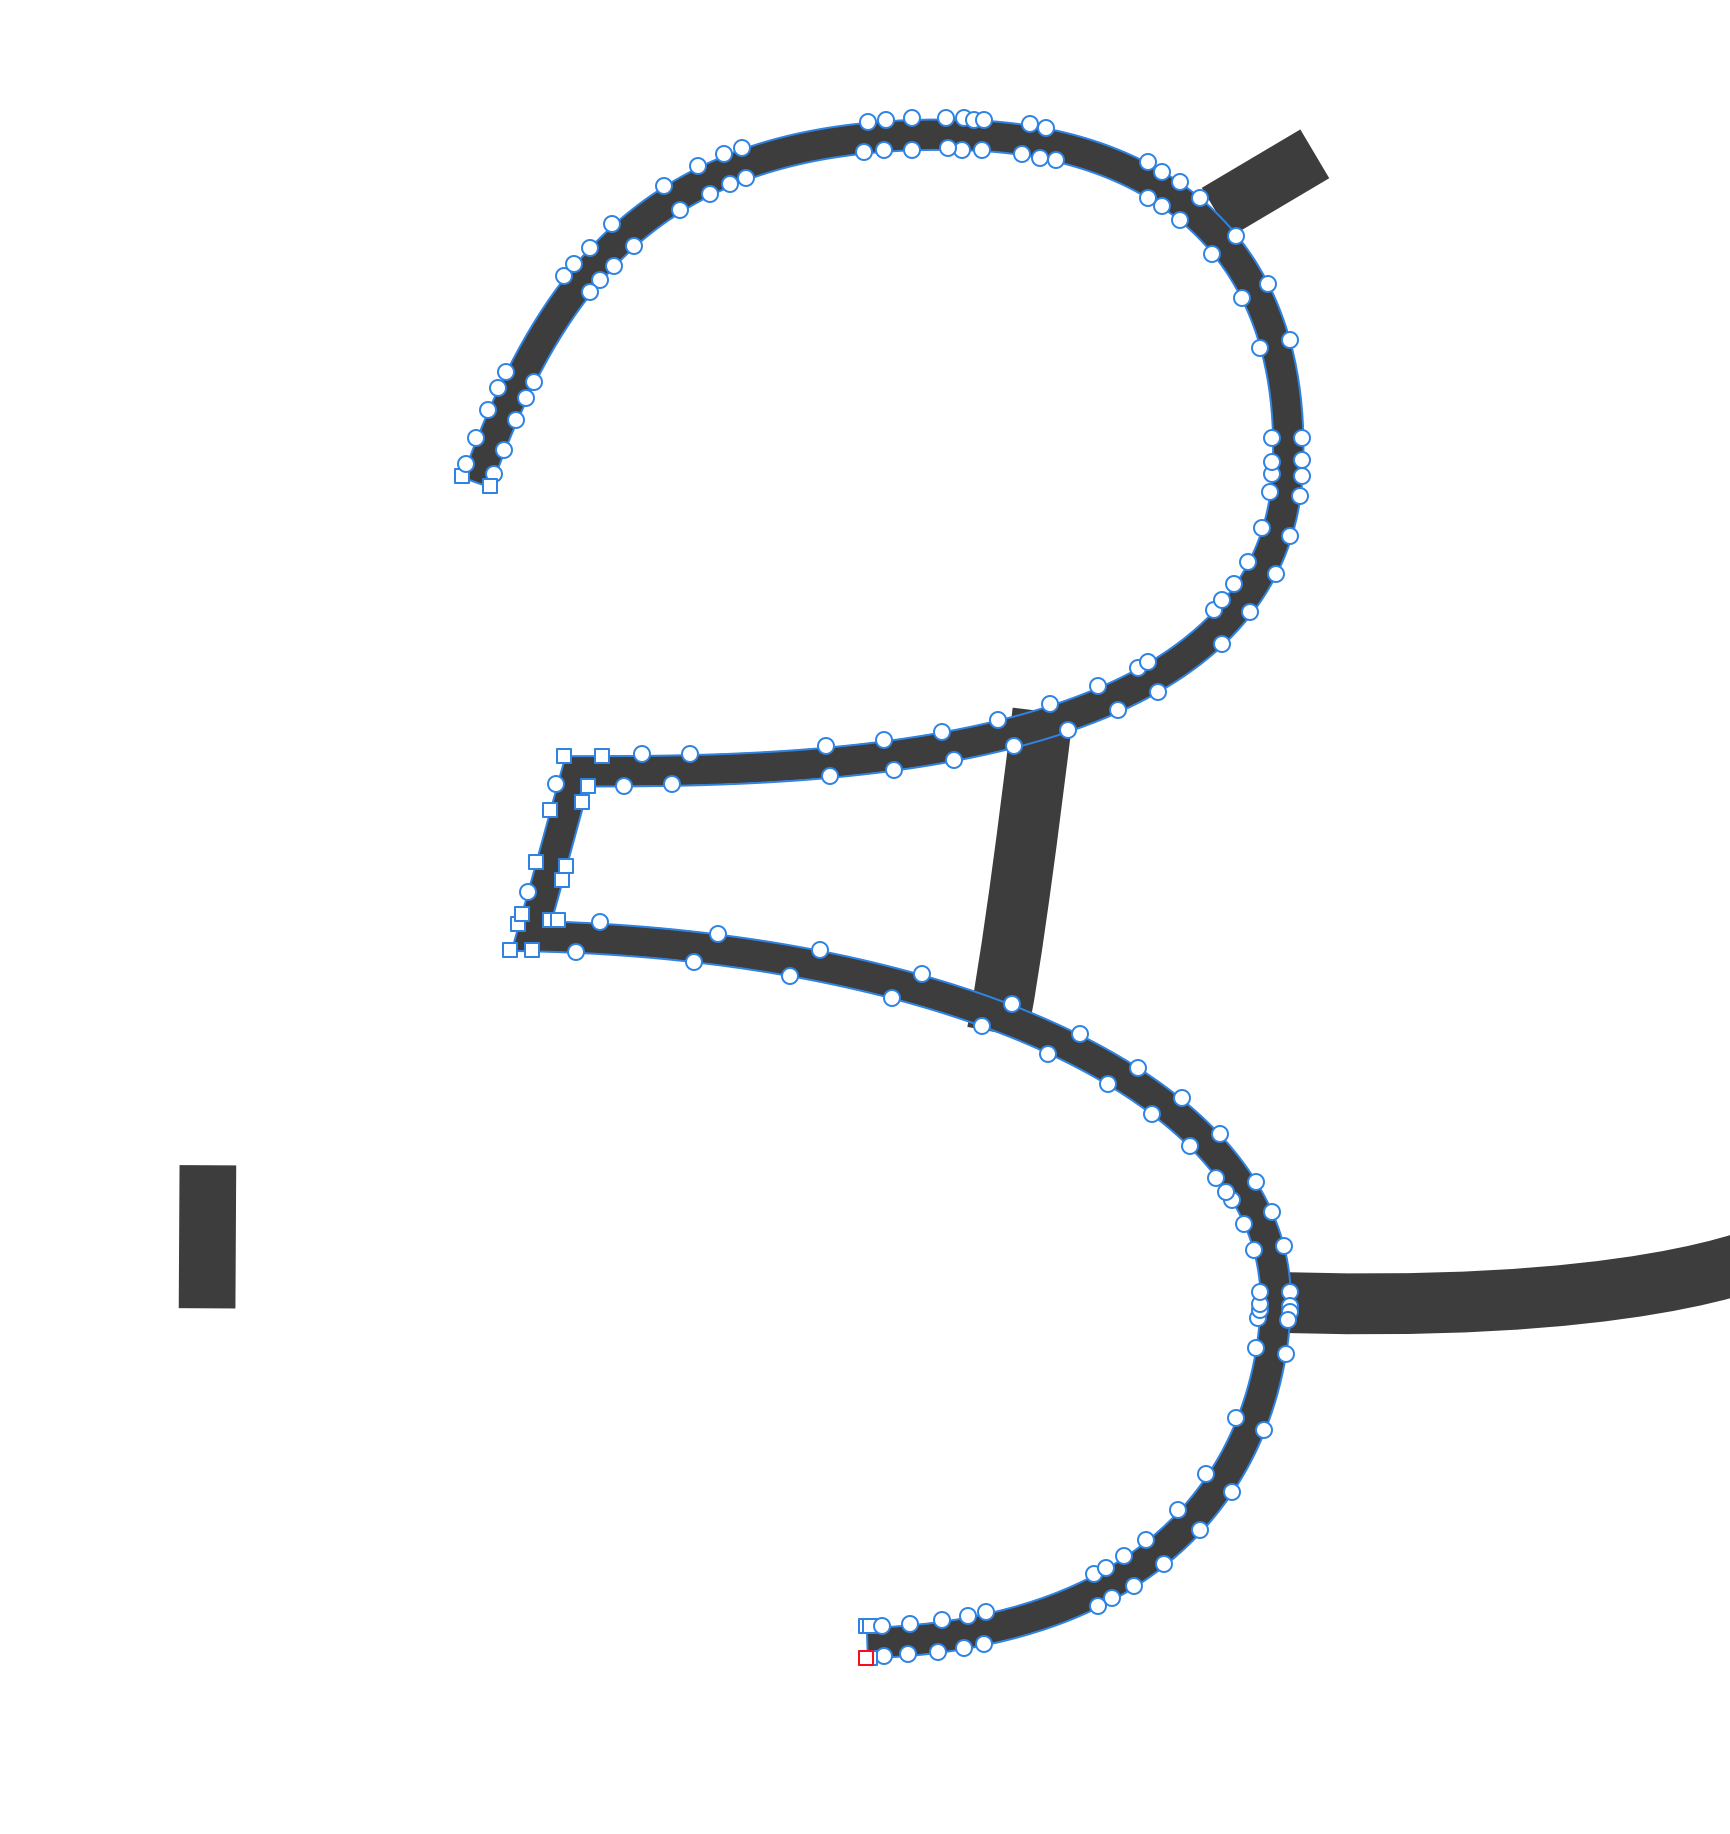
 Happy new year guys! I am in the middle of creating my first font (handwritten) and use Affinity Designer for designing the digits. However, the process is very tenacious right now. Since I'm new to font development, this is my current approach and setup. I created a document with a growing number of artboards, one artboard for each possible digit, ligature, symbol, and so on. I created each digit using a stroke with slightly varying line widths at the beginning and end. The program into which the digits are imported works with PDF, SVG, EPS among other (to me unknown) file formats – that's okay, because I can output each digit with the export persona named accordingly. SVG is the recommended file format. But I do run into some problems: The exported digit-files MUST NOT be exported as a path with a stroke The exported digit-files MUST consist of a single shape. The exported digit-files (even if points 1. and 2. were taken into account) as SVG are created with a white box in the size of the artboard around them, which lead to another step of selecting and deleting something manually that actually wasn't created in the first place while designing the digit. (The document is set up with the check for Transparent background under the Colour dialogue) I would have guessed now I can select all contents of the different artboards via shift+click in the layers palette and convert them with a single click on "Expand Stroke" - but this is not possible, because the selection is automatically limited to the artboards and not to the children. SelectChildrenOverMultipleArtboards.mov Furthermore, I would have liked to use an action/macro to merge the multiple curves of single letters like A, B, E or F into a single curve - but unfortunately the macro palette only exists in Affinity Photo, if I see it correctly. Does anyone have an idea how to convert the files without all the unnecessary additional effort/tasks? Cheers and have a nice day MrDoodlezz
 -
 I'd like to select a continguous group of pixels (same color) and then stroke select them to draw an outline extending away from the selection. Rummaged through threads for almost an hour and couldnt find out how to do it, though I did see mention that stroke selection was possible in Designer. Seems really complicated. Could someone give me a step by step, or link me to a vid that explains the aforementioned procedure? I can do it gimp really easy, but I don't know how to do it in Affinity Designer or Photo. I use Photo most of the time, but it seems I have to use Designer to do stroke selection. Not sure though... Thanks in advance for any help!
 -
I'm trying to make some organic shapes with custom/random stroke dashes, upon expansion I get this messy fills: Before: After Stroke dash settings: 0 2 44 2
-
 Hello, I'm using Affinity Designer to create a svg map which is to be processed by a custom software. This programm requires a path and its expanded stroke. Is it possible to get a path name like "path_XXX_expanded"? This would make my work a lot simpler. Thank you in advance. Greetings Rogue Seven
 -
Dear Affinity-Team, I've been working on a logo font where i use mostly bezier curves to define the look and after that expand to strokes... while I'm used to clean expanded strokes/curves... within Illustrator for instance, in Affinity Designer the created points are quite a lot if not messy?! This is even more problematic (also slows down the app considerably) with SVG/EPS Exports. (see attached files) Optimising / simplify curves/strokes could be helpful.. in that case. As well just a better conversation or maybe better conversation control. Other than that is the Affinity Designer pretty nice!
-
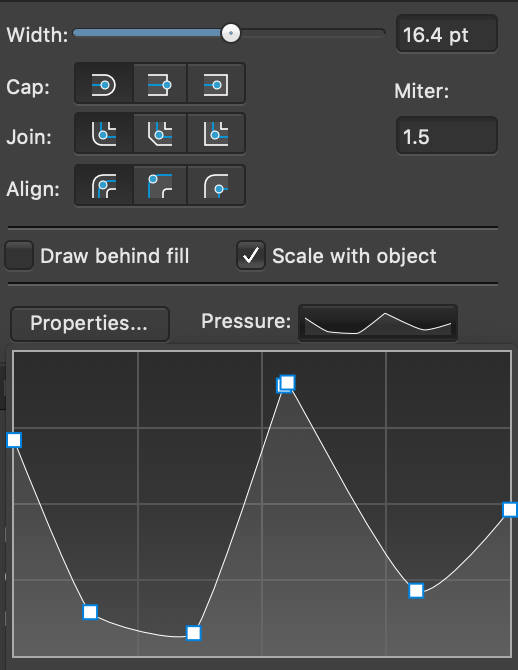
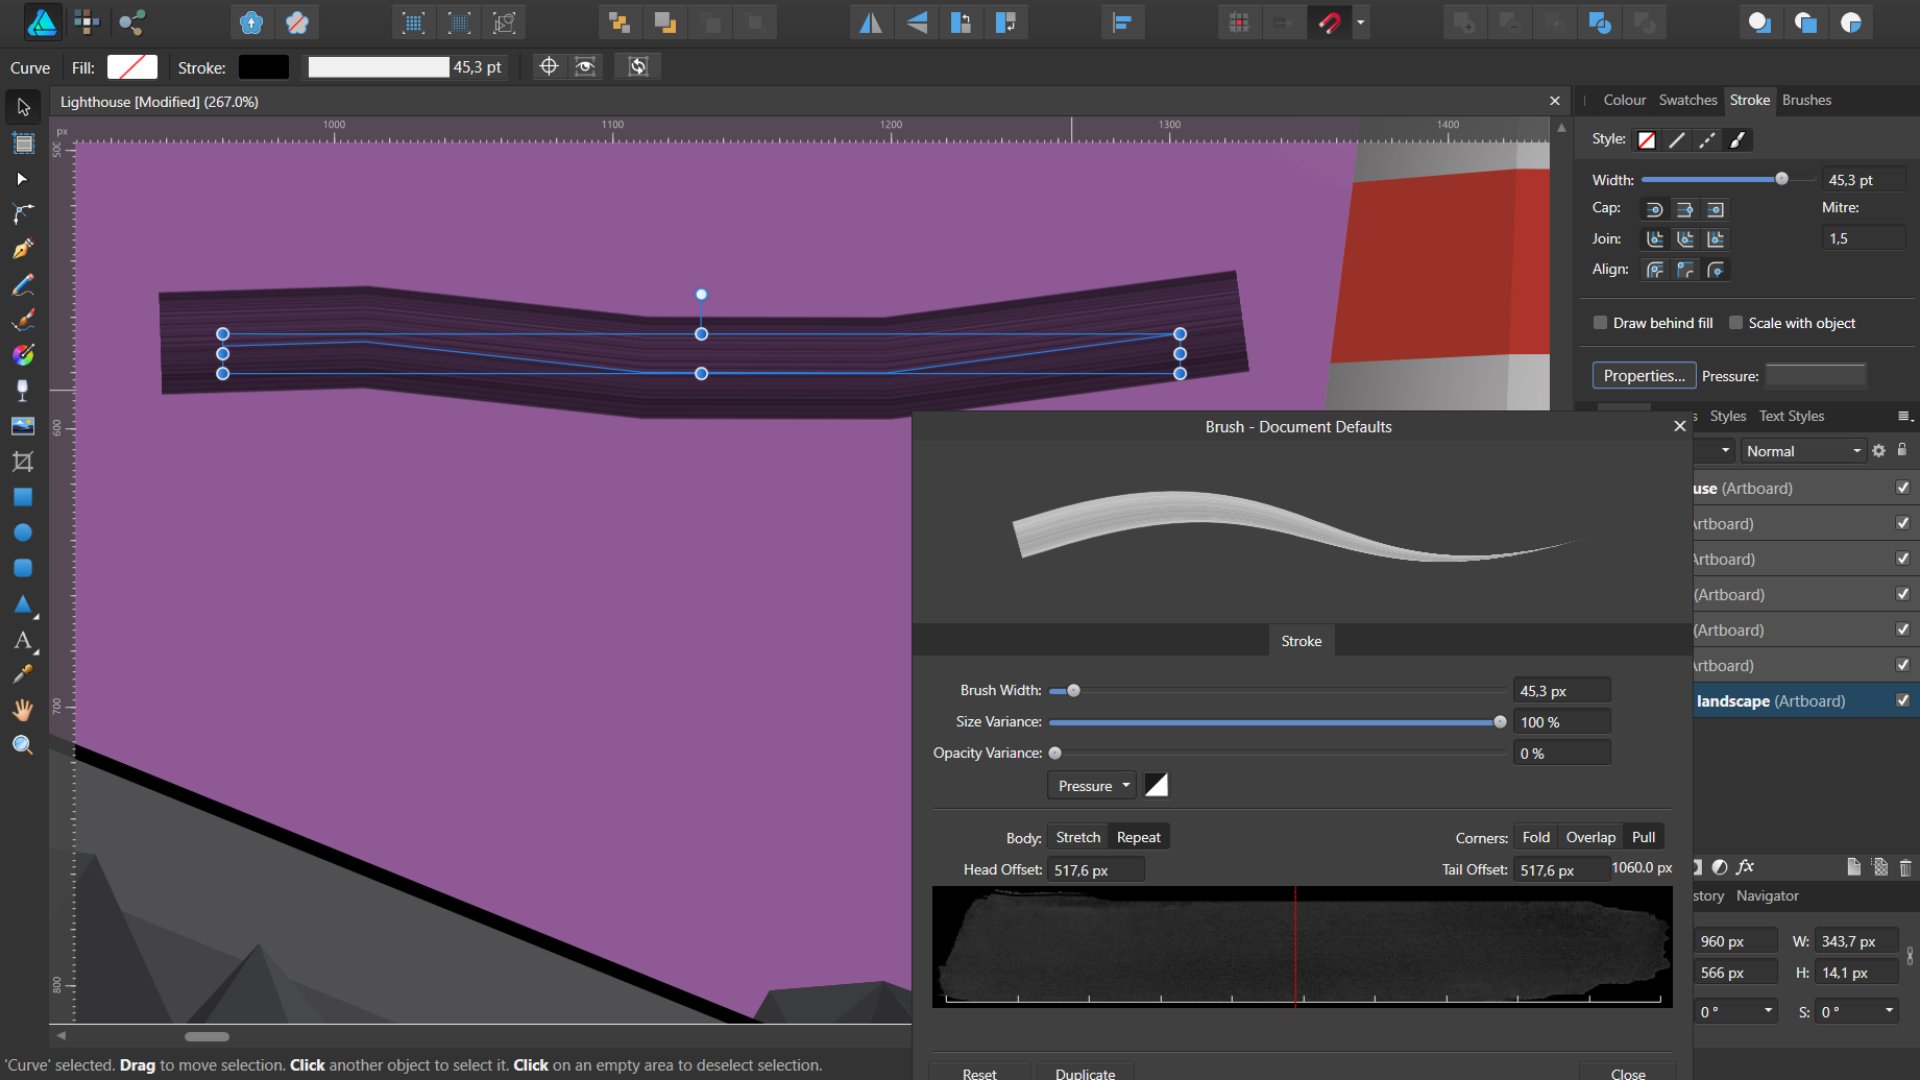
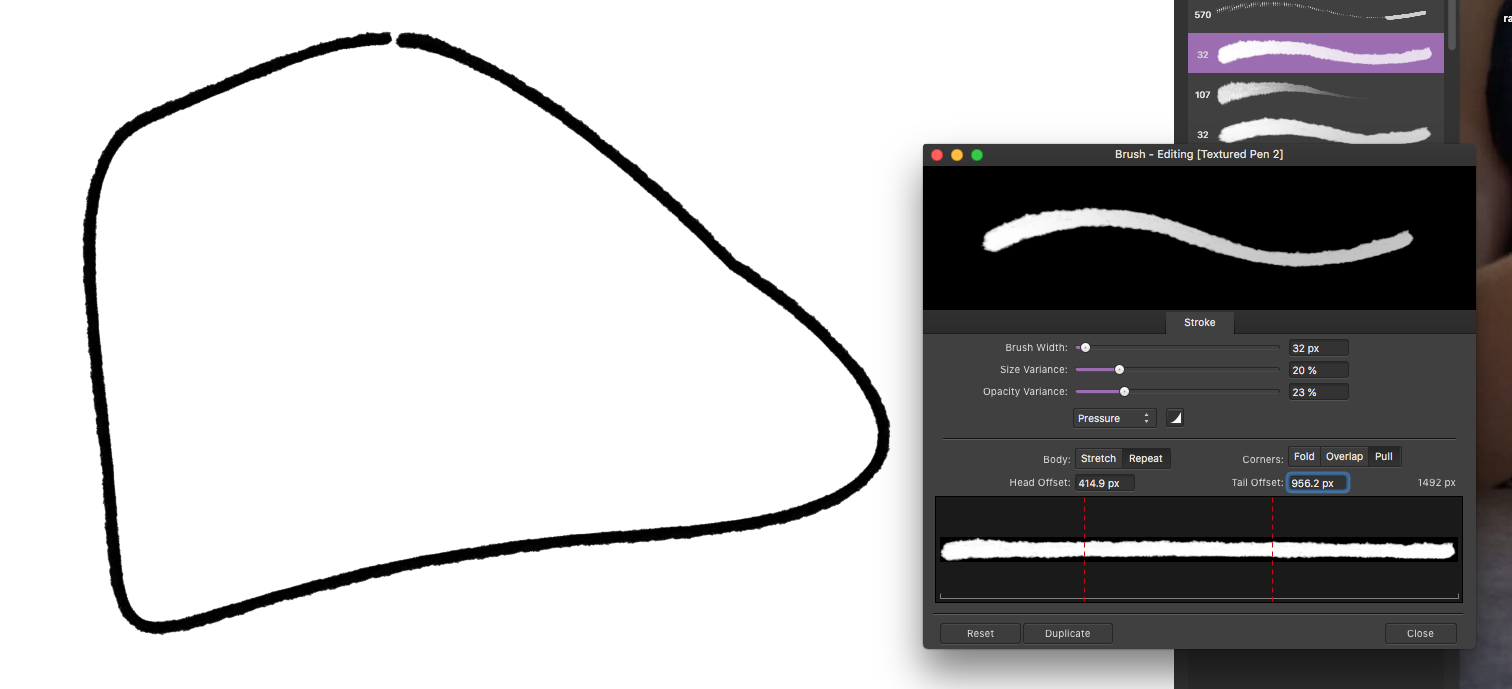
 I've been trying to figure out how can I change width of line/brush stroke that goes gradually from 0 to any desired width. Maybe there is something in stroke/brush properties. I tried: Properties when Stroke card selected also Edit brush (preassure) So I edited my custom brush as shown in the picture below but curve still has equal width all the way. Thanks for the advices or links to this kind of issue if there is already! Martin
-
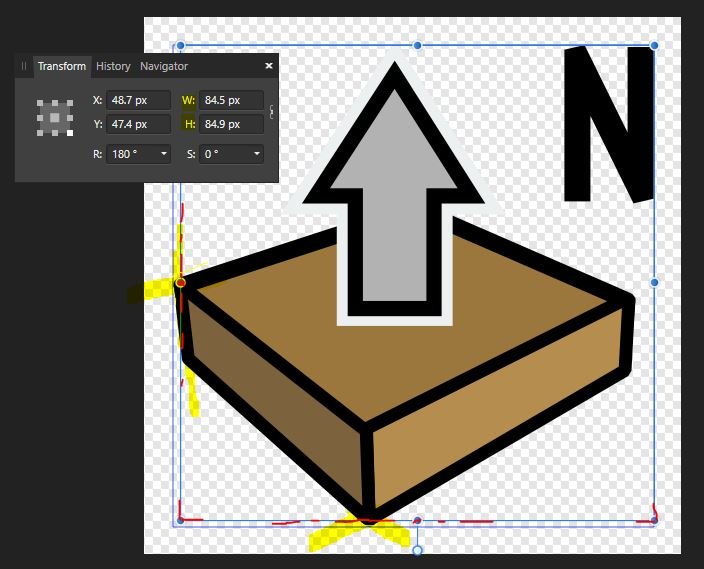
 I haven't used AD in a long time so please understand that I may not be using the proper terminology. I dragged an .svg file into a blank screen I wanted to find the exact size of the "footprint" of all the objects which I have imported. The "Transform Pane" displays the width and height of the selection "frame". However, the frame is defined from the centerline of any stroke that crosses the frame. What need is to have the frame include the outer-edge of the stroke width. If not then is there a setting for the stroke width to be positioned only to the inside of the stroke centerline? Please advise as to the best way to go and let me know where/how to change either one of these settings. This is important because artwork will eventually be exported to an exact pixel dimension. The exports will be used as an icons in a WebBased Toobar and all the icons must have the same size/aspect ratio.
-
 Textured Brushes on Strokes- How do I get rid of the gap where the last curve node joins the first one? (screenshot attached) The only way I could work around it was to break the curve, however on a doc with hundreds of strokes, this would be very tedious! Thanks in advance,