Search the Community
Showing results for tags 'soft proof', 'affinity photo' or 'mac'.
-
 Below is my list of written tutorials I have done over the years. The first few were done using early versions of Affinity programs but they should still be ok. Some menus may have changed or tools look different but the basics are the same. Also most are for Affinity Photo, but some could be done in Designer. Plus the "Beginners Look at Affinity Photo" ones will pretty much be the same in Affinity Designer and Publisher as all 3 programs have same basic functions. PhotoPlus and Affinity Photo – make a fake Starry Sky background https://www.dropbox.com/s/3la5z4amc11wcgx/starry-Sky-PhotoPlus_and_Affinity_Photo.pdf?dl=0 Affinity Photo – Silk Embroidery Effect https://www.dropbox.com/s/9h4mpso7i77z1oq/Affinity%20Photo%20-%20Silk%20Embroidery%20Effect.pdf?dl=0 Affinity Photo – Silk Embroidery Effect V2 https://www.dropbox.com/s/6usbza25vidgmck/Embroidery%20Tutorial%20v2.pdf?dl=0 Affinity Photo – Vintage Cabinet Frames https://www.dropbox.com/s/bj2dsmwmy0juazk/cabinet-frames.pdf?dl=0 Affinity Photo – Fake Evening Sky with Rain and Lightening https://www.dropbox.com/s/mlcdnducotitp1d/Fake_Evening_-_Lightning_-_Rain_-_Affinity_Photo.pdf?dl=0 Affinity Photo - Art Projects Shows 2 ways to make a blank canvas on an easel have what might be a painted image on it, from a photograph. https://www.dropbox.com/s/8fx18c77t2dnulb/Art-Projects-sept2018.pdf?dl=0 Infrared V2 – Affinity Photo 3 ways to make fake Infrared images I Needed a project to use in the Affinity Publisher beta, so I thought I’d update an old Serif PhotoPlus tutorial to an Affinity Photo tutorial. It basically shows 3 methods to get Infrared style images. https://www.dropbox.com/s/0c0mgqfrbrdv4q5/Affinity%20Tutorial%20-%20Infrared-v2.pdf?dl=0 Affinity Photo – Convert German Video – Film Strip Image in 3 parts pt 1 https://www.dropbox.com/s/iewleyt95a8qhdk/Photo_Film_Strip_-_German_Tutorial_pt1.pdf?dl=0 pt 2 https://www.dropbox.com/s/2j35gkvxr9emcq6/Photo_Film_Strip_-_German_Tutorial_pt2.pdf?dl=0 pt 3 https://www.dropbox.com/s/6yvxubgne0kqct4/Photo_Film_Strip_-_German_Tutorial_pt3.pdf?dl=0 Affinity Photo – False Water and Reflection https://www.dropbox.com/s/4sm0qqikvp0hs0a/affinity-photo-false_water_and_reflection.pdf?dl=0 Affinity Photo – Chinese Painting Styles in 2 parts pt 1 https://www.dropbox.com/s/uvqn9hf9mo2xwbr/Chinese_Painting_-Pt_01-_affinity-photo.pdf?dl=0 pt 2 https://www.dropbox.com/s/6ovc317ncjjosd0/Chinese_Painting_-Pt_02-_affinity-photo.pdf?dl=0 Affinity Photo – Beginners Look at Layer Masks https://www.dropbox.com/s/c0lsf9e7kdymdyd/A-Photo-%20Beginners%20Look%20At%20Layer%20Masks.pdf?dl=0 Activ8 issue 1 – Better Cloning https://www.dropbox.com/s/a1d283mn7icltzc/ACTIV8-issue1-BetterCloning.pdf?dl=0 Activ8 issue 2 – Spheres https://www.dropbox.com/s/igufcf3unu4z84b/ACTIV8-issue2-spheres.pdf?dl=0 Activ8 issue 3 – Affinity Photo - Select Tree - Replace Sky – 2 ways https://www.dropbox.com/s/lx0ko7f2xjqsg3r/ACTIV8-issue3-replacesky.pdf?dl=0 Activ8 issue 4 – Tri-Fold Image https://www.dropbox.com/s/1iyp59mr3bzjlri/ACTIV8-issue4-TriFold-image.pdf?dl=0 Activ8 issue 5 – Emboss With Lighting https://www.dropbox.com/s/t5r6tiz3c7k7o1s/ACTIV8-issue5-emboss-with-light.pdf?dl=0 Activ8 issue 6 – 3D Text https://www.dropbox.com/s/gif1x6xrtfrp2z8/ACTIV8-issue6-Three-D-Text.pdf?dl=0 Activ8 issue 7 -Affinity Photo, Designer and Publisher – A look at Styles This written tutorial, mainly aimed at beginners of any of the Affinity Software made for PC and Mac. It may work the same on iPad version but I don’t own one so can’t confirm that it will. It looks at what Styles are, how to make some Gradient Styles and some Styles made from images. Then how to Export and Import your newly made Styles. After that I do a basic overview of a couple of video tutorials I have made in the past. Using the Mirror Filter and the Equation filter to make new images, to then make Styles from. Lastly, another overview of a recent video tutorial, which looks at using the Vector Crop Tool in Affinity Designer to grab sections of an image to then make Styles from. The end of this PDF tutorial has interactive links to all the video tutorials and links to the downloads of all the Styles I have made in these video and written tutorials. https://www.dropbox.com/s/82szaatnflaw8fk/ACTIV8-issue7-Styles.pdf?dl=0 Activ8 issue 8 – Affinity Photo – Make Sketch Image With Just The Channel Mixer A while ago I made an Affinity Photo video tutorial about making a sketch image just using the Channel Mixer adjustment. I thought I’d up-date it slightly in this written tutorial, which can be done in Affinity Photo, Designer or Publisher. https://www.dropbox.com/s/6etmt3am6ljprwn/ACTIV8-issue7-ChannelMixer-Sketch.pdf?dl=0 Activ8 issue 8a – Affinity Software – 4 Creative yet simple ways to use Blend Modes This is a written tutorial update of a video tutorial I did in Feb 2018. They are fairly basic edits and will work best with an image that has a white background. So, I will use one I got from Pixabay, as are the other images used. Links to the video and image are in the written tutorial. The video was done in Affinity Photo but this will be done in Affinity Designer but I see no reason why it can’t also be done in Publisher. https://www.dropbox.com/s/sluebvjl86nuk8e/ACTIV8-issue8-Four-Uses-for-Blend-Modes.pdf?dl=0 Activ8 issue 9 – A Beginners Look At Affinity Photo part 1 Looking at opening images and saving your edits. Plus, file formats also a look at the Layers Panel and Colour selection Although tutorial is for Affinity Photo all will work pretty much the same in Affinity Designer And Publisher https://www.dropbox.com/s/7ztaxn4siom7evd/ACTIV8-issue9-Beginners%20Look%20at%20Affinity%20Photo%20pt01.pdf?dl=0 Activ8 issue 10 – A Beginners Look At Affinity Photo part 2 Looking at opening and setting up a new document other than an image. The Brush Tool and changing the Brush Tips. Then looking at the different types of Pixel and Vector layers you can make. Layer Masks and their use. Plus, a quick look at Text and Shape layers and the Glyph Browser. As with part 1, most (if not all) of the information in this tutorial will work just as well in Affinity Designer and Publisher as all 3 programs are so similar. https://www.dropbox.com/s/kourodnfojwq26l/ACTIV8-issue10-Beginners%20Look%20at%20Affinity%20Photo-pt02.pdf?dl=0
 -
 Hi Everyone, Can someone please help me with Hair Brush that I can add to the Affinity Photo on the Mac. I am looking for Hair Brush.
 -
Hi Everyone, Can someone please help me with Hair Brush that I can add to the Affinity Photo on the Mac. I am looking out for Hair Brush.
-
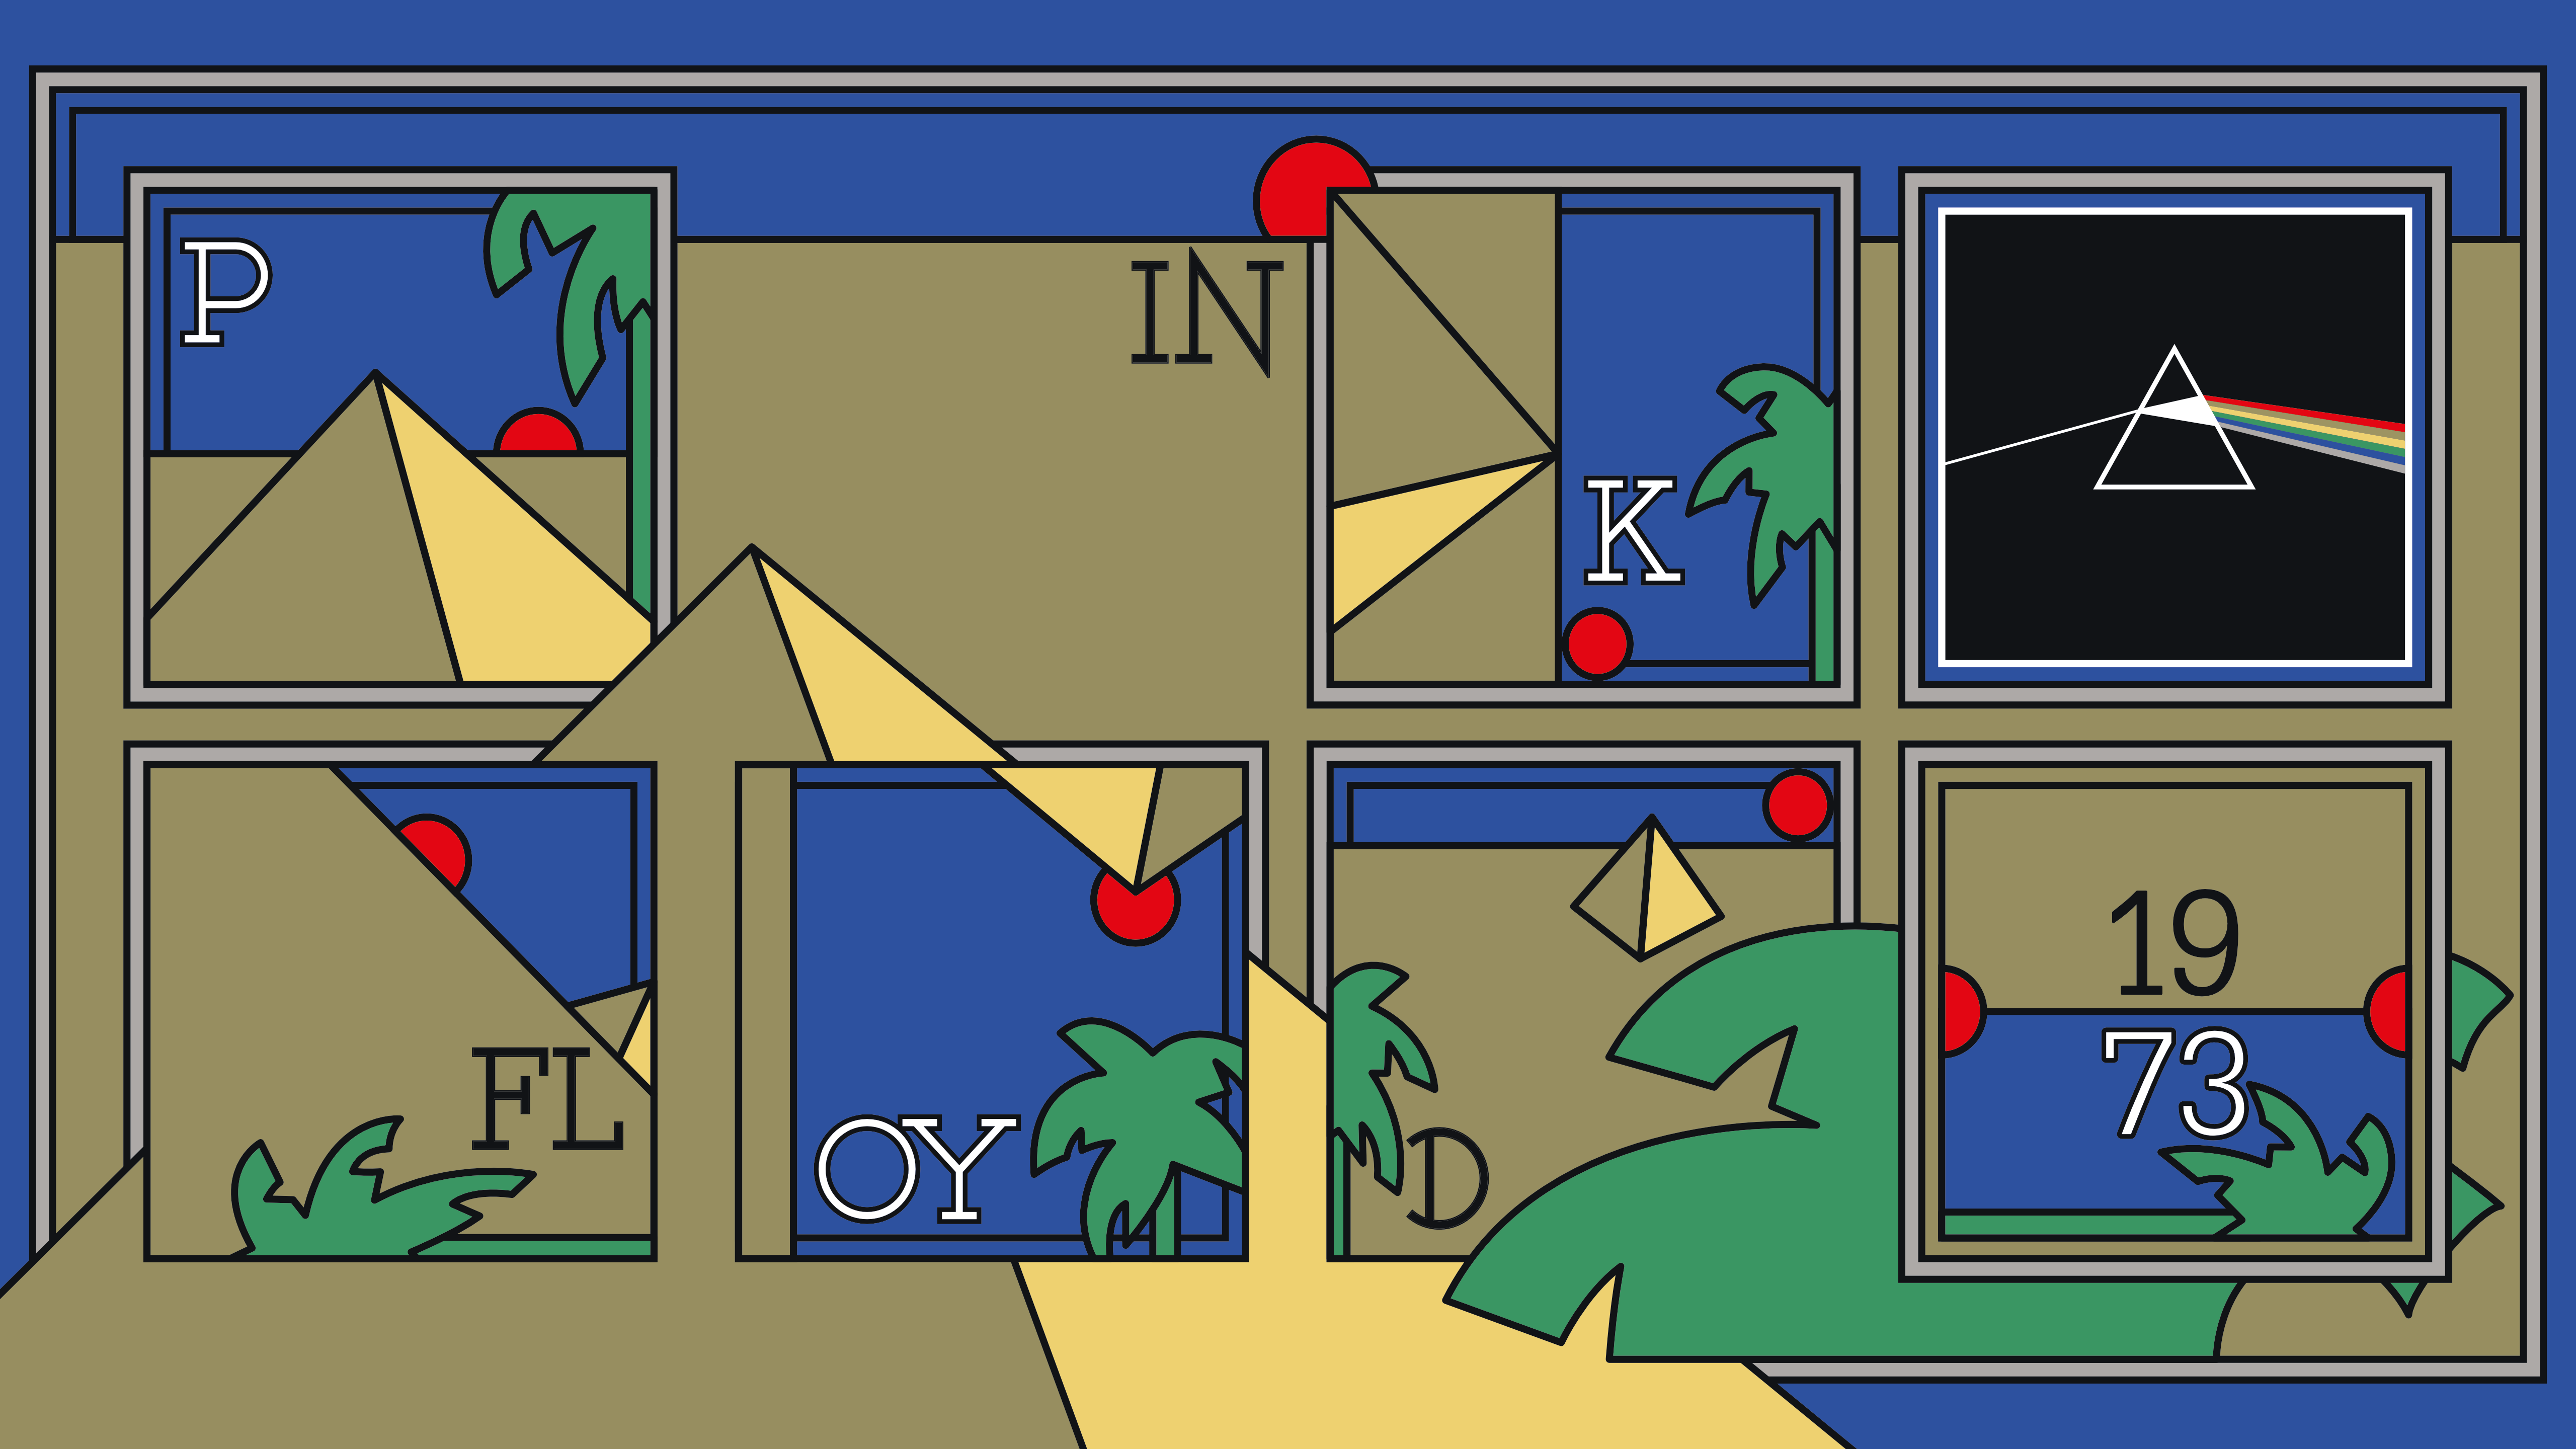
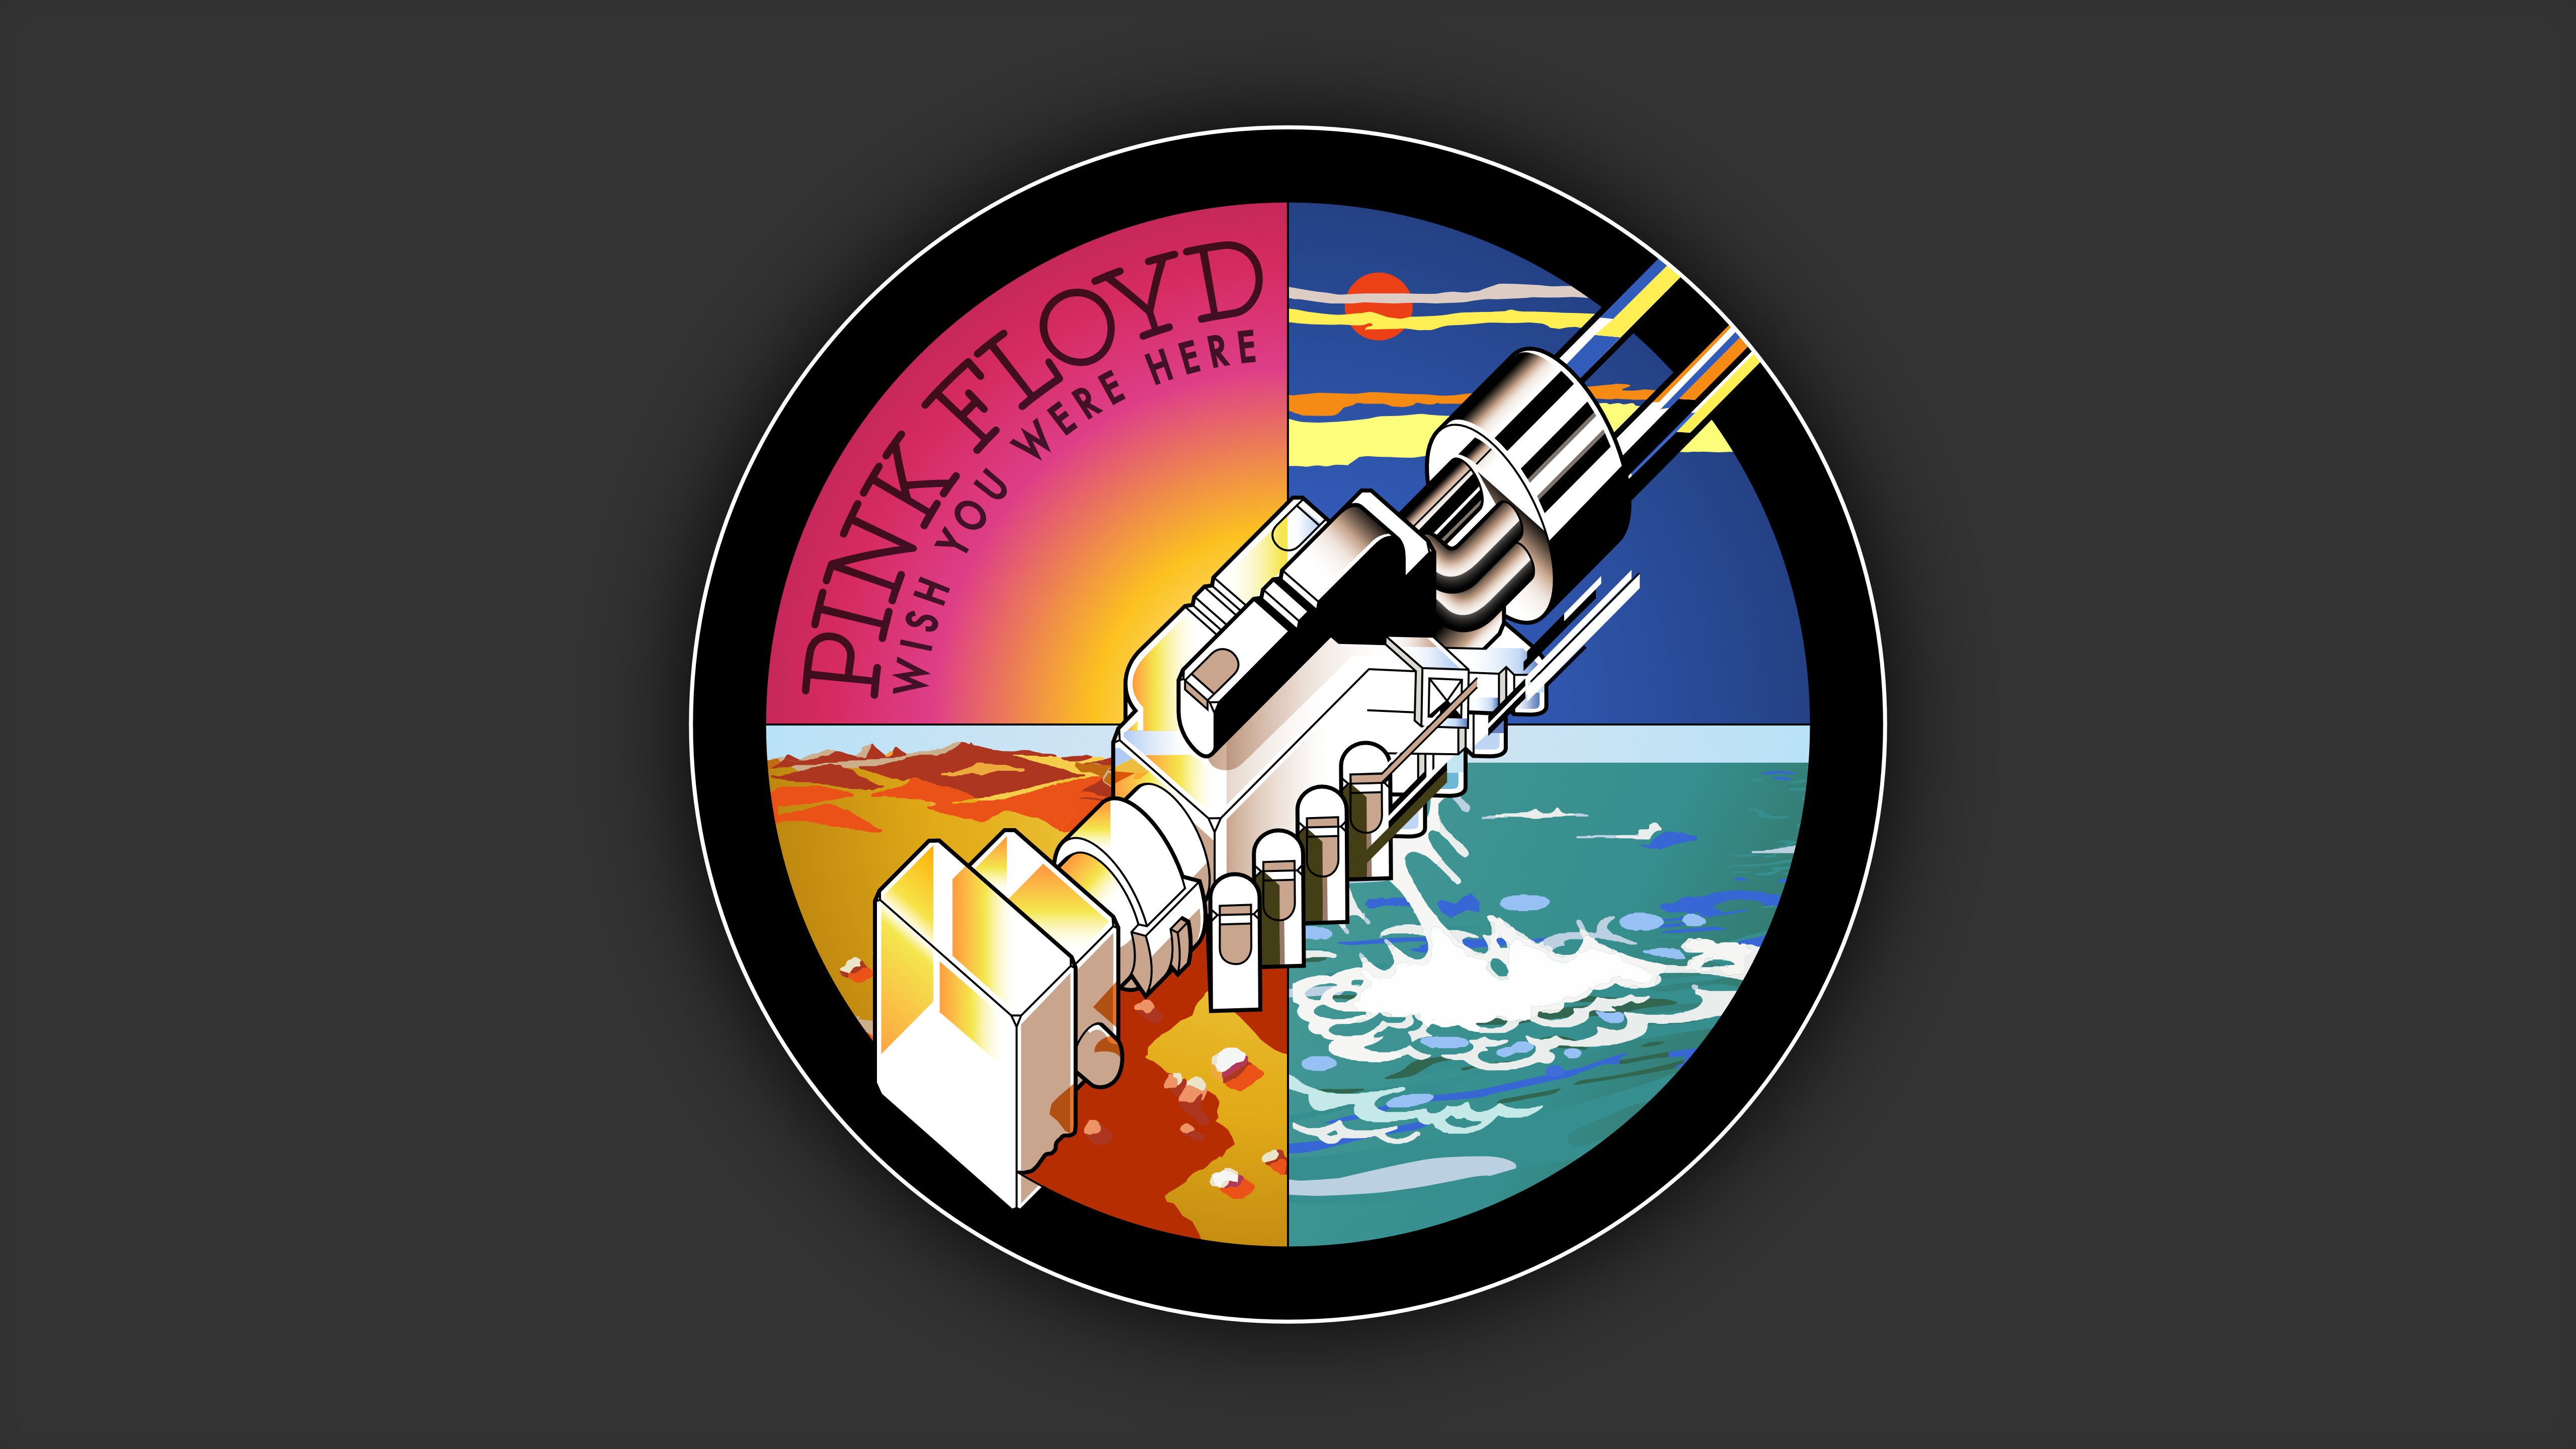
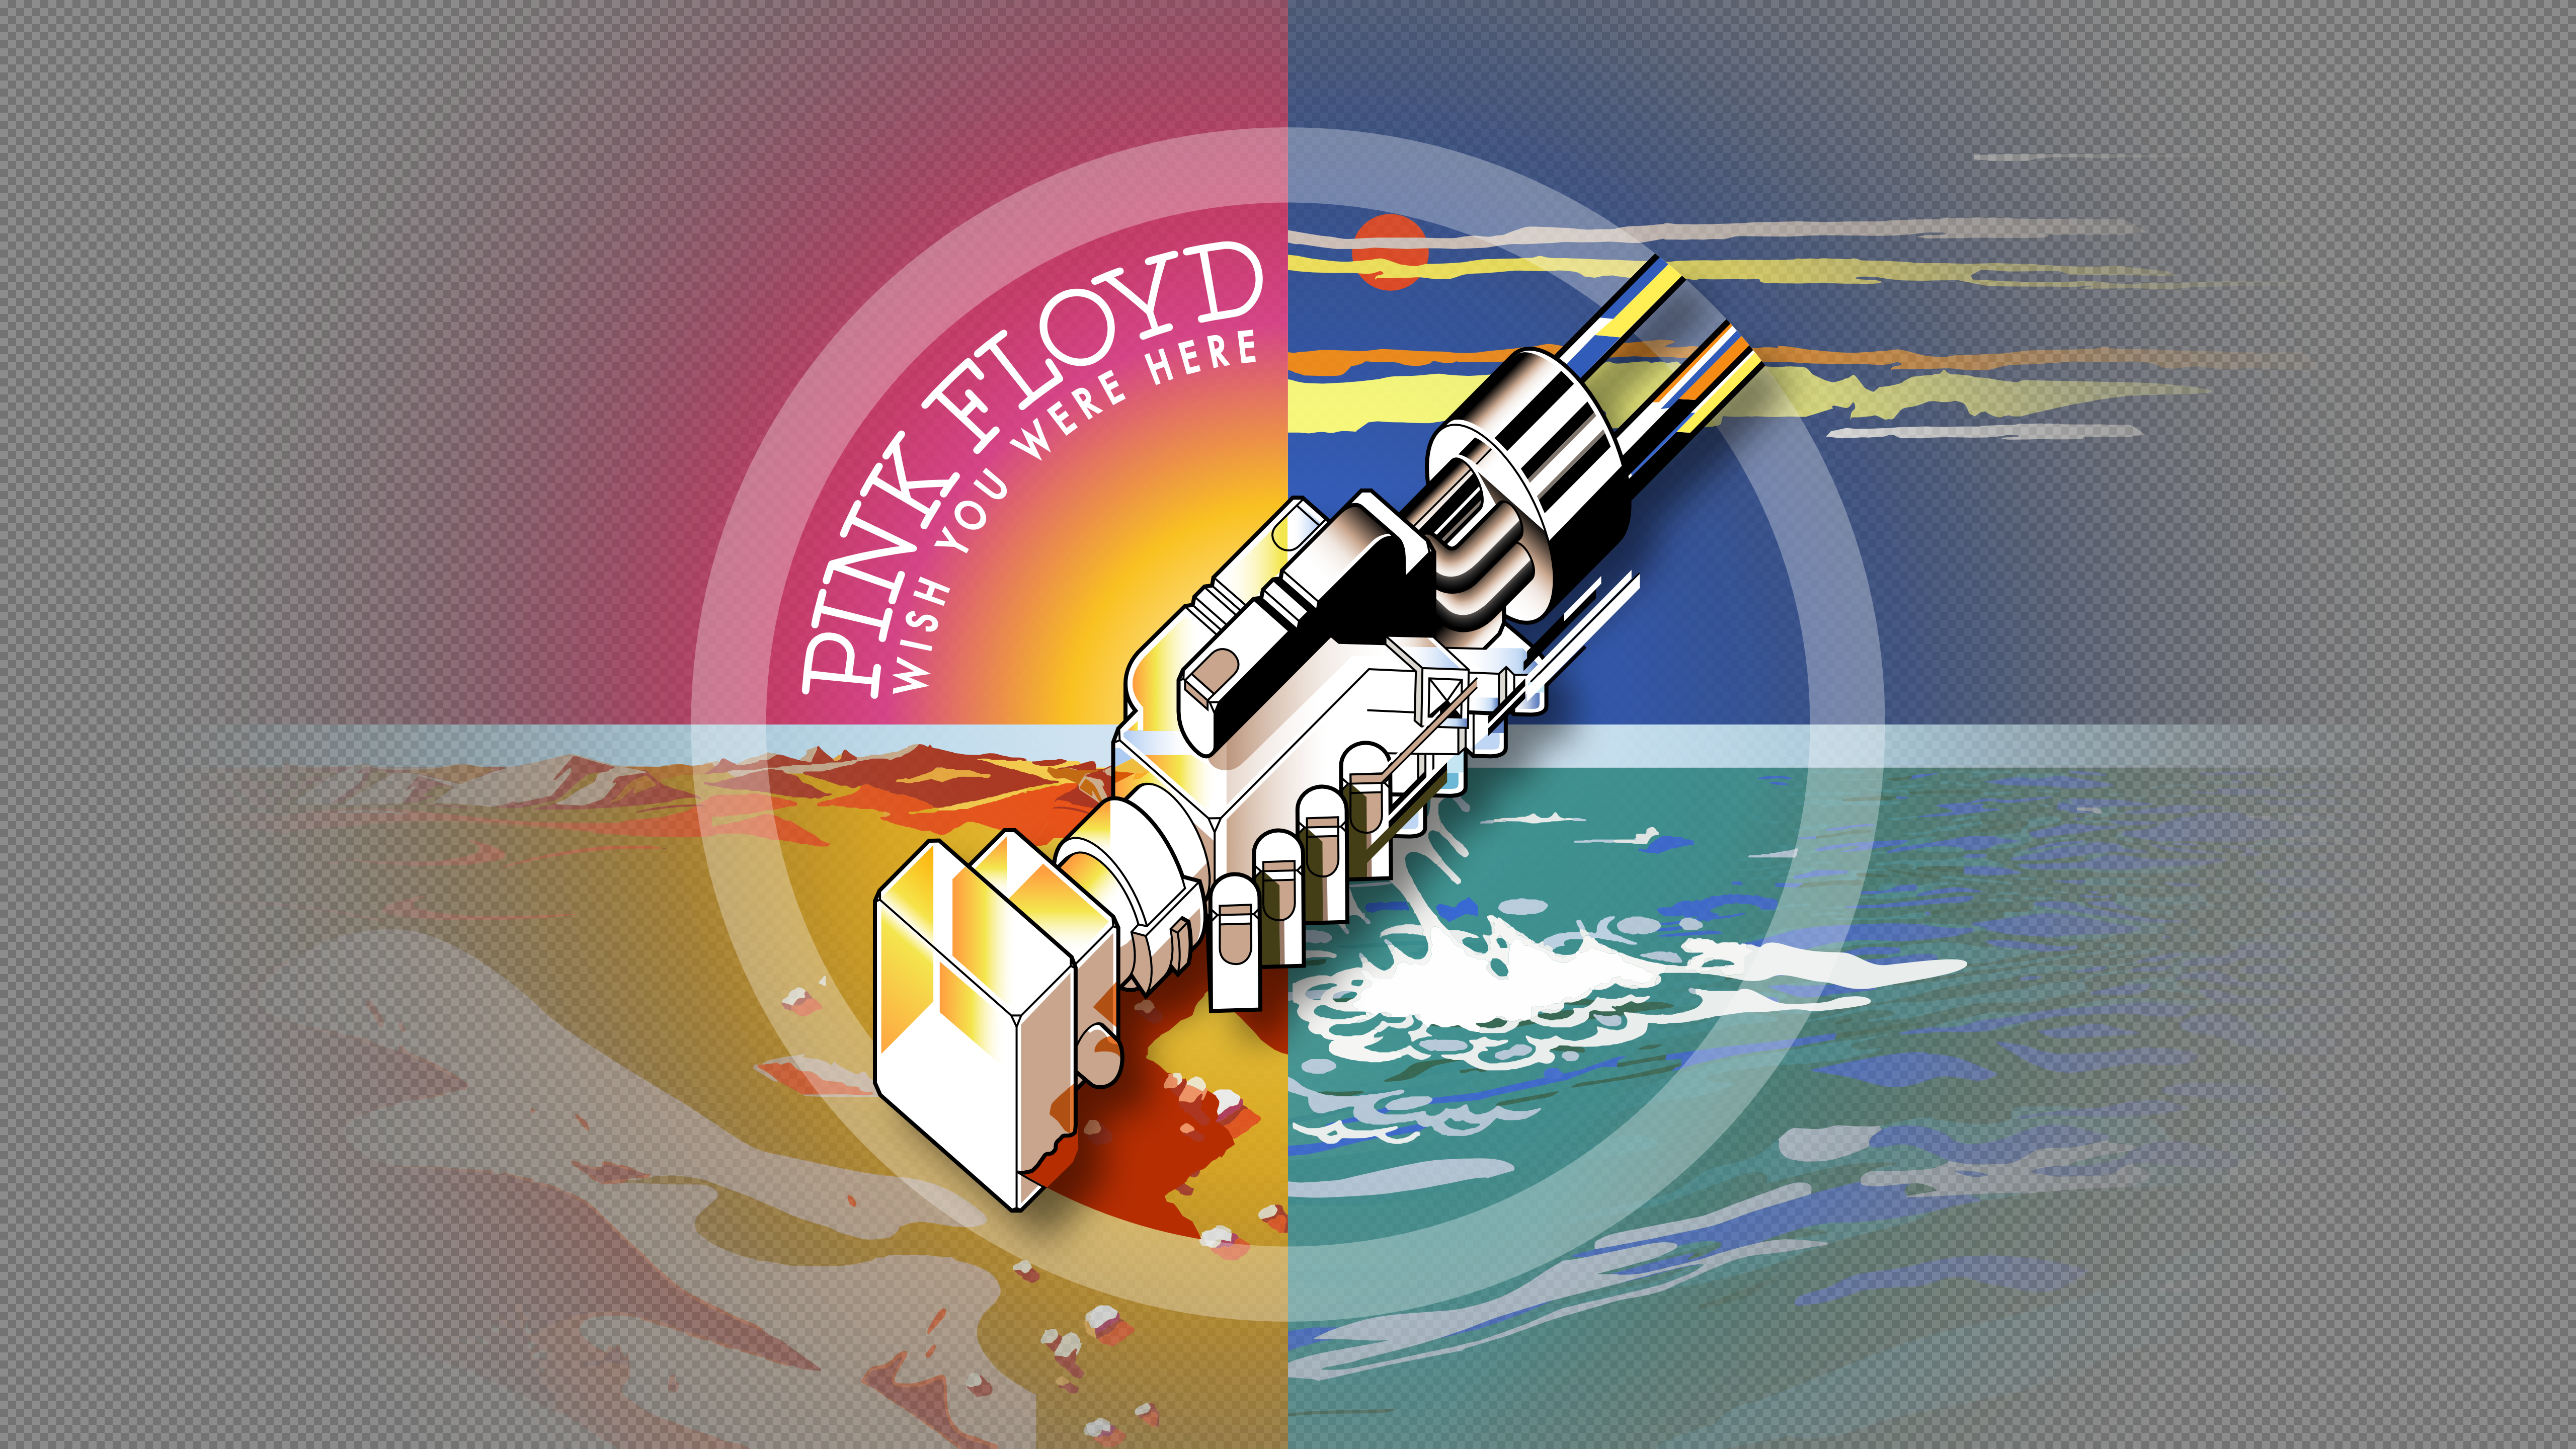
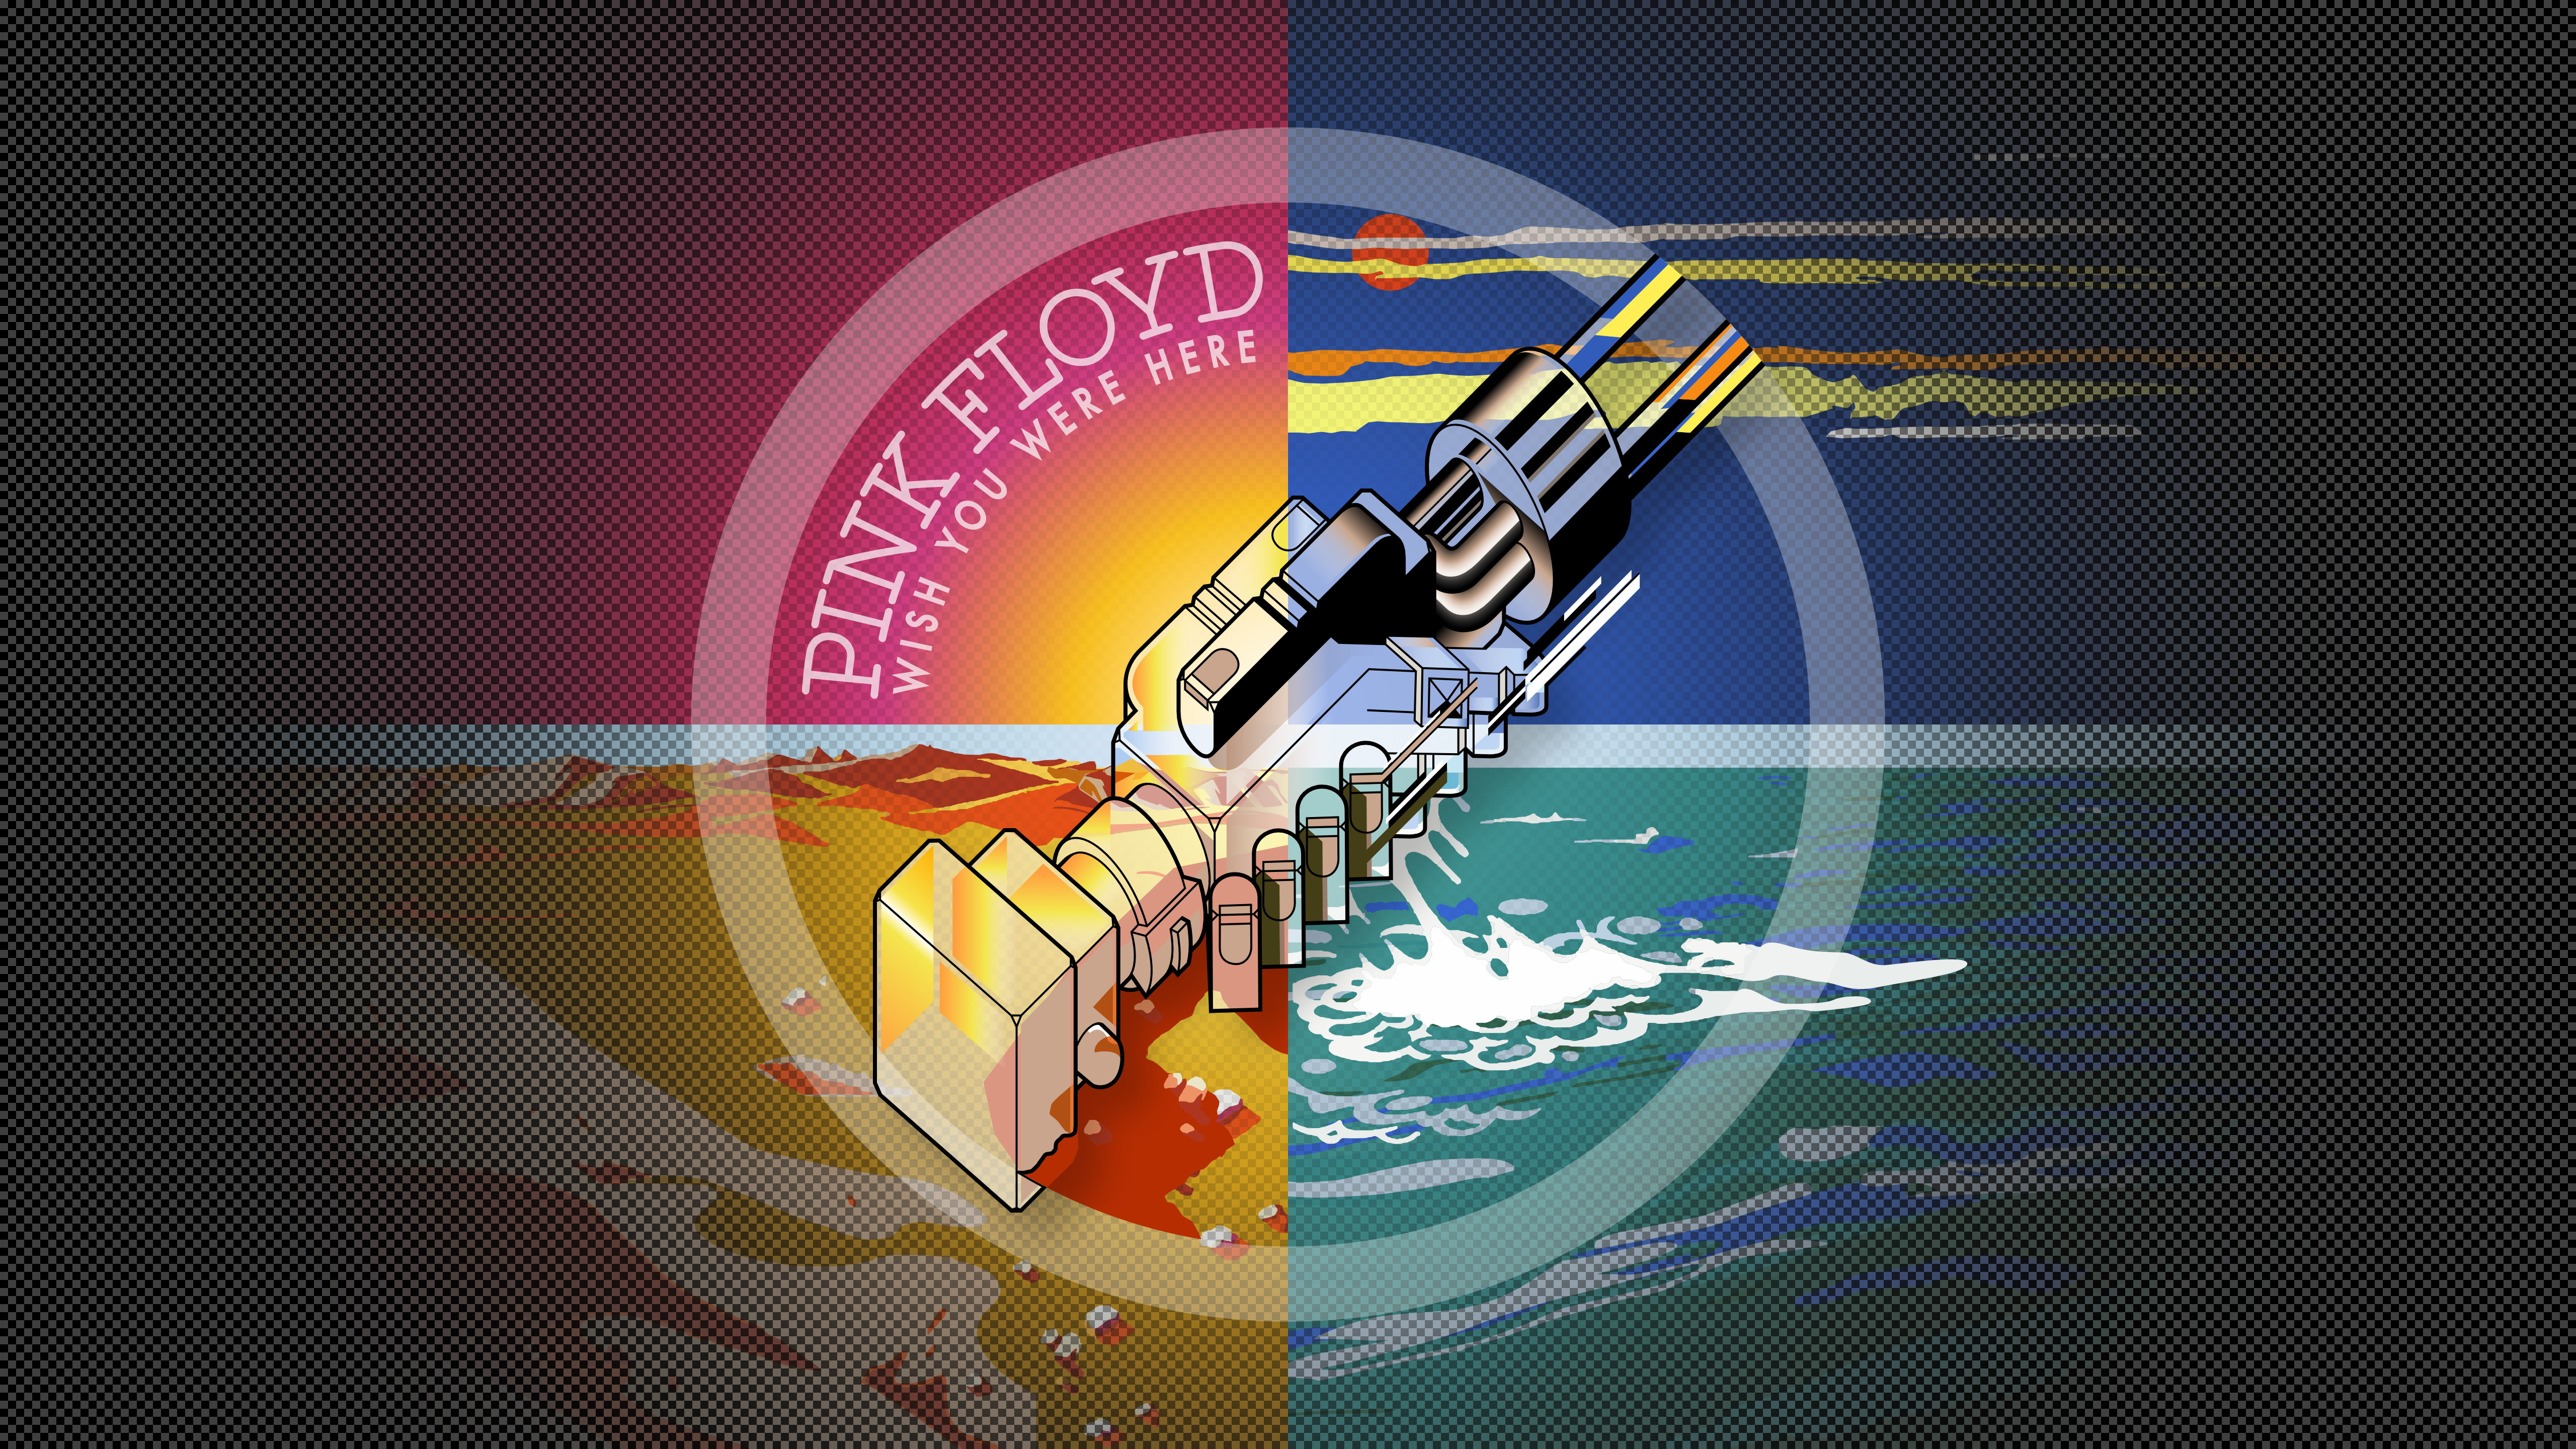
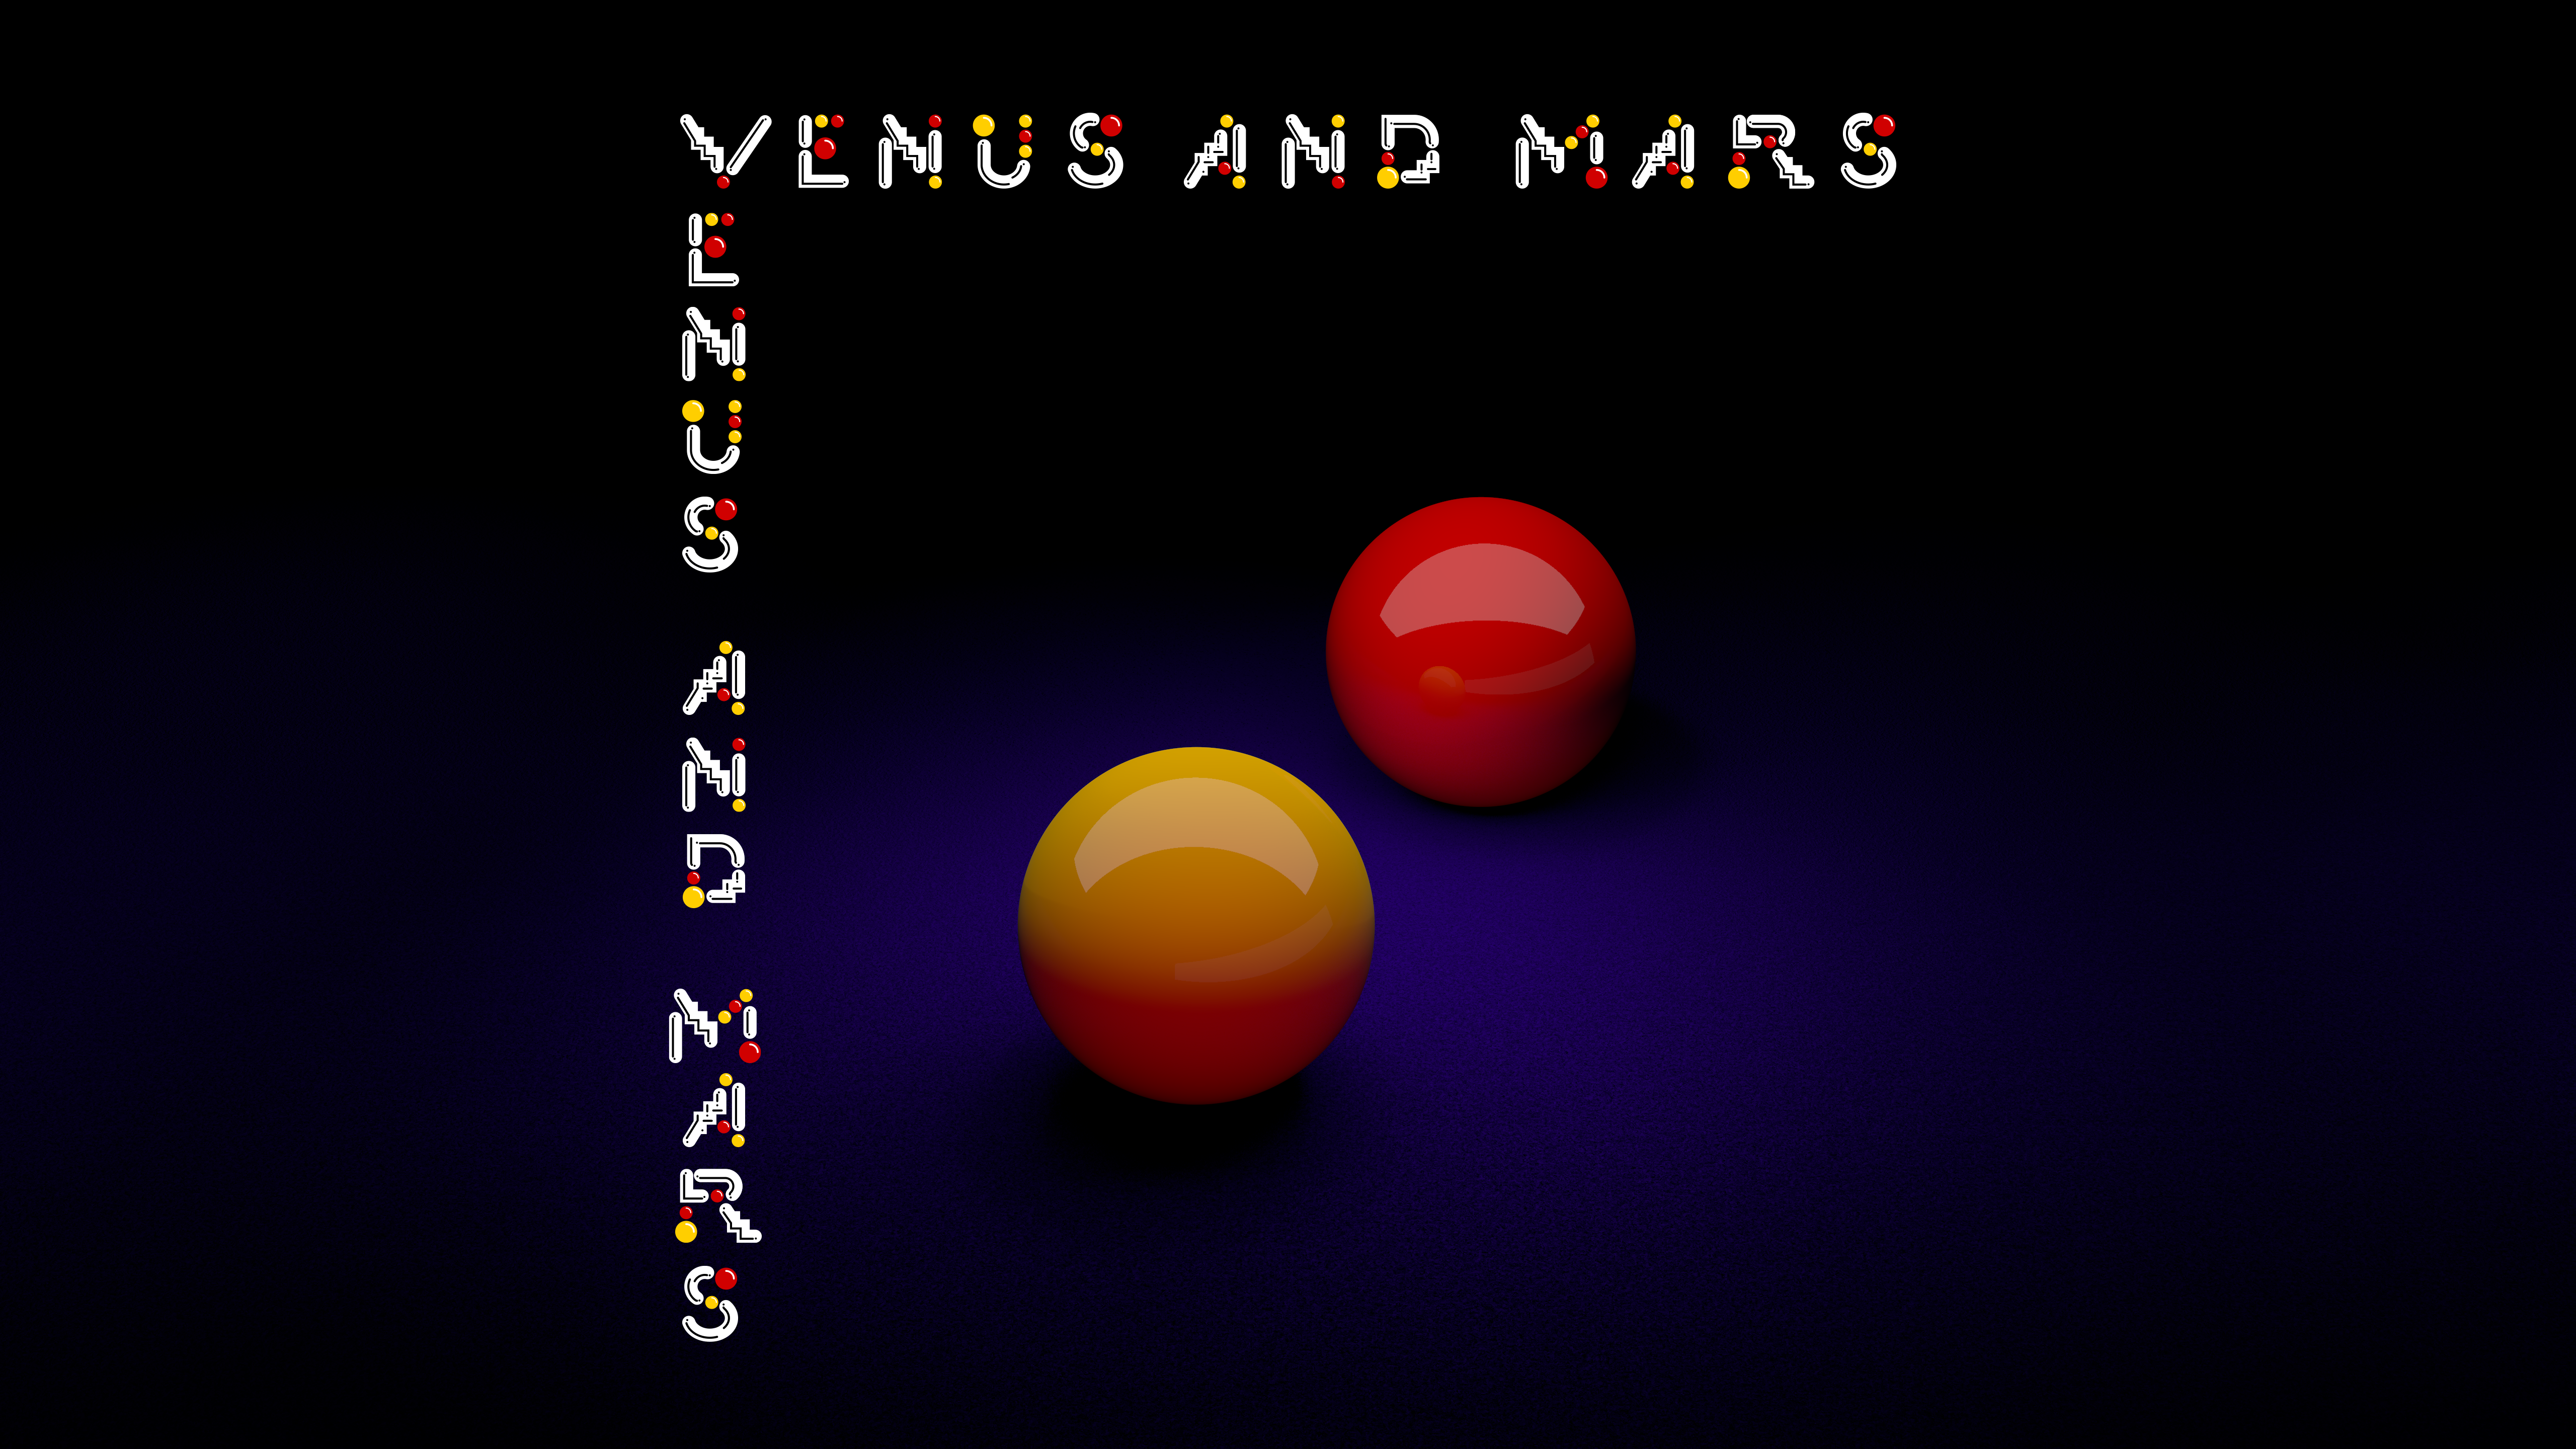
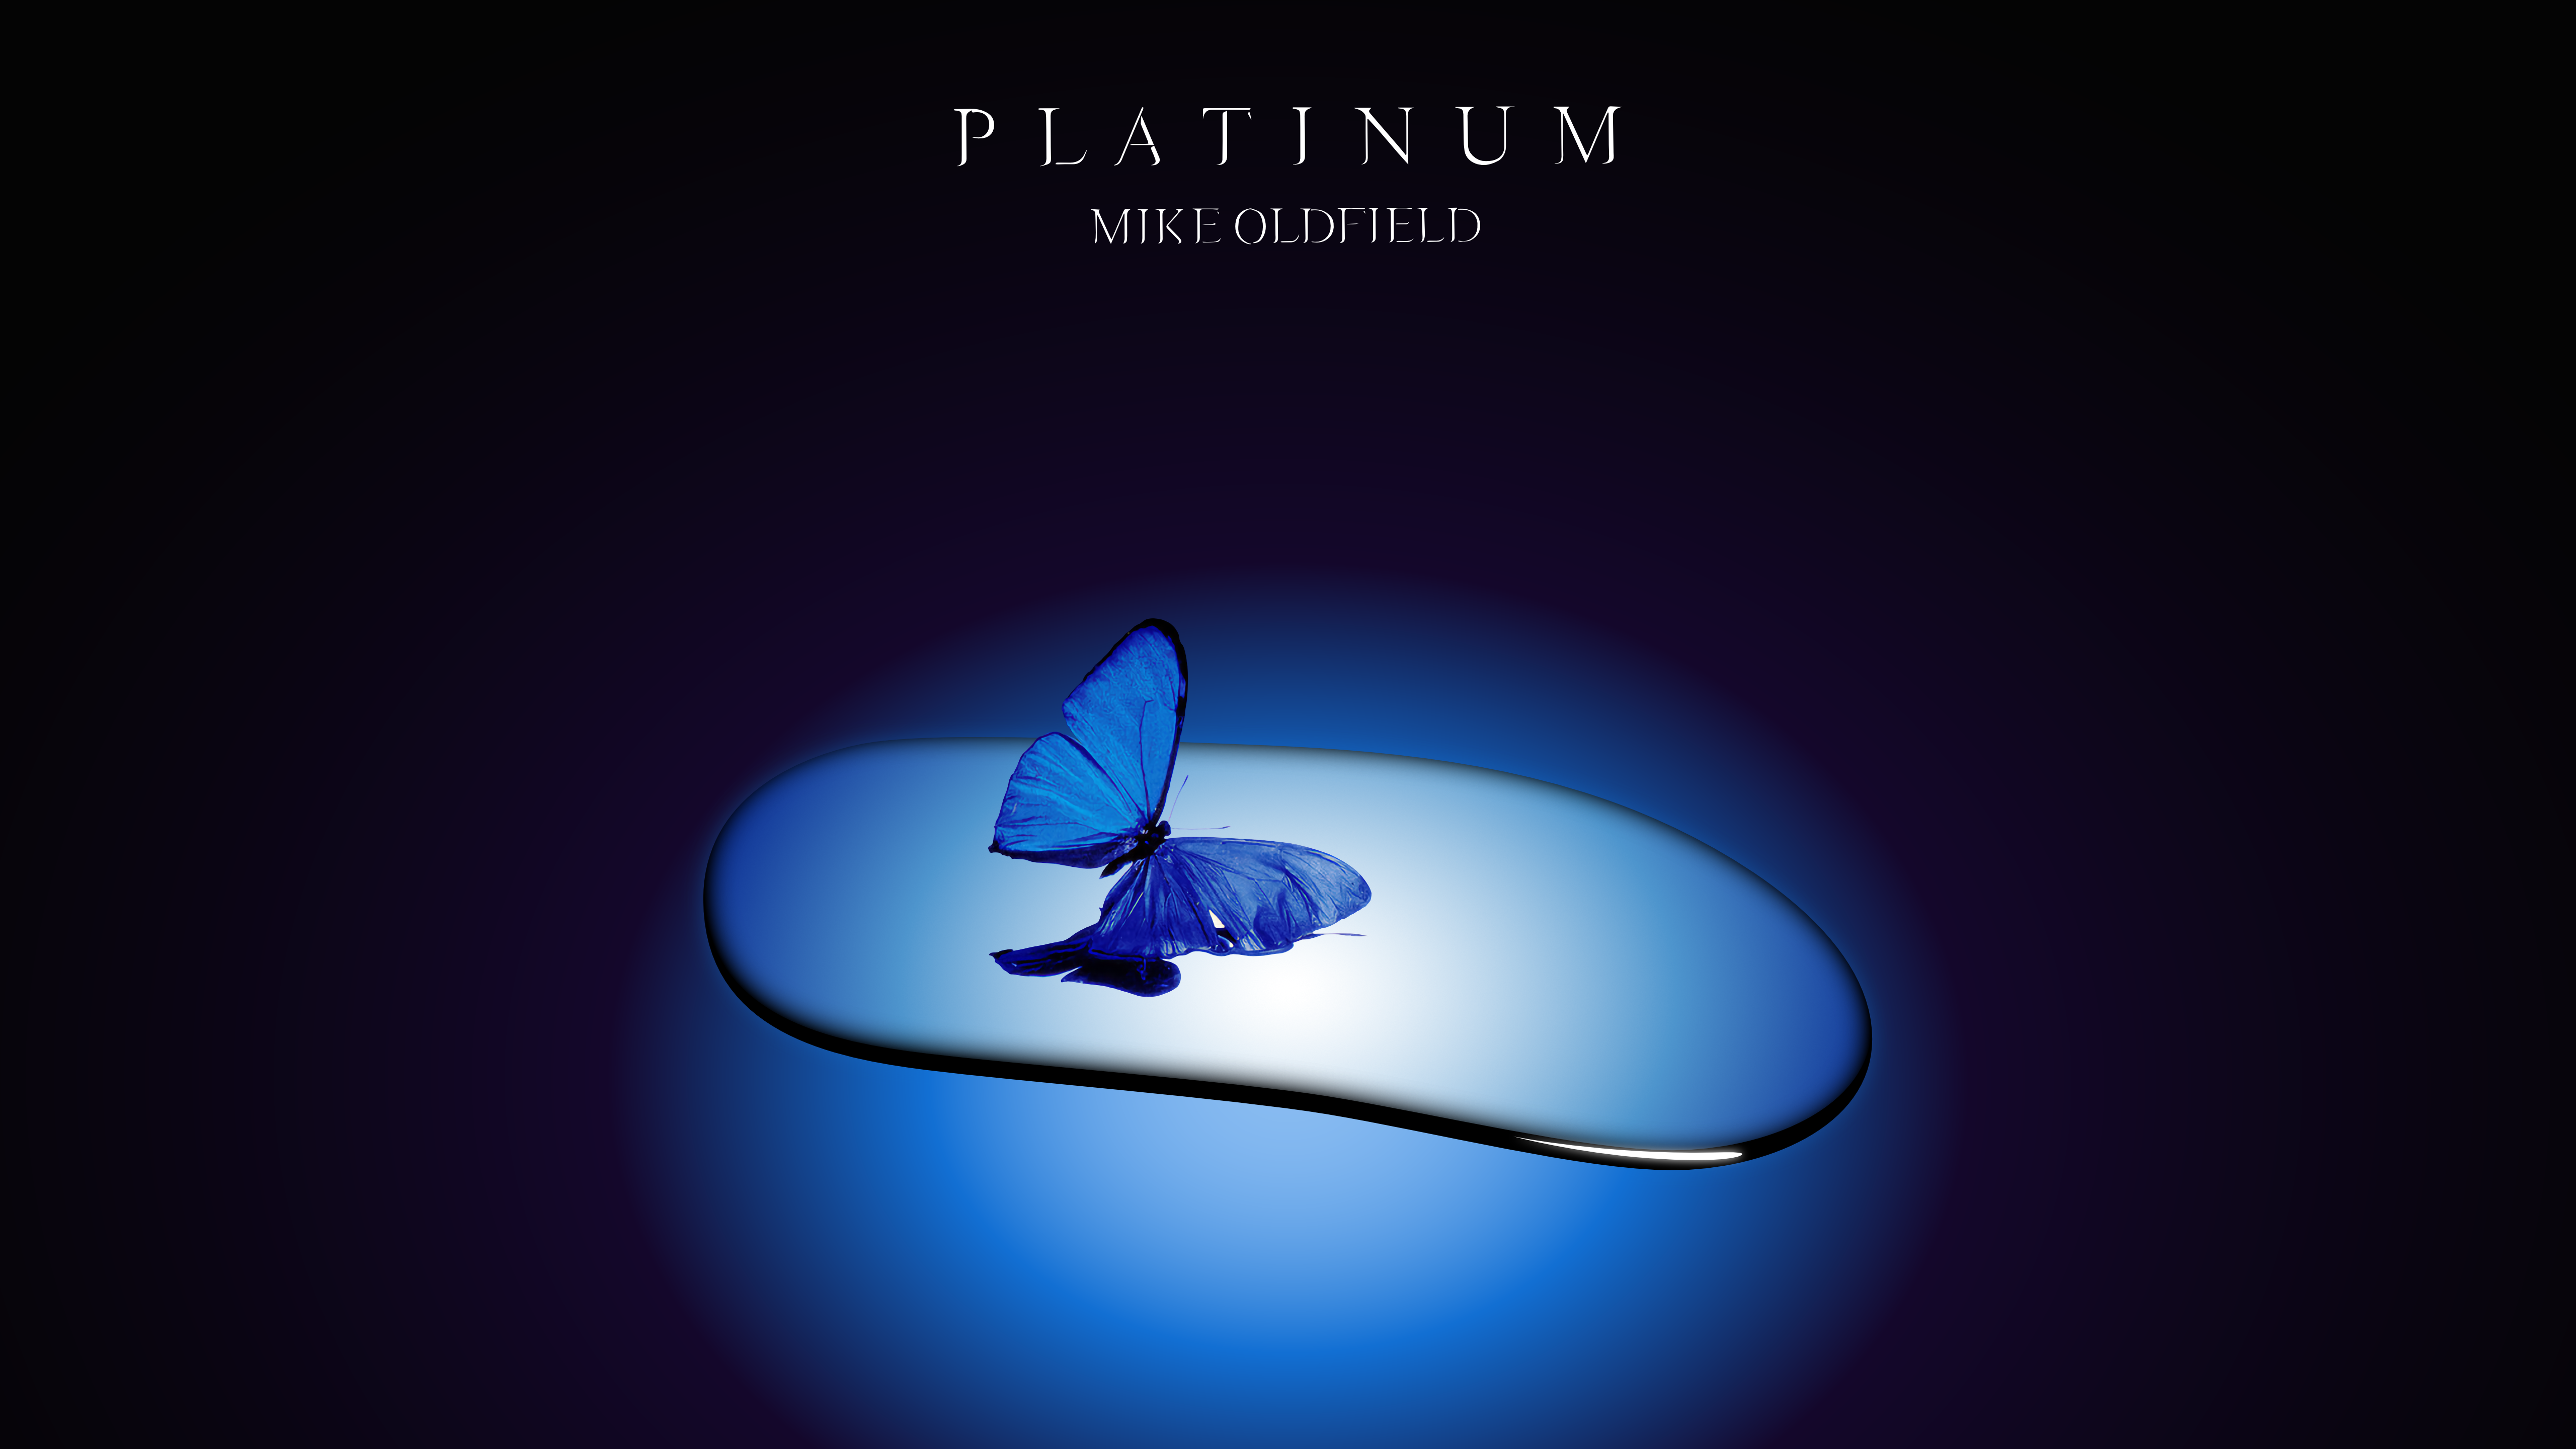
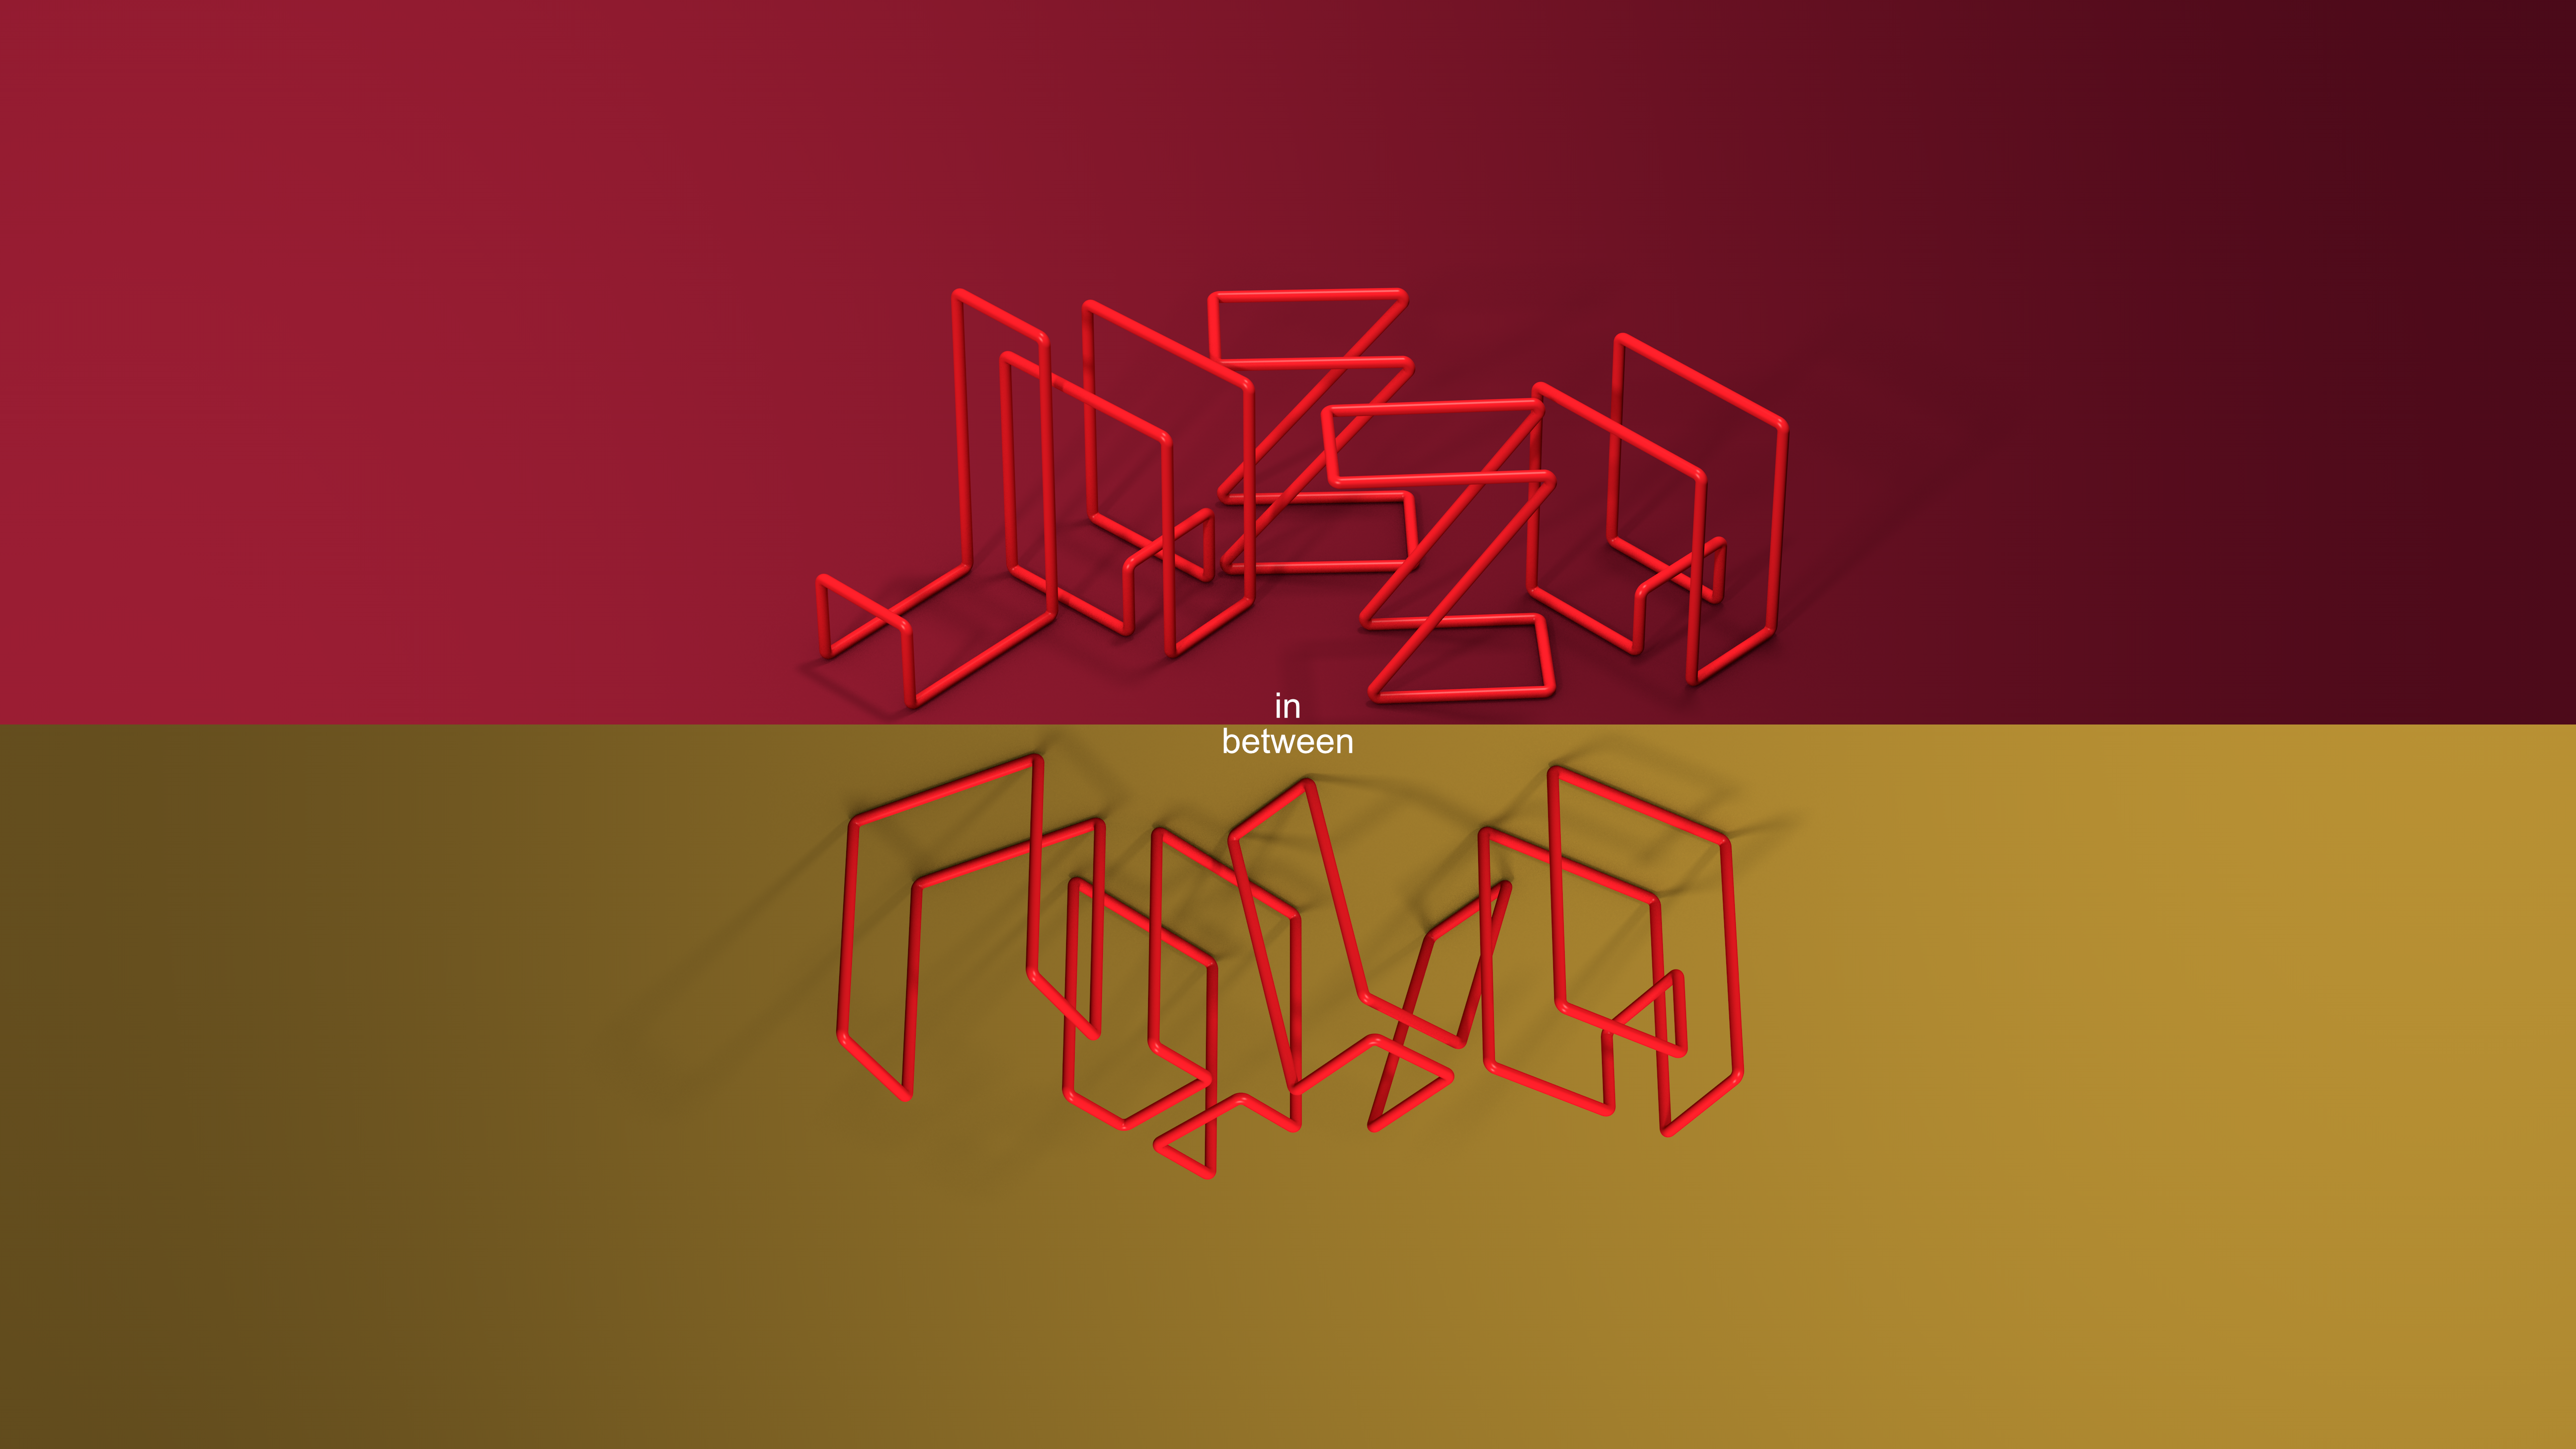
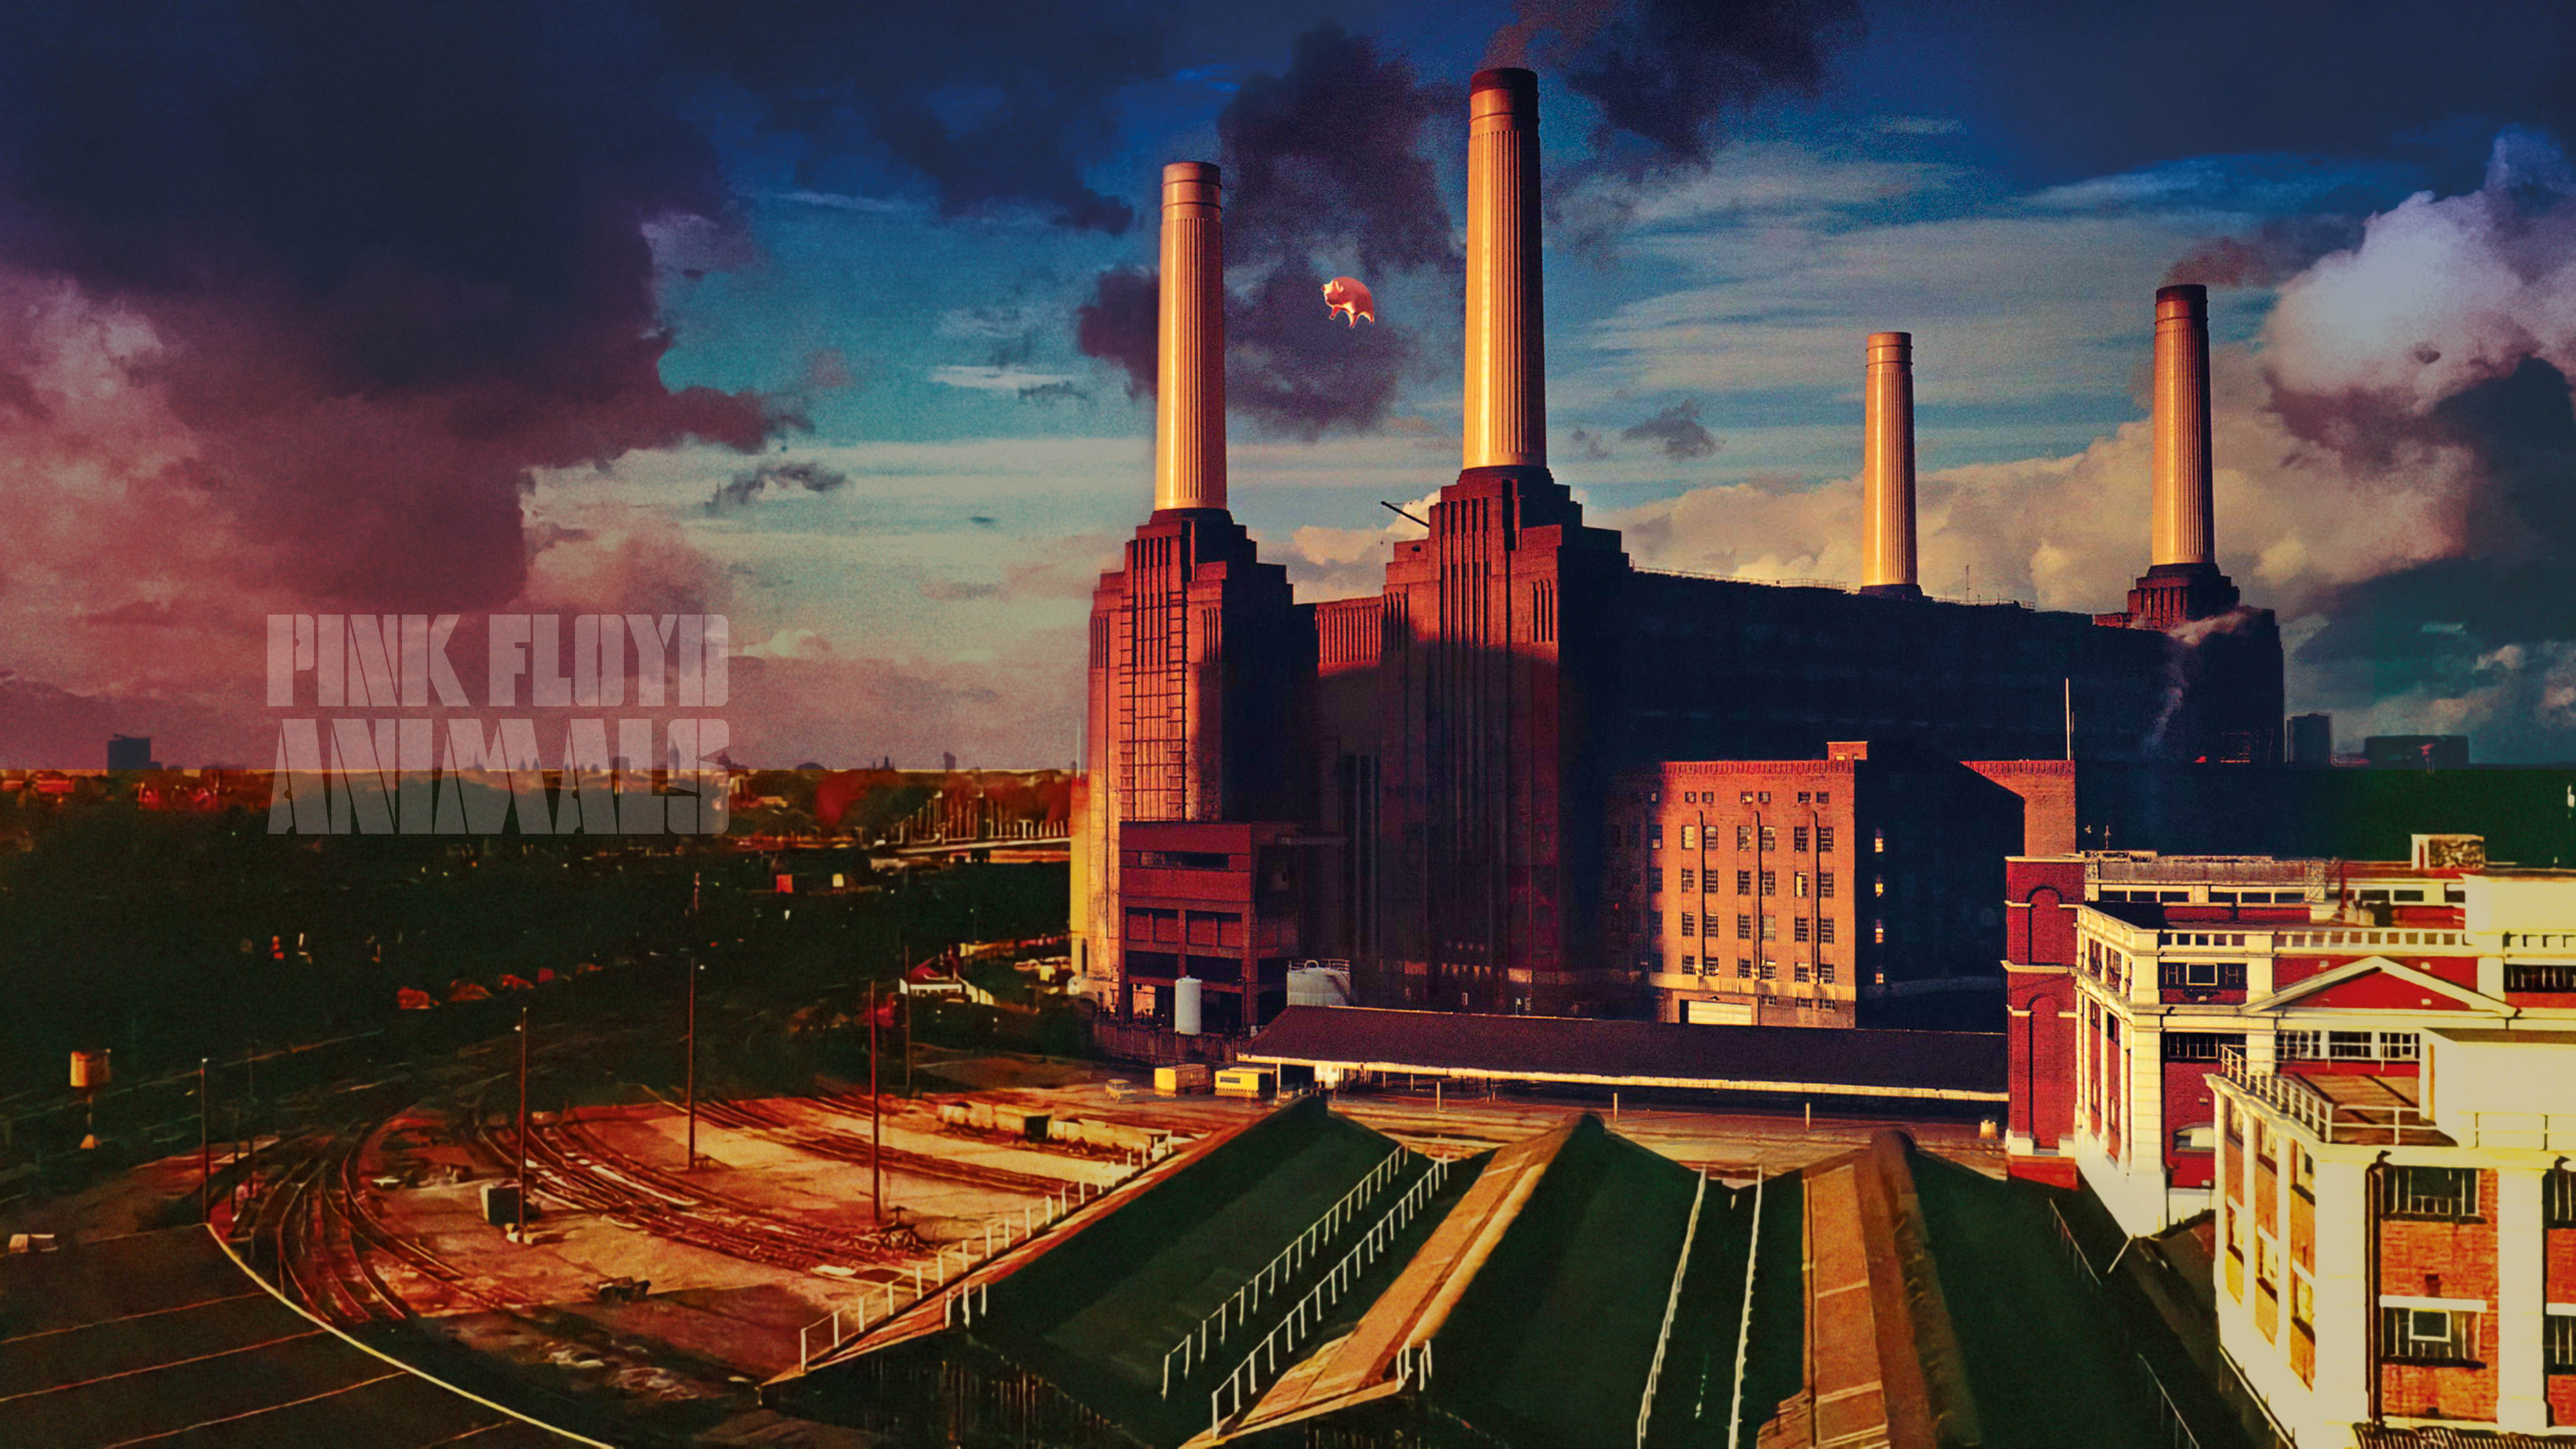
Hello, just here the pleasure of sharing graphic covers of 33LP vinyl covers of some of my favorite musicians in the form of high resolution wallpapers (5120 x 2800 px) saved in .PNG... I hope you will like it... 😉

- 17 replies
-
- 19
-

-

-
- affinity photo
- affinity designer
- (and 3 more)
-
 Suggested improvements to States feature: Ability to rearrange order of States. Ability to rename States. Ability to group States in names Groups. Ability to capture unique File/EXIF/IPTC data per State. Safeguard accidental deletion of States. Safeguard accidental update of States. Safeguard accidental deletion: the Add and Delete buttons for States are very small and very close together. The incidence of accidentally clicking Delete while trying to add a new State is very high. Delete has no confirmation and no undo. Options: relocate buttons or confirm delete or undo delete State using document History? Same problem with hitting Update when aiming for Settings. Metadata: layer States are effectively subdocuments/variants, which when exported often need specific amendments to metadata (eg: if a layer containing a cat is turned off, there should no longer be a metadata tag for 'cat' when exported). At the moment, the only solution is to mash metadata for all States together and then amend metadata manually when exporting them, as was the case before States were available. If States captured metadata it would be very useful. [As an aside, I would add editing tag metadata is currently difficult because there is a text justification and scrolling bug for that field creating abnormally large gaps between tags that constantly shift while typing, making it hard to proof-read tags for punctuation and spacing errors. Tags have to be edited in Notepad and pasted in because it is too difficult to type them directly.]
-
- 1
-
-
- affinity photo
- states
- (and 1 more)
-
 working on 300dpi file i am facing a very beginner problem im newly using affinity photo. how to fix brush lag and latency ? do i need to change these performance settings please help Desktop 2024.01.05 - 18.23.47.02.mp4
 -
 Liebes Forum! Ich habe es bislang nicht geschafft, in Affinity Photo eine brauchbare Funktion zu finden, die mich Zuschnitte auf eine Ebene beschränken lässt. Ich kenne die Möglichkeit, aus eine Auswahl eine neue Ebene zu erstellen. Das ist aber ziemlich fummelig. Worum es mir geht: Ich habe ein Foto, von dem ich gerne mehr als nur einen Ausschnitt exportieren würde. Mit Zuschnitt beschneide ich jedoch immer jede andere Ebene mit, womit ich alternative Ausschnitte zerstöre. Zuschnitt hat aber die extrem brauchbare Möglichkeit, das Seitenverhältnis festzulegen und Overlays einzublenden. Nichts davon steht mir zur Verfügung, wenn ich eine Auwahl erstelle: kein nach eigenem Gusto fixiertes Seitenverhältnis, kein Overlays zur Optimierung der Komposition. Eigentlich ist das doch eine ganz grundlegende, sehr nützliche Funktion. Das Open Source-Programm GIMP hat sie. Photo tatsächlich nicht? Verblicke ich da was oder gibt es wenigstens einen Workaround? Wenn da Jemand brauchbare Vorschläge hätte... Wäre toll! 🙂 Viele Grüße Paul
 -
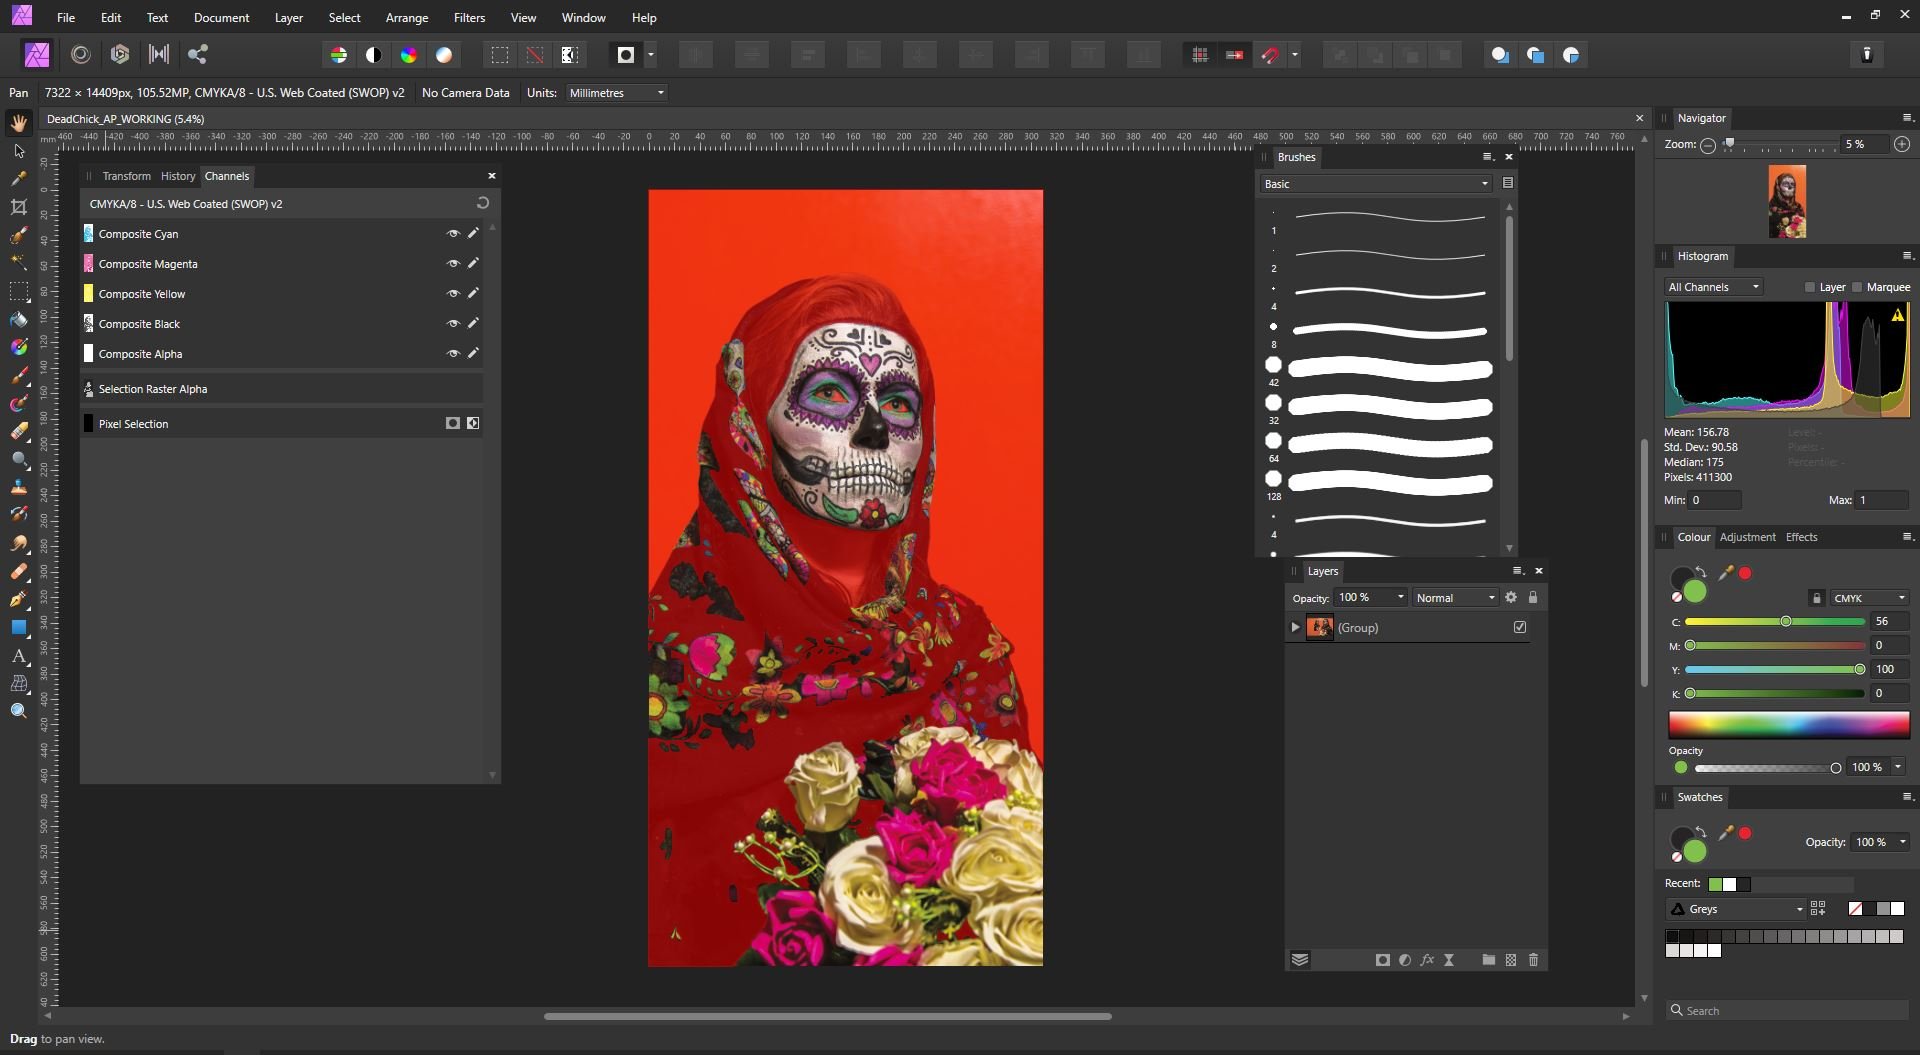
 Hey all, I'm struggling to create and export an Alpha Channel from Affinity Photo (v1.7.1.404) to a CMYK .TIFF image. The image has been masked out and I'm trying to make a named Alpha Channel to be used as a Spot Colour for digital print in an Onyx RIP (To be names 'Spot 1' which refers to a Spot White Ink). Please see the attached screenshot for the masked out area which I'm talking about. I've followed several other posts and YouTube/Vimeo video's and it's just not clicking for me. The image will export as a .TIFF but it won't export an Alpha Channel no matter what I try. Methods I have tried: 1. Mask out areas, on the 'Selection raster Alpha' channel, right click, and 'Create Spare Channel' and name it 'Spot 1' 2. In the layers under Adjustments, create and Channel Mixer and pull up the Alpha slider. What am I doing wrong? Thanks for your help!
-
 Okay, I'm an early beta user of all the Affinity suite and I'm convinced it's getting better and better after each update. I hope I'm wrong but I can't find a way to work on photos or bitmap illustrations in Affinity Photo with duotones, tritones and even quadritones with spot colours via the channel like I'm doing it with Photoshop. Is it possible? It would really help me to get rid of Photoshop for good. To clarify my process, in Photoshop, I'm working in Greyscale mode and then I'm adding spot colours via the Channel panel. Photoshop is then able to simulate in Grey mode the spot colours and simulate the overprint of each colour. While working with spot colours on illustrations, I'm having 1200 dpi A3 files in greyscale mode which gives me quite small files size while working with large high resolution files. This is super handy. Most people working with silkscreen print process know what I'm talking about. I'd also love to be able to work with bitmap 1 bit image in Affinity Photo as well but I don't think I can do that either. Many thanks.
 -
 Hello, When I open the psd smart file below, I got error directly in the app opening: Unknown property : EffectGradientFill,gs99 Unknown property : AdjustmentGradientFill,gradientsInterpolationMethod Unknown property : EffectGradientFill,gs99 It causes the texture of the background (which uses pattern) missing. Can you fix it so that it acts normally like in photoshop, please? My computer: Apple M1 Max MacOS 14.3 (23D56) App version: Affinity Photo 2.3.1 thirt-mockup-for-bug-report.psd
 -
I thought I'd have a go at correcting the flaw in the family photo HRH Kate released. I used Affinity Photo 2 clone brush and tone mapping to remove the bit everybody was talking about.
-
 Here is another painting in acrylics produced using DAP Pro 7 and interfacing with Affinity Photo. I have included a video of the painting process along with the resulting multilayered Affinity Photo file so you can see how the painting comes to life with human-assisted AI. Play with the Affinity Photo file to your heart's content to see the layering involved and each painting stage. This is a very productive tool. Thin Acryllic Model.mp4 Model Thin Acrylic_DAP_ALL__Acry-Real.afphoto
-
The plural of "rabbit" is "rabbi", right? Well anyway, here's an illustration I did for my wife (the rabbit fanatic...we have owned as many as 7 at one time!) Done in AD v2.3.1, with a few trips to the Photo Persona and Affinity Photo for some filter effects. I created two Artboards in AD so I could create different versions. Hope you like them. Cheers.
- 4 replies
-
- 5
-
-
- affinity designer 2
- photo persona
- (and 3 more)
-
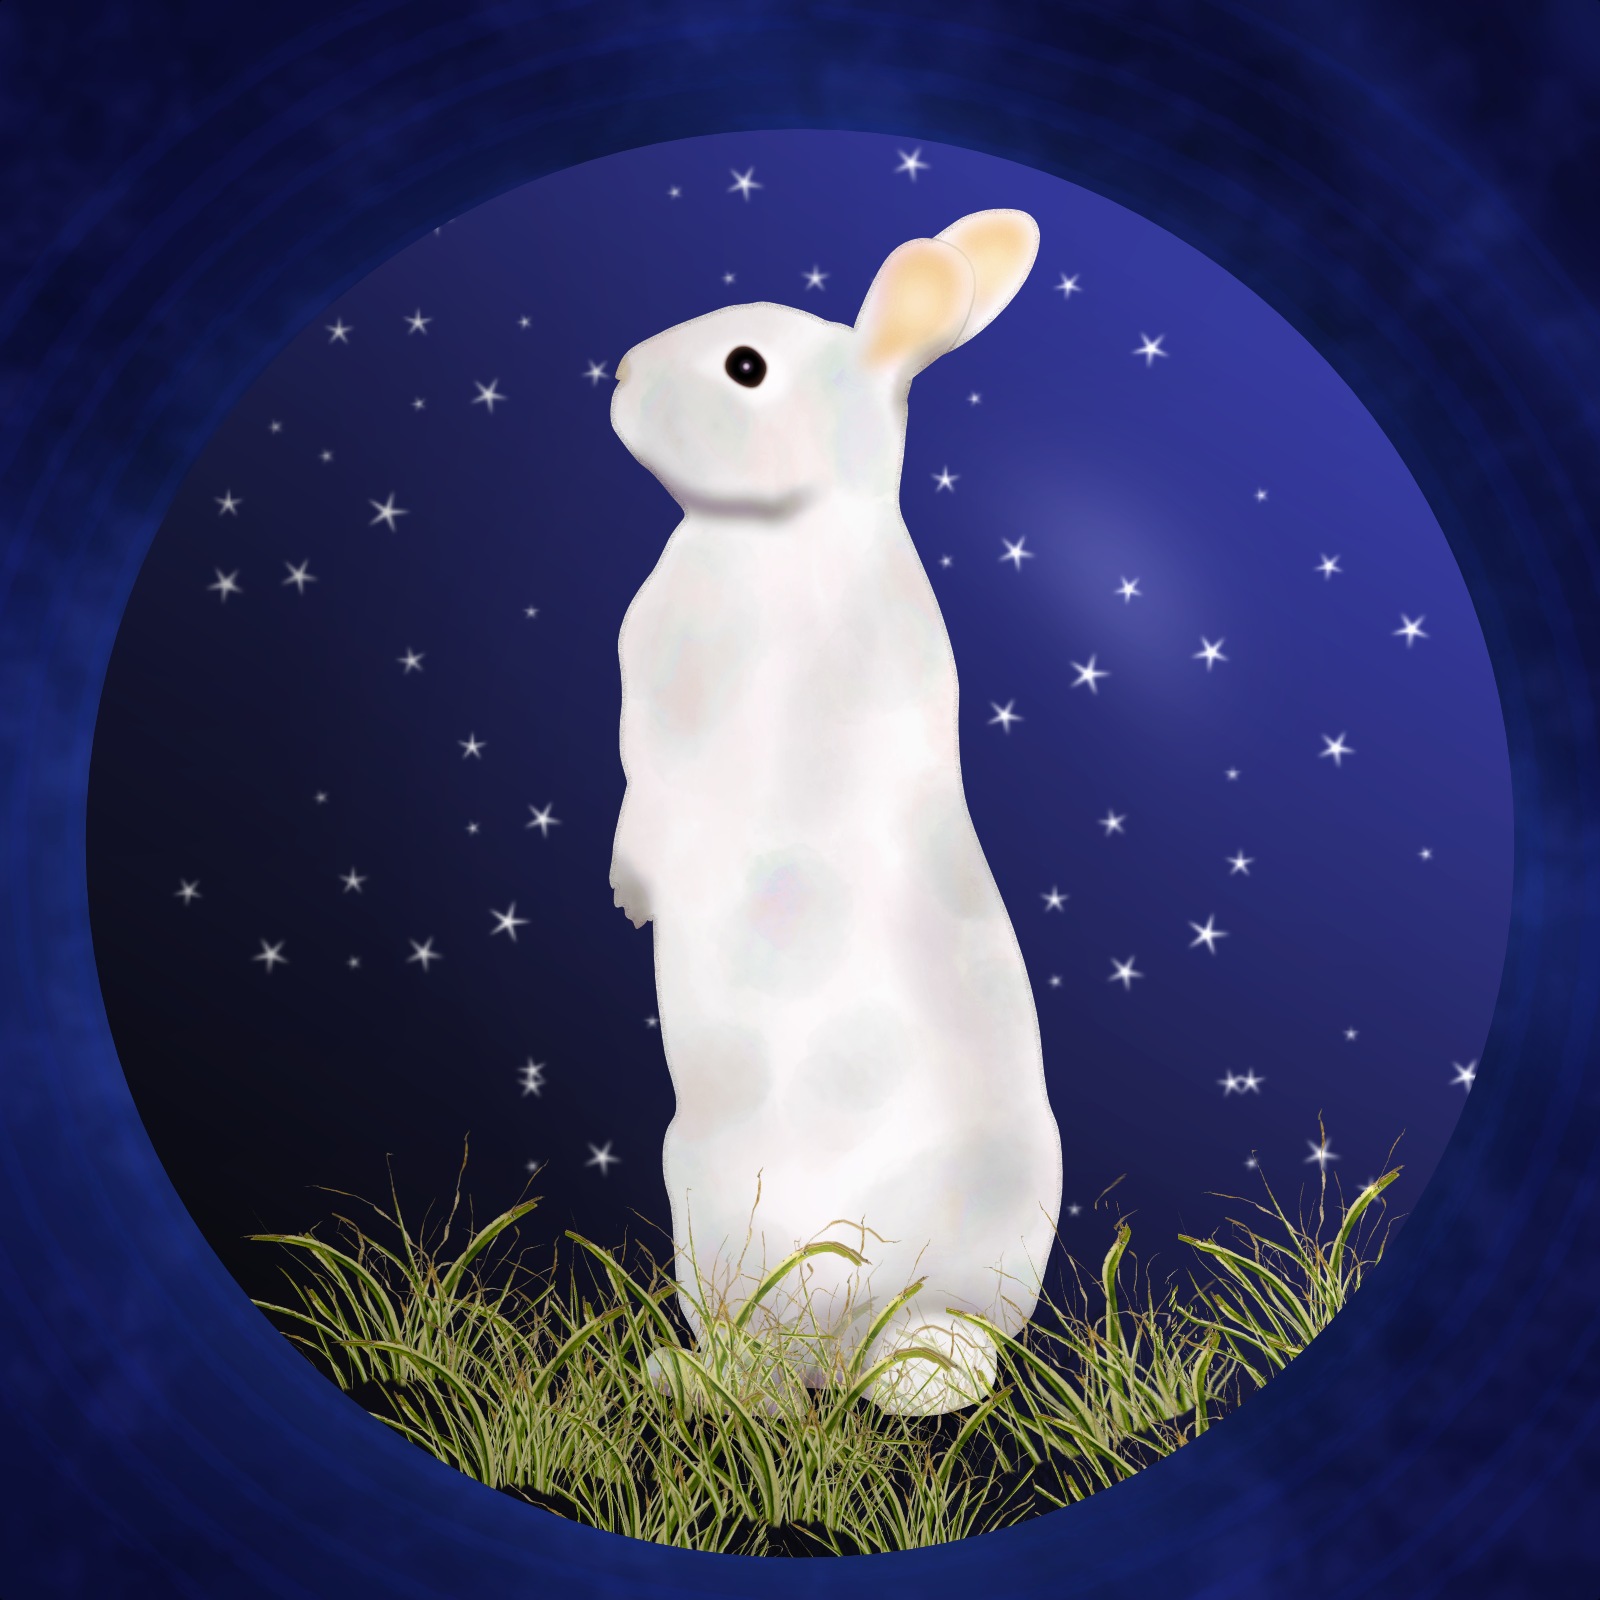
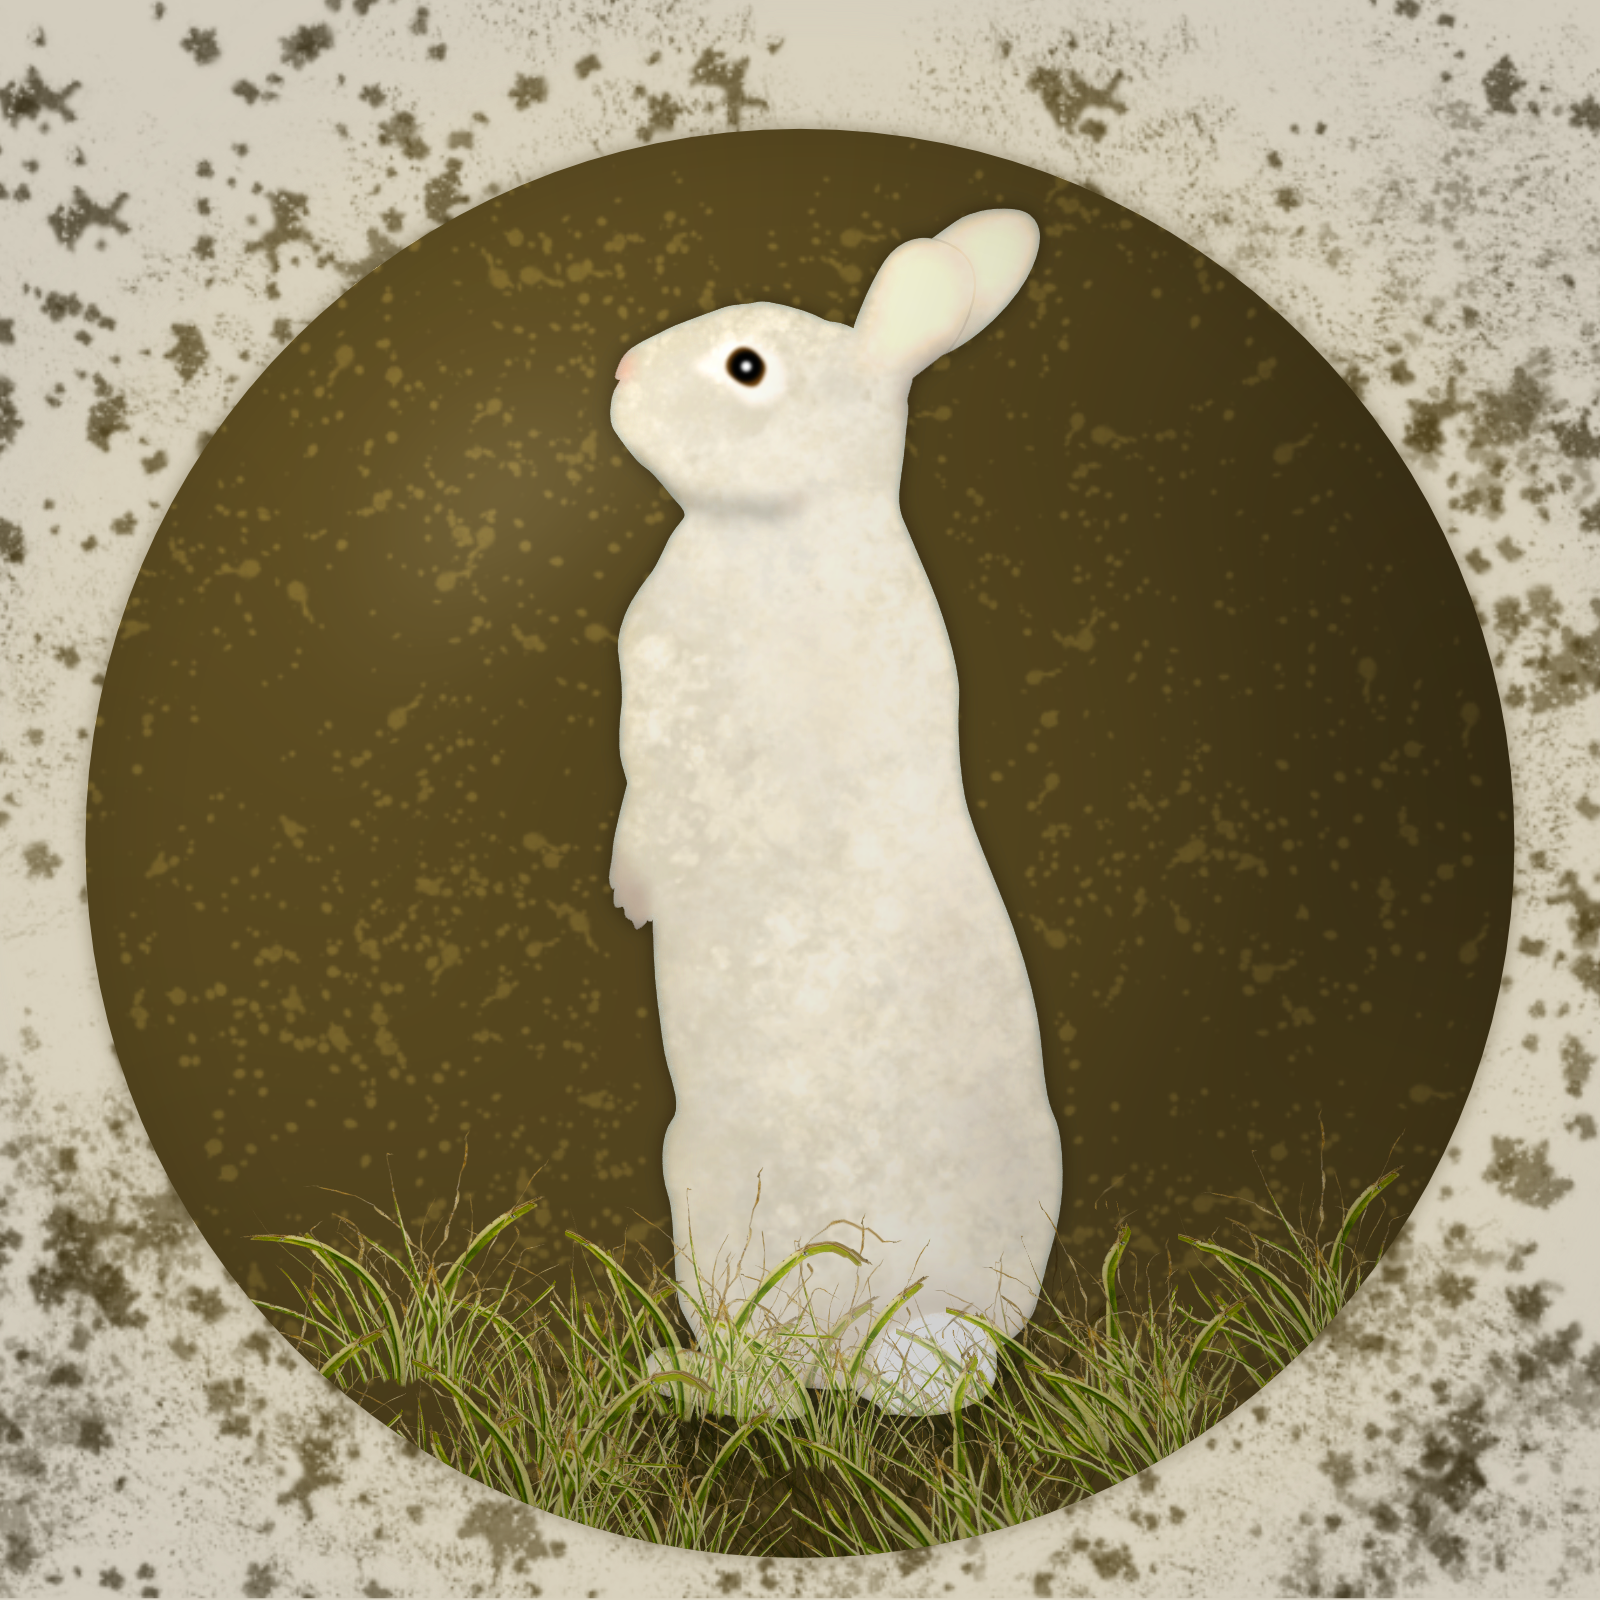
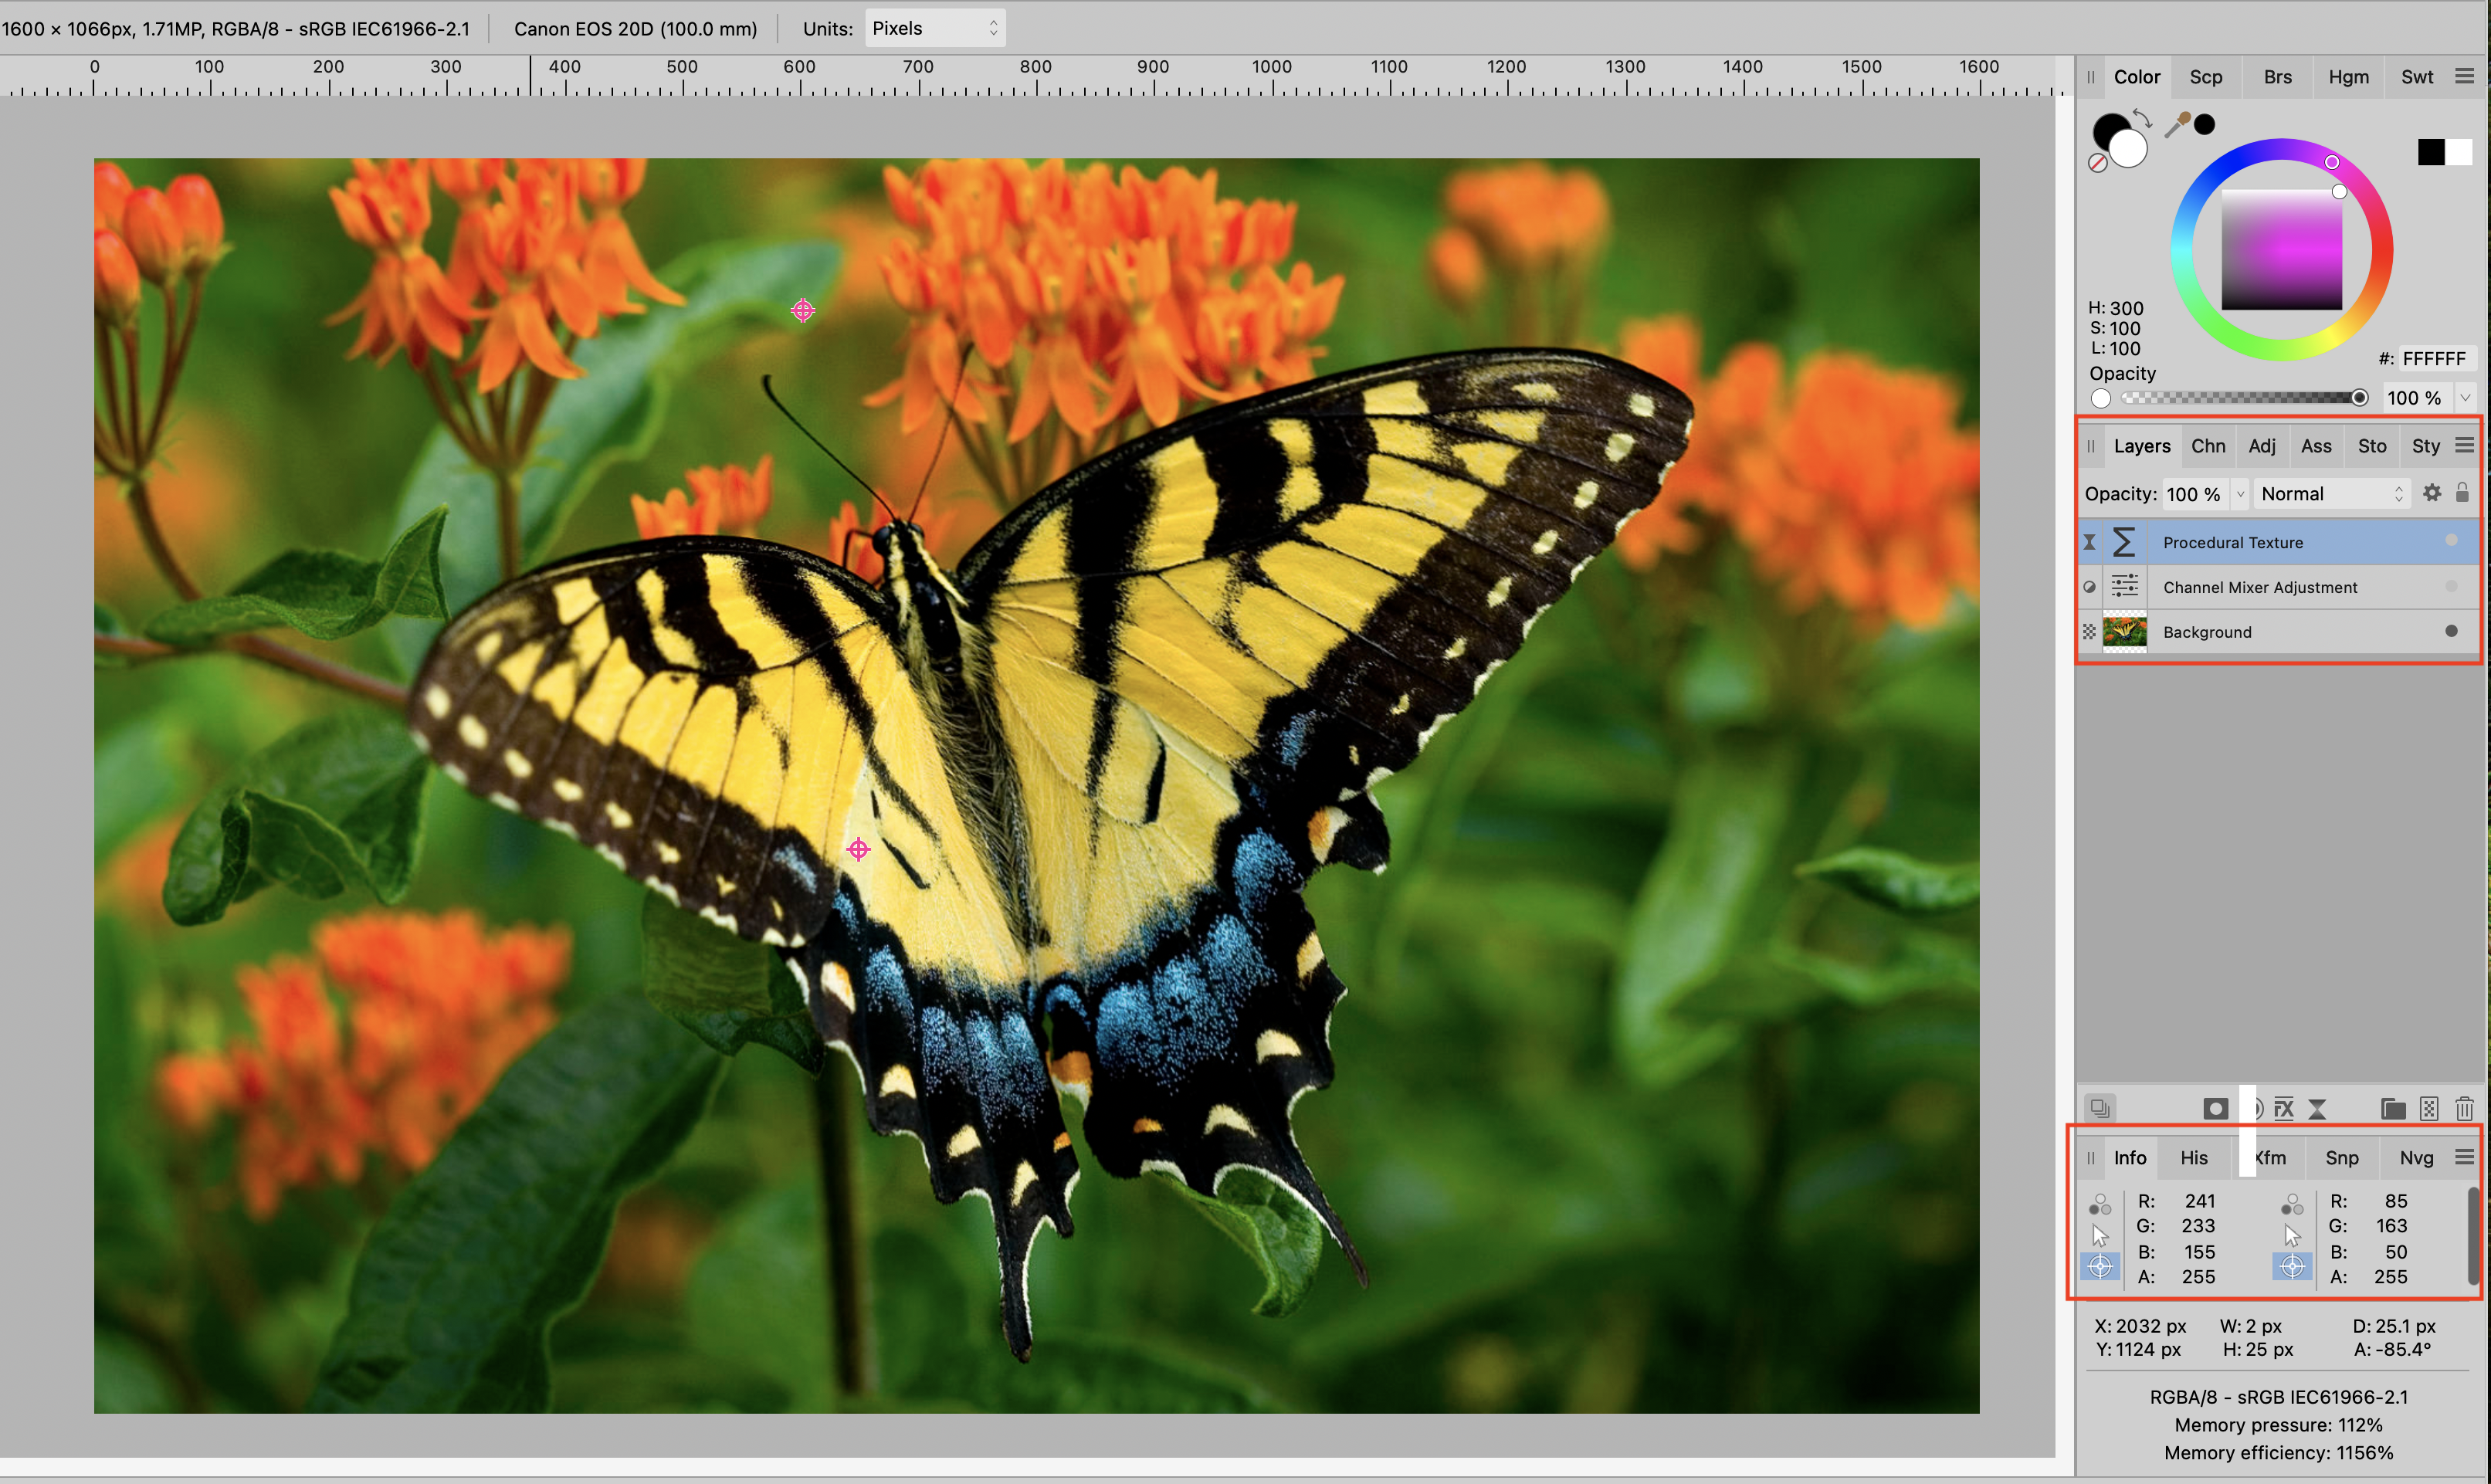
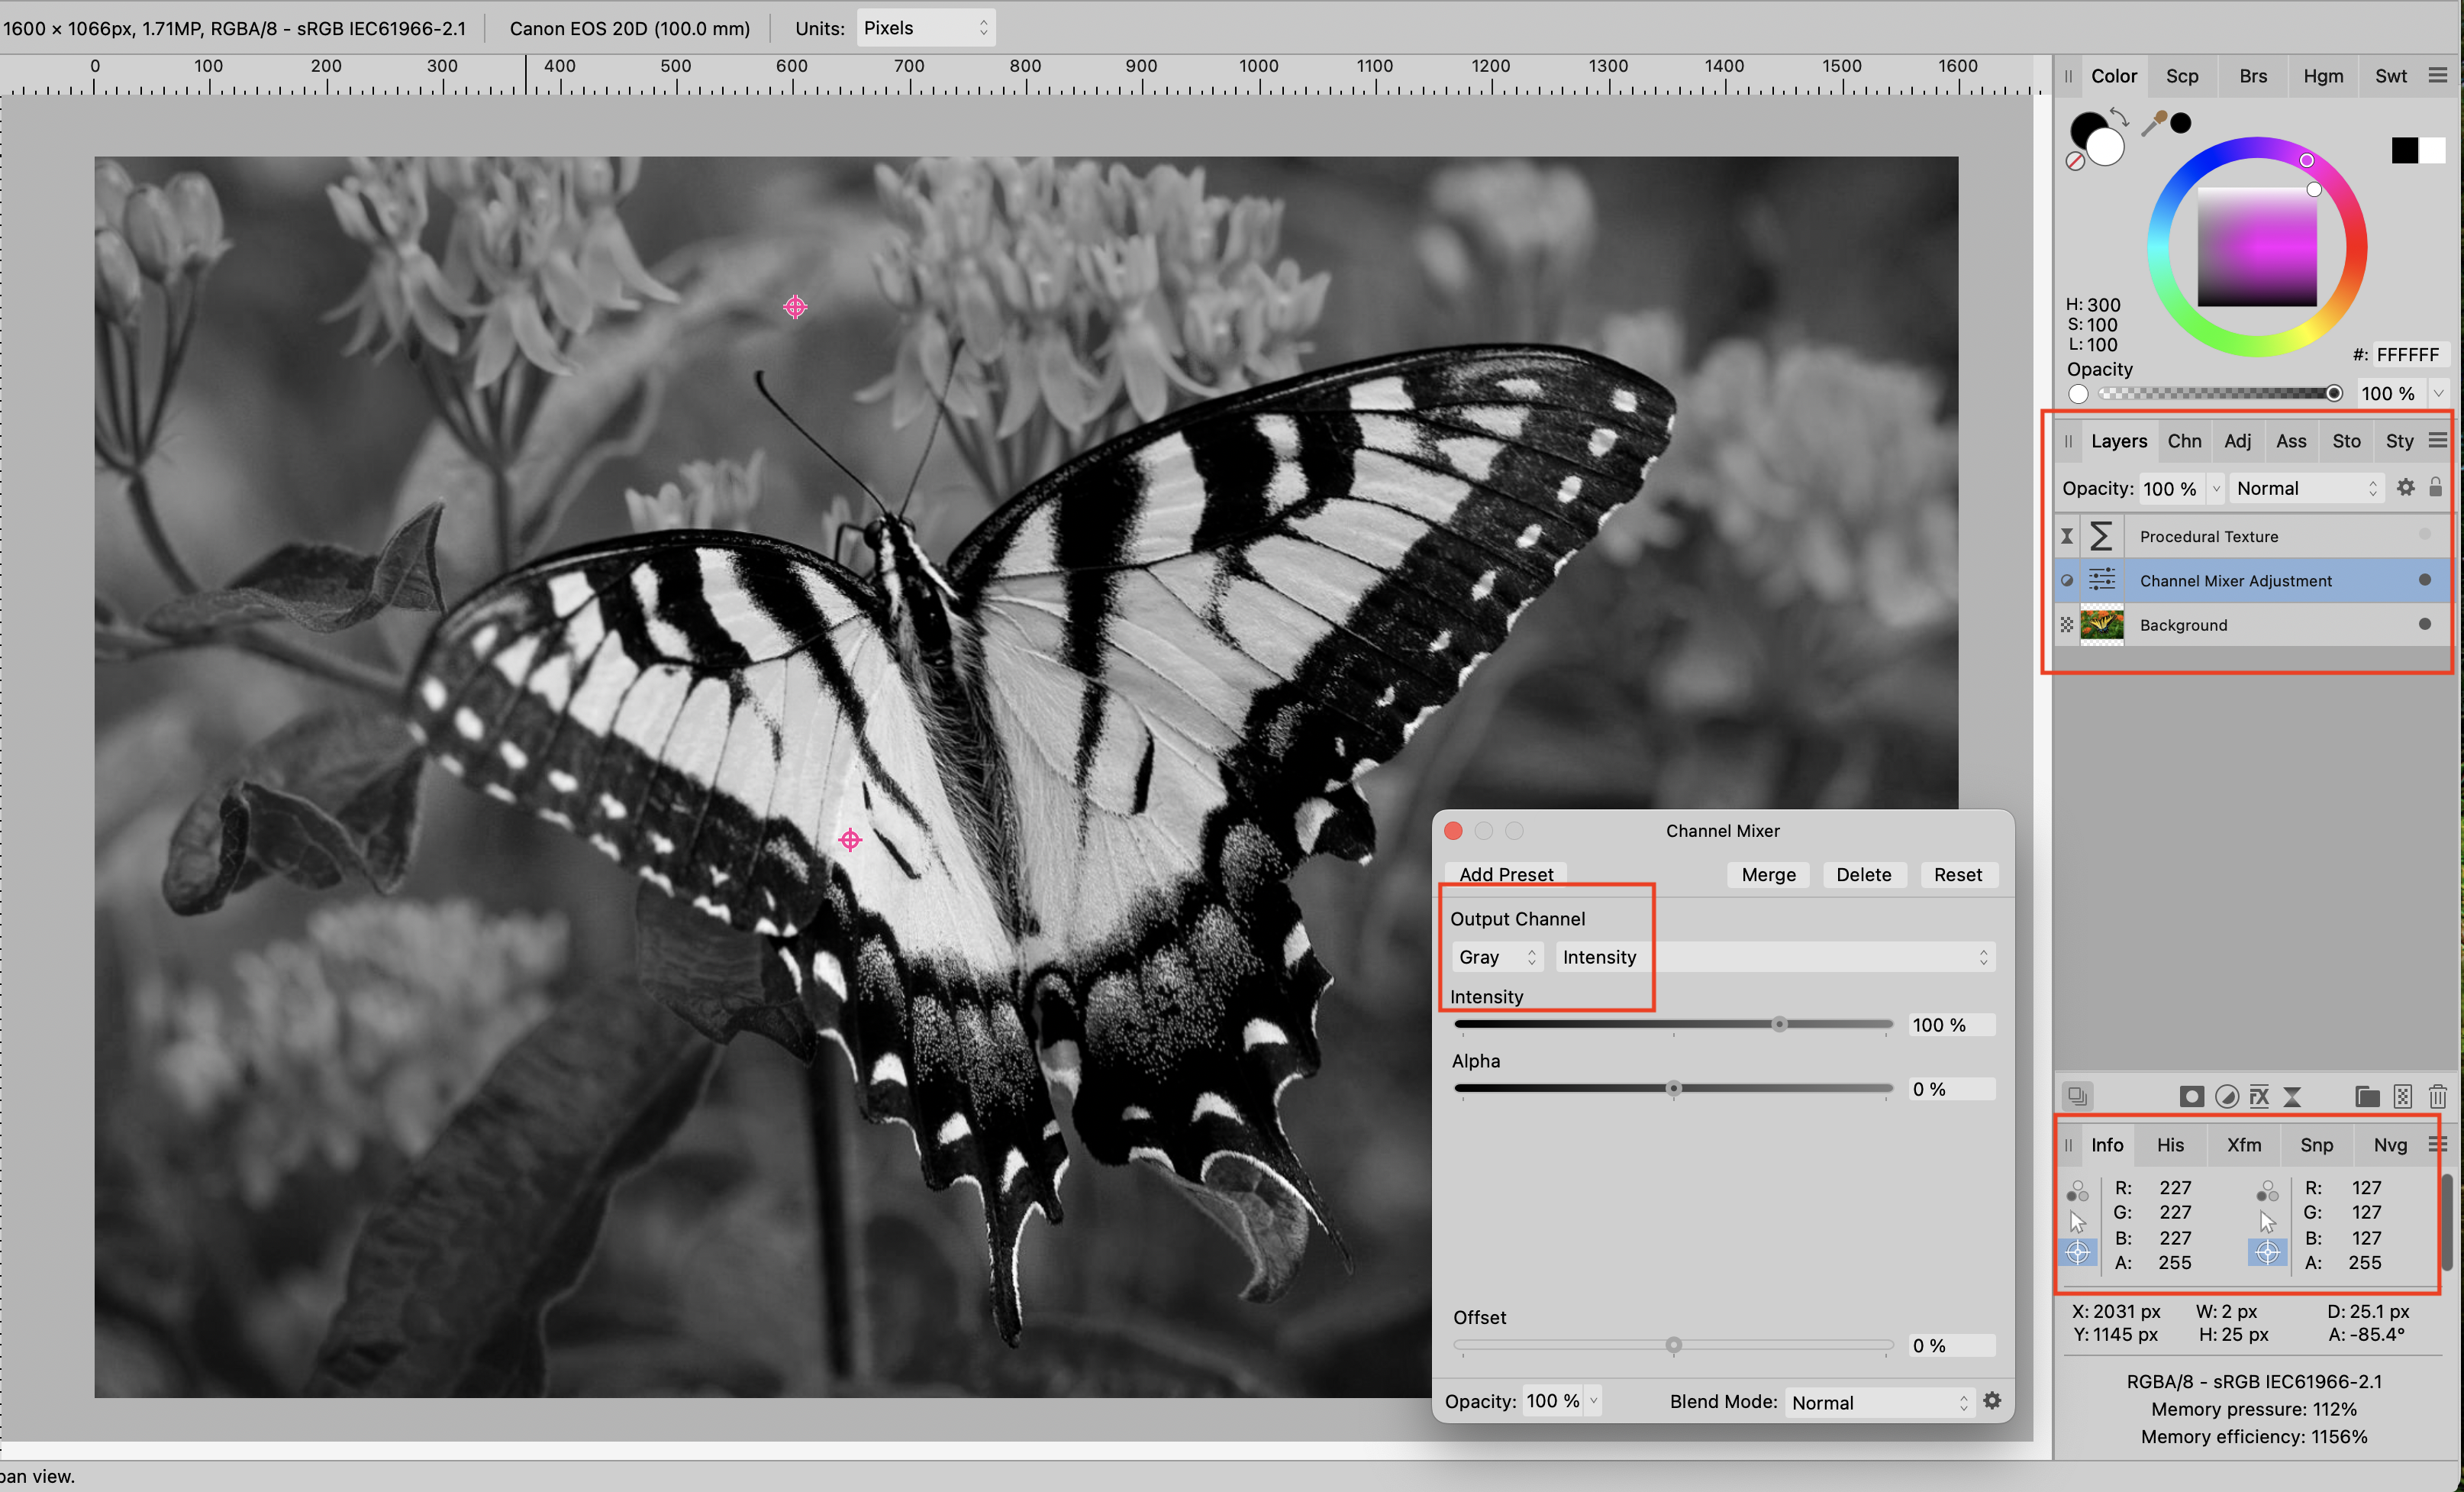
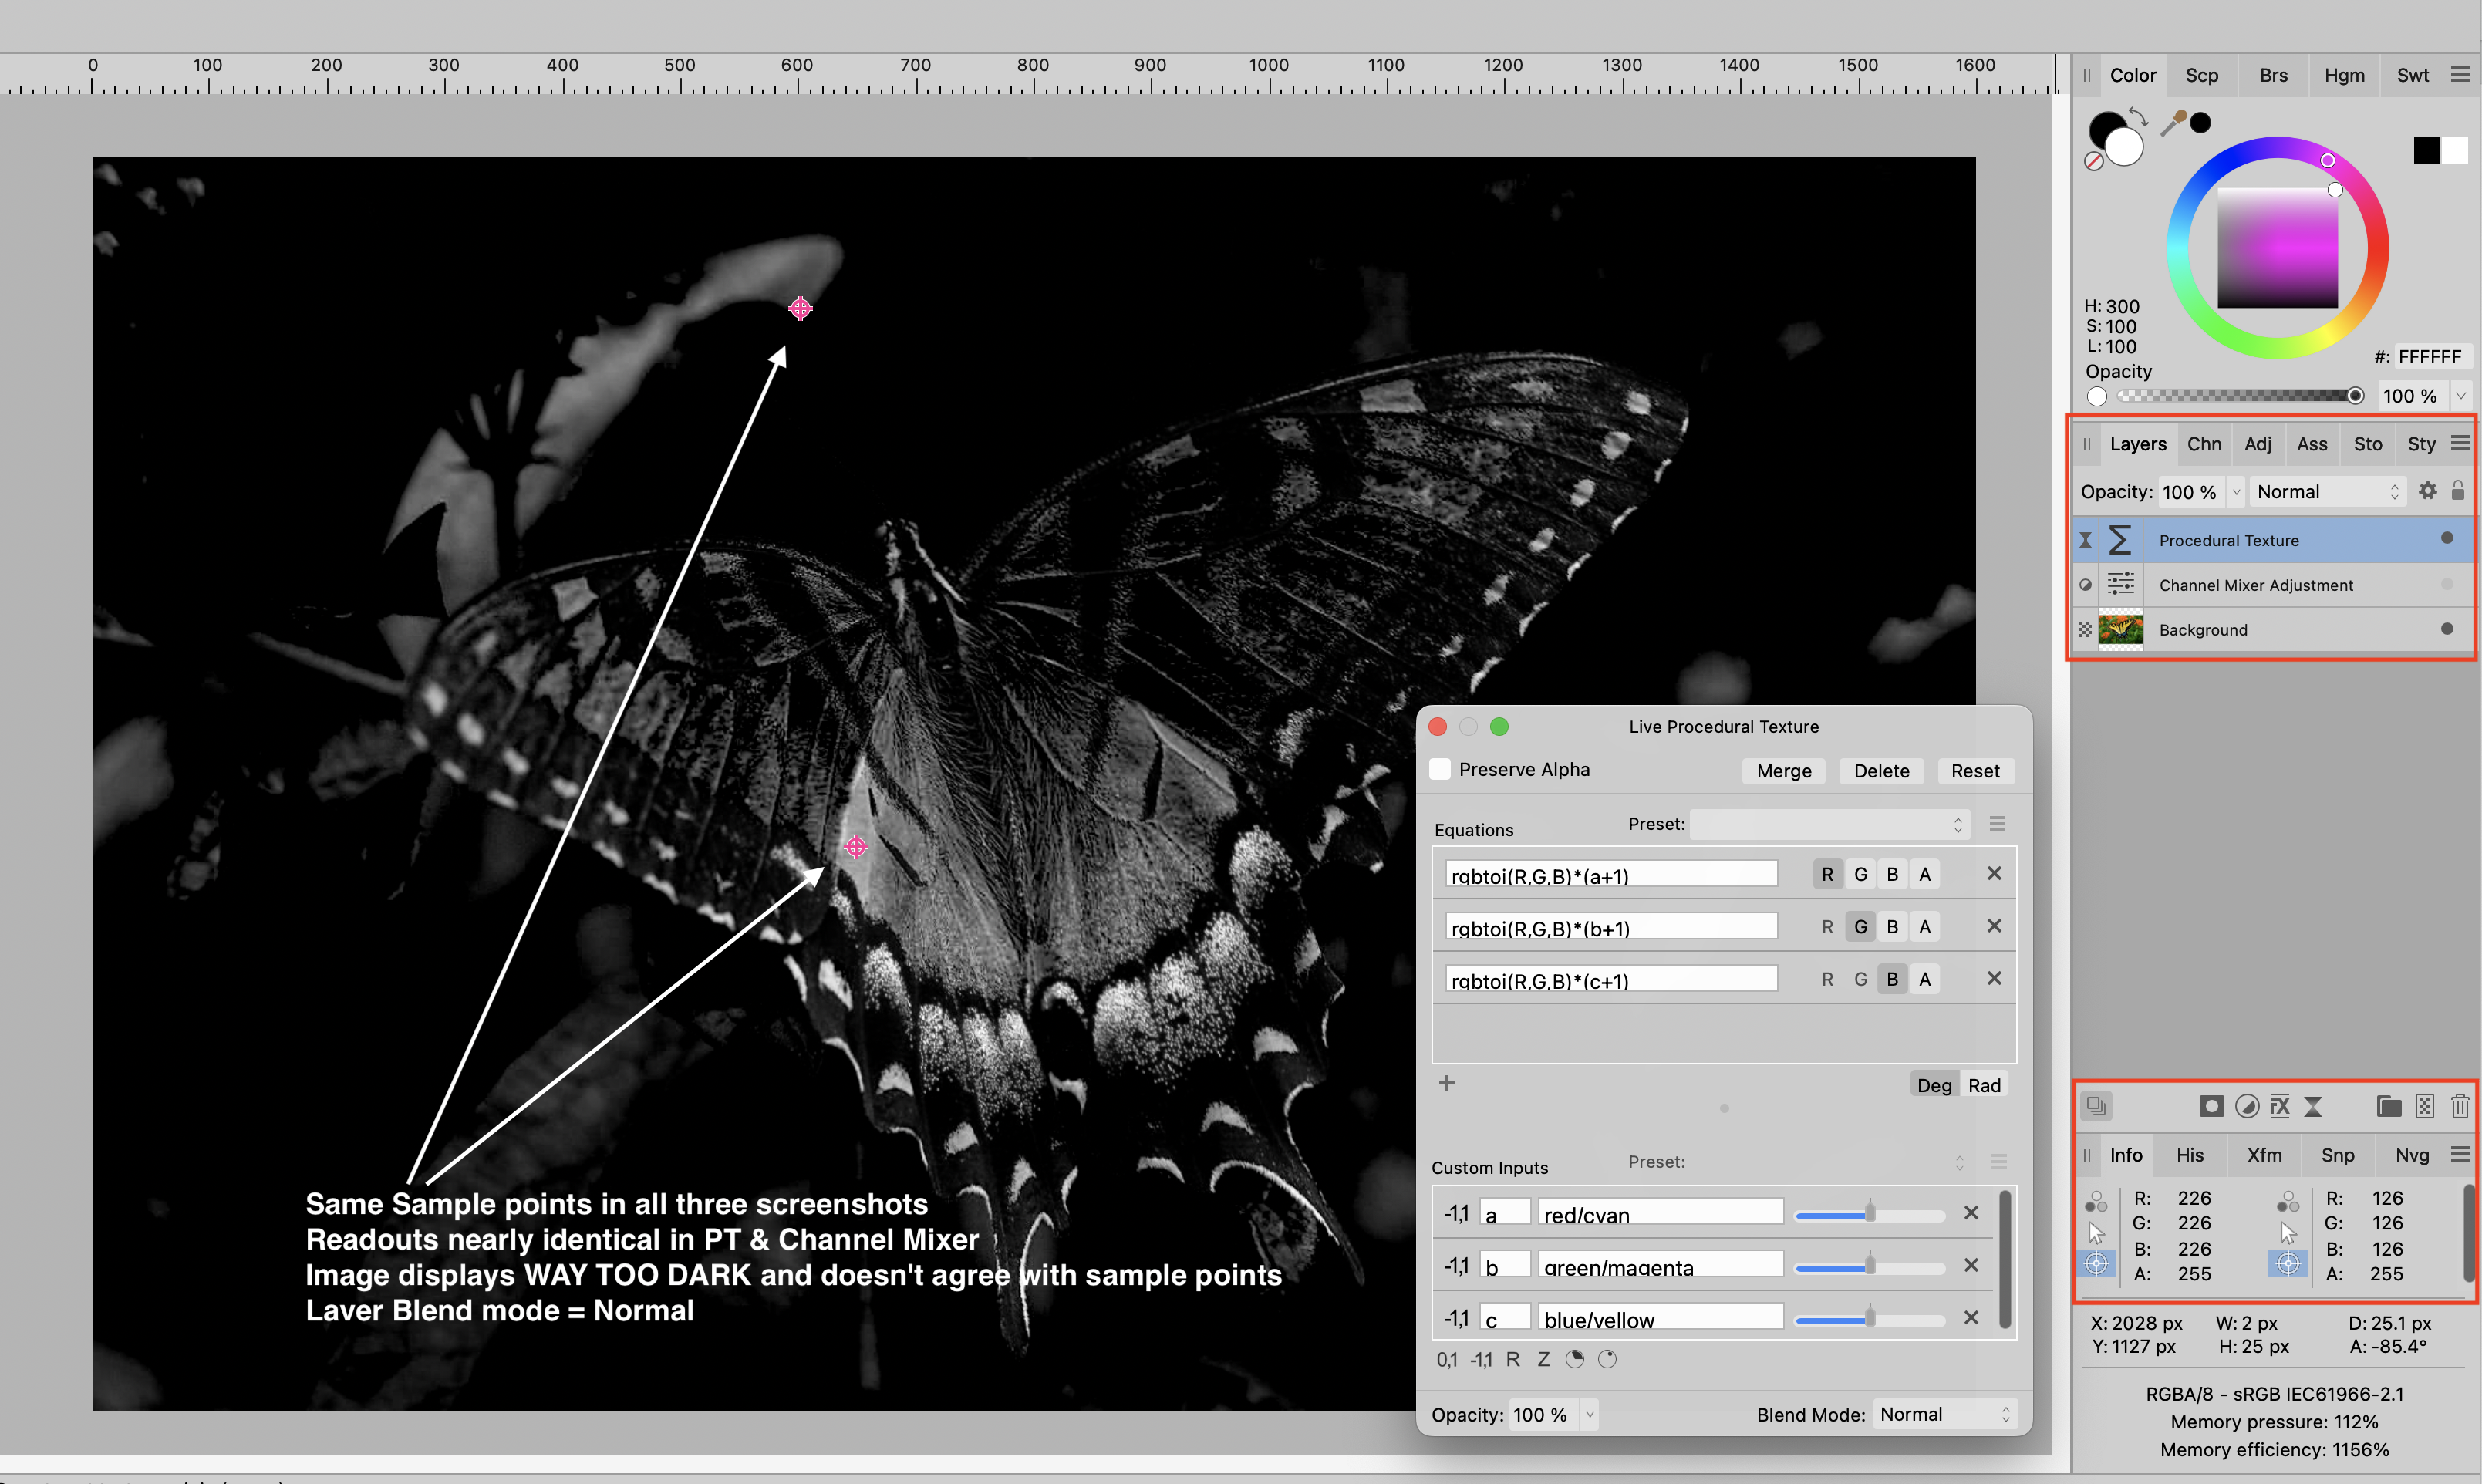
 I am experiencing some strange behavior with Live Procedural Texture and the "rgbtoi" function. Perhaps I am doing something wrong, but if so, I can't figure out what it is. I'm on a MacBook Pro running Ventura 13.6.4, using AP 2.3.1. I was trying to create a Toning Preset using Procedural Textures, but the display comes out very dark, which stopped me in my tracks. Here's the original image. I picked this image because it had a lot of different colors for testing. The below image shows only the base layer (the original pixel layer). The layers above the base layer are hidden. I added a Channel Mixer Adjustment Layer and set it to grayscale and I get the expected result. It displays the weighted grayscale of the image (using approximately 30% Red, 59% Green, 11% Blue for the conversion to grayscale). Note the sample points in the Info Panel. They look about right to me and agree with the image as displayed on my monitor. Below is a screenshot with the Procedural Texture Layer visible and the Channel Mixer Layer hidden. I used the "rgbtoi" function, which I believe does a similar RGB to weighted grayscale conversion as Channel Mixer (approx 30%R, 59%G, 11%B) and provides the output as grayscale intensity. The image displays extremely dark, but the sample points in the Info Panel are nearly identical to those shown in the Channel Mixer screenshot. The sample points do NOT agree at all with the displayed image. I'm guessing it is a "display issue" because the calculated values in the Info Panel seem to be correct. If I change the Layer Blend Mode of the PT layer to Color, Hue or Saturation, the image displays the same as Channel Mixer, but this shouldn't be necessary. And for my purposes, it defeats my intention of building a PT to do Toning. I could put a Channel Mixer Layer (set to Grayscale) below the PT Layer, but that shouldn't be necessary, should it? Seems like a bug to me, unless I am missing something (which is very possible). Any help would be appreciated. I'll also attach the afphoto file, created using AP 2.3.1. Thanks. PT-rgbtoi.afphoto
-
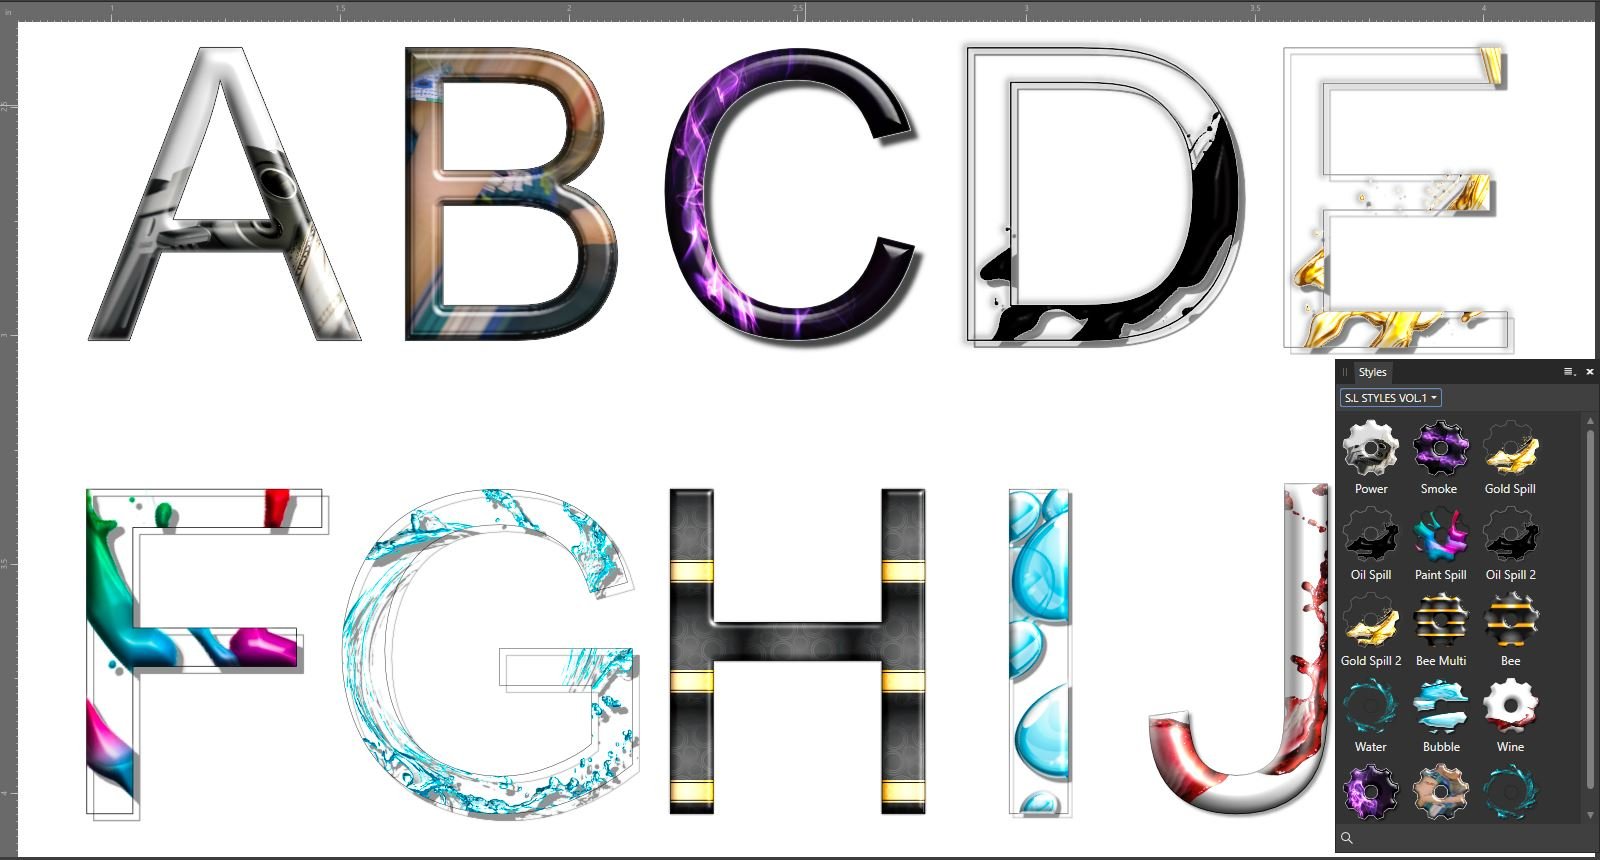
Hi everyone these are some styles i created for use on individual letters , hope there good enough for everyone to find a use case for them. this is my first go at creating styles it is a 148.59MB DOWNLOAD. S.L_LETTER_STYLES.afstyles
- 26 replies
-
- 21
-
-
-
- affinity designer
- affinity photo
- (and 1 more)
-
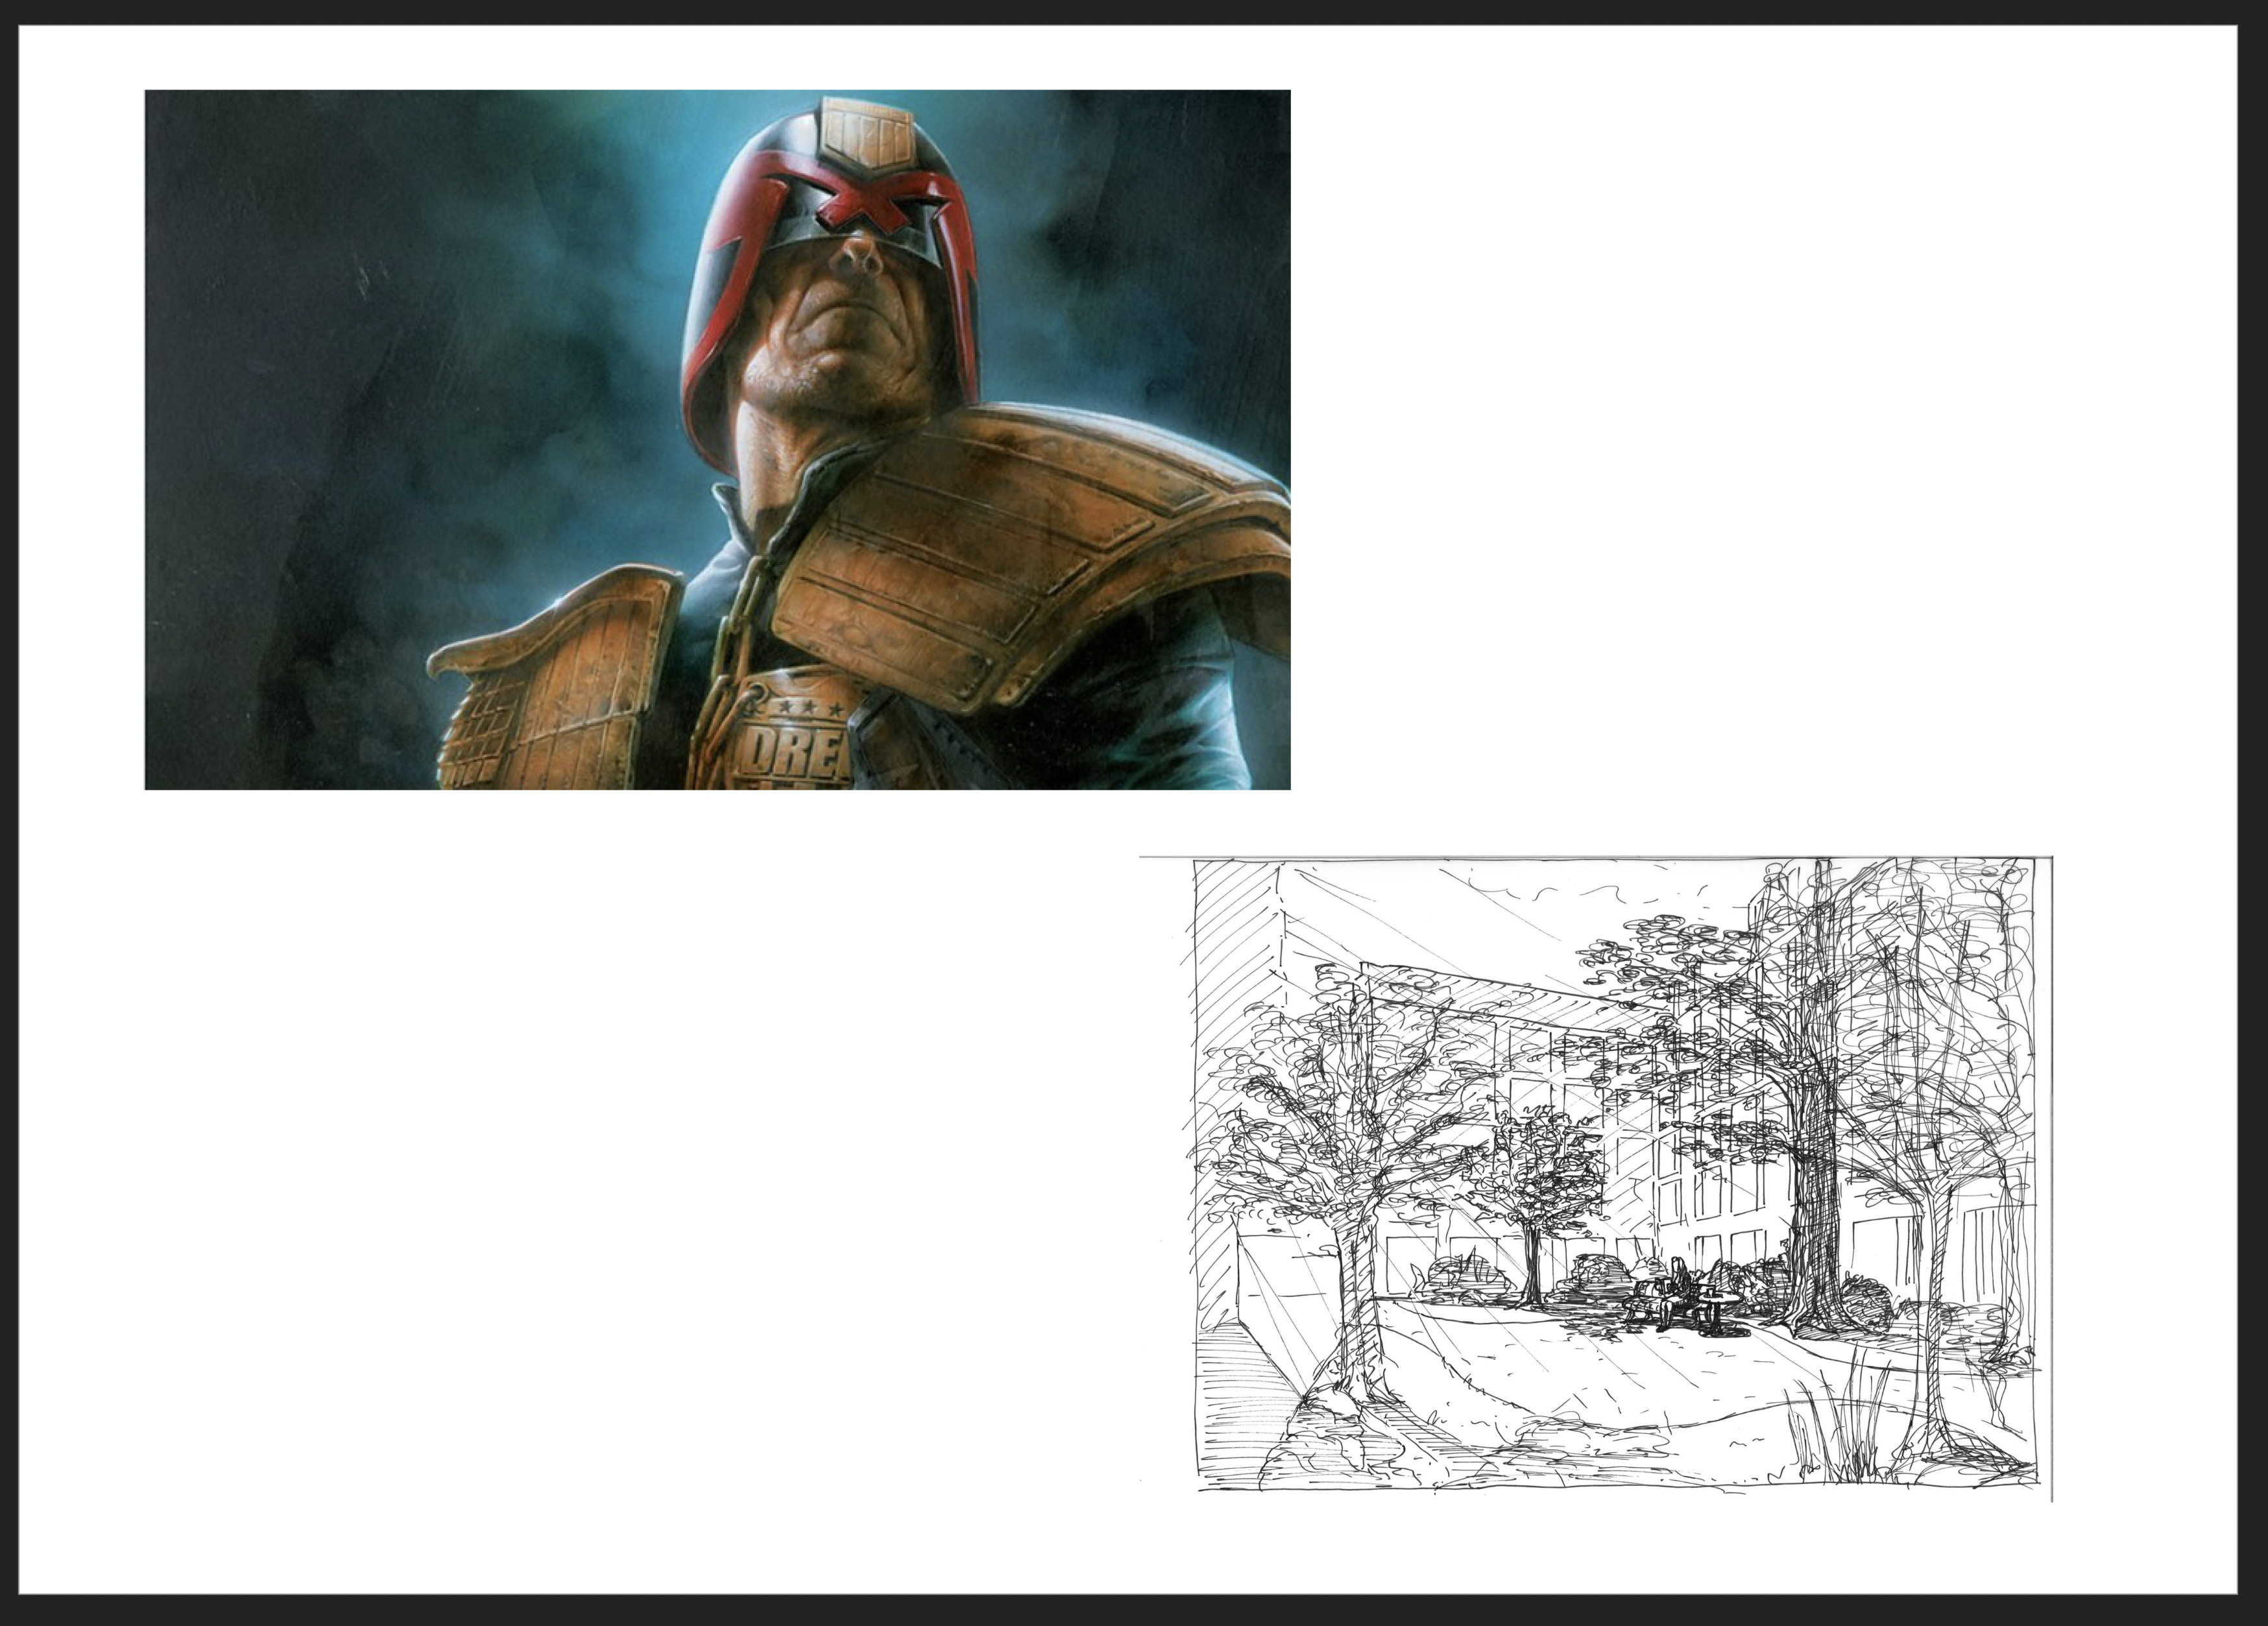
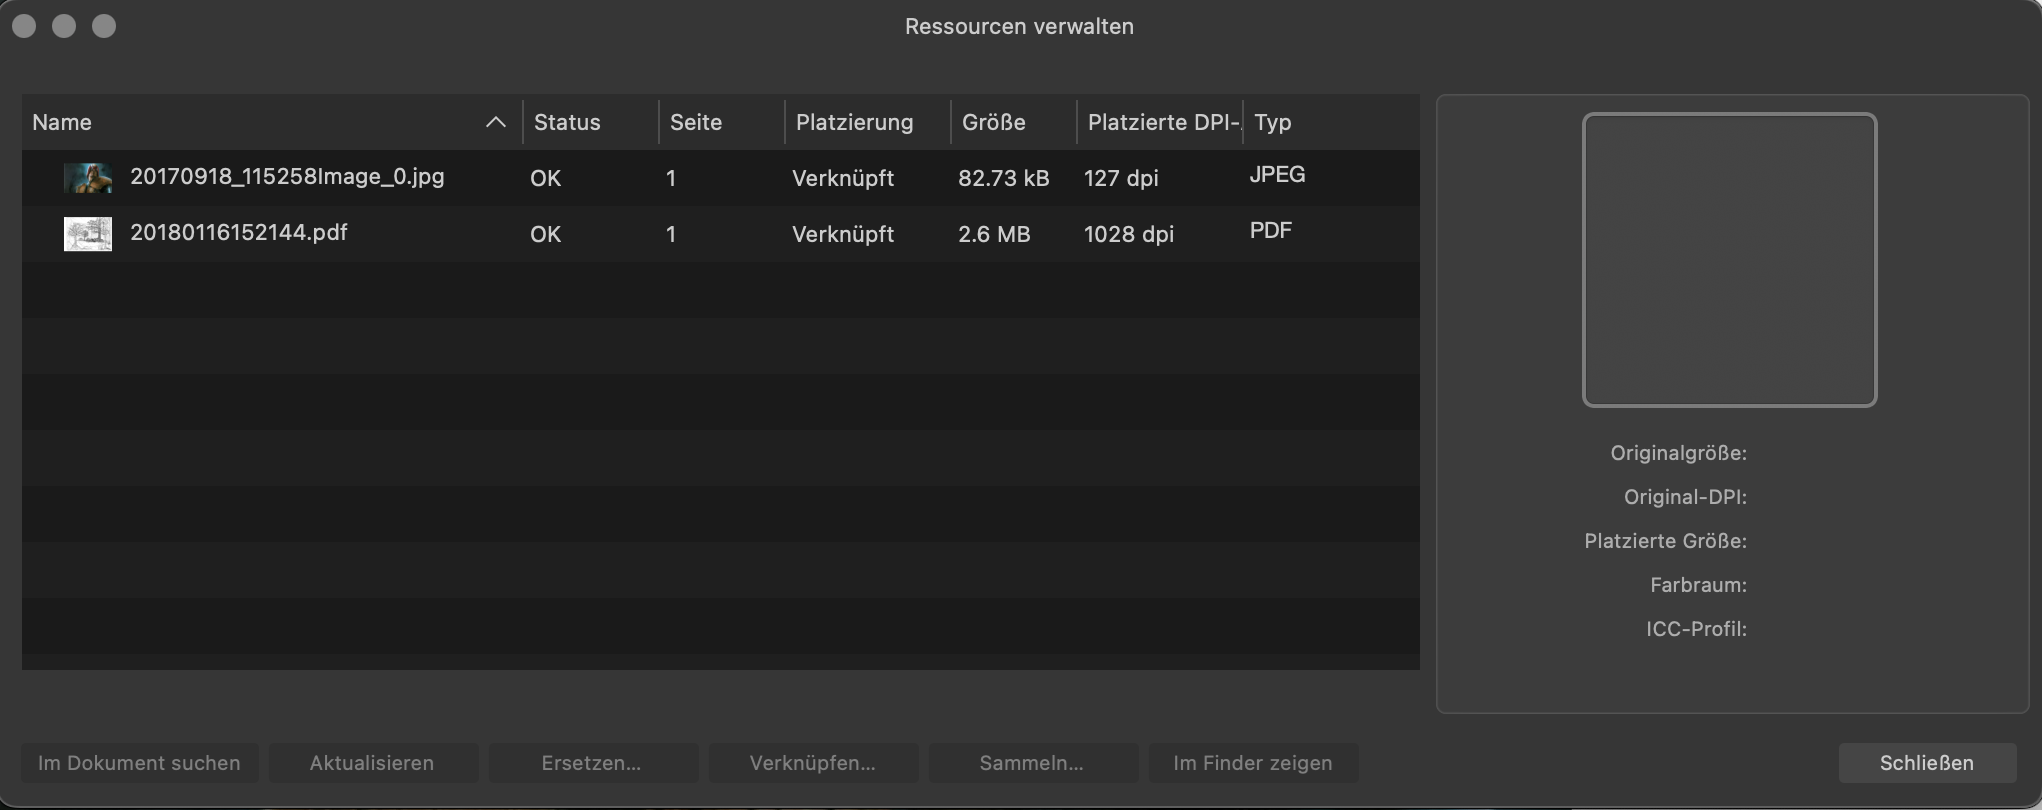
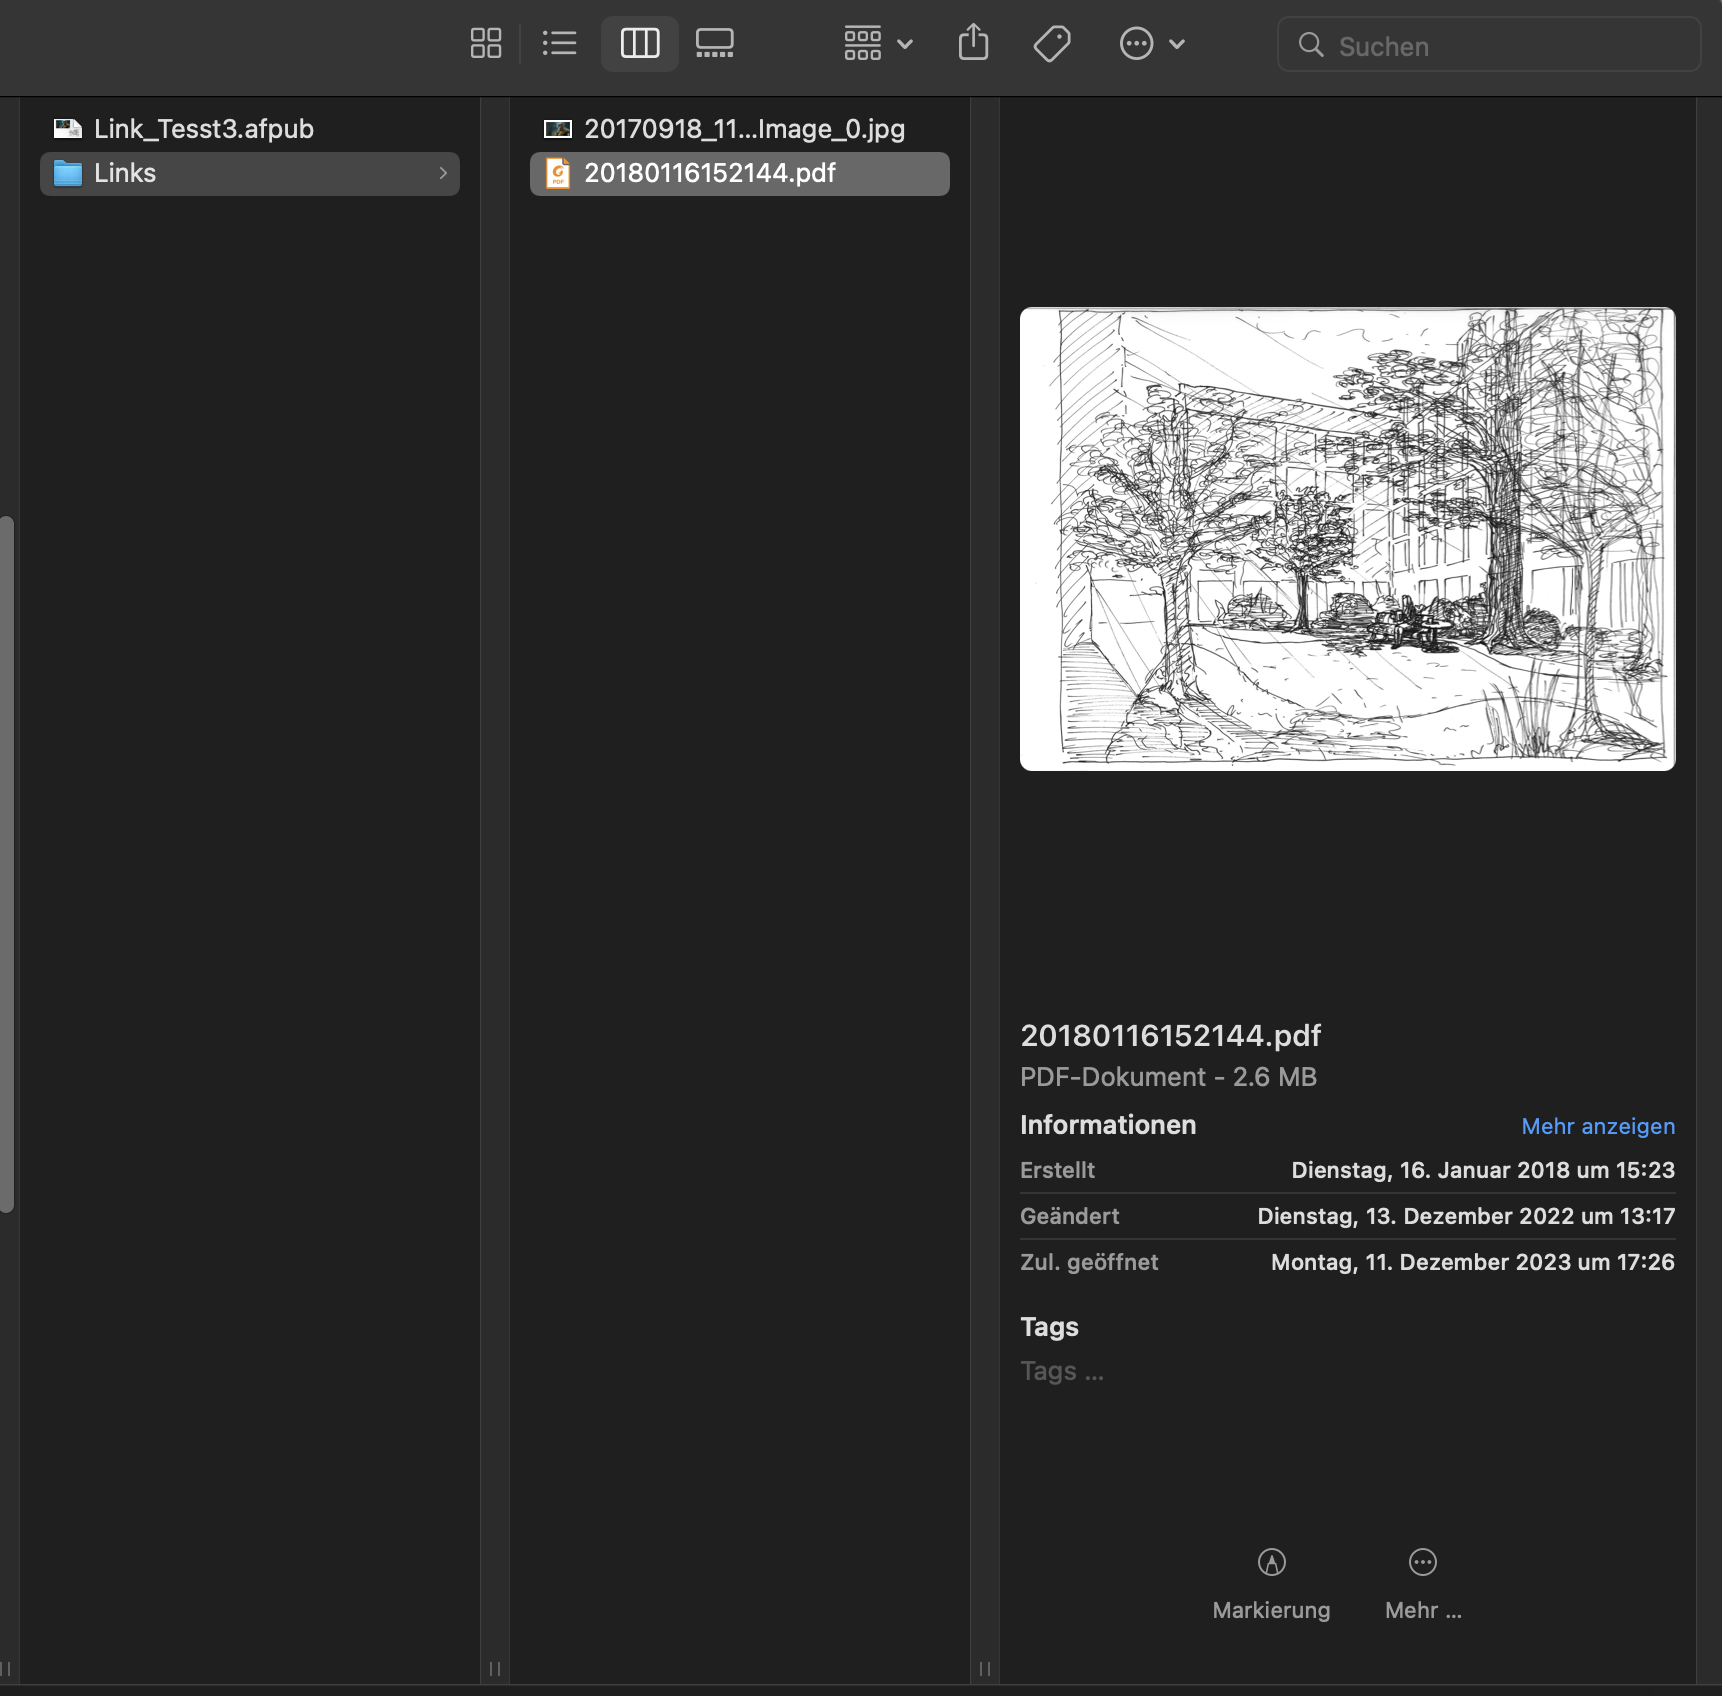
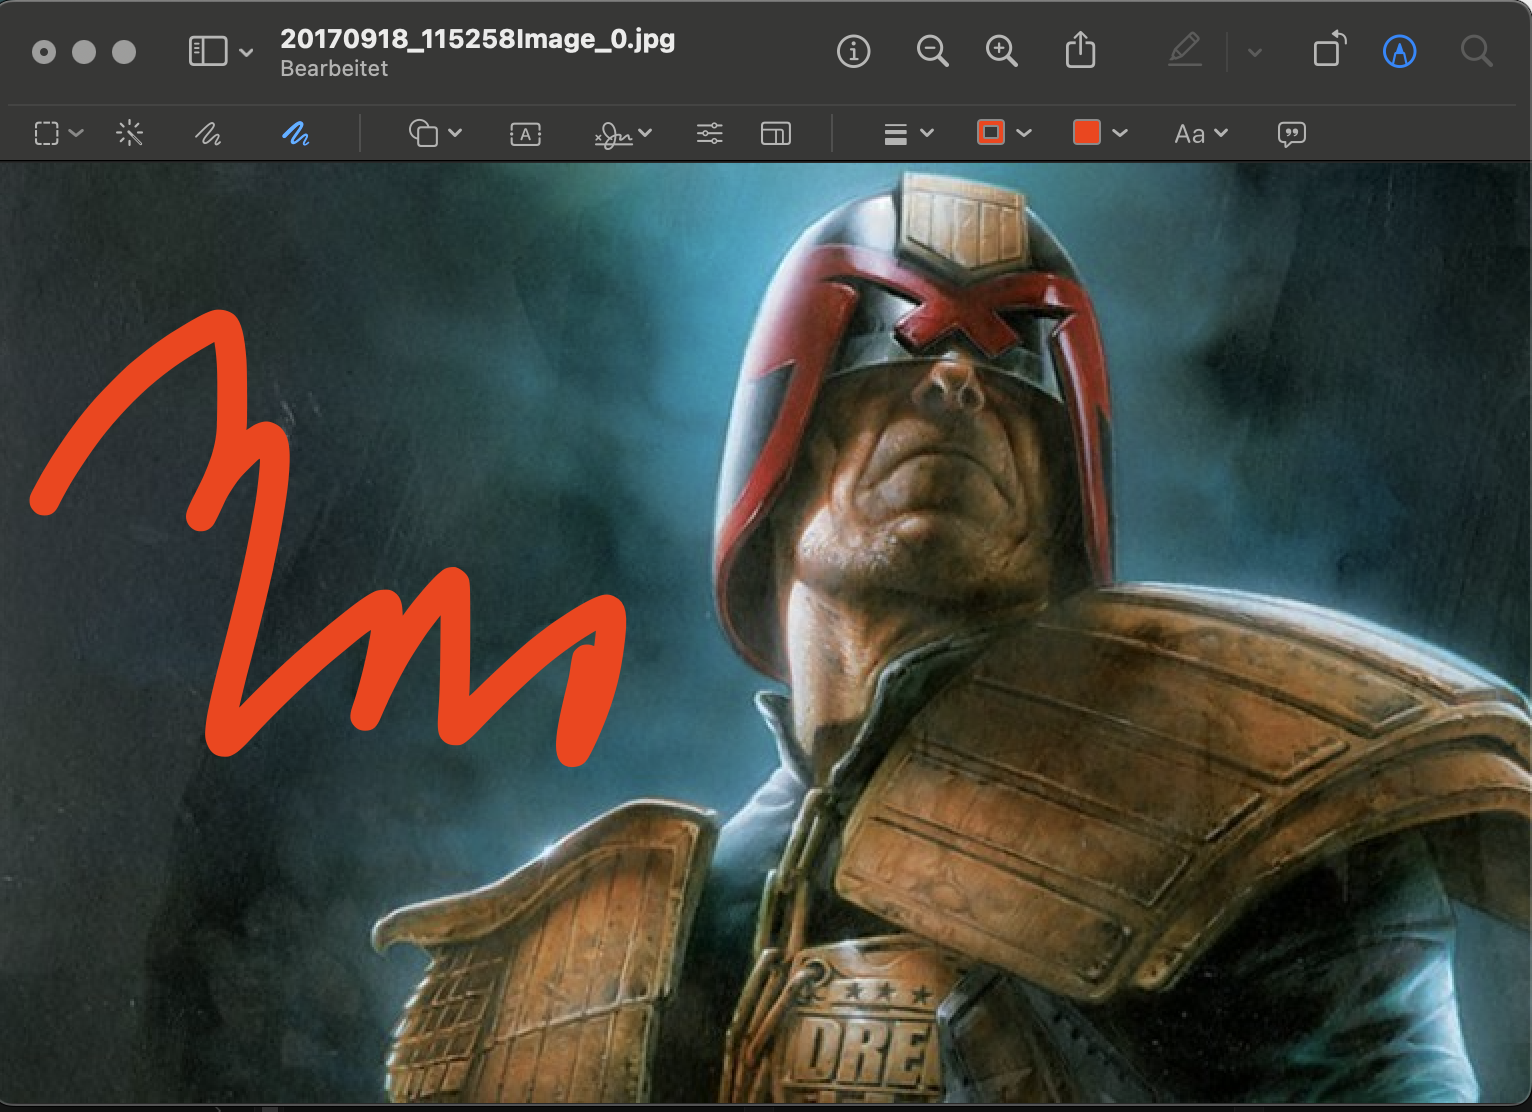
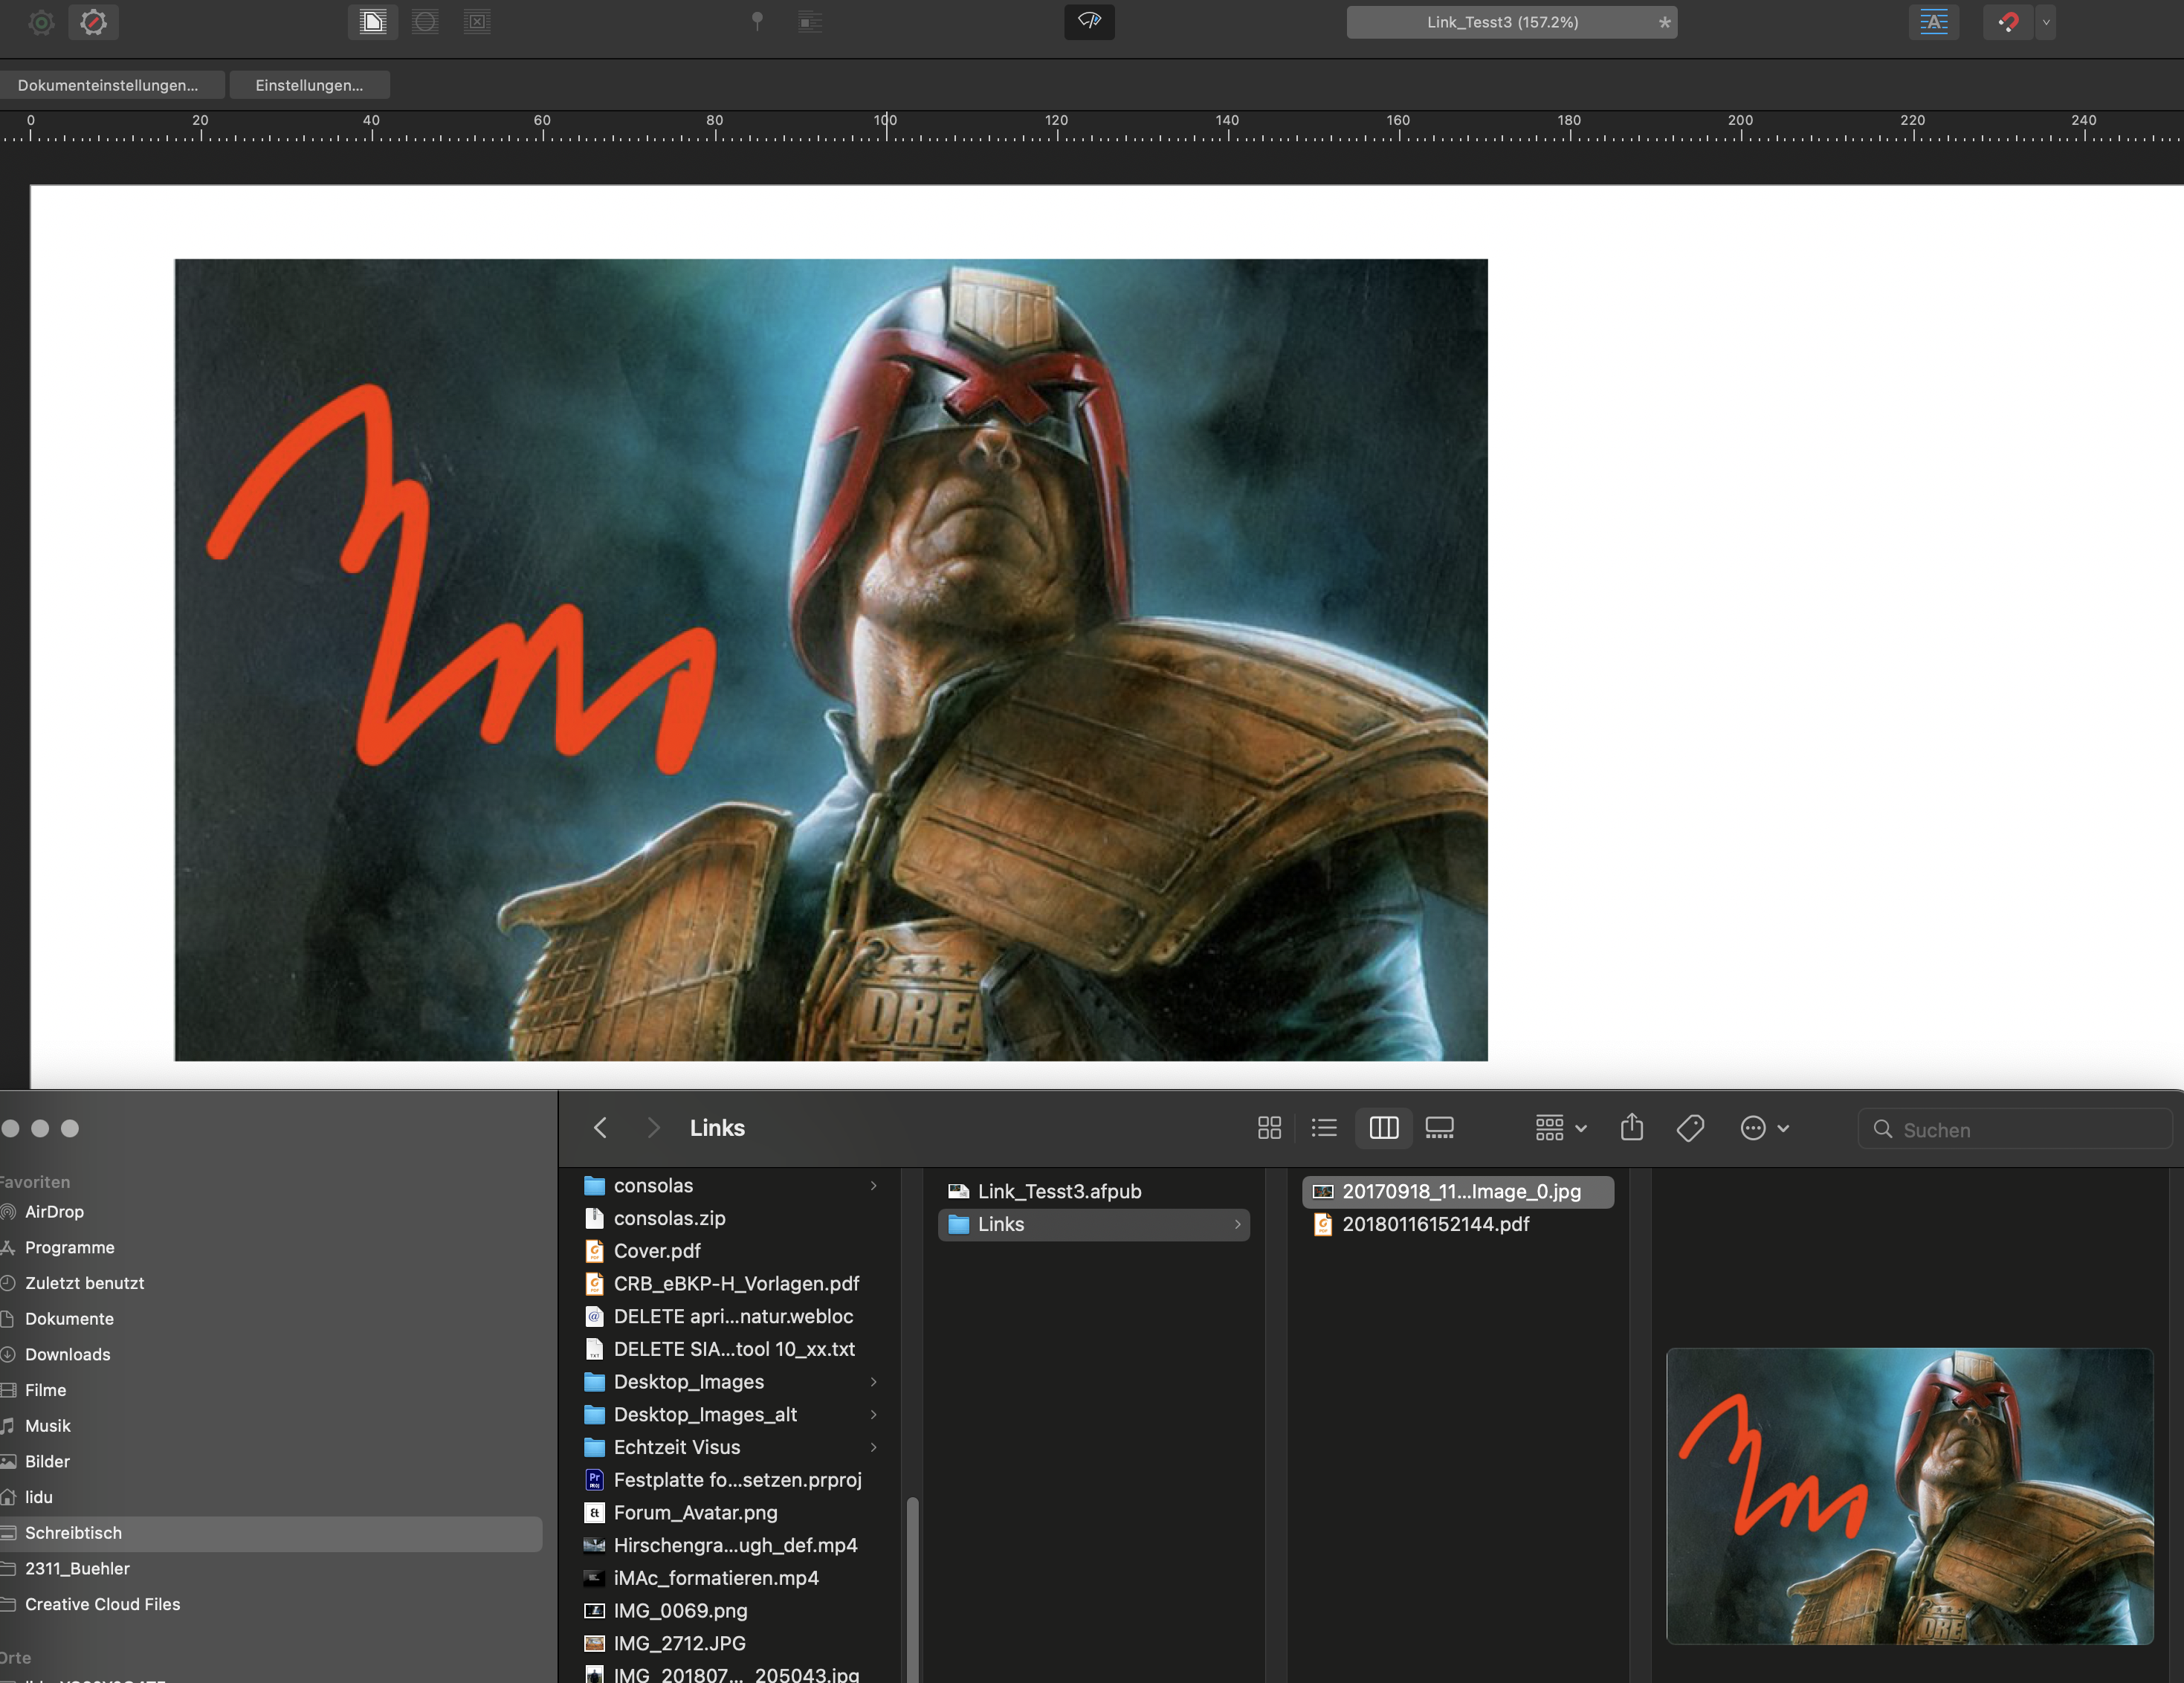
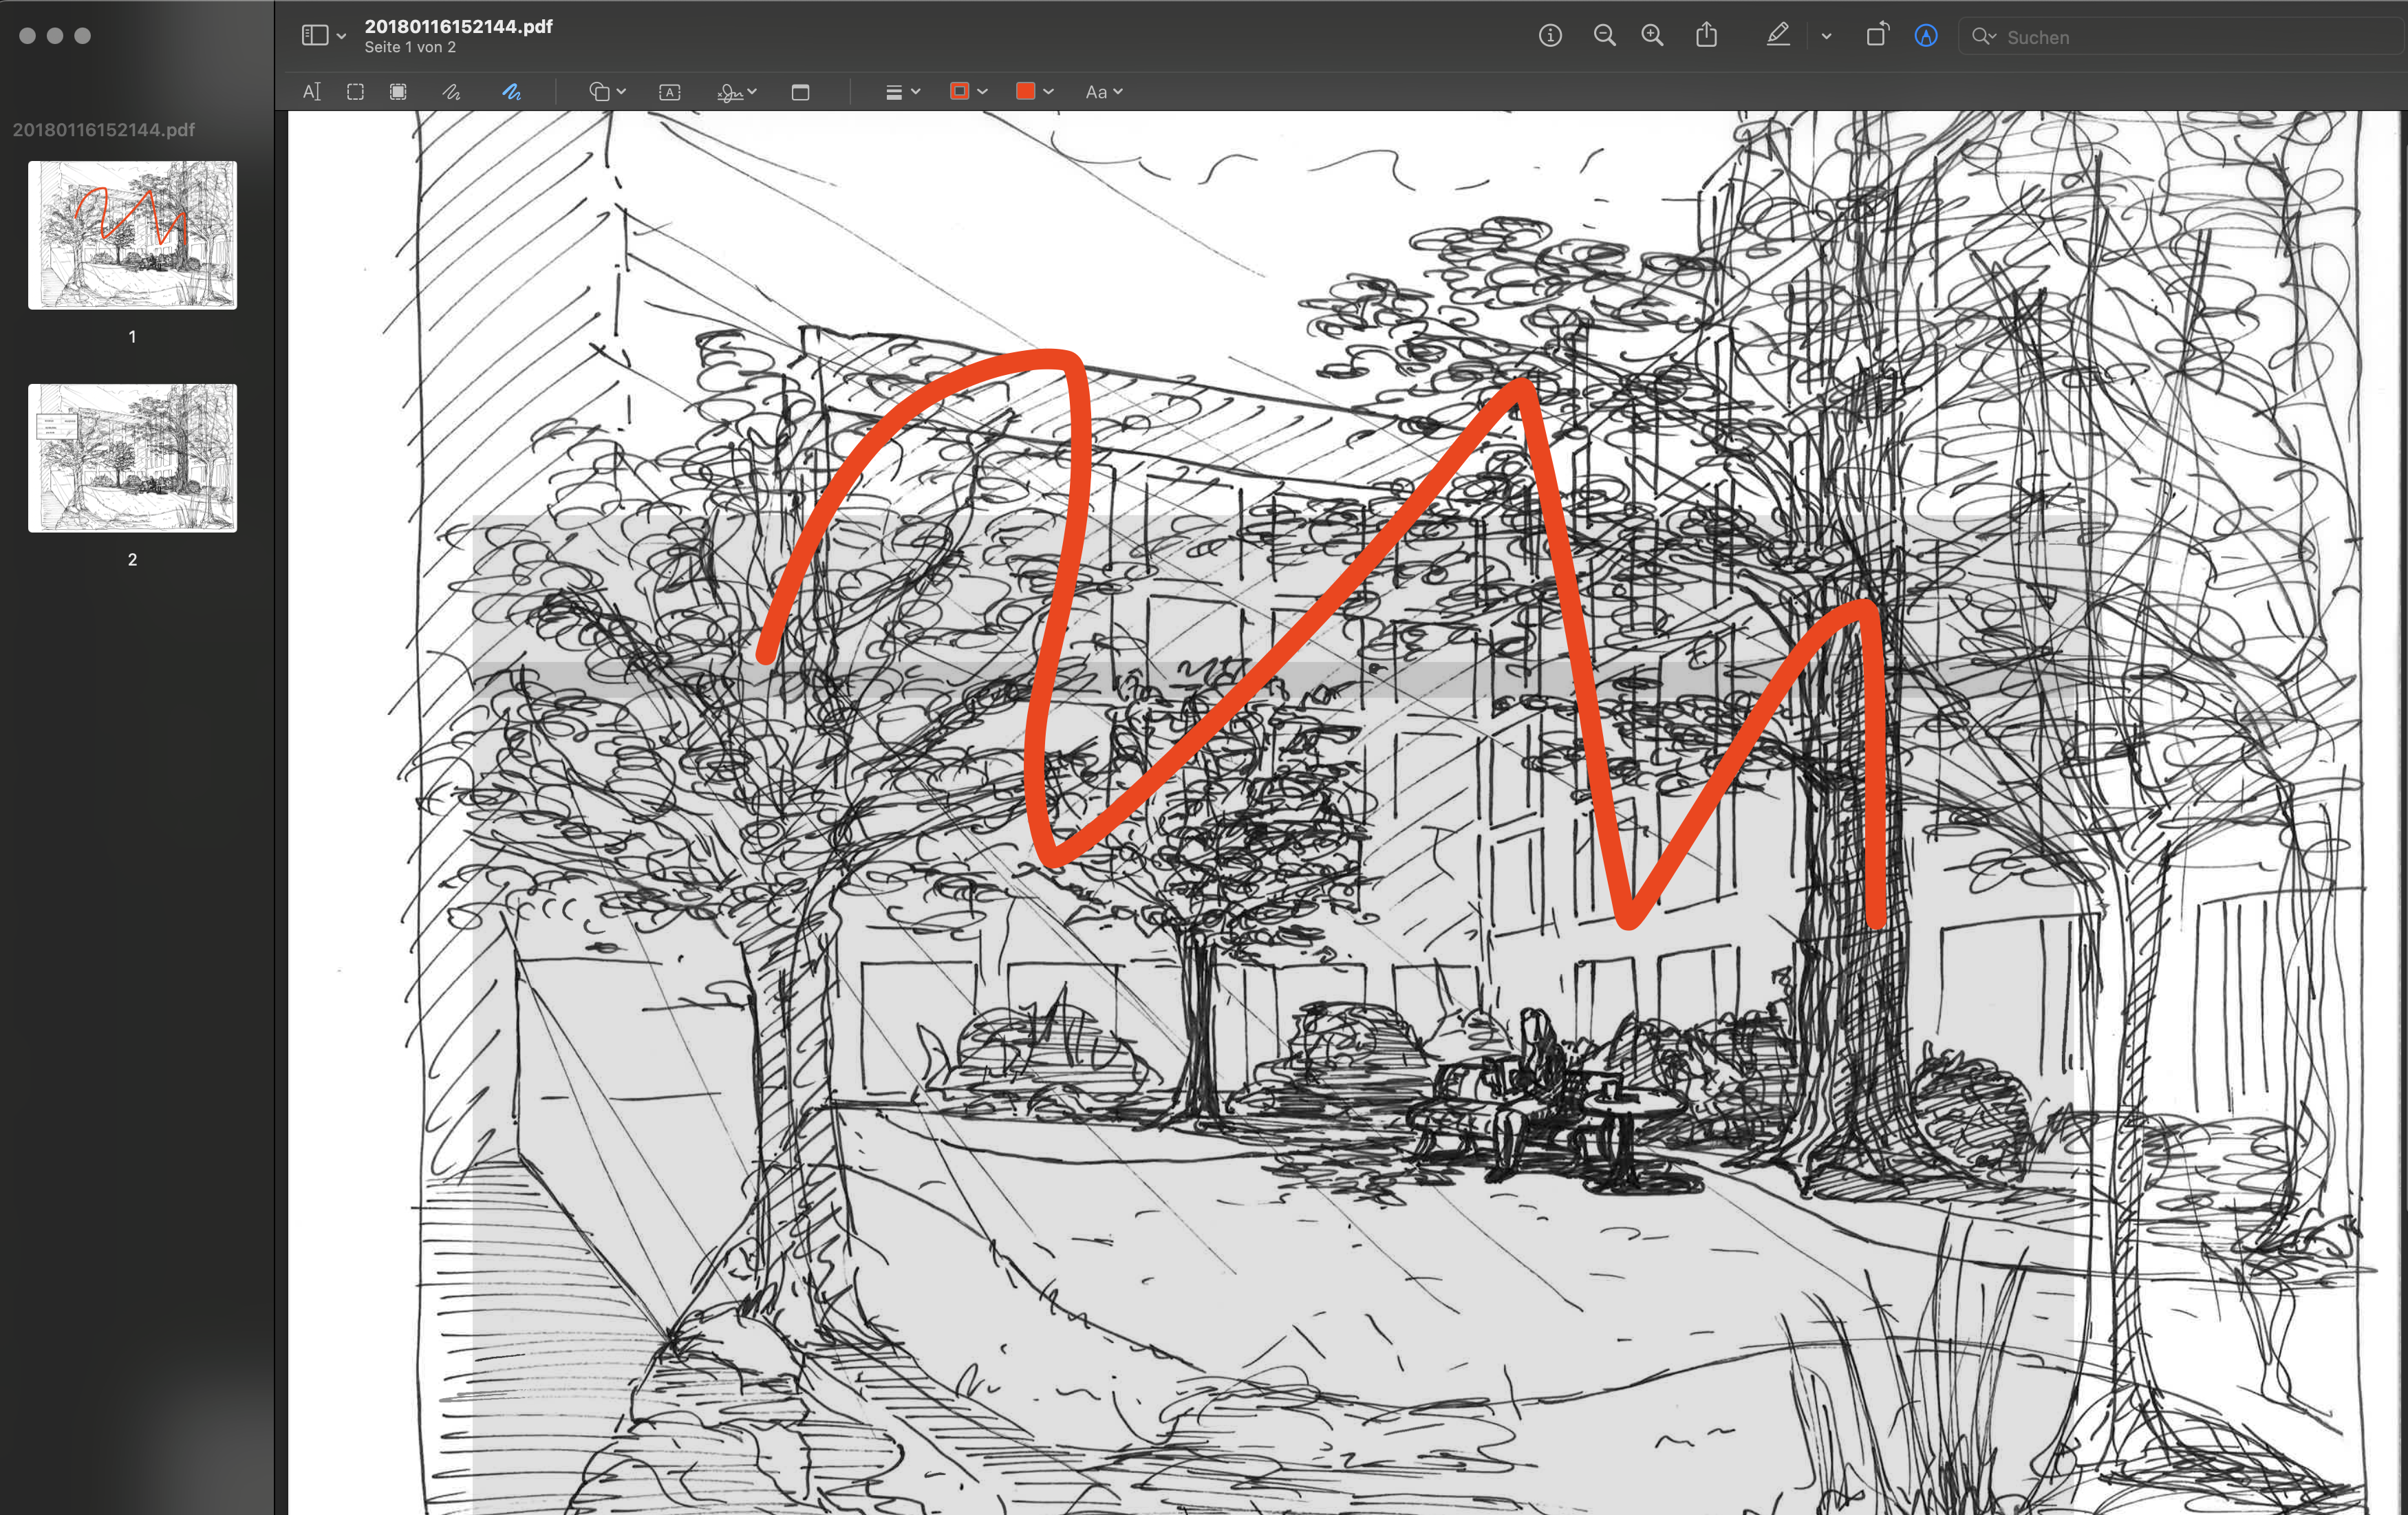
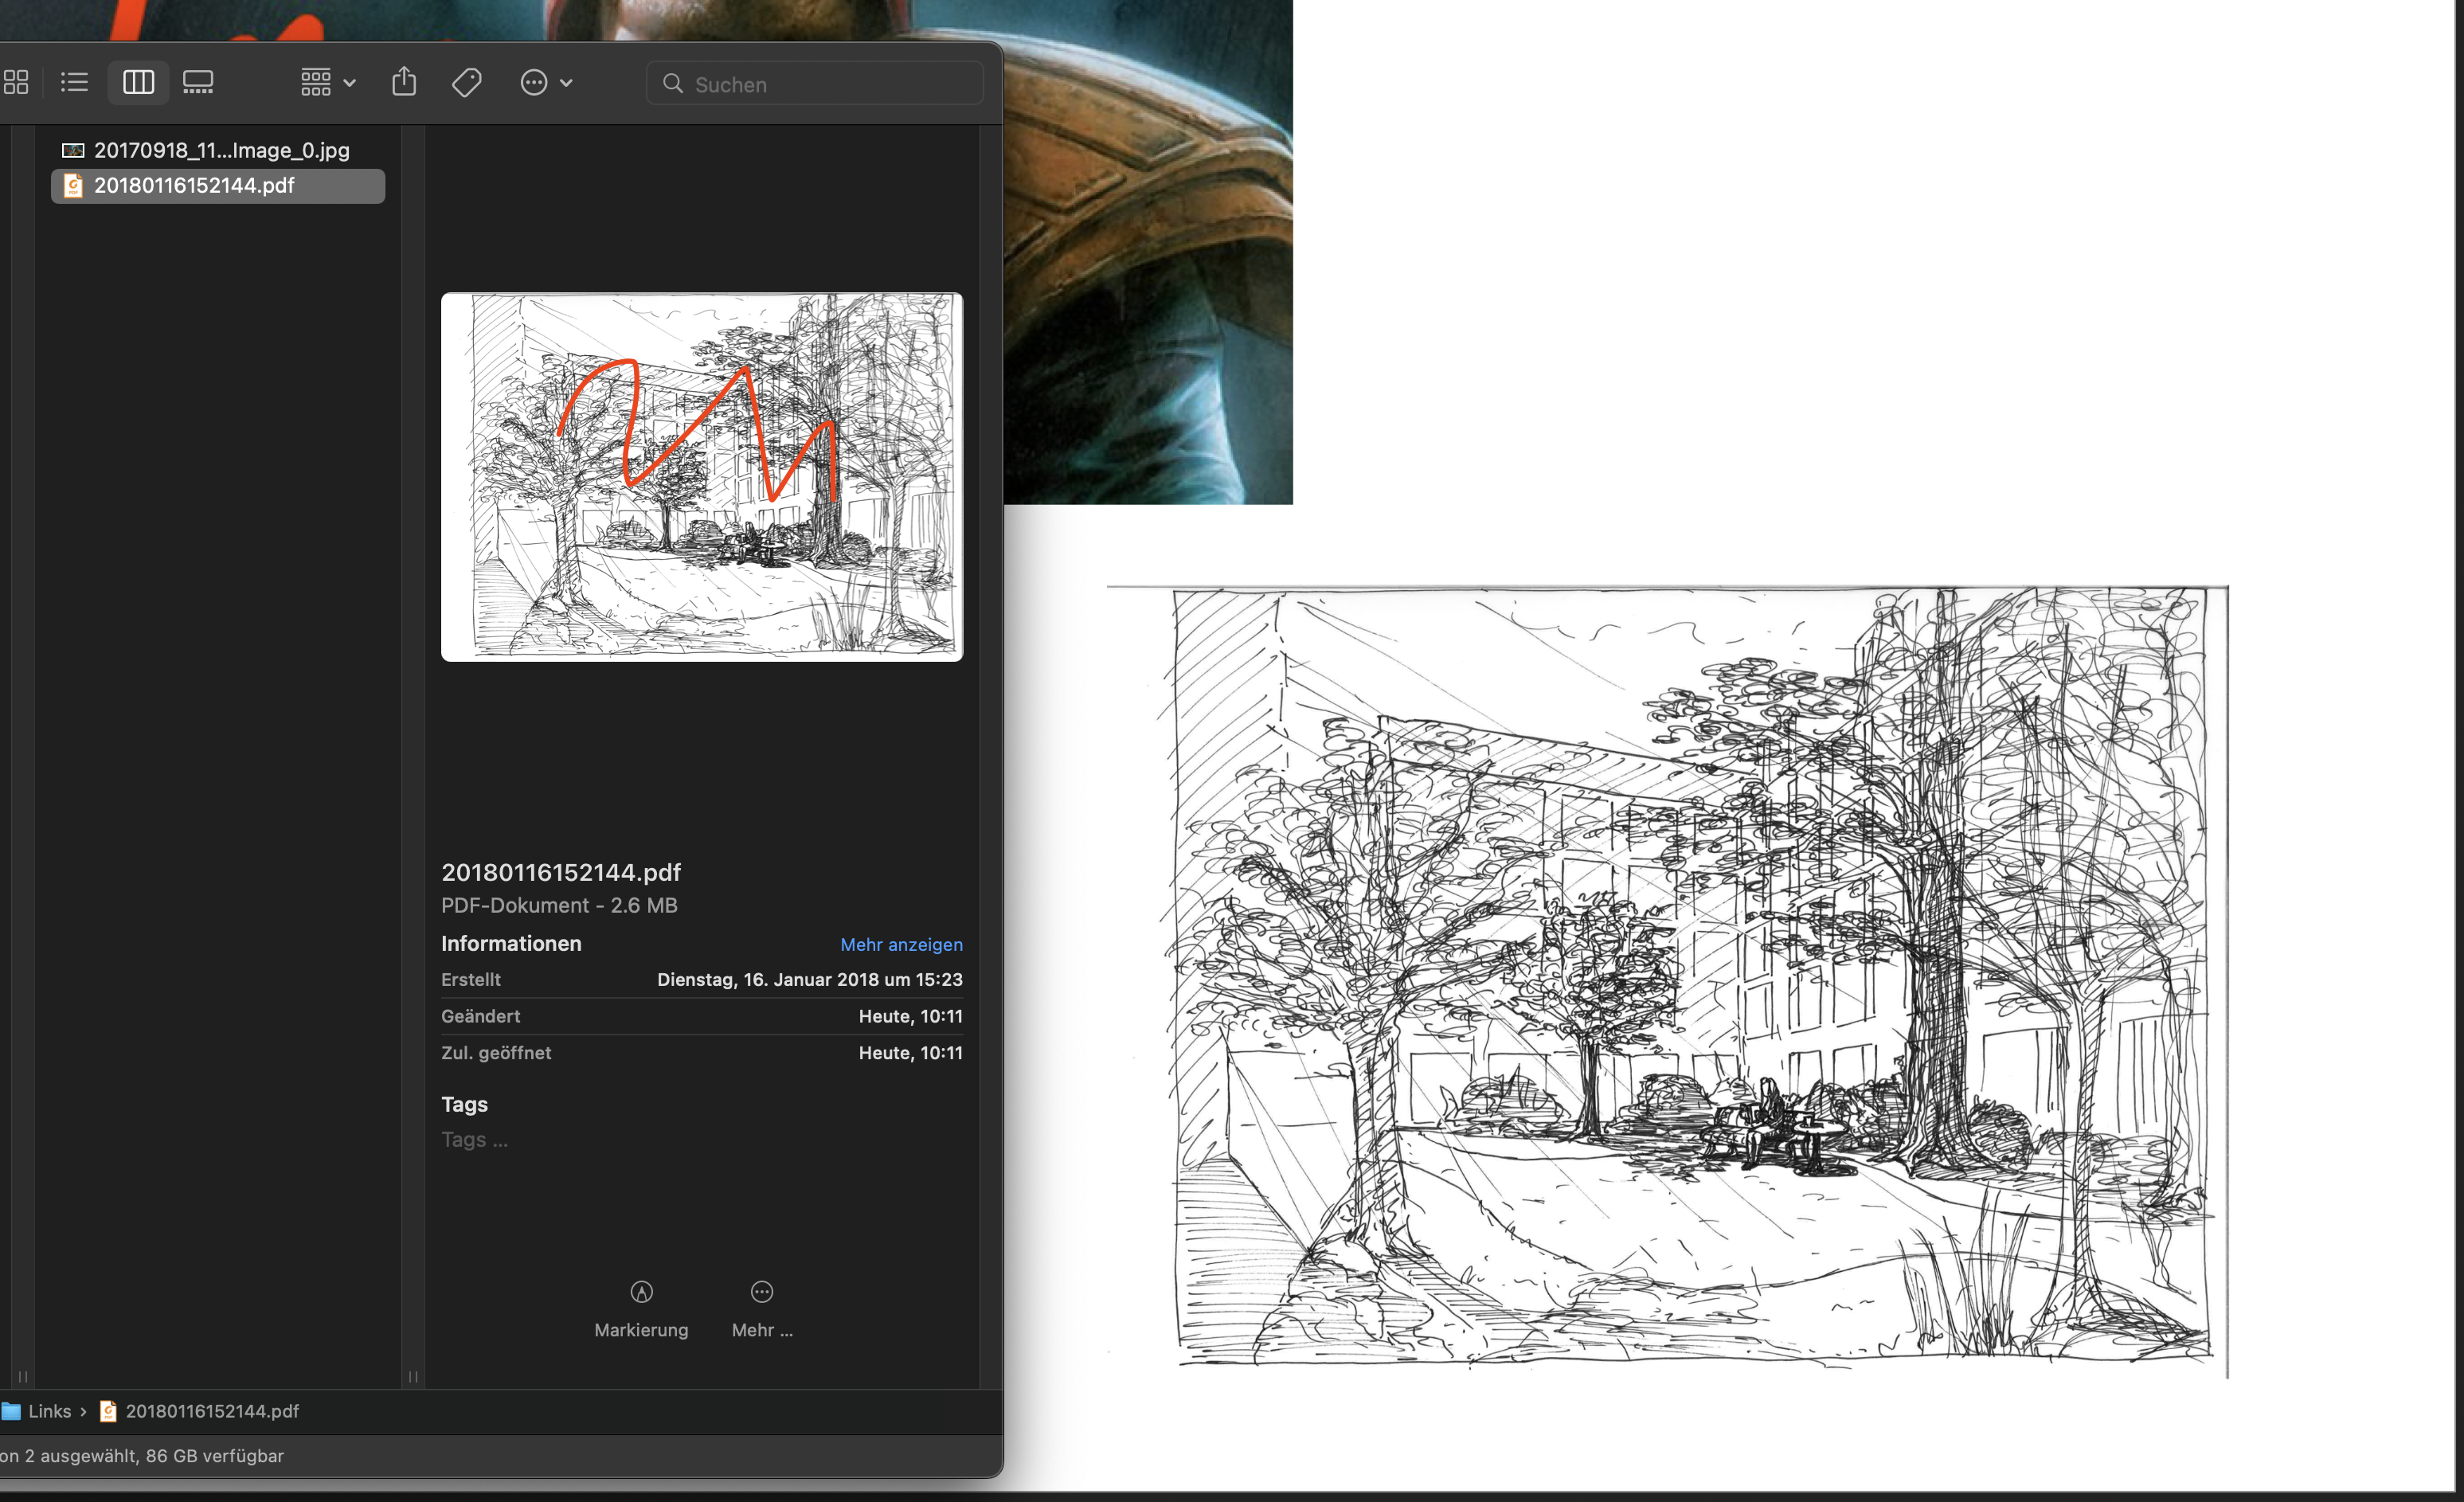
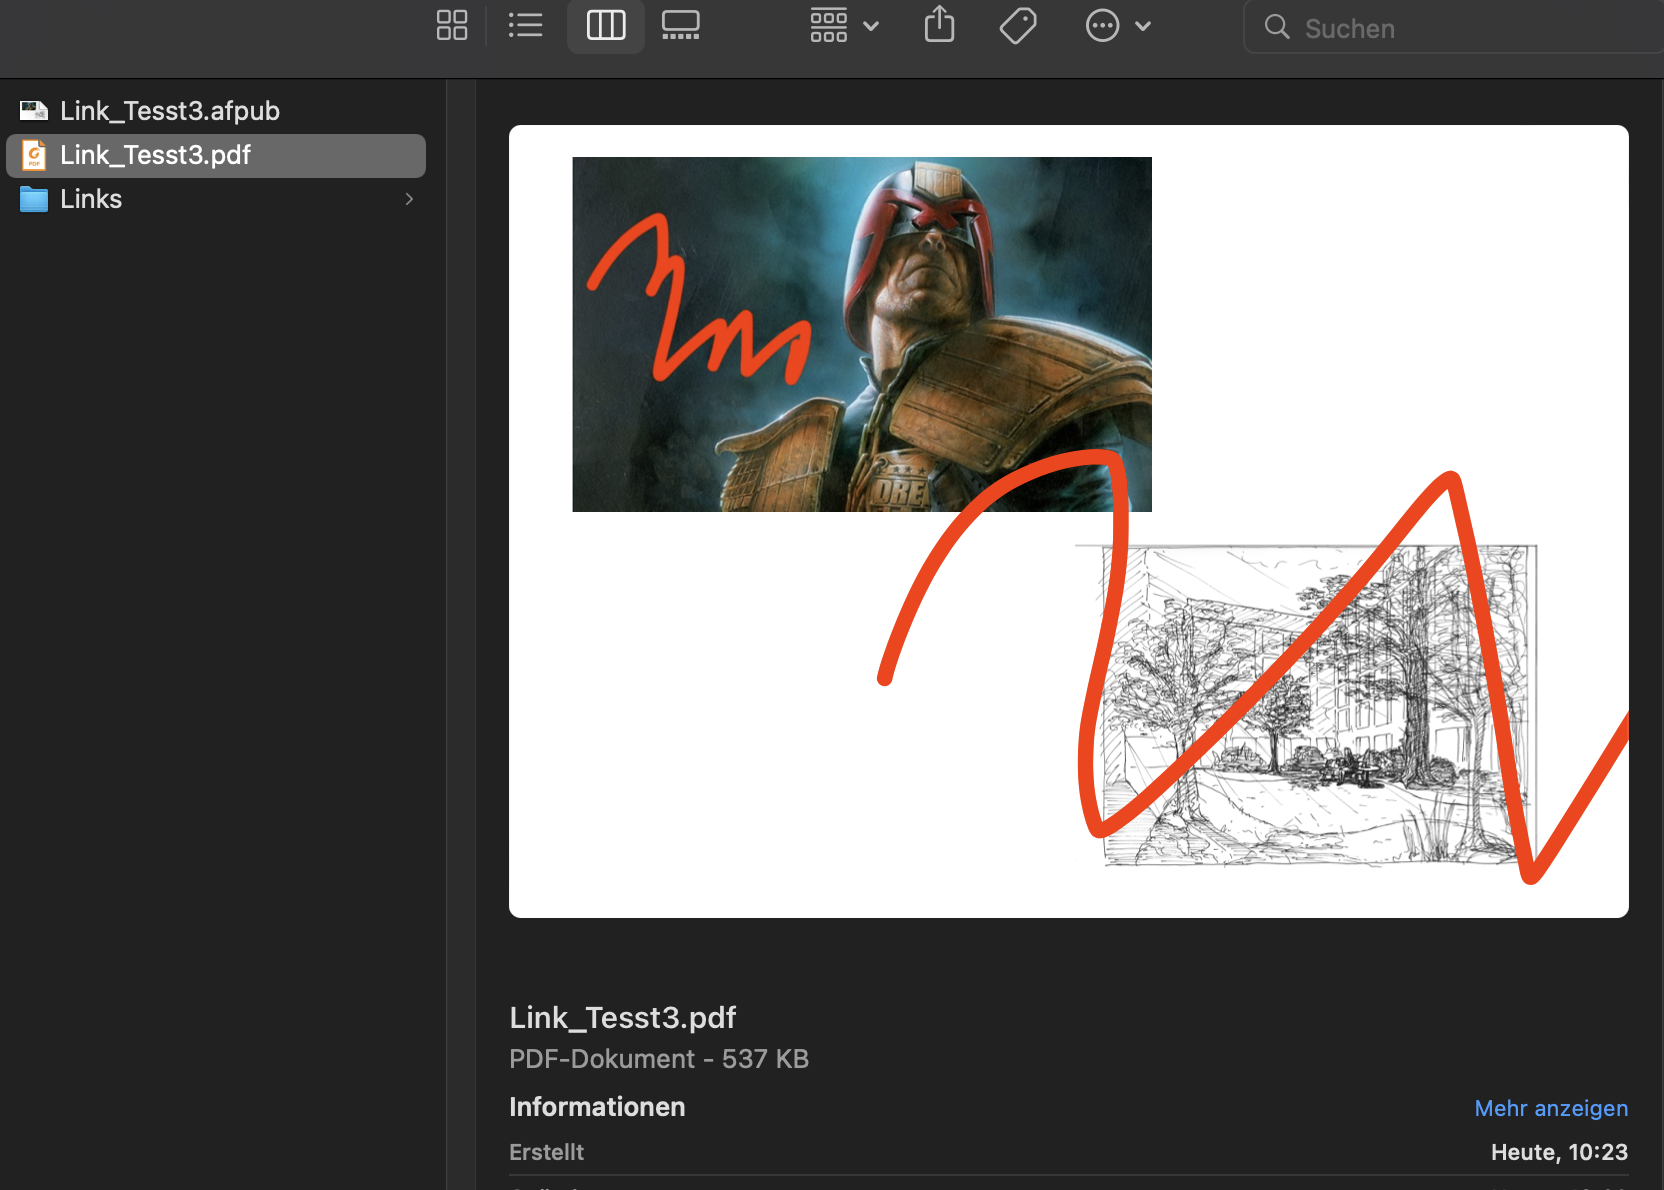
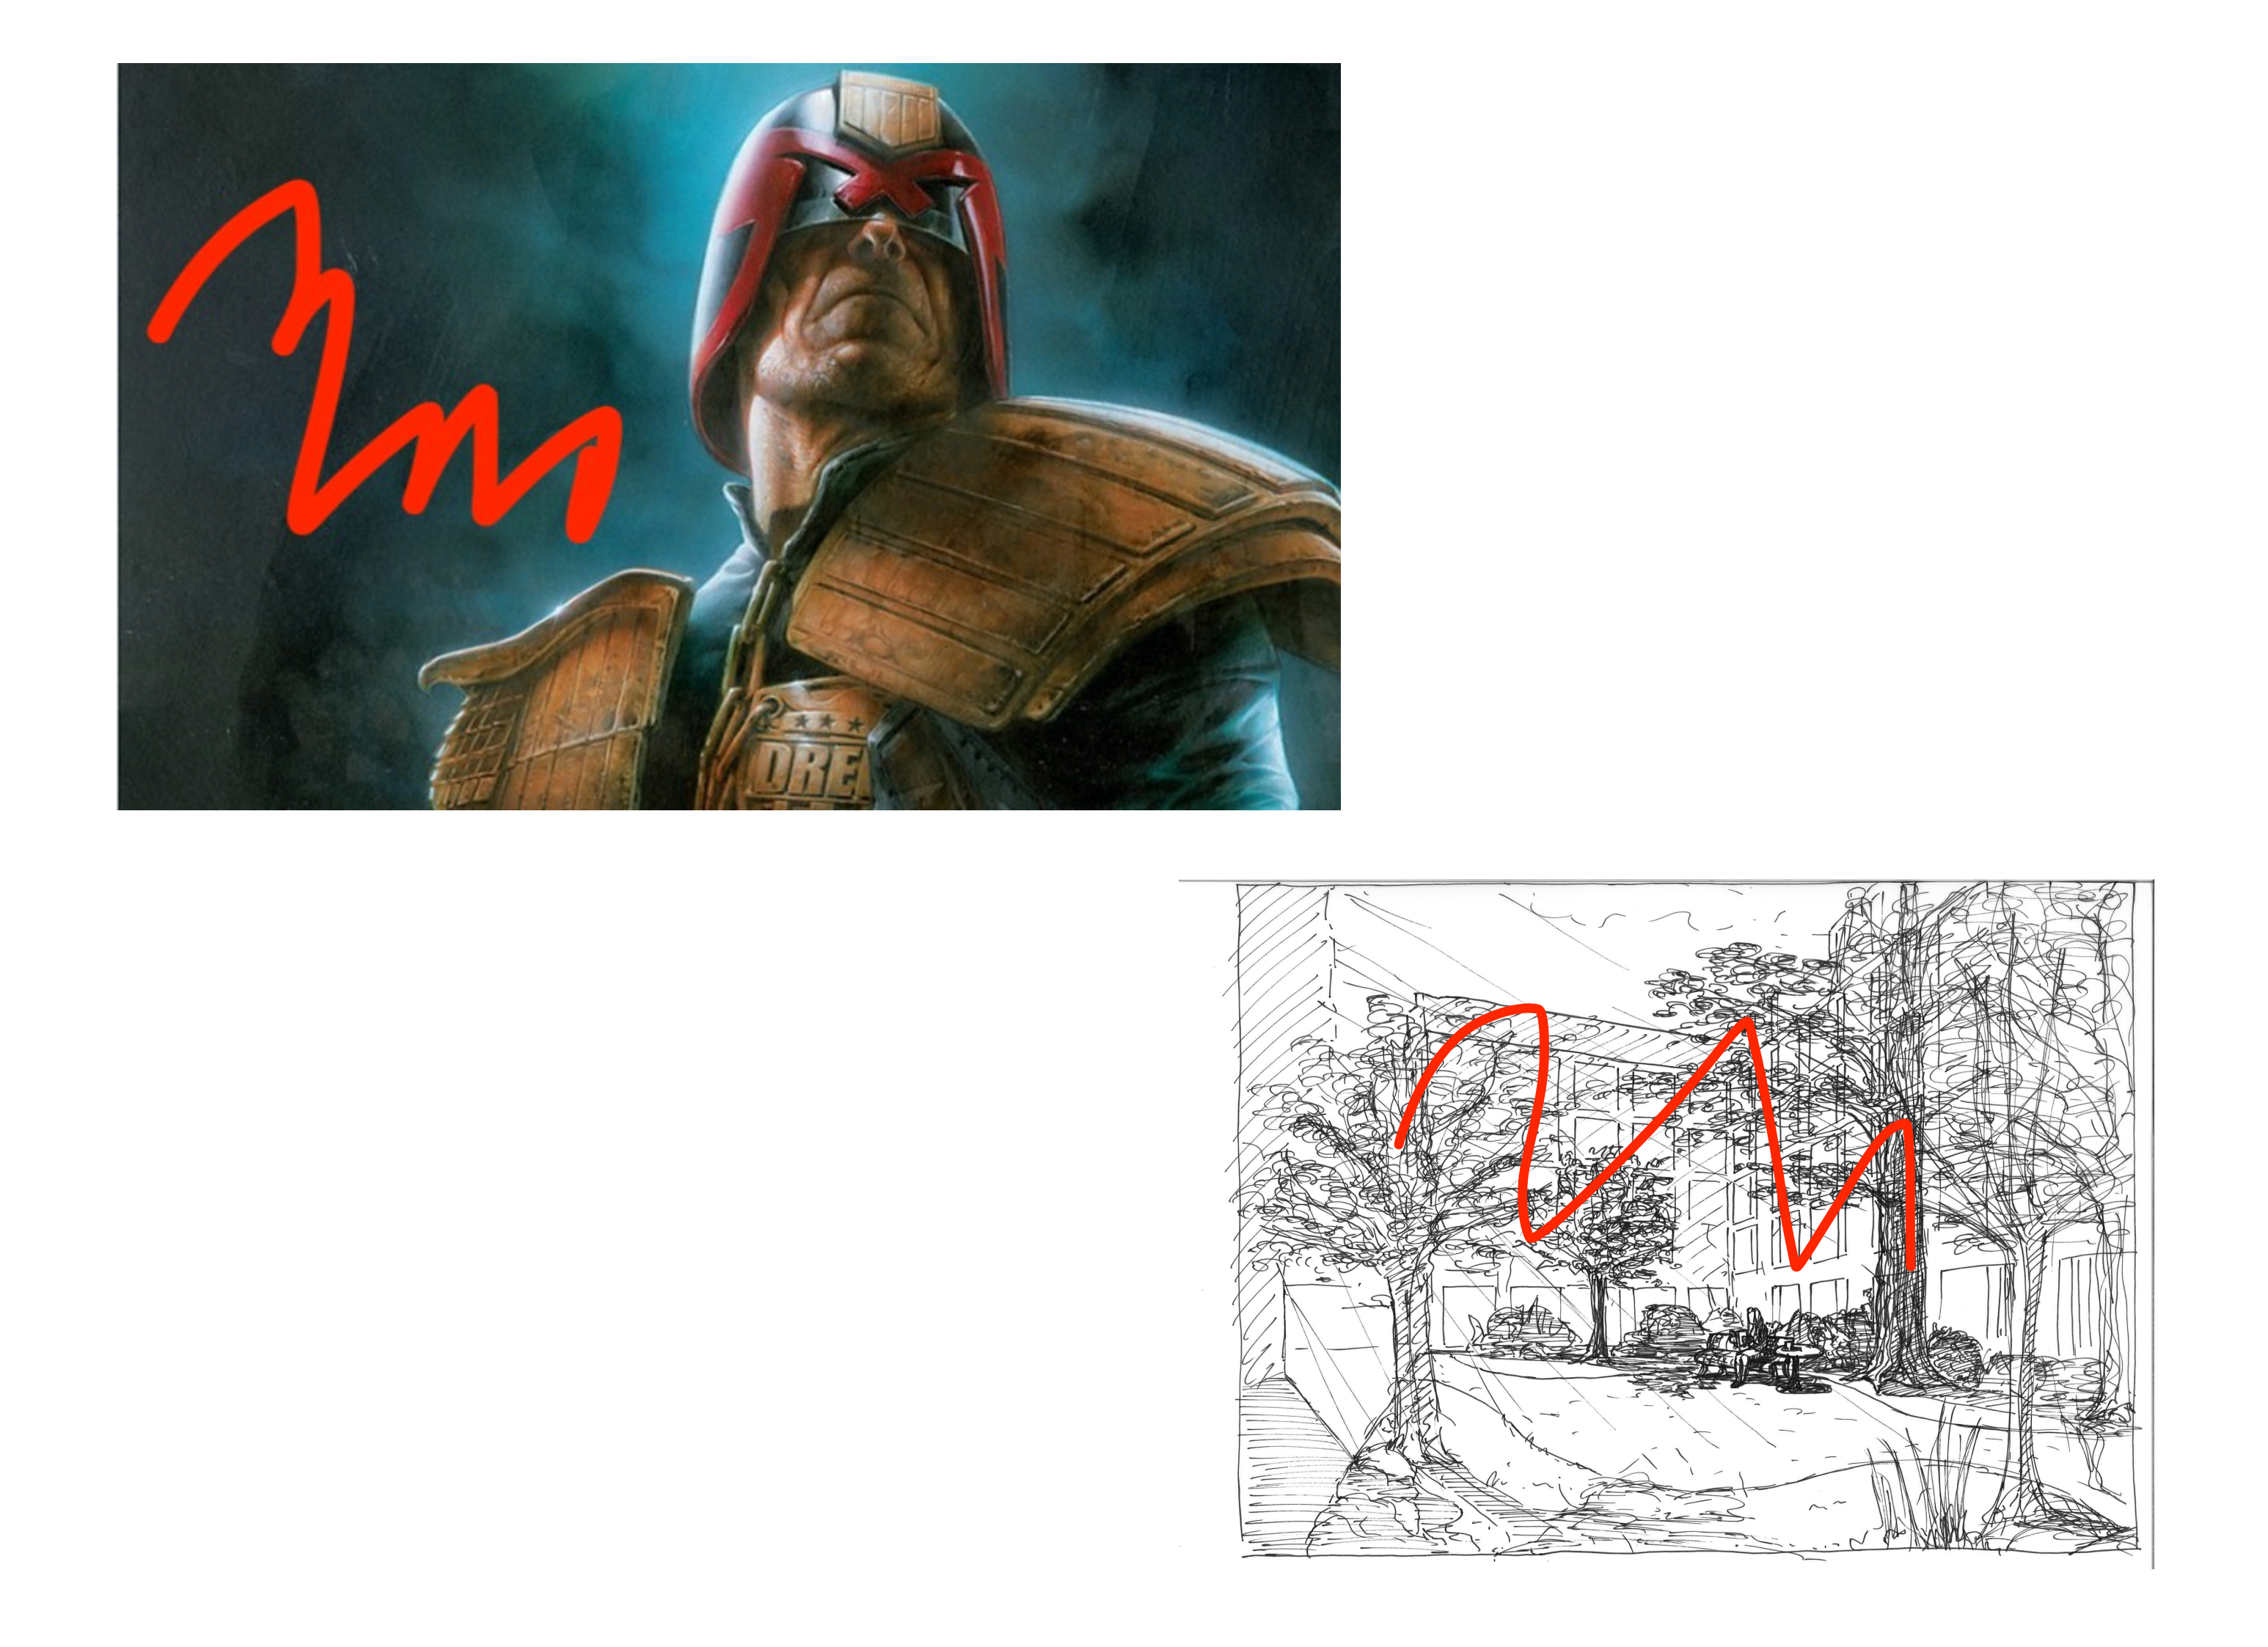
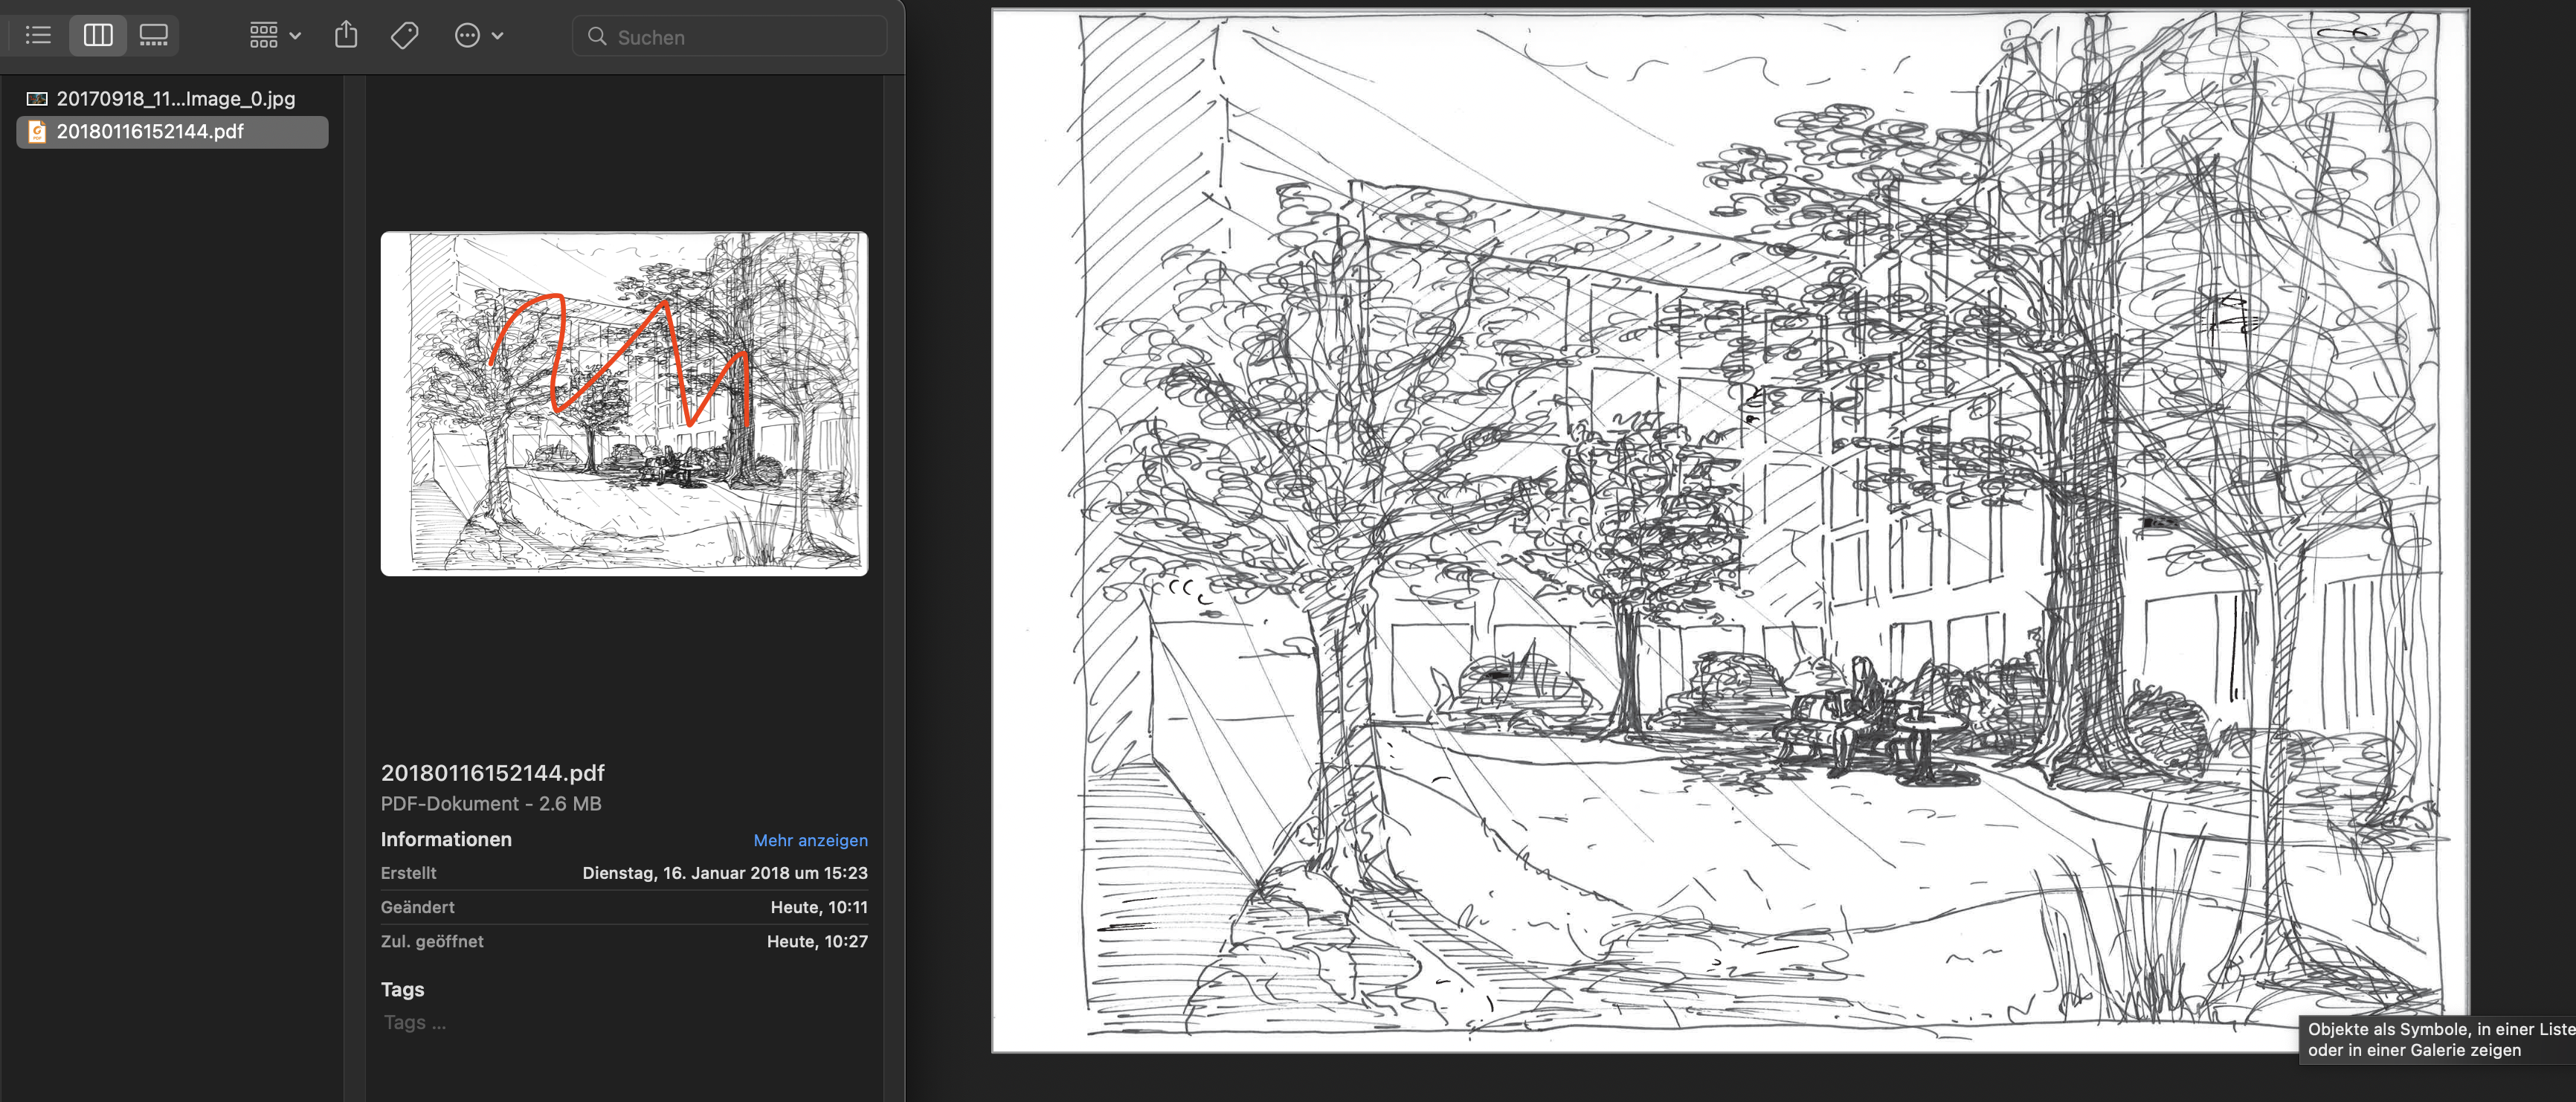
 Hello, this is what happens: - I create a local Publisher-File. - I drag/drop a .jpg and a .pdf file into it and put them on "linked" - I open the .jpg file in Preview and draw something on it and save it - Changes appear immediately in the publisher file - I do the same with the .pdf - No changes appear in the publisher file Further notes: If I export the publisher file as PDFs both changes appear in the exported pdf, however the Finder preview of said pdf looks a bit odd. If I open the changed PDF in Publisher it also does not show the changes I made in preview. It also does not work If I make changes in Adobe Reader. If I open the PDF in Publisher and change something and export it as pdf and overwrite the old one, changes are there, but the old ones are gone System: Mac OS Monterey 12.7.3, Macbook Pro M1 2021, Publisher Version 2.4 Thoughts: I think it seems to be a problem with the way these changes are made in Preview and Adobe Reader. Even worse, if I add some Text in Preview, the file becomes completely unreadable for Publisher, giving me an error. If I re-import it via drag and drop, it is there but without the Scribbles and Text.
-
 So I have a project I just finished that was a live document. I kid you not, as I’m clicking to go hit save or export or something to make a hard copy… the program glitches, crashes. I go back in to reopen the file, but it instead duplicated 3 project folders somehow… there is a thumbnail of the file inside but no live document to open (it says 0) so I can’t save it from the dashboard. I assumed there would be some temp folder for the cached files I could scrounge for and reopen the last instance, but I can’t find one and don’t see any mention of one. Is it hidden in system folders? I am so frustrated. In other programs, this would be the natural troubleshooting but not here… is there some way to restore a file from cache or did I just lose a lot of work because the file corrupted/disappeared? I have my files stored in the iPad, not syncing to a cloud. edit; I can rename the folder, which renames all 3. I tried updating, restarting the app and iPad.
-
I like the "Displace-Filter" very much, have it used for painterly effects like this.
-
 Windows 10 Pro x64 Affinity Photo 2.2.0 To be clear at the start, I am not asking for: Instructions on tools, or changes to tools. Instructions on hotkeys, or changes to hotkeys. Instructions on changing cursors, or any new cursors. Instructions on changing macros, or any new macros. Here is a very simple example of what I would like to see happen: Open an image file. Type CTRL-A. The entire image is now selected. (Yes, there are easier ways to see the dimensions of an entire image. But this is the simplest example I could think of.) What are the dimensions of what I have selected? I would like to see this information on my screen, preferably in the Info box. I would not like to have to click additional tools or keyboard combinations in order to see it. I would like it to be displayed in the Info box at all times (if something is selected, of course). Whether the selection has been made with a keyboard shortcut, or a lasso, or a magic wand, or a color-range-select -- none of that should matter. If a region(s) is selected, I would like to see the height and width of what is currently selected displayed in the Info box. I hope I am being clear, but if you have any questions about what I mean, do please ask me. Please be as specific as you can about what I have been unclear about. Thank you. P.S. See also:
 -
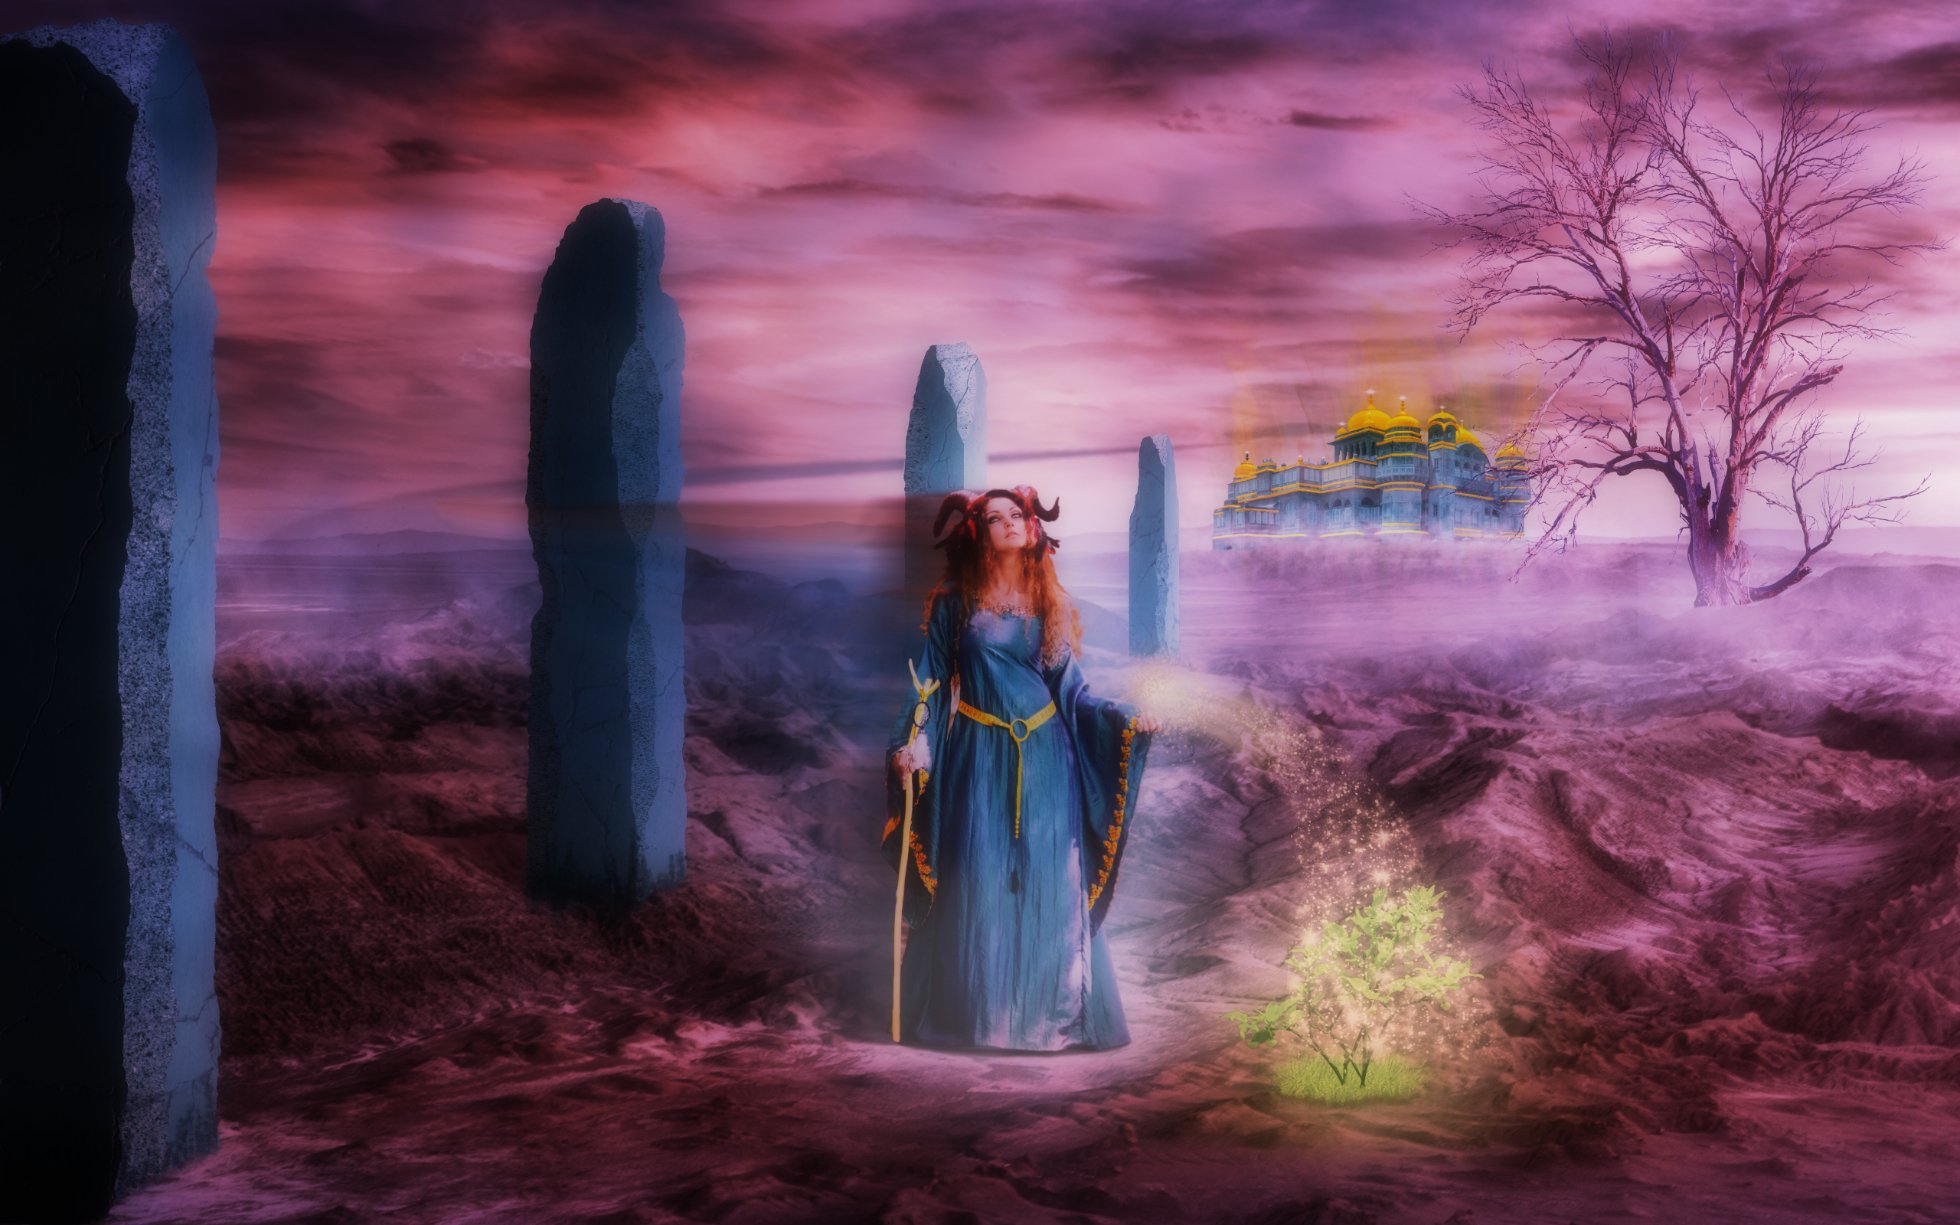
All photo's sourced at Unsplash. Ancient pillars created using shapes and textures. Colour scheme courtesy of my brain.
-
 So I'm finally making the switch from a windows laptop to a MacBook, and I wanna make sure that I get something that's both in my price range, and also runs affinity well. But that being said, there's a lot out there. If you use affinity on a MacBook, what have your experiences been? What year/model are your MacBooks? Are there any MacBooks I should stay away from? Affinity is by far the biggest consuming product I will use on the laptop, so that's why I'm here first. I've been told MacBook pros are the way to go, but I don't know much more than that, and my only mac experience has been an iPad pro and my 2016 imac all in one dinosaur, which barely runs affinity at this point.
 -
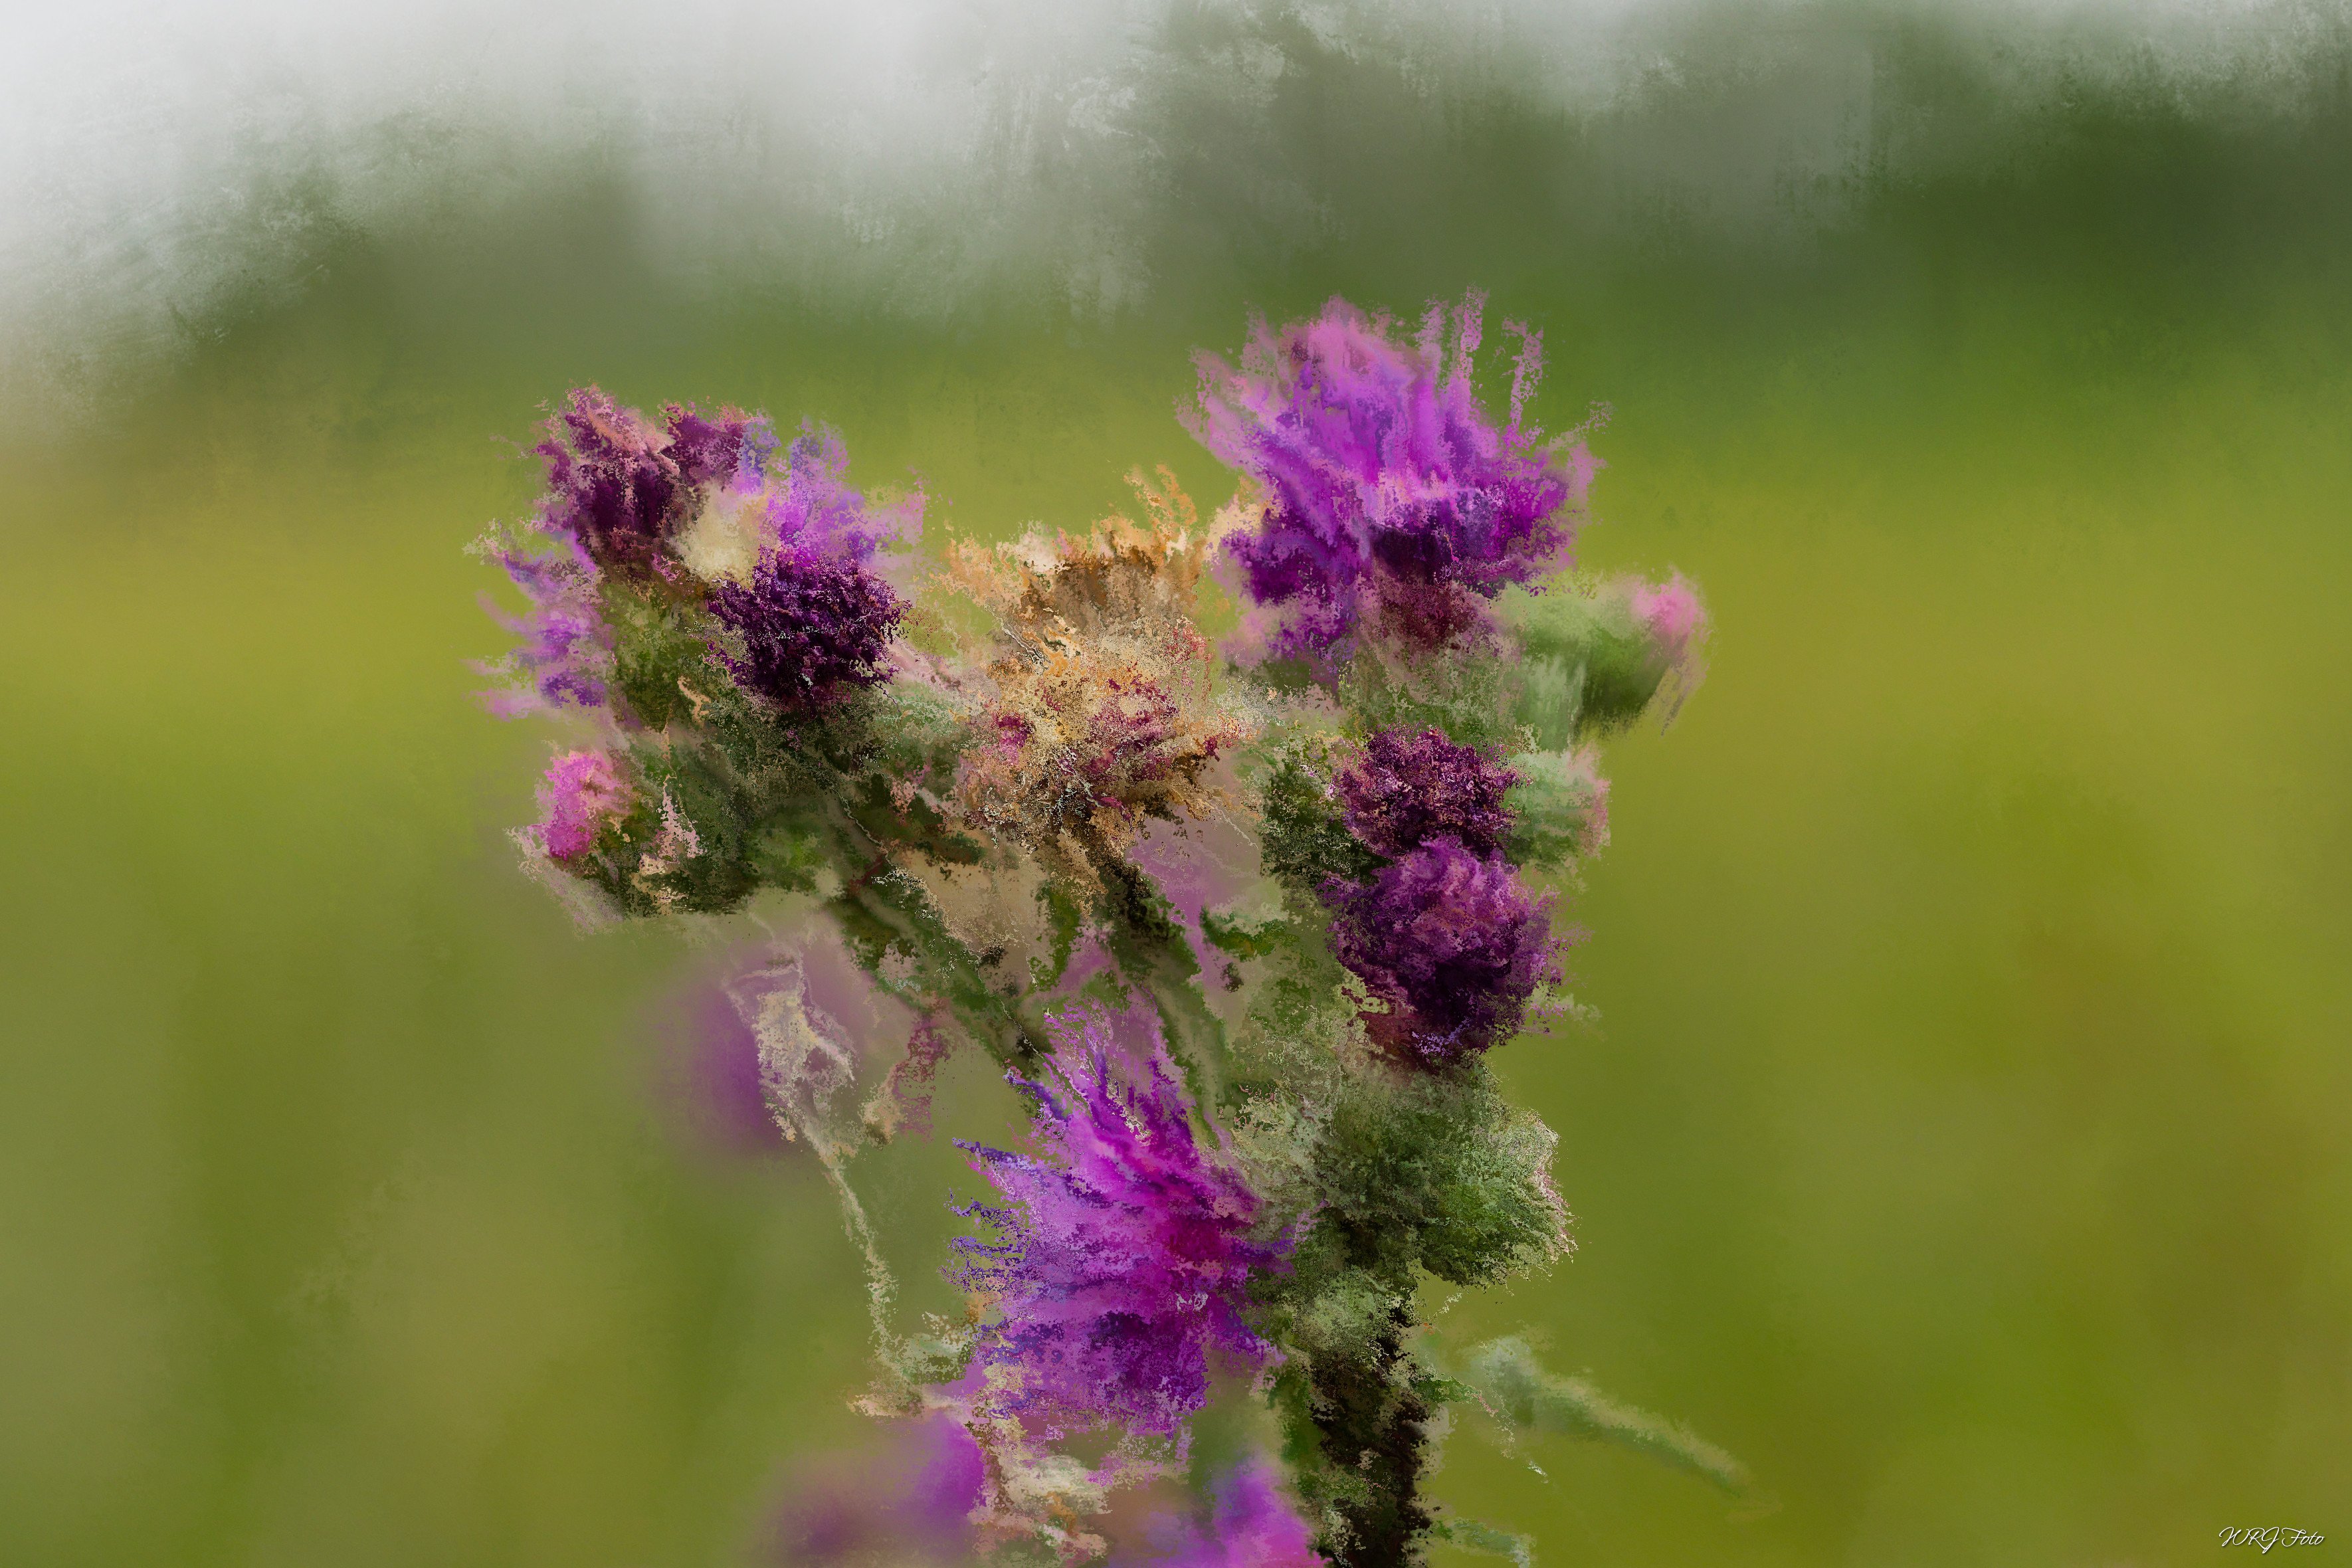
If a screw is loose, life has a bit of play. Playing with paper strukture and dissolve filter ... Paper from Pixabay
-
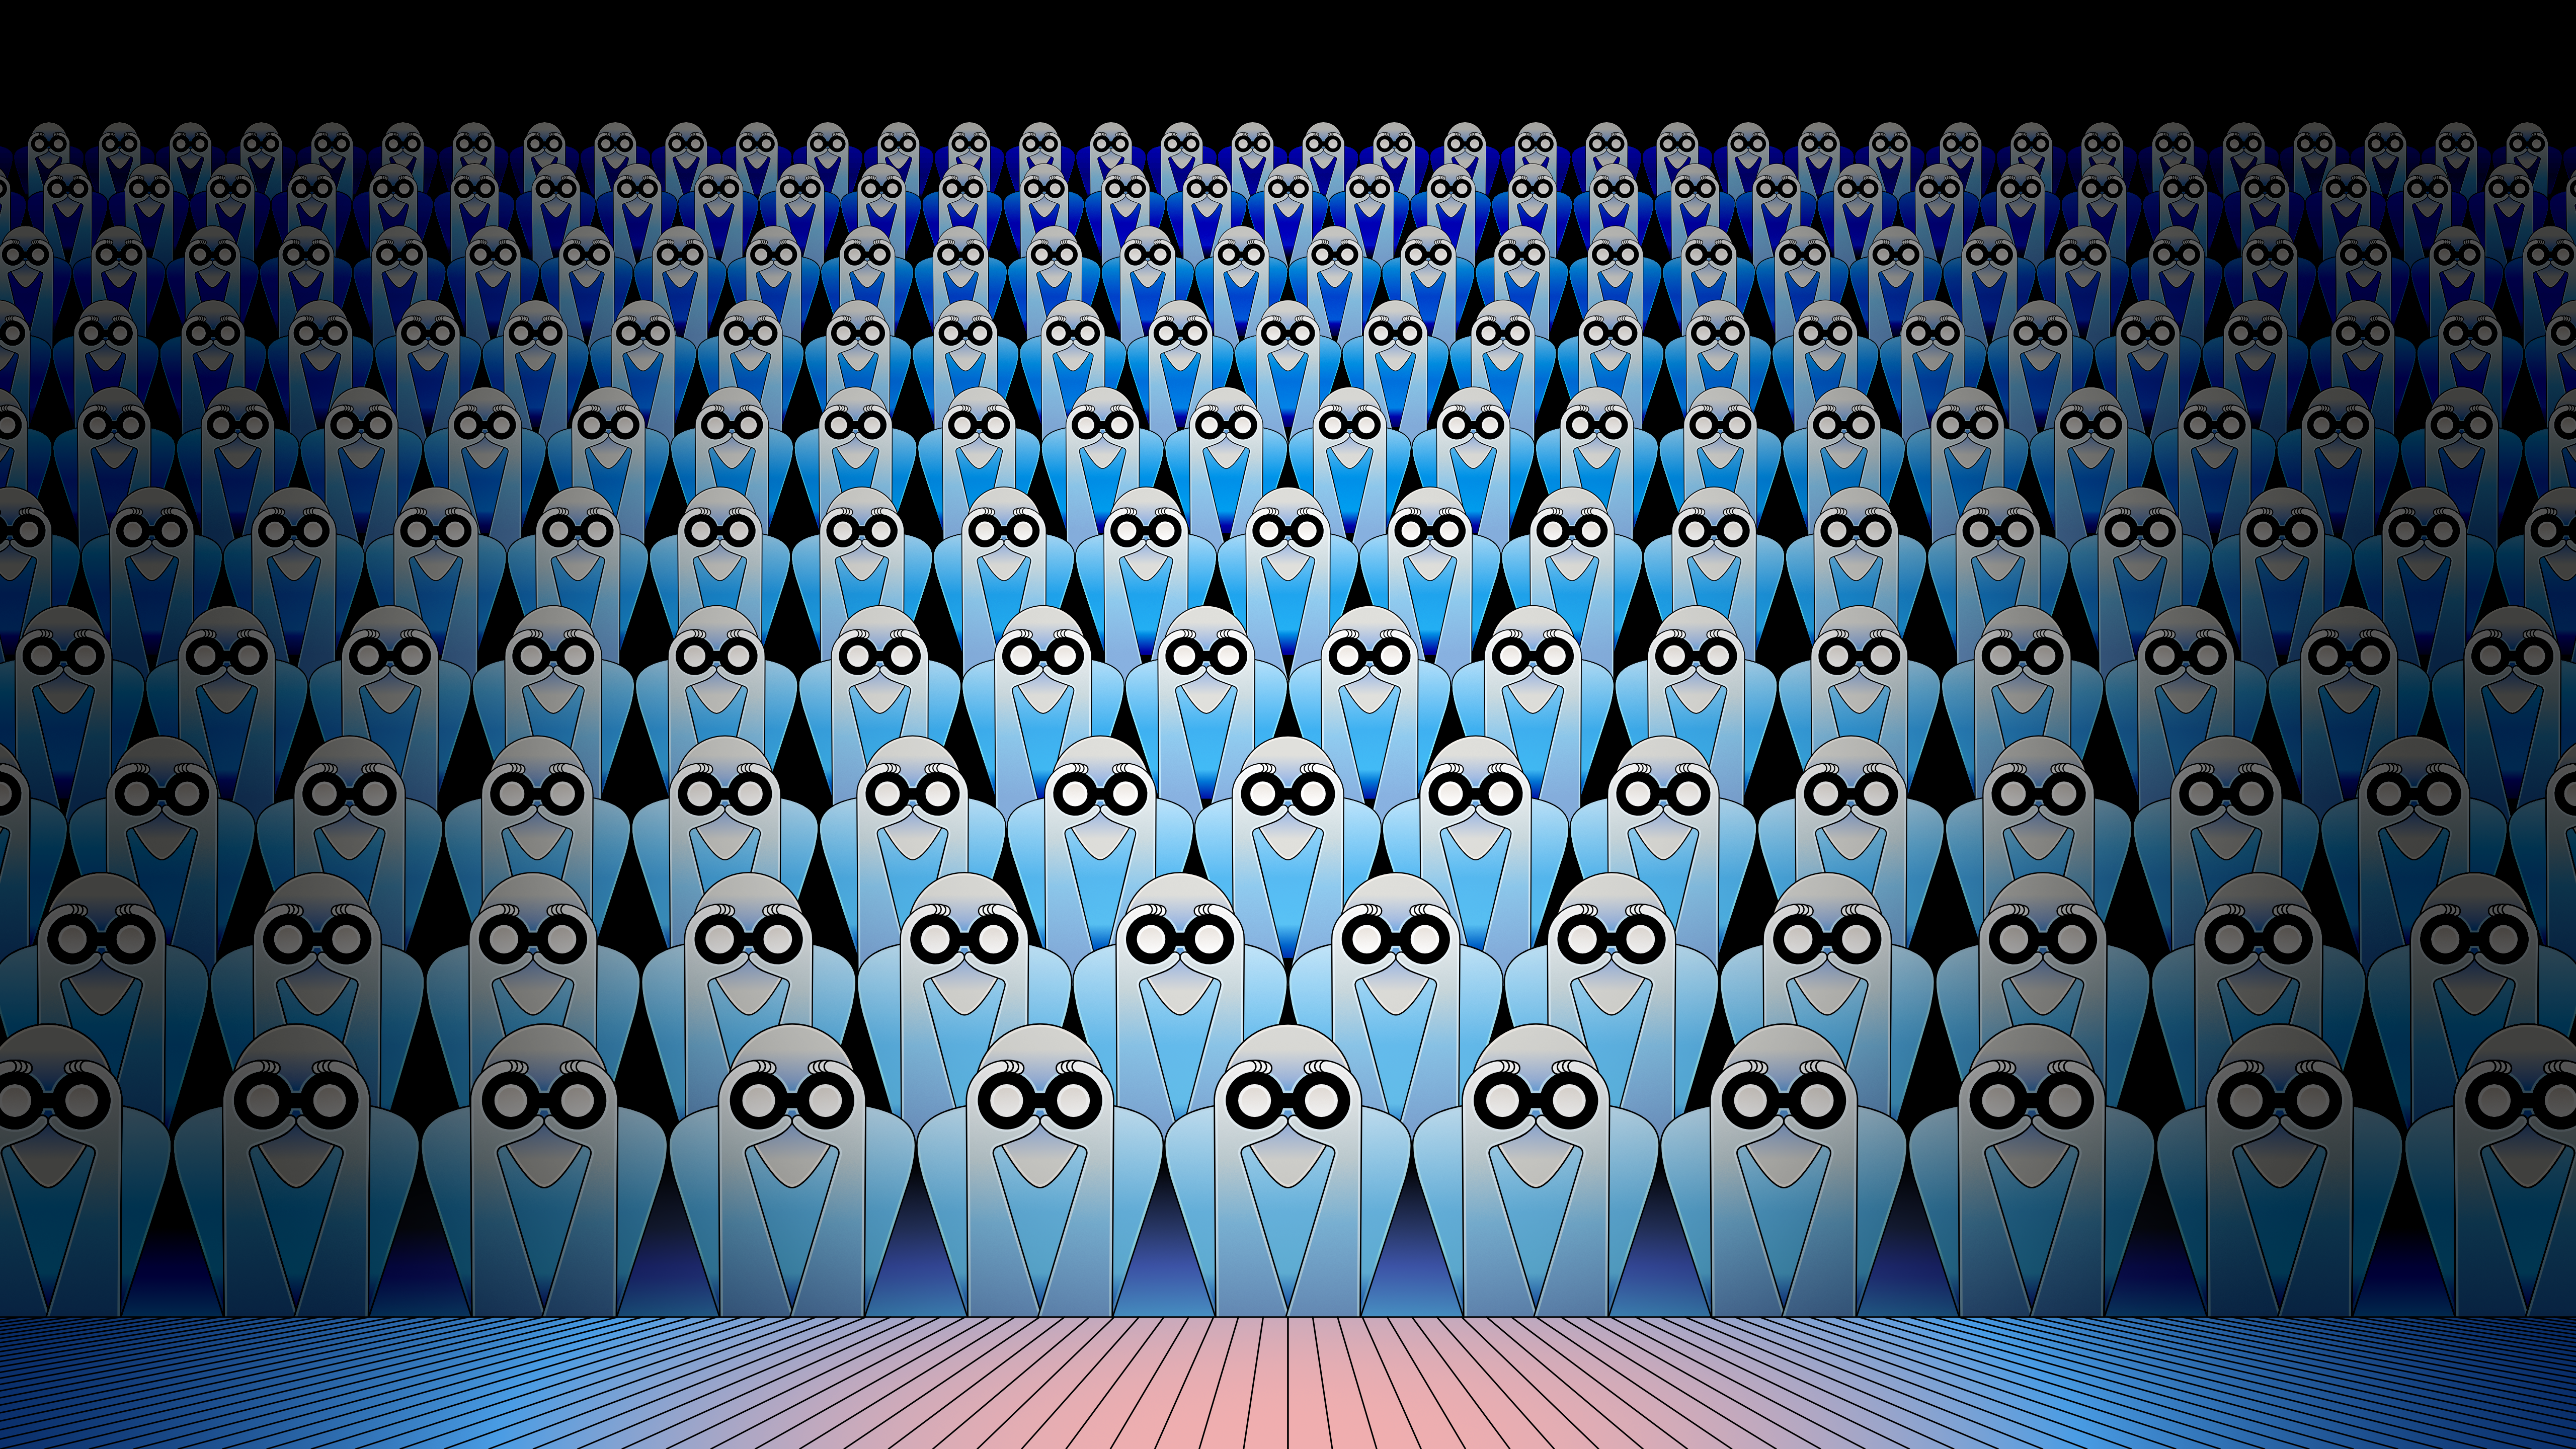
 In this Affinity Photo Tutorial I show how to use abstract motion blur artistically. Technically, this is not motion blur, but rather zoom blur, because a vanishing point must be observed. I'll first show how to apply the zoom blur to just the train. Then I'll show how you can do it exactly the other way around. This requires some preparation, such as determining the vanishing point, creating a selection, and of course, understanding the difference between motion blur and zoom blur. Of course, you can apply the effect to anything that moves: a car, a dog, a projectile. I wish you much fun. Ciao Jack
-
- 2
-
-
- affinity photo
- tutorial
- (and 6 more)
-
 Currently when resizing a selection, the selection resamples the nearest neighbor outside the selection. The result is that a resized image that has edged that have been feathered or blended into a gradient due to the algorithm used to resample when stretching the image. I'd like to suggest that the move tool gains an option to select the type of sampling algorithm used, with one option be none, to permit the creation of variegated flood filled rectangle based upon selection without the feathering/blending effect or utilizing a different sampling algorithm. This feature would be applicable to Photo or Design where pixel selections can be selected and transformed. The need for this feature goes as far back as early V1 days - I've found numerous reports of this problem with no suitable solution implemented.
 -
Made in Affinity Photo as a Happy Birthday card.


.png.00ca21be0cfd27c97a9f14162f1611ea.png)
_DAP_Acry-Real.jpg.75be05a614afeae166f06e5c66f69c9c.jpg)