Search the Community
Showing results for tags 'shapes'.
-
Is there a hexagon tool? I can find pentagon, but I need a hexagon
-
 Pop Up Affinity Photo Tutorial This is a pop up photo manipulation, but I thought I would change it up by adding some floating graphics from the background. The tutorial uses shapes, geometry, blend ranges (blend-if) perspective and more. This Digitally Fearless Affinity Photo tutorial was requested by one of my subscribers. https://youtu.be/z1_drshbedo
-
 I can't even begin to explain how useful an Affinity alternative to the Quickshape (Procreate) or Snapline (Adobe) feature would be. 😊 The ability to draw a pixel line, circle, or rectangle by hand, and then hold the stylus/mouse down for a second for it to become a 'perfect' shape. It would be a total game changer and save so much time, especially for anyone using Affinity apps for illustration or digital artwork.
-
- 2
-

-
- shapes
- quickshape
- (and 7 more)
-
Can someone please check why this shape "combines" so horribly? Debug Doc Shapes.afdesign
-
I can't seem to be able to split text in Affinity Designer? From what I can gather it's only shapes that can be divided? Is there a way this can be achieved? I've attached an example that I had to call my boyfriend and ask him to do this on Adobe Illustrator for me as I couldn't achieve this design like I was hoping to on Affinity. Is there any sign that this could be a feature in the near future?
-
 I’m bummed I keep getting on here to ask for help with seemingly easy tasks lol, however the easy things are the ones I seem to have the most trouble with. All I wanna do is subtract the rope shape from the text underneath, so it’s like a cutout of the shape from the letters. I tried converting the text to curves and it wouldn’t let me use the subtract tool after that. Untitled.afdesign
-
 Back when I was using Photoshop I could import some pretty cool additional shapes so they would be quickly available. Is there anyway to import additional shapes into AD?
 -
 Hi Affinity community, I've had a look in the forums but nothing is showing(maybe it's how I'm terming it). Anyway, I have a canvas with a size of 798px *798px. I also have an image 798px * 798px positioned 0px & 0px. I also have a square/rectangle the same size 798px * 798px with 1px orange stroke on the inside positioned at 0px & 0px with no fill. However the square/rectangle does not fit on the canvas. It disappears 1px & 1px to the right and bottom(in this case). Is this an issue with me & my sizes or is it a bug. In the attached image in image 1 at top you can see the selected rectangle is at 0px 0px & is 798px and that the canvas is also 798px. In the bottom part of image (image 2) you can see the stroke disappears to the right & bottom. This is happening in both AD & AP. I have tried changing where the stroke sits on inside, center, outside many times. This has happened quite a few times in the past & tonight I thought I have to try & solve it before it does my head in(that may be too late). I've noticed this happening with images as well, that they sometimes they don't fill the canvas properly. Any help appreciated.
-
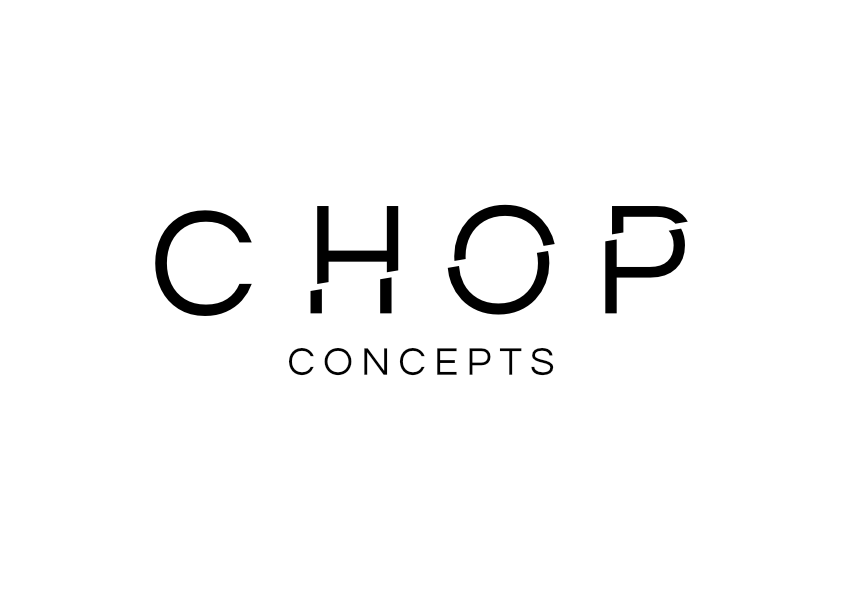
 I'm trying to "cut out" one shape from another using subtraction. In this case, I want to cut out the "Heinz" text from the background black shape. This only works whe the top shape (the Heinz text) is partially outside of of the bottom shape (you'll see me try this first in the GIF below). When the top shape (Heinz) is completely within the bottom shape, the subtraction doesn't work. Why is this?
 -
 Hi! When I'm working on UI, I want to quickly copy and paste or replace selected nodes inside the same shape or another shape. I know I can do it with a compound object but it's a long process when you just want to isolate a group of nodes and turn them into a new curves path or paste/replace on another.
 -
 Hello, I have a question about the using the grid and shapes. After I draw shapes with the three sides -"front side and top" I want to make adjustments to the grid axes with the shapes remaining locked to the grid so that the perspective of the shape also changes. I can adjust an axis after drawing shapes but the shapes drawn will not move with the axis. By thinking carefully and setting the axis I want beforehand, the need to change any axis would be diminished. But I'm wondering if it is possible to lock objects to the 3 isometric planes after they have been drawn so that they will follow and conform to adjustments of any of the 3 axes afterwords? If so how do we do this?" ps, If it's not possible, might this be in the works? Thanks
 -
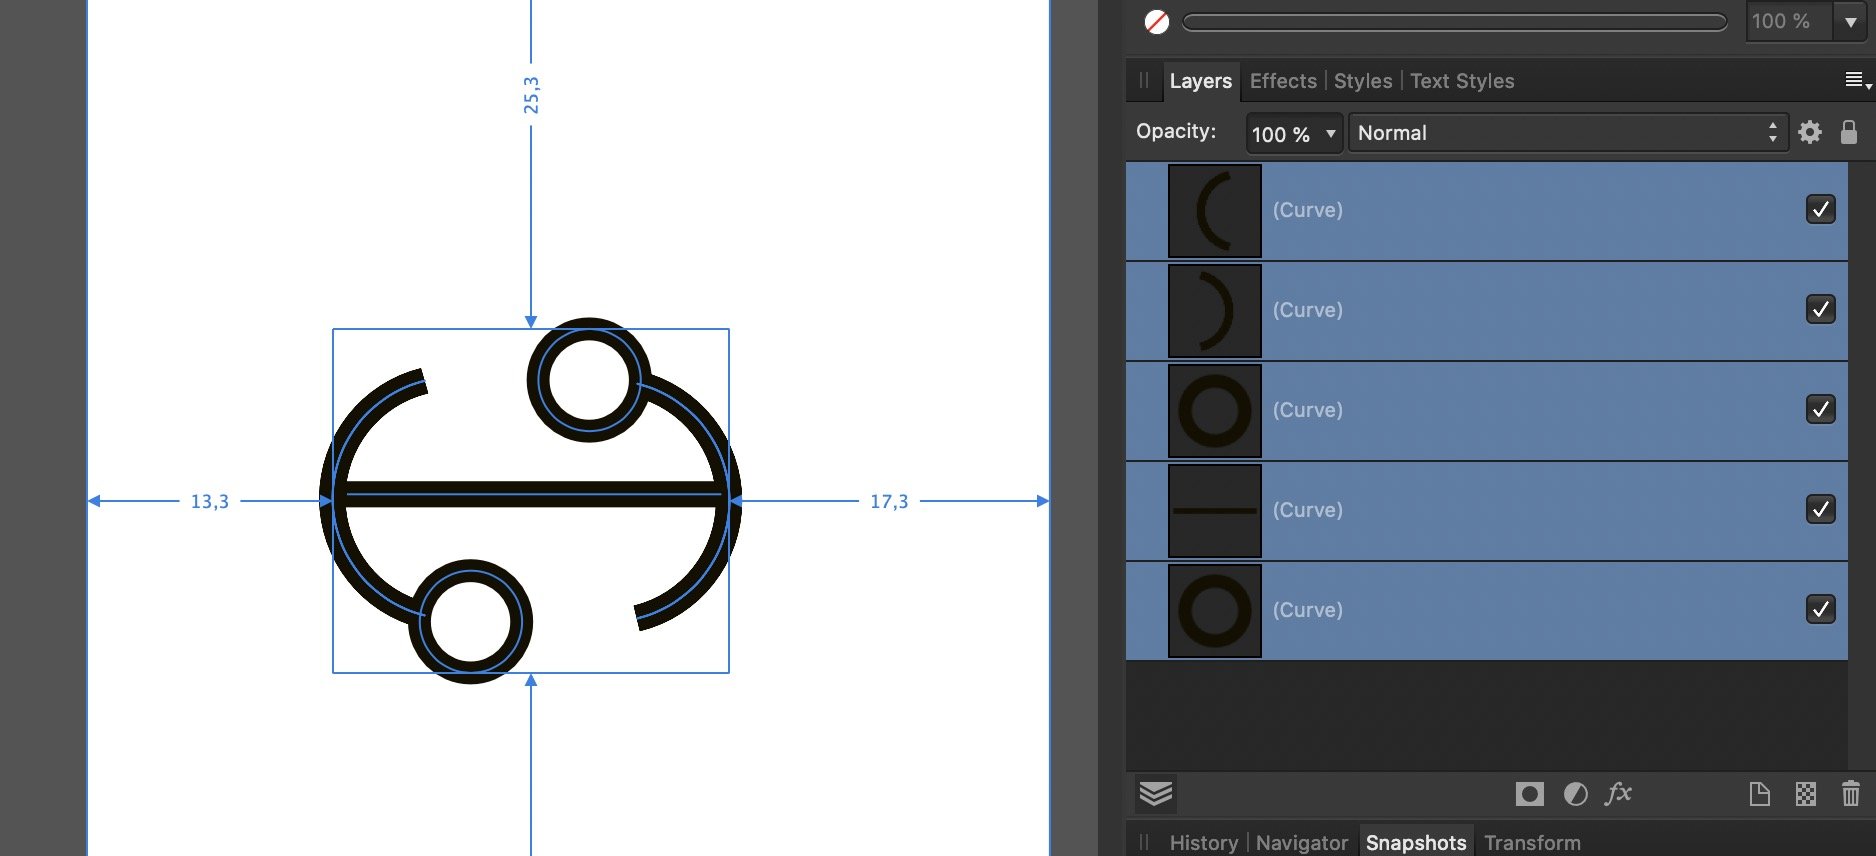
 Hey folks, I'm just wondering what' the difference between the two options in the Layer → Geometry menu. At first glance they both seem to have the same function – maybe someone can enlighten me? 💡 Cheers and … wash your hands MrDoodlezz 😄
 -
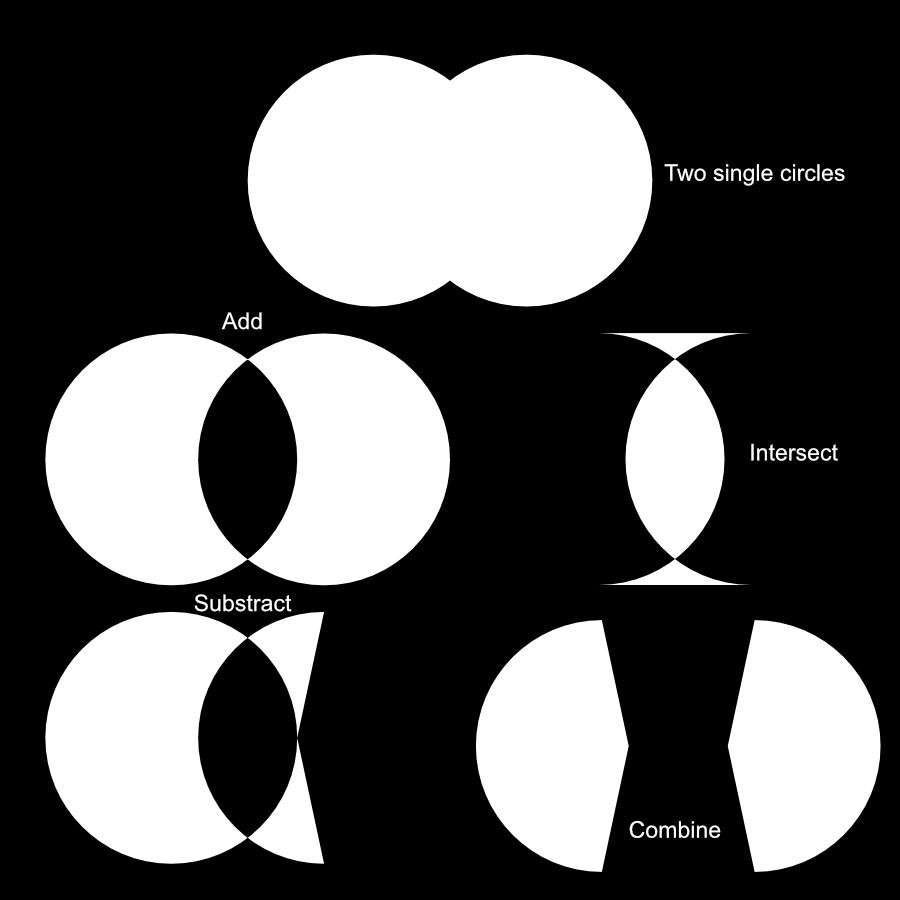
Hi In 1.8.3 i tried to do some boolean operations over two single circles (Tried both as editable shape and converted to curves) The results are… pretty absurd. This is super basic boolean. I've attached the example file. Steps: 1 - do a single circle with circle shape tool. • 2 - duplicate with Alt-drag • 3 - Do a boolean operation and wonder about the mysteries of life. Is super weird. EDIT: ADDED INFO: I've been unable to repeat the error. It seems to only happen to the shapes currently in the example file. as soon as I create a new shape, it works well again, except with the existing circles. You can try to duplicate and perform boolean. It seems that the original circle has something incorrect in it, but can't tell you what is it. It was made directly as a simple circle and duplicated. I hope you could find some mischievous glitch on it. boolean-nuts.afdesign
-
 Recently I checked a topic regarding same issue on this forum, but it's for a desktop version, I tried to do same recommendations from Erica (https://forum.affinity.serif.com/index.php?/topic/106098-export-from-ad-to-ai-converts-lines-to-shapes-all-settings-correct-nothing-works/&tab=comments#comment-573567) to apply on ipad version, but nothing works. I need to keep strokes attributes because I have to work with this file in AE. I'm new in AD and I'm testing if AD works better to work a vector illustration on ipad (I've been using vectornator, pretty good but with limitations).
 -
 Hello - this is embarrassingly simple, but I'm new to affinity and have spent hours trawling the net to find an example of how to do it. I have a circle on the page and I want to manually colour it in with a brush - but I want to separate it from the background so that when I use the brush tool on the circle, the colour does not go outside of the edges of the circle. What's the approach for this? Does it need a layer mask? Big thanks!
 -
Hey guys, Check this out. AF tried to combine these two shapes with only 4 nodes, removing the one at the bottom and making the new shape round. Edit: I've tried combining the rectangle with a triangle and it's worked fine.
-
Macro record. Draw shape (picks up current fill). Try to change fill colour. Flashes of hope then frustration of being pulled back to original colour.
-
 OK. I give up. How to create a rectangle shape on a layer; actually, 3 different layers with a different colored rectangle on each layer. I've tried to add pixel layer then choose the Rectangle Tool. (1) 1st problem is that the rectangle doesn't want to stop blinking even after I press Enter. (2) Then if I manage to get 2 layers each with a different colored rectangle, Affinity won't let me add a 3rd layer directly above the 2nd It creates 3rd layer but inserts blank Pixel Layer between 2nd & 3rd. Wanted my Affinity screen to look like the one in my attachment so could follow along. Rectangle Layers.docx
 -
I know it's picky but it would seem to make sense for PC/Mac/iPad to harmonise where it is feasible (understanding the different interfaces, of course). I'm an old coder and quality engineer and sometimes unnecessary little things just get to me. I have PC and iPad versions and here are just a few of the niggles in the shape menu: Sequence is different, top to bottom. Sequence is illogical on iPad (more sensible on PC), eg. with the infrequently used square star near the top. Double star is missing from iPad. PC spelling is Donut but iPad is Doughnut (I'm in the UK, btw). Hopefully not too difficult to sort out in a future release. It would make an old moaner very happy.
-
 Hello. I am working on a large file which contains many shapes which share their borders. Only the outline will be printed (there is no fill to any of the shapes). It is very important that two shapes sharing path overlap precisely otherwise printed stroke will not have the same thickness/shape. How can I shape the path of two elements at the same time (so the path stays overlapping)? I know I could break the path of one shape, remove overlapping piece and only modify the remaining path of the second shape. This however takes many steps to accomplish (not a problem for a small piece but could take ages with large files; imagine jigsaw puzzles cut pattern"). How can I somehow "glue" both shapes and modify mutual path with simple drag method typical for single paths? Thank you in advance for your help! Best regards, Marcin
-
 So I tried making a shuriken. For that, I wanted (at first) to make a triangle and cut out a bit of that in the middle. I made a quite simple shape, wanted to duplicate that, flip it horizontally and then combine those. But there remains a seam, no matter how I snap the two together. Someone on an unofficial Affinity Discord Server (credits to gromofdoom) helped me out by saying the snapping was never really working in this software and I need to overlap the two halves, combine them and then delete the unneeded nodes. Why does Affinity make such a simple task this painful? That's a pretty difficult workflow for something that wants to be an Adobe alternative. Or am I blind and there's actually a better way to do that? I attached my project file (with extended history in it!) so you can see what I did (there's much stuff I did which didn't make any sense, lol). shuriken.afdesign
 -
Trying to add these two shapes into one shape, not sure what’s going on. Would like as few nodes as possible. IMG_5075.MP4
-
On designer v1.7.2 I have noticed when opening eps files, the shapes are opening incorrectly (seems to open smaller). The illustration looks like there is a stroke around the shapes. In previous versions of designer, I did not see this issue. Please see template example. Shirttestfile.afdesign
-
 So I am trying to create images that I can use as assets, not as a layer asset but as a vector image asset. But I am unable to do this. If I in Designer export to say svg or eps I get them as embeded document, and then I cannot save it as an asset. I have tried searching for this and seen many videos, but it seems I am not sure what the correct search is for this problem. I have tried creating all objects so they all become "curves" but that does not seem to help. And I do not want to raster it as that does not make it vector. What is the correct way of saving this as an object/image that I can use as an asset later?
-
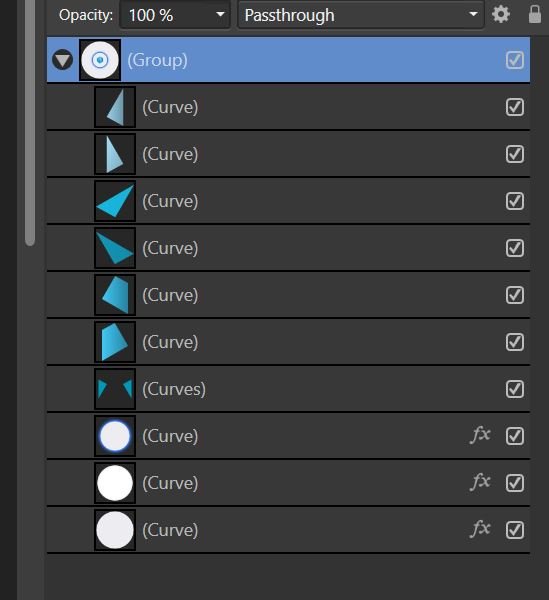
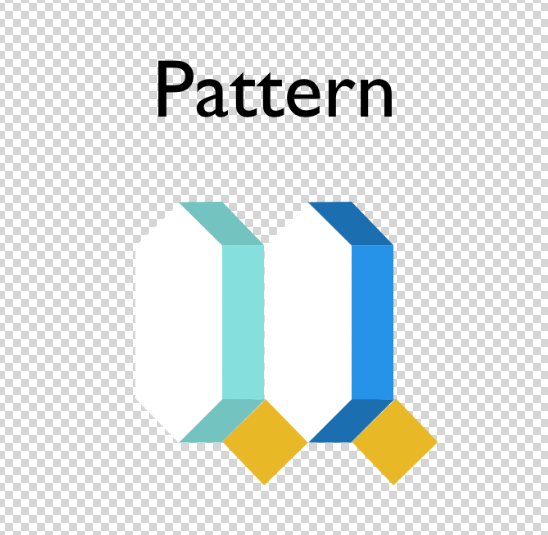
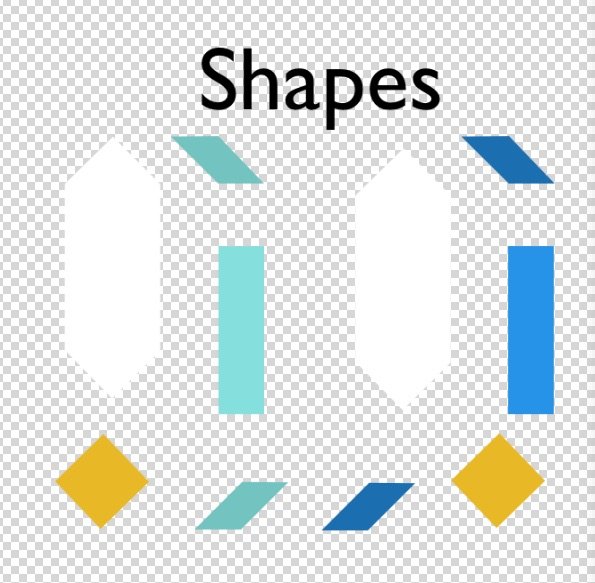
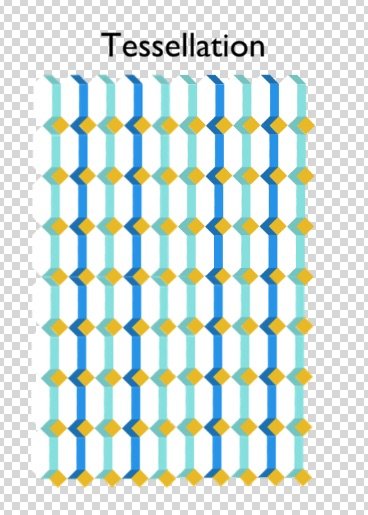
 I build Tessellations using Affinity Design in normal mode (not Isometric). To do this, I create Shapes, adjust their size + arrange them to build a Pattern: So that the Shapes snap within a Pattern and so that the Pattern when duplicated, snaps within a Tessellation (as demonstrated in the 3 images below) Below I describe my workflow followed by questions looking to make my process more efficient. WORKFLOW Step #1 - Find Shape Dimensions for Pattern To find the dimensions of the Shapes within the Pattern, I: Create the Shapes, then I Adjust the constrained size + Rotate + Move the Shapes so they snap to each other (this provides the necessary Shape dimensions to fit within the Pattern) Step #2 - Find Shape Dimensions for Tessellation as well The dimensions of the Shapes must snap within the Tessellation too - so I: Duplicate the same Pattern (from step #1) as many times necessary so the duplicates fully surround all sides of the Original single Pattern, then I Adjust the constrained size of the Shapes so that all shapes snap to each other within both the Pattern + Tessellation (this provides the Shape dimensions within the Tessellation) Step #3- Erase the erroneous, extra Shapes that don't fit within both the Pattern & Tessellation Once the Shape dimensions are final (they snap within both the Pattern and the Tessellation), I erase the erroneous, duplicate Patterns, keeping only the Pattern with the correct Shape dimensions that snap within both the Pattern and Tessellation. Step #4- Merge the Patterns into images rather than shapes (so document 's size don't hinder its agility) Once the erroneous Patterns are deleted, I: Duplicate the Pattern one time Hide the Original Pattern Merge the Duplicated Pattern Step #5- Create the Tessellation Duplicate the Merged Pattern enough times so it fills the entire canvas, creating a non-heavy tessellation QUESTIONS for: Steps #1 and #2, is there a more efficient workflow to adjusting the constrained shape sizes, rotating and moving them so one can learn if they fit into both the *Pattern* and *Tessellation* at once? (rather than having to go through both steps). Ideally, I'd create the Shapes & fill with their corresponding image as usual - but then Adjust, Rotate and Move the Shapes within the Pattern and Tessellation so they snap to eachother in one step. Also, this more efficient workflow would allow me to skip Step #3 that would have multiple erroneous shape sizes [How] can I use the isometric panel for this? Step #3, is there a different format or method I can use so that the repeated, individual Shapes and Patterns don't reduce the document's agility? Otherwise, when making modifications the document's large size hinders its speed. Also, if I don't merge the patterns into images, when returning to the document for any additional modifications, I can avoid having to re-create the tessellation. Thank you so much for any feedback or guidance.