Search the Community
Showing results for tags 'shape'.
-
 Is there or could be interesting to have the area of a shape or polygon automatically calculated in the ‘transform’ panel, together with the now existing position and size? thanx!
 -
 I'm finding shapes and the clumsily labelled "curves" features hard to use. Maybe Affinity is not allowed to implement Illustrator-like procedures, but the present arrangements are convoluted, confusing and to me, unreliable. Having discovered that shapes have to be converted to curves to edit them - then "break" them at a node (why?), I find I'm often unable to delete the node or part of the path I want to without losing more than I want or the whole object. Deselecting an object seems to automatically "select" another - can that be turned off? Zooming in/out with the Illustrator-like key combination doesn't seem to function if something is selected, which is inconvenient. I've found snapping works, but for me only randomly. As I'm migrating from Illustrator I'd love to see more illustrator-like processes if that is at all possible, and a quick look online suggests I'm not alone! I've not got far into Affinity yet so can't comment on much else at the present. And I recognise that some things will be different and I could be missing something obvious....
 -
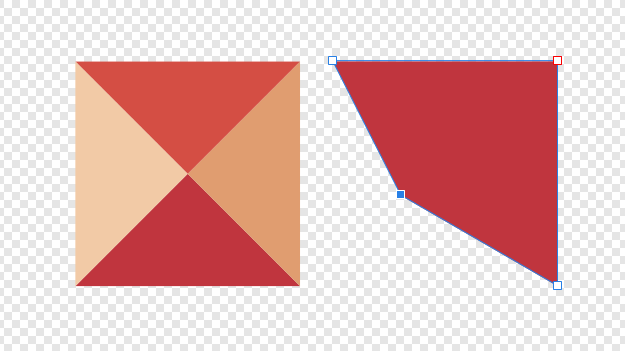
 Hello, i've created 4 triangles with different colors and grouped them (left object). Now i want to move the left lower corner, like i moved the node in the right object. The problem is, that i cant convert this group of triangles into one shape and therefore i cant select the "group node" (just the individual tirangles nodes). Is there a solution? Thank you very much! Fabian
-
 I seem to be going round in circles in trying to resolve this issue, so please help me if you can. I have an image that I want to crop at a diagonal (see attached image). It would seem that the Add/Subtract/etc. functions only work when it is two shapes that are being worked on, not a shape and an image - at least, when I try to do this, they are all greyed-out except for the Divide function (which doesn't appear to do anything). I have tried using a jpeg image, but have also converted that image to an eps and an svg, all with no luck. Am I doing something wrong, or asking AD to do something it can't - and, if that is the case, what can I do as an alternative? Is there a function in AP that would allow me to do this? I want to overlay the resulting, cropped, image onto an artist's impression. Any input would be much appreciated. Shape from image.afdesign
-
 Hi Good People Need help. I am totally new and just a beginner. I am learning (I want to learn how to use graphic software for my own). I have a butterfly. I want to take off 1/4 of wings (he has 4 wings - I need one to substract). This one - substracted I want to paste as a new site/page/layer. I was reading all day your suggestions but nothing happens to my butterfly. Please - step by step - show me how to cut out one wing and paste it on another "page" Will appreciate your help very much.
-
 I want to shape the bottom edge of an image. In CorelDraw I would convert a placed image to curves and use the node tool to pick each bottom corner and move up to give me a curved bottom edge. Doing the same in Designer doesn't work. Selecting the node tool allows no selection at all. Where have I gone wrong?
 -
 I am struggling to find the setting to remove the small crop icon on an image that is filled into a shape. The image is not visible as a second layer and the layer is ticked and not hidden
-
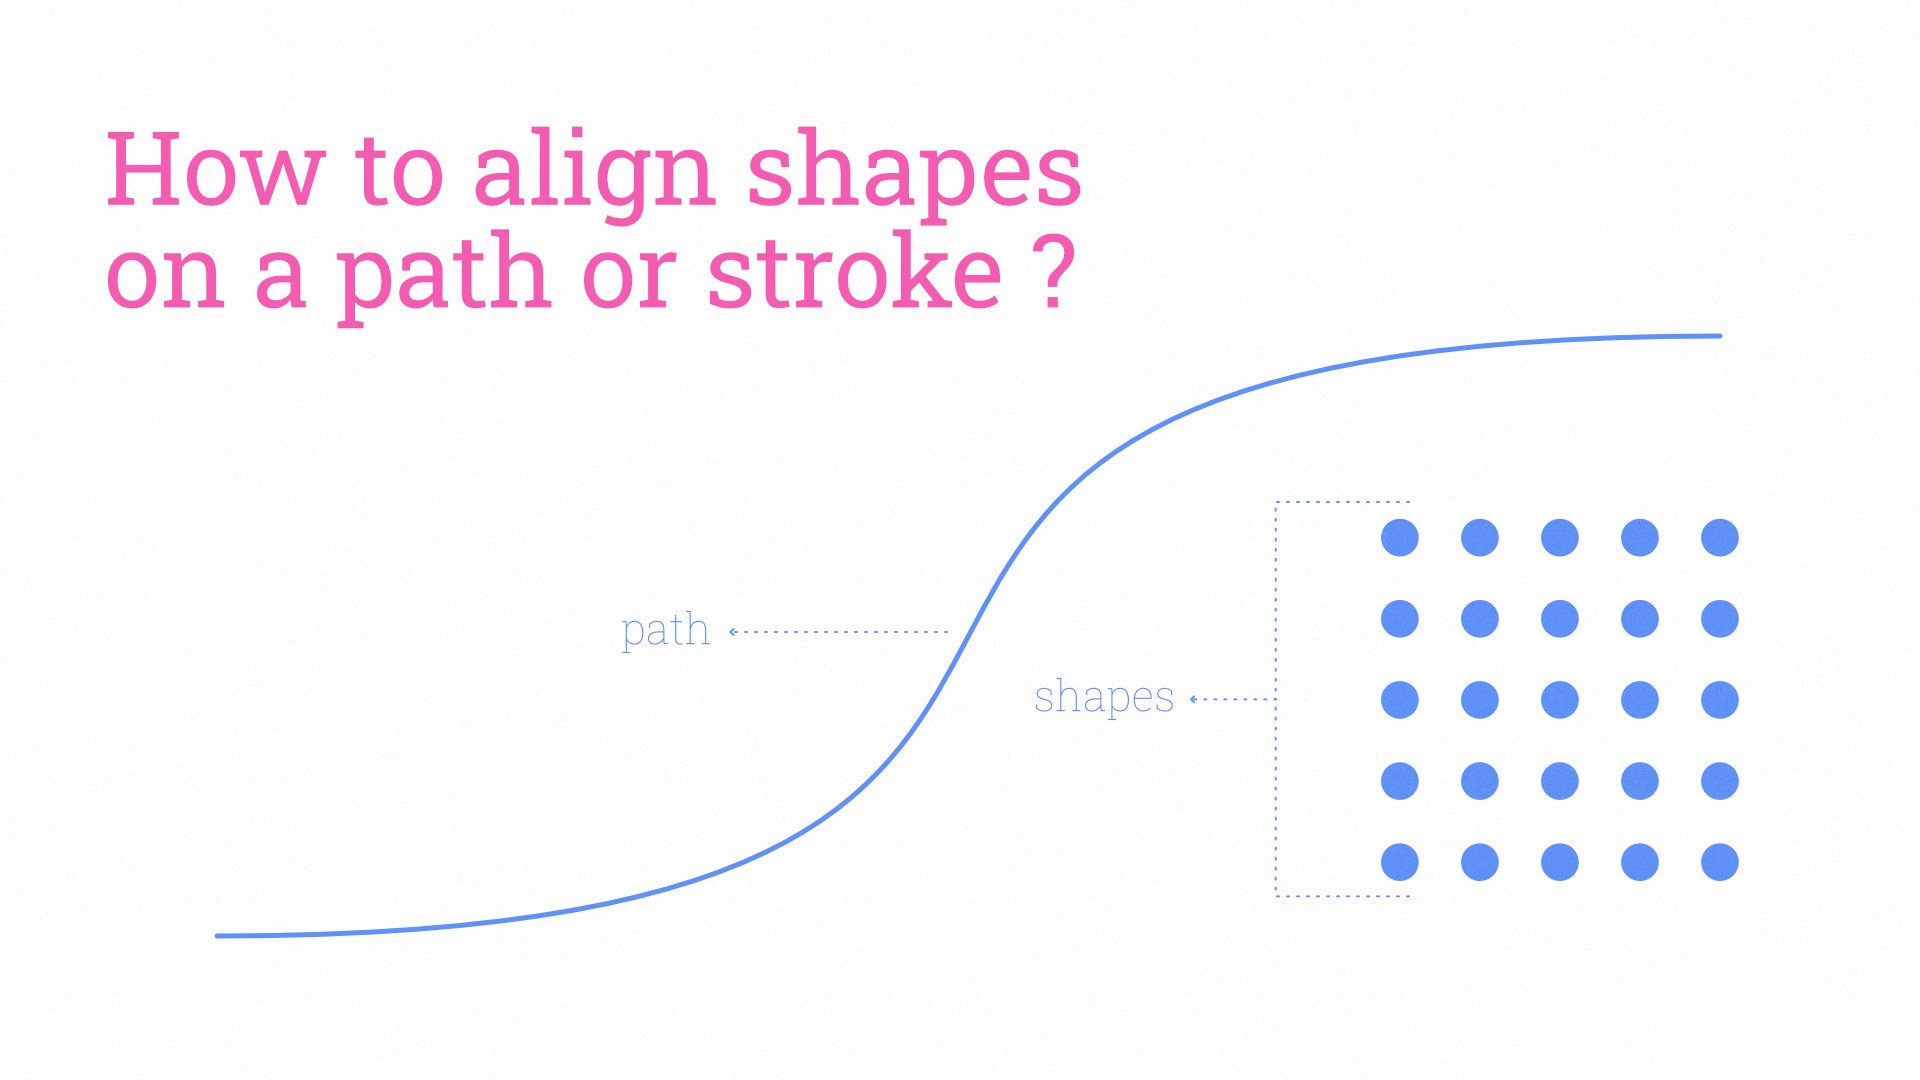
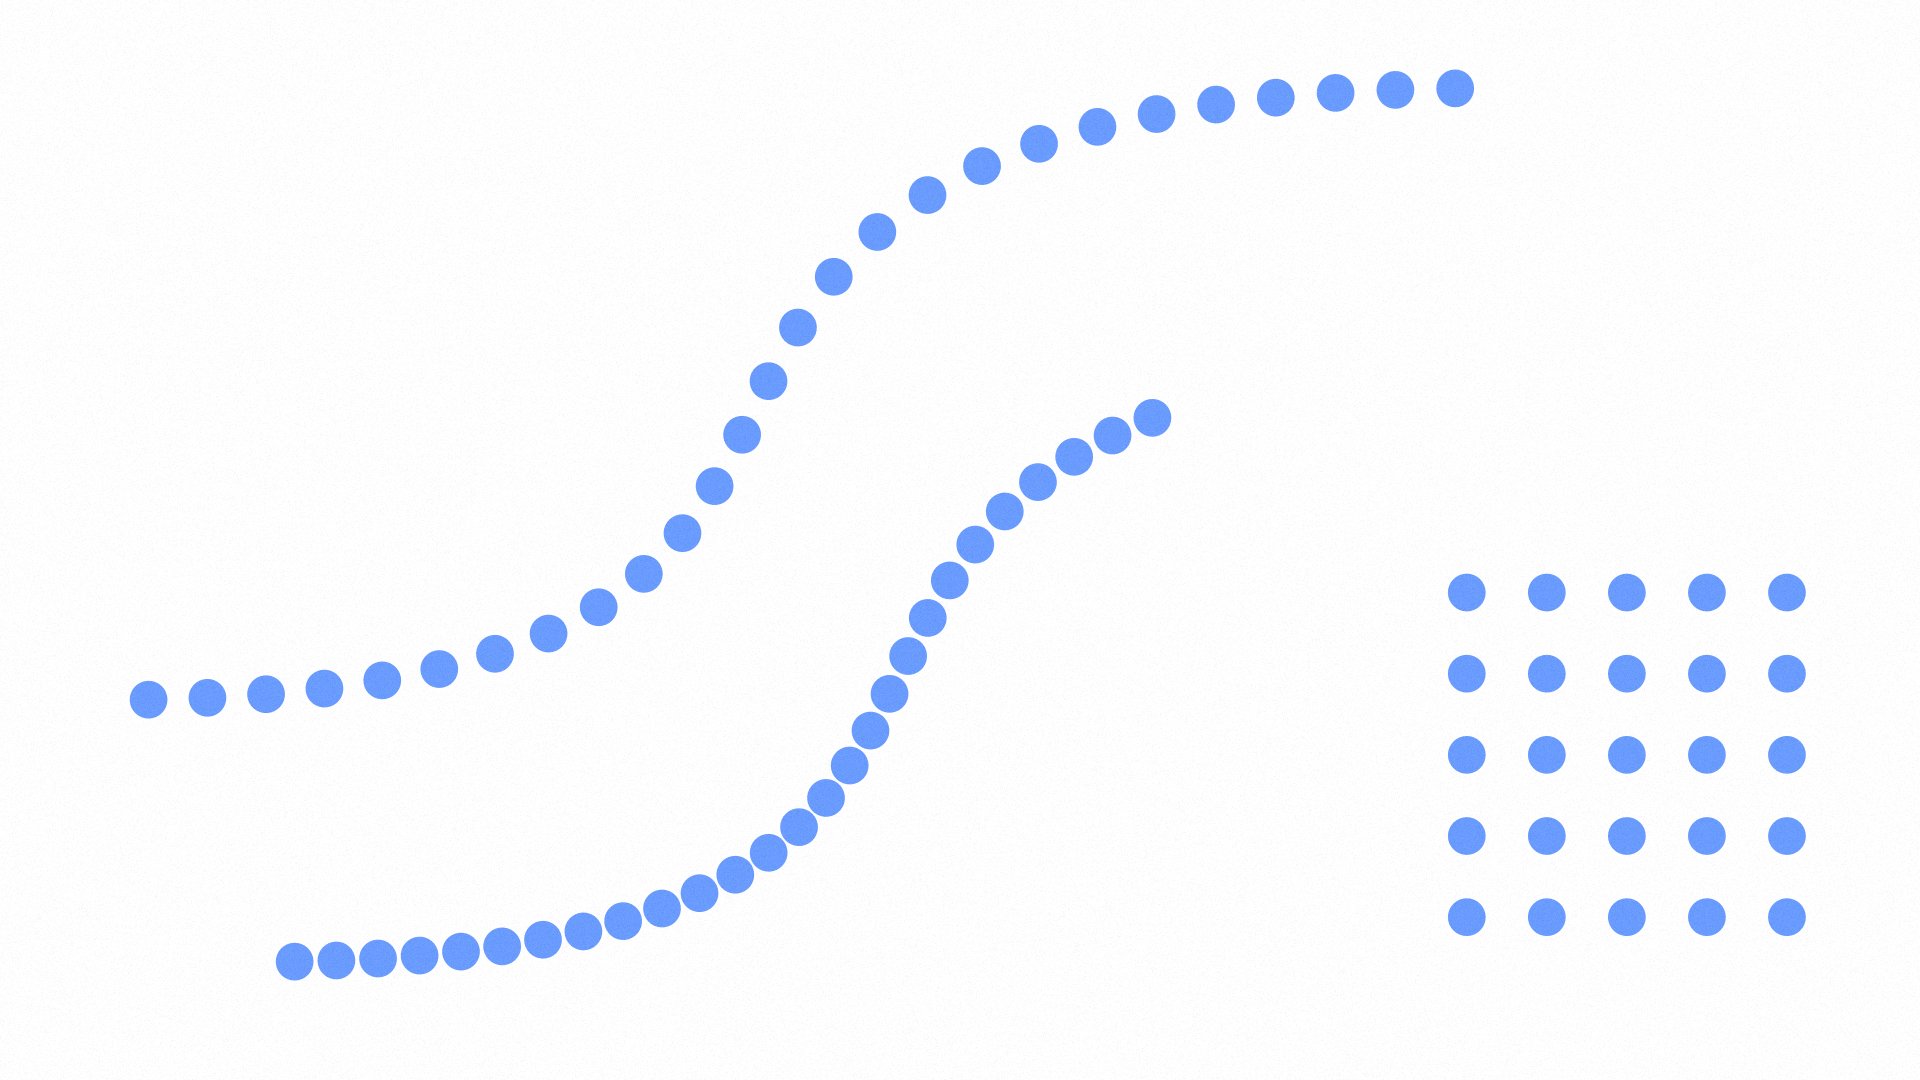
 Hello world, Does anyone know how to align a these circles on a path or stroke ? Thank you
-
Hello Affinity, With the help of @Old Bruce I managed to copy circles on a path, and align the circles using the text tool. It is not as user-friendly to modify the space of the circles using the characters tracking. It is like a sort of a hack way to aligning shapes to paths. I thought it would be nice to add a separate feature for aligning shapes on paths. Also add the pattern feature too, so we don't manually repeat patterns. I know I ask too much but you guys are awesome. Thank you, text-path-align.afdesign
-
 I have a template for a 12oz latte mug (conical). How do I transform an image to fit the template please?
 -
Hi, I have created a rectangle using the shape tool. I put a thick black stroke on it with no fill. When I select the shape and click “expand stroke”, it appears to be the correct type of shape that I want (except with no fill or stroke) but adding a fill does nothing. Theoretically, I think it should look the same as it did originally, but the thick black stroke would instead be a fill. When I set the fill to black, the appearance doesn’t change, i.e. no black shows up. Thanks!
-
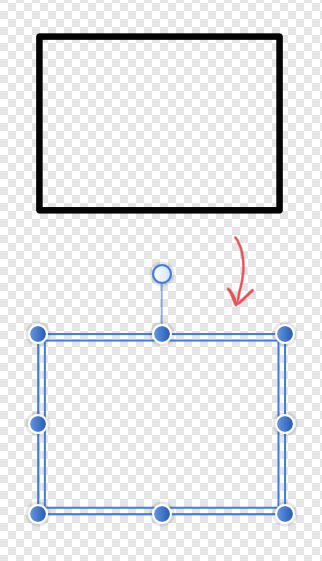
 Hi, everybody, I'm a new customer! I took advantage of the "homeworking" discount this period! I had already tried Designer but now I can finally work on it. I'm trying to understand how he thinks in the combination of shapes, since I'm not a Master in graphics, I can't understand how to create this simple pencil shape so that it's 1 shape only! I attach a gif, I'm stuck, I can't figure out what to do so that the two vertical lines of the pencil remain (the ones in the middle). I've tried dozens of different ways, with curves without curves, with shapes, booleans...😰 Where am I wrong? Thank you very much. pencil.afdesign
-
 Hi. I've got this png shape of a chain link. I'm trying to slightly bring the ends of the broken sections, a little bit closer to the centre link. So that the appearance can be that it's almost removed the gaps. I think just stretching the ends parts of the chain on the left and on the right, closer to middle link, will be sufficient for it to look closed. I want it then to be a new png image. Does anyone know the best way to achieve this please? Thanks chainlink.afphoto
 -
 OK guys this one is annoying me; I am trying to use (let’s say the Ellipse Tool) to place a shape on an image then I want to cut that shape out leaving a transparent hole in the image. I know how to use masks but must be having a senior moment because this is frustrating me. I can obviously get the shape to show the picture (and remove the outside of the shape but not the other way around. I have tried inverting the Pic and the Shape. I have tried using the subtract whilst holding ALT but no good. Can anyone help please.
-
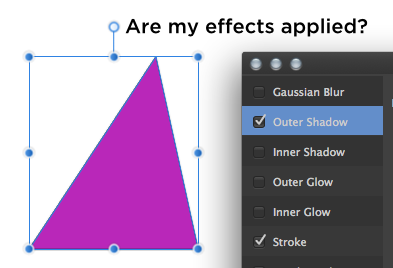
 If I draw or select a shape, its handles and bounding box are active as long as it's selected. Okay so far. But when I elect to add a Layer Effect, the handles and bounding box should be temporarily hidden, as they can obscure the very effects I'm carefully applying. I realize that, unlike Photoshop, AD allows me to edit/deselect a shape even while the Layer Effects window is in the foreground. It's not really a modal window! So what's the solution? Well, a compromise might be to hide the handles and bounding box, when the Layer Effects window is present, unless my cursor explicitly moves over the active shape -- making those things more sensitive to my actual intent, in other words. Otherwise assume that I need those to be hidden until I've dismissed the Layer Effects window.
-
 Hi, This is still in the UI and not working. Pretty disappointing. I've spent hours trying to figure out what I'm doing wrong. I guess I'll just have to stop using Affinity
 -
 Genereally idea of appearance is interesting, but in current state flawed by some issues: - When Designer file is imported to Photo, there's no way to change fill or stroke of shape with few appearances set. Why? Because there's no Appearance panel in Photo. BTW disparity between obvious features are baffling to me in Affinity. Why Photo misses Stroke Panel? Or why Designer doesn't have proper document preview implementation as Publisher? Etc. It's all doable in all apps anyway, only is long and unconvinient. - When Appearance item is clicked, then pressing DELETE key deletes... object. Seriously? - Appearance item can be dragged on recycle bin icon, but dropping it there doesn't delete it.
 -
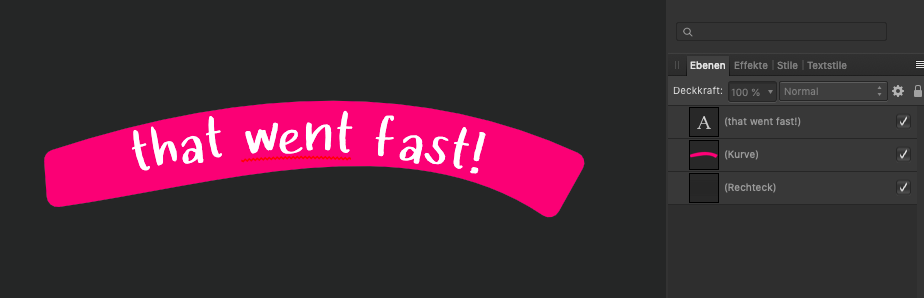
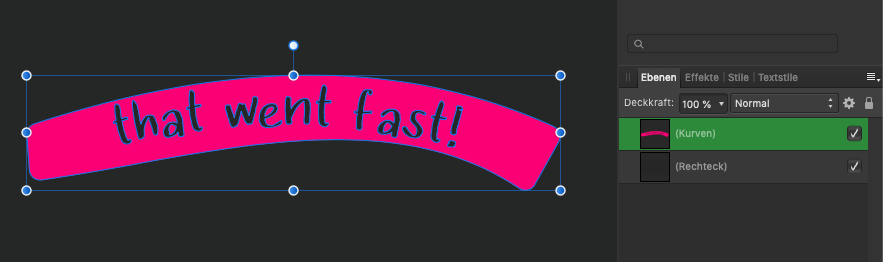
 Hi, Does anyone have any idea how to fit text to a banner so that it looks nicer than the example I've attached? I need it to fit between the red lines. Banner.afdesign
 -
 I've got a text in a shape (a double star) and I want to put it partly over a jpg. The shape sits on top as expected, but the text which should be over the jpg doesn't appear. The text outside the jpg appears okay. Publisher 1.7.3.481 on Windows 10.
 -
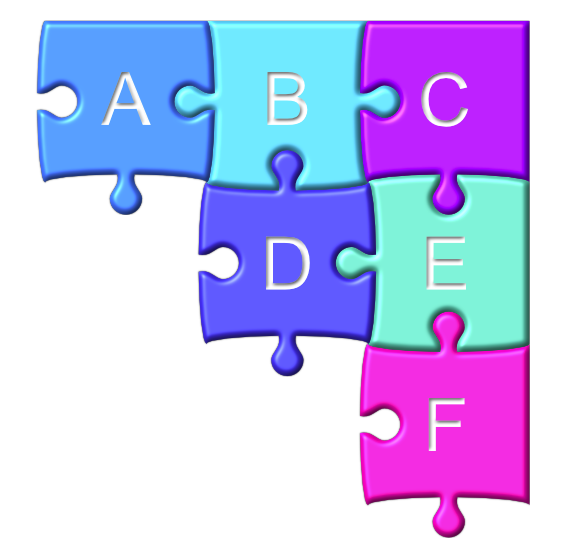
I recently read about someone paying to get some simple jigsaw artwork and thought it was a shame they had to do that, so I decided to create some shapes that could be usable for free. Attached is a sheet of jigsaw shapes that are customisable (compound layers, just adjust as necessary) and should fit to any regular grid (after proportionally resizing the shapes). Apologies for the terrible names of the layers but I think it’s fairly easy to figure out which one is which. I’ve also attached some images showing: 1. The basic shape sheet. 2. A simple use of coloured shapes. 3. A more ‘artistic’ use with 3D and embossing. The shapes are usable in all Affinity applications: Designer, Photo and Publisher. You can use these shapes for anything you want, entirely for free, without restriction or attribution. basic jigsaw pieces.afdesign
-
 Hi everyone I'm completely new to vector editing (so you'll have to bear with me if I use the wrong terminology to describe what I've done/am trying to do or need to ask you to clarify what you're telling me) but I said I'd help my wife create a logo for her blog and potential YouTube channel, and have dabbled a bit with Affinity Photo, so here I am, giving the trial version of Designer a whirl. My aim is to export the end result as an SVG and in a bitmap format so she can do with it what she wishes (or as is more likely to be the case, tell me what she wants me to do with it) So, what I'm trying to do is create a stylised ball of yarn, with the lines depicting the strands transparent so that if there's something behind the ball of yarn it will show through. I've managed to do this but I think I may well have done it the hard way, and my result is a bit scruffy in places, so I want to find out if there's a better way to achieve what I want before I do any further editing. I started out with a fresh document with no background and created a circle. Then, in a new layer, I drew a white curve which I copied & pasted & rotated to form the outlines of the strands of yarn. This is the first point where I got stuck and may have chosen the wrong (or at least, a non-optimal) way to go about things. I needed to remove parts of some of the curves where the "strands" they were being used to depict needed to look like they were going underneath other strands. From my limited understanding of such things, I thought I should just need to add some additional nodes to the curve either side of where I needed to remove it and then delete the section of curve between those. I can't quite remember what it was I tried (this was last night) but I couldn't seem to get this to work. After a quick google, the only method I could seem to find that worked was to go into the Pixel persona and use the Erase tool to remove the parts in question, but that's where things got a teensy bit scruffy. Having completed the erasing, I had my pattern of defining lines I wanted to use to cut out of the circle. Again, I got quite stuck here. From another quick google, I thought that if I grouped the lines all together into one shape, I'd then be able to cut that shape out from the base circle by selecting both layers and using Subtract. But when I had both layers selected, Subtract wasn't an option, only "Divide", and clicking this didn't appear to have any effect. I tried various different things, including selecting individual curves rather than the whole lot (but that didn't achieve the desired effect and one of the things I did appeared to remove a "D" shaped section rather than the shape of the curve, although I've a theory as to why that was) but wasn't having an awful lot of joy. In the end, what I've done this morning on my commute to work, is create a selection from the white curves and then I (somehow, can't quite remember what I did now) managed to select the base circle layer and use the Eraser tool again to erase the bits of the circle within the selection. The end result looks right, apart from some scruffy areas from when I erased parts of the white curves, but I'm sure there must be an easier way to achieve the same result. I've attached the design as it stands so far. Any tips or pointers towards tutorials that'll help me figure out the best way to do things will be much appreciated. yarn-logo.afdesign
 -
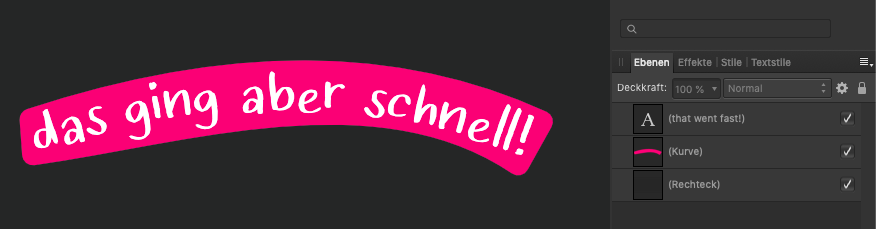
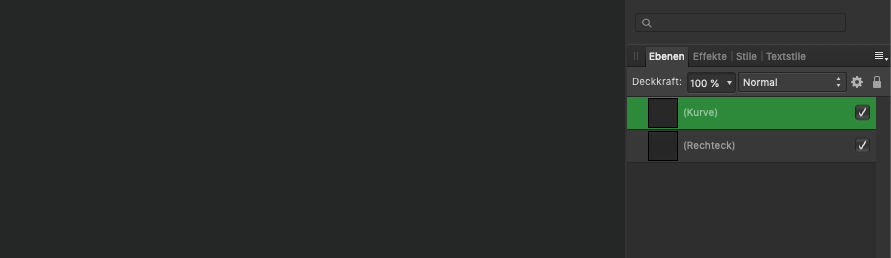
Hello! I looked for similar issues but found none that described my experience, so I'm starting a new thread. I'm having an issue where the subtract operation works for two specific layers but doesn't work after a small change is made. (Yes, fill mode is set to alternate) I want to subtract a text on a path from a simple shape, see here: Upon hitting subtract I am left with the expected result (correctly subtracted): However, when I try the same with the text in German (which is what I am intending to do), I end up with something different. Same setup, only the text has changed: result: There's just nothing left. It was driving me a mad because I thought I had made a mistake and simply couldn't figure out what was going wrong. Having isolated the issue so clearly I believe it must be a bug, right? It's the same when I convert the text to shapes first, by the way. Any insight would be most welcome, thanks! klsmn
-
 The algorithms for some of the geometry tools seem to be slightly off when calculating where the finishing shapes should be. In the video, I placed a blue circle under the red one to show that the combined shapes to be divided before I do it don't match the combined shapes after I hit "Divide." geometry_tool_problem1.mp4
- 7 replies
-
- 1
-

-
- geometry tool
- pathfinder
- (and 3 more)
-
 Did Affinity have tool like Shape Builder tool in Illustrator that cut the shape from unnecessary line ? Thanks in advance Doron
 -
So, this is something I can't get used to and what I believe is some kind of bug - because it makes simple task apparently imposible to do (at least in straightforward way). Let's say we want to draw shape like this: Now, what is trivial in Corel... corel.mp4 is impossible in Designer: designer.mp4 I've worked with Corel for past 12 years and IMO it's curve calculations and node shaping feels more natural and logical than those in Designer. Convice me otherwise. And if this is intentional, then can you explain what advantages this have over Corel's implementation? Why it's this way? For now - wtf Affinity? wtf.mp4