Search the Community
Showing results for tags 'selections'.
-
 When I bought Affinity Designer, I assumed I could use the pen tool to make precise selections. But I can't find any way to turn a shape made with the pen tool into a selection. When I Google "Affinity pen tool selections," I find that you can do it with Affinity Photo. It seems like pen tool selections should be available with Designer too, since it has a pixel persona. Am I missing something?
 -
 Do we have the option to load a selection as file on AP iPad version.I have my watermark saved as selection and load it as file on desktop version.want to do same on iPad or any work around? Thank you Charles
 -
 Using Affinity desktop in Mac. I have a jpeg which should not require rasterizing but I even tried that. I duplicate the layer, make a selection with the free hand tool and press the DELETE key. It deselects it. If instead I make a selection with the rectangular or the elliptical tool and press DEL, it works. Pixels inside selection are removed. Is this normal behavior? I tried with a different photo and also restarted my laptop, but same behavior. Of course, I can remove the pixels by using Refine and Mask, but I would've thought that the Delete key would work to delete pixels inside any selection, regardless of how one makes it.
 -
 In the last 24 hours I've recently dived in head first with the macOS and iOS versions of Affinity Photo. I feel like this is something I've been waiting for since the iPad came out and just realized this week the iOS version can run macros let alone macros made on the desktop version. I am beyond thrilled however I'm running into a few issues I was hoping someone could help me with. I'm attempting to create a macro that will make a layer mask based upon a selection which is essentially selecting out people in a photo. When I make a macro so far it will always repeat the same selections which if that's the best it can do for now then I can work with that however I'm hoping there's an option that when the macro is ran it'll prompt the user to make their own selection and would be even better if this would also work similarly on iOS but not holding my breath on that just yet. Is there a way to have a macro ask the user to do something at this stage of development? If not are there any good workarounds and would those work on iOS? Also is it just me or do some filters (Only thing I've really noticed so far) work differently depending on if it's ran on iOS vs desktop with same settings on same image? Perlin Noise is something I'm working into a macro and it just seems to blend better on iOS but with same exact settings on macOS it has to be heavily modified to reach something similar when ideally I'd like to have the same result on each platform. Edit: So I see there's some actions that have settings next to them and within that there's an eye that can be clicked that will prompt a user so is there a way to have this come up for a selection or to mask something on a layer? Any help is appreciated.
 -
 Hey there, I'm a brand new user of Affinity Photo, I was so ready for a change from Photoshop and Adobe... so far I really love what I'm seeing. Actual support for multi-layer EXR? Wow, this is great... anyway, onto the matter at hand. In Photoshop, I'm very used to two things when creating a selection, and was wondering if Affinity had the same and was hiding from me. When creating a selection in Photoshop using either the Marquee select or the ellipse select tools, you can either hold Ctrl to constrain, or Alt to draw the selection from the centre of the mouse, rather than the edge. Is there a way to do that in Affinity Photo? Also, the next thing I can't find anything about is moving a selection whilst I'm still clicking and dragging. The same in photoshop as dragging a marquee select, and the whilst dragging, holding down the space bar to move your selection before you even commit to it. Does that make sense? Anyway, are these things that exist already, if so my apologies! Keep up the great work! Thanks, Tim
 -
 hello all, and happy new year! please i need some explanation about refining selections to "new layer and mask". i did the following experiment on the attached image: 1) select the background of the image with the selection brush 2) invert pixel selection 3) refine selection (default values, except for a bigger brush) 4) select "new layer and mask" 5) apply i'm not interested in how the quality of the selection could be enhanced (i.e. applying some feather during the refine process): instead, i can't understand how the new layer (with mask) is generated. I would expect a copy of the original layer, with a mask that describes the selection. the mask appears how expected (by me at least), but the new pixel layer shows something weird (to me). in the attached image, if you hide everything except "layer - created by new layer and mask", strange artifacts are clearly visible. they disappear if the mask is activated again. if i make a copy of the original layer and apply a copy of the mask to it, the result is similar - but not identical: if you alternatively make visible the new layer or the background copy (with their masks), you can notice that something in the image subtly changes. if you make both the layer visible at the same time, the quality of the selection improves. it improves even more if you make a second copy of the background copy and mask. now, the improvement of quality does not surprise me so much: i guess it depends on the fact that the areas that are left erroneously slightly transparent by the mask get more opaque when displayed one above the other. but i really cannot understand why the new layer created by "refine selection" is not a copy of the original layer, and what the artifacts are. i'll be grateful of an explanation or any clue. thanks in advance stefano IMG_1904.afphoto
 -
 I am use to creating a selection in photoshop, selecting the adjustment and adding a mask to the adjustment. Sometimes i need to make an adjustment to the mask. With Affinity Photo, when i have a selection performed, i select and adjustment and then the adjustment has a mask applied to it. How do i stop this. I prefer adding masks manually or to a group of adjustments. Thx Mike
 -
I think this has been requested a few times already, but I'd like to hear if there's still a possibility to see it in AP. Is there going to be any chance soon or later (hopefully soon) to combine multiple selections by CTRL-clicking multiple layers? Better, combine and subtract/exclude multiple layers? (CTRL+SHIFT, CTRL+SHIFT+ALT, CTRL+ALT). The only choice left right now is to create mattes (and combine/subtract them).
-
 All, While using Selections the I run into multiple problems which occur after initial selection. 1. Trying to drag around the canvas to refine the selection by using the any of the Selections tools and the "marching ants line" disappears and the program will either crash or act like no selection was made. Sometimes panning around the canvas will bring things back but it is hit-or-miss. 2. After refining selection to mask, New Layer with mask or New Layer the a haze appears on the mask layer. This looks like a blur has been applied with streaks all over the canvas. 3.Cannot make selection without first creating a New Pixel Later. The Selections acts as if there is no information to select until the pixel layer is created and then the layer to make selections out of is chosen. Again another hit-or-miss issue. 4. After trying to add an adjustment layer to a mask, Photo will crash and when I re-open the program the adjustment has been applied in a checker board pattern on the mask and I am unable to undo without again crashing. At this point I have to start the workflow over for any meaningful recovery. The Selections problems make this program so unstable that I cannot use it for any work on the go. I do use the desktop version on MacOS but the point of having it on my iPad is to have the flexibility to create anywhere.
 -

Problem selecting light grey.
TrevorW posted a topic in Pre-V2 Archive of Affinity on iPad Questions
I have been wrestling with a selection issue. Funnily it is something I used creatively in PS but in SAPhoto I can't get round it. I recently took a photo of Lincoln cathedral. Its pinnacles are covered in light grey lead. I selected the sky (uniform light grey) and then refine edge to sort out the trees, small pinnacled and balustrades. The pinnacle tones are similar to sky so I was not surprised to find the programme struggling to select these easily. I painstakingly painted in the shapes within refine edge. Marching ants were in the correct place. However when I used the mask I found that even though I had noticed the red matte of refine edge was somewhat pale and painted in to be deep red, the mask was 50% or so transparent. The sky replacement obliterated much of the selected pinnacled. I tried using the pen tool to make selections (my preferred option in PS) and tested - no luck, still partially transparent and indeed when I used refine edge to add to the density of the mask by painting in the selection, it even began to bleed outside the pen selection areas. Anyone got a solution, please? -
Selection context menus different
LLM posted a topic in Pre-V2 Archive of Affinity on iPad Questions
I have both an iPad 9.7 (2017) and an IPad Pro 2 and have found that the contextual menus are different. Using Refine Mask Tool, there are no output options on the smaller iPad. On both iPads the brush only refined at approx. 50% and didn't fully mask the adjacent area. When I am using the Selection Brush and switch to Subtract, the selection keeps deselecting. Most of my work is compositing and these glitches are very frustrating .
-
Selections—output choices missing
LLM posted a topic in Pre-V2 Archive of Affinity on iPad Questions
In tutorial of selection woman on beach, the refine edge context menu has options for output. My choices don’t have the same menu on the bottom. -
 Affinity Photo developers need to seriously make selection and moving objects much easier in iPad! I don't know about the desktop version but it is such a hassle to select and copy to a new layer (why so many unnecessary steps?) ... and then to use the Move tool is a very aggravating chore which is MUCH MUCH easier in Photoshop! Come on... I'm sure you guys can do better than this considering how efficient and easy it is to do everything else in Affinity Photo. Please refine and simplify the selection, copy/paste and move functions in Affinity Photo for iPad.
 -
 Hello, What is the most efficient way to accomplish the following: (1) Create/refine a selection (2) Make an adjustment to it (3) Be able to go back and apply other adjustments to the same selection later on #3 is where I'm struggling. Thanks for your patience in helping a newbie.
 -
 Just wondering if it would be easy to implement shift, command clicking to make selections from multiple vector layers for the creation of top layer masks - at the moment I've found the only work around is to open in photo and use quick mask and selecting each layer separately then painting out - would also be useful if you could press backspace to delete the selection rather than have to paint it out when in quick mask mode or when directly editing a layer mask
 -
 I'm using Capture One Pro 10 (MacOS 10.12.6) for my raw converter. Using the "Edit In..." selection in Capture One allows me to open my files in Affinity Photo and saves the changes back to the PSD or TIFF file created in the process. If I do this with multiple files for stitching, Affinity opens them in tabs, but I can't select the open images as the source for stitching. It would be nice to be able to select multiple open files from the panorama, hdr, focus merge or stack selection tools. Thanks, Phil
- 2 replies
-
- 1
-

-
- selections
- stacks
- (and 1 more)
-
I'm using Capture One Pro 10 (MacOS 10.12.6) for my raw converter. Using the "Edit In..." selection in Capture One allows me to open my files in Affinity Photo and saves the changes back to the PSD or TIFF file created in the process. If I do this with multiple files for stitching, Affinity opens them in tabs, but I can't find anyway to select the open images as the source for stitching. Is there some way to select open files for panos and merges? I can export the files and open them from the selection box but that kind of makes a mess of my workflow. Thanks!
-
 Is there a way to nudge a layer on the iPad Pro? When I look under the help files on the open screen it mentions it but it doesn't say how to do it. Since there are no arrow keys is it possible?
 -
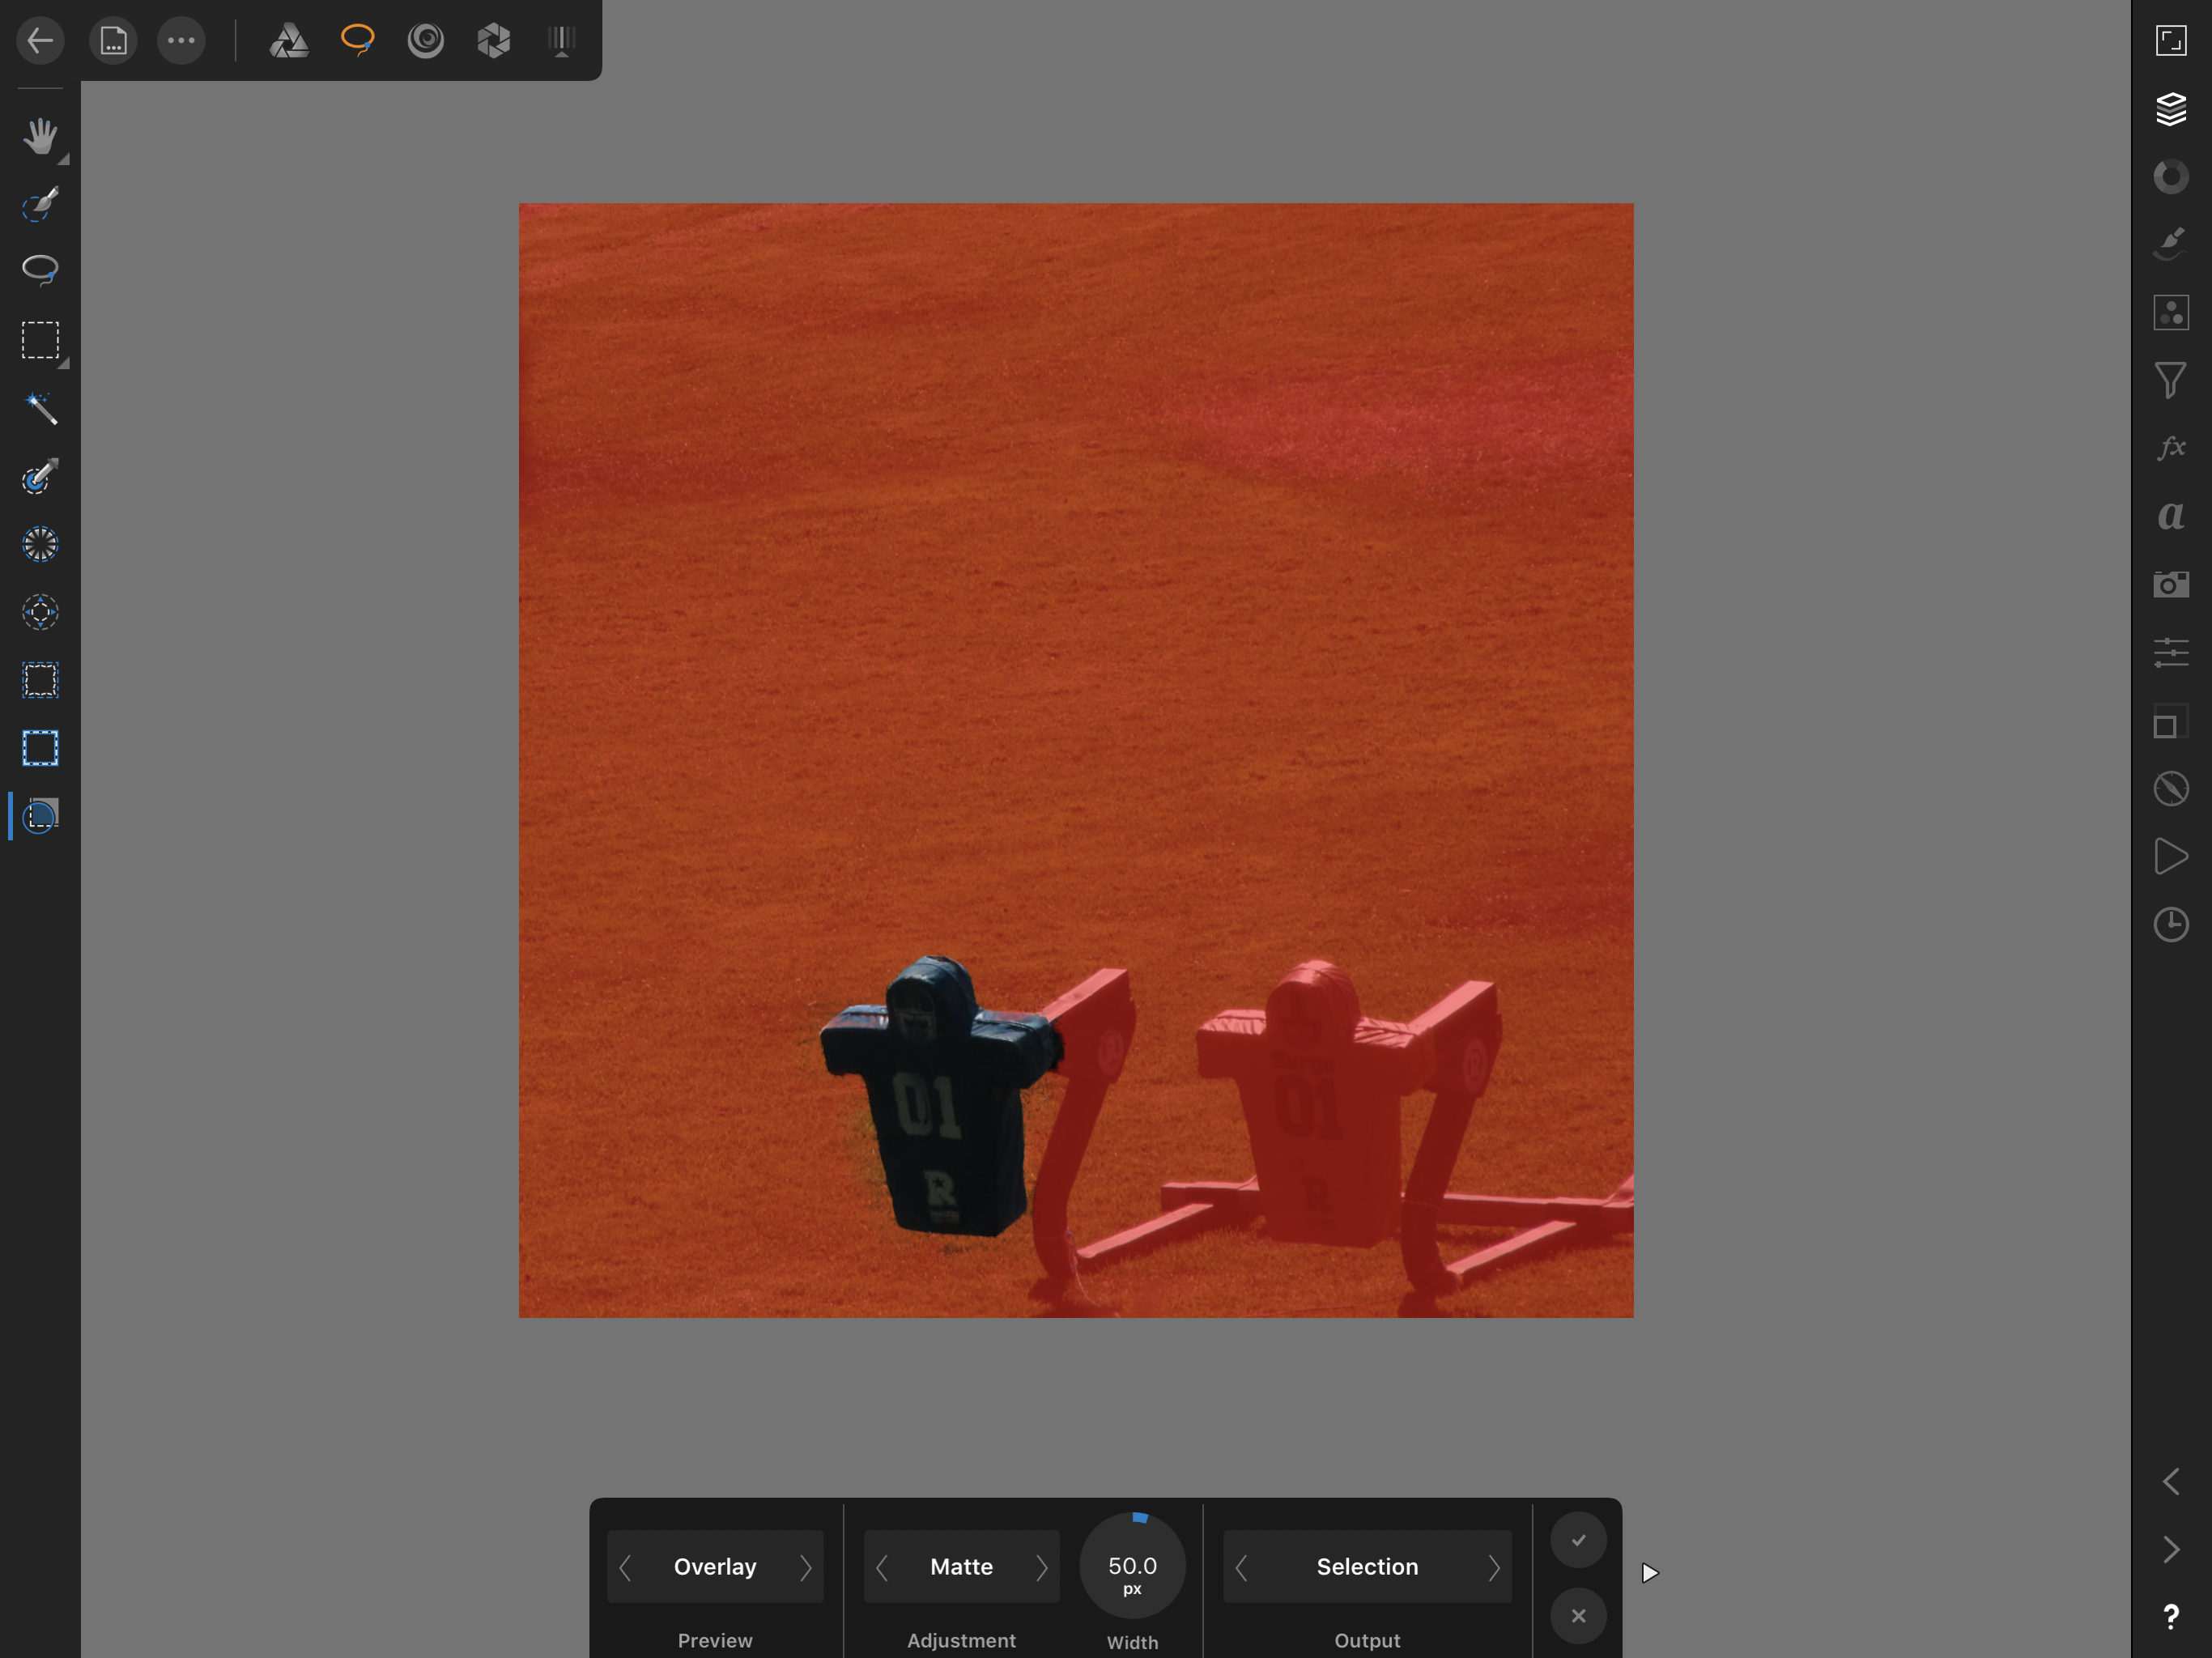
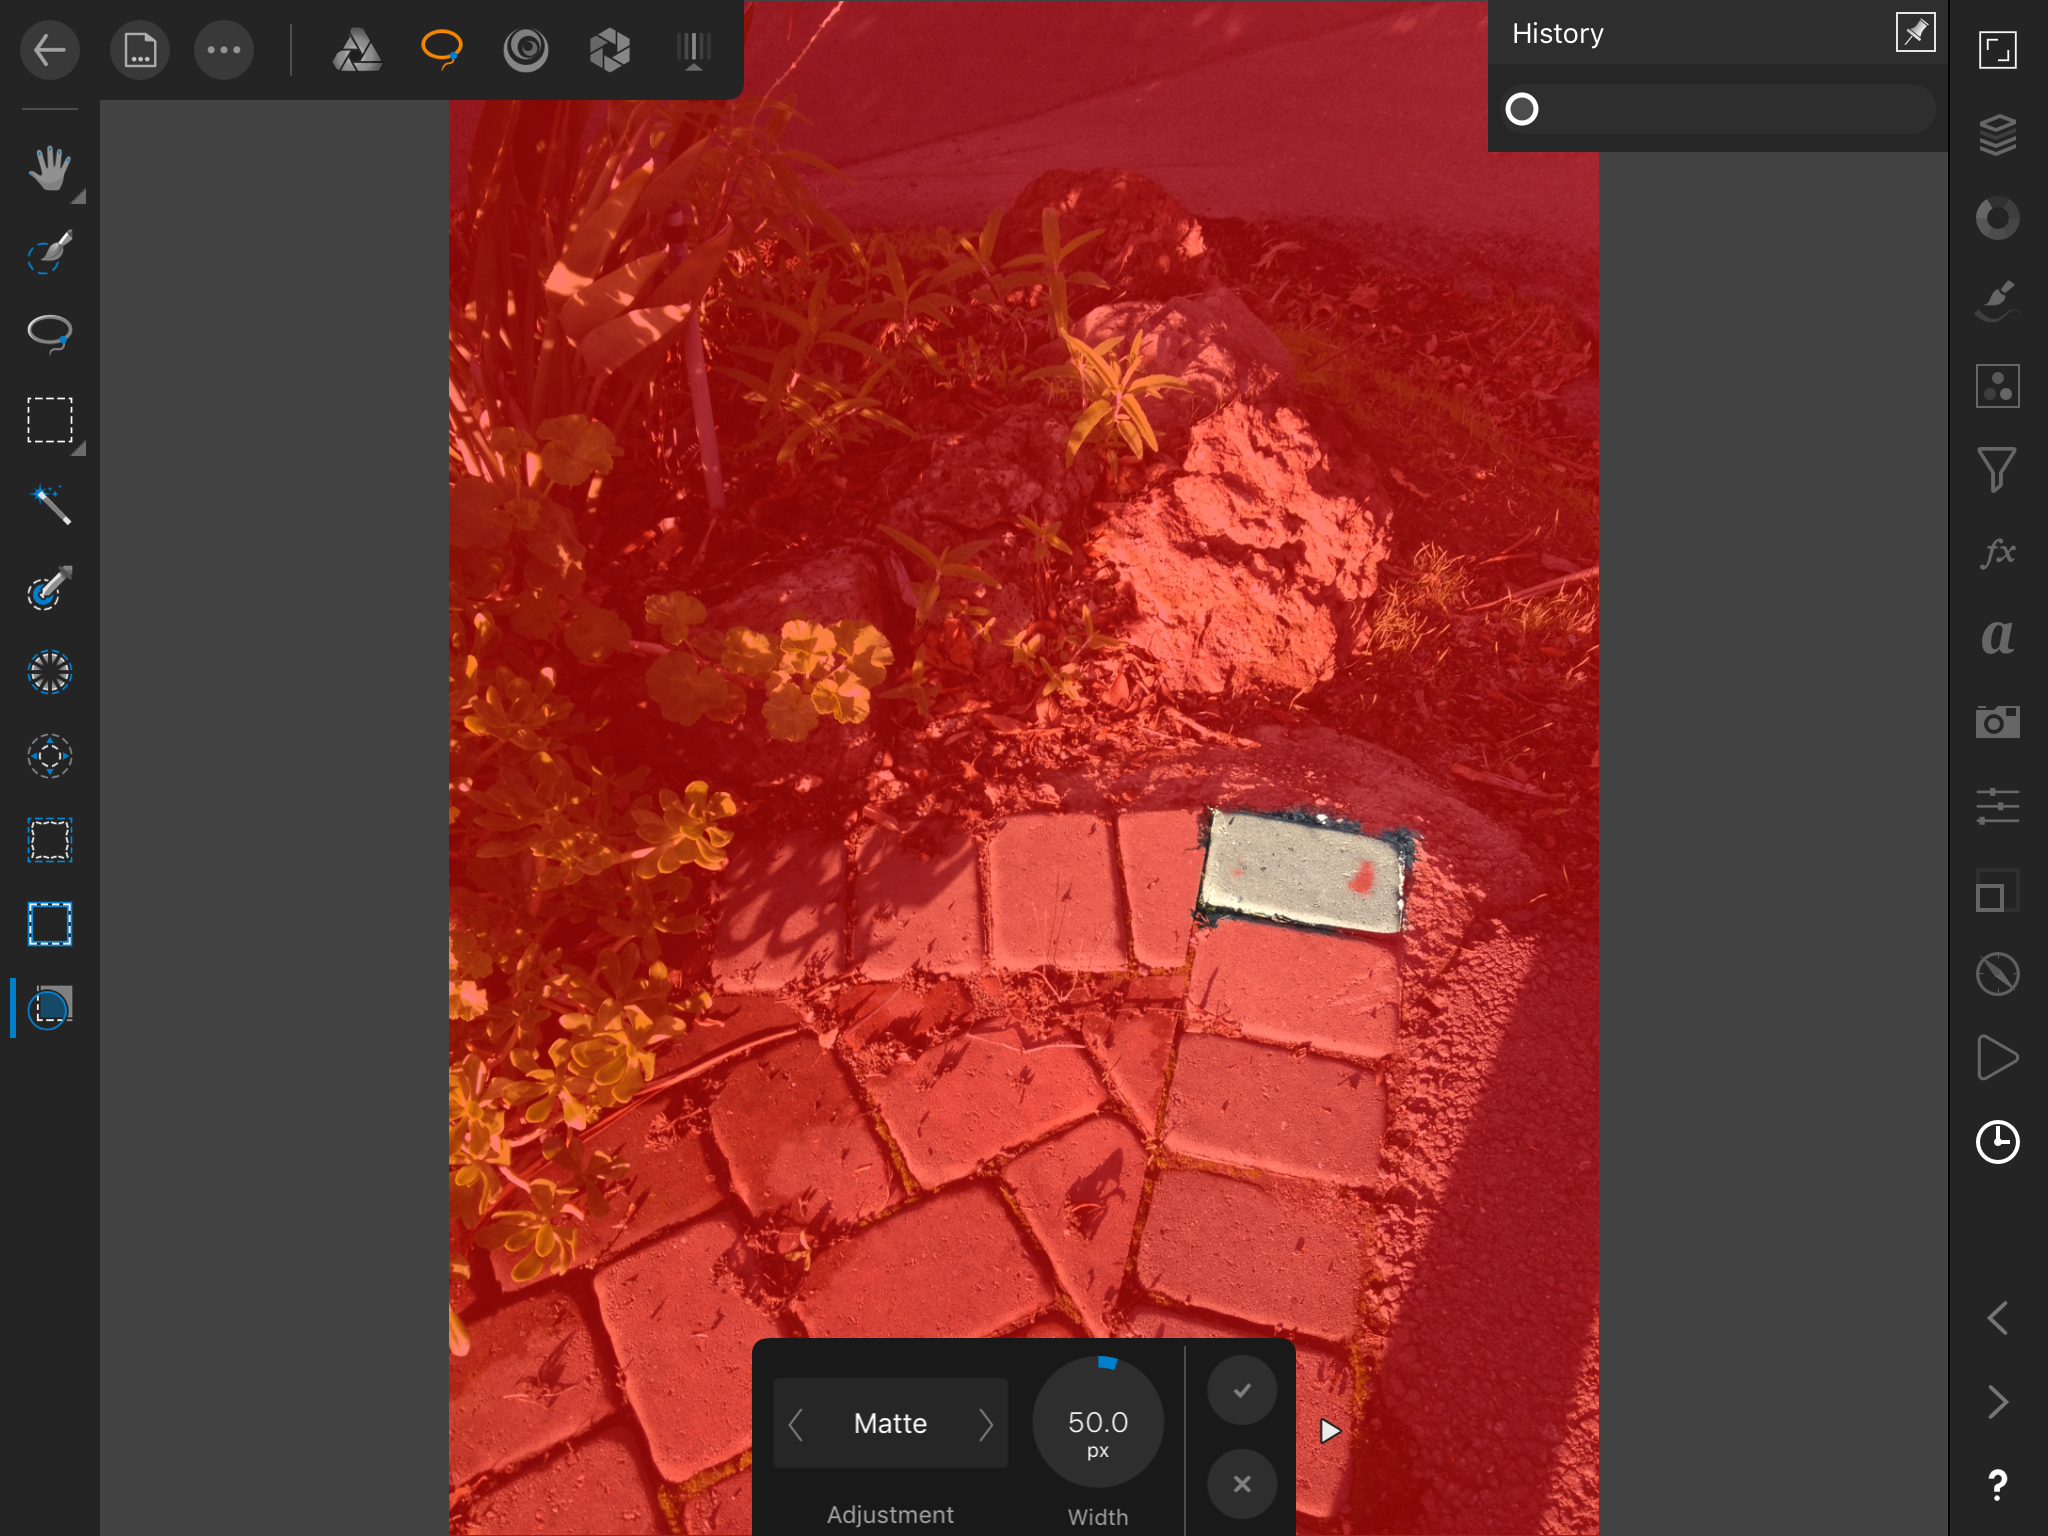
When using features such as selection refinement and overlays, it would be nice if we could change the matte colour, for cases where the subject/background already have a lot of red in them.
-
Hi guys and wonderful Moderators, I know it's been probably said in a few posts but I'd like to list some of what I think are a few of the most needed features in AP. 1. refine masks uusing levels and curves, this is the most important thing, I'm not talking about refine edges or similar, I'm saying that once you created a mask to have the possibility to open a curve or levels adjustement for that mask to refine its range, as things are now we are pretty much stuck with the mask as it is at the moment of creating it, I just refuse to believe such thing is not available in AP, it's a foundamental feature, I mean AP has equations, EQUATIONS!!! and we can't put in this feature? 2. Some sort of luminosity masks panel, YES I'll ask for it for as much as it takes, even if it means having you put one in out of desperation for not having to read my every post about it. And I mean a full fledged LM panel, not the select midtones/shadow/highligh thingy, I mean a zones system/varying degrees of shadow/midtones/highlight selection though masks maybe. Seriously the channel way of doing it manually as it is now is cumbersome and uneffective, resterize layer to mask? really guys? nice feature but let's just step it up. 3. color picker when using the HSL tool 4. More color selection well...selections, blue, red and green are not enough really, maybve axpand to yellow, cyan, magenta. 5. slice tool to percentage or exact slices, as of right now I find the slice tool really...casual and amateur, would be nice to tell AP to: 'slice the image in 3 part vertically', insted of the free hand tool, which is pretty much useless imo. 6. suggestion for 3 filters, one is the tonal contrast equivalent, would be nice and save a lot of time having some sort of tonal contrast in the live filters, baybe a dynamic brightness too. your glow filter, nice idea, but poorly implemented all it does is blow out the highlight, maybe making it s that it protect saturation and luminance in some way, that's be nice. 7. create a panorama out of the opened files, same goes for hdr, it's really bothersome having to export all images before having AP create a new pano. 7 1/2, come on guys, let's just have an 'align layers' option, I don't know if i'm doing somehing wrong but stack create stack in the arrange panel doe snot align anything if you're not opening a brand new set of images, we need to align layers in an opened file. Thank you guys for this platform in which you allow us to give suggestion, I know i may sounfd just like the usual run of the mill whyny customer, but I do complain because I believe in this software and its possibility. Seriously though, take into consideration these suggestion, let's not just trail behind Photoshop, let's make a clear jump foreward.
-
 When I select an object to adjust with the selection brush, and then add an adjustment layer and choose an adjustment from the drop down menu, the following happens: a) no matter what adjustment I select (brightness, exposure, etc) nothing changes inside the selected object. b) when I deselect the selection using Command+D, a solid white line remains around the object I selected. How to make this work correctly? Thank you. Melanie
 -
 I have been trying to make Selection on one photo to copy into another. However, my efforts have been frustrated by the Selection shooting off in all directions and not trying to stay on the main colour of the subject I'm trying to select. I have Added and Subtracted to the selection but it won't do what I want. It certainly isn't doing it as easy as in the tutorials. I have given up for now. Is there a pen tool (Photoshop)?
 -
 Photoshop has traditionally had the Select > Color Range command. There is also HSL keying inside the Hue/Saturation adjustment toolset, which, annoyingly cannot be used to create selections for use with other commands without clumsy workarounds (that I know much better than I would care to admit). What I am hoping to see is a non-destructive way to do masking based on luminance, HSL tools, as well as possibly more sophisticated keying algorithms that are found in video software (Primatte, Keylight, etc.). Most video-focussed color correction software (DaVinci Resolve, Speedgrade, Lustre, Baselight, FilmMaster, Assimilate Scratch) allows for non-destructive HSL keying already. The most elegant way I can imagine this working inside Photo is that similar to regular layer masks, a new procedural mask layer type for non-destructive HSL/Select Color Range masks with adjustable parameters would be available. Like an adjustment layer, except that the result would be a mask instead of an RGBA image, to be used just like regular layer masks. That way, it would be easy to adjust the selection parameters interactively after the fact, and, if need be, rasterize destructively to a regular raster mask layer. In additions to the keying in Luma, RGB, HSL, YUV and LAB, parameters for blurring the result, expanding/contracting the mask would be useful. The exact same functionality could then double as a vastly improved "Select Color Range" command as well.
- 12 replies
-
- 3
-
-
- Color Range
- Keyer
- (and 8 more)