Search the Community
Showing results for tags 'replacement'.
Found 11 results
-
For anyone who misses the instant artist feature from Serif PhotoPlus I have discovered a free stand-alone replacement. It is called Fotosketcher and can be downloaded here. Sadly it is Windows only. https://fotosketcher.com/ This should keep some users going until Affinity Photo gets its own internal artist photo processing features. I have included an example water colour style image on this post to show its possibilities.

-
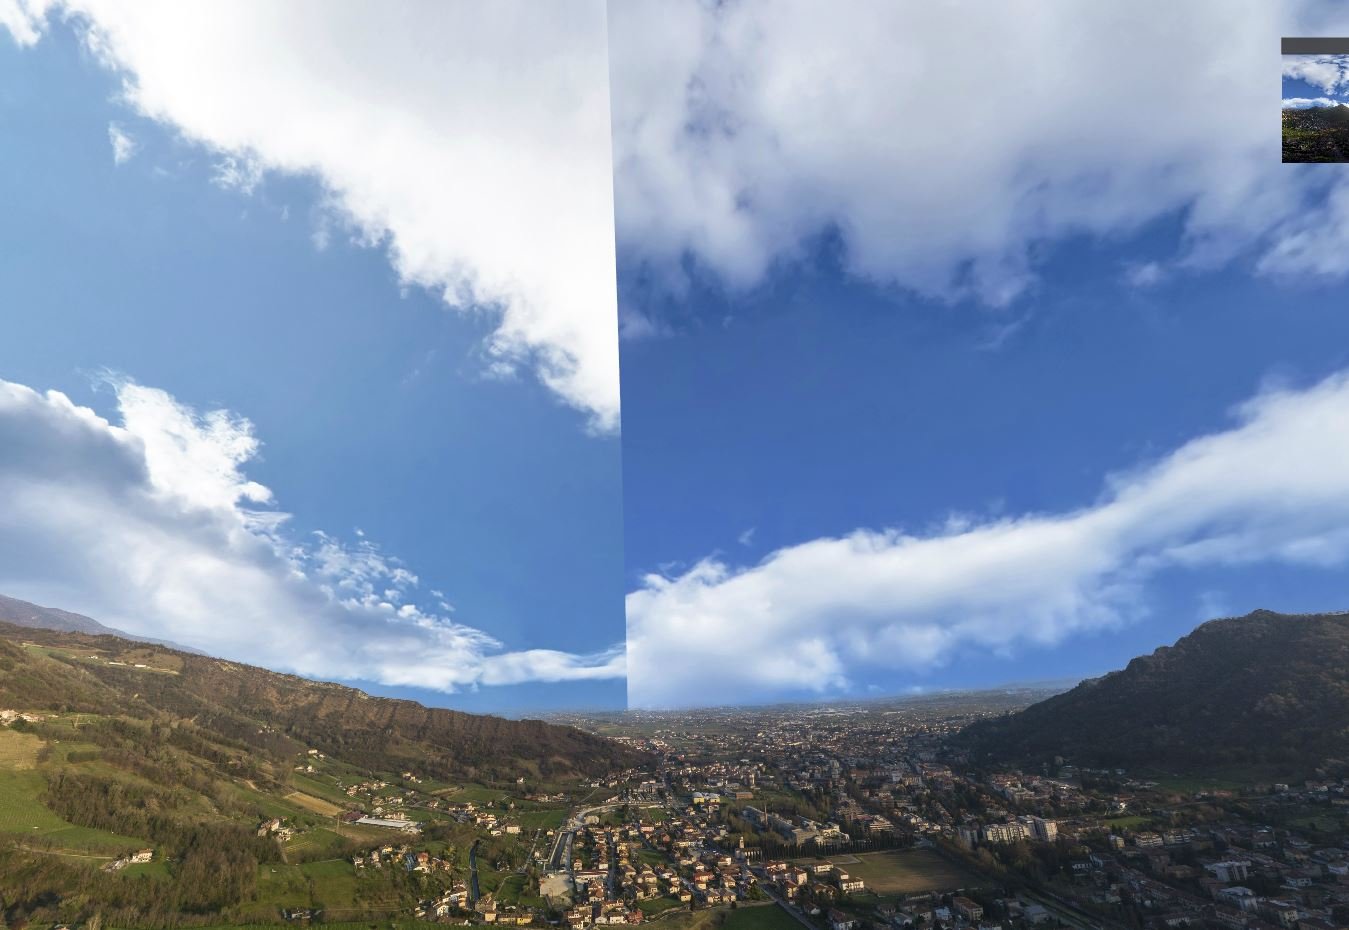
 Hi guys, I'm a newbie. Can someone explain to me, step by step, how to replace the sky in a 360 image? I followed the official Affinity tutorial but what I get is a "sky" cut. I am attaching a screenshot. The sky I used is a 360 photo that I downloaded from the web. But it seems that affinity does not recognize it as 360. What am I doing wrong? I read on another topic that I have to apply the equirectangular distortion. But I don't know how to do this. Can someone explain it to me? Thank you
-
 Hi, does anybody knows if the is any method for replacing an existing image for another one in Affinity Designer for the iPad as there is in the desktop version? Thanks
 -
 Hello! Please have a look at the following image: https://drive.google.com/file/d/1O8yEvxtFKmYVeJZn5QgdxLKUXv_eRsdO/view?usp=sharing It's a low-res artwork of a neuron, often found in scientific contexts. The left part is the original image, the right part is the original image where black has been replaced by white (so that this image can be put on dark backgrounds). The right part is also the result of Photoshop, where I've simply used "Replace Color", chose full black to be replaced by full white, tweaked a little bit with the tolerance, and that's it. I'm having trouble getting the same result with Affinity Photo, unfortunately. I think the fact that the image is basically low-quality makes it a little bit harder. The goal would be to replace the black stroke with a white one, but leave the red color inside exactly the way it is, just like Photoshop did. Here's my first naïve approach using Curves: https://drive.google.com/file/d/140_HbrpTRi7PwpjuwgKQmbqCb6zA78k9/view?usp=sharing As you can see, I can keep most of the red color, but I'm getting some chromatic abberation around the red circle (why?). Second approach, using Gradient Maps: https://drive.google.com/file/d/1AwJtaEAy58O-O0ZWMno89S0sLIc1xbpC/view?usp=sharing The problem here is that I have to hit the same shade of red of the original image at any specific value point, which means I'm recoloring the red circle unfortunately. Any other approaches I missed, and which I could learn? I'd greatly prefer a non-destructive way (compared to Photoshop's) and keep using Affinity Photo/Designer (as always), so I'd be thankful for any help! Affinity Photo's Color Replacement Brush doesn't seem to work at all, it will try to do this: https://drive.google.com/file/d/101TrlMsApn2OfKwgkvKsM1bTs8M9-eEk/view?usp=sharing
 -
 Can someone tell me how to do a good sky replacement of this photo? Included are the original and my failed attempt. As you can see there is a lot of purple in the leaves (upper left) in the original. I tried to defringe but that did not solve it. There must be some way to get rid of that purple, make the sky selection/replacement easier. Don't worry that they are not the same size, I am looking for good technique not an interesting photo. Thanks in advance. Orig.afphoto badReplace.afphoto
 -
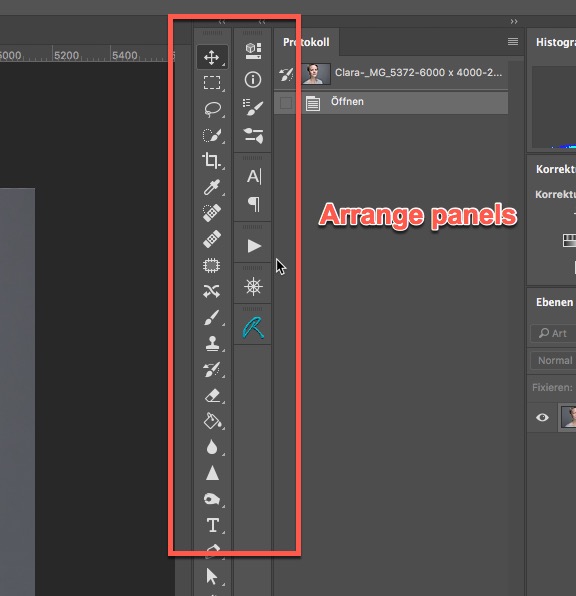
 Hi there, as an Adobe user for years I´m thinking about switching to AP and donwloaded the trial version. From what I see after one day of testing I´m really impressed and I´m sure it not only can replace Photoshop, it seems to be the better software. With that said I have some questions from a AP beginner (not a image editing beginner at all) perspective: 1. Is there a way to "export" images from Adobe Lightroom right into AP? I mean some option to set AP as the external editor in LR 2. Is there an option to save individual workspaces such as in Photoshop? I mean customize the canvas and panels I use the most and save that. 3. If 2. is possible is there a way to use these individual workspaces on two Macs? I´m using an iMac and a MacBook and would like to have the same environment on both machines 4. Is there a specific workflow with CaptureOne? I mean use C1 for tethering, as catalog and for RAW processing and AP for more advanced image editing/retouching 5. Are "panels" available such as in PS? I mean can I arrange my panels and tools in a way shown in the attached screenshots (and save this in my workspace)? I think that´s all for the moment. Thanks a lot for your support. Cheers Michael
-
 Hi, as the title says, but it seems the option doesn't exists. (until today i never needed it but it seems to me to be a basic feature) Is it possible to find and replace a font on an entire document? The only topics talking about it, sent me back in 2015, and was already in the roadmap at that time ? I might be missing something . Waiting for your help. Thx. Ben
 -
 I have a simple JPG generated by some software, and I'd like to replace one colour (straight black or white) with another, or make it transparent. So far, any attempt to use the colour replacement brush tool have not given any result, and my search on the forum found its use to be an as yet unanswered question. I was hoping this brush would act as pick-and-replace tool (if pixel is <colour set> then replace with the colour set as front) but evidently I have this wrong. As I have both AD and AP, here are my questions: - which is the best to use? - what is the exact process to replace a specific colour x with a colour y? (layer select, any settings that can mess it up, which brush to choose, how to choose the colour to change and set the colour it will be replaced with). - just in case I come across this later, is there also a way I can control the *range* of colours accepted for replacement (the cat example isn't universally the same orange). I'm clearly missing something simple, but I can't seem to identify what.
- 16 replies
-
- 1
-

-
- colour
- replacement
- (and 1 more)
-
 I meant to purchase affinity photo instead of affinity designer. Can something be done?
 -
Just downloaded an AD file that contained fonts that were not on my system. Is there a way to do a 'search & replace" for fonts, or otherwise exercise some control over the font substitution? Cheers!
-
 When you finish working on affinity photo then It would be great if you made simple app which replace lightroom and discontinued aperture. Also I think making that app in this year would be business wise decision because you can use all the fuss about photo editing programs on apple app market.

.png.7151b39c4a32ec90d09389b037e4095b.png)