Search the Community
Showing results for tags 'removal'.
Found 8 results
-
 Hi everyone, I was wondering if anyone knows if there is a plugin (hopefully compatible with Affinity Photo) that can delete a background automatically without pay per image? So basically with just a click of a button (no masking). Examples: https://www.remove.bg/ (great results) https://imagezerow.com/#/ https://www.unscreen.com/ (video/gifs) https://burner.bonanza.com/ and so on.. Hopefully this will become available in Affinity Photo.
 -
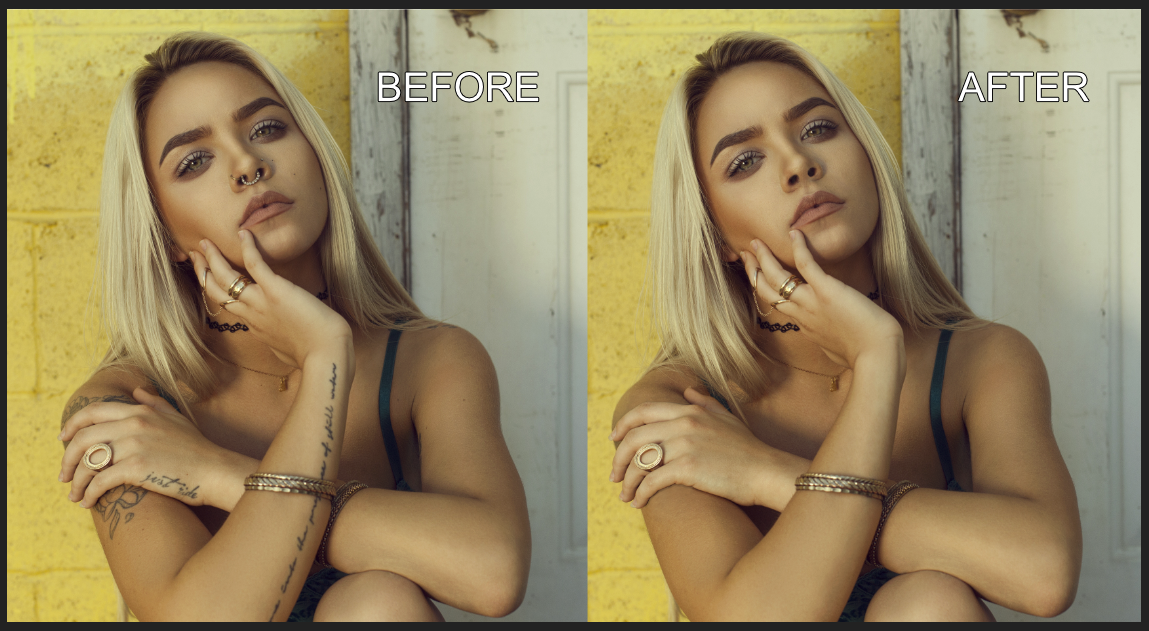
 Although I find the Smart Selection brush quite useful, it doesn’t always get the job done, so here’s an alternative method for separating elements with fine detail in a photo. 1). Don’t forget to rasterise the imported image. 2). Duplicate it. One version will be be converted to a high contrast black & white image, while the other remains the same. 3). Take one of the copies, and in Adjustments Studio in the sidebar, scroll down to Vibrance in order to dial down the Saturation, creating a ‘greyscale’ image. 4). While still in Adjustments Studio, scroll up to Levels, increase the % of Black and decrease the % of White, in order to create a high contrast image. 5). Use a Black brush to fill in any White areas you DON’T want to become part of the selection. 6). Next, access the Channels Studio in the sidebar, click on the three dots next to composite Blue (or either of the other colours), and choose the option: Load to Pixel Selection. This will select all the white parts of the image. 7). Switch to Selections Persona, and with the Move Tool, click & hold on the Canvas to call up a dialogue box, and finally choose Invert Selection. 8). Switch back to Photo Persona, and with the Move Tool selected copy & paste from the original colour image to a new layer. You’ll be left with the desired portion of the photo. Notes: I’ll sometimes duplicate this new isolated image, in order to add a Multiply effect under Layer Options. This can help the image to blend better with the background if placed beneath the unadjusted layer. Also, when using Channels Studio to make a selection, you can save a copy of it by clicking on the three dots next to one of the colour composites and choosing Create Spare Channel. You will then be able to return to the Spare in order to make another selection. I hope this is helpful, let me know if there are any questions. FullSizeRender.mov
-
- 2
-

-
- selection
- remove background
- (and 5 more)
-

affinity photo Tattoo and ‘face furniture’ removal experiment
GarryP posted a topic in Share your work
This was far trickier than I first thought is was going to be (and the result isn't nearly as good as I hoped). I’ve only shared a low-res version as the high-res version is a mess. More experimentation with the various tools is much needed. If anyone has any tips for this kind of thing then please share them.
-
 Hello, I'm a Affinity beginner, so I need some assistance please. Is there any way to do median or mean filtering as I could before in Photoshop with stacked layers in a smart object? I'm talking about doing things like this: https://theuijunkie.com/delete-tourists-photos/ I have a project coming up and I need to shoot a busy street, but I want to apply same technique as above. Is it possible to make a "long exposure" using series of images with same exposure, almost like some iOS apps do now utilizing movie clips to blur between frames to make one single long exposure image. Thanks Aleksander
 -
 I am brand new to Affinity Photo and have a photo that needs a portion of the fence that is distractingly out of focus and blatant taken out but I have no idea how to do so. I have attached the photo below. It is the odd red line cutting the picture in half, basically. Can you help me? Thank you so much!
 -
 Hi, in diesem Affinity Photo Tutorial zeige ich aus der Serie Affinity Photo Foto Optimierung wie man das Foto Staffelhintergrund verbessern kann. Hier geht es nicht um große Effekte, sondern um viele kleine Verbesserungen, die dann hoffentlich für ein besseres Ergebnis sorgen. Es geht darum, eine Tiefe im Foto zu vermitteln. Durch Dunst in den Tälern. Außerdem war das Original diesig. Ein typisches Problem bei Landschaftsaufnahmen mit großem Teleobjektiv. Den Dunst gilt es, zunächst zu entfernen. In this Affinity Photo Tutorial, I show you from my serie photo optimization how to improve a photo. There are no great effects, but many details which hopefully improve the result. In this landscape photo, I show how to improve a background with haze and dust from valley to valley. Viel Spaß / have fun Ciao Jack Foto / photo: eigenes / self made YouTube-Video
 -
 I'm trying Affinity Photo's (v1.4.2) Haze Removal filter on an Olympus E-M1 raw file (.ORF). The filter seems to have no effect (zero) at all, even though I realize I need to Develop the raw file before I can access the Haze tool. The raw file is recognized by Affinity Photo and opens just fine. But the Haze Removal tool doesn't shows no visible difference. (Note that Photoshop CC and its Dehaze effect works well and works directly on the raw file... no "development" required.) Maybe there's something simple I'm missing, even though I watched the video about this tool a few times and tried to research it's use here in the forum. Thanks for any advice you can give.
 -
Hello. if you haven't already tried the new stacking option in AP 1.4.....you really should. I have been trying out object removal, stacking a number of photos to remove any moving objects. I'm not going to go into the in's and out's here, do yourself a favour and watch the tutorial here The example below is of the BMW Welt in Munich and made up of 13 handheld shots. The second photo is the stack without any object removal to give you an idea how effective this tool is. Have fun trying it out. Joe