Search the Community
Showing results for tags 'quickmask'.
Found 5 results
-
 Some initial background info: #1 - I work on Mac and am preparing to update to a new Mac Mini. #2 - I have been an Adobe Photoshop (plus Adobe Illustrator and InDesign) user for a little over 20 years (but trying to decide if switching to Affinity products would be a good alternative). #3 - Have been watching a lot of YouTube tutorials to find out more about Affinity Photo but for some reason, either people are not fully understanding my question or they are simply not familiar enough with Adobe Photoshop. #4 - And most importantly, I need answers from someone who is totally knowledgeable with both: Adobe Photoshop and Affinity Photo..............and a person who knows and understands the difference between creating a Selection and creating a Mask. There is a distinction albeit, both Selections and Masks are commonly called "masks". Now my question: Does Affinity Photo allow one to activate the "Quick Mask mode", and be given the choice to choose between "Mask area" and "Selected area"? (and then allow the user to select a paint brush (NOT the Selection or Mask brush), but rather, a paint brush (with black selected as the foreground color) and then commence to "paint" a translucent red (or any color of choice) "Selection" on the areas of your image that you wish to be "Selected" (NOT masked, but rather, "Selected"? And taking this a step further, Does Affinity Photo allow the user to exit Quick Mask by pressing the "Q" key (on a Mac)..............and does Affinity Photo allow the user to "invert" the "selection" to a "mask" and visa versa? (CMD+Shift+I) on a Mac If you don't follow my questions, then you probably don't have that much knowledge of Adobe Photoshop. I would greatly appreciate getting the answers to my question from some kind folk or folks.......... Thanks, Roger
 -
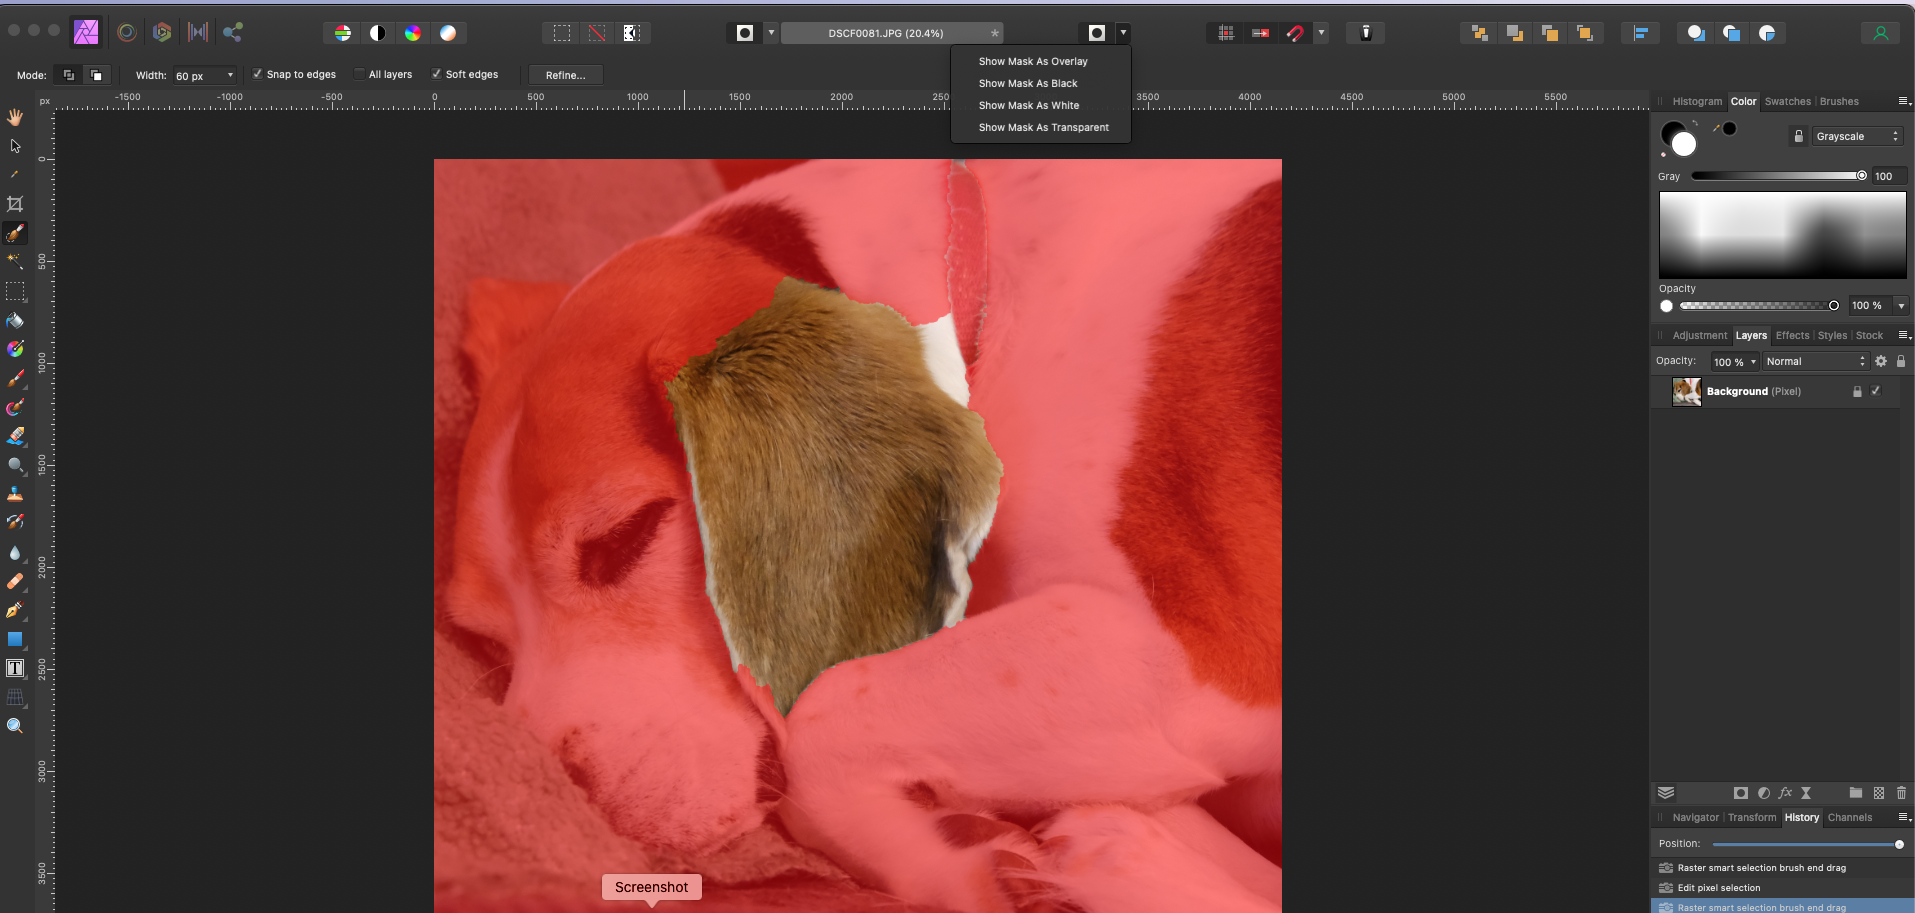
 It isn't super critical, but I cannot get the "show mask as ..." drop down to work when using the quick mask. For example, "show mask as black". These are the Affinity Photo help directions I'm trying to follow: "To change Quick Mask view: On the Toolbar, click the arrow next to Quick Mask Enabled and then select a Show As option from the pop-up menu." I get as far as this in the instructions, but can't get this to work. I attached a screen image below. Thank you
-
 I can make a selection and then fill the selection using inpainting. This works as expected. If I make a selection, transform the selection and then use inpainting the result is not what I would expect, distorted. How can I transform just the selection so that when I fill the area there is no distortion? Maybe this very short (27 seconds) video will explain my problem better? https://www.dropbox.com/s/pcz8qn47ds3jmwv/select.mov?dl=0 Thanks!
 -
 Hello, supports Affinity Photo the "Selected Areas" option? Example: http://adobe.ly/1Ob3PLz (Photoshop Help | Create a temporary quick mask -> Selected Areas) Thanks! :) Carsten
 -
 Dear Sirs and Madams, (sorry for my bad english) first: aphoto and adesigner are both very very cool and useful programs. :D it was a very short time to converse my habituation from indesign to adesigner. (meanwhile i rather use adesigner) your video-tutorials was very helpful but in aphoto i must learn still some things, so i am sorry when following suggestions or questions are unnecessarily: 1. shortcuts in non-english keybord-layouts thats a big problem for german users because the user operability suffers some time. especially the „[" and „]“ keys are not reachable in german keyboard layouts. is there an (usable) way or for german users without changing the whole keyboard layout? (that would be in conflicts with shortcuts in other programs) 2. if using quickmask, the brush color must be set to „white“ to remove desired areas in the red „invertmask". but if i set the brush color to „black“ his functionality is opposite - like an eraser. thats very cool - so i dont need to set the eraser size seperately - only switch from white to black. but it is a bug or a feature? (i have not seen that in the tutorials) 3. is there a shortcut in quickmask (like „alt“) to switch from „mask“ to „demask“ function? 4. there a many different brushes in aphoto but most as an „circle“. sometimes i wish there would be some brushes with „sharper“ forms to better paint ore refine masks. maybe like an „triangle“ that can be rotated and changed like desired to work better in sharp edges. 5. i wish the cropping tool would be have a "preview“ function for blend out the unselected (cropped) areas. maybe switchable in the colors black, white or (selectable) gray. so it would be better to estimate the cropping result bevor pressing the „apply“ button. (wysiwyg style) 6. a more consistently way to crop "lossless" - without loosing the cropped areas after pressing "apply". the crop tool could maybe be ask on pressing "apply" what to to: "crop finally - and loosing the cropped pixels" or "crop with mask - without losing the cropped pixels". 7. a better indication which tools will act "reversible" or in "finally". (parallel or serial processing) at the moment this distinction is "from where" the tool is selected - from the "layers" or the "filters" menu. and - to find a needed filter the user must be click around in different menus. i think ALL filter should be storaged in ONE place (one menu) with a special sign (or a submenu) if the filter is availble for act in parallel and/or serial processing. best regards, yummiweb