Search the Community
Showing results for tags 'procedural texture'.
-
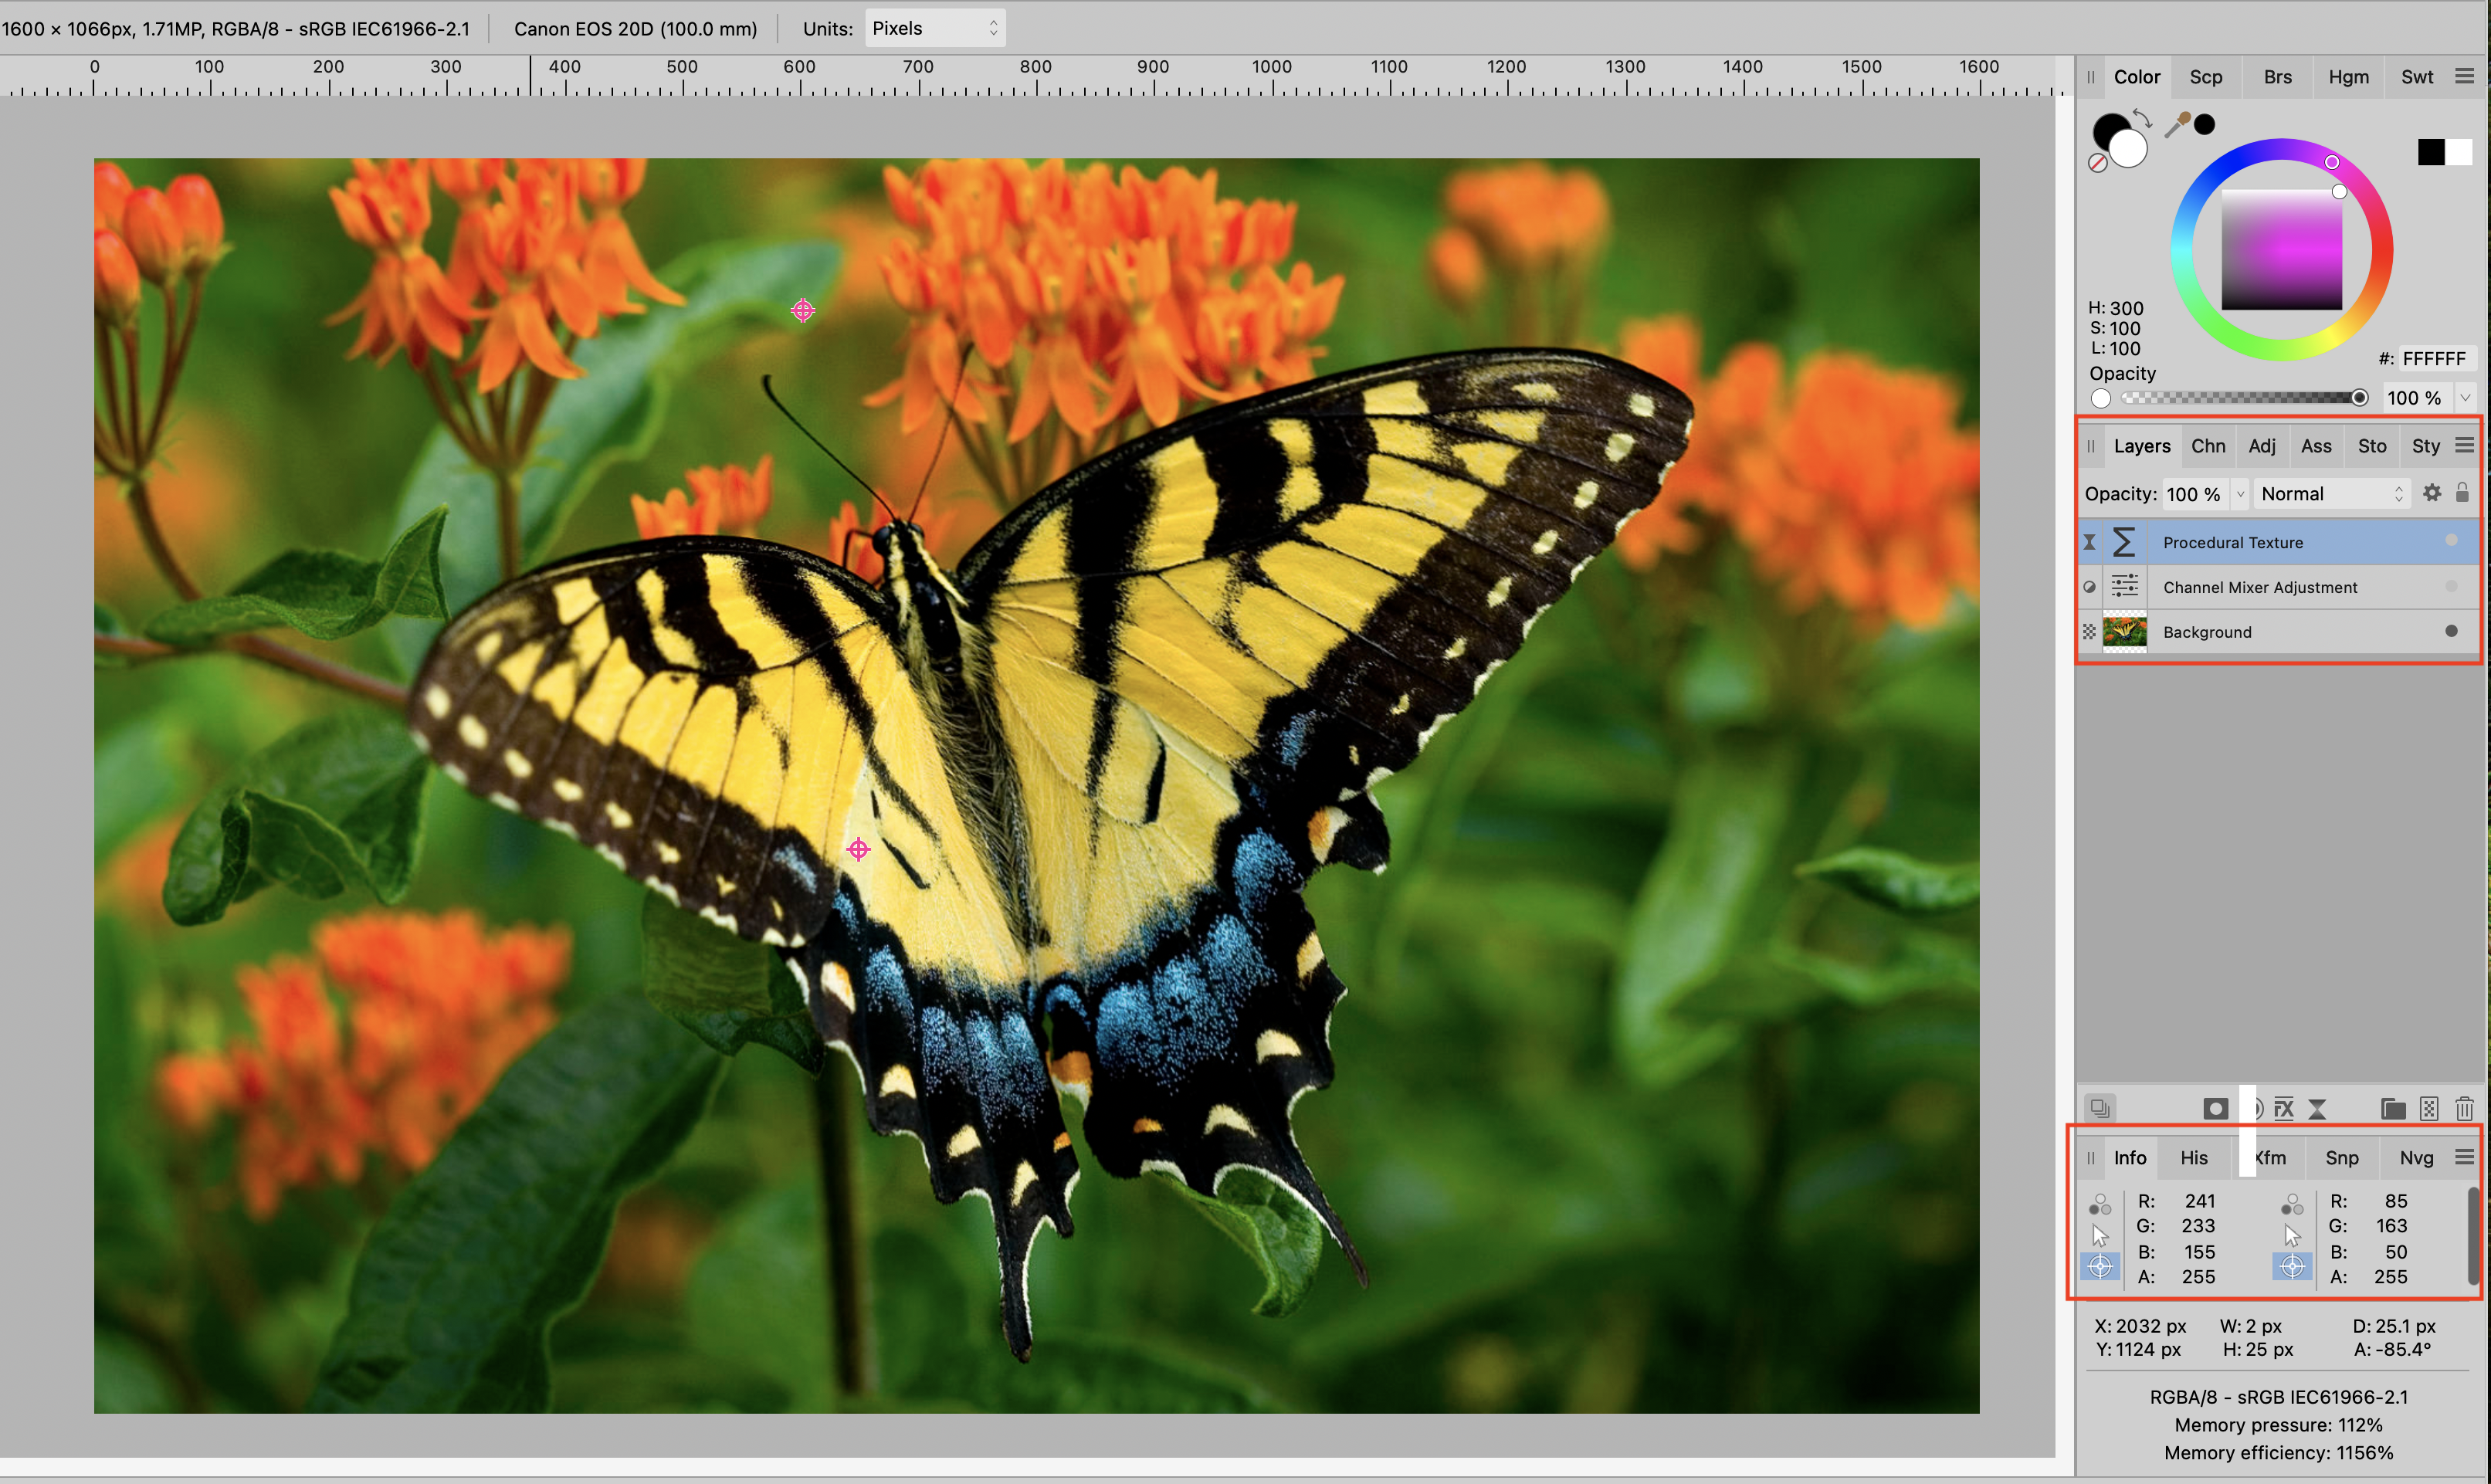
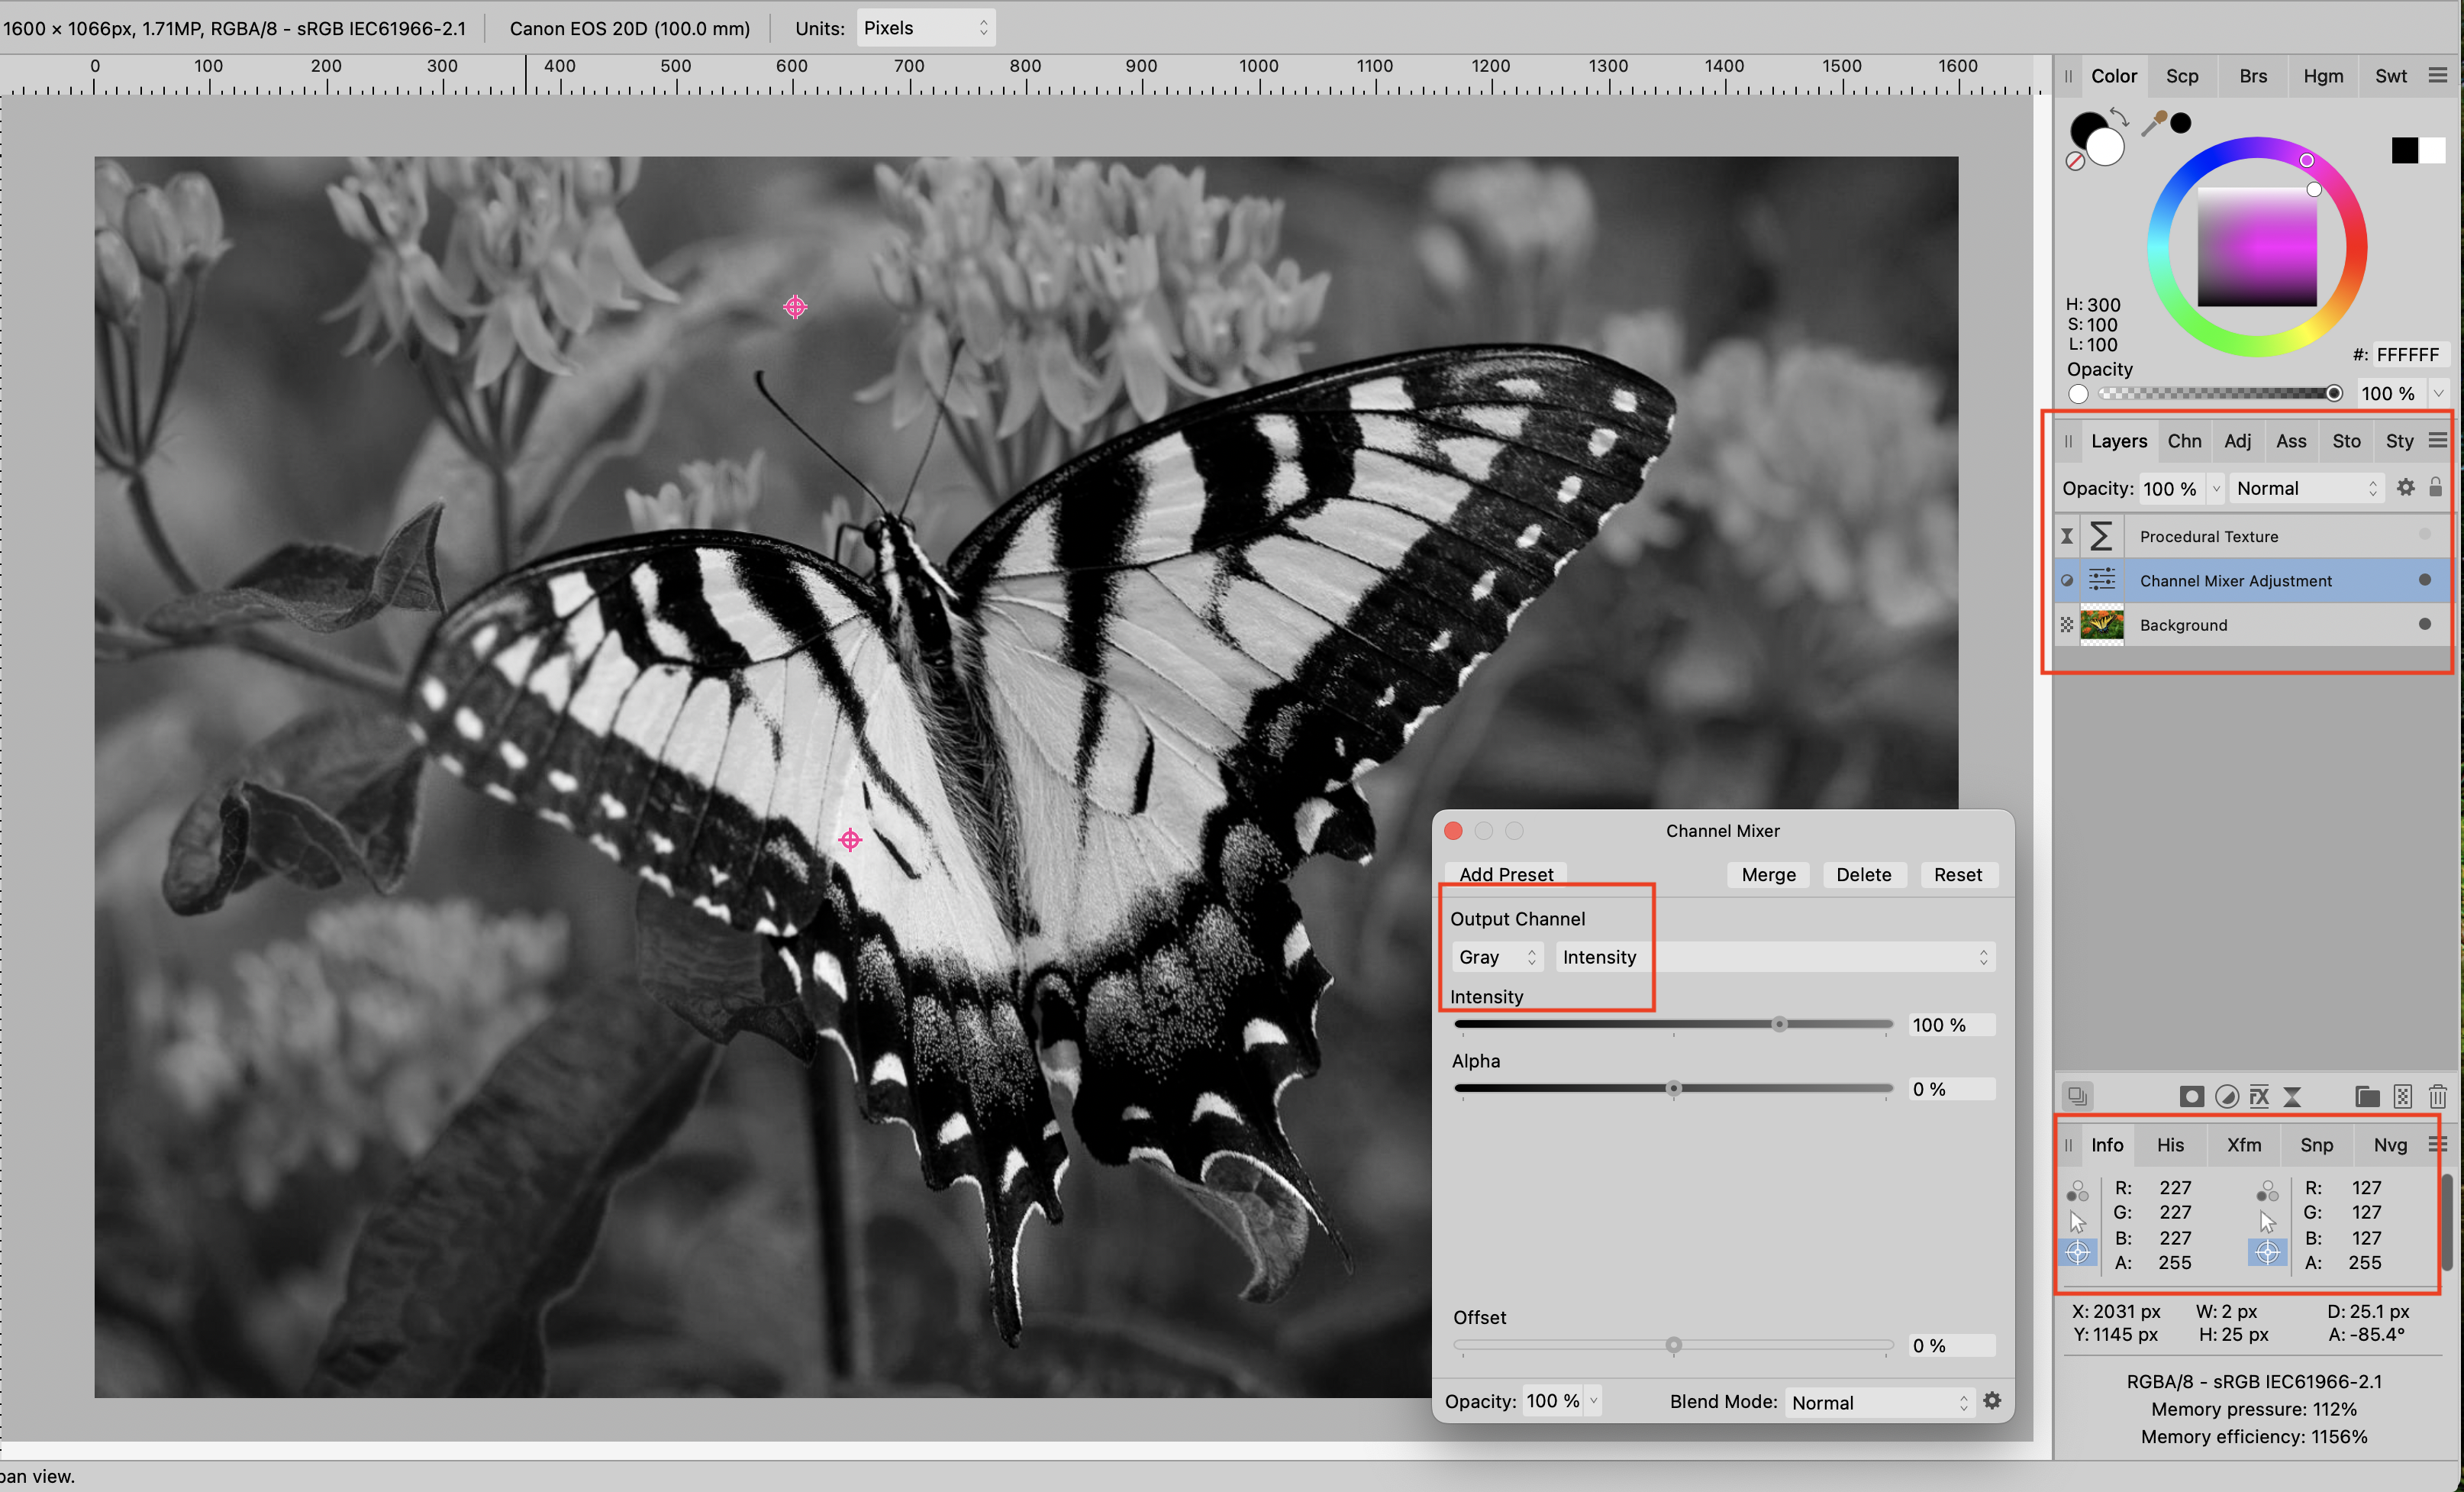
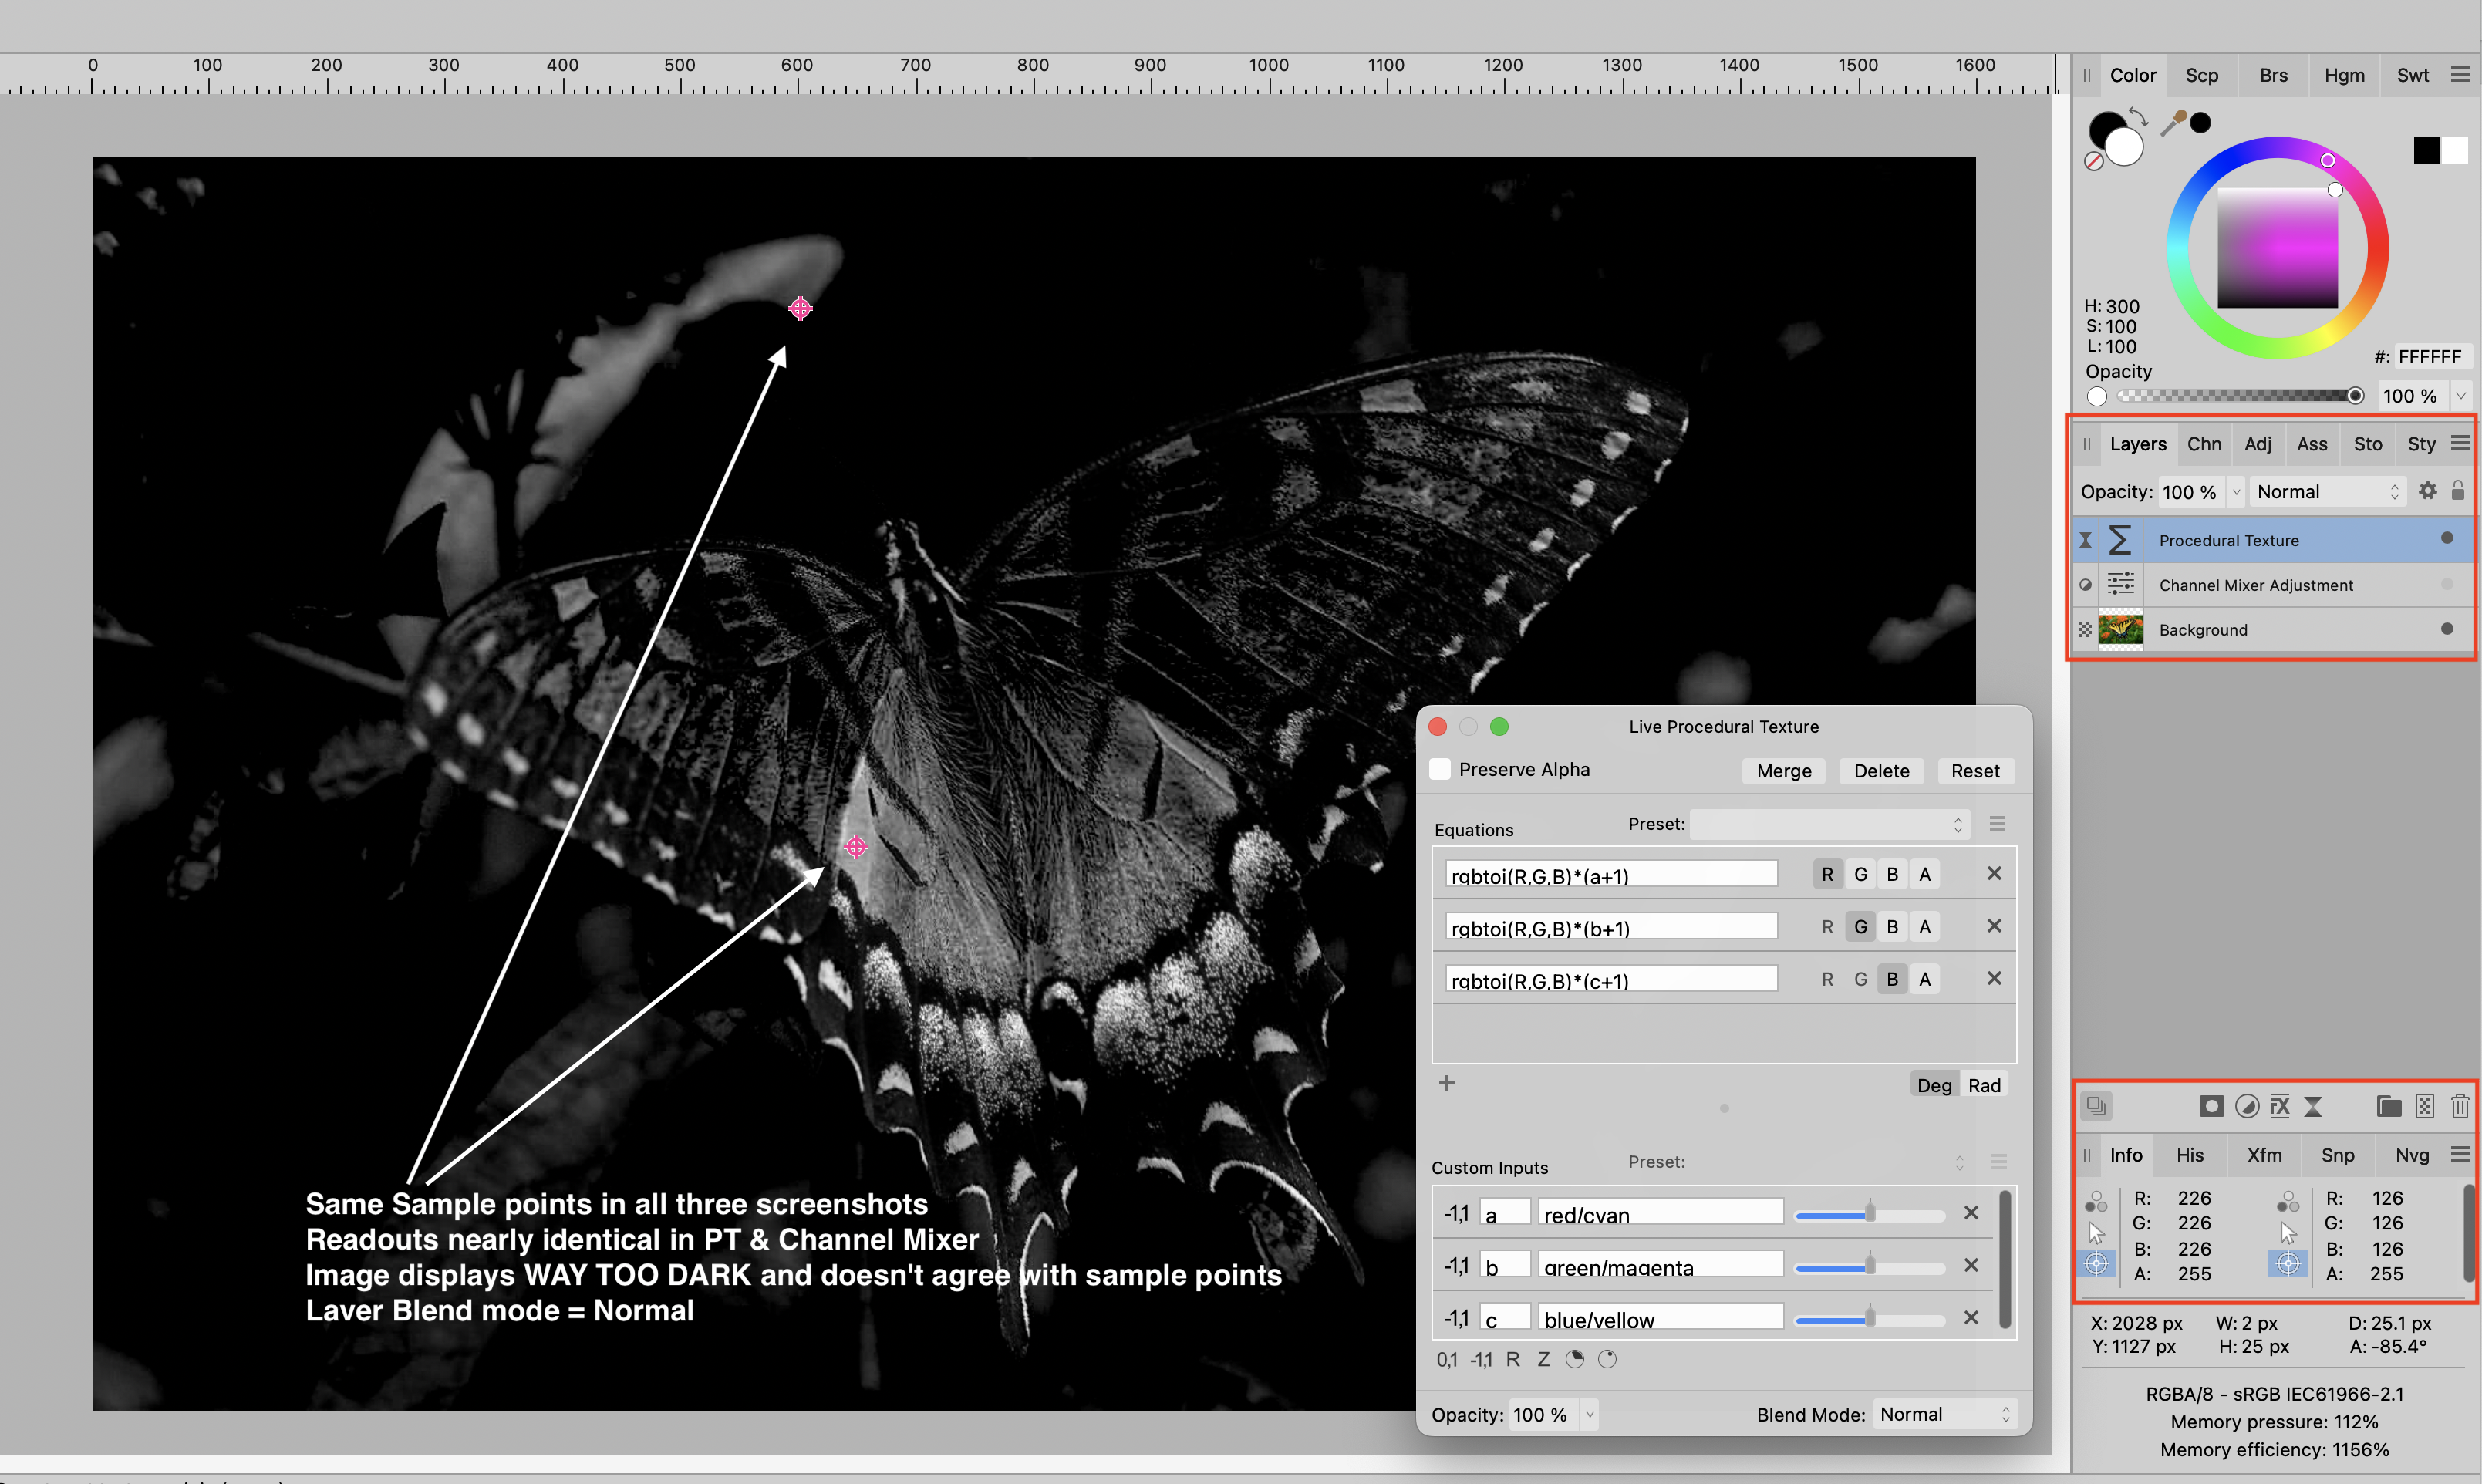
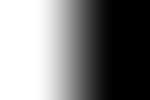
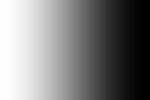
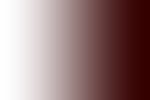
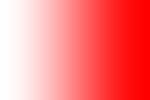
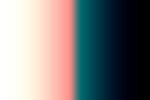
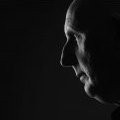
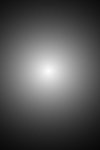
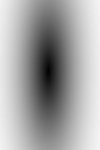
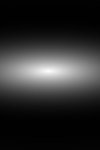
 I am experiencing some strange behavior with Live Procedural Texture and the "rgbtoi" function. Perhaps I am doing something wrong, but if so, I can't figure out what it is. I'm on a MacBook Pro running Ventura 13.6.4, using AP 2.3.1. I was trying to create a Toning Preset using Procedural Textures, but the display comes out very dark, which stopped me in my tracks. Here's the original image. I picked this image because it had a lot of different colors for testing. The below image shows only the base layer (the original pixel layer). The layers above the base layer are hidden. I added a Channel Mixer Adjustment Layer and set it to grayscale and I get the expected result. It displays the weighted grayscale of the image (using approximately 30% Red, 59% Green, 11% Blue for the conversion to grayscale). Note the sample points in the Info Panel. They look about right to me and agree with the image as displayed on my monitor. Below is a screenshot with the Procedural Texture Layer visible and the Channel Mixer Layer hidden. I used the "rgbtoi" function, which I believe does a similar RGB to weighted grayscale conversion as Channel Mixer (approx 30%R, 59%G, 11%B) and provides the output as grayscale intensity. The image displays extremely dark, but the sample points in the Info Panel are nearly identical to those shown in the Channel Mixer screenshot. The sample points do NOT agree at all with the displayed image. I'm guessing it is a "display issue" because the calculated values in the Info Panel seem to be correct. If I change the Layer Blend Mode of the PT layer to Color, Hue or Saturation, the image displays the same as Channel Mixer, but this shouldn't be necessary. And for my purposes, it defeats my intention of building a PT to do Toning. I could put a Channel Mixer Layer (set to Grayscale) below the PT Layer, but that shouldn't be necessary, should it? Seems like a bug to me, unless I am missing something (which is very possible). Any help would be appreciated. I'll also attach the afphoto file, created using AP 2.3.1. Thanks. PT-rgbtoi.afphoto
-
I want to create a Procedural Texture filter preset using one of the Voronoi functions, but can't seem to make it work. I know there's a standard Voronoi Filter, but it is very limited...basically size and line thickness. I was hoping to be able to create a PT filter that allows me to adjust size, shape, line thickness, distortion, blur, etc. I'm not sure what I am doing wrong, but I can't get the Voronoi functions (i.e., cellnoise, cellnoise2, cellnoisedist, cellnoiseedge) to do anything at all. Can anyone provide some examples that work to get me pointed in the right direction? I'm using v2.3.1 on a Mac running Ventura. Thanks.
-
I'm pretty new to Procedural Textures and need help creating a non-destructive version of Auto Contrast using a Procedural Texture filter. I want the filter to automatically set the white and black points in each channel to values that I specify, instead of just 0-255. I may want to leave a little headroom at the white and black ends for further editing. I'd like the use an Integer to set the Black value in RGB terms, e.g., 0, 5, 10, 15, etc. I'd also like to use an integer to set the White value in RGB terms, e.g., 255, 250, 245, etc. So, for example, I might choose to have the final Histogram adjusted so all 3 channels set to 10 R/G/B on the black end, and 245 R/G/B on the white end. Is there a way to do this? If so, can someone post the formulas I'd need to accomplish this? I couldn't figure out which formulas or functions to use. Thanks.
-
For a few days now I've been playing around with layer effects and some procedural filters – it's super fun and I love the results it can generate! This is the result this morning, based on my own logo and 100% pure Affinity Photo magic, and (except for the very last couple of steps) nondestructive. Maybe I'll release a macro for this sometime, if I can manage to squeeze it into a clean sequence. It'll work with almost any kind of base – images, texts, vector layers. This is what the base result will look like after the macro is applied, everything else is layer effects (and a background texture):
- 4 replies
-
- 7
-

-
- affinity photo
- layer effects
- (and 5 more)
-
 Hi Everyone, I have been on a mission to fill the void in the Macro environment by the lack of gradient support. To this end I was introduced to Procedural Texture and saw some possibilities and started tinkering. The manifestation of this can be found in several working groupings of R,G,B Vignettes and Linear gradient macros uploaded in the Resource section that I will update as interesting developments occur. In this, I will attempt to break down some of the math and show you how I am attempting to work around my limited knowledge of geometry(has been a while since trig) to make this accessible to the beginner who wants to implement some control over the basic examples and give some direction over how to navigate this powerful tool. If you would like some immediate video immersion of outstanding examples, that I may start from or point to, see Graphicxtras.com on youtube. If anyone has anything to add/correct/questions, comments, etc. please jump in...this is only meant as a supplement to the Affinity Photo Procedural Texture help section that can leave the beginner a little overwhelmed. So, here is the first installment of my experiences. And certainly, if anyone wants to use these explanations in video format please feel free...just post a link for everyone to see it. Procedural Texture 101 https://en.wikipedia.org/wiki/Procedural_texture These are some common definitions of elements of an equation w = width of document h = height of document x = horizontal axis y = vertical axis rx = relative x(position) to upper left hand corner expressed as (0,0) horizontal axis (rx,0) ry = relative y(position) to upper left hand corner expressed as (0,0) vertical axis (0,ry) R = red channel G = green channel B = blue channel A = alpha channel Relative x and y (rx,ry) x and y coordinates can also be specified as values relative to any starting point on the screen or any subset of the screen such as an image. On the Web, each clickable area of an image map is specified as a pair of x and y coordinates relative to the upper left-hand corner of the image. https://en.wikipedia.org/wiki/Cartesian_coordinate_system osc(input, parameter) The following syntax follows the typical convention of function(input, parameter) where the function( = osc ) https://en.wikipedia.org/wiki/Wave_function https://en.wikipedia.org/wiki/Wave_equation https://en.wikipedia.org/wiki/Oscillation_(mathematics) osci(input, parameter) This function example represents the oscillation over the set (in this case an interval) of the function( = osci ) https://en.wikipedia.org/wiki/Interval_(mathematics) This example is formula from the Checkered preset osci(rx*c/w,ry*c/w) variable c(Z) produces squares + addition of variable a(Z) to control vertical axis osci(rx*c/w,ry*a/w) c(Z) produces horizontal rows a(Z) produces vertical rows example. c=0 (no horizontal rows) c=1 (1 horizontal row) c=25 (25 horizontal rows) c=5, a=5 (square with the size of 5 rows horiz and 5 rows vert)(effectively enlarging 5x larger than (1x1) c=5, a=1 (rectangle with the size of 5 rows horiz and 1 row vert) etc. See video example of procedural texture squares at Graphicxtras.com I will update with macros of these examples as I go along, or if you want to get started go to procedural texture and find the checkered preset and start experimenting. orig softlight 50 checkered R,G,B enhanced* * enhanced with Dave's Shifter Macros(slight tweeks with all 3) looks like candy. (These are free macros available thru his InAffinity channel on youtube. This one came out today...) Enjoy and Experiment - T V
-
 Asinh stretching (hyperbole arcsine) is a common practice in astrophotography workflows to extract data from a stacked linear image. I was hoping to be able to use the procedural texture filter functions to asinh stretch my images in Affinity Photo, but it seems the required functions aren't supported (see https://affinity.help/photo/English.lproj/index.html?page=pages/Filters/filter_proceduraltexture.html?title=Procedural Texture). Since the asinh function could be manually recreated with Log functions, I'd request either of the two functions to be supported. Thanks!
 -
 I made a procedurale texture following a tutorial from James Ritson. Two issues: A. the PT does not have any effect - meaning it does nothing B. I cannot save it as a preset (I already have a category made with another document). An older PT I made is working and available in the presets. So, I assume there is an issue in the PT I don't see. AP Version 1.10.5.1342 on Windows
-
 I can't seem to rasterize procedural texture. Is the only solution to merge all visible layers?
 -
 Hi, Is it possible to offset pixels along the X and Y axes, using a procedural texture?
-
Hi all, I'm trying to figure out how to add new parameters to the Live Procedural Texture but I can't get my head around it. Basically I would like to use the Smoothed bars preset and add a rotation parameter and a way to control the thickness of the black bars and white bars independently, is this possible? Thanks in advance, Juan
-
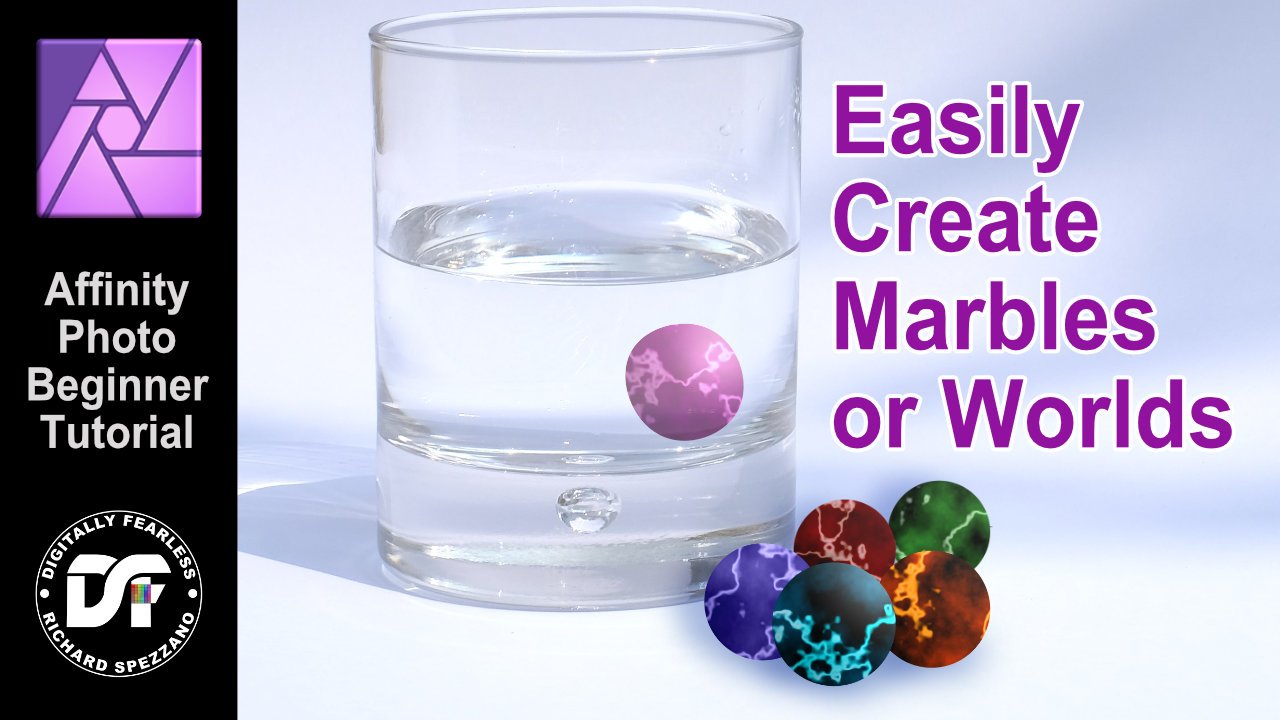
 Create Marbles My Latest Digitally Fearless Affinity Photo tutorial - Easily create marbles. https://youtu.be/YHECNTQ4SgI
-
 It would improve ease of use if the Procedural Texture Filter panel would resize to display more Custom Inputs (up to a reasonable limit) without requiring scrolling or resizing the panel. I am using a number of Dave’s macros which create Procedural Texture Filters with multiple Custom Inputs (up to 8). This either requires scrolling through the visible list three inputs or resizing the panel to almost screen to height due to the Equations region. The macros add significant attribute based selection capability to Affinity Photo, so hoping the team can make some accommodations for them. Thanks
-
Here's a funny thing. Load the attached RGB....jpg file. Procedural Texture. Add variable 0..1 called 'xx'. Put the following code (a snippet from some HSL tinkering) into R, G and B channels. var mx=max(R,G,B);var mn=min(R,G,B);var mr=mx-mn;var ms=mx+mn;var ifmo=roundup(mr-.001);var ll1=ifmo*ms/2;var iflo=roundup(.5-ll1);var ss1=ifmo*(iflo*mr/ms+(1-iflo)*mr/(2-ms+.001));var ifrx=1-roundup(mx-R-.001);var ifgx=1-roundup(mx-G-.001);var ifbx=1-roundup(mx-B-.001);var hr=ifrx*(1-ifgx)*(6*roundup(B-G)+(G-B)/mr);var hg=ifgx*(1-ifbx)*(2+(B-R)/mr);var hb=ifbx*(1-ifrx)*(4+(R-G)/mr);var hh1=ifmo*(hr+hg+hb)/6;xx You should see the value which is in the xx variable (0 to 1, black to white) as the rest are vars. But what I'm getting is the variable acting on the colours within the image, but not the mono. Just to confuse things further, if you remove the last var statement (var hh1=ifmo*(hr+hg+hb)/6;) it works as it should. Don't know if its significant, but I created the image using shapes and no (white) background and exported it to jpg. I re-did this export and same effect. I then tried it with another exported file and had a similar effect. Something to do with exporting of files with no background to jpg? Still odd about the PT code effect. EDIT: Hmm. More tinkering. Don't think it's export. Happening also on fresh pixel image.
-
 Hello, I want to get a color value of a pixel at (x, y) coordinates. Is there a color sampler function in Procedural Texture Filter similar to texture2D in GLSL? Thanks!
 -
Ctrl+C cause crash when a group has a procedural texture live filter. It seems that this happens when a group has a vector or an image layer together. Group that has only procedural texture or a pixel layer together is ok.
-
Hello All, I have been inspired by a thread I started this morning on Basic Procedural Texture Deconstruction to allow beginners to see into the process and the math to be able to create their own Procedural Texture. I thought sharing some of my documentation would be a good place to start and fortunately videos are available at Graphicxtra.com. They are a great resource. Unfortunately, not how I got started, but, I am so happy to have found them that I will start seeing if I can work through an entire video at some point. For now, I am still figuring out that gradient macro workaround and this is a linear variation that introduces another formula in a unique way. I hope you like it as I hope to expand on this one a little. LINEAR V2.0 Formula: smoothosc((c1*rx-d1*ry)*a1/w,b1) smoothosc((c2*rx-d2*ry)*a2/w,b2) smoothosc((c3*rx-d3*ry)*a3/w,b3) Inputs: a1(R),a2(R),a3(R) lines b1(0,1),b2(0,1),b3(0,1) hard edge c1(-1,1),c2(-1,1),c3(-1,1) horiz shift left, right from center d1(-1,1),d2(-1,1),d3(-1,1) vert shift up, down from center For now, this produces linear gradients that shift left or right, up or down, rotate limited( this happens when using the horiz shift and the vertical shift at the same time). The R,G,B creates multi colored gradients. This layer is non destructible and applies at 50 percent grey coverage at 100 percent opacity for choosing color gradient. Set blend mode to overlay or soft light to see image and adjust transparency to taste. T V - LINEAR PT R,G,B V2.0.afmacros Enjoy and Experiment - T V NOTE - I started a new beginners supplement to the Procedural Texture Help section in the tutorial resource section. You will be able to find more examples with free Macros and my attempts to break them down in understandable ways. It should help others become a little more comfortable with this incredible process. Future examples will show up on the tutorial forum page...
- 1 reply
-
- 1
-
-
- linear gradient
- procedural texture
- (and 1 more)
-
With a little help from my friends, I offer a fresh look at linear gradient procedural texture formula. Yes, it happened in a flash this morning, so, examples will have to follow. This is complete with some exceptions that I was experimenting with a little last night... V1.0 Creates very controllable R,G,B linear gradient with edge hardness, contrast, tint, tone, etc. V1.0 needs wants desires 1) Point of gradient spread. (It should be represented as a fraction from location point rx, ry -/+.) 2) Scale controls.(push left/right/up/down) 3) Skew controls.(angular push) 4) Rotate controls.(being able to use angle input or elevation/rotation controls would be great, my current rotation is very limited 45...yes, I know) grad 100 grad edge 25 grad edge 50 grad edge 75 grad edge 100 contrast 2 contrast 5 contrast 8 lines 2 lines 3 lines 4 lines 5 lines 5 edge 50 lines 5 edge 100 blue 100 blue 100 redt 50 blue 100 redt 100 redt 100 redt 100 edge 100 * It is important to note that red, green, blue (0,1) controls base or areas of gradient with no color, redt, greent, bluet controls gradient color. The gradient is expressed at a rate of 150 percent coverage of width. It could be removed or controlled by a variable. This macro is 100 percent non destructible and does not use the R,G,B image information in its calculations. Use transparency and blend modes to taste or add a white pixel layer under procedural texture layer, merge visible, and use that layer as a gradient. I am currently at a loss as where to insert the formulas for scale, skew, rotation without completely altering this in undesirable(controllable) ways...also, is it possible to batch process pixel layers? Macro will not export... Experiment and Enjoy - T V T V - LINEAR PT R,G,B V1.0.afmacros T V - LINEAR PT R,G,B V1.1.afmacros T V - LINEAR PT R,G,B V1.2.afmacros Examples to follow... ***V1.1 replaces fixed spread of gradient to 100 percent of width. Created variable r,g,b (0,1) controls shiftr, shiftg, shiftb for horizontal shifts creates multi color gradients. A limiter may be necessary to slow the shift progression. Offset rx, ry variables might be interesting for greater variation... >>Originally set for horizontal image. Running this just now on a vertical image the gradient just needed to be shifted over. Turn on edge hardness to hard. Use the edge(center of gradient) as location point that you center the gradient too. Dial it back to taste. 1.1 grad redt 25 redt 50 redt 75 redt 100 V1.2 creates R,G,B variables for hard edge and contrast to add more edges and brightness...Interesting since this has no (ry) I am not sure how to put in an (rx, ry) shift to create that 3D offset...looks like I can now have my own Rothko and Richter...new ideas keep coming... > NOTES - Experiment with R, G, B channels combinations by turning the channels on or off. Creates different color combinations. Change R, G, B channel formula rx to ry. Creates horizontal and vertical channel combinations. Rotation and offset would enhance angle of color. Rings or other shapes would be interesting. Combining using differing formulas on differing channels((R)rings, (G)linesH, (B)linesV),etc.. Question...How much is too much? Simplicity is probably the route to go when these get cleaned up(more digestible). One set of controls and have plug in effects... Examples to follow...
-
- 1
-
-
- macros
- linear gradient
- (and 2 more)
-
Is there a panel to input / edit the equations for the Procedural Texture filter in Affinity Photo on iPad? I can't figure out how to find it. Thanks.
-
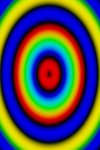
For your pleasure...I have been busy working this vignette thing again, and I think, this is getting somewhere. Completely different approach to achieve a more controllable experience in every way to the gradient macro workaround, and well, much, much, more. First, this macro/procedural texture is set up for a round gradient. Like the original, it applies perfectly to vertical and square images. To center the gradient on a horizontal image(should not be off by much), double click the procedural texture layer and use the crosshair over image to drag and reposition. The controls will allow the complete control over shape(horiz, vertical), size, gradient, etc. If you want an old fashioned mask layer, set blend mode to normal and opacity to 100 percent, merge visible, turn off procedural texture layer, invert merged layer, reset new blend mode to multiply, set new opacity to taste. Of course, that is just for the black gradient vignette...the possibilities are in the experimenting... Red, green, blue (0,1) controls the entire image the same as normal R,G,B sliders to mix color. Red, green, blue (-1,1) controls radiate from the gradient center. Layer opacity 50% blend mode subtract. (R255,G0,B0) (R0,G255,B0) (R0,G0,B255) (R,G,B=255) (R,G,B=0) size 5 red 100,0,0 redt shift more redt shift intensity 2 ring 3 shift +redt shift +grnt shift 25% trans 50% soft light 50% vivid light 50% soft light T V - VIGNETTE PT R,G,B V2.afmacros T V - VIGNETTE PT R,G,B V2.1.afmacros T V - VIGNETTE PT R,G,B V2.2.afmacros T V - VIGNETTE PT R,G,B V2.3.afmacros *** V2.1 Adds three (R) ring progression controls (over the 10/10/10 fixed spacing to g(R)/h(R)/I(R)) (these could be enhanced in two ways; adding a scale factor control to each of these (R), and or add controls gr(0,1)/gg(0,1)/gb(0,1), etc. to create some enhanced color variations. *****V2.2 Reorganizes, relabels, restructures formula. Added ring scale (R) controls. Macro setup for center horizontal photo, slightly offset in vertical. *******V2.3 Corrects black gradient with invert. ++> future needs for this is a control to rotate. - Ultimately, a way to control color choice, order, midpoint, etc.... V3.0 New formula, more with less...radial, linear, R,G,B offsets, etc. While getting this together this AM, practicing the new fad of social distancing, TV on, and a nugget pops up with Joan Jett +3 in different locations, jamming a song called 'New Light of Day'. Starts off kinda slow and wonky...gets going and wow, grooving on an inner plane, I am feeling energized. Nice start to the day, so, here you go, another round of jamming... Macro is set for normal vignette start. These are additional examples of new effects... elliptical radial offset radial offset horiz linear vert linear vert linear ofstxy(-250,0,250) xy(0,500,1000) radial horiz linear radial elliptical 1 elliptical 2 vert linear -1 -2 T V - VIGNETTE PT R,G,B V3.0.afmacros T V - VIGNETTE PT R,G,B V3.1.afmacros T V - VIGNETTE PT R,G,B V3.2.afmacros V3.0 notes to do... 1) Control for Sin/Cos factors. (This would control gradient and size...) (getting addressed by differing formula with contrast controls) 2) Rotation...have found h/v shift / skew formulas...( /w turn this 45degrees) 3) Offset scale factor control( +50px, +100px, (?))(done) 4) Contrast-luminosity-brightness/hue-saturation-intensity controls(?) (This would control gradient and size...) 5) Create variables for functions...(simplification of repeatable formulas, offset scale factor control...) ***V3.1 Creates variables, adds hss(R) horiz shift scale and vss(R) vert shift scale (offset scale factor +50px) *****V3.2 Created vsb(R) vert shift blue and hsb(R) horiz shift blue to move it from a fixed position. >Thinking out loud - Of course, this is a work in progress and I have no idea what I am doing, just following this down the rabbit hole...This is about procedural texture right now. When its done, it will be all about Blend Modes...more coming... Enjoy and Experiment, - T V (this is really a toast to 3 individuals for sharing procedural texture videos for affinity photo...I could use some help there if someone wants to demo this...) Please feel free to comment, as this will also help others expand their comfort zone! A mind is a terrible thing to taste...😉 If you want more... go see Graphicxtras.com on YouTube! I am on a new formula, starting from Linear gradients, that is looking promising as an upgrade. I have some shifts/skews to add, and we will just have to see... Hope someone out there finds this entertaining at least. When I am moving the dials one click at time, the new possibilities just keep going...why this gradient thing? Never thought I would still be diving deeper into this, but, here I am...MORE PROCEDURAL TEXTURE PLEASE! Yes I am going to have to make a macro to generate examples for posting...
-
 I'm working on isolating the maximum value colour in each pixel, so in Apply Image I'm successfully using: DR=SR*rounddown(1-(max(SR,SG,SB)-SR)) DG=SG*rounddown(1-(max(SR,SG,SB)-SG)) DB=SB*rounddown(1-(max(SR,SG,SB)-SB)) rounddown is effectively a boolean operator that reduces this expression to 1 or 0, which happens when the R, G or B value is the same as the maximum value. Implementing this in Procedural Texture I'm getting an illogical and different result. R: R*rounddown(1-(max(R,G,B)-R)) G: G*rounddown(1-(max(R,G,B)-G)) B: B*rounddown(1-(max(R,G,B)-B)) In a test case using B to check out differences, the evalution of B differs *sometimes* when Blue is the maximum. I suspect a rounding or clamping effect, so (max(R,G,B)-B) is not sometimes wholly zero when B is maximum. An example where this evaluation fails is RGB of 102, 109, 135. This seems to be happening more when the value of Blue is higher. A fix is clamping the max calculation, B*rounddown(1-clamp((max(R,G,B)-B),0,1)), but is a kludge that shouldn't happen (and, I'd suspect, most users would not find). Procedural Texture, for some reason, seems to calculate much faster than Apply Image. Not sure why this is. When PT calculations don't need kludges I'll move over a number of macros I offer in my InAffinity YouTube channel (which currently take several minutes to calculate in Apply Image). APh version is 1.8.0.585
 -
Today, I was on a search for Procedural Texture formulas and I found one in the help menu, thanks Affinity! Instead of giving you a macro based on that alone, I added (0,1) controls for red, green, blue. This expands the versatility of the radial vignette to create color toning, blends, etc., as well, all in one. The controls are set up for a black round gradient vignette. When applied, the gradient is sized and centered to the image and will add a non-destructive layer above the layer stack. This can be applied from any selected layer or not. Double click on the Procedural Texture layer to open the Procedural Texture dialog box. With the Procedural Texture box open, select any point on the image area to move the center of gradation. The first (3) controls change the size and depth of gradient. The second (3) R,G,B(0,1) controls offset the black gradient to color, just as normal R,G,B control sliders. +++ After further testing, the settings of the macro set this up perfectly on square and vertical images. For horizontal images try changing the 1st control to 25%, 2nd control to 50%, and 3rd to 2. Experiment and Enjoy! - T V My hope is to learn how to replicate this in a linear fashion, amongst others, which, will fill a current need in the macro environment to be able to produce a variety of color gradients options. ***Any help will be rewarded with more macros ✌️ ...I just finished another (divided) version which produced interesting results...also, another gradient vignette version controlling EVERYTHING completely differently... T V - VIGNETTE PROCEDURAL TEXTURE R,G,B.afmacros
-
It would be great if variables/custom inputs in Procedural Texture were selectable in macros, rather than just Opacity. Thanks!
-
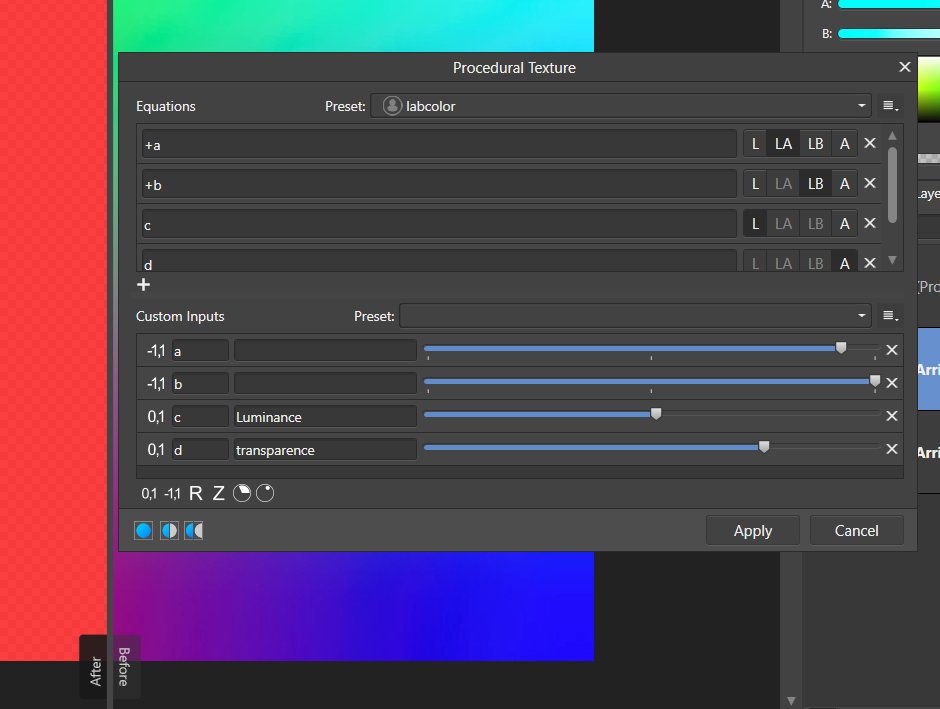
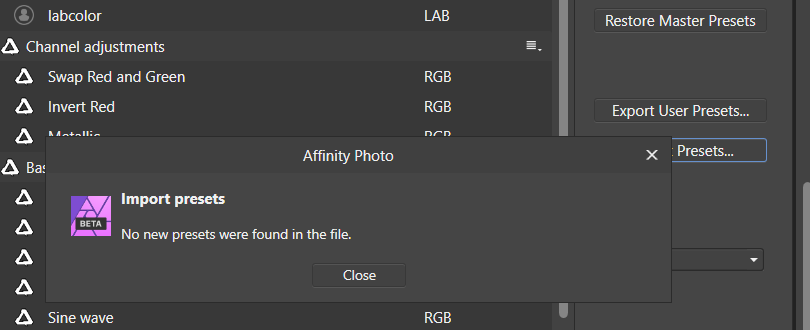
 Hi, I start with with the procedural texture ( Filters> Colours> Procedural texture) It 's in Lab mode , ( I wanted see LCH if s the easiest way to " move" w color ), Before, I made an simple test. in 1.8 beta, play with channel save as a preset, close the file An reload with another test file BUT By default we have RVB option, sometimes very difficult to reload it , and impossible with live filter option I can export the preset, but I want re import, photo (beta and release) say me Sometimes I have difficulties for found Lab option, perhaps by bad understanding of the structure Preset manager can you say me labcolor1.aftoolpresets
-
In the latest release, when creating a procedural, what you type in the equations field doesn't stay. For example: Open up an image Open up the procedural texture filter You should have no equation lines yet Click on the + to create a new equation line. It will just show a 0 in the field now. Change that 0 to x and hit enter or tab. Notice how the display goes back to 0 but the filter actually took effect? If you click back in the field it will show what the equation actually is (in this case just x). If you create another equation line by clicking the + button then the original line will now show the equation that was in there and the new line will show 0.
-
 Hi I just installed the new beta and gave it a bit of a whirl. so far the issues I`m seeing are as follows 1. using the square bracket keys to increase/decrease brush size is not working 2. redraw on blur, smudge etc brushes is very slow and resulted in a lock up 3.procedural texture needs sliders not equations. I can't figure out how to experiment with this at all! I suck at math and even simple algebra is very difficult for me but give sliders to visually experiment and this filter will become useful. as it is i can't use it at all. 4. Filter forge 7 works for me with the stable version but generates an error with the beta.