Search the Community
Showing results for tags 'print'.
-
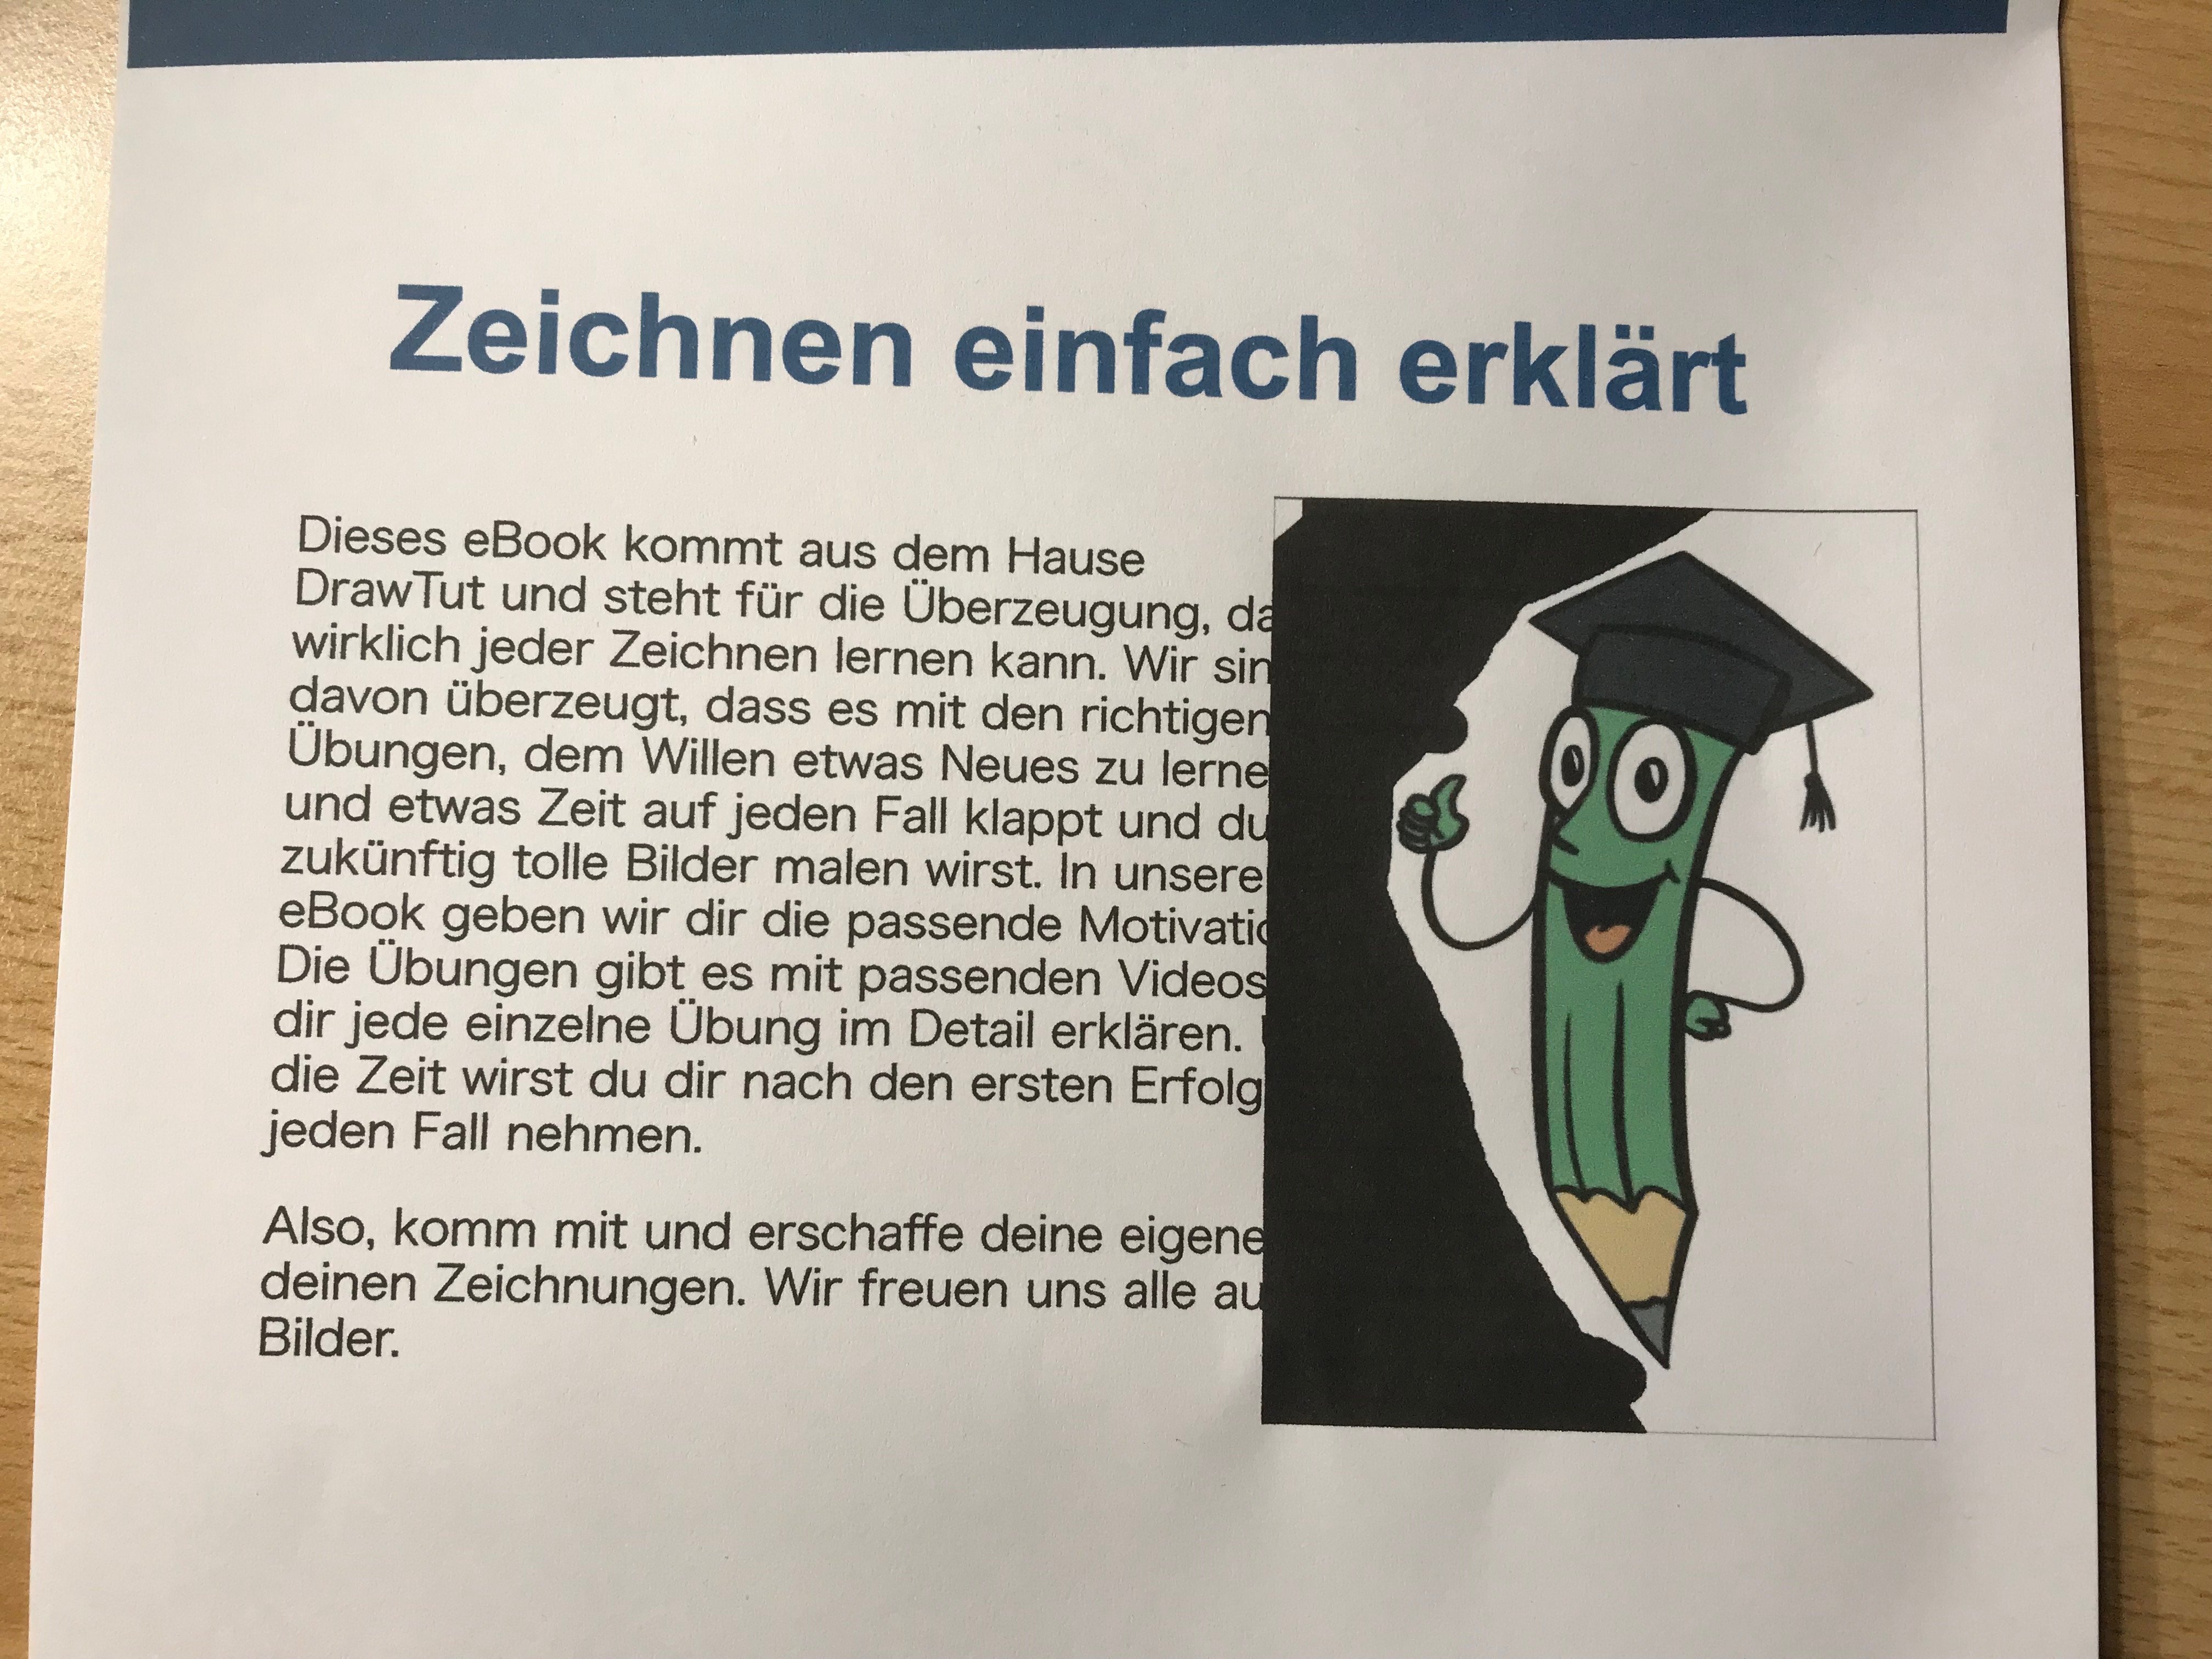
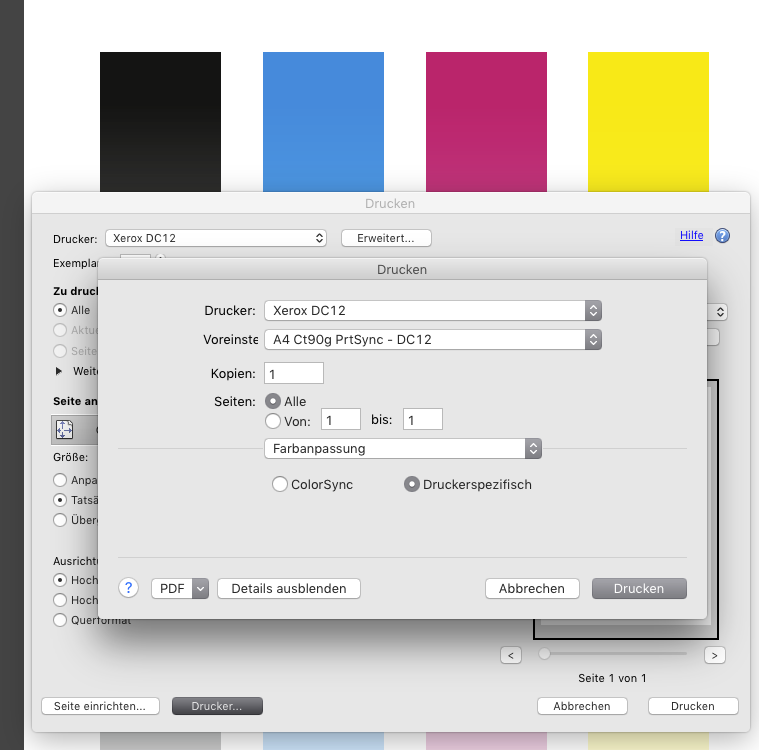
I have created an extensive document with many PNGs with transparency. I want to provide and compress them as PDF eBook. However, with normal printing of the compressed PDFs, the images are printed with a black background. This does not happen when printing uncompressed PDFs. Here the printout and the file:

-
 I'm working on horizontal A4 size art board and when I print it, it doesn't fully print. Somehow, A4 paper size in print option is shorter than actual art board that is the same size. I tried to change the options in Affinity and printer itself's options, but both doesn't solve the problem. What should I do?
-
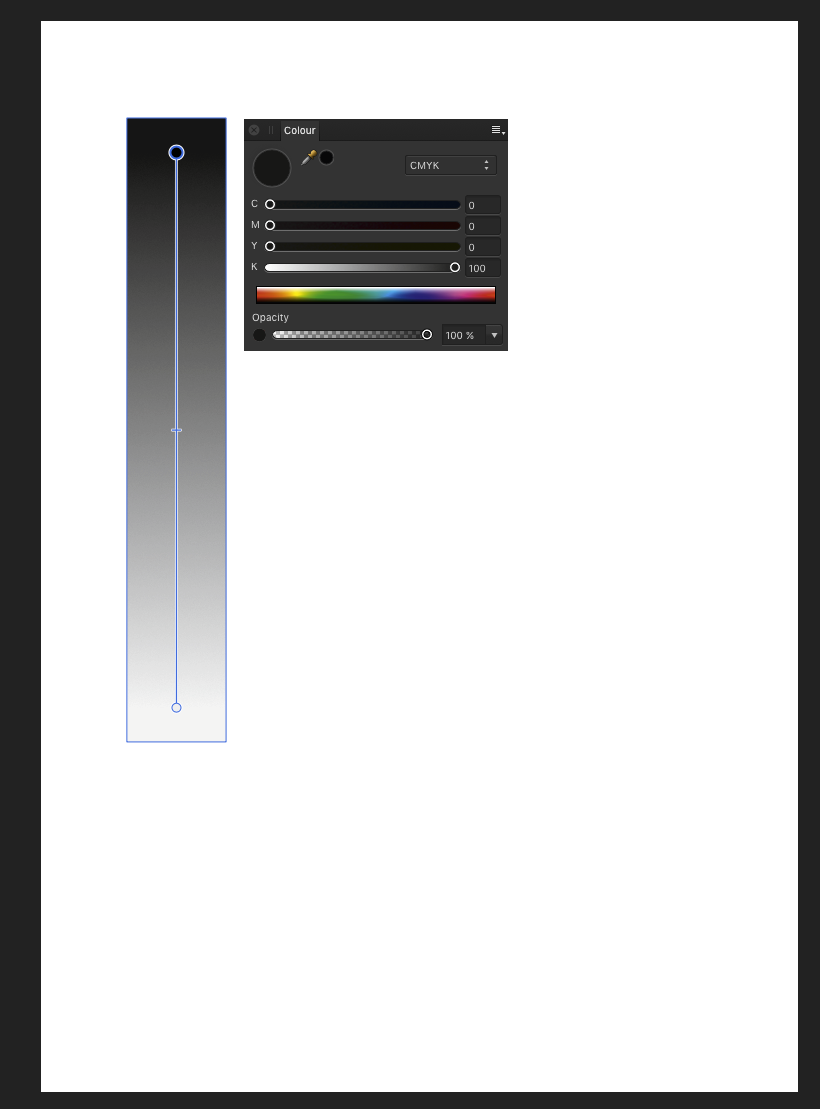
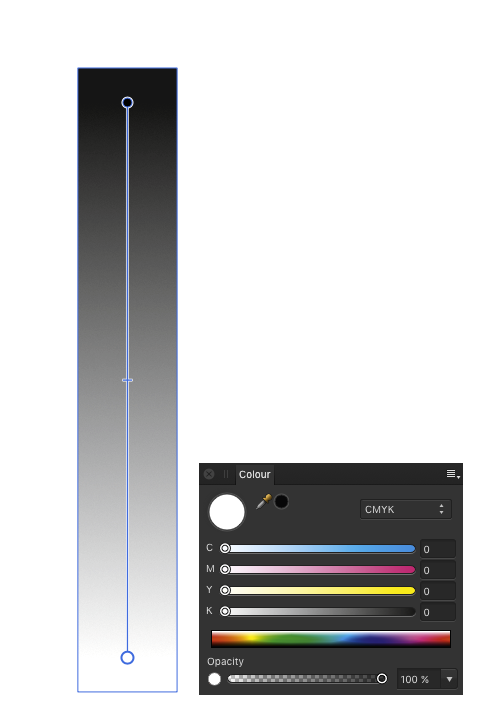
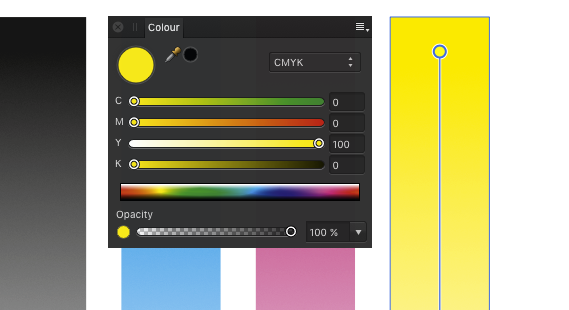
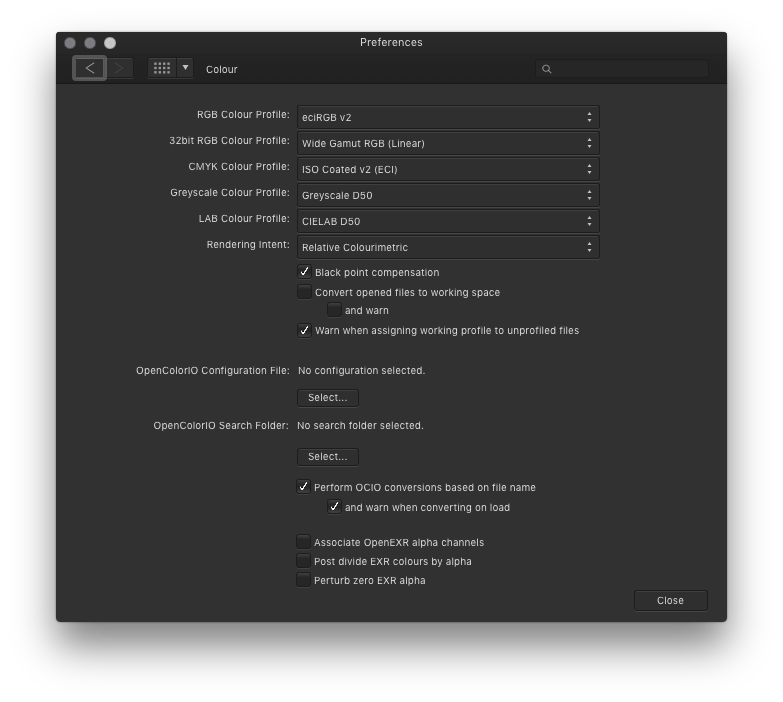
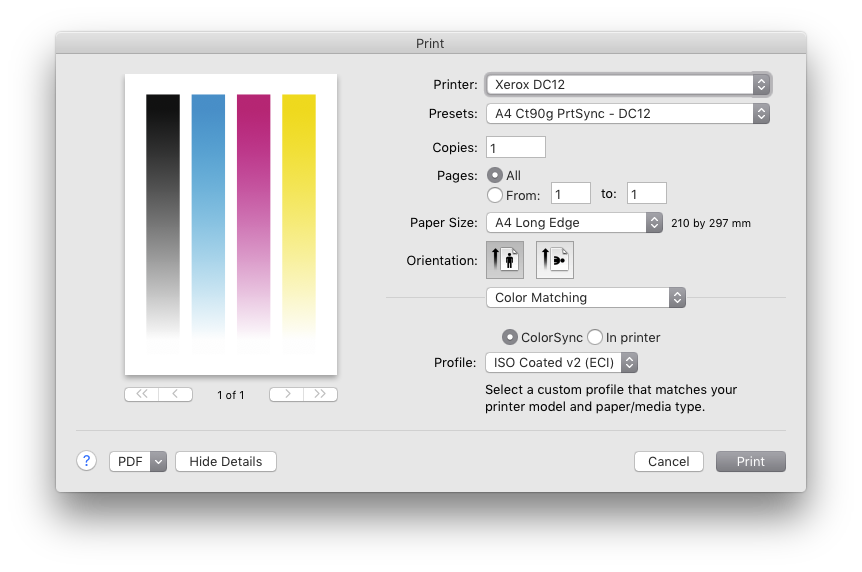
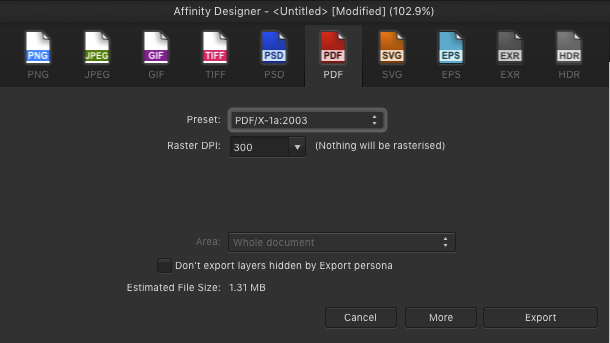
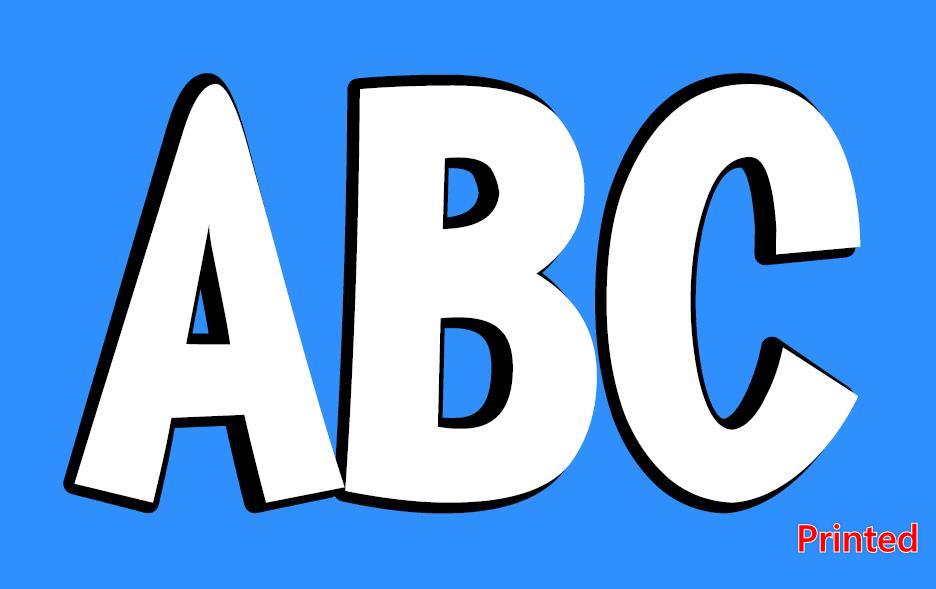
 Greyscale become multicoloured when printing from Affinity Designer. Obviously a conversion to/from color profiles happens inside Designer. How can I prevent this from happening? (This happens to all colours. It is just shown best with greyscale.) My printer expects data in the same colour profile as my AD files working profile. (ISO coated v2 (eci)) When exporting a PDF/X1a and printing with Adobe Acrobat everything is OK.
-
 Hello, I'm having recently some trouble with bleeds. I'm a newbie to graphic stuff, I've created a poster and now i need to print it and cut off the edges, so there are no white borders around it. In the document setup, I've set the bleeds to be 3mm on each side. When exporting, I've added all the crop marks and all the stuff, but when I export it to the final pdf file, the bleed marks are 3mm away from the poster, not in it actually (please see attachements, and the bleed is much bigger just to notice the difference). I want Affinity Designer to put the bleed marks in the actual poster, so there will be part of the image cut off. Unfortunately, I can't set bleed with minus at the beginning. Could anyone please help me? Thank you. A lot. Mike ostrava4.pdf
 -
Hi, I have been testing the Affinity Publisher Beta since its launch and find it to be performing well in most departments, but for a few glitches here and there which is being actively resolved by the developers in the subsequent builds. Kudos to them for the good work! One feature I would really like to see added in APUB to its already impressive list is "print preview". The ability to view the file to be printed, make imposition layouts, multiple ups, booklet layouts, add bleed, trim & registration marks will be a great help to the printing fraternity. With this one addition Affinity Publisher can break the monopoly of Corel Draw among the print industry in India. That said I have nothing against Corel Draw, it is a good, steady and mature software with lots of features and amazing ease of use. Its main drawback is its forbidding cost! I feel another able competitor in the market will bring about the right balance. Really appreciate if the APUB team can consider this feature for the future builds. Regards, Vijay
-
 Hi Team, There seems to be a problem in the way AD versions 1.9.0 through to 1.9.2 recognise and pass vector line information to our Trotec 'JobControl' print driver. The print/render will now produce a raster red line instead of a vector for files created in any version prior -> 1.8.5. If I redraw that very same line (then snap it to the existing path in 1.9.2 Beta for example) and print the file to JobControl, the line will print correctly. We have hundreds of files with complex cutting Artboards in them. As it stands we will have to recreate every red cut line from every shape and layout if versions 1.9.0+ will not print lines created in previous versions. The only way to get around this is to export every file to .eps format first. But then we lose all the group/layer stacking and colour tagging which is used for hiding and printing different combinations of large piece-count layout files. Another change in 1.9.0+ is that it does not recognise the 'Defined by driver' paper size in the AD print settings used to print to the correct laser-bed sized file. I now have to change the setting to 'custom' each time in the AD print dialogue and enter the size manually to have it set the correct 610mm x 305mm file table size. I have been printing for two and a half years into JobControl using exact RGB colour values for both red and blue vector cuts. Stroke width is not critical as long as it is sub 0.05mm, I always set ours to 0.02mm. I mention this because I have read a number of posts here on the forums which believe a critical 'hairline width' for Job Control is necessary for cut lines to be recognised and rendered. This is not so. JobControl is more concerned with the RGB value and seems to accept any stroke value under 0.05mm (0.14pt). I have tried the printing process with numerous files created in versions ->1.8.5 and all red/blue vectors seems to behave the same. I am keen to get to the bottom of this as it's a big time-consuming workaround for us for years to come if the files can't translate into future AD versions for easy, reliable laser printing. Can provide files and system info through a secure channel.
 -
Just upgraded to V1.9.2 and can no longer print borderless. All was fine in 1.9.1. I've done a few test prints with full extension and there is now a non printed area at the edge of every print Normally when Borderless is selected in the print driver, the red dotted line around the edge of the preview disappears. This also no longer happens. Also the same bug in Photo 1.9.2 I've had to downgrade to 1.9.1 in both Designer and Photo until this is resolved
-
 Dear all, I have an outdoor exposition coming up, for which 20 of my photos (bug portraits) will be printed on 1,3m x 1,3m boards (51x51 inch). Is there any option in Affinity Photo to upscale, to add pixels (as in: a higher ppi)? The photos are originally 6240 x 4160, but since the prints will be square, they will be cropped. Do I need something like Topaz Gigapixel, or is there a tool in Affinity Photo that can do something similar? Cheers!
 -
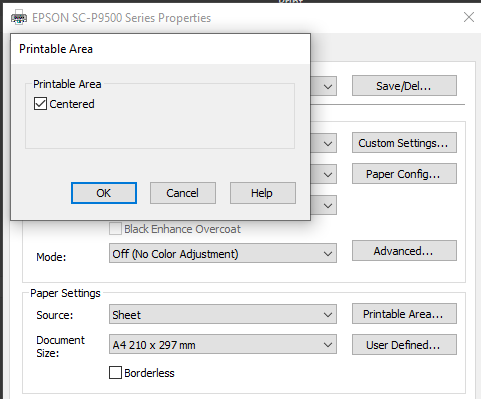
Hi. I posted this bug but on a previous version, so i'm not sure if this is the best practice but am starting a new thread. I got too busy with work to follow up on this and have just continued using photoshop in the meantime. In the process of writing this I think i've narrowed down the problem. Windows 10 Affinity Photo 1.9.2.1035 Epson surecolor SC-P9560 (aka 9500 9570 in other regions) Printing from driver Similar issues going way back posted here and here basic problem: Epson SC-P9560 has uneven minimum margins for sheet prints (roughly 14mm top and 3mm bottom). In every other software i've used (PS, LR, Qimage, Mirage) the print/preview will reflect these minimum margins, and any resizing to printable area will respect these boundaries. In order to have a centered printable area, you must check the following box in the driver: If for example I set up an image file at my exact print dimension and send it to the driver in any other software, I must check this box to get a centered print. This is expected behaviour, and in rare cases I will print with a 3mm margin on one edge for a particular image. In Affinity, it seems that checking the above box actually de-centers the print layout. I won't go into great detail showing examples (they can be seen in the previous post), but can provide more context if people don't understand this. unchecking this option seems to produce a centered print, which is opposite the expected behaviour. Confusingly, leaving it unchecked also allows printing with the factory minimum (~3mm/14mm) margins. Assuming that this behaviour is consistent, it could actually be a little more convenient for me overall (I can ignore the "centered" checkbox), but it's definitely odd behaviour, and completely threw me from adopting Affinity for the last 6 months. IMO this should at least be noted so that people don't have the same issue. I wonder if AP is doing something similar under the hood for other printers that show a similar layout problem? Thanks. Will update if I discover anything new.
-
 I am trying to print various images / photo's from Affinity Photo using a Canon Pro 1000 printer and for some strange reason all attempts have resulted in the image displaced e.g. not centred. The margins are all set up & look good & even in soft proofing but the A2 printed image is offset to one side (rt.) approx. 2→5mm in both portrait & landscape. When editing / printing using the Canon software then the photos don't have this issue. I've noticed other posts on here that have similar issues but I've not discovered a solution. If anyone is able to advise me as to what is amiss that would be great as not being able to produce a correctly positioned photo kind of defeats the whole purpose of my purchase.
 -
The stroke on text with particular font will be shifted when printing. I can send the font(it's a paid font so I can not upload here directly) as sample.
-
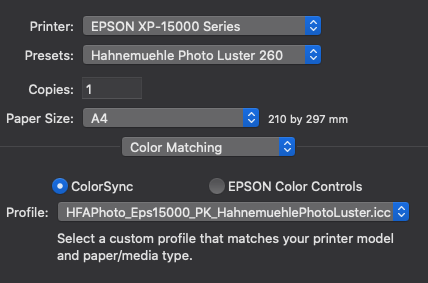
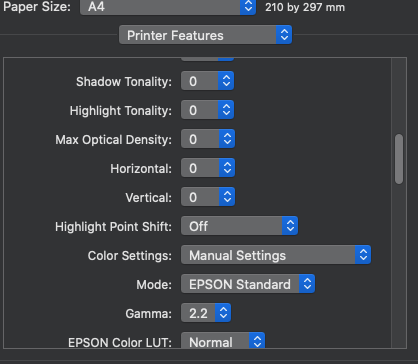
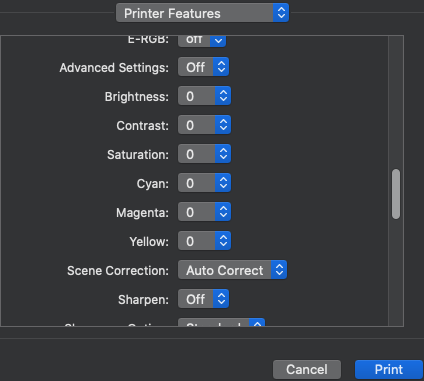
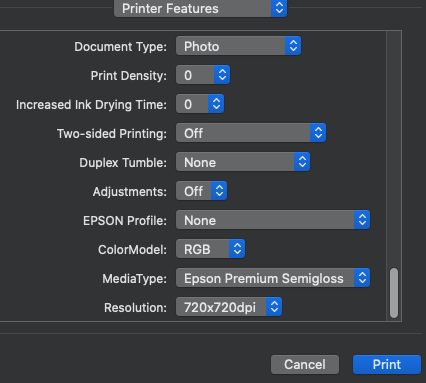
 Hello everyone, I bought an Epson XP-15000 and I'm trying to print from affinity photo on MacOs. I've done the soft proof correctly and now I'm in Print menu but I have some doubt. About color matching I set up this: But here in printer features there are a large number of parameters. How can I set them, please?
-
 Would be nice if you could add an option to reset the number of copies every time I print. Remembering the number is often annoying.
 -
is this planned? This is absolutely crucial part of printed work. REALLY needed ASAP.
-
 I have weird issue where I set the size to 5x7 in but when printed it is not 5x7 in. size issue.afpub IMG_1448.HEIC
 -
 Hi Guys, Im currently working on a name badges template for a company. The size in Affinity designer is 74mm x 24mm When I export to pdf and print it they are 70mm x 23. This is also when "fit" is turned off. Is there anything I need to change when exporting to pdf? could DPI have anything to do with it? srry Im a web guy and not a print guy :P Hope you can help.
 -
 Hi, I hope you can see in the attached image. Black lines are appearing around part of an object. I have checked that I dont have a black stroke on those layers and I dont. I cannot see it on the screen until I go to print then its in the print preview and the subsequent print itself. Hardware acceleration is already turned off and Im on the most up to date release of Designer. Im at a loss of how to get rid of it. Kind regards Gill
-
 I am preparing a celebration document for my wife's 80th birthday. I have started to print them off, and3 have a problem. The pictures are all coming out with a reddish setting As a comparison I have printed the same picture out on page plus and I attach a scanned image of the two. The lower from PP, the upper from AFF Pub I have an Epsom WF7610 printer. The printer is set to CMYK/8 US web coated swop v2 So where am I going wrong?
-
 Hello! I couldn't fins answer of forum, so decided to start a new topic. I am working on project to print in Affinity Designer. I need rounded corners in printed files. How should I notice it to print house to crop it correctly? Shall I set it somehow in bleed? Is it possible with Affinity Designer? I have made transparent background and put on this retrangle with rounded corners, but I am afraid it woulnd't work for cropping correcty... Any assistance is appreciated, thank you!
 -
 Since I updated to version 1.9 (this morning) I am unable to print anything on any of the Affinity apps. The program crashes as soon as I select File--> Print. I don't even make it to a print dialog box. No, I don't have any artboards. Just very simple content. I have updated Windows, and made sure my Dell laptop could handle the Affinity programs. I am at my wits end and think I wasted a lot of money on this Suite.
 -
 Hi, When I go to print a photo on my HP Envy printer, the colours are far too dark / saturated. If I print from the windows photo app the colours are about right. I'm using Kodak glossy photo paper - pretty standard stuff I assume(?) - though right now I'm also trying plain paper to debug until I'm somewhere in the right ball park. What would be the recommended printer profile for a home printer with photo or plain papers? Lots of options but most seem to be aimed at professional printers rather than than home inkjet etc. Probably starting the obvious but I assume the soft proof settings should match the printer settings? Thanks very much!
 -
 Having come from Photoshop, I would love to see a feature to allow non-centered printing in the print dialogue without having to change the size of the canvas and re-placing the image. Oftentimes, I want to print in a specific place to save paper, and the current method is cumbersome to say the least. I also use custom sizes, for instance printing old B&W 3.5" square, however part of the image is cut off, I assume because you can't specify borderless, even though you set the non-printable area at 0. Maybe operator error, however, I see no way to overcome these issues conveniently
 -
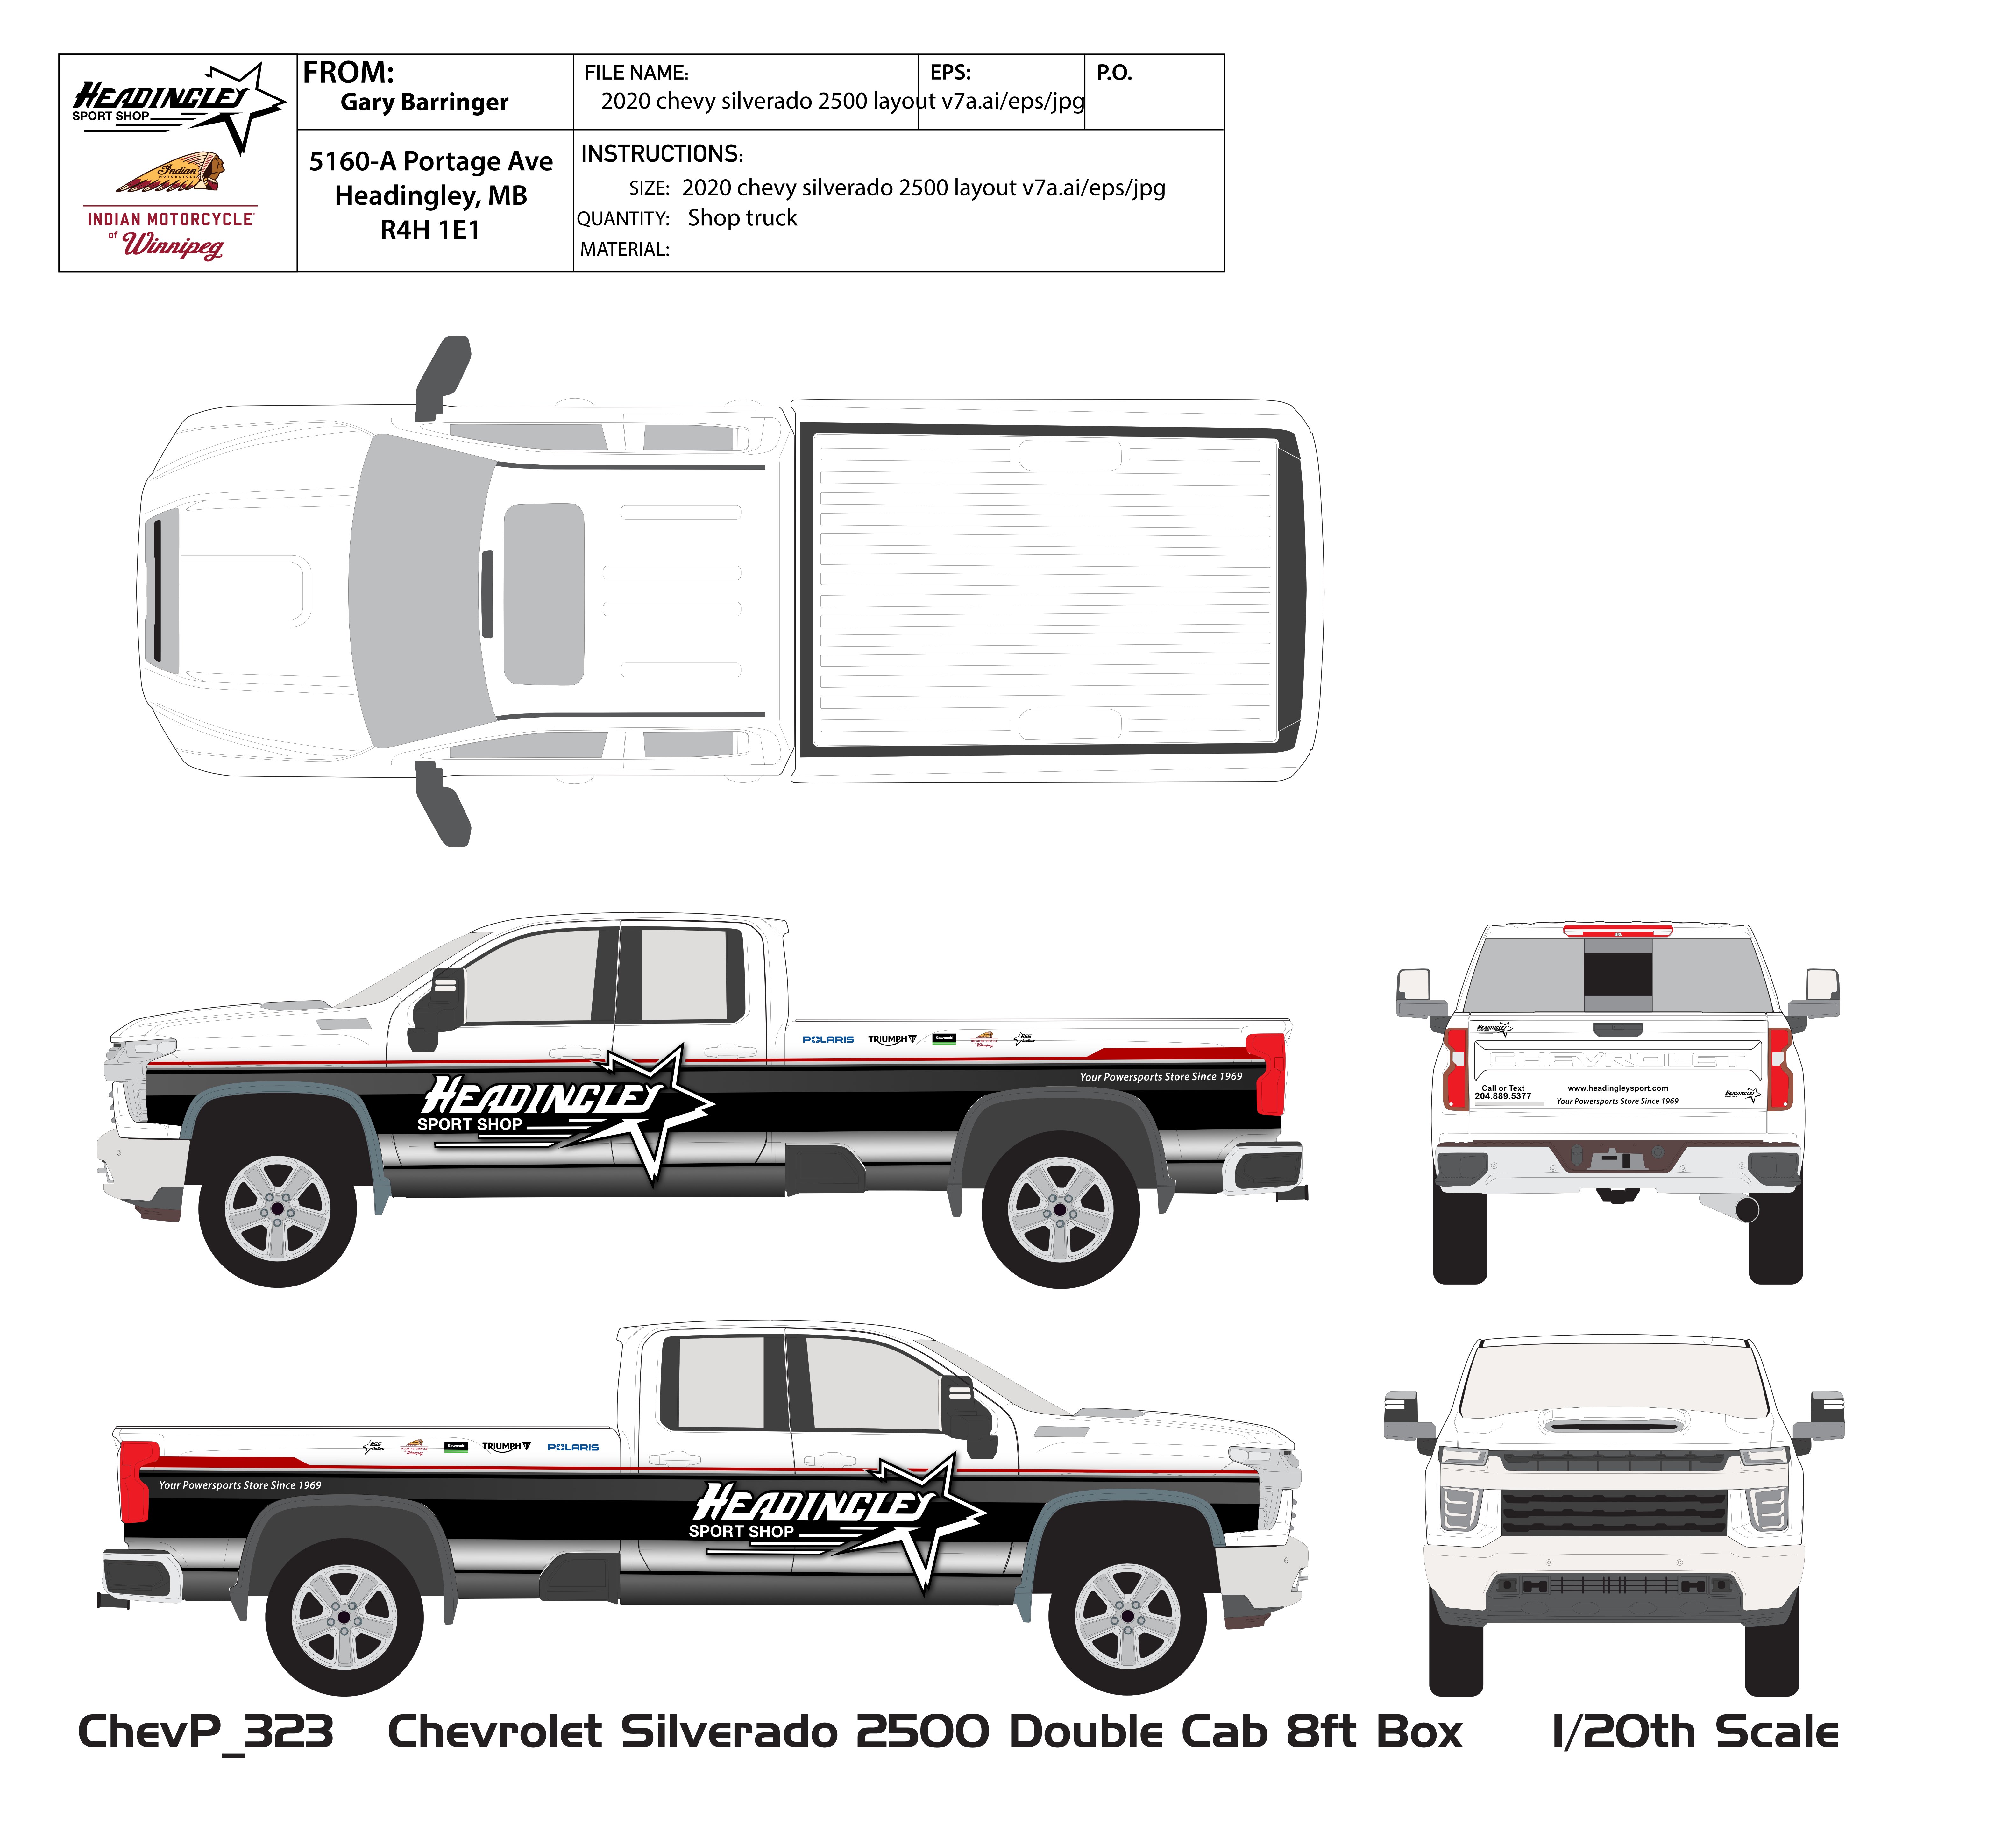
 Hello the most recent build is not printing Files correctly. The effects of layers seem to not stay clipped when printed. They are perfect on screen, but not while printing. the first file is the original file and how it should look, the other three are photos of how the the drop shadow is leaking out side the clipped area. For now i am printing from a JPG to fix it, but i should be able to print from the DESIGNER file without having this happen. Gary
-
When I try to use the print function from menu or from shortcut cmd+p, I first noticed this when, I open a pdf file, and then try to print it, publisher 1.8.3 crashes. Even after saving as a publisher type file *.afpub, crashes after the file is saved as publisher type. I have noticed this is now happening with all documents, even those created in publisher. The work around, I have been using is to export as a pdf, and then open in another PDF reader like Preview or Acrobat, from which I can print. I'd be happy to test any patches or fixes. d System iMac13,1 i7, 3.09 16 GB 500GB Samsung MacOS 10.13.6 (17G4015) Publisher 1.8.3
-
 Dear Friends, the most used size for printing in my case is european "A4 letter". Till now, if i selected this size of print media a popup windows appears with message like "the document will be resized, fitted to match the media. So the final result on the paper was a resized picture to maybe 95% of its original size to be fully printed to A4 letter including the margins. The exception was of course if i choose "A4 borderless" printing what my printer is able to do. Maybe it happens with update to 1.9.1 (no hardware or settings changed), but now this alert and autocorrection is missing. Even if i manually choose before print "Fit to Printable" it doesnt happen in reality. So the final result is cropped on the paper, since the content after the margins is not printed. Im i alone with this bug now please ? P.S. Im absolutely familiar with templates, margins sizes etc., but i also print couple of times some drafts, pictures for daughter etc and im really missing this popup-feature now. Thank you very much !