Search the Community
Showing results for tags 'print size'.
Found 4 results
-
 When I print any file I need to keep the print settings embedded in it, so that in future I can print exactly the same image at the same media settings on the same paper at the same size. Photoshop embeds this information within the file, so that whatever device I print from, years hence it will remain the same. This is vital for limited edition prints and for all my client's work when they reorder prints. I cannot go back through files twenty years old and recreate this without the data being embedded. I don't think this would be difficult to achieve and I see that users of Publisher have asked for the same feature. Please may we have it so that I can stop giving money to Adobe for their overpriced, bloated cash-cow.
 -
 Hi I am trying to prepare a photo to print as above. The actual available size is more like 9.5” x 7.5”. I want to be able to crop the photo using the rule of thirds, add my own frame image on a separate layer, plus signature, etc.. my starting file is a developed .orf file. I am printing onto A4 paper on a Mac using a Cannon Pixma printer. I want the finished photo to fill the mount size. I have tried everything I can think of and am getting nowhere. As you can probably guess I am a newbie to this so hope someone has the patience to help me. If needed, I can supply more info. I have searched but not found anything, as yet, that will unravel the wool over my eyes! many thanks in anticipation....
 -
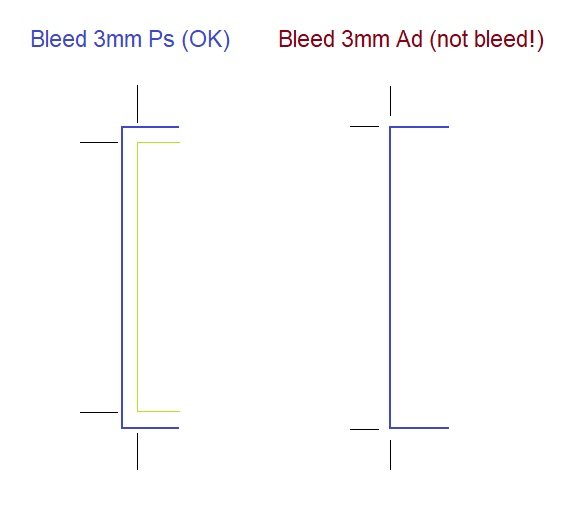
 Hello all, please I have problem with bleed, specialy print crop marks in export to PDF. I have document (business card) and size of document is bigger in every size by +3mm. For PDF export I need put into this document crop marks with bleed 3mm ( this crop marks go -3mm to the documet) and give me pure bussiness card size. If I set in >docoment setup "bleed" to 3mm, in export I have set "include bleed and include crop marks", after export pdf with this settings NOTHING HAPPEND = crop marks are always in maximum document size not -3mm inside document. (I try put against 3mm / -3mm / and diferent numbers...nothing happend). Please help!!! Im mad, because in PS it was 2 click in PDF export and it was done, here I cant handle it easy way. TY for your help
-
 I've been using Photoshop & CorelDraw. Saw a promo video for Affinity and thought I would check it out, found some great features and some areas that really don't work for me. I've briefly looked at the forum and seen some references but don't know the status of the following: 1. Why images don't open at 100%, I know you can go to view and click 100% but what possible reason could there be to default to a different resolution? 2. I would suggest that when rulers are selected they be shown inside the image window with guidelines from the crop cursor to the ruler - uninterrupted. Works great in PhotoShop. 3. Another feature in PhotoShop I use a lot is to be able to toggle between Actual Pixels - Fit In Screen - Print Size. I often save parts of an image for different purposes and easy access lets me double check correct look for that purpose. 4. I would also suggest for your video tutorials you use a larger cursor with contrasting colors. I find it very difficult to both follow what is being said and trying to find the cursor so I can see what is being said. Regards Barry U