Search the Community
Showing results for tags 'picture frame'.
-
 AP 2.4.0.2301 Win 10 Pro 22H2 Build 19045.4046 This bug was not present in AP 2.3.x. Picture frames placed inside a data merge layout and linked to a field in a CSV file which contains a path to an image show the image when initially placed and linked. However, incrementing through the records in the file in the Data Merge Manager window causes the image to disappear completely. Reloading the CSV file does not correct the condition. Closing the AP document and reopening it does not correct the condition. Opening prior AP documents which worked fine in previous versions results in the same behaviour in 2.4.0. Oddly enough, when the merge is generated, the resulting file does contain the image. So the bug appears only to affect the layout view. Of course, this bug makes layout and editing complicated.
 -
 In Publisher 2.3.1, when I create a Picture Frame and a Text Frame for a caption and snap and group them together, usually there will be a space between the picture and the caption text as in image A but occasionally there won't as in Image B. Both text Frames are Top Aligned and the image is the same size as the Picture Frame in both cases. I can create space between the Picture Frame and Text Frame to look right, but there should be a way to do it automatically. How can I fix this?
-
 In Publisher 2.2.0 and 2.2.1 on Windows 10.0.19045, the drag handles for picture frames can get dissociated from the actual frame position. Video 2023-10-20 11-18-31.mp4 When this happens, the lock children function ceases to work the way it should, the children are always locked. Steps to reproduce 1. Create an empty frame on the canvas 2. Fill the frame with an image 3. Move the frame around and/ or resize the handles (perhaps check and uncheck the lock children button a few times) 3. You'll notice that neither the content frame nor the picture frame are aligned 2023-10-20 11-27-44.mp4
 -
 Steps to reproduce: Create a new document Draw 2 or more picture frames Open the Layers panel Try to change the frame's stacking order Expected result is for the frame's stacking order to change, instead the moved frame will nest within the frame immediately below its new stacking order position. See attached video for a visual explanation. Bonus bug: if I actually want to nest the frames, I cannot trigger it intentionally. Trying to place a frame within another in the Layers panel never triggers the "filled layer" visual effect that indicates an object will be nested within another. This bug is, to the best of my knowledge, limited to picture frames, square and round. Other objects are unaffected and behave normally. Temporary workaround, use the layer arrange commands. Either on the application menu at Layer > Arrange (and their respective keyboard shortcuts), or the layer arrange buttons on the application toolbar. Both are imune to this bug. Thanks! Gravação 2023-07-13 112345.mp4
 -
 Got some crazy activity going on with picture frames in Affinity Publisher 2. When I have pictures in picture frames the dimensions when using the move tool to resize etc works fine until I lock children. When this is done the box scaling goes crazy, shrinking smaller than should be when shrinking, expanding larger than should be when stretched, and not settling until released and reselected. Unlocking children returns behaviour to OK. Thought it may be high res screen issues, but acts the same on an HD and changed resolutions. Note the scale is actually wrong in the transform panel too. File in video was newly created after having this happen all over an 80 page doc… thought maybe memory, but no this is just one page one pic. Lock Children Picture Frame Publisher v2.1.mp4
 -
 Hey everyone, slowly but surely I'm losing my mind over here, haha. I think I've rebuild this master page at least three times by now, but every time I load images, some of them are mirrored. What's even more irritating: If I apply the same master page again, they get mirrored again. Now … what is going on here? Can someone please explain? Applying_Master_changes_single_frame_orientation.mov Even if the frame itself were mirrored (unfortunately this is not indicated anywhere, or is it?), it shouldn't be mirrored every time the master page is re-applied, at least from my understanding. I come accross this issue on almost (?) all the other master pages that use frames, hence why the master pages name ends with a 2. I tried to fix it several times now and feel like I’m running in circles, setting up the master pages from scrap over and over again. Is this a known bug? Am I doing something wrong? Any help would be greatly appreciated. Cheers!
 -
 When you data merge a PDF file into a Picture Frame, it automatically gets placed with "Page Box: Trim Box" setting, which cuts off all bleed area, making any files with Trim Box defined unusable for data merge purposes. There needs to be a setting allowing you to choose the type of a PDF box in data merge settings, or if should be placed with either "Bleed" or "Crop" boxes selected instead.
 -
Hi there! I came across this picture frame presets bug recently and thought you might be able to help with it. I made a video capture which demonstrates the issue as I thought it would help illustrate the problem better than me just talking about it. https://www.icloud.com/iclouddrive/00cHQ2xz-PQRZMStoIxsNheVQ#PictureFrame_Presets_bug Thanks, Oli ;-)
-
 Would you please implement a shortcut function which can quickly put an object into a picture frame or clip it onto a layer within the Document view (canvas/artboard) instead of through the layer panel? (i.e. holding modifier key(s)(or right mouse button) + drag an object onto another object on the canvas/artboard) Because I remember when I used CorelDraw a decade age, they can let me drag an object into a picture frame while holding the Alt key. Which is intuitive and quick. Think about it - while I have a hundred of layers, if I want to put an object onto a specific layer, I need to search for the mother layer from the long list of layers, from the layer panel, while dragging the child object back and forth. Isn't it much simpler if we can do it within Document view instead? We can also do the alignment at same time. It saves us a step.
- 14 replies
-
- 1
-

-
- clipping
- picture frame
- (and 1 more)
-
please see this bug reported in Windows - it is found in Mac, AFPUB 1.10.5. This still plagues me every time and, strictly speaking, there is no way to avoid a host of pre-flight photo proportion errors and, worse, photos that appear to be no longer adhering to their original aspect ratio. https://forum.affinity.serif.com/index.php?/search/&tags=afb-4723
-
 I have a large document with some 250 pictures inside Picture Frames. I have decided to change the look of all by adding a color Stroke, and a rounded corner set at 2%. Is there any way to make these hundreds of changes in "bulk" - with one command instead of doing each manually? That would save me many hours of work.
 -
 Hi Community I'm on Publisher 1.10.4.1198. I have a picture frame with multiple adjustment layers and with three more sub-groups in it. The sub-groups contain masks and adjustment layers. Problem: I try to resize the picture frame but not the Image in it. Only the frame. I therefore drag the picture frame on one of the blue bullets with the move tool. The Image gets resized too. It looks like it is attached to the image frame. If I put a new image frame in the document with a image in it, i can resize the frame with the same technic as desribed but the image gets not touched. It stays in the same size. How can I in my above discribed image frame with its sub-groups achieve, that only the frame gets riesized but not the image? Edit: The frame "Properties" is set to "None" - The picture will not be scaled Thanks in advance. Jayenbee
 -
 When placing logos (which have often times transparent backgrounds) inside a picture frame I want to have control over the readability. Especially if placing them over an image. So if the logo designer did not include a white background (paper is always white, so why bother...) and I don't want to risk altering the logo, I usually assign a white fill to the picture frame which then provides the opaque background for the logo. I'm not able to do this in AfPub. Which is weird because a stroke is possible...
 -
tl:dr: The screengrab should explain it already. Experimenting with different Images in a pinned down layout and being able to easily switch them out (e.g. for a retouched version) without changing the placement and aspect ratio is very important. It should work the same whether you are using the resource manager, using the replace-button or dragging it in from finder. (which, for me, is the fastest way when working visually) But it does not. Obviously this is implemented in different ways... And the drag n'drop feature has (a) bug(s). As there currently is no beta for publisher I cannot test if this is addressed already with the upcoming 1.9.4 RCs Bildschirmvideo aufnehmen 2021-05-17 um 15.17.51.mov
-
 Hello, I just switched from the Adobe CC to Affinity and i run into a problem withing Affinity Publisher. In InDesign I'm used to making a mockup of my document using wireframes, and then filling it with text and picures. When i wanted to do the same thing within Publisher, I can't type in a picture frame. I seem to have to make a seperate textframe for typing. Can an empty pictureframe be used as a placeholder before filling the document with text and pictures? Or is it just an empty placeholder for pictures?
 -
 hey! how to adjust a existing picture frame to some given measurements? at this point I only found the way to resize by dragging the frames edges an trying to hit the exact measurements needed. is there a way to set such frame to eg. 350 x 350 px with some simple adjustment?
 -
 In an earlier version of Publisher I gave a (gradient) colour background to a picture frame and placed a partly transparent picture in the frame. (a .png portrait without background) The background than appeared as expected. I now try this again, but the background stays white. Where did I go wrong? (I took a frame I made earlier and it just worked - I could even change the colour etc - . But when I make the frame from scratch it does not)
 -
 Hi Earlier today I had an issue with Publisher freezing when I was trying to draw a text frame. After trying a few different things i worked out that when the issue happened when I tried to draw the text frame over a picture frame. If I draw the text frame over an unoccupied area of the page I can then move it over the picture frame without any problems, but every time I tried to draw it directly over the picture frame I experienced the freeze. The picture frame was a sub-layer and I had the parent layer selected when drawing the text area. I have not come across this before, is it a known problem? Thanks Ian
 -
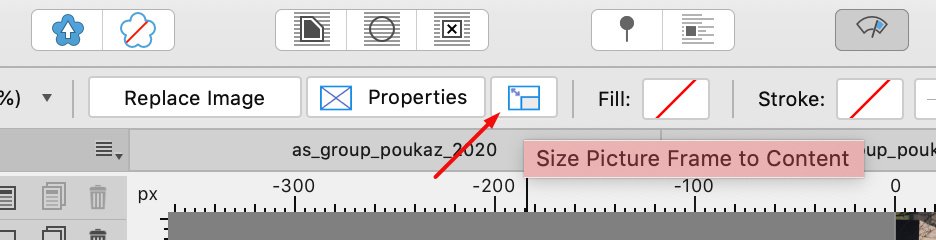
 Hi, 99% of the time I use Scale to Max Fit when placing picture into the picture frame. The dedicated button next to Properties is set for Size Picture Frame to Content. It would be super useful if we could assign it to different behaviour. I for example have never used this button. Yet every time I place the picture I have to click on Properties and set Scale to Max Fit. It could save me one click/little bit of time. Thanks!
-
 Steps to reproduce: Create a document with a master page. On the master page, create two picture frames at the same coordinates. Using the Layers panel, drag one picture frame into the other so that it becomes the other frame’s content. If you are using the attached file, start here. On a regular document page, select the inner picture frame using the Layers panel. Place an image into the inner picture frame. Expected: the image would be placed. Actual result: the inner picture frame disappears from the Layers panel as if it was deleted. Only the outer picture frame remains. The image is not placed on the page. The image is not found in the Resource Manager. This is Publisher 1.8.5.703 on Windows 10. I have a use case for using nested picture frames in a publication, so this is not just a weird corner case. I would like to use the inner picture frame to manually crop and rotate an original image and the outer frame to automatically fine-tune its dimensions to my grid as I’m experimenting with different grids and layouts. In that scenario, the inner frames would have scaling turned off and the outer frames would be set to Scale to Maximum Fit. Nested picture frames on master page.afpub
 -
After working for some time it turns out that I cannot apply any kind of adjustment to a picture that's contained in a picture frame. The following video should say it all. Screen Recording 2020-08-14 at 16.58.42.mov
-
 I have put a picture frame on a page and dropped an image into it but after adjusting part of the image is not appearing. first photo shows the image after being dropped in to the frame. second photo shows the complete image in affinity photo. second image shows image adjusted to fit the frame at the top but the bottom of the image is missing. I have set the frame back to default still does the same thing. Never had this happen before.
-
Hi guys, First of all - big thank you for: IDML support, New Document dialog, Preflight Check and Smart Object. Brilliant, brilliant things. Now for the things that need to be updated or changes or fixed: Distance between objects: I noticed you made a little change to the displaying the distance between objects. However many times it is still cover by the top handling line and the numbers cannot be seen. And also - since this update I am unable to see the distance between any two objects next to each other. For example - I have a text box, under which is a picture frame, then another text box, line divider and another text box. And when moving the top text box, instead of showing the distance between that box and the picture frame, it shows the distance to the next text box. Which doesn't make sense to me. I absolutely need to be able to see the distance while moving the certain elements. (under snapping I have everything enabled for all the layers - except for Force Pixel Alignment). Am I missing something here? Preferences: still a big mess unfortunately. Especially the Search feature. Which doesn't work at all. There is a lenghty post on this topic already somewhere here and nothing has changed since tha post yet.... Escape & Transform panel: When making changes in Transform panel, like changing the size of the element or changing its position, and I press Escape, it should definitely take me back to the canvas to the Move tool. I am using keyboard shortcuts whenever possible and I move elements many many times by using keyboard arrows. When I make a size change in the Transform panel and then press Escape, I would expect that I will be able to use arows to further move the element. But the cursor stays in the Transform panel and arrows will only change whatever value is there - angle, position etc... I have to click inside the canvas to get out of the Transform and use the Move tool again. On all the screenshots you can see the problem related to the objects' distances. On two screenshots you also see the problem with the distance number not fully visible. What would help here would be either the numbers nex to the line and not directly on it. Or - which is a better solution I think - displying the number horizontaly next to the line.
-

Picture frame with property »None« on a master page
Guest posted a topic in [ARCHIVE] Publisher beta on macOS threads
Publisher Beta 1.8.0.523 I have placed a picture frame on a master page with the property »None. The picture will not be scaled.« The behavior of the picture frame is correct if you open the picture frame with the mouse immediately to the correct size. The image is placed in the original size in the frame. But if I change the size of the picture frame again after opening the first time, it will no longer behave correctly. For example: I open the picture frame with the mouse and then I set the size exactly in the transform panel. Now by placing an image the size and even the proportions of the picture change. -
 I have been playing around trying to figure out how to convert some InDesign documents to Publisher. Although the conversion works really quite well, there are certainly some bugs, especially with placed images. I got frequent crashes when replacing images, and they are generally not correctly sized and sometimes squished. Now that I had set up the spread as I wanted, I wanted to test if it would work in a real world situation: I have the same basic spread but the content (graphs, tables etc.) have to be changed. What I ran into immediately is that Publisher does not retain the customized placement of the image when I replace it. I replaced both Designer files as well as EPS files, but in both cases I have to manually rescale and position the image each time. The files that I replace the images with are exactly the same dimensions, so this can not be the problem. It just seems to reset the picture frame each time. This is of course very annoying and gives a lot of unneccesary work. Is this some kind of bug, as I can not see why this would be intended behaviour?
- 12 replies
-
- 1
-
-
- picture frame
- idml
- (and 1 more)


.png.c0919a3dc20f33005f2d8694949c4e3d.png)
.png.4a59e8232105ab8d929466a008a567d6.png)
.png.312b3df4191d620d82161c075bd6ff8b.png)