Search the Community
Showing results for tags 'photo'.
-
 Ich arbeite mit Affinity Photo, Affinity Designer und Affinity Publisher (Version 1.8.6) auf dem MacBook air (Mac OS 11.1 Big Sur). Wenn ich eine pdf-Dateien öffne, bearbeite und dann wieder als pdf-Datei exportieren will, stürzen die Programme ab, sowohl Photo, Designer als auch Publisher. Ich benütze jetzt wieder Version 1.6.1 ohne Abstürze. Ich möchte aber die neuesten Versionen anwenden. Was kann ich machen?
 -
 When using Affinity Photo I switched over to the Tone Mapping persona and it froze my Win 10 PC. I have all the latest drivers (last I checked) Task Manager wouldn't even open the only thing i could do is barely move a stuttering cursor over the completely frozen screen , I had to resort to holding the power button to turn off the computer. If there is any way of stopping this or making sure it doesn't happen or happens less frequently I would appreciate a proverbial hand.
 -
 Hi, in Affinity Photo up to 1.8 and 1.9.823 RC4 beta, the info pannel has only 8 bit resolution (or even worse 1% steps). I want to request having option (default when document with 16 / 32 bit color depth is used) to get 16/32 bit information. Thank you.
 -
 Affinity Software – Beginners Guide Photo - Designer - Publisher Finding The Tools You Need If you are following an online tutorial for any of the three Affinity programs and they use in the tutorial a tool you cannot see on your set up. Then this tutorial will hopefully help you find the Tool or Studio tab you need to follow the other tutorial. As Affinity Photo, Designer and Publisher look and act pretty much the same, the info here should work in all 3 programs the same way. This is done on a PC but should be the same for the Mac version. Not sure about iPad versions as I do not own them, but I guess they too are built in much the same way. https://youtu.be/U7mKyKYTXf4
-
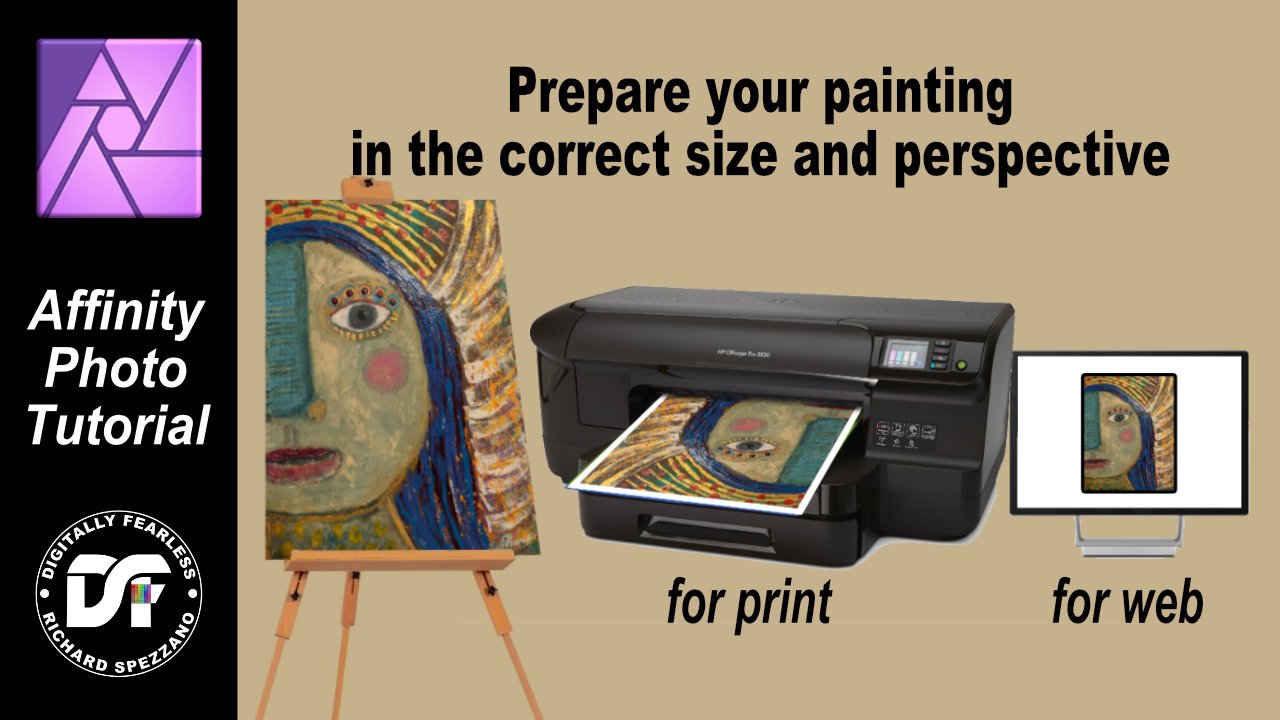
 How to print non-digital paintings. How to prepare your painting for print in the correct size, and for web. This Affinity Photo tutorial video shows how to put the photo back into correct perspective and size it for print. Imagine you just finished an oil painting and you want to digitize it so you can sell prints, place on the web, or submit your work to a gallery. Taking a photo of it on the wall or on an easel distorts the image. This video shows how to correct the distortion and size it correctly. https://youtu.be/BEMNW8PewIs
- 4 replies
-
- 4
-

-

-
- affinity photo
- tutorial
- (and 5 more)
-
The new timelapse feature is something I've been patiently waiting for, and am incredibly excited to start using with the official release of 1.9! After experimenting a bit with the beta, I've noticed some potential serious pitfalls for the way that the feature is currently intended to be implemented, and I have a few suggestions on how to improve on this. Firstly, the reasons why this feature may be limiting is as follows: You would need to make sure that you don't forget to toggle "Save History with Document" otherwise your entire process timelapse (hours worth of work) would be gone - I've done this a few times already. You're limited to your history states, and some projects (particularly illustration type projects) involve thousands of brush strokes and adjustments which would make it near impossible to ensure that your computer can save that many history states without getting really bogged down. That means you will need to cap your undo limit and subsequently override old history states meaning a chunk of your timelapse would likely be lost. Savings those history states will also create incredibly large file sizes, which is very impractical for anyone looking to use this feature. My ideas. In the old days (before Procreate along with its timelapse feature was born) there was a little app/widget called Schnapps for Mac - http://schnappsformac.com While the website is still up, I'm sure this app is no longer functioning or being updated in 2021, but it basically saved a snapshot of your canvas every time you saved your document. It had no direct impact on your document or file size, and had no relation to your history states or undo limit (which can be quite volatile if you aren't careful/mindful at all times). Upon export you could choose your desired video format (or looping gif) and also the playback rate. My proposal. Would it not be better for Affinity to use a similar approach? Instead of using the "Save History with Document" option, you can include a "Record Timelapse" option under the "File" menu, which can be on by default to avoid any accidental loss - or include it in the "New Document" dialog when creating a new document. Every time you save a document, the app can save a 1080px (1080px in height, and the width can be dictated by the canvas aspect ratio) snapshot in a folder within the app's program files which can then be recalled and assembled by the app when you select "Export Timelapse". That way the user won't ever see the snapshots or have to deal with big file sizes with limited history states as the timelapse files would be stored elsewhere on their computer. If, in the future, Affinity ever changed the way that the files are created, the timelapse files would remain completely unaffected since they would be existing snapshots, not past history states. Timelapses move pretty fast, so there's no reason to include every single step of the process in the playback, so in the long run every save-state would probably be a better option that ever history-state - either that or saving a snapshot, say, every 10 history states or so. Schnapps was a very simple and lightweight app, but it was incredibly effective at doing what it was designed to do. The only examples could find that I did with Schnapps (back while I was still a student) were these short videos - I did a little bit of post editing with them to add transitions and video elements, but the timelapses show the process: https://vimeo.com/111345964 and https://vimeo.com/107825113 I completely understand that the Affinity team has done a lot of work with the timelapse feature already, but I can assure you that nipping these potential future issues in the bud before it's actually released would make it a lot easier than accepting the limitations now and getting stuck them in the future after the feature is officially released. A lot of creative apps (Procreate, Sketchbook Pro, ArtStudio Pro, Clip Studio Paint, etc) now have timelapse features and have perfected them already, and it's become a highly sought after feature for the 'modern creative' so there's quite a bit of pressure to get it running smoothly and properly. Just my two cents, and thanks for making it through the super long post!
- 9 replies
-
- 4
-
-
- timelapse
- new feature
- (and 6 more)
-
 I've been using Designer everyday now for a few years, and occasionally I use photo to edit and touch up photos for work. I want to start enhancing up some family photos to go up round the house. Any general tips and/or recommendations as to which tutorials to have a look at first?
 -
 Hello I created a page with some graühes in publisher and i wanted to move some single lines in one of the graphes ... so i changed to photo perosna and realized that affinity changes the quality of the graph. is that normal? or how can i avoid it? First pic is in publisher and second one when i switch to photo
-
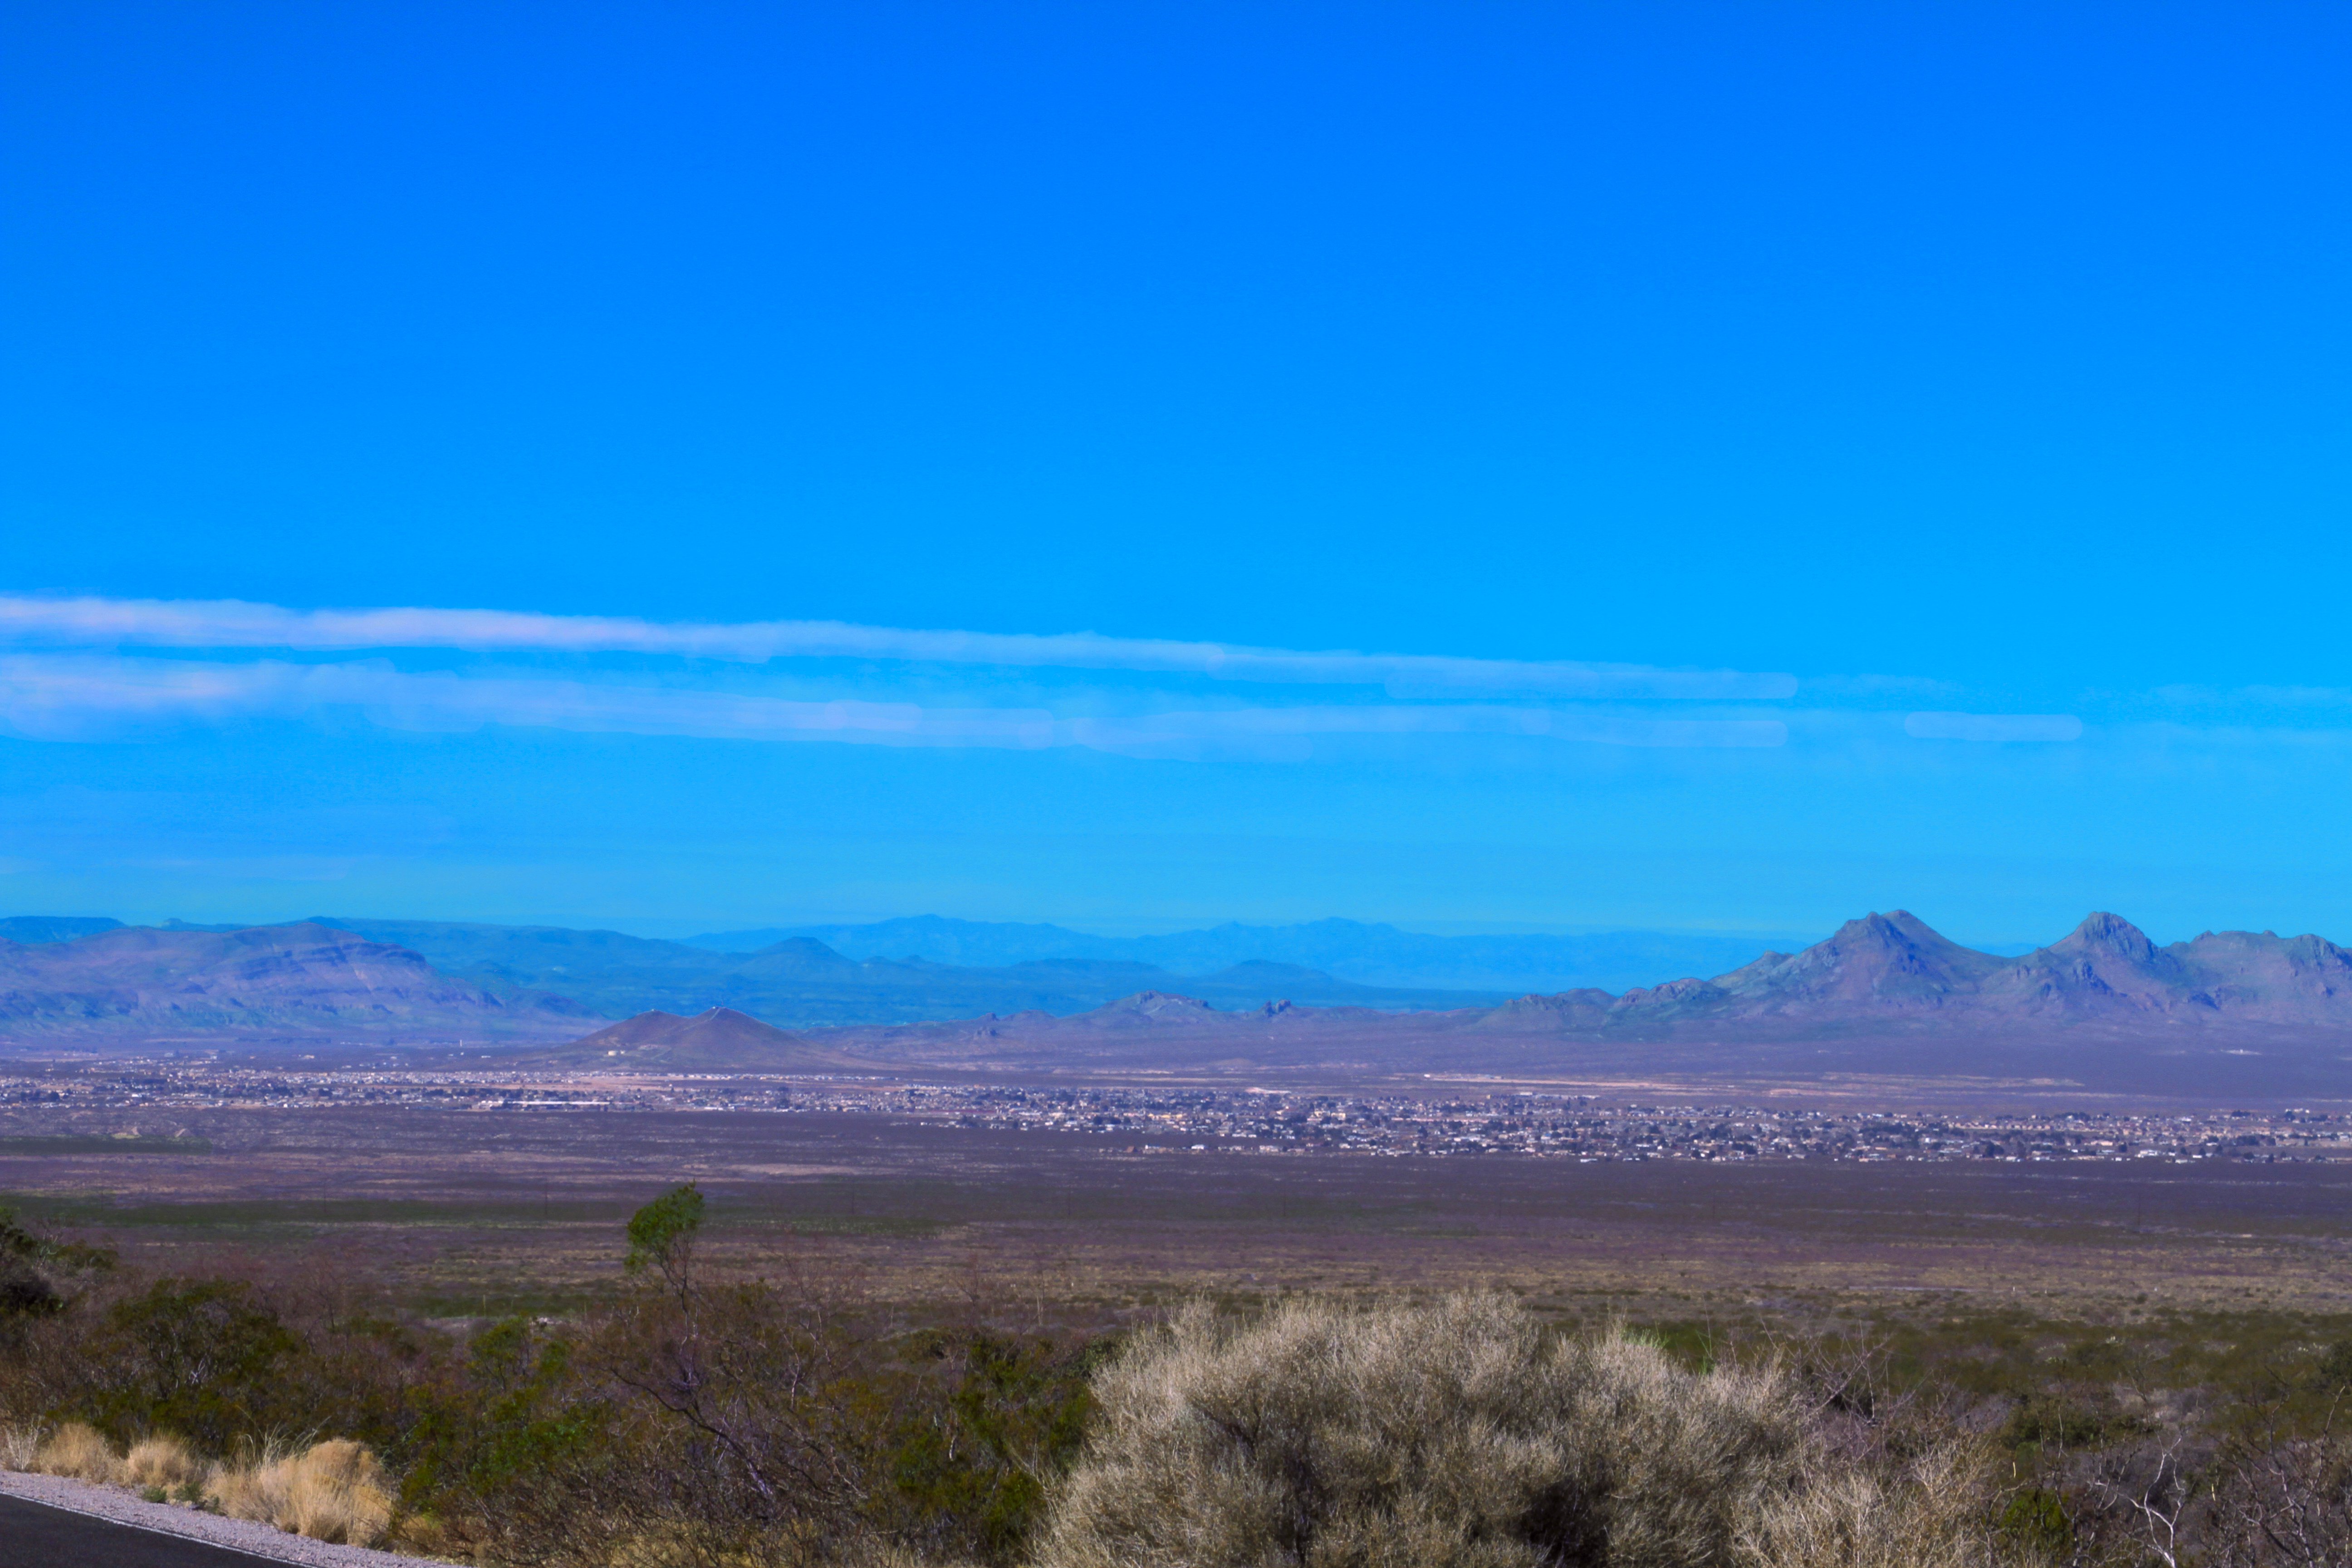
Landscape from above LAs Cruces NM. Canon 7D Camera Settings: f/20, 1/50s, ISO-100, 70mm Canon 28-135 USM Lens First image was as shot and second is edited to ad a little more color vibrance. All edited in affinity photo. The image was too dry and I wanted to push the colors up a little
-
 I don’t get it! From the reviews I’ve read before getting the Affinity Designer for the iPad, I was under the impression that this is the best design app ever! How does the best design app ever not have a Free Transform tool or options?! I’m totally frustrated and wasting a lot of time to figure this out, because I simply can’t imagine that a “design” app doesn’t allow me to distort an image. And the idea that I have to buy another app and add to the work and time, just to transform a simple image, and disrupt my work flow! Could someone explain how this happened? Because I’m regretting buying the app with every passing day.
 -
 How do I copy part of a placed image in Publisher? I have two placed png scans on a single Publisher page. I want to copy part of one image over to the other image. When I do a freehand select of a part, copy it, and then paste it, what I get is the whole of the first image, not just the freehand selected section. This was done in the Photo Persona BTW, as I assumed I had to when working with a pixel image. Do I need to get out of Publisher and do the copy/paste thing in Photo? Publisher Win 7, V 1.8.5.703
 -
 Hi, I work in product photography and my clients need all their images clipped with the clipping path tool and also want to image delivered in TIF/PSD format including the clipping path. I usually work with Photoshop but are ready to jump ship since I am fed up with all the bugs in Photoshop. To make the jump I need to somehow export the clipping path I create in Affinity Photo within the PSD/TIF export so the client can just open it and see the path. Is there any workaround to export the clipping path in a file? Thank you!
 -
 Just purchased Photo and Designer and could use some clarification on a couple of things. Getting the free (thank you) included "Fine Liner Affinity Brushes" by The Artifex Forge brushes working was a bit of a challenge. Just double clicking them loaded them into Photo, not designer, because Windows has apparently associated the afbrushes extension with Photo, not Designer. I've since learned they don't show up in the Photo Brushes list because they're vector brushes and won't work. So why does Photo import them instead of serving up a dialog box explaining why it won't import them? More importantly to me right now: Since they don't show up in the Photo Brushes list, how do I delete them from Photo? The collection of Panels at the side is apparently called the Studio? It's nice that that can be detached from the main image window on its own, and resized, but it's mildly infuriating that selecting a panel within the studio immediately resizes it to its default width. Do I report that as a bug? Is there a toggle somewhere I'm not finding? The Studio maintains it's new width when resized while still attached to the main image window. Thanks. It's clear that these programs have a lot of powerful features, but there looks to be quite a learning curve.
 -
 I can't even begin to explain how useful an Affinity alternative to the Quickshape (Procreate) or Snapline (Adobe) feature would be. 😊 The ability to draw a pixel line, circle, or rectangle by hand, and then hold the stylus/mouse down for a second for it to become a 'perfect' shape. It would be a total game changer and save so much time, especially for anyone using Affinity apps for illustration or digital artwork.
-
- 2
-
-
- shapes
- quickshape
- (and 7 more)
-
 Hello Everyone Hello Team I gladly spent the last few days working on projects and realized how easy and fluid Affinity photo have become but ... yes because can't move forward without a request for improvement. I'd like to notify that the Develop Persona is something quite complicated from noobs perspective which should be revamped and made more intuitive for all levels of knowledges. What's there and the way it works is cool but more for Pro/Skilled people to work with (same case for the Tone mapping persona) to my defense on this, I used Luminar for like every projects I needed to finish which is actually a non-sens. Looking at Photoshop with their improvement made on Camera Raw, I believe this is a sort of path to bring on the Develop Persona of Affinity Photo. Making things easy to grad and to do without having to worry "what app will color grade with ease while making me save a big amount of time and money etc." I know it's possible and the Team behing the Photo app can make it happen with the ease of a click for our pleasure and joy. Something mid-ground between Camera Raw and Luminar will be welcomed. Hope I posted in the roght place without creating a duplica of request that aleready existed years/months ago. Blessings !
 -
Hello Everyone Hello Team I think it is time to think about bring an internal tool/function that will allow users to backup their full #Designer #Photo #Publisher profile and restore that full backup when needed. I mean, it often happened to me (and I guess to many) to be called on reinstalling my PC (windows actually) and find out I have to redo everything from the very beginning and considering my personal collection of assets, brushes, palettes etc. have i'm an unexpected way over the years ... I'm spending an hour or more to make everything work as expected or just be back like on my previous setup and this goes also for tab/studio alignment etc Really it's something different which is need to make this happen and former Adobe products will agree with that it's just painful to set everything back to the right place we want them. if in any case this was asked or there is an existing topics on this already please admins, feel free to move this in there as I personally couldn't find where to insert this and chosed to create a new topic. Hope this will happen at some stages and make a lot of people happy. Blessings !
-
 I was creating a tiled pattern similar to the ones I describe here. This involves placing several images onto the background, flattening and applying an affine transformation, then repeating this process until the background is invisible. Typically, the Place command always looks for a png file. However sporadically, it wants to look for text files instead. Having told it to look for png files, it does so for the next few. This looking for text files seems to occur after I flatten the image. Why is this happening, and how can I stop it? John
 -
 Hello, a suggestion that has been on my mind for a long time: it would be really nice if one could sort the brush categories in the brush palette afterwards. That one can sort the brushes within a category is good so far. Please go one step further and make it possible to sort the categories itself. Maybe this is already possible and I just haven't found it yet. Cheers, Puck
 -
 Hi Affinity Forum! I'm fairly new to Affinity and having been learning as I go since buying it over the summer, but I have come across a hurdle that I need some help with. I'm in the early stages of founding a new online wine startup (caminodelvino.co.uk) and I have been practising and playing around with my photo and editing skills in the run up to launch. Using a mini home studio as my setup, I've managed to edit a photo (see wine photo attached) to an acceptable level so far and recently, used the healing brush tool to edit out the crease line on my backdrop so that it looks more 'professional'. I have three questions: 1) is there a better alternative to using the healing brush for the removing background creases or folds? 2) if not, is there anyway I can make it non-destructive to the photo at all, or is this likely to be a last decision editing job in any circumstances? 3) As much as blue is a nice colour, it isn't the backdrop I'd like to use for my wine on my website. I have alternative backdrop colours, but I was wondering if there is anyway I can lay over a full background colour (RGB Hex #FEF0E2) to be more inline with my companies colour palette, whilst retaining that 'professional' photo look about it (i.e slight shadow effect etc. - see shoe photo for example). Any help would be greatly appreciated thank you!
-
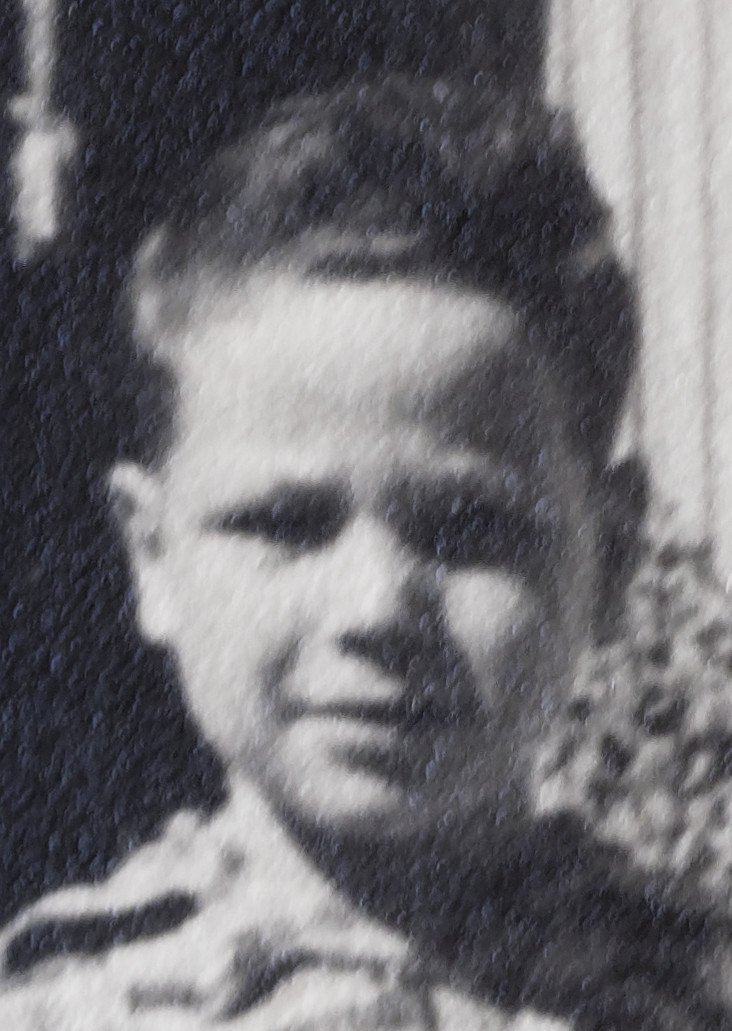
 New to Affinity Photo - steep learning curve but enjoying the challenge and getting some excellent results. Beginning to restore old photos. Any suggestions on how to remove the markings on the old B&W photo below? FFT Denoise does not seem to work. Thanks.
-
Does anyone Know if Affinity Designer and Affinity Photo support the use in the Veikk A30 Pen Tablet? Really need to know im thinking about buying it and im really need to Know if i will be able to use it Thank a lot
-
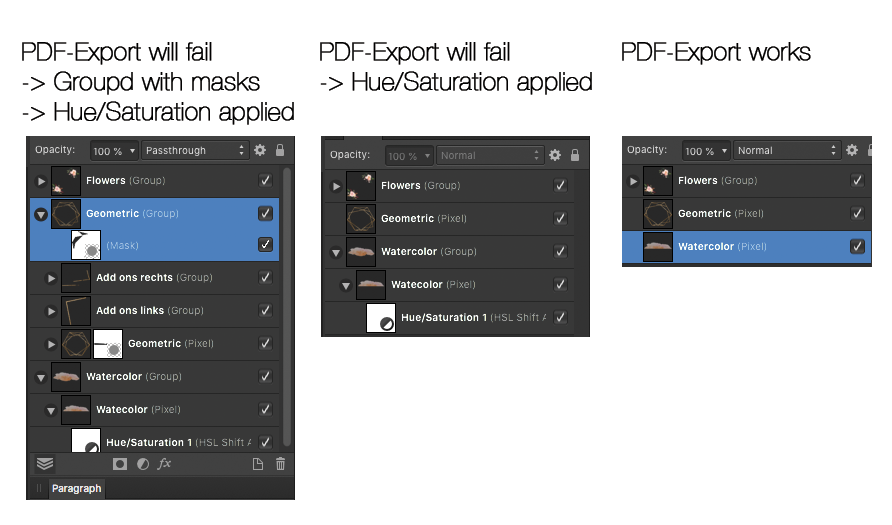
 We are currently transferring from Adobe to Affinity on all our graphics workstations. Therefore we discovered a bug as follows: When a designer file has a photo file linked via resource manager we get an not further specific error when exporting the designer file to a PDF. This only happens, under certain conditions: We can reproduce this issue when the photo file linked in the designer has eg. a hue/saturation adjustment applied to one layer and masks applied to another layer and groups. Rasterising only the group with the mask attached does NOT solve the issue. Rasterising all groups solves the issue but then I will not need to link the photo file anymore, as I could link a flatend TIFF instead to keep the base changeable. We can reproduce this in almost any project we started with photo and designer. We also tested komplex photo files without masks and adjustments. In this case the PDF-export in Designer works fine. I have attached a screenshot of the layers of an example photo file causing this issue. Once everything is rasterised it will work, but thats not a solution for us. Thanks for the help! Philipp
-
 In trying to work on a file I'd created, I get a dialog saying that the file can't be opened permission denied. Any idea what that's all about??? Mac OS, Catalina
-
 I am days into a free trial on my Mac but cannot enlarge the thumbnails to view them so really I can only guess which ones to open.. As the Mac is my main computer this is a deal breaker for me unless someone can enlighten me. I also down loaded onto a laptop with windows 10 and that gives the full range of thumbnails to view but it's the Mac I need to use.
 -
I made these using black & white photos found on the internet as guides. Although I usually work in Photo, I did a lot of the vector work in Designer, as I find it easier to switch between the Pen and he Node tools; then again, some things are easier or only available in Photo.She wasn't just a comic dancer: she was a decorated war hero of the French resistance, and set up and funded a number of philanthropic projects, as well as championing civil rights back in the US.And she really did have a pet Leopard named Chiquita. This first one was made entirely from vectors with flat fills and no outline (apart from the text, of course). For this one, I got a little more ambitious. It's made with Vector shapes, gradients and brush shading. I had the style of Gaspar Camps in mind, but it's a lot simpler than his work. Still., I'm learning! More ambitious still! Made the same way as the previous pic, but with a lot more brush shading and gradients. Here I was thinking of Alphonse Mucha; see previous comment!I made two image brushes for the leopard's rosettes (spots to you and me). The 'leaves' are supposed to be feathers! I've tried out a couple of alternative colours with HSL adjustments, but I can't make up my mind which I like best..For the shadow, I created a new pixel layer in Photo with 'Merge visible', converted it to black (Levels), stretched it with the Move tool (and a little adjustment to the feet with the Mesh Warp tool). I then applied a gradient and a Box Blur live filter, also with a gradient to make it lighter and more blurred further up the image.


.png.72e88c233a90cb6c0961c5222ee446bf.png)