Search the Community
Showing results for tags 'perspective'.
-
I'll be the first to admit, I am NOT an accomplished photo artist. In fact, I would put myself at a "3" or "4" on a 1 - to - 10 ability scale. Therefore, I am always looking for more and more lessons to increase my skills and enhance my talents. In doing so, I hope to gain the most from the Affinity tutorials, given I'm a registered user of all three apps. And therein lies the frustration. In short, when I attempt to watch the Affinity tutorials, the presenter starts by introducing the subject, and then proceeds to open an image, and in doing so, nearly always opens up a series of layers he has already created. Unfortunately, he has also renamed them, so those of us who are learning, have no (grrrrrr) clue of how or why he created them. Therefore, HOW ARE WE EXPECTED TO KNOW WHAT, OR HOW HE IS PROCEEDING? It's obvious he is 'assuming' we all can successfully guess what the hell he has done, why, and with which tools. (Beyond frustrating; more importantly, it is a terrible representation of Affinity.) Specifically, these tutorials are high on the 'frustration menu': Blend Modes (https://affinity.serif.com/en-us/tutorials/photo/desktop/video/310319088/). He calls them 'render passes'. No definition of 'render passes', (I can interpret such a term in a number of ways given it's out of context. I spent the better part of any hour searching for 'render passes' without luck.) Layers (https://affinity.serif.com/en-us/tutorials/photo/desktop/video/311178905/). Even in this video covering basic layering, he begins with a highly populated list of layers. HE KNOWS WHAT THOSE LAYERS ARE, WE DO NOT! How can we get a strong, integrated understanding (i.e. without obvious questions popping up such as, "What are those layers, why did he chose them, and how did he create them?") It would only take a few minutes to explain them and build the lesson from the beginning instead of beginning the tutorial at some arbitrary point along a learning curve. At the least, reference those tutorials which provide the lessons for creating the components he is utilizing. The list of other similar examples is long. The solution is to include the steps he has left out prior to his video starting point. PLEASE, make videos for the audience, not the perspective of the presenter. If you are going to start with pre-created elements in support of a subject, take the time to explain them. You know what they are, but if you expect us to get value from the tutorial, you have to explain yourself so we are on the same page as you. Thank You.
- 4 replies
-
- context
- perspective
-
(and 2 more)
Tagged with:
-
Buon giorno, scrivo questo post per riprendere due post precedenti che sono comunque interconnessi, chiedo agli amministratori di chiudere i miei due post precedenti. Uso un altro software con licenza GNU / GPL, o "darktable", e lo uso per una semplice ragione, sfruttando la libreria lensfun che è presente anche in affinità ma che è in grado di applicarla anche su file jpeg e usando un software gnu / gpl adattato allo scopo "ShitfN" per correggere le distorsioni prospettiche attraverso il rilevamento in gruppi di linee di fuga, sia che si tratti di linee verticali o verticali oblique, riesce a farmi guadagnare tempo prezioso nel correggere distorsioni e prospettiva, dato che Affinity ora applica il profilo dell'obiettivo solo ai file raw e non direttamente ma dopo il salvataggio, il che è scomodo, ma per me ancora poco pratico poiché utilizzo una fotocamera "Sigma".Inoltre Affinity per ora non ha una funzione di correzione della prospettiva automatizzata o almeno non di quella che funziona così bene, il risultato è che ogni volta che devi procedere a mano e in termini di tempo, diventa insostenibile ogni volta che devi cambiare un numero pieno di immagini. Chiedo quindi che, dal momento che questi due software, la libreria lensfun e ShitfN siano open source, fare uno sforzo e adattarli il prima possibile in quanto ciò fa la differenza tra un programma comodo e quindi utile e un programma bello ma non completo. Metti un video come richiesto, in modo che tu capisca di cosa sto parlando. Grazie Lorenzo correzione dell'obiettivo prespective correction.mp4
- 2 replies
-
- correction
- distortion
-
(and 8 more)
Tagged with:
-
-
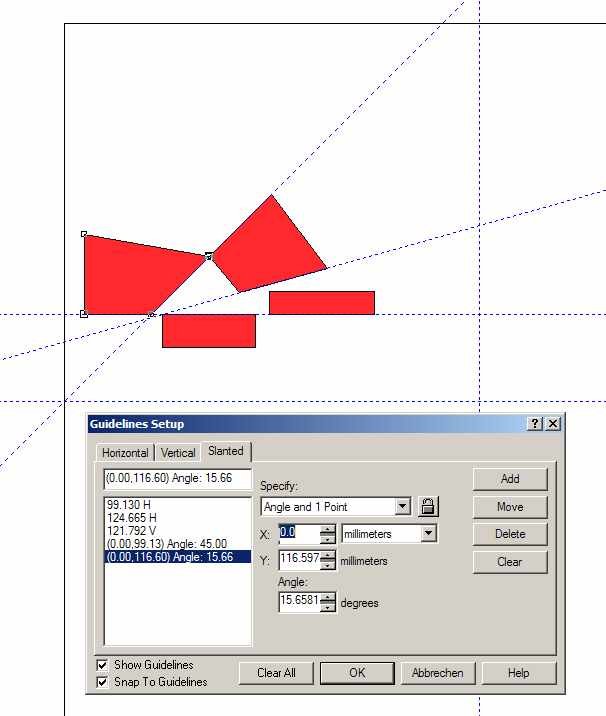
A great feature I came to appreciate in other vector editors when doing perspective drawings or circular arrangements are slanted guides. In Designer, there are no slanted guides but the grid helps out. However, a full grid is not always needed. The workaround I use, is to make a "Guides"-Layer and put some lines on it as guides. With object snapping, these lines can be used as guides. Still, it would be nice to have an additional panel to set up slanted guides. Below a snippet from a program with slanted guides.
-
a point that shoots lines in all directions that can be used for drawing better in perspective and that you can have multiple dots so you can make better forms for closer building the points may need to be outside the canvas
-
Hi – I wonder if there is any way in Affinity Designer and/or Photo of doing the following. Imagine a can, say like a can of paint. I can draw a can that looks fairly 3D-ish, and/or use a photo of an actual can and overlay something. I then have a whole range of 2D labels, basically rectangles with text and logos on, that I want to paste over the can graphic (or can photo) in such a way that it looks distorted, like it’s actually wrapped around the can, like a real label would. I have played about with Mesh Warp and Perspective in Photo for ages, but can’t get anything that looks any good, and I can’t find anything in Designer that seems to do anything like this. I’ve read on the web that Photoshop does have some very limited 3D capabilities, and indeed I’ve spoken to someone who said they’ve done something like this in Photoshop (allegedly), but they could not give me any details (and I don’t have Photoshop anyway). Any suggestions what I could do in Designer/Photo?
- 2 replies
-
- perspective
- wrapping
-
(and 7 more)
Tagged with:
-
Hi, i'm just wondering about the live filter/perspective.Looks good at first sight, but subsequent corrections are nearly impossible. When the live filter perspective has been applied, any further mouse click is no longer related to the picture. Depending on how strong you corrected the distortion any tool you are usinf after the filter is no longer in sync with the mouse click. This makes this live filter useless to me. Or am i doing something wrong? Currently i'm using the normal filter for this, but this is destructive and cant be re-adjusted if you are not satisfied with the first attempt.
-
I took a photo recently of two skyscrapers that are close to each other. I took the photo at 28 mm on my Canon T7i. The buildings do not appear straight and I tried to use both the single and dual plane perspective tool and cannot seem to solve the problem. I have attached the image. The file is 10.9 Mb and uploads are failing. Can you provide me with another method by which I can provide you the file?
-
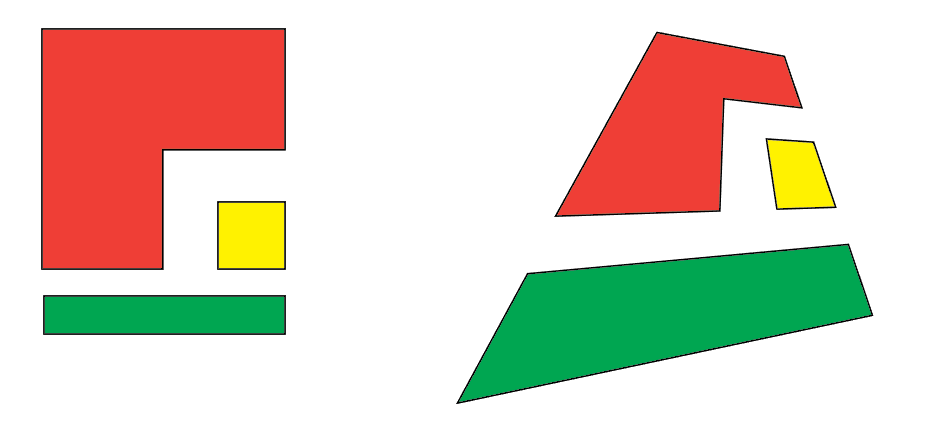
Hi, "personas"! I am new to Affinity, but I am learning fast and now I need help. After learning how to use gradient tool, I was working on perspective and noticed that the gradient effect won't follow the changes (see image). I am using Affinity Design and the gradient was applied to simple shapes. I don't want to rasterise them. Does anyone know how to make the gradient follow the changes? Thanks. Love, from Brazil
-
As a follow-up to the recent Perspective Skew Correction Video by Affinity Photo, I attempted to take the perspective correction one step further by using the Mesh Warp Tool. Below shows the original image used in the video, the application of the Source Mesh, the resulting Destination Mesh, and the resulting image. If the experts at Affinity know an easier way to do it, please let me and the other Affinity Photo devotees how . . . .
-
Hi, I am using Aff. Designer for a while and I like it very much... Still, I miss few things which would be nice to be included in future updates: 1. Blend tool (to blend two drawings in desired steps...) 2. Better transform possibilities of objects (perspective, warp...) 3. Nodes transformation - to be able to transform group of nodes (to rotate and resize them).
- 6 replies
-
- blend tool
- nodes
-
(and 1 more)
Tagged with:
-
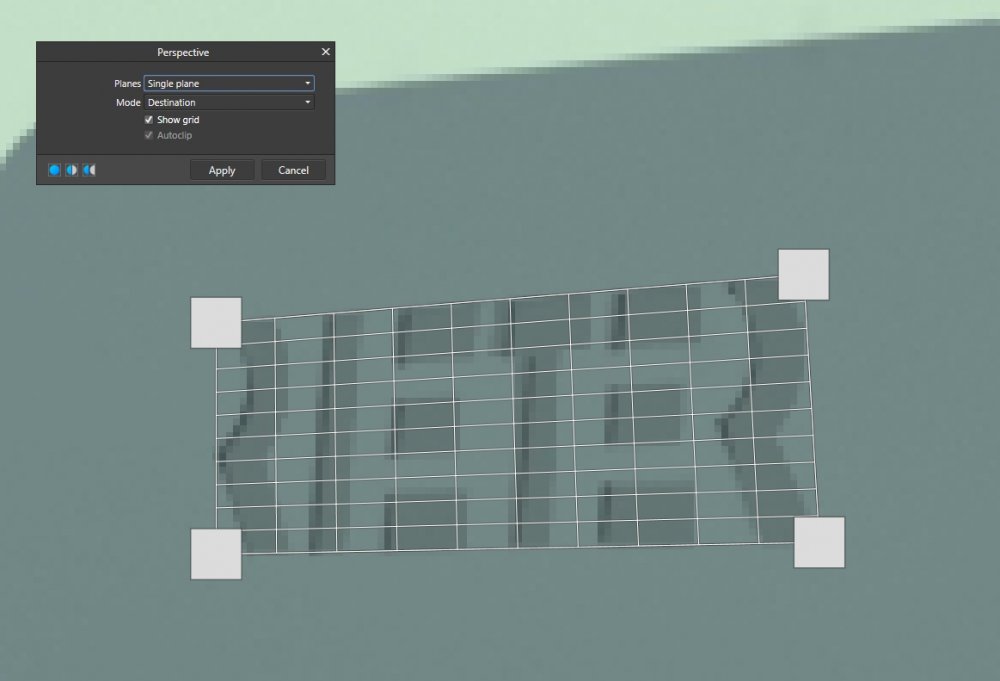
hello, is there a possibility to scale the perspective grid proportional. with a shortcut and the mouse. in ps i can set the corner points of the grid and then with strg-alt-uppercase enlarge the grid proportional. background : i set the corners of the main object and then i enlarge the grid to get more picture... thank you, wiso
-
I think it'd be great for the perspective tool to work on the iPad in the same way it works on the desktop version. For example, on the DT version, I can grab each corner of a rectangle and place those corners wherever I need to. On the iPad ver. I can only move the entire shape into a perspective as a single unit.
- 2 replies
-
- affinity photo
- ipad
-
(and 1 more)
Tagged with:
-
Hello. I proposed a new mesh functionality with a perspective setting. For now, I created such a net by hand: Designia_Perspective_Grid.afassets Regards example:
- 11 replies
-
- perspective
- view
-
(and 3 more)
Tagged with:
-
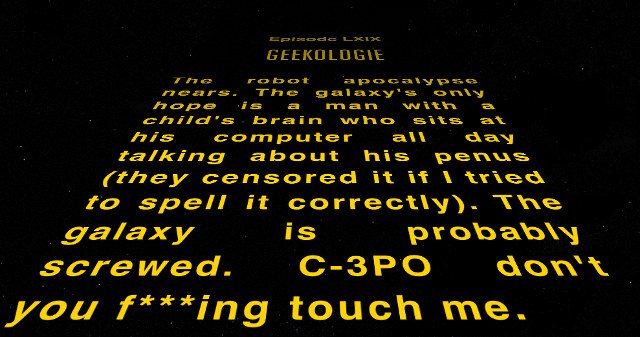
I'm about halfway through my Designer Beta and while I've generally been absolutely in love with it, whipping vague whims up into actual designs with astonishing efficiency, I recently ran into a glaring omission—the ability to perspective-transform shapes without rasterizing them (and even that would appear to require a copy of Photo, which I haven't yet explored). And not in a skew-to-the-side way (which does seem to be readily available in Designer), but in a vanishing point fashion, like the text in the picture below. In what I've googled of the issue, I've seen it spoken of as an established, known limitation, but also didn't see it on MEB's most-requested feature list, so... here I am officially requesting it. My wheelhouse is... abrasive, hard-sell punky type designs, the ability to project shapes towards the viewer is something I frequently employ. I'm not going so far as to call its absence a dealbreaker when my trial expires, but I will say it's looking like it'll be a persisting nuisance having to find workarounds.
-
- transform
- perspective
-
(and 1 more)
Tagged with:
-
Hello. I present a drawing of the church using the perspective grid proposed by me. Regard More info:
- 2 replies
-
- draw
- perspecive grid
-
(and 2 more)
Tagged with:
-
Hello Affinity. I would like to propose a new document grid. Is there a chance to add a perspective grid, making it easier to create drawings using perspective? This grid was introduced in ArtRage 5 and it is very useful. For now, I created this grid by hand: Designia_Perspective_Grid.afassets Best Regards
- 5 replies
-
- perspective grid
- grid
-
(and 3 more)
Tagged with:
-
In PS (ach), you can draw a distortion perspective tetragon in their 'Perspective Crop Tool', then grab the middle of the sides to drag move the whole side parallel to the original. This is shown with a node dot in the middle of the side, similar to the ones at the corner. Seems like an excellent addition to an already-splendid Perspective tool. Thanks for watching!
-
perspective tool - oversized handles
maxen posted a topic in [ARCHIVE] Photo beta on Windows threads
The perpective tool handles seem to be oversized. Although the visible handles area is displayed way too big, the actual active area seems to be the usual small spot. -
Drawing ellipses and the likes of it is a real pain when it comes to perspective. Would you consider creating an isometric version of the polygon tools so that we can create ellipses, rounded rectangles and regular rectangles directly in one of the three axes? This would be a real time saver, especially combined with boolean operations.
- 3 replies
-
- isometric
- perspective
-
(and 2 more)
Tagged with:
-
Hi folks, I would like to insert a freely composed image in another picture wiith the perspective projection feature on iPad Air 2, newest app version. Unfortunately I've been not successful after tying for one or two hours. When I mark an area with the perspective projection function and zoom in with the hand tool, I can draw freely and everything works fine after tapping perspective projection again. But this does not work with objects like pasted images or rectangles whose always get inserted in new layers. When I group the layers and rssterize them to one I am not able to reset the zoom mode. Is there any possibility for doing that in the iOS version? I wish you a beautiful snowy Advent Sunday!
- 1 reply
-
- perspective
- projection
-
(and 4 more)
Tagged with:
-
Hello, As soon as I do change a form with the perspective tool, I am no more able to modifiy its colour. Is there a way to change it ? Thank you for your support and best regards
- 1 reply
-
- perspective
- change
-
(and 1 more)
Tagged with:


