Search the Community
Showing results for tags 'painting'.
-
 Tell please, Do you plan to make such a convenient brush setting like in Photoshop. It is much more convenient than at the moment in Affinity Designer or affinity photo.I'm talking about the circle above the arrow in the picture below. very easy and convenient to change the brush - just press mouse 2. and in Affinity Designer i could not change roundness for brush, I thing option SHAPE in brush setting can set roundness but not for all brushes. I beg you to implement such an implementation is very convenient for drawing. Thank you for your attention and have a nice day.
-
 Hi, I have a problem with the brush cursor in Affinity on Mac: When I have brushes with some kind rotation function applied, like brush direction, the brush cursor does not respect this and stays the same all the time. Although I appreciate the refined brush cursor in some use cases, this is quite annoying, as this makes it hard to judge how the strokes will come out. Applications like Paintstorm do have a rotating brush cursor, and its very helpful. Either the brush cursor should rotate, or I need a neutral brush cursor like a crosshair. More options in the respect would be helpful.
 -
Temple_Of_The_Four_Winds.pdf
-
 I didn't find a setting for that, so I'd like to ask You to add it: I often need to see which exact brush I have currently selected. I have many of them, some similar by icon, but different in behaviour.
 -
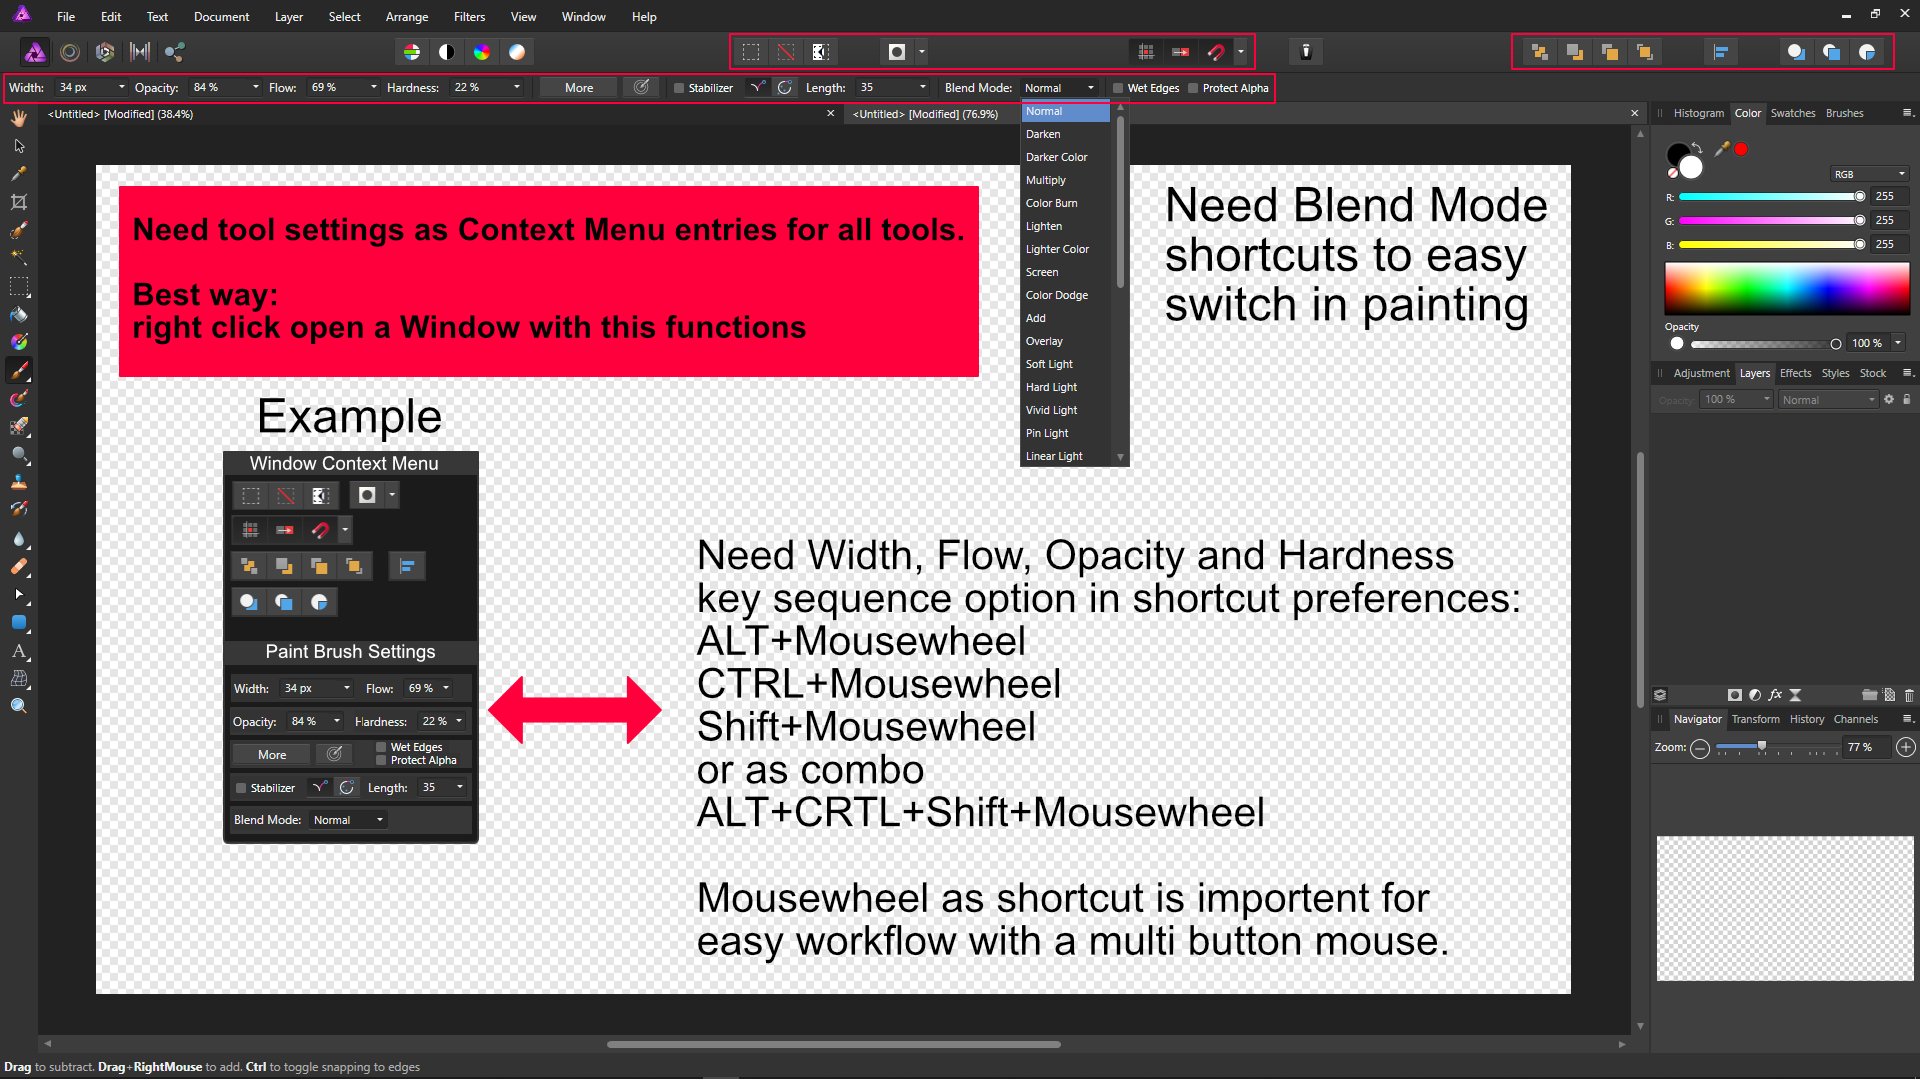
 more specific context menu entries for each tools and an option to customize the context menu in settings.
-
Hi there, I'd love to see symmetrical drawing added to Affinity Photo. Minimally, across the vertical centerline, although it would be nice to be able to do symmetrical painting with any number of strokes evenly distributed. More than anything, though, when creating character sheets, it's nice to be able to quickly lay out symmetrical detail live, rather than mirroring after I draw for a while. Thanks, Alec
-
 Using Photo trial 1.6.4.104 . Edit : In Windows 7, Wacom Intuos Pro 4 XL. The problem : The current interactive color picker tool, that is, switching to pick color with alt key, or my case, side pen button configured as alt key, while you are with the brush tool, to very quick pick a color between 2 big chunks of painted color, so to paint with an intermediate color. This is very very fast and common technique for color blending while painting. There are many other painting, illustration or texture making techniques that also need fast color picking. To all of those, this problem applies. The problem resides in several issues that I believe get solved with an easy solution. The magnifier lens that show up once you click on a canvas point (I am clicking, not dragging) to let you better pick the pixel you want is very good for photography but not important for painting. And I believe it is causing to lag the action, has a sort of small time there very noticeable when using very often, very fast (a need for painting-blending, also called glazing technique). Sometimes, if fast enough wont pick the color, at times. It's a bit hard to work so when painting (loosing focus, slowing down, etc). This all by setting the alt key in a wacom pen side button. One very big problem is that very often, a fast click wont pick the color. Probably because it is expecting a drag, not a click like in other software apps. A suggested possible solution : Could it be possible / easy (I have no idea) to add a "not to be default" option so that users can disable the magnifier / dragging ? The eyedropper tool works a bit more like this, although if dragging or keeping it pressed, the magnifier ends up showing up, but you need to drag more/less dry click for it to happen. Well, in any case, not to replicate with the interactive picker the blue marquee around the object that the eyedropper tool forces, that would be bad while painting. Having an "alt + pen click" (no drag, no magnifier) color selection on canvas like in any other 2D application. With not even the magnifier on it. As I believe the estimation/input about if is there dragging or not, or actually displaying the lens, is adding some delay there, and causing some times not to even pick the color. Or never pick it, if fast enough. There even might be photographers wishing to have at least the option to deactivate the lens, so to have a blazing fast color picker, so, I guess is a good thing to add for any group of people, always as an option that does not need to be default after install. This would be huge for me (and I suppose, for any other person painting, making comics, illustration, texturing, etc, etc) , for my workflow. (a reason to purchase, indeed) Too lengthy version here, but I realized I hadn't done a formal feature request, and I was talking about two requests in same post (about digital painting requests in general), mixed with another matters, and it was too long, in any case.
- 2 replies
-
- 2
-

-

-
- illustration
- comic
- (and 6 more)
-
 Playing with the brush engine in Photo & Designer and found that Hue / Saturation / Luminance Jitter work differently from other apps… In Affinity the jitter is applied per dab. Compare with Photoshop (and others?) where the jitter is applied per stroke. In my limited experience per stroke is more useful in digital painting for creating subtle variation between painted strokes. Could Affinity have the option to choose how the jitter is applied? Thanks for your consideration.
-
Is there a way to hide the outlined brush tip? I guess some people might like it, but for me it is totally disturbing, especially with complex brushes. The outline hides faint brushstrokes and makes it very hard to judge if they are correct, especially with large brushes, low opacity and short strokes. I prefer just a dot, or nothing, as I see the tip of the Wacom pen anyway.
-
Hey folks, I am currently testing AP for digital painting and illustration. I like a lot, but the outlined brush tips (desktop version) can be extremely disturbing: - they lag behind - some complex brushtips with large sizes hide subtle paintstrokes, so it is hard to see what I am painting under the cursor I didn't find a way to hide the brushtip completely. Is there one? If not please consider adding a user preference for that. On the plus side, I like the feature parity of desktop and ios versions. Being able to use the same brushes is also a huge advantage. Regards, Marin
-
Affinity photo and Krita. Personal work.
-
 There is this technique I want to replicate in Affinity Photo that can be done in Photoshop, but I can't get it to work in AP (see video link below). What I basically want to do is select all the pixels of an image from all the visible layers by using the Channels window, create a new layer, and then finally fill the entire selection with a single colour that has translated the shades of the selection into transparent pixels (i.e. pure white is 100% transparency, black is 0% transparency, and grey is everything in-between those extremes). Video link in question: https://youtu.be/WZOJqbSBPxI?t=7m1s
 -
 Hey all! This is my new video about painting in Affinity Photo @AffinitybySerif Share please and thanks for watching!
 -
Bought Affinity Photo last year, but took a long break from it because of the lack of a stabilizer at the time. Decided to go back to the program yesterday just to see if I could replicate my workflow from Photoshop, which I got decent results from. Still need to figure out some kinks in the system before I feel like my work in Affinity Photo is up to par with my Photoshop work. Might finish these two if I feel like it.
- 37 replies
-
- 6
-
-
- black and white
- painting
- (and 1 more)
-
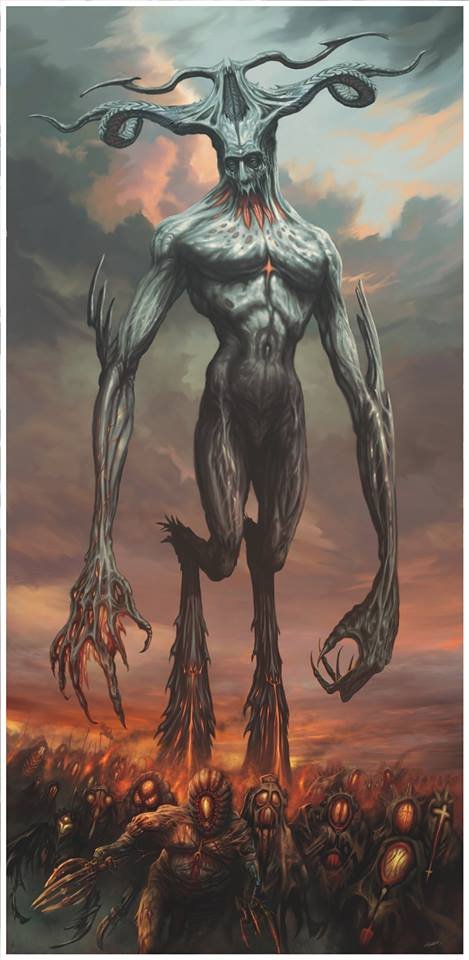
Hey guys! Here is my first post here, and this is my video about painting the Monster in Affinity Photo. Hope you like it! Feel free to share and subscribe to my YouTube channel! Best regards, Andrew Bzh.
- 5 replies
-
- 9
-
-
- painting
- affinity photo
- (and 3 more)
-
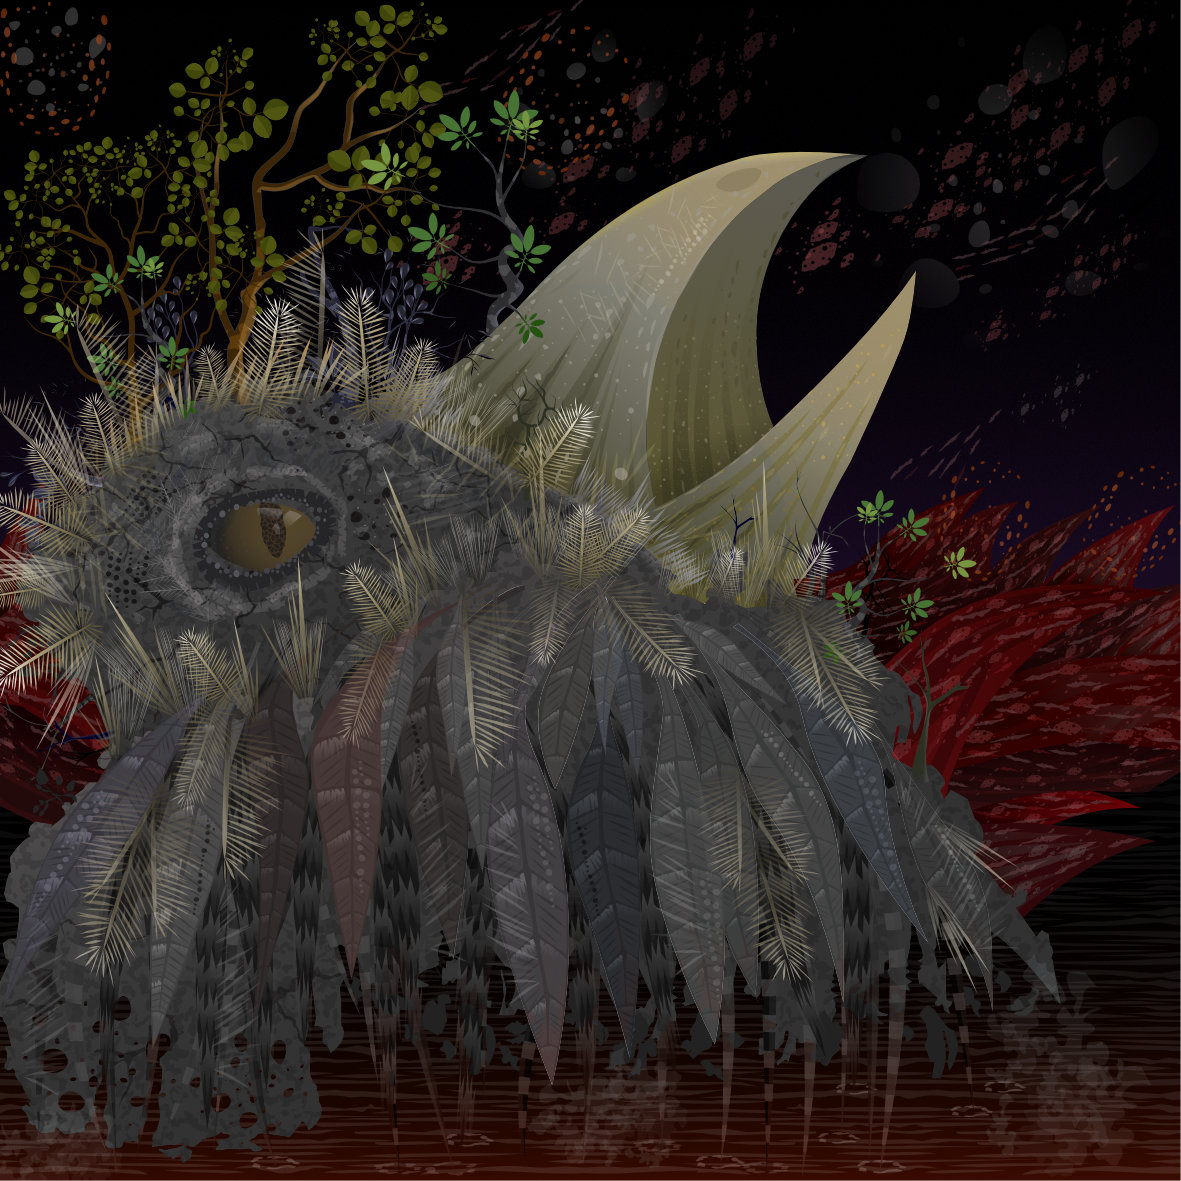
Screech Just sharing the latest crazy drawing! based on Inktober:09 All vector reconstruction of sketch started in Sketchbook Pro 8.5 last year Completed in AD using just vectors Size = 200 x 200 mm (300dpi)
-
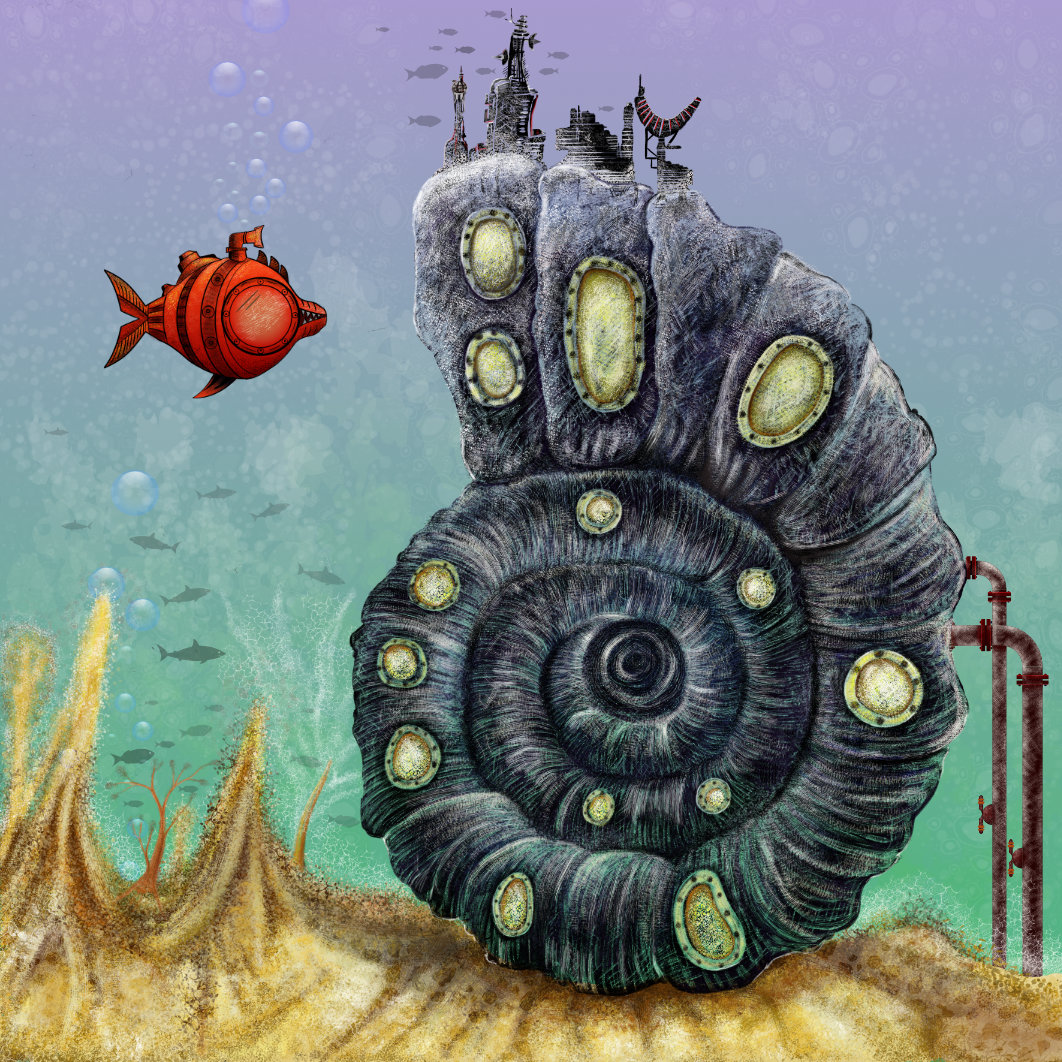
Been playing with the texture paint brushes again...and sharing the result! Mostly Pixel Persona! Original size 300 x 300mm (300dpi)
- 11 replies
-
- 14
-
-
- painting
- raster brushes
- (and 1 more)
-
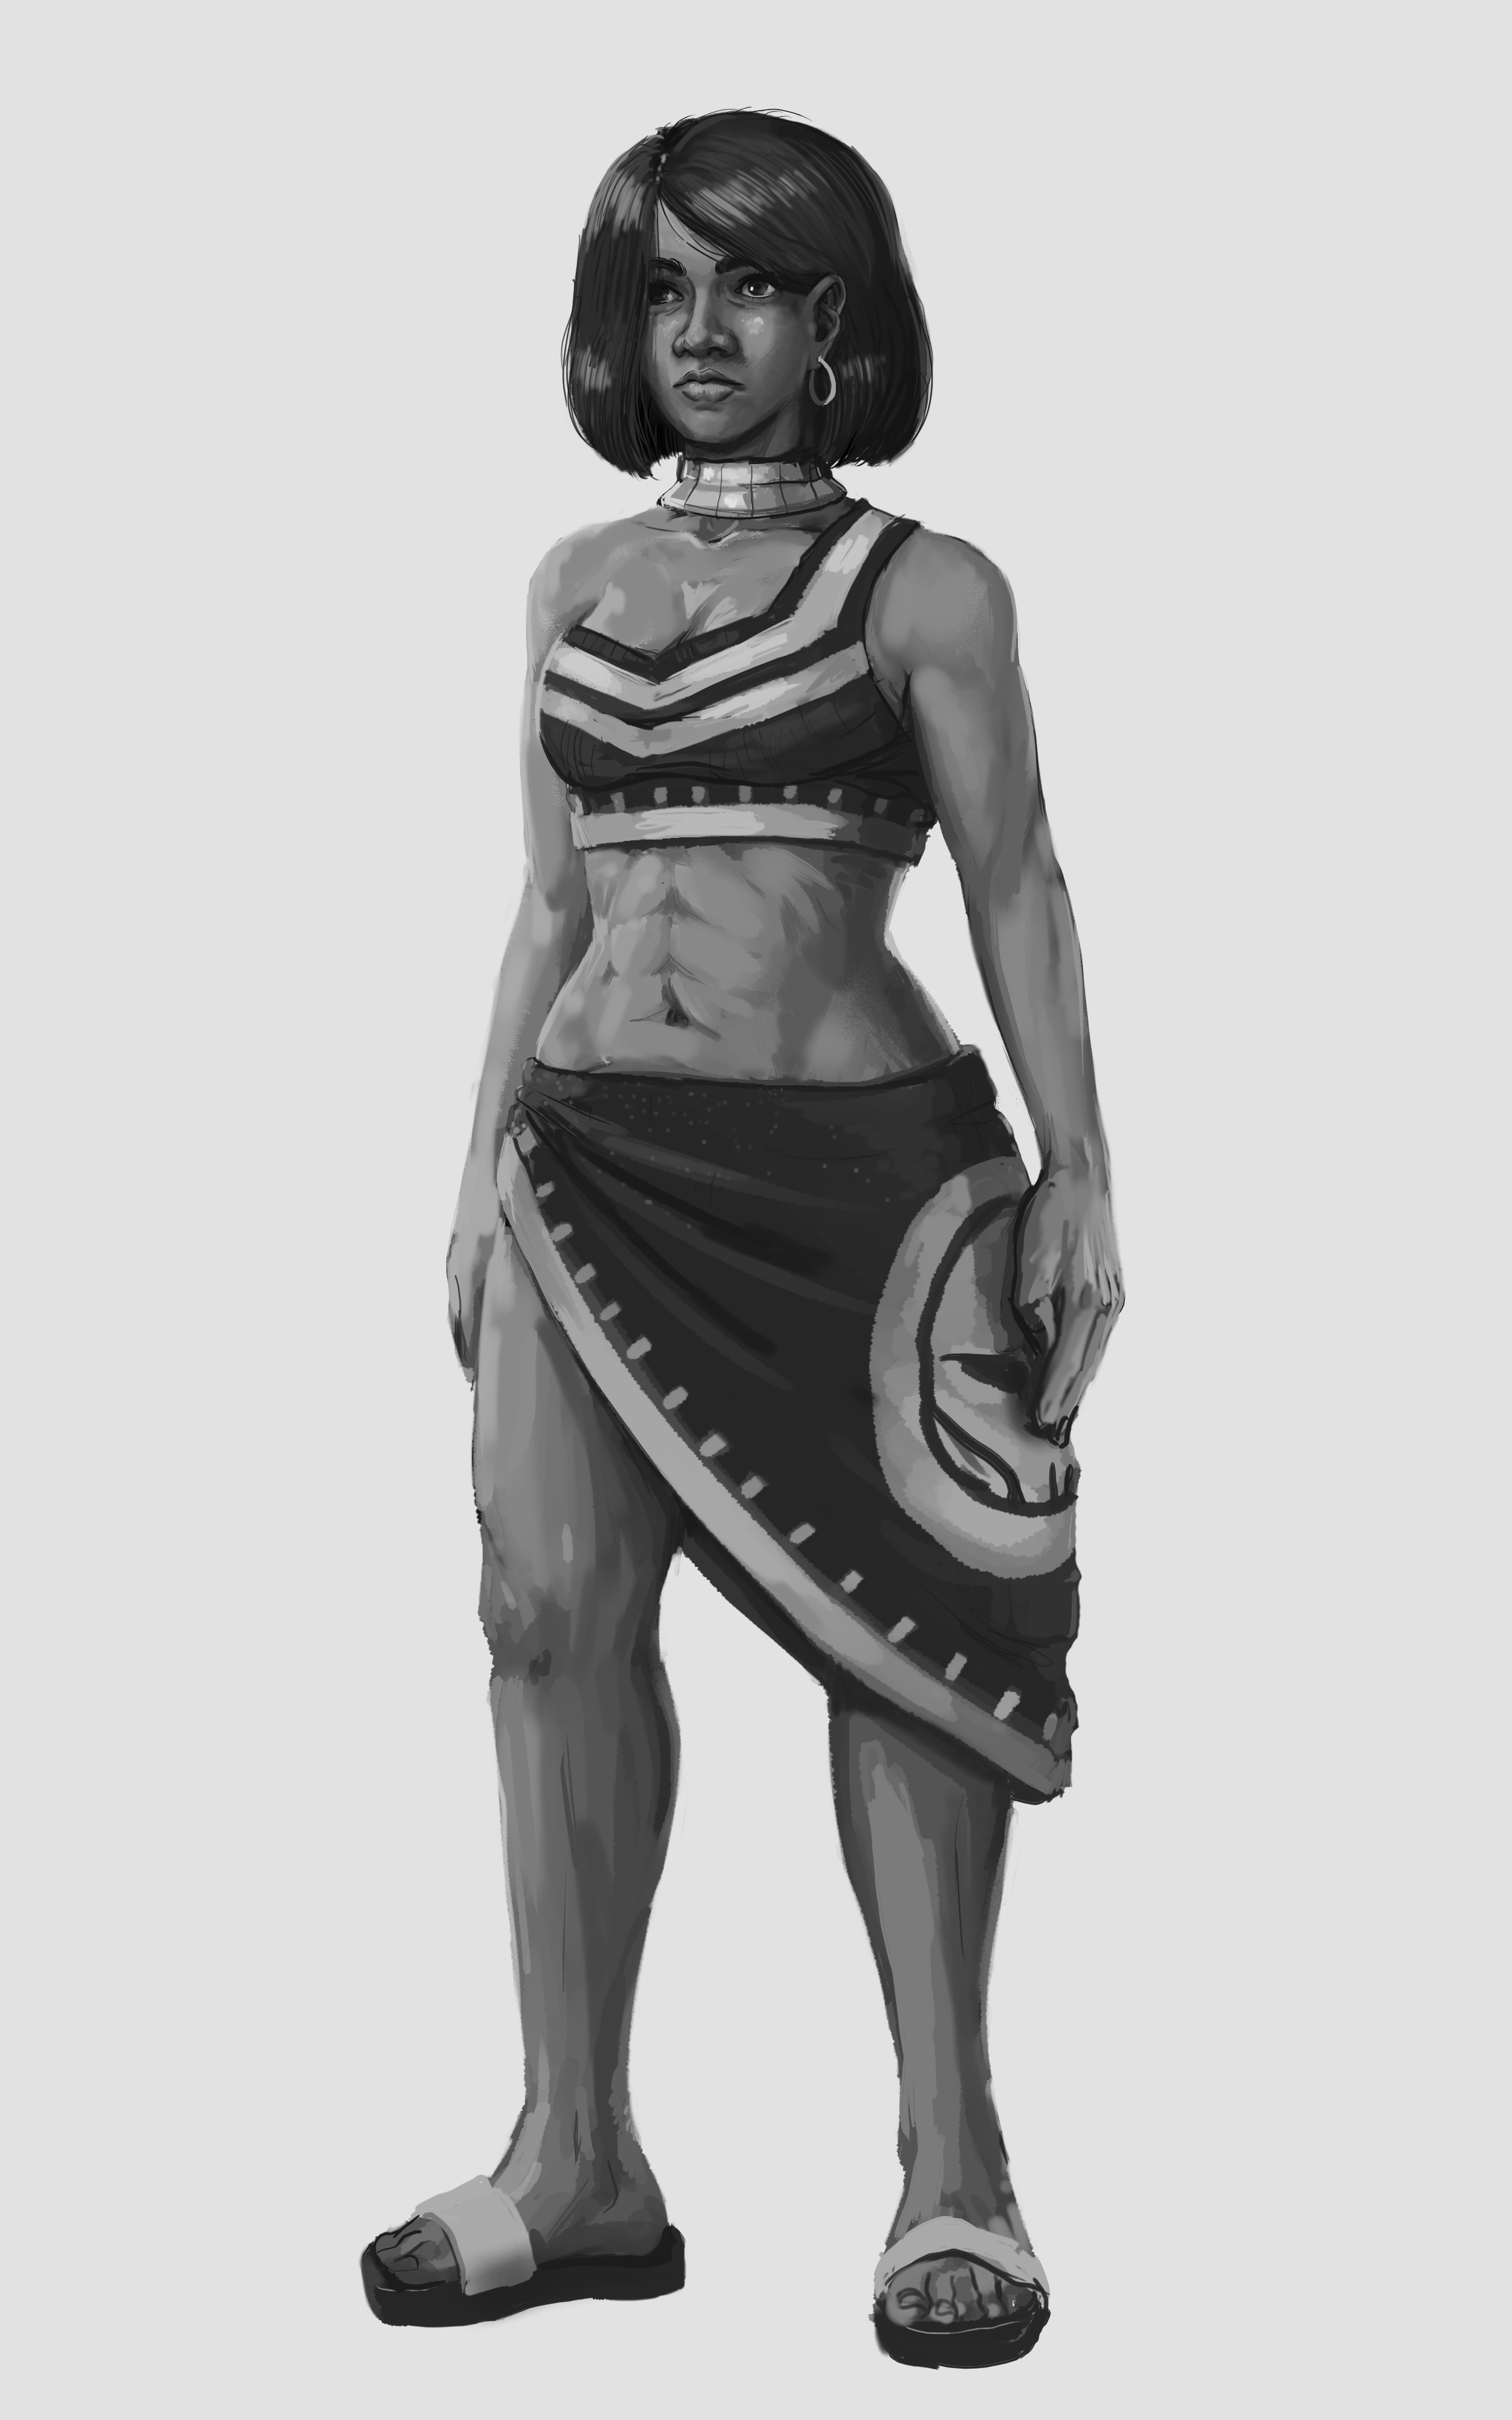
Weekend fun character painting. Hope someone likes it. Really quite amazed at the versatility of the old classic smudge as a real painting tool.
-
Finished this to a satisfactory level. Painted on a budget HP laptop that cost me £350. A3 processor and 8GB RAM. Hat's off to the developers. Link to WIP:
- 6 replies
-
- 10
-
-
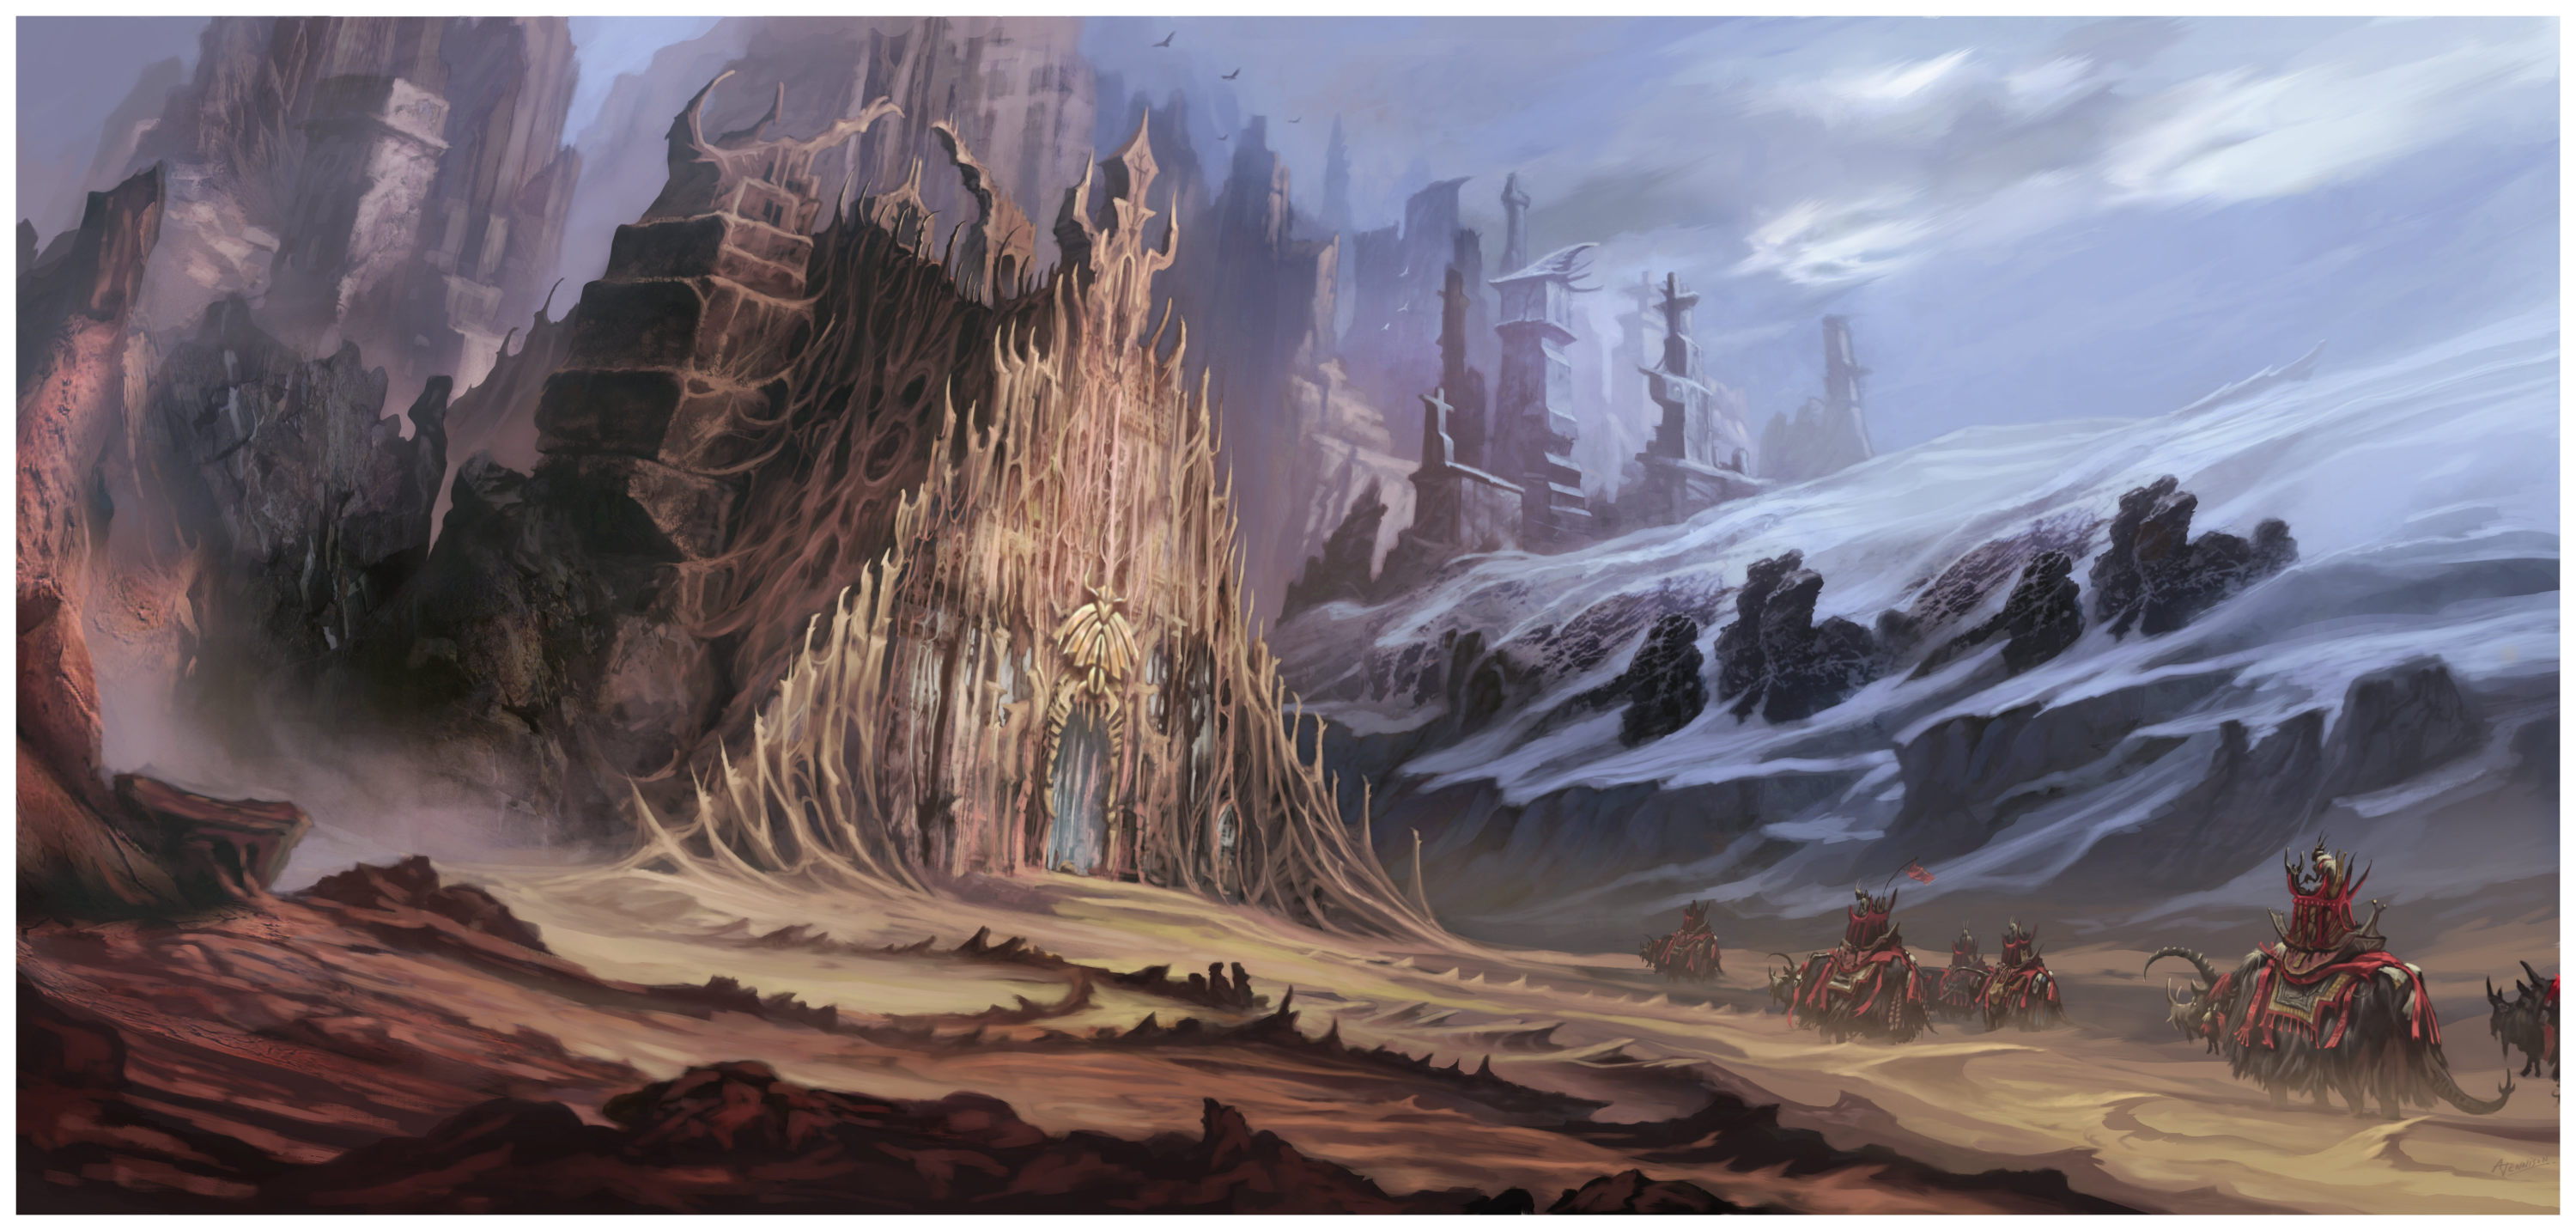
- fantasy
- fantasy landscape
- (and 1 more)
-
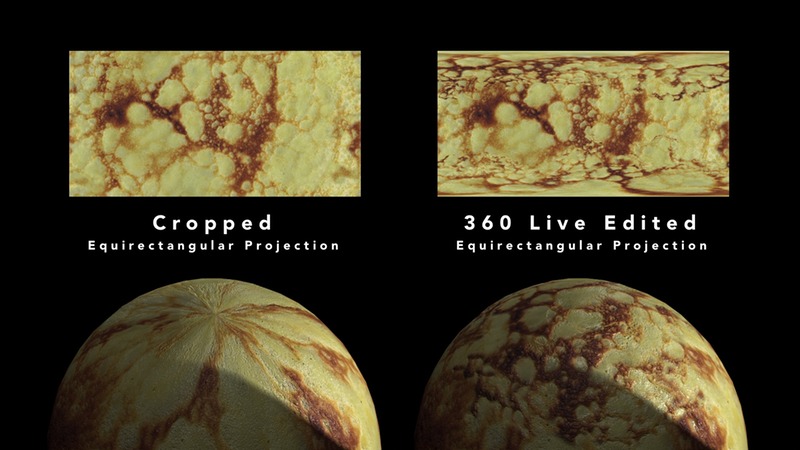
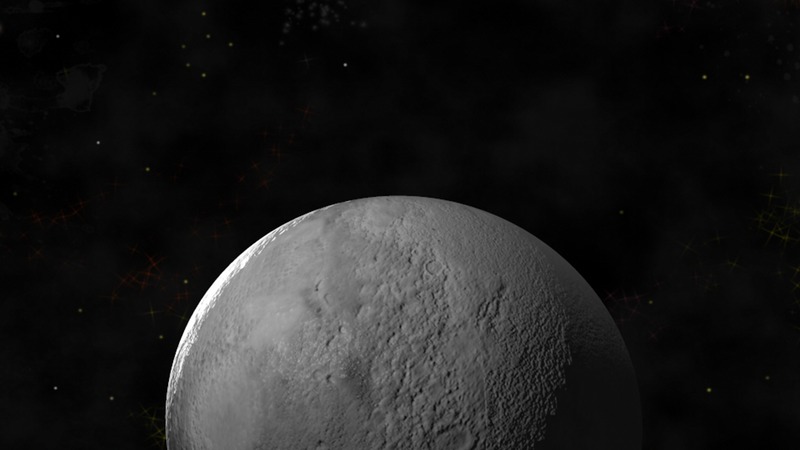
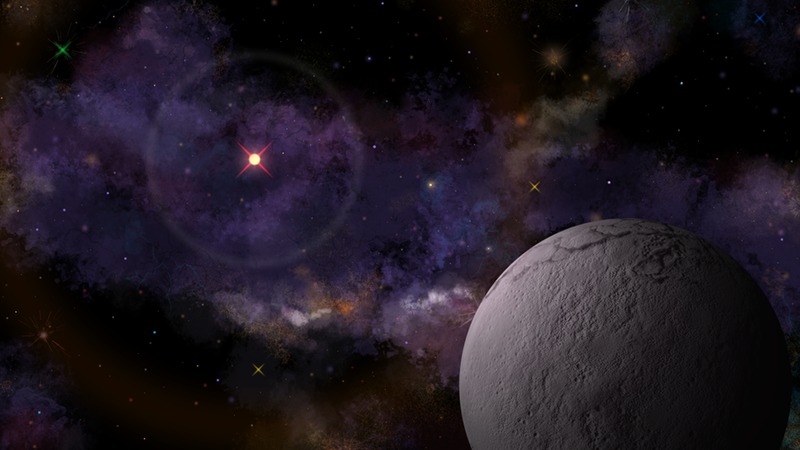
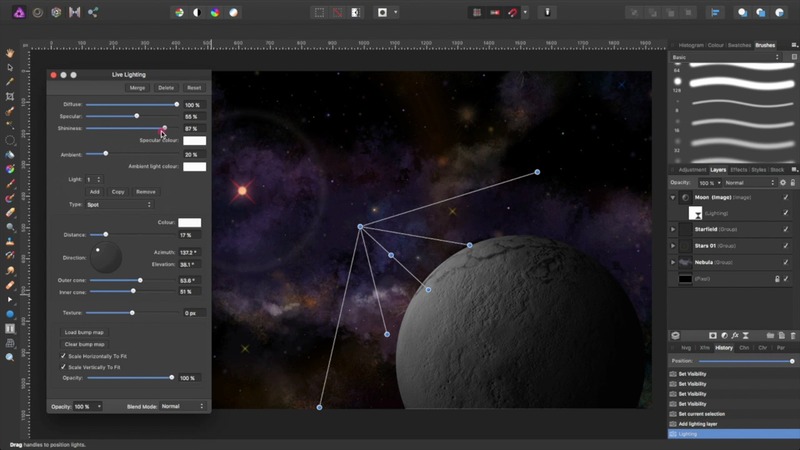
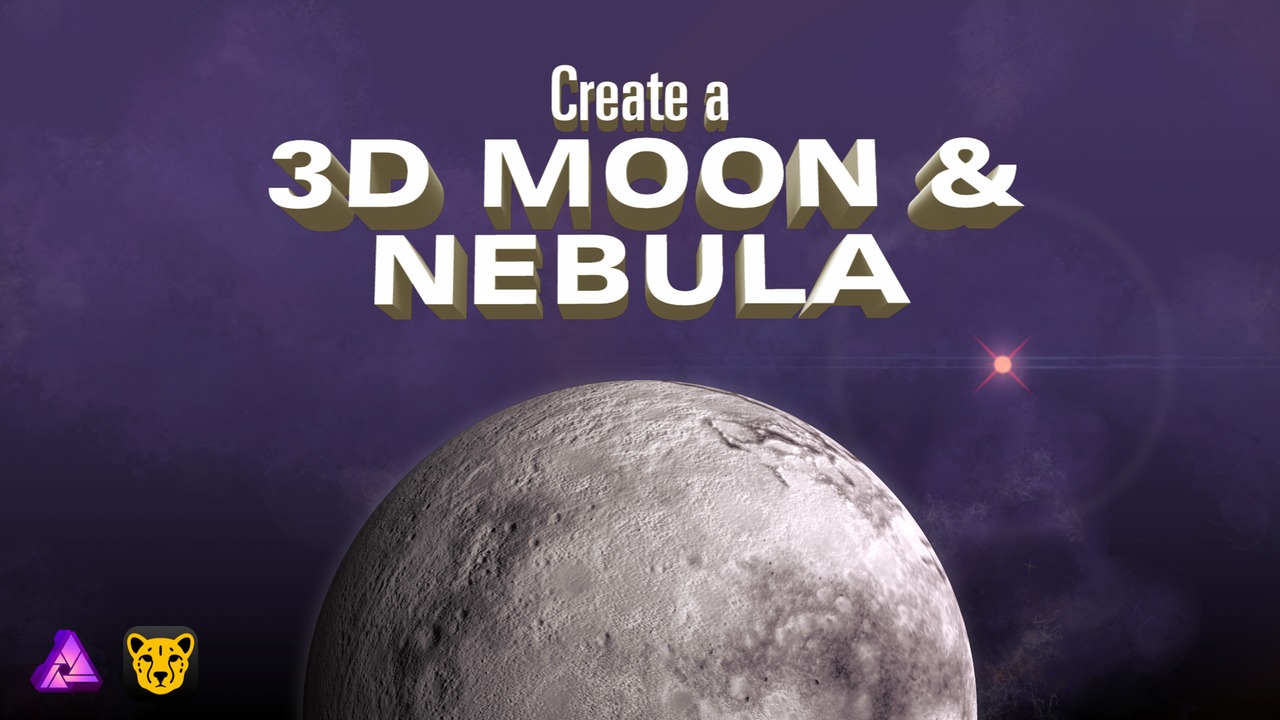
 Now on Skillshare here: http://skl.sh/2GjWV8q Note: I have renamed this class. It was "Create a Space-Themed Illustration". This class covers a range of easy to master skills, from cooking, to 3D rendering, to digital painting. Part 1 – The Pancake Moon In Part 1 of the class, you will learn how to: make pancakes in your kitchen using Affinity Photo, make equi-rectangular projection texture and bump maps out of the pancake's cratered surface using Cheetah 3D, wrap the texture and bump maps around a sphere, and render your pancake moon. We will be using Affinity Photo to create our texture and bump maps, and Cheetah 3D to render the pancake moon. Part 2 – Painting a Starry Nebula With Affinity Photo, you will learn how to: use shapes to create stars and simple lens flares use the standard set of Affinity Photo brushes to paint star fields and a nebula composite your moon with your starry nebula, and fine tune the lighting of your moon. Here is the permanent link to the class: http://skl.sh/2ooIWa9 Note: This link requires a subscription to Skillshare. Please use this link if you already have a subscription, or you are intending to sign up to Skillshare. I'm not sure what the current deal is, but Skillshare sometimes offer free access to all their classes for a limited time. Links to other space-themed classes by the following Skillshare teachers are available from this class. But wait, there's more... Free Access Link: http://skl.sh/2ogF9L2 Note: This free access link is limited to the first 12 people who use it and is valid up until the 28th of February 2018. It only provides free access to this class. You may need to sign up, and it's free. It's best viewed on a desktop browser or tablet. I hope you enjoy the class. Disclaimer: I have no affiliations with Serif nor Cheetah 3D. This is not an official Serif nor Cheetah 3D class. Permission was obtained for using the Affinity Photo and Cheetah 3D logos for the purpose of class promotion.
-
 Affinity Photo and Affinity Designer are quickly becoming a realistic alternative to other software for many uses. They boast a great arsenal of features comparable to current industry-leading options, and I personally appreciate how they go out of their way to make the user's workflow more streamlined and simple without dumbing features down or restricting the potential for fine-tuning and more advanced control. From a creative/artistic point of view, both software packages succeed at delivering a very solid and stable experience and the interface hardly ever gets in the way of creative flow. That said, I believe there are some minor improvements that could be made to the software in order to help streamline the workflow for artists. This thread serves as a sort of compendium of suggestions and feature requests relating to improving the workflow for artists. If anyone else has any other ideas that you believe belongs in this list, you can add it below. NOTE: To my knowledge, this category of the forum deals only with the desktop software (Windows/Mac), but to avoid confusion, this thread is about the desktop versions only. View Rotation Precision (Designer and Photo) The view rotation feature is especially helpful for hand-drawn art, especially when using a drawing tablet that cannot be easily repositioned. It seems, however, that the canvas rotation feature is very limited, only offering a set rotation increment of X degrees left and right. Sometimes the jumps can be too big to find a good angle, and other times the user may want to precisely align the view to a line or a guide. The existing rotation controls can be mapped to hotkeys, but there isn't any default way of performing canvas rotation easily. My suggestion would be to add a feature that uses one of the modifier keys to freely rotate the canvas to an arbitrary angle. The canvas could rotate about the center of the current view, and moving the mouse around that central point would control the rotation. This is how I've seen other programs handle canvas rotation, and it works beautifully. An option to non-destructively flip the canvas view vertically or horizontally would also be welcome. Related link(s): https://forum.affinity.serif.com/index.php?/topic/49658-view-rotate-is-hard-set/ https://forum.affinity.serif.com/index.php?/topic/43396-arbitrary-canvas-rotation-angle-without-trackpad/ Better Control of Variable Pressure (Designer) The pressure graph can be used to control the thickness of strokes along their length, which is very useful for fine-tuning the look and feel of a drawing. However, there are some cases where the graph approach is awkward and cumbersome to use, especially when the user is trying to place a thick or thin segment at a very specific place. Since the graph is stretched from the beginning to the end of a stroke, simply moving points in a way that changes the total length of the stroke can ruin a carefully adjusted pressure graph. As others have suggested, I believe variable stroke thickness should be handled on a per-node basis such that the user can (for example) roll the mouse wheel over a point to easily adjust the thickness of the stroke in that location. I don't know if that necessarily warrants an entirely new tool since it could probably be combined with the node tool, but I wouldn't be opposed to it. Another issue worth noting is that strokes drawn using the vector brush tool don't appear to allow variable pressure adjustment; the graph can be opened, but changing it doesn't seem to have any visible effects on the stroke. Related link(s): https://forum.affinity.serif.com/index.php?/topic/496-stroke-width/ Pixel Tool (Photo) When using the pixel tool, if you click to place a single pixel, it generally doesn't do anything. The pixel tool seems to work only if the mouse is dragged. It would be much more comfortable to be able to simply click where you want to place a pixel and have it appear. As it stands, using the pixel tool for precision work feels finicky and inconsistent at best. Resetting Sliders (Photo) I noticed that in Affinity Photo's Develop persona, double-clicking on the sliders in the right toolbar resets them to their original values. This feature is incredibly convenient and sensible, but it seems to be the only place in the program where it works. Double-clicking on other sliders in other personas seems to do nothing. I don't know if they were originally intended to do this everywhere and a glitch broke the functionality, but I personally think it's a great feature and would love to see it expanded to the entire interface. As I said above, if anyone has any other points, please feel free to share! Affinity's software has been enjoyable and rewarding so far, and it approaches the quality and caliber of Adobe's product line without forcing a subscription. I want to see the software improve and flourish, so keep up the good work!
 -
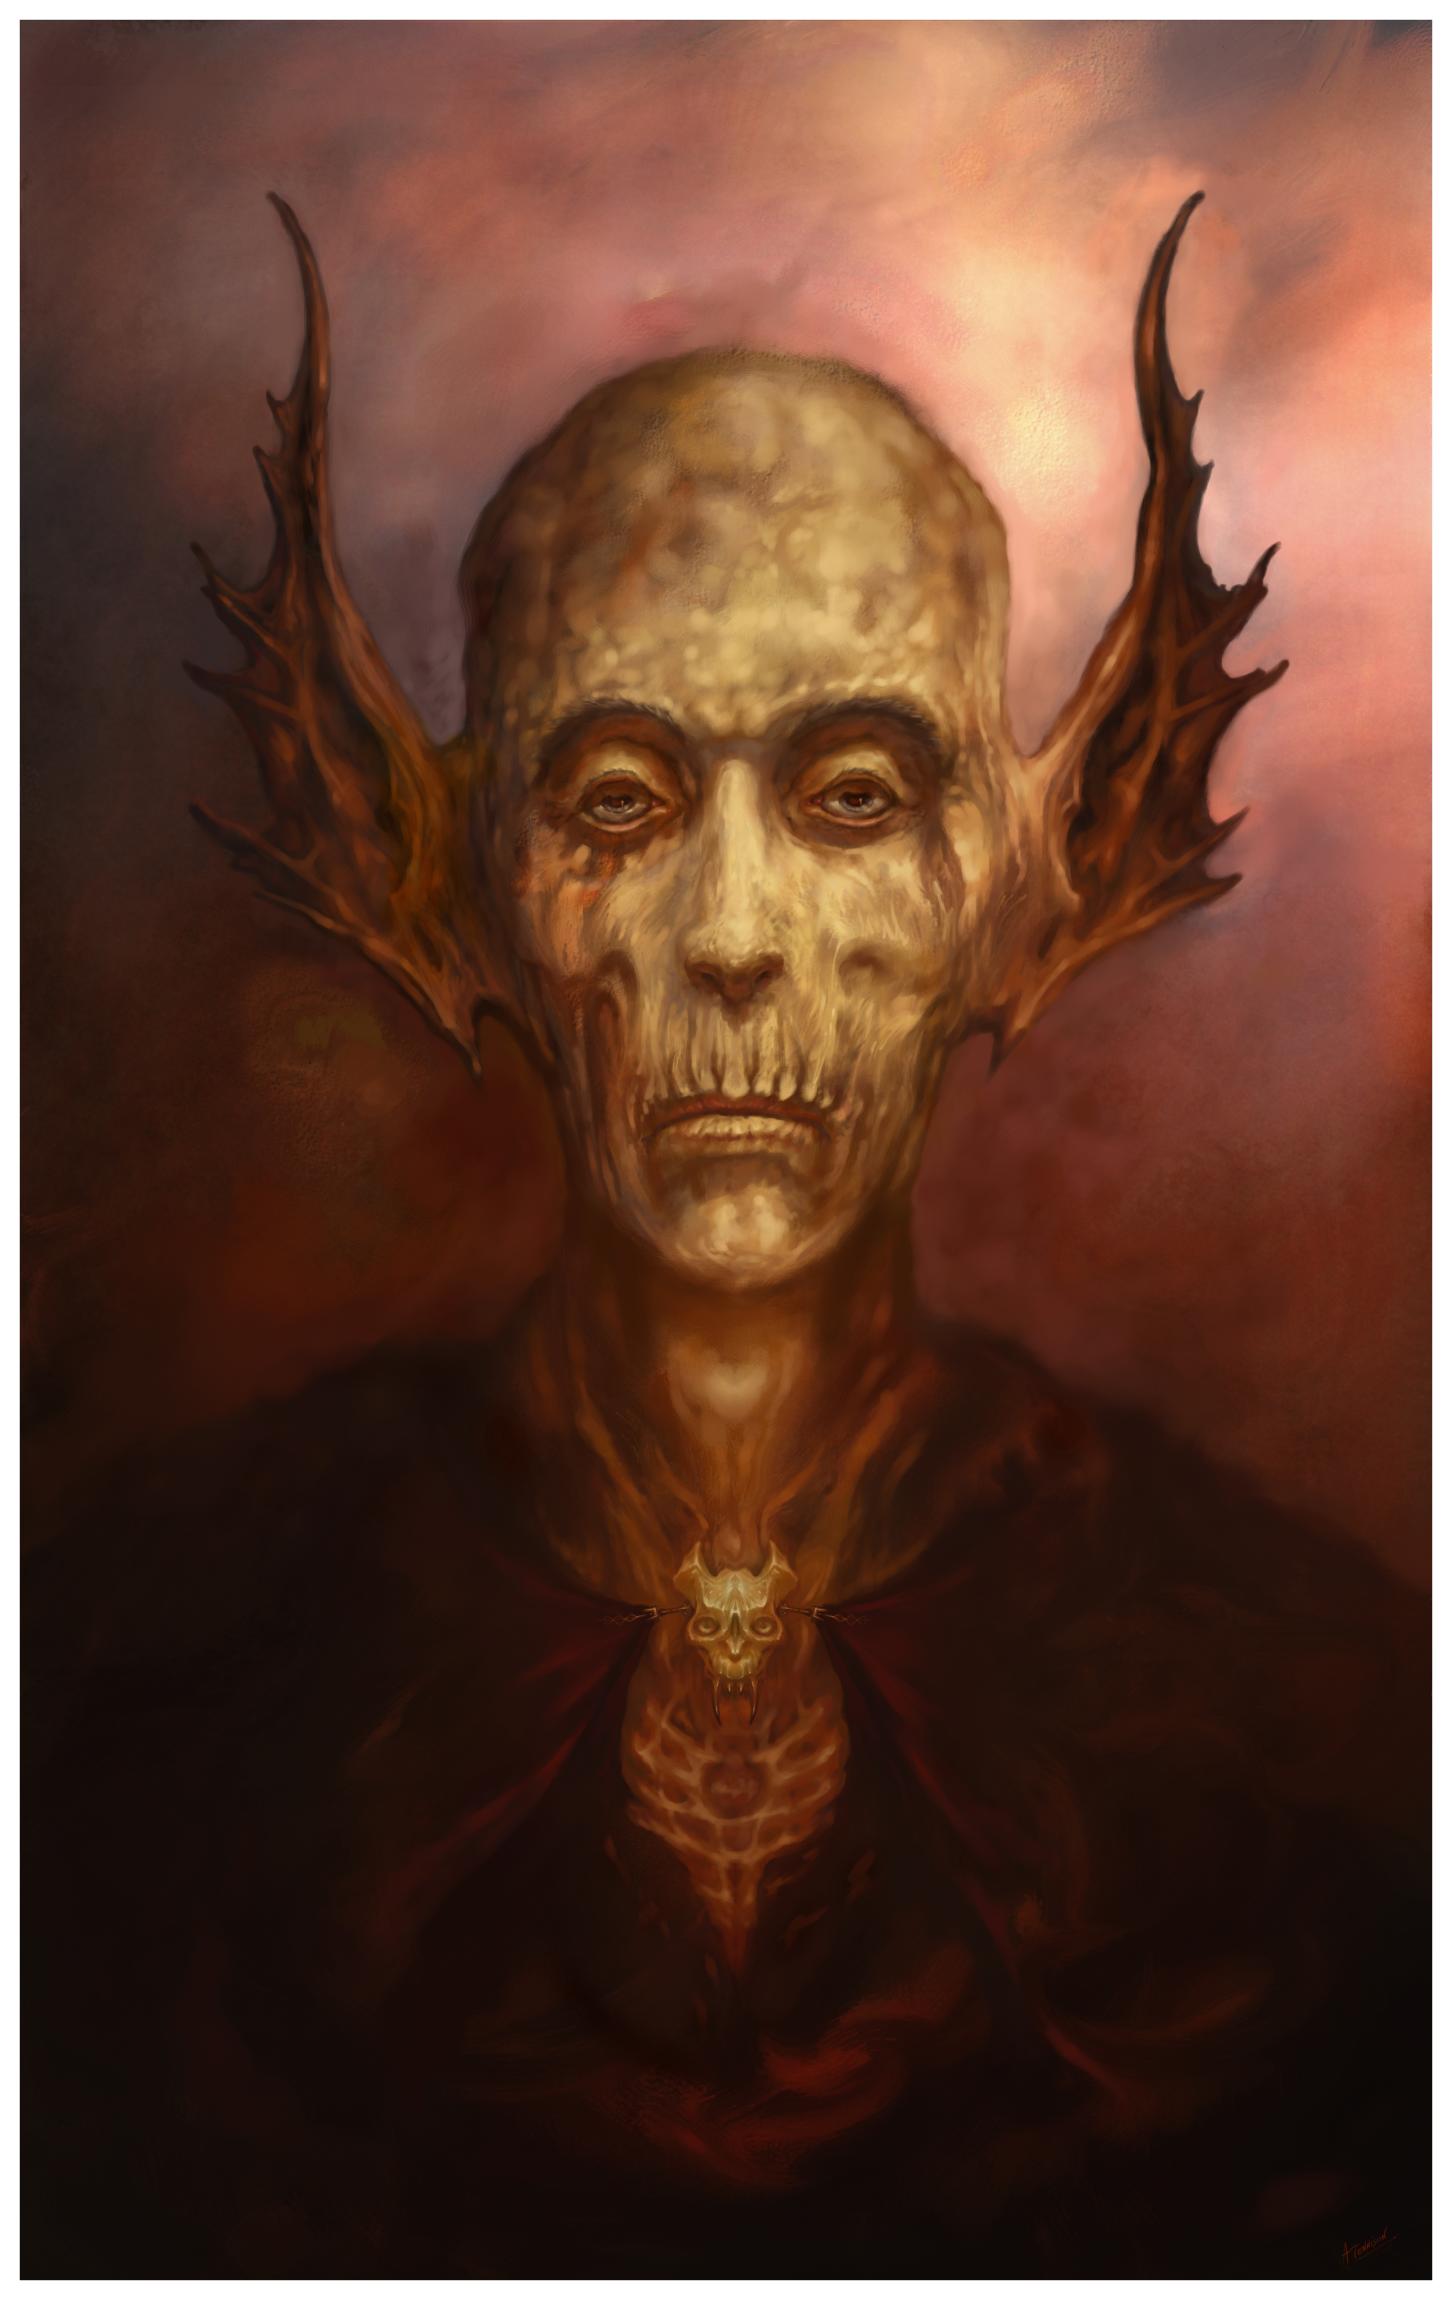
Simply an oil portrait, without much editing. Photographed from the canvas, some contrast settings made with Affinity Photo, that's all. Looking forward to feedbacks TNX http://b-bertuleit.de/oil-painting/
- 1 reply
-
- 2
-
-
- painting
- oilpainting
- (and 1 more)
-
 One of the features that would make the iPad version of Affinity Photo much nicer to work on is the ability to quickly flip the canvas horizontally using a gesture. I feel that this is a very important feature and I use it a lot in other apps. I use the horizontal flip when I'm drawing because it helps me see mistakes and makes inking/painting much easier since it gives me different angles to work on. I can imagine that this feature would also be helpful for photo editing because it makes it easier to check the work for any mistakes or areas needing improvement. So, please give us a gesture to flip the canvas horizontally. It would make a big difference! Thank you Affinity Photo team!
- 8 replies
-
- 5
-
-
- flip canvas
- flip canvas horizontally
- (and 3 more)
-
 Like I said in the title, what is the difference between the two programs regarding painting. They look exactly the same, have the same brushes, brush properties and options. Is there something I'm missing or not realising? I personally love the AD for its combination of vector and pixel, so I'm looking forward to paint in Designer as opposed to Photo which would be a traditional choice.
 -
 Hello, A few weeks ago I got myself a new Surface Book and Affinity Photo. I wanted to test how good the touch screen works and I started drawing something. But I could not do that properly because everytime I put down my hand whilest drawing it started painting underneath my handpalm. In Windows I found the option to ignore touch input, whilest the pen is beeing used, but if I lift the pen too high the same problem occures. Now I wanted to ask the Affinity Team if they have a solution to this problem, maybe theres a option to ignore touch input and only accept the pen. Yours faithfully, Lukas.K