Search the Community
Showing results for tags 'nodes' or 'transform'.
-
 Currently when resizing a selection, the selection resamples the nearest neighbor outside the selection. The result is that a resized image that has edged that have been feathered or blended into a gradient due to the algorithm used to resample when stretching the image. I'd like to suggest that the move tool gains an option to select the type of sampling algorithm used, with one option be none, to permit the creation of variegated flood filled rectangle based upon selection without the feathering/blending effect or utilizing a different sampling algorithm. This feature would be applicable to Photo or Design where pixel selections can be selected and transformed. The need for this feature goes as far back as early V1 days - I've found numerous reports of this problem with no suitable solution implemented.
 -
 Hello Affinity, Today I needed a "free transform" tool in Designer 2. When selecting nodes in Node Tool and activating transform, I would like to transform freely in perspective, not just scale, skew and rotate. Very useful with any Move/Transform tool.
-
 Searched through the forums, found someone else's single workaround but no reference to such a setting, read through Settings and document setup. I thought it would be a setting for Transform but that doesn't seem to be the case. I'm working on an enamel pin design and it's difficult to get the full dimensions of a pin (or make them fit a dimension) when I have to either constantly commit the outer stroke to vectors or some other workaround. Difficult to keep nondestructive and it can be a lot of extra unnecessary work.
 -
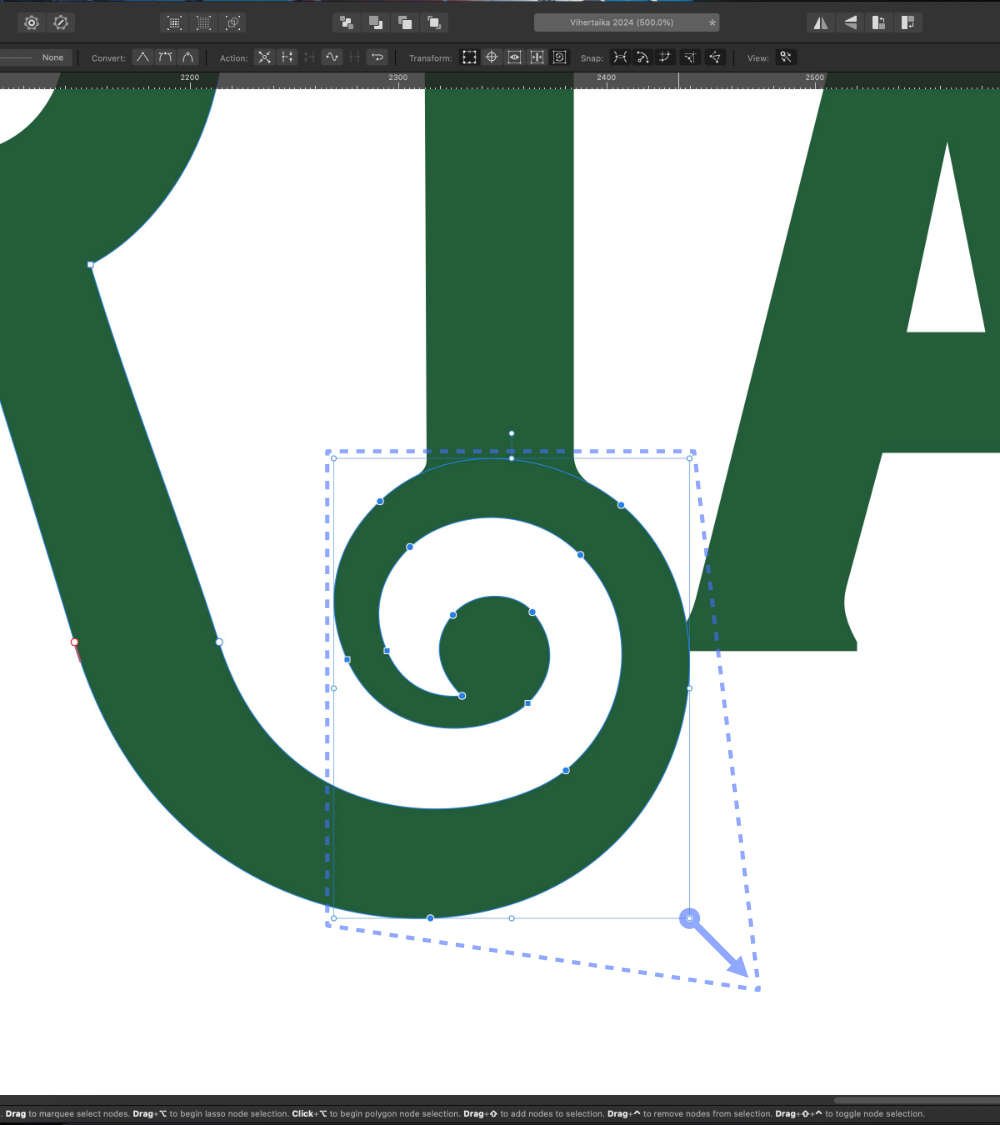
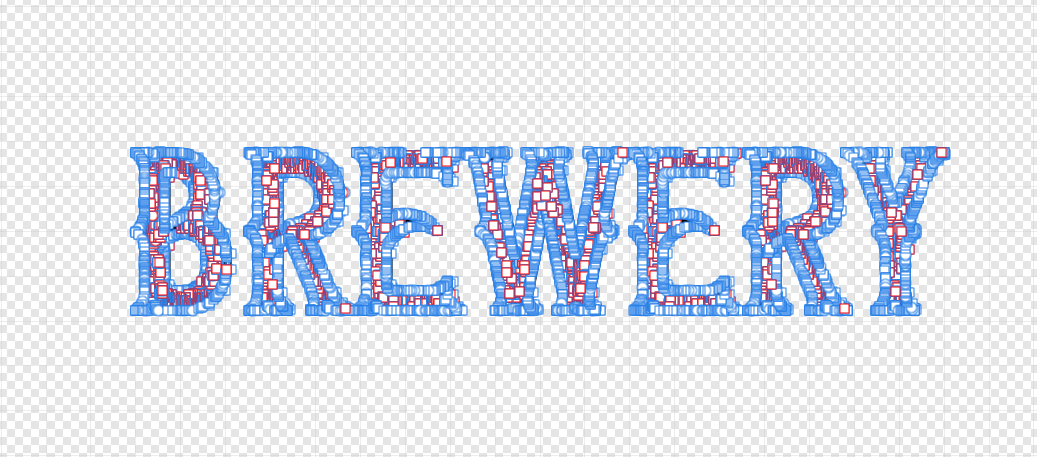
Hi, Is there an easy way to reset all of the nodes in the 1st photo so that this group of letters (curves) will collectively just have the basic corner nodes around the perimeter of the shape as a whole without rasterising? (as in 2nd photo). I would then like to be able to manipulate the group as a whole by adding in new nodes to the outside of the group. Or is the best way to do this using the Warp Group tools? Thank you, Jack
-
It would be beneficial / useful if a node could be moved (slide) along the path of a curve. This feature is available on Adobe Illustrator and I have used it often. I really miss this feature in Affinity Design (iPad). Thanks for your consideration of adding this feature.
- 1 reply
-
- 1
-

-
- affinity designer
- nodes
- (and 5 more)
-
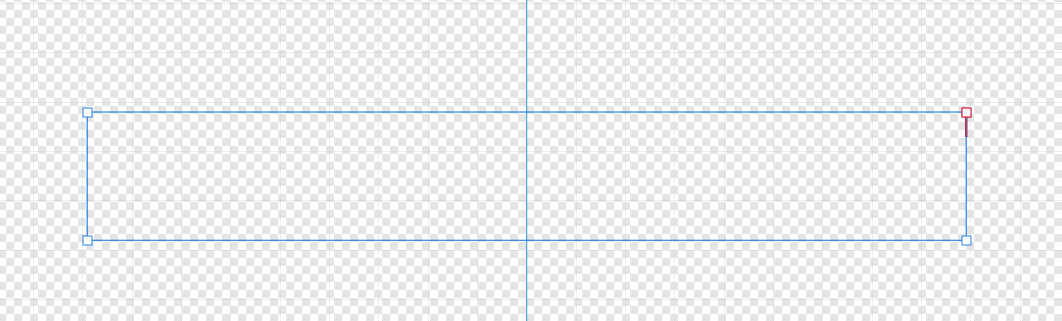
I have an open curve shape. The path tries to snap and autoclose the curve when I move the end node near the start point (red node). How can I prevent / toggle this autoclose or maybe the snapping ?
-
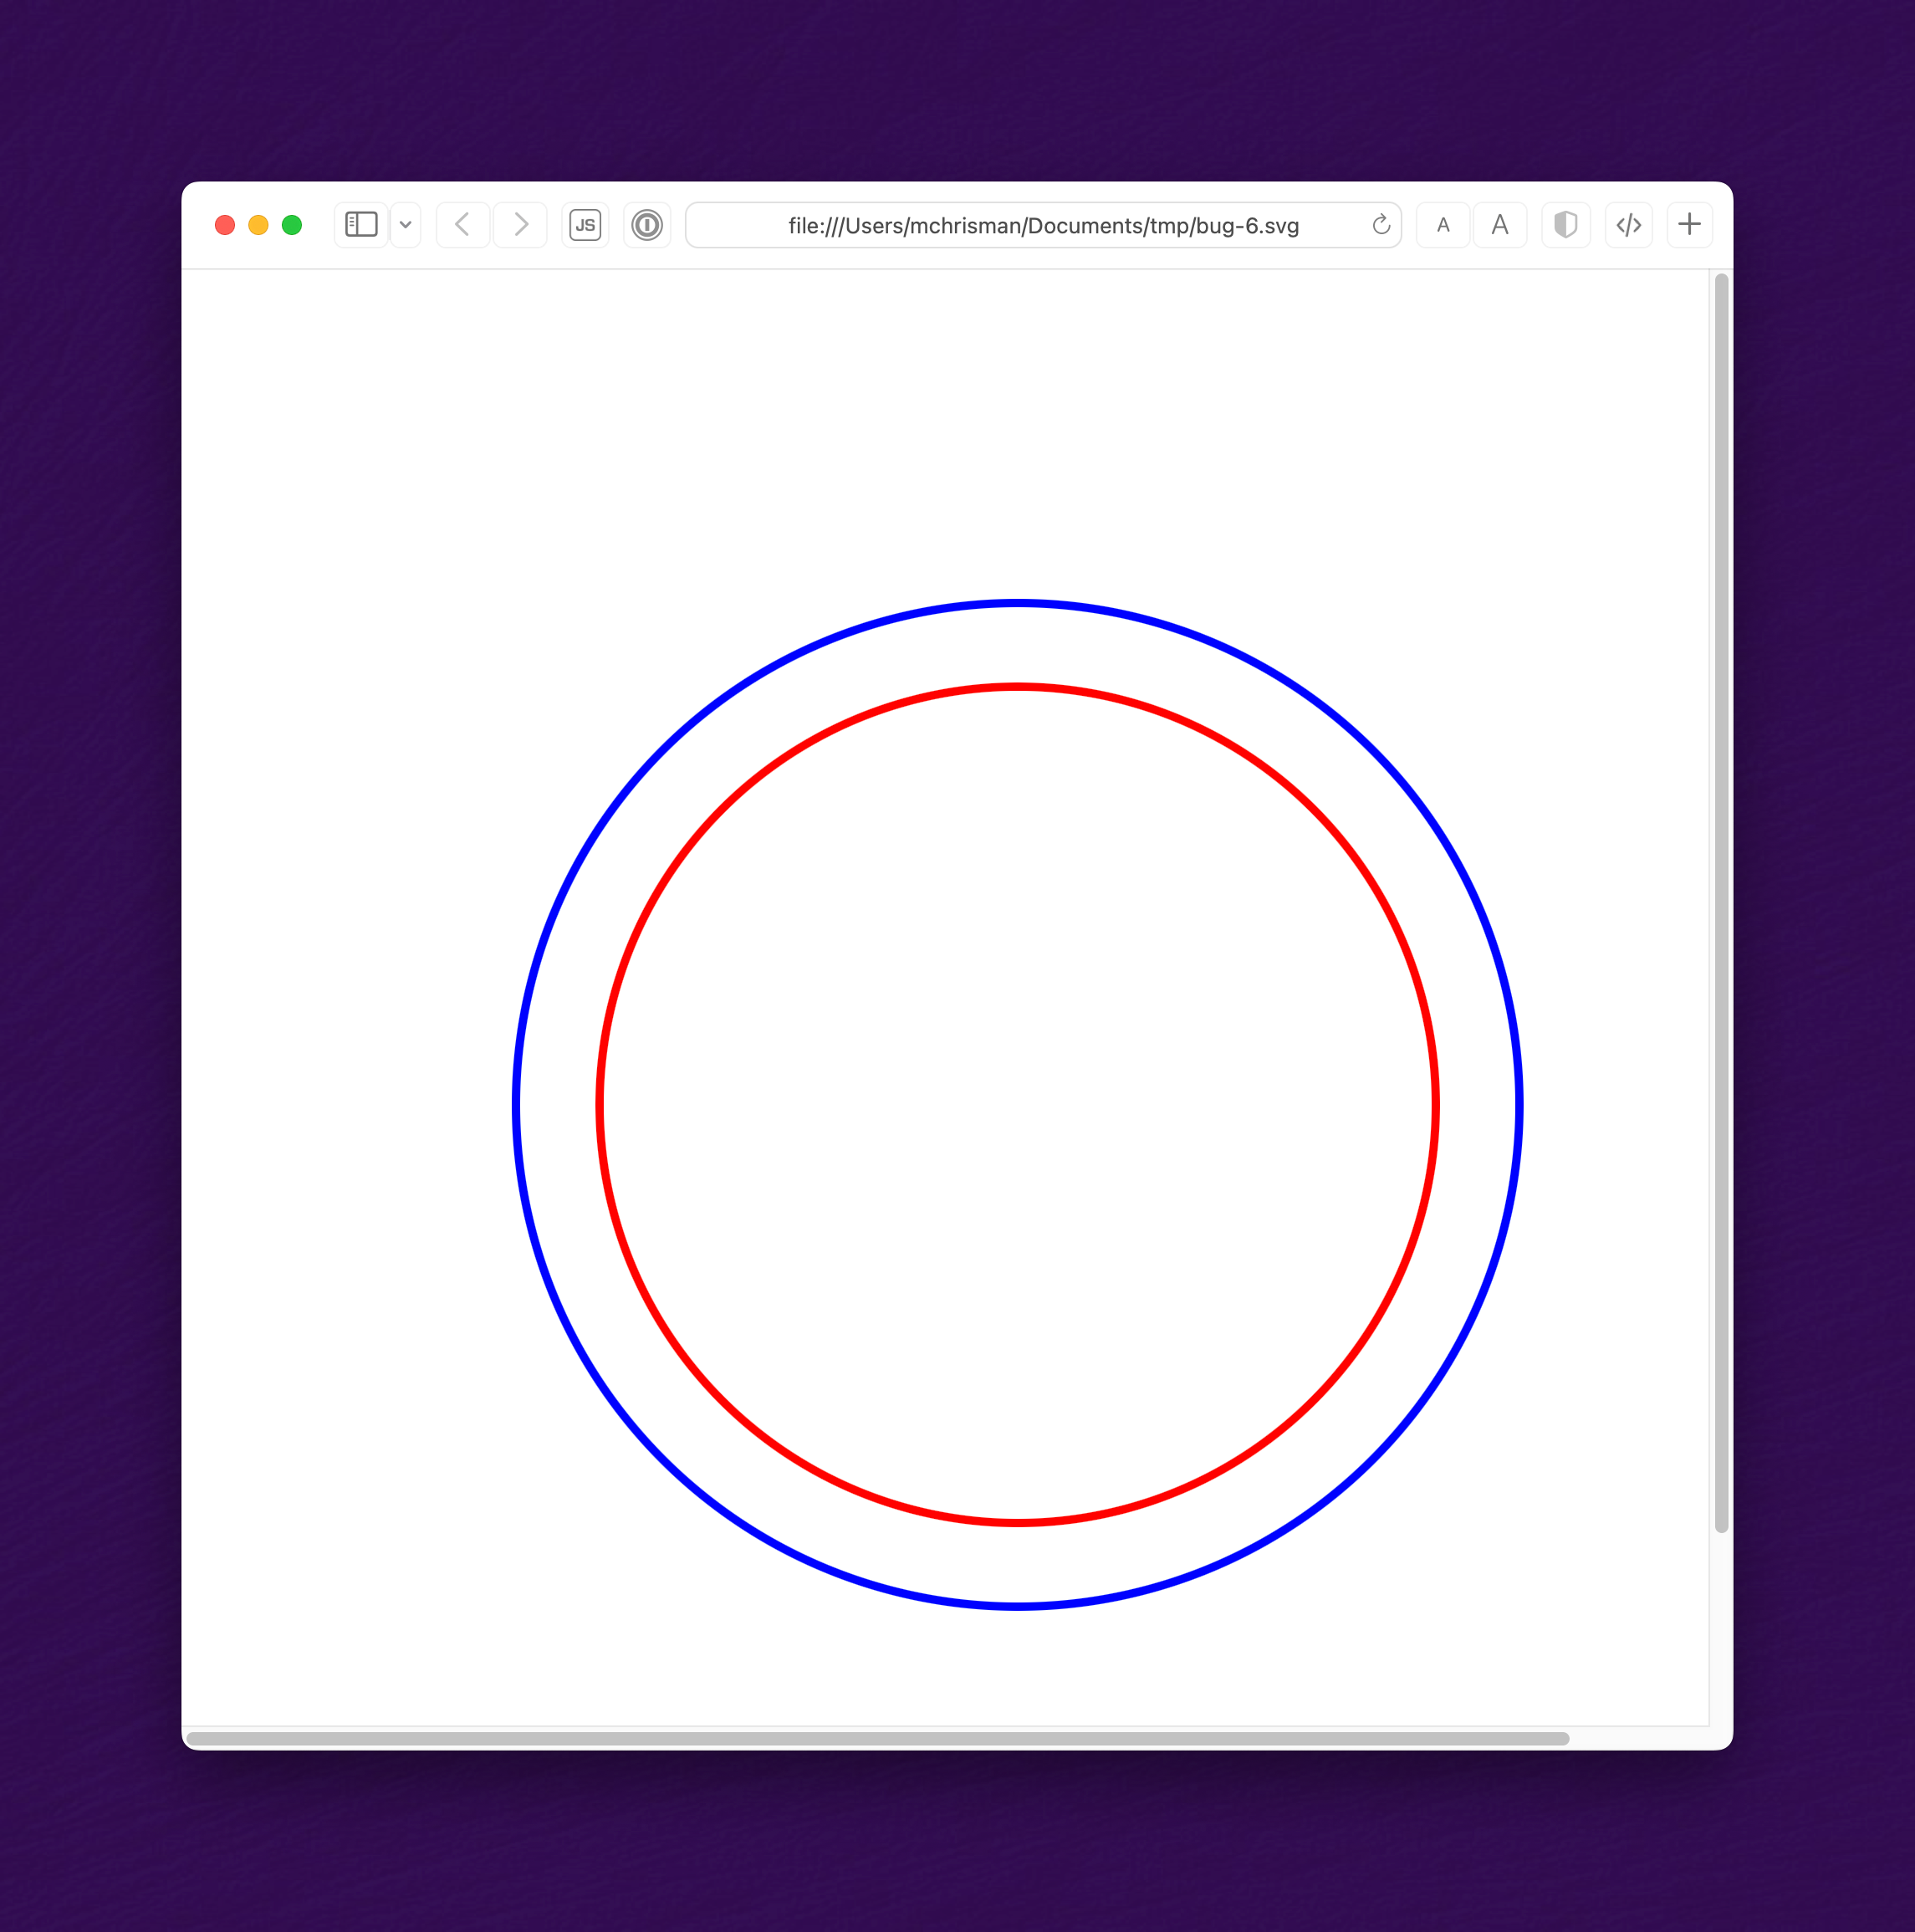
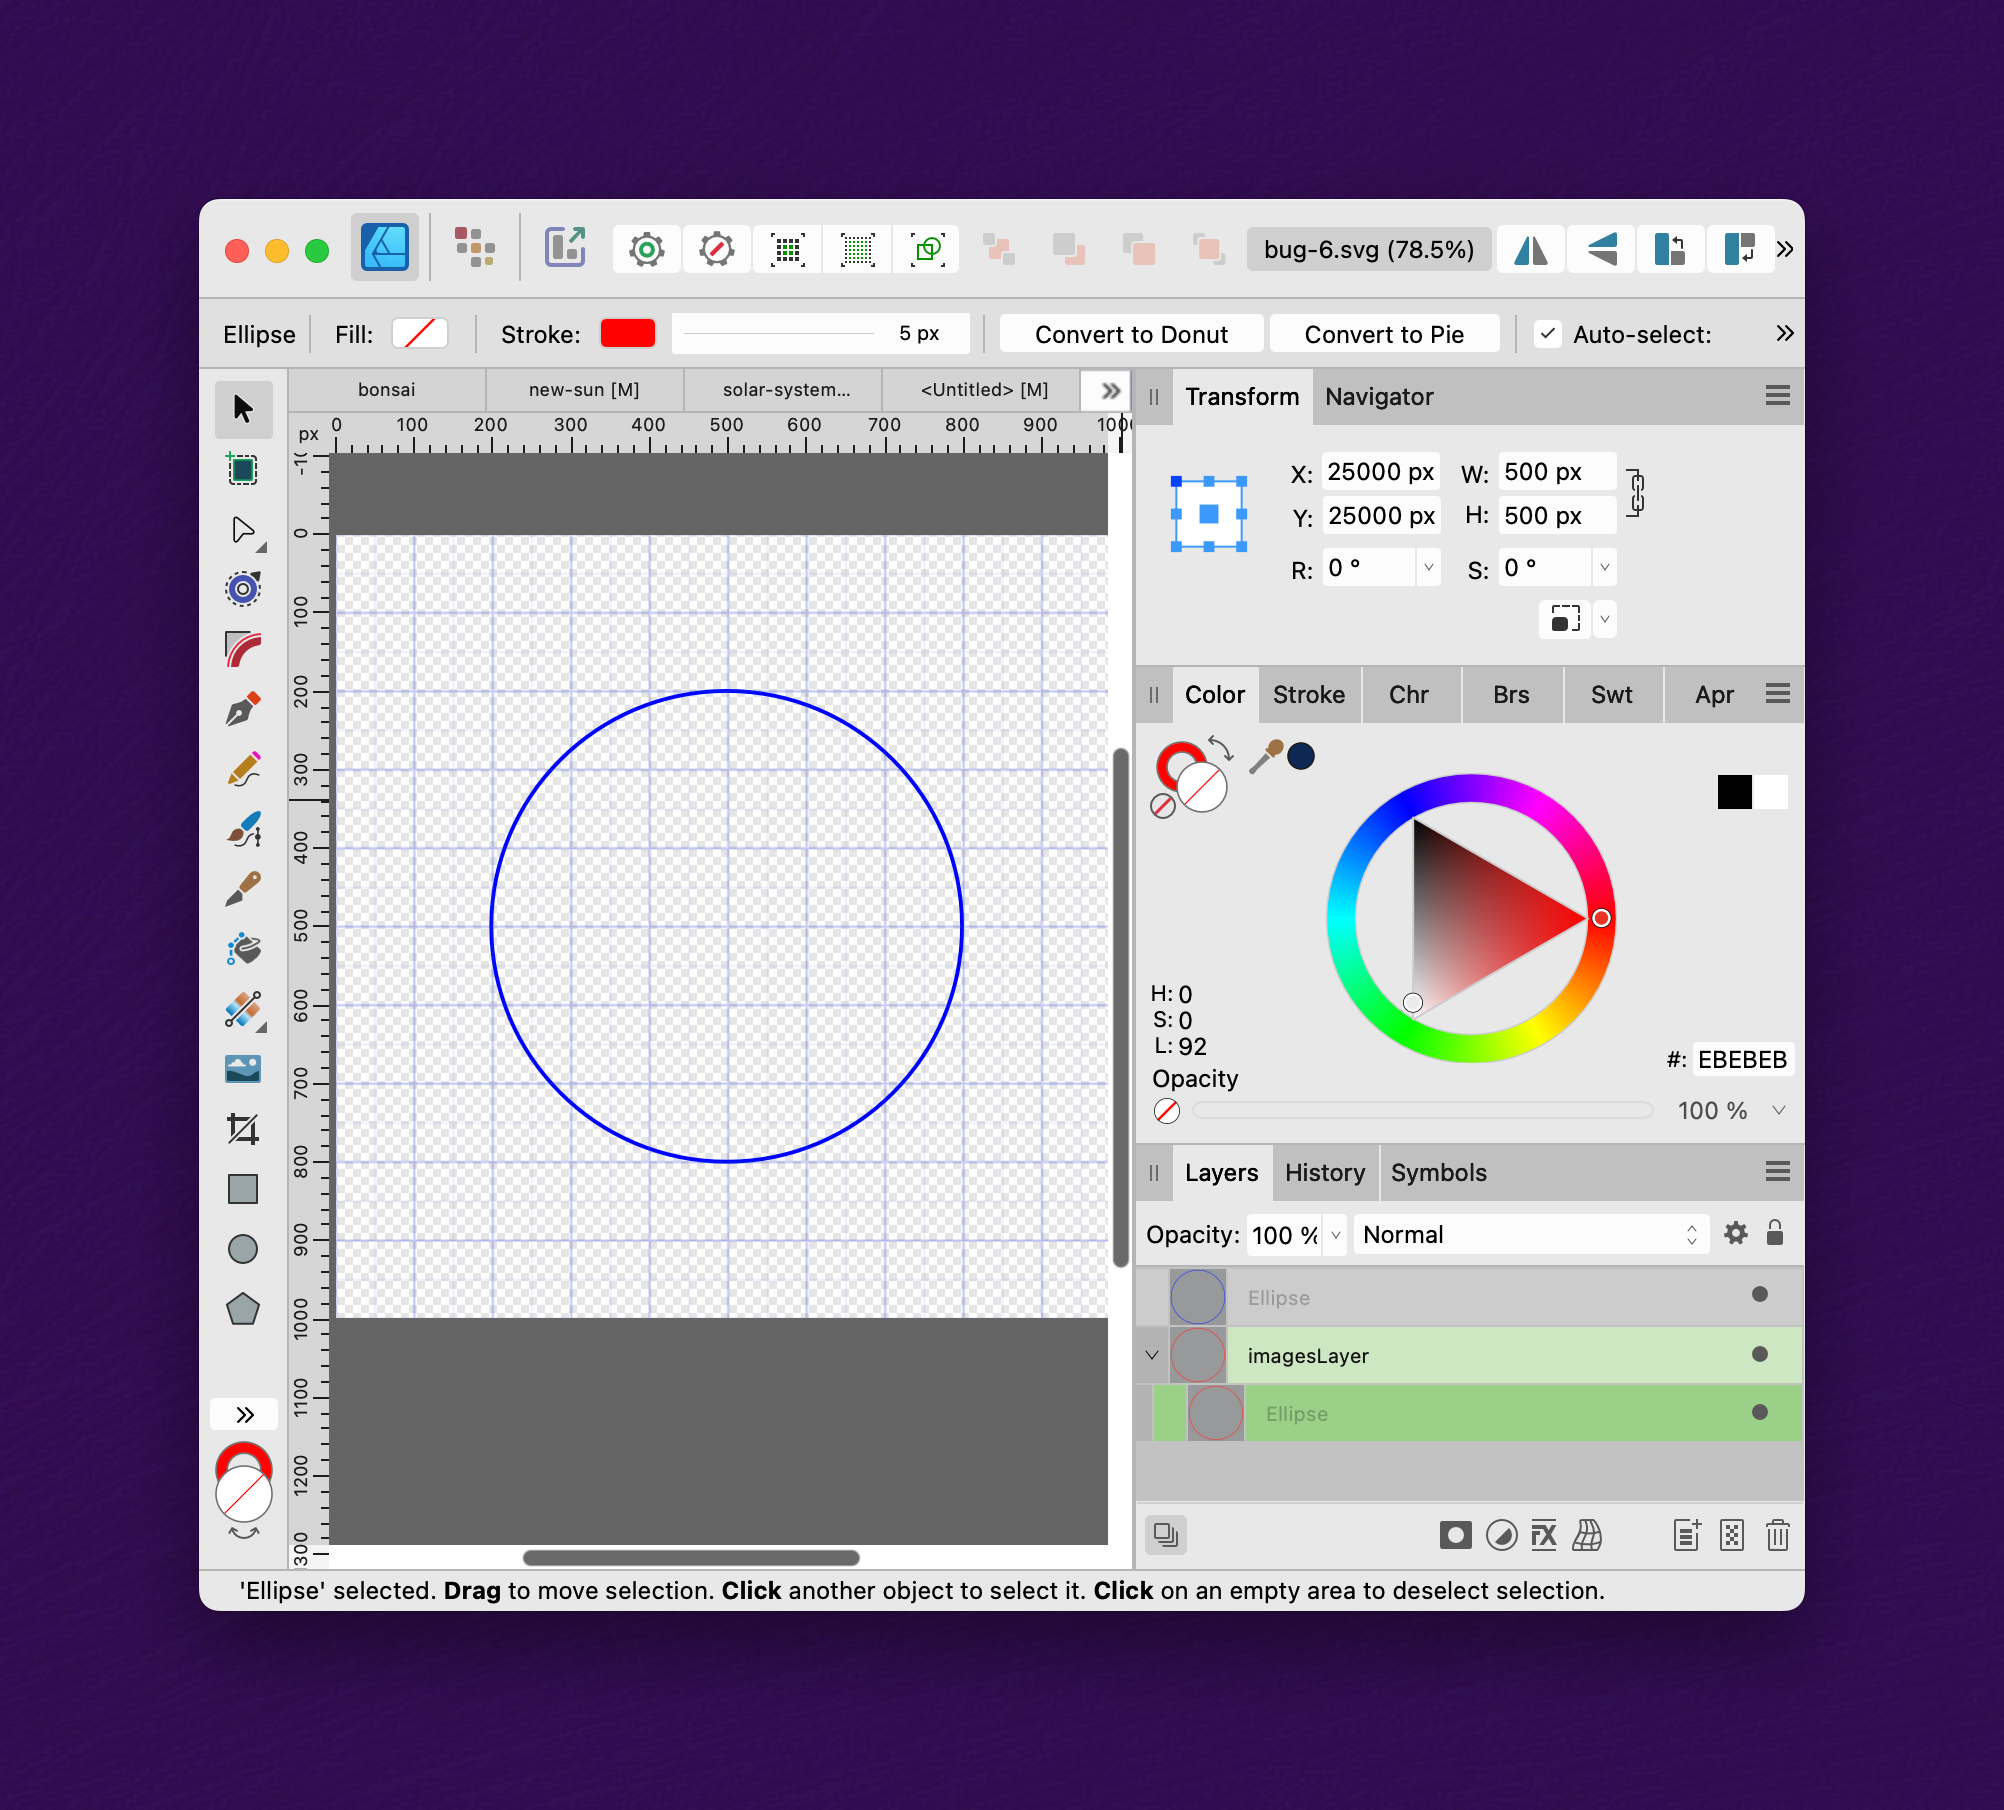
 Summary: An SVG file containing a group element with a simple "scale" transform causes a shape to be incorrectly placed. The bug may be related to incorrectly using a coordinate system based on the viewBox. Application: Affinity Designer 2.1.1 OS: MacOS 13.5 Reproducible: Yes. Detail: The attached SVG file describes two concentric circles, centered at (0,0), one red and the other blue. The file renders correctly in Inkscape, Safari, Chrome, and Intellij, thus: But when opened in Affinity Designer, the blue circle is centered at (500,500) while the red circle is centered at (25000, 25000): If the viewBox is deleted from the SVG file, the result is then correct. I suspect that the "transform" is being applied relative to the corner of the viewBox; but that is incorrect. Transforms apply in the "user coordinate system", not the viewBox coordinate system. Here's a wild guess: perhaps, in an effort to avoid showing unsightly negative coordinates in the UI, AD incorrectly handles the case of the viewBox having negative coordinates: it simply added a "translate(+500,+500)", and the scale() transform got applied after that. But as you can see, that would be incorrect behavior. bug-6.svg
-
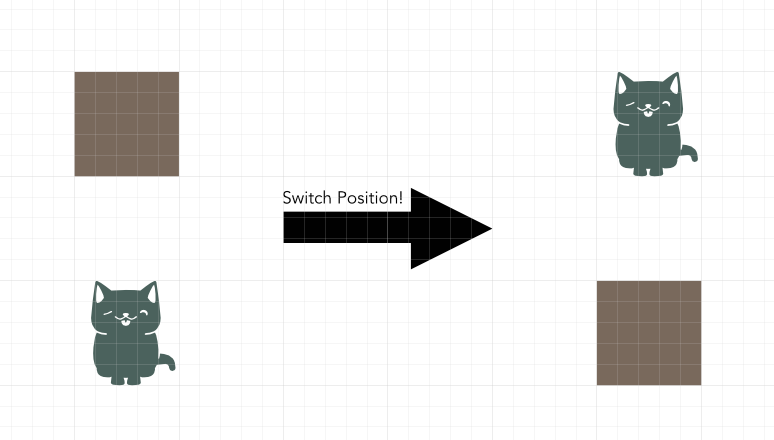
 When doing page layout work or screen design, it is extremely common that two objects on a page need to exchange places. The manual approach is rather tedious: Select one of them, drag it out of the page (or on top of the other), select the second object, move the second object exactly into the position of the firast object, and then to select the first object again and move it to exactly the same position that the second was in before. In some cases, even temporary guides or helper objects will be involved to ensure accurate positioning. A simple menu command or keyboard shortcut that just swaps the XY position of two objects would make this common task much quicker. Just select two objects, press a key and they are exchanged. Similar options could be created to swap the contents of two picture frames or to swap objects while maintaining the boundary rectangle by scaling them to occupy the same space.
-
 Version: Affinity Designer 2 SO: Windows 11 Device: Lenovo Yoga 7i gen 7 Reproducing the bug: 1. Create new file 2. Use the pen tool and create a trace 3. Use the nodes tool and try to move the controllers using a physical pen To give more details, i'm using the lenovo e-color pen. 1739073839_AffinityDesigner22023-04-2117-07-33.mp4
 -
 When using the transform panel to select a point of origin for scaling, etc., the selected or active point isn't highlighted correctly. The top/left default is larger and solid white, but when you select any other point, the size of the point changes, but not the color. I believe the expected behavior is that both the size and color would change to indicate the selected origin, and that would work. However, I would love it if the highlight color (used here and other parts of the UI) was user selectable in settings. Hopefully this isn't a re-post; searched, didn't find the same issue. Thanks. Affects: v2 and beta, all three apps OS: Windows 11 (22H2, 16GB RAM, 11 Gen i7) Hardware Acceleration: Enabled (no change without)
-
 I haven't used Designer in a long time but it seems like it had some modifier button that let you change adjust a point after you laid it down? I might have been another drawing tool that did that but it has been such a long time since I needed to draw vector graphics that my memory is hazy. This is a fairly basic function but I didn't come across it when I was going through the Designer book recently (which is several years old.) Am I right to think that feature was available in Designer? I mostly use Affinity Photo.
 -
Unless I'm missing a setting somewhere, objects created on a page will have the Y axis in relation to the page you are working on. The exception is unclosed paths / shapes, including straight lines, created by the Pen Tool which seem to have their Y axis in relation to the origin of the very first page in a document. This means that on p10 of my document the horizontal lines are showing an Y axis of 3044.8mm instead of 101.8mm! Oddly if you convert a rectangle to paths and then remove two of the nodes to create a straight line you get the correct positioning.
-
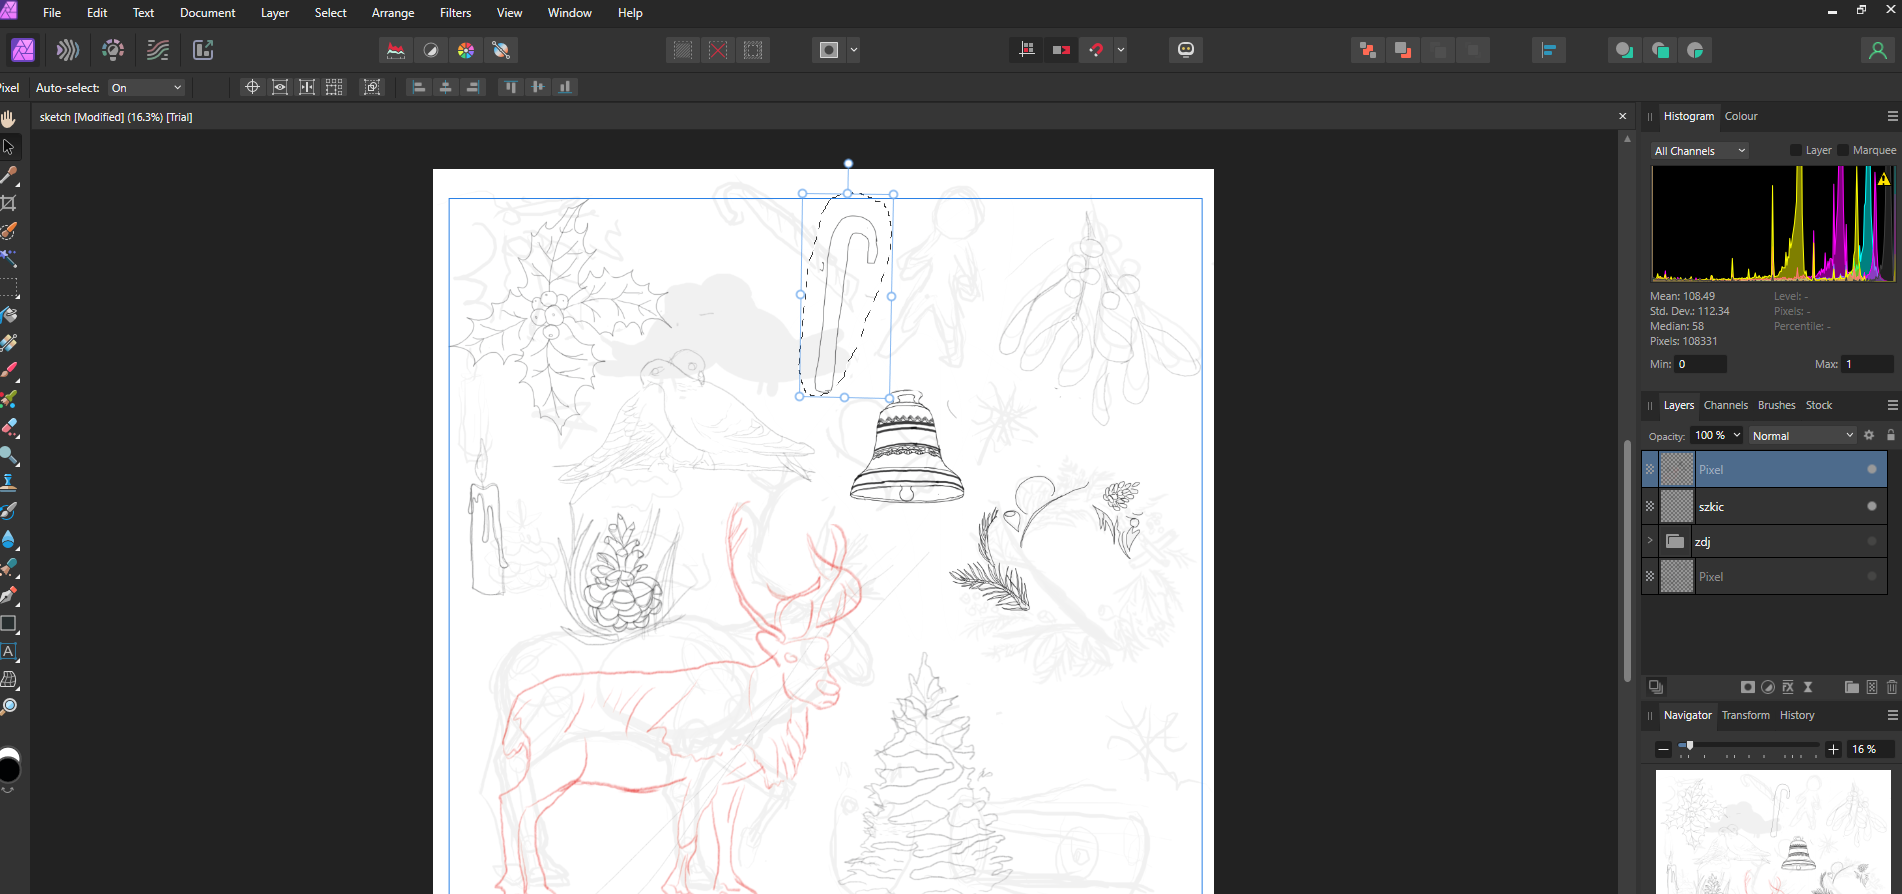
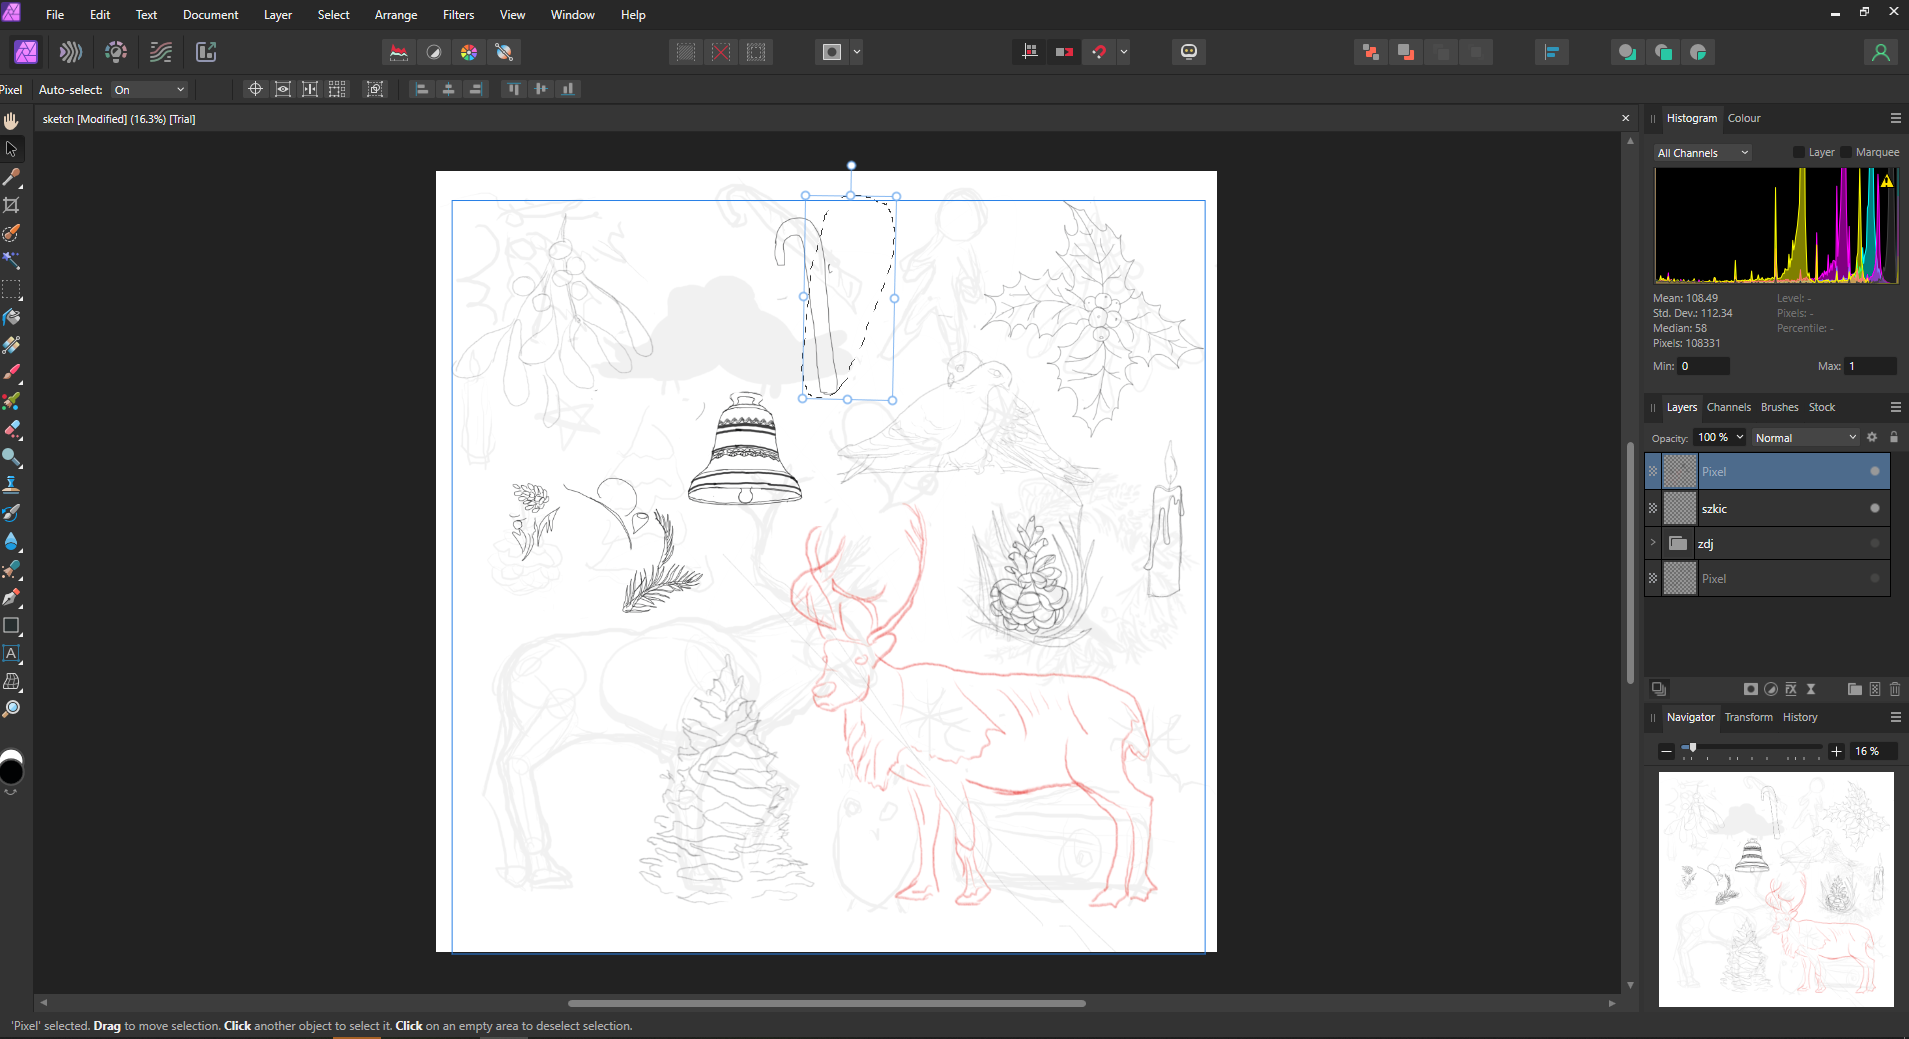
 Hello, I have a problem transforming selected pixels I have move tool selected and a selection of an object but when I want to transform it flips whole pixel layer.
-
 I think the locked icon should be little more distinctive, I mean more prominent. How about making it "bolder" abound 1px or so and in more high contrast color. The unlocked icon is ok to be left as is.
 -
 I would like to have linked layers like Affinity Photo has. This would be tremendously valuable for linking layer visibility and transforms in a complex document. I often work on complex city size drawings, which require me to work with one artboard due to performance issues. Given that I make multiple separate drawings on the same base maps, I would like to link their visibility (since layers and effects may be scattered across the layer tree) so I can more easily export the drawings individually.
- 14 replies
-
- 1
-
-
- linked layers
- transform
- (and 3 more)
-
 Hi there, I'm new to the forum and hope that everyone is doing well. I have a question in regards to dynamic guides in Affinity Designer. As I looked around on YouTube searching for a guide on how to create vector brushes in Affinity Designer I came across the following tutorial: After a straight line is created with the pen tool, at the 1:35 mark it shows nodes being added with the node tool and you can see pixel measurement displayed of how far apart consecutive new node is from the existing nodes. I'm using the latest version of Affinity Designer for Windows and snapping is working but no measurement gets displayed. Only when I place the nodes on the line first, then select one with the node tool and drag any of them on the line does the measurement display. But according to the video this should also happen when you just hover the mouse over the line with the node tool selected prior to placing a node. What am I missing? Thanks in advance, Tom
 -
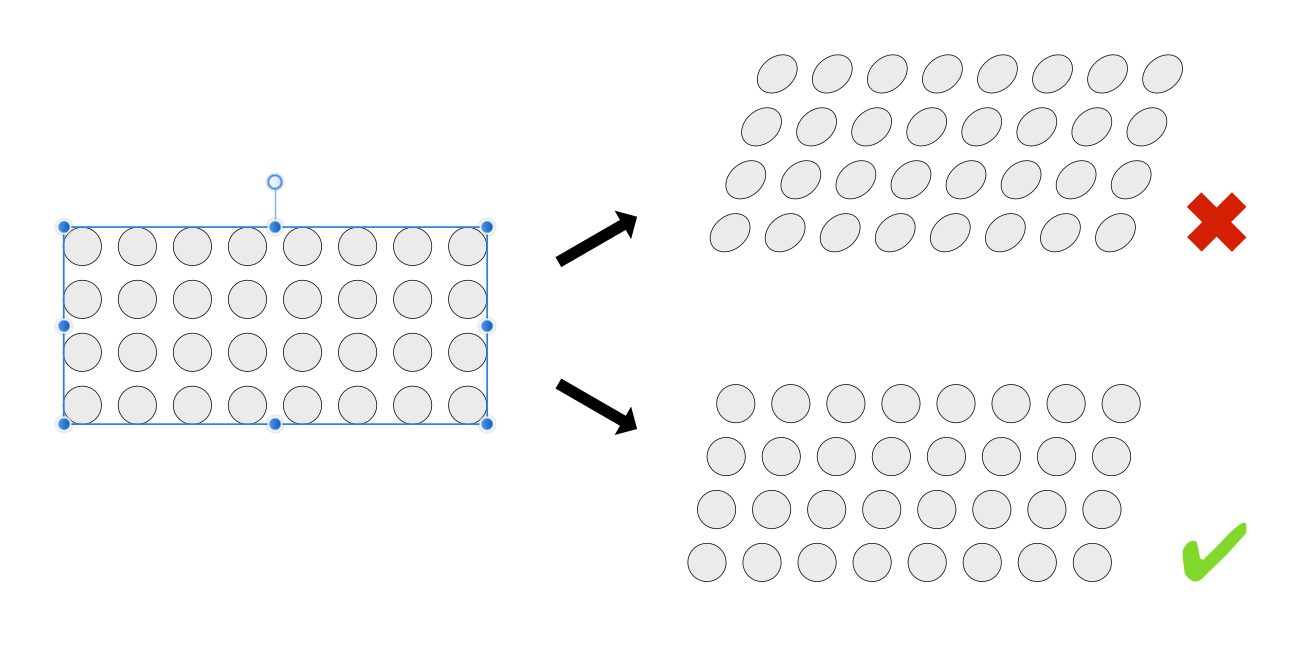
 Hello, in Affinity Designer, is there any way to transform a bounding box around multiple objects without affecting the geometry of the individual objects, i.e. only affecting the position of their center points? For example, having circles distributed in a rectangle formation, could I change the "shape" of this bounding rectangle without affecting the shape or size of the circles within? I know I can group rows of circles and distribute those horizontally. That works well in this simple example. I would however like to perform more complex transformations that can't be as easily decomposed into subsequent distribution steps. Thank you!
-
 Please increase the number of attributes recognized by Power Duplicate, and let it use them all at the same time. E.g. Imagine you could start with a square, round its corners a bit, add some color, change the transparency and line thickness, and only now would you apply the power duplicate. You would end up with a chain of objects resembling more and more circles instead of squares, having more and more of the added color, being more and more transparent, and, and, and... That would make life a little easier. Alternatively: a blend/morphing tool as in some other applications. We would choose a start and end object, and Designer would allow us to transform them into each other, producing an adjustable number of intermediate objects.
 -
In the Vector brush, I can delete segments of the stroke by holding Ctrl, however, if I select a bunch of nodes, I can't delete them using the delete key. 2022-10-02 11-37-53.mp4 Steps to reproduce 1. Go to the brush tool and create a random doodle. 2. Hold the Ctrl key and click drag to select multiple nodes. 3. Hit the delete key and notice that nothing happens. This is on Windows 10, Affinity Designer 10.5.1342
-
 To vectorize simple designs of geometric figures, as well as manually recalcrating them on other levels with the pen tool, I would like to ask if designer has a different and faster automated function of car vectorization, where however the vector knots that has created are visible. Thank you.
 -
 Hey there, sometimes when I want to adjust many node corners (the radius of curved corners in my cases) at the same time AD tends to freeze for a few minutes before it has been able to make all changes. Is this normal behaviour? The strange thing is that it only occurs sometimes in some files. It also seems to happen more likely the longer I am working continuously on a file. Anybody else having this sort of issues? Chris
 -
 How do I do this again? I cannot replicate it. All I can do is CTRL Z & CTRL Y to see that it can be done. AligningToStroke.mp4
 -
 Hi, very new to using any kind of software like this so bare with me if this is obvious. When I go to to use a brush or pencil tool to draw, as soon as I release the line it automatically brings up the nodes to manipulate the line. This is great but I don't want to have to hit my deselect hotkey every time I draw a line. I want to be able to see what it looks like clearly as and after I'm done drawing it; not the bright blue node line immediately following it. Is there a way to disable this? Many of the people in affinity's creative sessions videos don't seem to have this happen
 -
 Hello Serif I've been using Affinity Designer for some time now, and have missed this quite intensely along the way, so: I now work on both macOS and Windows with a mouse mostly, but also with an Apple Magic Trackpad 2. It is extremely efficiently stored in my muscle memory, so I work lightning fast with my right hand on the mouse/trackpad and my left on the keyboard for shortcuts. I work quite a lot and often adjusting a lot, lot of notes, thousands of clicks every day for periods. I change node type many times, and I miss a lightning fast way to switch between node types with a tap on the keyboard. Just one. You can do that in Coreldraw for example (and Vectorstyler). Today on macOS and Windows there are different and not as easy shortcuts for the same with mouse and keyboard in combination, but I miss that it is configurable, so you can also assign a key or a key combination for that matter. And especially just one key as a shortcut would make that workflow very easy. So in short, I suggest: You add the ability to assign a custom keyboard shortcut to sharp, smooth and smart node. That the option also can be just one key, e.g. S for sharp, O for smooth and A for smart (just example for illustration notwithstanding that they may be used already) That in the pen tool you can ALSO use them, so the last created node can be adjusted to sharp or smooth e.g.
 -
 Hello! I'm working with a document using inches, and when I move objects using the transform window it defaults to move by full inches (1" > 2"). In Adobe when you hit the up or down arrow in the transform window it will increase by (.0625") making small alignment easy. I am not asking about the nudge preferences, as I find moving that way to be imprecise, but I still like the increments of (.01") for very small adjustment. Screenshots attached. I apologize if this question has already been asked before.