Search the Community
Showing results for tags 'navigator'.
Found 17 results
-
Please, for the x-ray mode display feature, the displayed source image looks clearer, without oppacity, that really help me, thank you. I’m waiting for the respon
-
 Bug in every app: Scrolling with mousewheel inside navigator does not respect position of the mouse inside navigator panel view, but it is using position of the mouse of the whole affinity publisher application. It should work either like manual zoom input > zooming in/out centered on actual view or zooming based on mouse location inside navigator panel.
 -
 Hi all, TIA for help, and really appreciate the product and this community... I'm a new user trying to make a smoother transition from Adobe to Affinity. The biggest hurdle I keep running in to is understanding WHERE to find things. I know there are keyboard shortcuts (as well as the tips on the bottom of the Navigator), but that's not what I'm looking for. I know there are a ton of video tutorials, but I don't have time to sit through them with eyes plastered so as not to miss the one cursor movement I need. What I can't find is a simple way to see how to interact with the UI to access features, even those discussed in the HELP document. Let me provide an example. I have a photo, and want to adjust the Contrast in Affinity Photo. I look up Contrast in HELP, and I find a section addressing it -- but that section doesn't explain, or show me, where it is, how do I get to it? (Yes, I did try command-L, as a Photoshop habit, but that's not where Contrast resides). So I inevitably spend a TON of time looking everywhere, googling, etc. to just try to figure out where Contrast is buried in the user interface. I still don't know. This happens to me over and over again, and is incredibly frustrating when trying to retrain to a new UI, especially so when all that is needed is a "breadcrumb" or some kind of visual that shows a person where to find that feature (or command or what not). If I'm missing a resource that lays bare the UI in such a way, please let me know. Otherwise, Serif, can you please add breadcrumbs (eg. File > Edit > ) to the HELP section ASAP? That oversight is without a doubt the most disorienting yet easy-to-fix hurdle I have with all Affinity's apps. Thanks, again. - joanne
 -
 Without any modifications made, if you add a new View Point using Advanced mode in Navigator, photo become desaturated and unaffected by any tool parameter changes.
-
Sysinfo: Windows 10 Version 1903 (Build 18362.295), Affinity Designer: 1.7.2.471 I found a strange behavior when using the navigator to scroll around in a huge project file with several artboards. It's not possible to navigate with the navigator properly. Size of each artboard: 6372 x 3624 Px. navigator.mp4
-
In the desktop edition, you can pan a zoomed image by moving the indicator rectangle in the navigator. Why doesn't this work in the iPad edition, where it would be more useful?
-
 Windows 10 Home 1809, Publisher 1.7.0.227. The Navigator studio has some - undocumented, as far as I can tell - presets (little bars under the slider) that you can click on to quickly change the zoom level but they need pixel-perfect clicking to be able to use them. At present, the mouse pointer has to be exactly on the tiny one/two-pixel-wide bar. I think it would be better if there was a leeway of, say, three/four pixels to either side, or the bar could be made thicker with a correspondingly larger 'hitbox'.
 -
 I know this is pretty minor but a bit irritating. The navigator is at the top on the side over the layer/effects/styles panel. But when I switch to pixel mode, the navigator is suddenly at the bottom of the screen under the layers. I don't know why it moves but it is annoying to have it suddenly moved on me. Sig
 -
First: Congrats on photo for iPad, amazing!!! An idea to increase functionality of the Navigator studio panel: it would be great if it had a mode to display the area around the cursor at a user defined zoom level, ie, 1:1, 2:1, etc.... almost like a live loupe. This would be great for getting a detail view of brushwork or for selections, without loosing the big picture.... Of course this can currently be done using a second window, but I thought integrating it into the UI would be more elegant and a smoother experience.... Cheers!
-
Enjoying using Affinity Photo but one feature i miss from Lightroom is the ability to use a grid scan of an image with the Navigator to check for scanner/sensor dust spots. In Lightroom you zoom into the level required and place the Navigator top left - then using the page down/up key it covers the image in a grid. Great for double checking for dust. http://kelbytv.com/thelightroomshow/2015/02/20/the-lightroom-show-ep-2-our-second-show/ at approx. 2.30 is the tip
-
 In photoshop we have the 'info' pane, which tells you the X Y coordinates of your cursor position. We don't have this in affinity, and we also have a less accurate (more sparsely labeled) ruler to make matters worse. Additionally, there is no ruler tool to measure things. This makes it extremely difficult to make precise changes especially for corporate and web design work. It's starting to seem like Affinity is better suited for freeform graphics rather than precision. Please add these features.
 -
 Hi, Been asked to create a feature request for this as it's not considered a bug.... In the attached example file notice the following. Artboard 1 and Artboard 2 See how the saved View Point AB1 centres the view on Artboard 1. Now delete or move in Y(a fare distance) Artboard 2 Now try to use the View Point AB1 again. You should see it's no longer centred on Artboard 1. Apparently View Points are fixed to the document. So perhaps moving or deleting the artboard is updating the document parameters but this change isn't passed through to the View Points. Although the error only appears to be in the Y axis so changes in X are accounted for? I had invested some time in using this feature but then I deleted an unwanted artboard and all my View Points were rendered incorrect. I still consider this a bug with the design of the View Point system as it doesn't allow the user to work freely with it, but rather, under strict usage rules which aren't explained/shouldn't be there. Hope the example explains and it's clear to see how it's current functionality can nobble you :) Example file in MAS 1.4.2 but the same happens in the latests 1.5beta(3). viewPointExample.afdesign
 -
Using 1.5beta(3) The somewhat hidden 'view point' creator in the navigator panel is really cool. Helps me navigate large documents that contain lots of separate designs and exports. Couple issues though. Firstly, if you delete an artboard that is higher or lower in the document than other artboards - the positions of the artboards or the document size is adjusted. However the saved 'view points' aren't adjusted for the new positions, so they no longer point to the correct part of the document. So to clarify, this error only seems to occur when artboards have a different y height. If artboards are removed in the x axis and are the same height it works correctly. Secondly each time I start the app the 'advanced' section of the navigator is minimised and needs to be expanded again. Could this option be recorded out to my UI preferences so it's there when I re-open AD? Cheers.
-
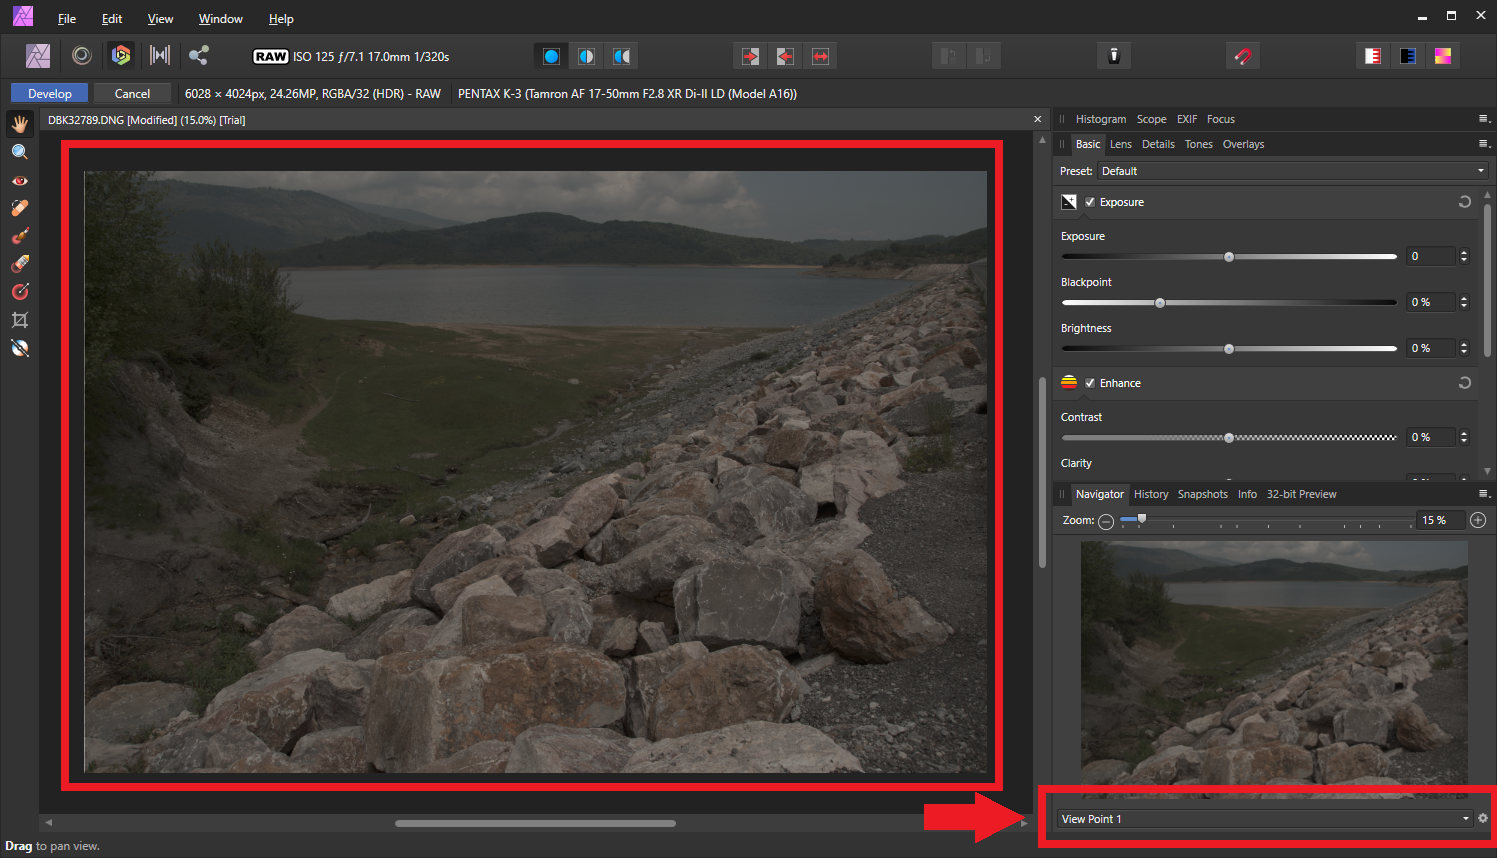
I'm currently trying out the Develop persona with a Lightroom-converted DNG from a Canon 6D. So far, I've noticed that: White Balance and Exposure sliders in Basic sidebar panel are expressed in percentage, as opposed to Kelvins and Stops, respectively, which would be more intuitive for photographers. The Navigator, EXIF and Focus tabs seem to be collapsed by default; when I click on any of them, it doesn't do the expected result of opening the corresponding panel, and instead moves the image (as if using the Navigator panel to drag the viewport). I tried closing the panel above, but no dice. When I click on Cancel (in my case, to try to switch to the Photo Persona), the image closes without any prompt or explanation. I'm aware that the Develop persona is still "under construction", but I hope it helps to jot down these issues for reference.
-
- 1
-

-
- exposure
- white balance
- (and 4 more)
-
I always have the navigator tab visible so that when I'm zoomed in a lot, I can still have an idea of where I am. The only problem that I have is, sometimes the colour of the navigator indicator (the floating box that follows your movement and shows where you are) blends in with the picture I'm working on and I can't always tell where I am. Is there anyway that you can make it so that Designer detects the dominate colour of picture and then chooses another colour for the indicator that is easier to see (possibly an opposite colour)? For example, now I'm working on a picture that is predominately blue, but the navigator indicator is blue or kind of greenish and it is hard to see. If this isn't possible, then how about the ability to change the colour of the indicator square? Just a thought. Does this happen to anyone else?
-
 Is it just me or does the Navigator palette just stops updating when the zoom is 25% or less? When I zoom out, above 25%, it updates just fine. Zoom in, and it sticks at 25% no matter how low the zoom is. Just found this out while working on a project. It occurs on older (made with MAS version, other betas) and on new Documents with the current beta (v 1.0.1.9863) I miss my old friends: 15%, 12.5% and 8.56% (you are my favorite). [sniff}
 -
I understand the Navigator tab, but it seems small. It would be nice to have something like Photoshop Elements. One can "Arrange Documents" > select "New Window," and then select "Two up." This lets one view the same picture side by side, allowing the person to work on one picture and see the full picture next to it. This is especially helpful when one is zooming in on their work and the picture next to it is zoomed out all of the way.