Search the Community
Showing results for tags 'matte painting'.
Found 3 results
-
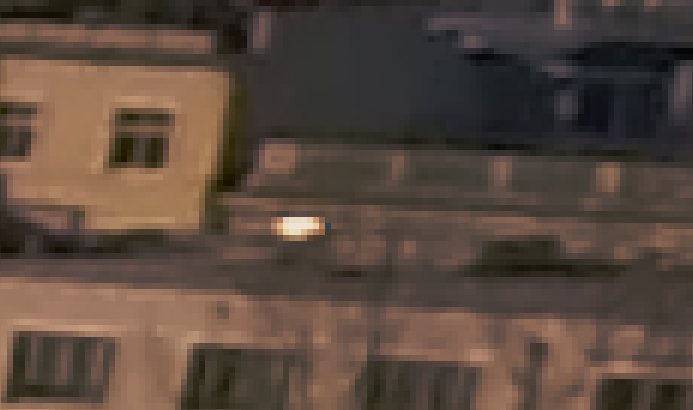
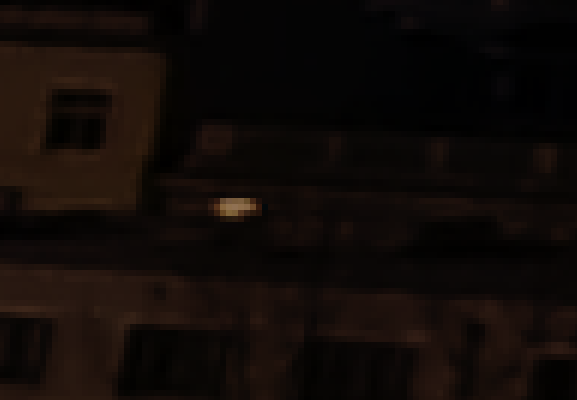
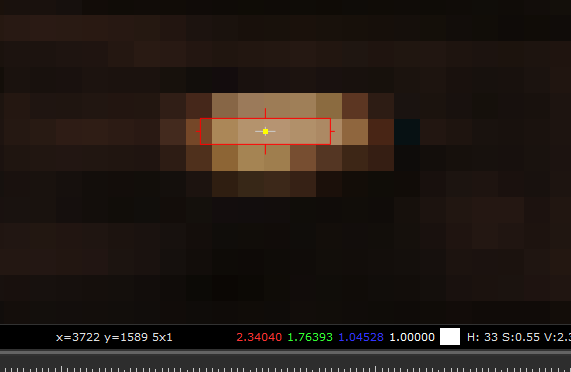
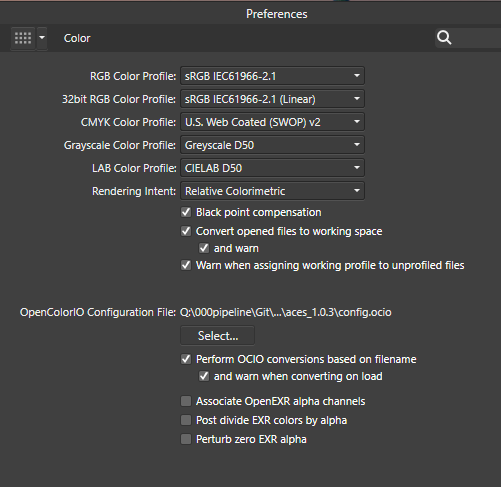
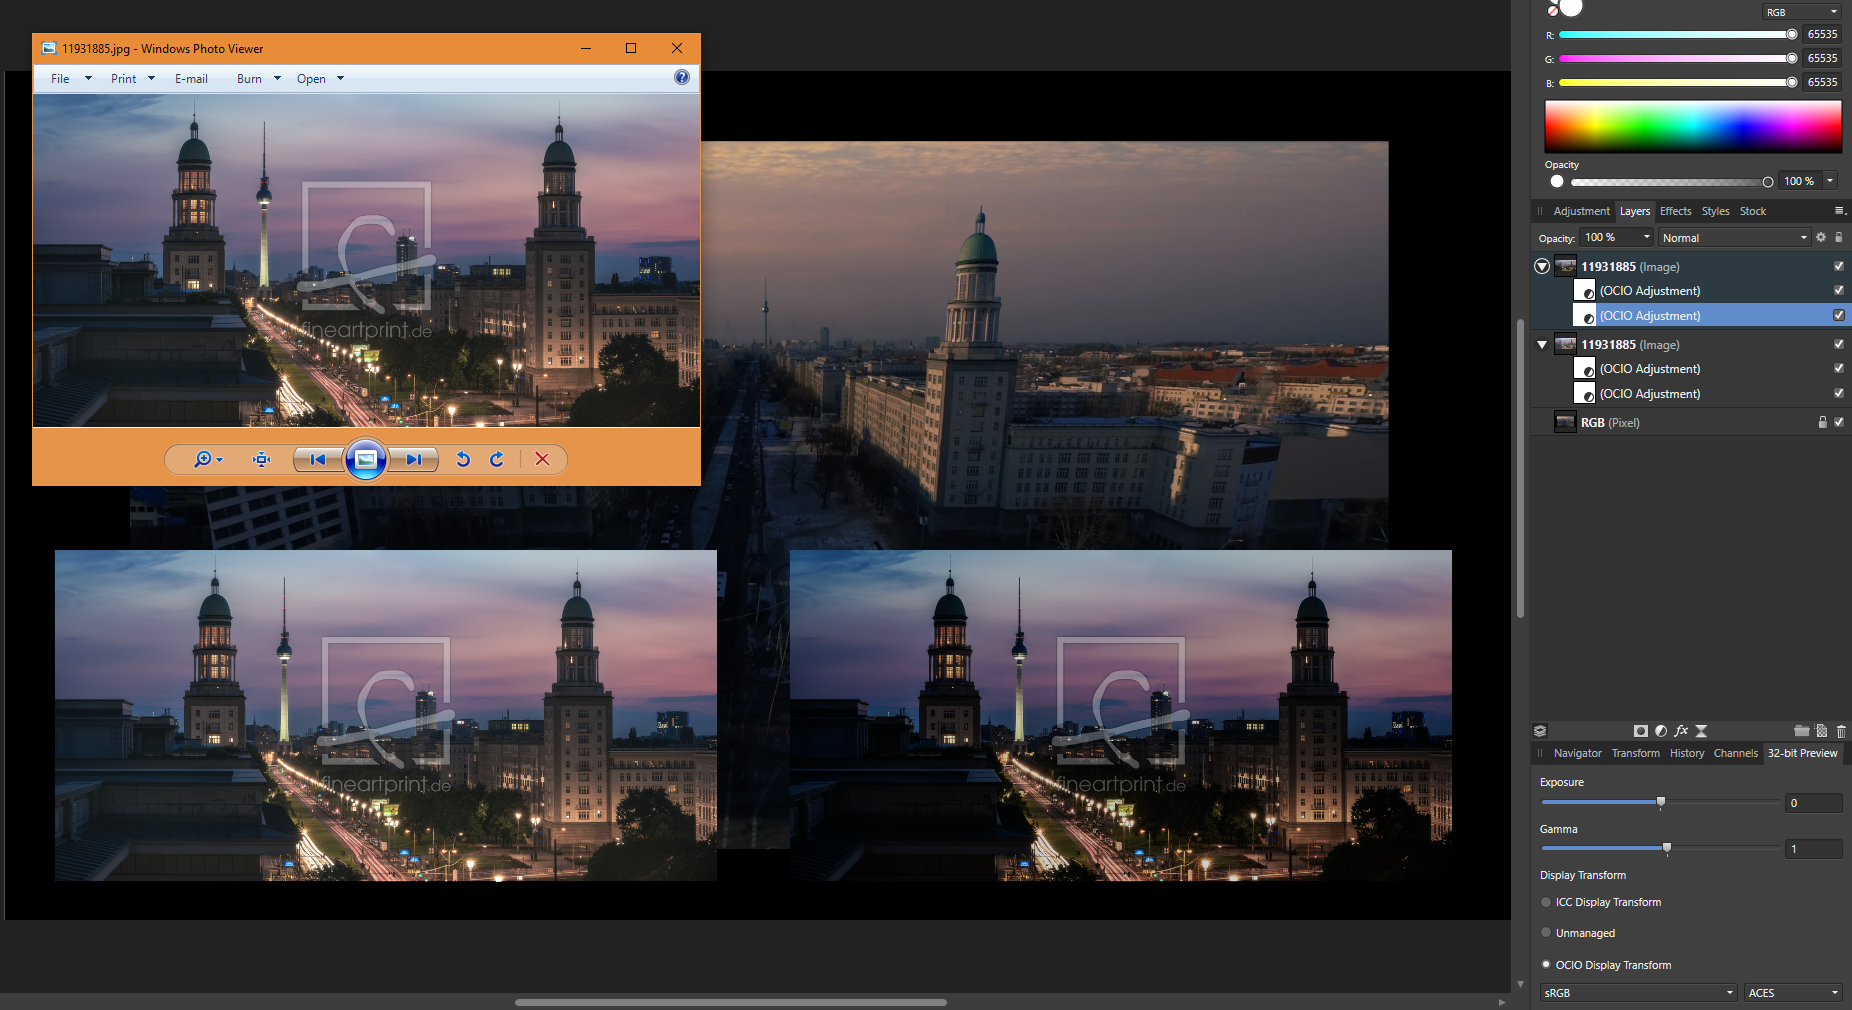
 Dear Serif Team and Affinity Photo users, I'm a VFX Compositor & Matte Painter and I'd like to move from PS to AP. I hope you can help me with some questions regarding the Implementation and proper use of ACES and 32-bit. My background plate is exported from Nuke as an ACES - ACES2065-1 16-bit EXR file. The import into AP (1.6.4.104) works fine - the file get's recognized as an ACES file and I get the same result using OCIO. But there are a few things I can't get my head around yet: How do I pick and paint high color values? Using the exposure slider in the 32-bit Preview I see that there are high values. If I pick and paint them back in, the result is way darker. (Changing the exposure doesn't effect the false picked color) picked in Nuke for comparison I moved from PS because there is a 16Bit limitation and I had to work with ACEScc files (log encoded) and use an ICC profile to check my work. I hoped to get around this using AP. Those threads are dealing with the same issue but the information is contradictory and I can't reproduce the method quoted first. https://forum.affinity.serif.com/index.php?/topic/49815-hdr-raw-pixel-values/ https://forum.affinity.serif.com/index.php?/topic/19787--/ What is the proper workflow of importing and edit JPGs in an ACES setup in AP? Unfortunately there's no way of assigning an IDT during import (as in Nuke) but I can reproduce Nukes behavior with OCIO Adjustment Layers, which seams pretty inconvenient. (Windows Photo Viewer as comparison) Bottom left: Two OCIO nodes in sequence [ACES2056-1 to Utility - Curve - sRGB] followed by [Output - sRGB to ACEScg]. Bottom right: Two OCIO nodes in sequence [ACES2056-1 to Utility - Curve - sRGB] followed by [Utility - sRGB - Texture to ACEScg]. This post deals with the question of the right IDT for JPGs in general. I guess going the Utility - sRGB - Texture way is better, isn't it? My color settings: If you need further information or I haven't made my questions clear enough please don't hesitate to ask. I'm glad about any help or further learning resources! Thanks a lot
-
 Using Photo trial 1.6.4.104 . Edit : In Windows 7, Wacom Intuos Pro 4 XL. The problem : The current interactive color picker tool, that is, switching to pick color with alt key, or my case, side pen button configured as alt key, while you are with the brush tool, to very quick pick a color between 2 big chunks of painted color, so to paint with an intermediate color. This is very very fast and common technique for color blending while painting. There are many other painting, illustration or texture making techniques that also need fast color picking. To all of those, this problem applies. The problem resides in several issues that I believe get solved with an easy solution. The magnifier lens that show up once you click on a canvas point (I am clicking, not dragging) to let you better pick the pixel you want is very good for photography but not important for painting. And I believe it is causing to lag the action, has a sort of small time there very noticeable when using very often, very fast (a need for painting-blending, also called glazing technique). Sometimes, if fast enough wont pick the color, at times. It's a bit hard to work so when painting (loosing focus, slowing down, etc). This all by setting the alt key in a wacom pen side button. One very big problem is that very often, a fast click wont pick the color. Probably because it is expecting a drag, not a click like in other software apps. A suggested possible solution : Could it be possible / easy (I have no idea) to add a "not to be default" option so that users can disable the magnifier / dragging ? The eyedropper tool works a bit more like this, although if dragging or keeping it pressed, the magnifier ends up showing up, but you need to drag more/less dry click for it to happen. Well, in any case, not to replicate with the interactive picker the blue marquee around the object that the eyedropper tool forces, that would be bad while painting. Having an "alt + pen click" (no drag, no magnifier) color selection on canvas like in any other 2D application. With not even the magnifier on it. As I believe the estimation/input about if is there dragging or not, or actually displaying the lens, is adding some delay there, and causing some times not to even pick the color. Or never pick it, if fast enough. There even might be photographers wishing to have at least the option to deactivate the lens, so to have a blazing fast color picker, so, I guess is a good thing to add for any group of people, always as an option that does not need to be default after install. This would be huge for me (and I suppose, for any other person painting, making comics, illustration, texturing, etc, etc) , for my workflow. (a reason to purchase, indeed) Too lengthy version here, but I realized I hadn't done a formal feature request, and I was talking about two requests in same post (about digital painting requests in general), mixed with another matters, and it was too long, in any case.
- 2 replies
-
- 2
-

-

-
- illustration
- comic
- (and 6 more)
-
 Hi! I am super fascinated bout the matte kind of paintings and landscapes people are drawing. I have some friends but all of them use Photoshop. I also posted in the Tutorial room but dunno if it's right so I post here too if it belongs to this forum better. I found this tutorial on youtube for Photo: https://www.youtube.com/watch?v=-3-8M_ruzUM which is kind of similar but to a very basic level of what I wanna do. Also this tutorial of color gradings is pretty cool: https://www.youtube.com/watch?v=tNRMocZj0Ok https://www.youtube.com/watch?v=S_8r2Zruhl4My question is, is this possible in Affinity Designer or should I go with Affinity Photo for this ??? I am thinking about the new Update deal for Affinity Photo this November. Couldn't find any tutorials for Affinity Designer for these topics so...yeah. Are there any out there doing matte designs? Here are some JPEG's for more inspiration: https://f4.bcbits.com/img/a2474467156_16.jpg https://i.pinimg.com/originals/87/eb/8a/87eb8a3c341aa3299f627cf9271a4592.jpg https://f4.bcbits.com/img/a3658960107_10.jpg New matte design: https://wallpapers.wallhaven.cc/wallpapers/full/wallhaven-494873.jpg https://i.pinimg.com/originals/b9/00/6f/b9006f27d367d0f676c6645a089621dc.jpg - fire https://www.walldevil.com/wallpapers/w09/41788-axwell-eternal-sunshine-of-the-spotless-mind-angels-jelly-jellyfishes-lights-swings-pyramids-lighthouses-birds-space-spaceman-tokyo-mazes.jpg colors & shine https://i.pinimg.com/736x/0a/c2/49/0ac249151ca241c60f0ea1c79d301d17.jpg My kindest regards,