Search the Community
Showing results for tags 'macro'.
-
I like the power of macros in Photo but in my workflow I use a lot of macros and there is no way to create or organize the most used macros, tools and menu items in a panel. I would love to see something like this implemented in the next version. A great example of something like this made for photoshop you can find here.
-
Hi, As I explain it in my previous post (MacOS + AP + Nik Collection FULL FONCTIONALS ...), Selective Tool plugin can't work in Affinity Photo because it open a scripts panel in Photoshop ; but most of then can be reproduce with simple macros in Affinity Photo ... So I did it ! 1- At first, you have to install Nik Collection plugins for Affinity Photo, some YouTube videos explain clearly how to do it. 2- You have to correct *.config files has I explain here. 3- Install "NIK Collection Selective Tool.afmacros" How it work ? Generaly, the "real" Selectiv Tool copye and merges all the layers, then it creates a full mask (black) befor calling the plugin you select with it. When you've finished to work in the plugin's panel, you go back in the editing software and you just have to erase parts of the mask with a white brush to reveale the effect ... NIK Collection Selective Tool.afmacros works exactly the same way. Note : you don't have to use Selective Tool to work with Nik Collection plugins ; this tool is just a "plus". Enjoy it ! NIK Collection Selective Tool macros for Affinity Photo.zip
-
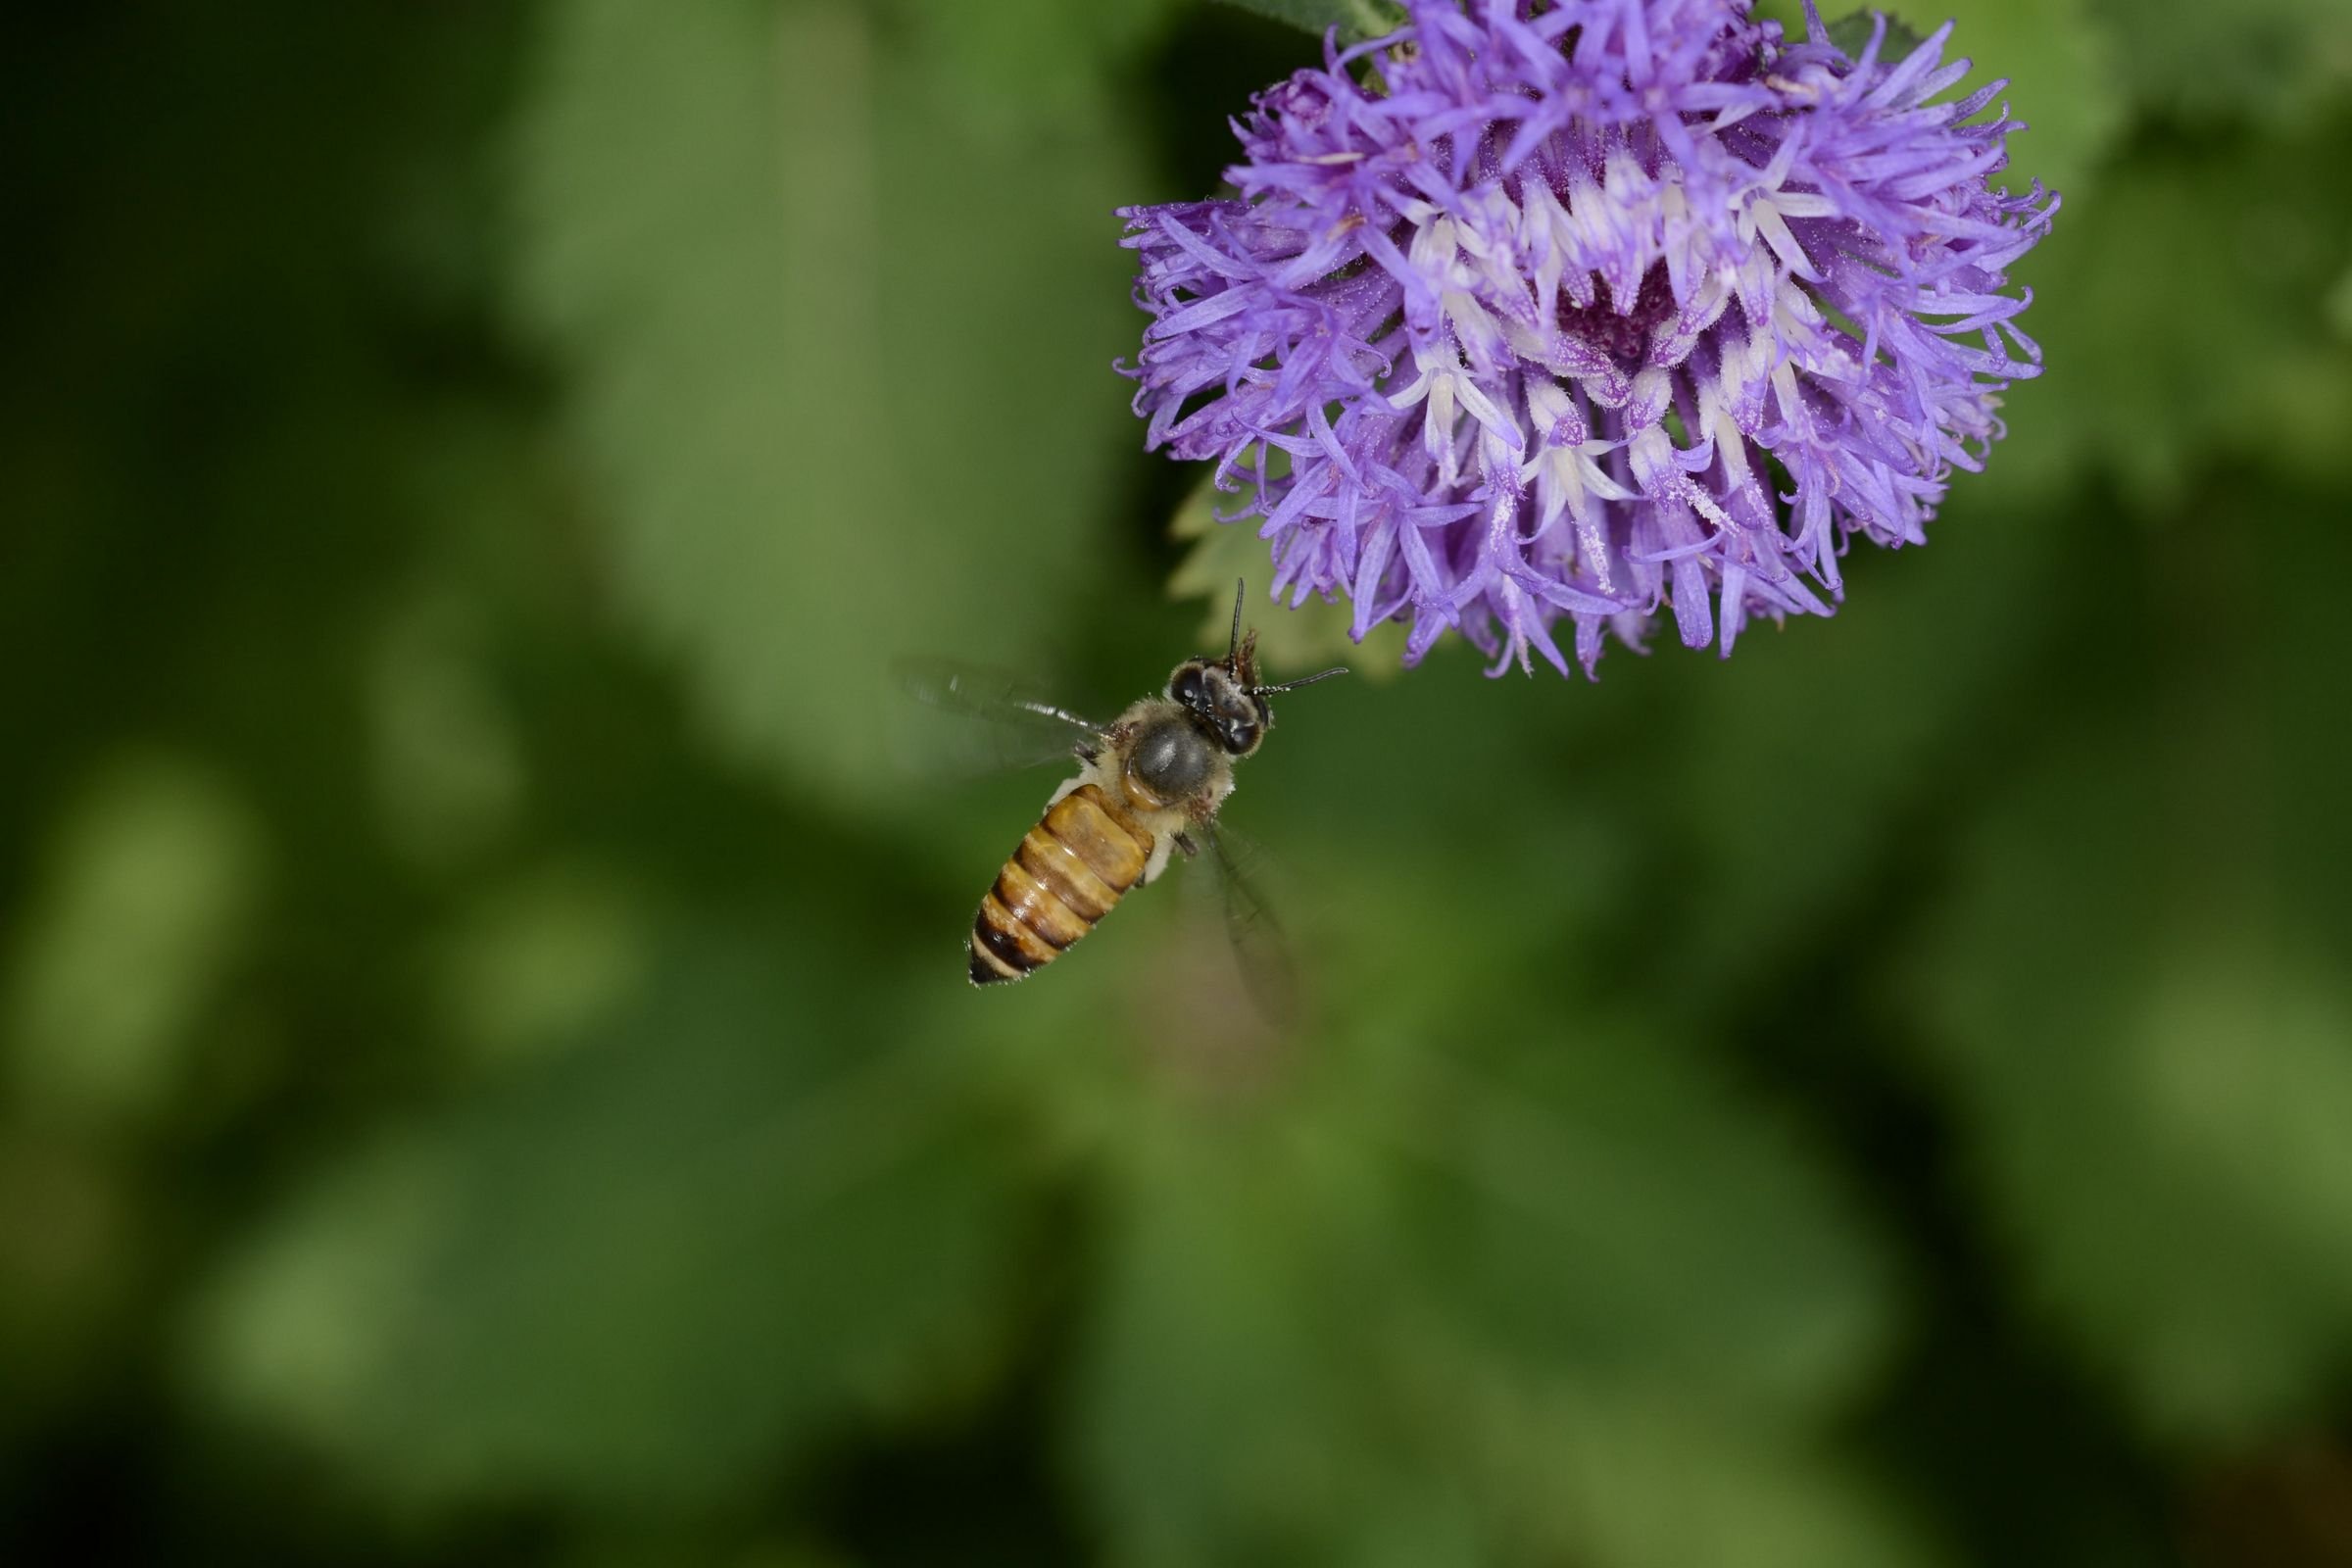
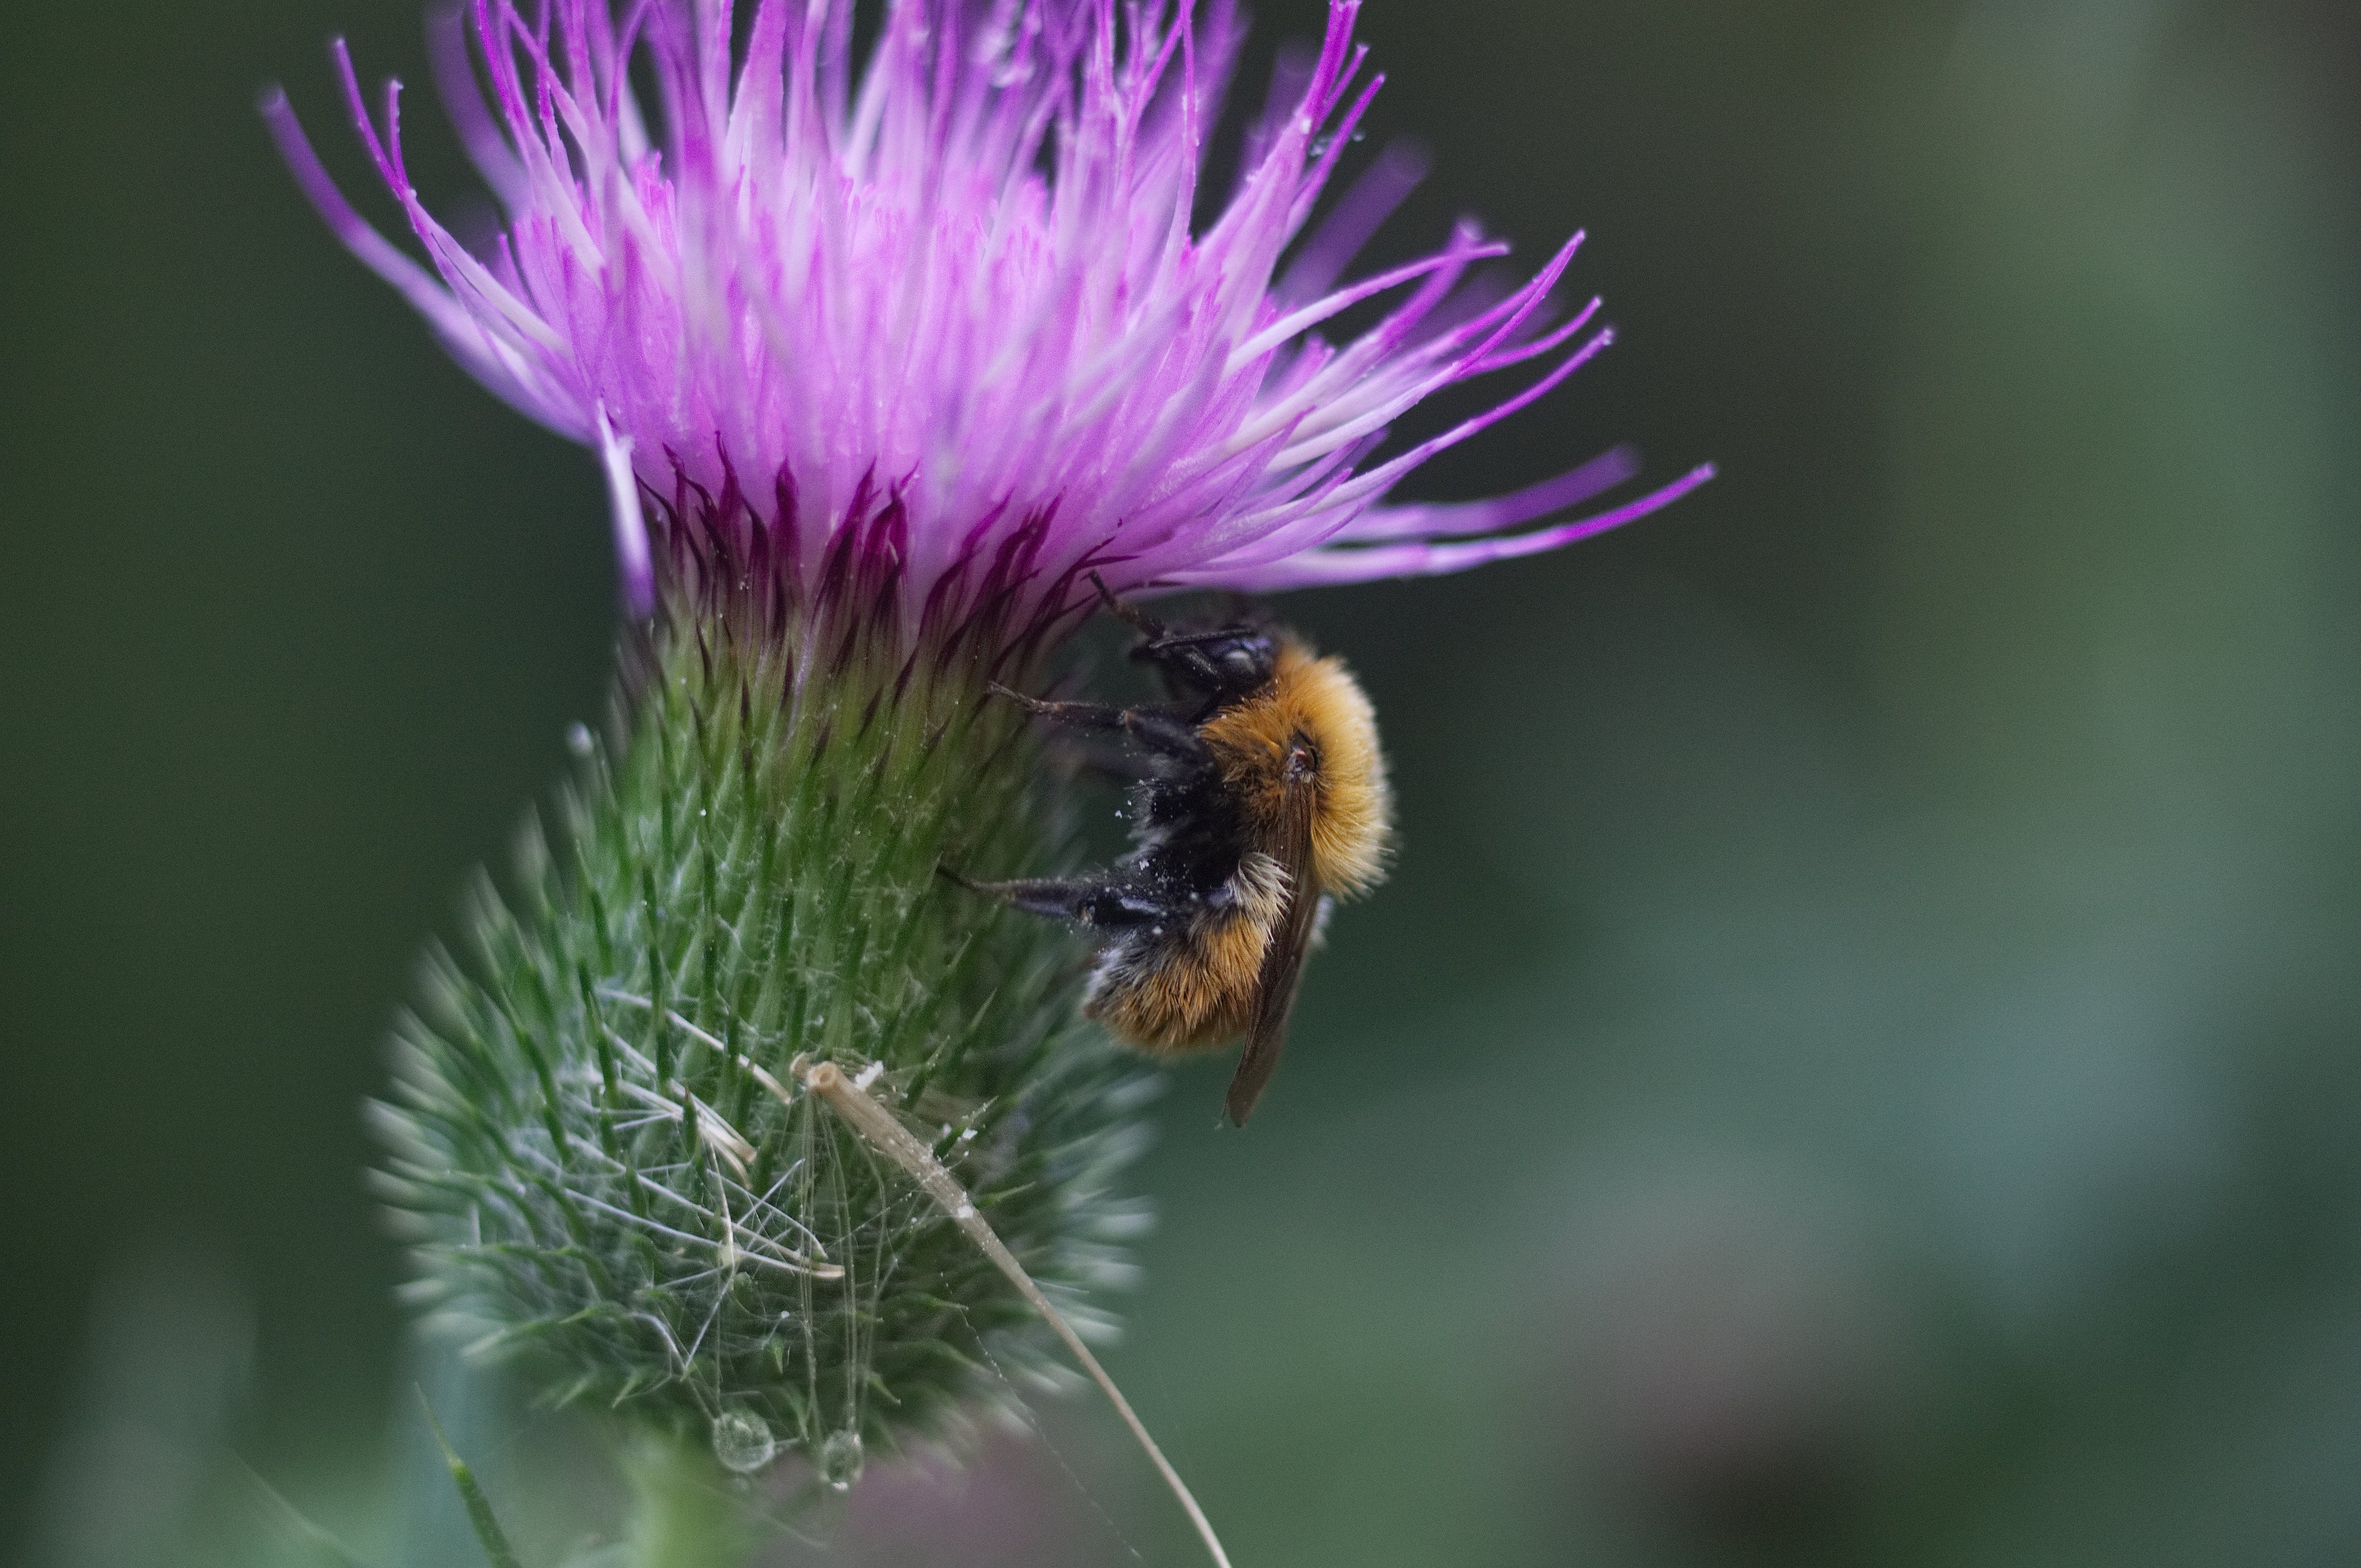
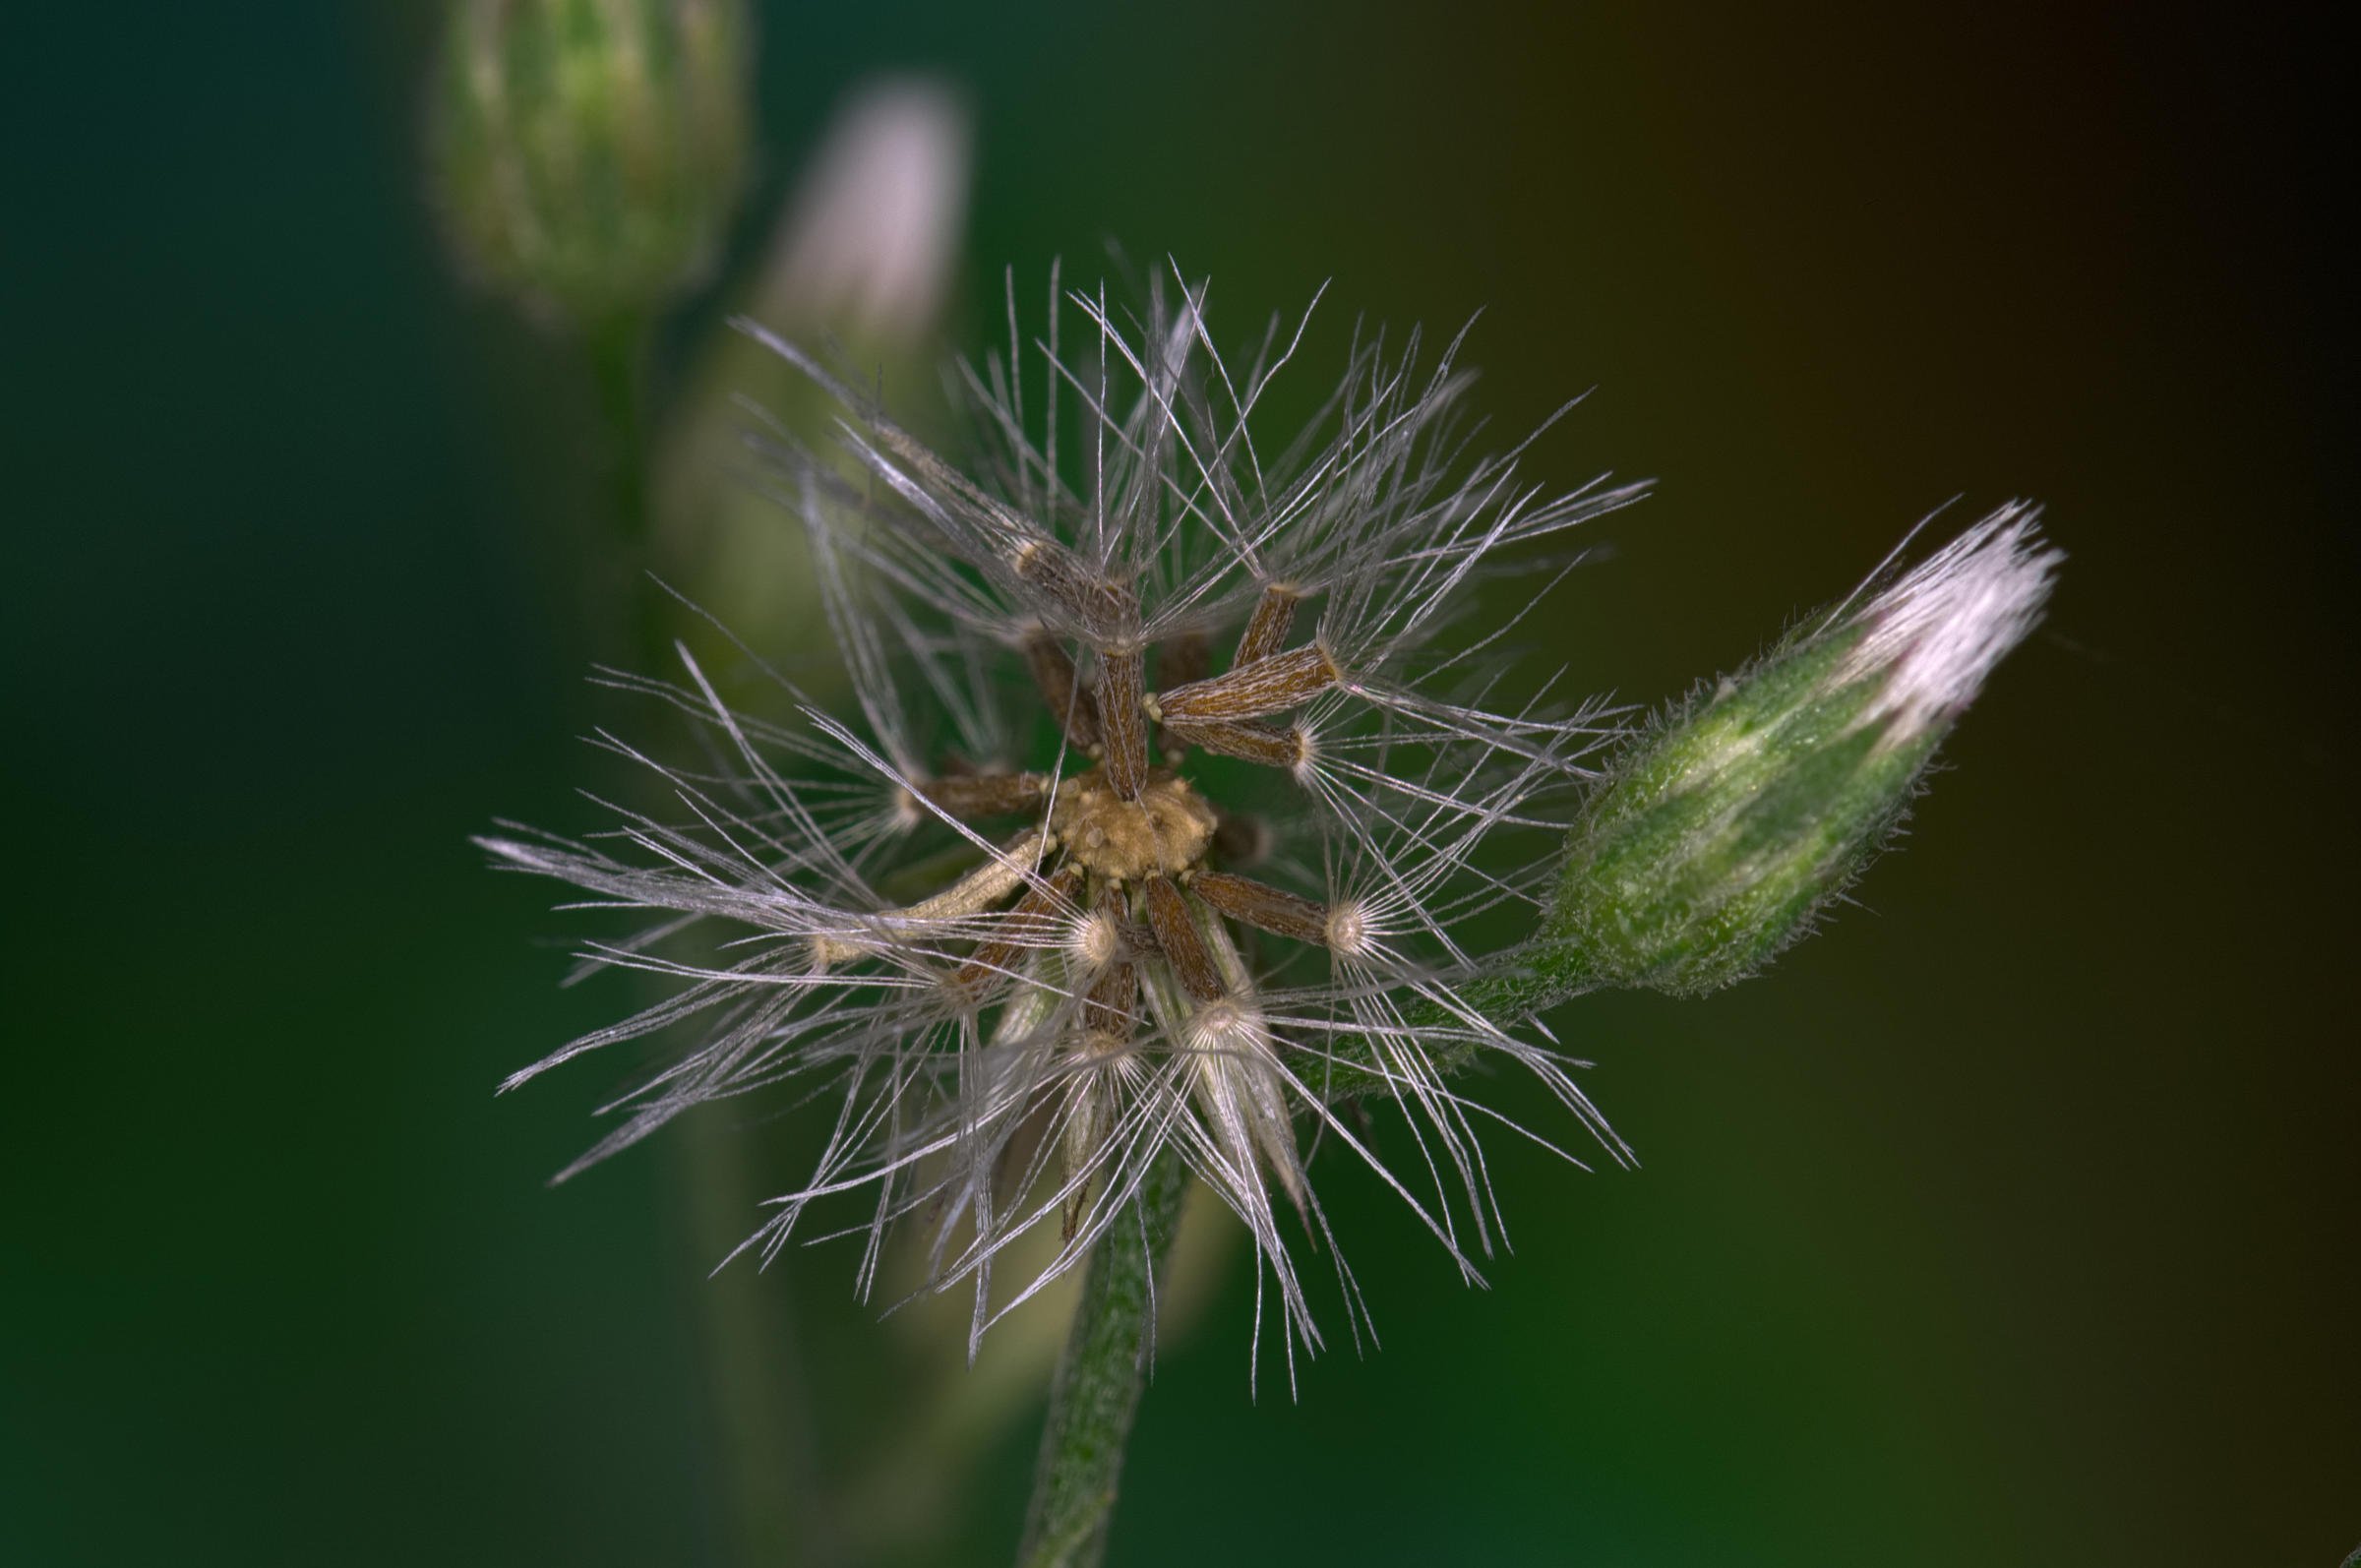
Camera: D3100 Nikon Lens: Tamron 90mm macro iso 100, f8, 1/125sec, Godox TT600 handheld external flash and X1T-N wireless remote on camera, 1/32 flash power. Camera Handheld. (Left hand flash and right hand camera with left hand fingers supporting camera lens barrel farthest end.) Processing: No settings modified in develop persona. After opening in photo persona, made color adjustments in LAB color space. Back in RGB space, made multiple curves adjustment targeting flower outer petals, inner white petals, greens and bee body. luminosity masks were used for the targeted adjustments. Flattened the layers, took it to LAB, used unsharp mask on lightness channel. Brought back to RGB color space, exported image to jpeg. Image below processed in AP. The second image is without any processing.

-
 I have used equations to resize my images as described in this thread. I use the Parameter a to adjust the final image size to the desired maximum. However the parameters are constrained to lie between zero and one (inclusive). In this macro, zero gives a size of zero and one gives a size of 4000px. The parameter a is a multiplier for 4000 so that 0.2 gives a target of 800px. I have found that it is much more convenient to enter a fraction in the parameter box so, instead of entering 0.2, I can enter 800/4000. All the user has to do is to remember the denominator should be 4000. The ability to enter fractions is documented for other parts of the user interface, but I thought it worth mentioning that it works here as well. John
 -
 I was watching a video course on Lynda.com (Advanced Affinity Photo for Desktop) and the video for creating your own macros. The video shows recording a macro where the first step is to create a selection from a layer. When I try that, I get Macro Recorder - Cannot record "Selection From Layer". Am I missing some setting that I need to change to allow this or is it not available on the Windows version? The course appears to be recorded on a Mac version of Affinity.
-
 ---- the settings after running the macro ? Do I need to explain more??
-
 Good Morning All! I am currently attempting to find a replacement for Adobe Fireworks as the business I'm employed by would like to move away from the costs involved with Adobe. We have narrowed it down to Affinity Photo as a necessity to have for the batch function but also a luxury to have the Photoshop capabilities to use on the rare occasion. We had some custom scripts written which we imported into Fireworks. I cannot get the same end result with solely the batch process function within Affinity. Below is the script contents that were written for us for Fireworks. Is it possible to automate this inside Affinity? Essentially we want the option point the batch tool to the files to resize multiple photo file formats into 1000 x 1000 72dpi. For example, If the image is 1000 x 500 before batching, we want the batch program to fill out to 1000 x 1000 with the colour white. We no longer require "makeResize" and only "makeLarge" within the script. var theDoc = fw.getDocumentDOM().filePathForRevert; var origFile = Files.getDirectory(theDoc) + '/' + Files.getFilename(theDoc) var newFile = 'file:///C|/batched/'+Files.getFilename(theDoc, true) makeLarge() makeResize(227, 227, '_m') makeResize(75, 75, '_s') makeResize(40, 40, '_t') Files.deleteFileIfExisting(origFile) function makeLarge() { var oldHeight = fw.getDocumentDOM().height; var oldWidth = fw.getDocumentDOM().width; if (oldHeight > oldWidth) { newWidth = 1000 var temp = oldHeight/newWidth newHeight = oldHeight/temp newWidth = oldWidth/temp } else { newHeight = 1000 var temp = oldWidth/newHeight newWidth = oldWidth/temp newHeight = oldHeight/temp } fw.getDocumentDOM().setDocumentImageSize({left:0, top:0, right:newWidth, bottom:newHeight}, {pixelsPerUnit:72, units:"inch"}, true); fw.getDocumentDOM().setDocumentCanvasSize({left:0, top:0, right:1000, bottom:1000}, true); fw.getDocumentDOM().setDocumentCanvasColor("#ffffff", true); fw.getDocumentDOM().selectAll(); fw.getDocumentDOM().align('center vertical', 'true') fw.getDocumentDOM().align('center horizontal', 'true') var theDoc = fw.getDocumentDOM().filePathForRevert; var theFolder = Files.getDirectory(theDoc) var theFilename = Files.getFilename(theDoc, true) var fullPath = theFolder + '/' + theFilename var theExtension = Files.getExtension(theDoc) fw.exportDocumentAs(null, newFile+'_l', ({applyScale:false, colorMode:"24 bit",exportFormat:"JPEG",jpegQuality:80,jpegSmoothness:0,jpegSubsampling:0,name:"JPEG - Better Quality",numEntiresRequested:0,percentScale:"100",useScale:true,xSize:0,ySize:0})) } function makeResize(height, width, ext) { fw.getDocumentDOM().setDocumentImageSize({left:0, top:0, right:height, bottom:width}, {pixelsPerUnit:72, units:"inch"}, true); fw.getDocumentDOM().setDocumentCanvasSize({left:0, top:0, right:height, bottom:width}, true); fw.getDocumentDOM().setDocumentCanvasColor("#ffffff", true); fw.getDocumentDOM().selectAll(); fw.getDocumentDOM().align('center vertical', 'true') fw.getDocumentDOM().align('center horizontal', 'true') var theDoc = fw.getDocumentDOM().filePathForRevert; var theFolder = Files.getDirectory(theDoc) var theFilename = Files.getFilename(theDoc, true) var fullPath = theFolder + '/' + theFilename var theExtension = Files.getExtension(theDoc) fw.exportDocumentAs(null, newFile+ext, ({applyScale:false, colorMode:"24 bit",exportFormat:"JPEG",jpegQuality:80,jpegSmoothness:0,jpegSubsampling:0,name:"JPEG - Better Quality",numEntiresRequested:0,percentScale:"100",useScale:true,xSize:0,ySize:0})) } Convert for Web.jsf
 -
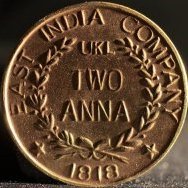
Hi guys I'm an amateur photographer from Italy. I'm 21 years old and I'm beggining my journey with Affinity Photo. I would like to have some impartial Advice about this photo I shot few days ago. I post produced this raising the contrast and using my brush to give a little bit of clarity. I raised the shadows and I used the brush to be more precise raising them only in particular parts of the image. At the end I used a Green Fill Layer (with 4% opacity and soft light fusion mode ) to highlight and "give more importance" to the green part of the image. I shot this photo with a Nikon D3100 with a 55mm Micro-Nikkor f/2.8. f 2.8 / ISO 400/ 1/200 Bee's head was a little bit out of focus (I Even raised the Details, Radius 5% and Amount 100%)
-
My first test on focus stack. The speed of processing was impressive since the working space was set to prophoto-16 bit. It took only a few minutes to complete 25 images alignment and stacking. To compare, one single frame and the final stacked image are enclosed. Only minimal editing (curves and USM) is done on the stack. The output is very good. Soon I will be testing with 70 to 160 images taken with microscope objectives. Camera- Nikon D3100, Lens Tamron 90mm Macro, f18, 1/3 sec, ISO 200. This is the final stack. The image below is one of the 25 frames.
-
 Hi, i have built some macros. Affinity Photo is showing me a "Generating Preview" window when i start the macro. After approving the dialog box the macros fulfills the task. This takes two times the time. I dont want a preview to be generated. If it is showing unwanted results i still can go back in the history. How do i turn this feature off?
 -
 Hi, I just got Affinity Photo and so far I love it. I found a few tutorials for using the Epic Skies Macro that came with version 1.6 back in November. I fully realize that I missed that free promotion. I'm cool with not getting it for free. I'll gladly pay for the macro and the photos. I know that I can buy the photos from Uplift at this link - https://www.upliftactions.com/products/epic-skies-cloud-overlays But Uplift only sells a Photoshop action, not the Affinity Photo Macro... does anyone know if I can buy the macro anywhere? Any help would be greatly appreciated. Thanks, Josh
 -
 Just purchased Affinity for Windows and it says it comes with a free Macro Pack. I can't find any details of this pack and what it does or how to install it.
 -
I've been delving into Affinity photo and the macros As I like to learn by doing I recorded a quick little macro for enhancing blue hour shots. It deepens the blue and adds a little warmth at the same time with adjustable parameters for denoise, exposure and more I thought I'd share it here Blue Hour enhancer.afmacro
- 9 replies
-
- 2
-

-
- macro
- bllue hour
- (and 1 more)
-
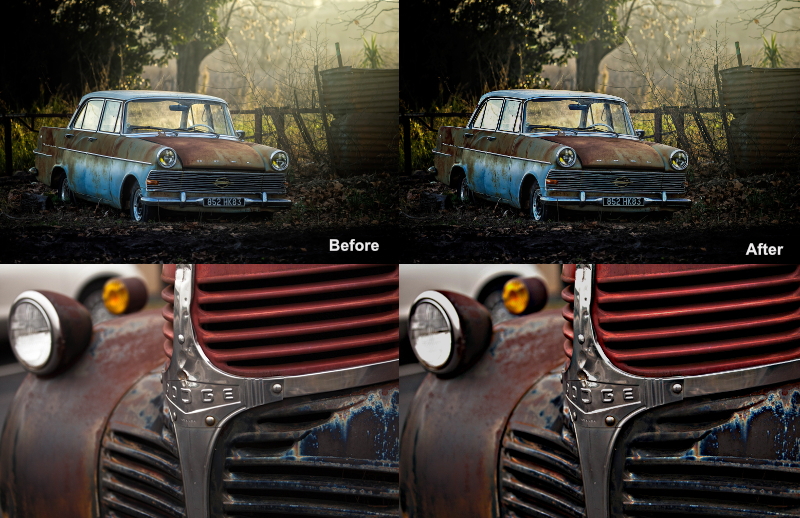
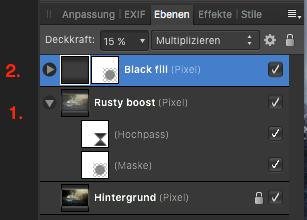
Photos of rusty motifs sometimes have a certain flair, which you can reinforce/enhance if desired. This Rusty Boost Macro just tries to do this in a reusable manner with some simple applied layers. LAYERS This macro creates two layers for you with corresponding layer masks: The macro makes first a copy (Ctrl/Cmd-J) of your background image layer and then applies a high pass filter on it (with a default setting of 20 px) and puts this layer into vivid light blending mode. You might adjust the layer's opacity to your taste here. There is also a layer mask applied so you can include/exclude certain image areas with a white/black brush here on demand. A 15% opacity black fill layer and mask are applied in multiply blend mode, in order to give blacks a slightly stronger go and darkens the image slightly. You can adjust the black fill layer opacity to your liking and use for the layer mask a white/black low to medium opacity soft brush and paint over the image, in order to include/exclude certain image areas from the black fill. THE MACRO rusty-boost.afmacro
- 3 replies
-
- 2
-
-
- affinity photo
- macro
- (and 1 more)
-
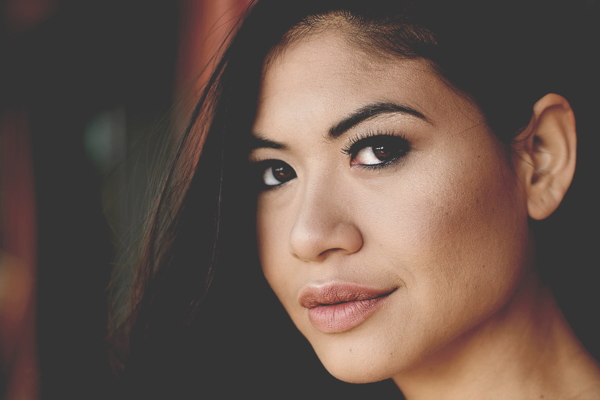
For certain photos like street, casual wear, but also sometimes for portraits, I tend to use matte color effects if those shots have to underline some more urban style. It is an easy task to apply some matte color effect to your shots, though if you need it quite often a reusable macro is the way to go for this. - Here is one adjustable matte color macro for Affinity Photo, which you can reuse for such matte effects for either color or b&w images. BEFORE AFTER LAYERS This macro creates three layers for you with corresponding layer masks: A curves adjustment layer which applies the main matte coloring to the image, which lowers contrast and flattens blacks. You can use the mask (draw with a white/black brush) to exclude/include specific areas from the matte color. For example you could exclude in portraits the eyes from being matte here etc. A contrast boosting layer which allows to give back a little bit of the contrast lost by the matte color effect. This is as default a copy of the matte layer with an applied soft light blending mode and half lowered opacity. Again you can use the mask to remove or reapply certain image areas here. Finally a desaturation layer which can be used to lower the saturation of possibly still too bright colors. You can use the mask here too in the same intended way as before mentioned for the other layers. THE MACRO matte_color.afmacro Matte color.afmacros
- 2 replies
-
- 8
-
-
- affinity photo
- matte
- (and 2 more)
-
 Hello guys I need your help understanding an issue I’m having regarding file size. I’ve noticed that my files are getting very large. I don’t save history with the files and I know that Affinity uses incremental saving, and reduces file size after some time, or so I read. I’m using version 1.6.7 To reduce the file size to it’s minimum, I’m doing this: Open the large file COPY all the layers Go to FILE>NEW FROM CLIPBOARD SAVE the new file Size reductions are very significant, ranging from 2% to 91%. Let me give you an extreme example: Original file: 72,7 Mb (3 layers) Save as: 61,3 Mb (same 3 layers) Copy layers to new file: 6,30 Mb (same 3 layers) The problem is that doing this procedure to an hundred files, is very tedious and time consuming, so I’m wondering if I’m missing something, and if anybody else had a similar issue. Also I would be interested in knowing if anyone has created a macro to reduce file size. Thanks PS: I know that storage space is cheap, but I’m interested in using as less space as possible
 -
 Hello, First I want to thank you guys for the great tool Affinity Photo you have created for us to use. It takes some time to addapt to it, but it certainly works really good. I have an issue I want to tell you about. I am taking the product photos for an online shop and it's a big collection. I have developed some Macros, and lately I have been suffering from LOW DISK SPACE. Well, I started looking for the reason and I saw that the reason was 'My pictures' folder. I told you it's a big collection and I have thousands of photos. The Macro I apply is very simple: Exposition correction Curves editing Streightening + Square Crop Adding 3 guidelines and that is all. Should be simple. Of course, I need to keep the working file until the Season is over, just in case. But the thing is, these simple steps are converting my 5MB pictures into 50MB .afphoto files and it's eating up my Storage Space. Thank you for your work and I hope you will be able to solve this in following updates. Best, Anelia
 -
 Hi there, I would like to partition a lot of picture into nine subpictures each. In other words: I would like to digitally cut every picture into nine pieces. And at first, using the slicers available in export persona seemed to be the perfect solution. Since the partition always stays the same, this sounded like a job for batch mode. I just have one problem: When recording a macro, I cannot define a slicer. So right now it would seem that I cannot use this awesome feature in batch mode. Does anyone know any way around this? Thank you very much and kind regards, Dreamer
 -
 A really cool feature for Affinity Photo (APh) would be to save the history as a macro
 -
 Hi, Iam trying macro in affinity photo to make iPhone designs using mock-up, please help me out for placing image and resizing the design. Something like this https://youtu.be/lWgF4uSkCR4 I am using affinity phote cause I have created mock-up and I get best out it in affinity photo. Thanks
 -
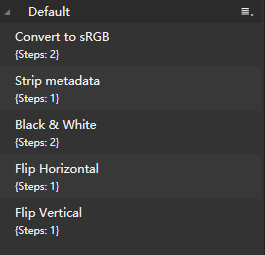
 Sorry, I'm new here. And I've searched the forum, and don't find any answers. What I want to know is that if I deleted my default macros in library, is there any way to get those macros back? I haven't delete them now, but this question is so distracting. And I'm afraid to lose them, so I don't dare to delete them then try to get them back.
-
 It would appear (from my limited experiments) that macros do not allow moving between documents when recording. I can start recording, copy from one document to paste into another but as soon as i move to the second document the recording appears to stop until i return to the original document at which time it continues. Can someone tell me if this is the case or is there something I am missing? As I'm using the trial version with a view to replacing other tools this appears to be a severe limitation.
 -
 So I am trying to edit a star lapse I took by recording my macro then re applying it to a batch. However the results are way different when I do this. How come? I know the Macro is good because when I run it on just a single image it looks great. However when I run it as a part of a batch it doesnt even look the same. Whats the point of the batch processor if it doesn't work? I was really hoping to use affinity over Adobe products but its looking like for mass image editing nothing beats adobe. Might have to just suck up and pay to stupid monthly cloud subscription. ugh. Anyways the first image is my original macro ran on just a single image and then the image on the right is from the batch, and yes I used the same macro for both. Image 1 https://www.dropbox.com/s/ikm4y3e0hh6sue4/PTRO5713.jpg?dl=0 image 2 https://www.dropbox.com/s/vkt8y5jnecfz7kx/PTRO5713b.jpg?dl=0
 -
Is there any way that Select by luminosity of Layer can be recorded in a macro. E.g. Ctrl, Shift an left clicking the layer gives you a selection based on luminosity (the brightest pixels) However if you try to record this as a part of a macro you get a warning that states layer selections cannot be recorded as macro. Basically, we should be able to record every action we do in a macro as in Photoshop. Come on Serif this is a basic requirement. Cheers in anticipation
-
 I enjoy using Affinity Photo on a Mac (OS X 10.12.6). I frequently need to resize a folder of images and run a small macro to place my studio logo on these lower-resolution images for use by the client, post them to social media, etc. I downloaded the update for Affinity Photo v1.6.7, and it's great. But is there still no way to run a batch job on a folder containing both landscape and portrait orientation images and end up with all of them properly resized to the same pixel dimensions without distortion? I saw a discussion about a complex macro for this purpose in another thread. However, this essential function should be included as a basic part of Affinity Photo's capabilities, yes? Has anyone had success with this sort of operation? I really love Affinity Photo and tell all of my pro colleagues about it as a potential replacement for Photoshop, but this simple issue could hold many pros back. Thanks very much for any insight that you developers and experienced users might have.