Search the Community
Showing results for tags 'line'.
-
 In AD 2.3.x the alignment of some tools does not work as expected. E.g. lines drawn by pen tool, or Serial Tool. Using e.g. the Heart Tool has no issues. No such problems in AD 1.x Please watch the video ➡️ Line and Brush alignment issues Alignment AD 1.x.afdesign Alignment AD 2.x.afdesign
 -
 howdy does anyone know how to adjust the length of the line on arrows after they have been placed in the document without affecting the arrowhead? for example, i created a custom arrow to use in architecture presentations saved it as an asset for reuse, i would like to only change the length of the line, (not the arrowhead) so that arrowhead is not modified but the line can be lengthened preserving it's width thank you affinity photo 2 #macos #arrow #linelength #line #arrowtool
 -
 Hi. I can't seem to find a way to make a named style for pen tool lines. Suppose want to make a quickly selectable "line style" that has some predefined attributes for use with the pen tool, such as 4pt, a particular pressure patern, color, etc. If this can be done in AD, please give me some hints as to how. Thanks.
 -
Is there ever gonna be a quickshape like feature for Designer2 for iPad and Publisher2 for iPad? Not having a feature like that makes it harder to draw and make nice lines and nice circles. The stabilizer feature still isn't close enough to that. I know that there are features for picking a certain type of curve to use if you're drawing a curve or circle and we can fix each line and circle with dots in each line or circle in Designer. That just takes way more time to get the perfect line or circle by having to switch shapes, curve lines, and or edit the lines/curves. It would save everyone tons of time to just add auto line, curve, or circle maker option without having to change tools constantly. To be able to just draw a circle and hold the stylus down on the screen and make a circle and we can easily edit it after that. Same goes for curves and lines. So we don't have to edit a wonky line, curve, or circle. Which is i.m.o. more work than just editing a nice straight line, curve, or circle. I.m.o., that's why most people use Procreate instead of Affinity just for that reason. Affinity has tons of great features, but it's hard to use them or want to buy the program(s) for them if it means way more work to make nice lines, curves, and circles. Then a person is spending more time trying to get that correct. That's a big reason as to why a lot of people don't do digital art and why tons of people just get Procreate or Infinite Painter (can be used on iPad and Android tablets) just 'cause of the super ease of doing those things. If you guys can, please make a quickshape type version for Designer and Publisher. I have the version 2 lineup of iPad apps and I don't use them just 'cause I spend way too much time fixing the lines, curves, and circles. When I get that done much faster in Procreate. Procreate is lacking in a lot of features that Designer has, but quickshape feature in Procreate makes it worth skipping out on those features. A $70 one time fee for Designer isn't an expensive price. Though I feel like the price would be worth it compared to the $10 fee for Procreate if you guys have your own quickshape feature. Since your programs come with a lot of extra stuff that Procreate doesn't have.
-
 Now, as ".dwg" is supportet. I'd love to see the precise straight line tool on iPad.
 -
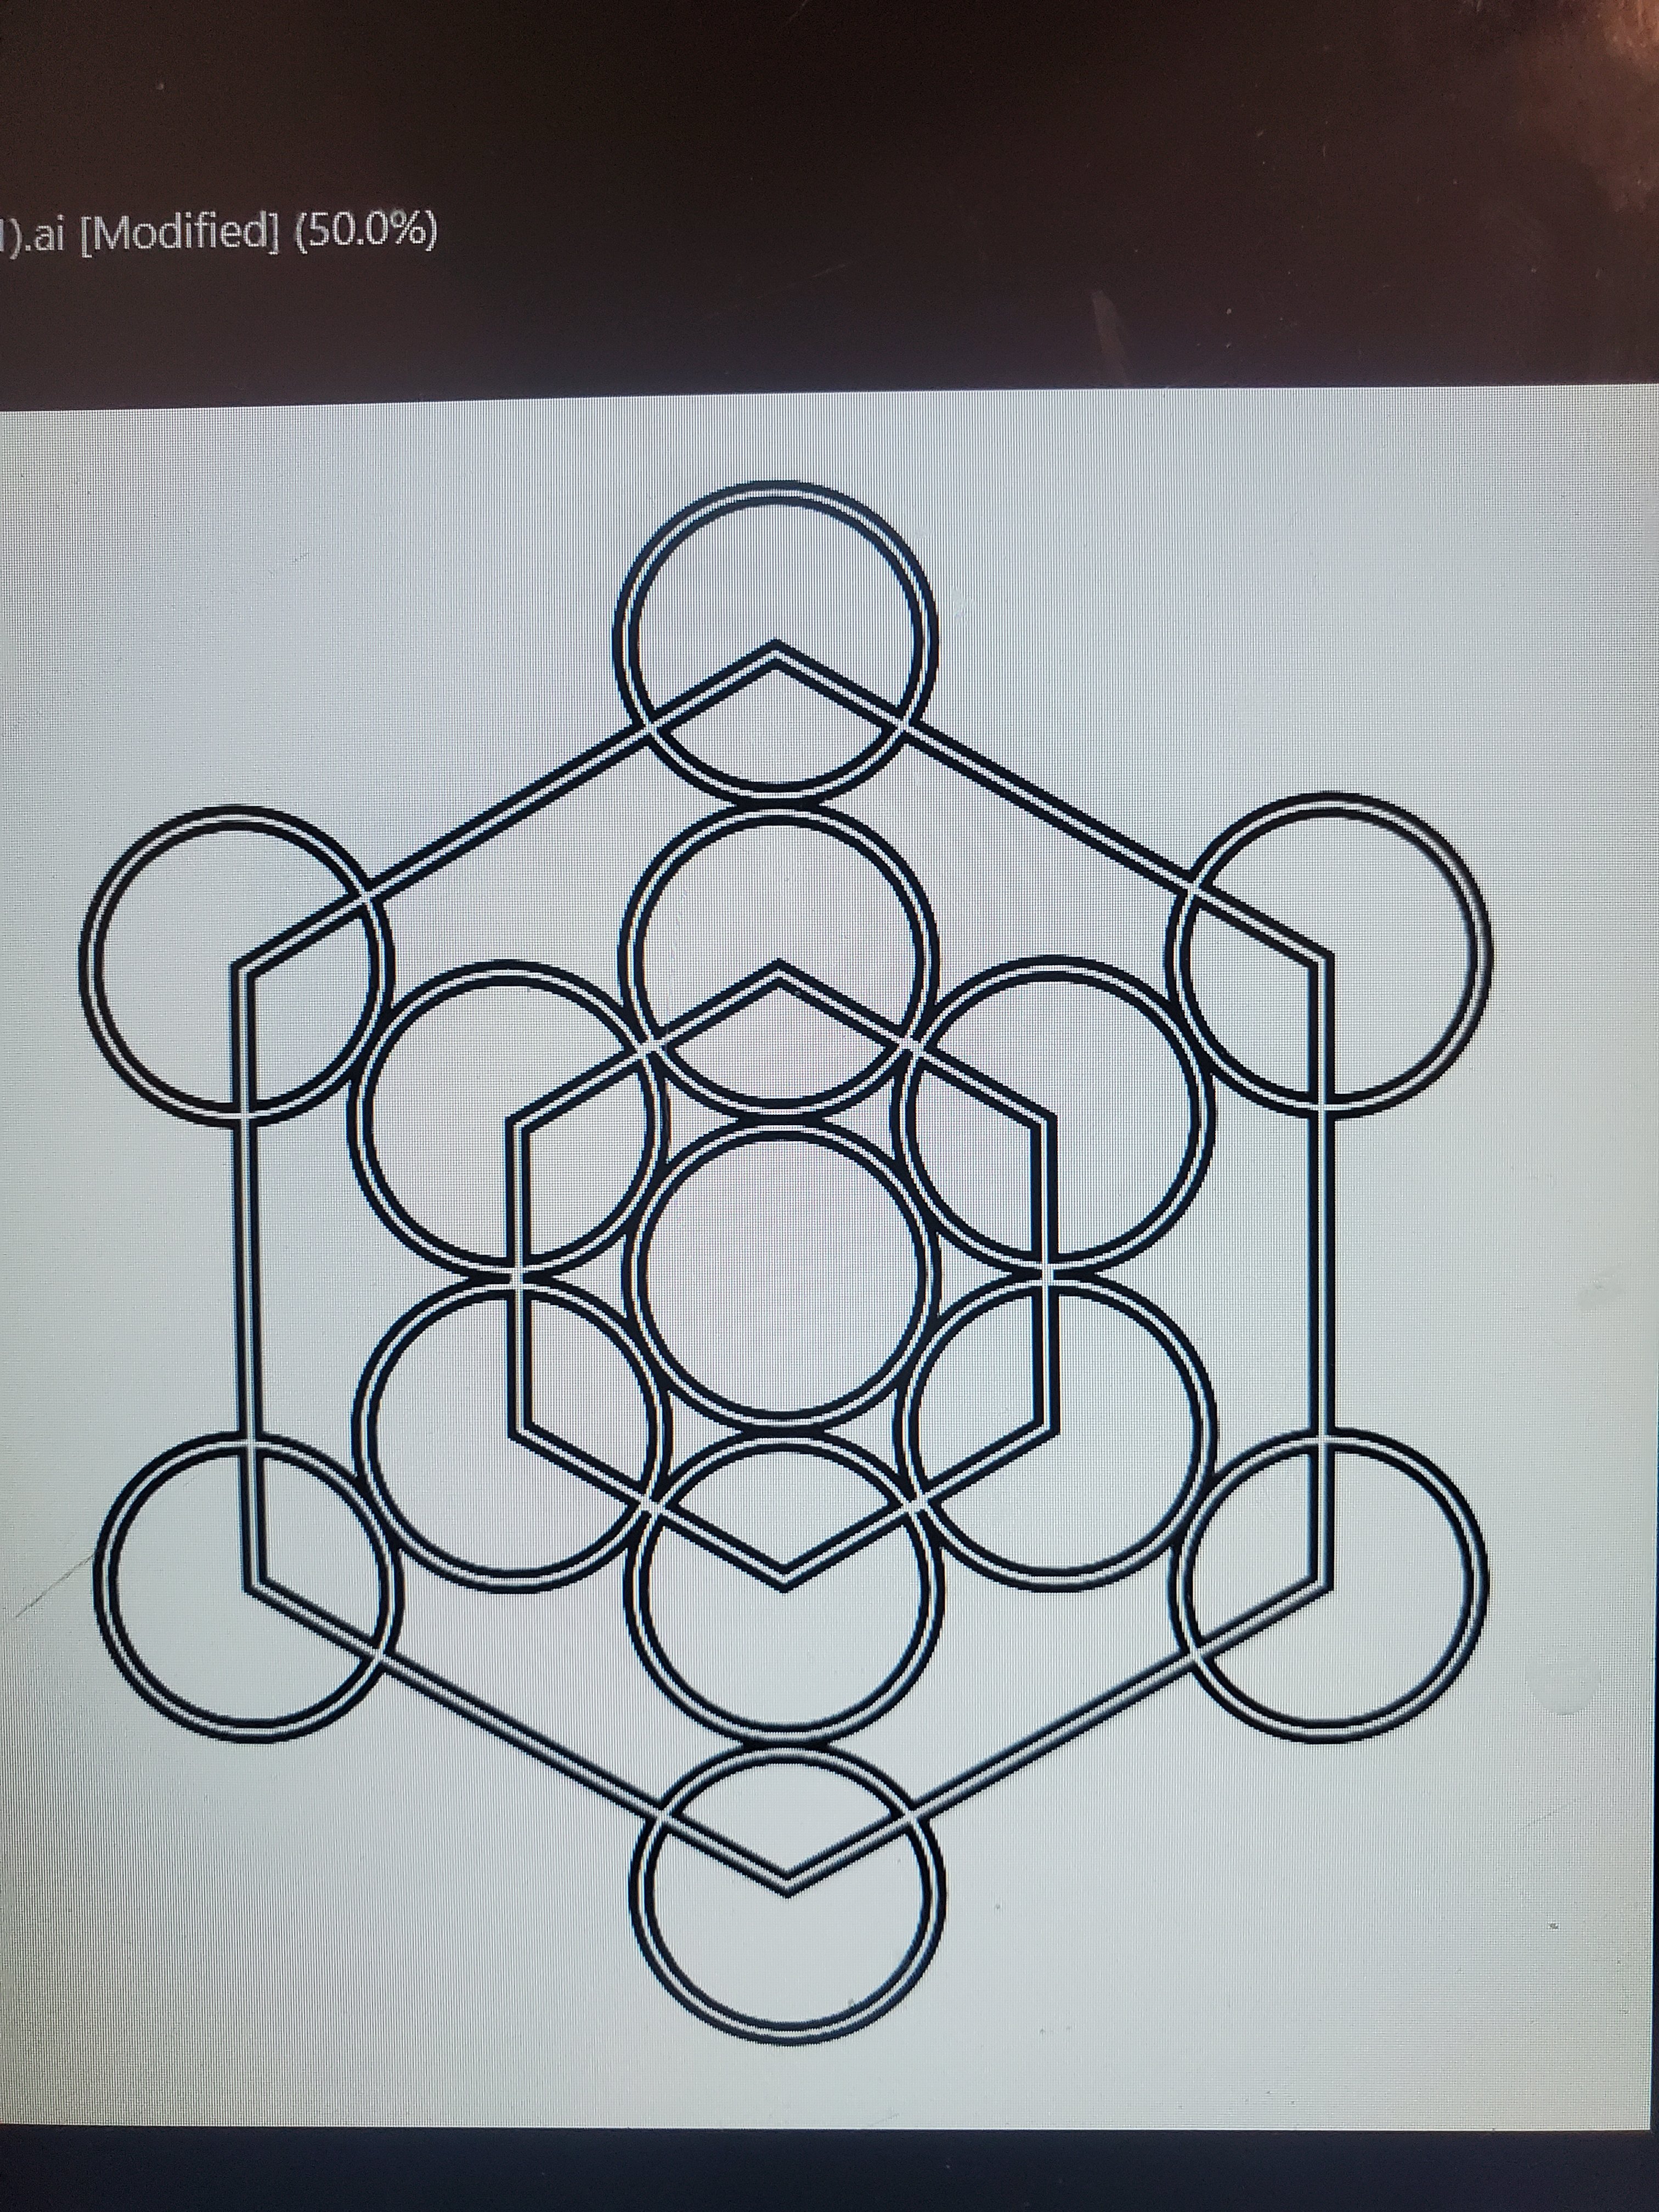
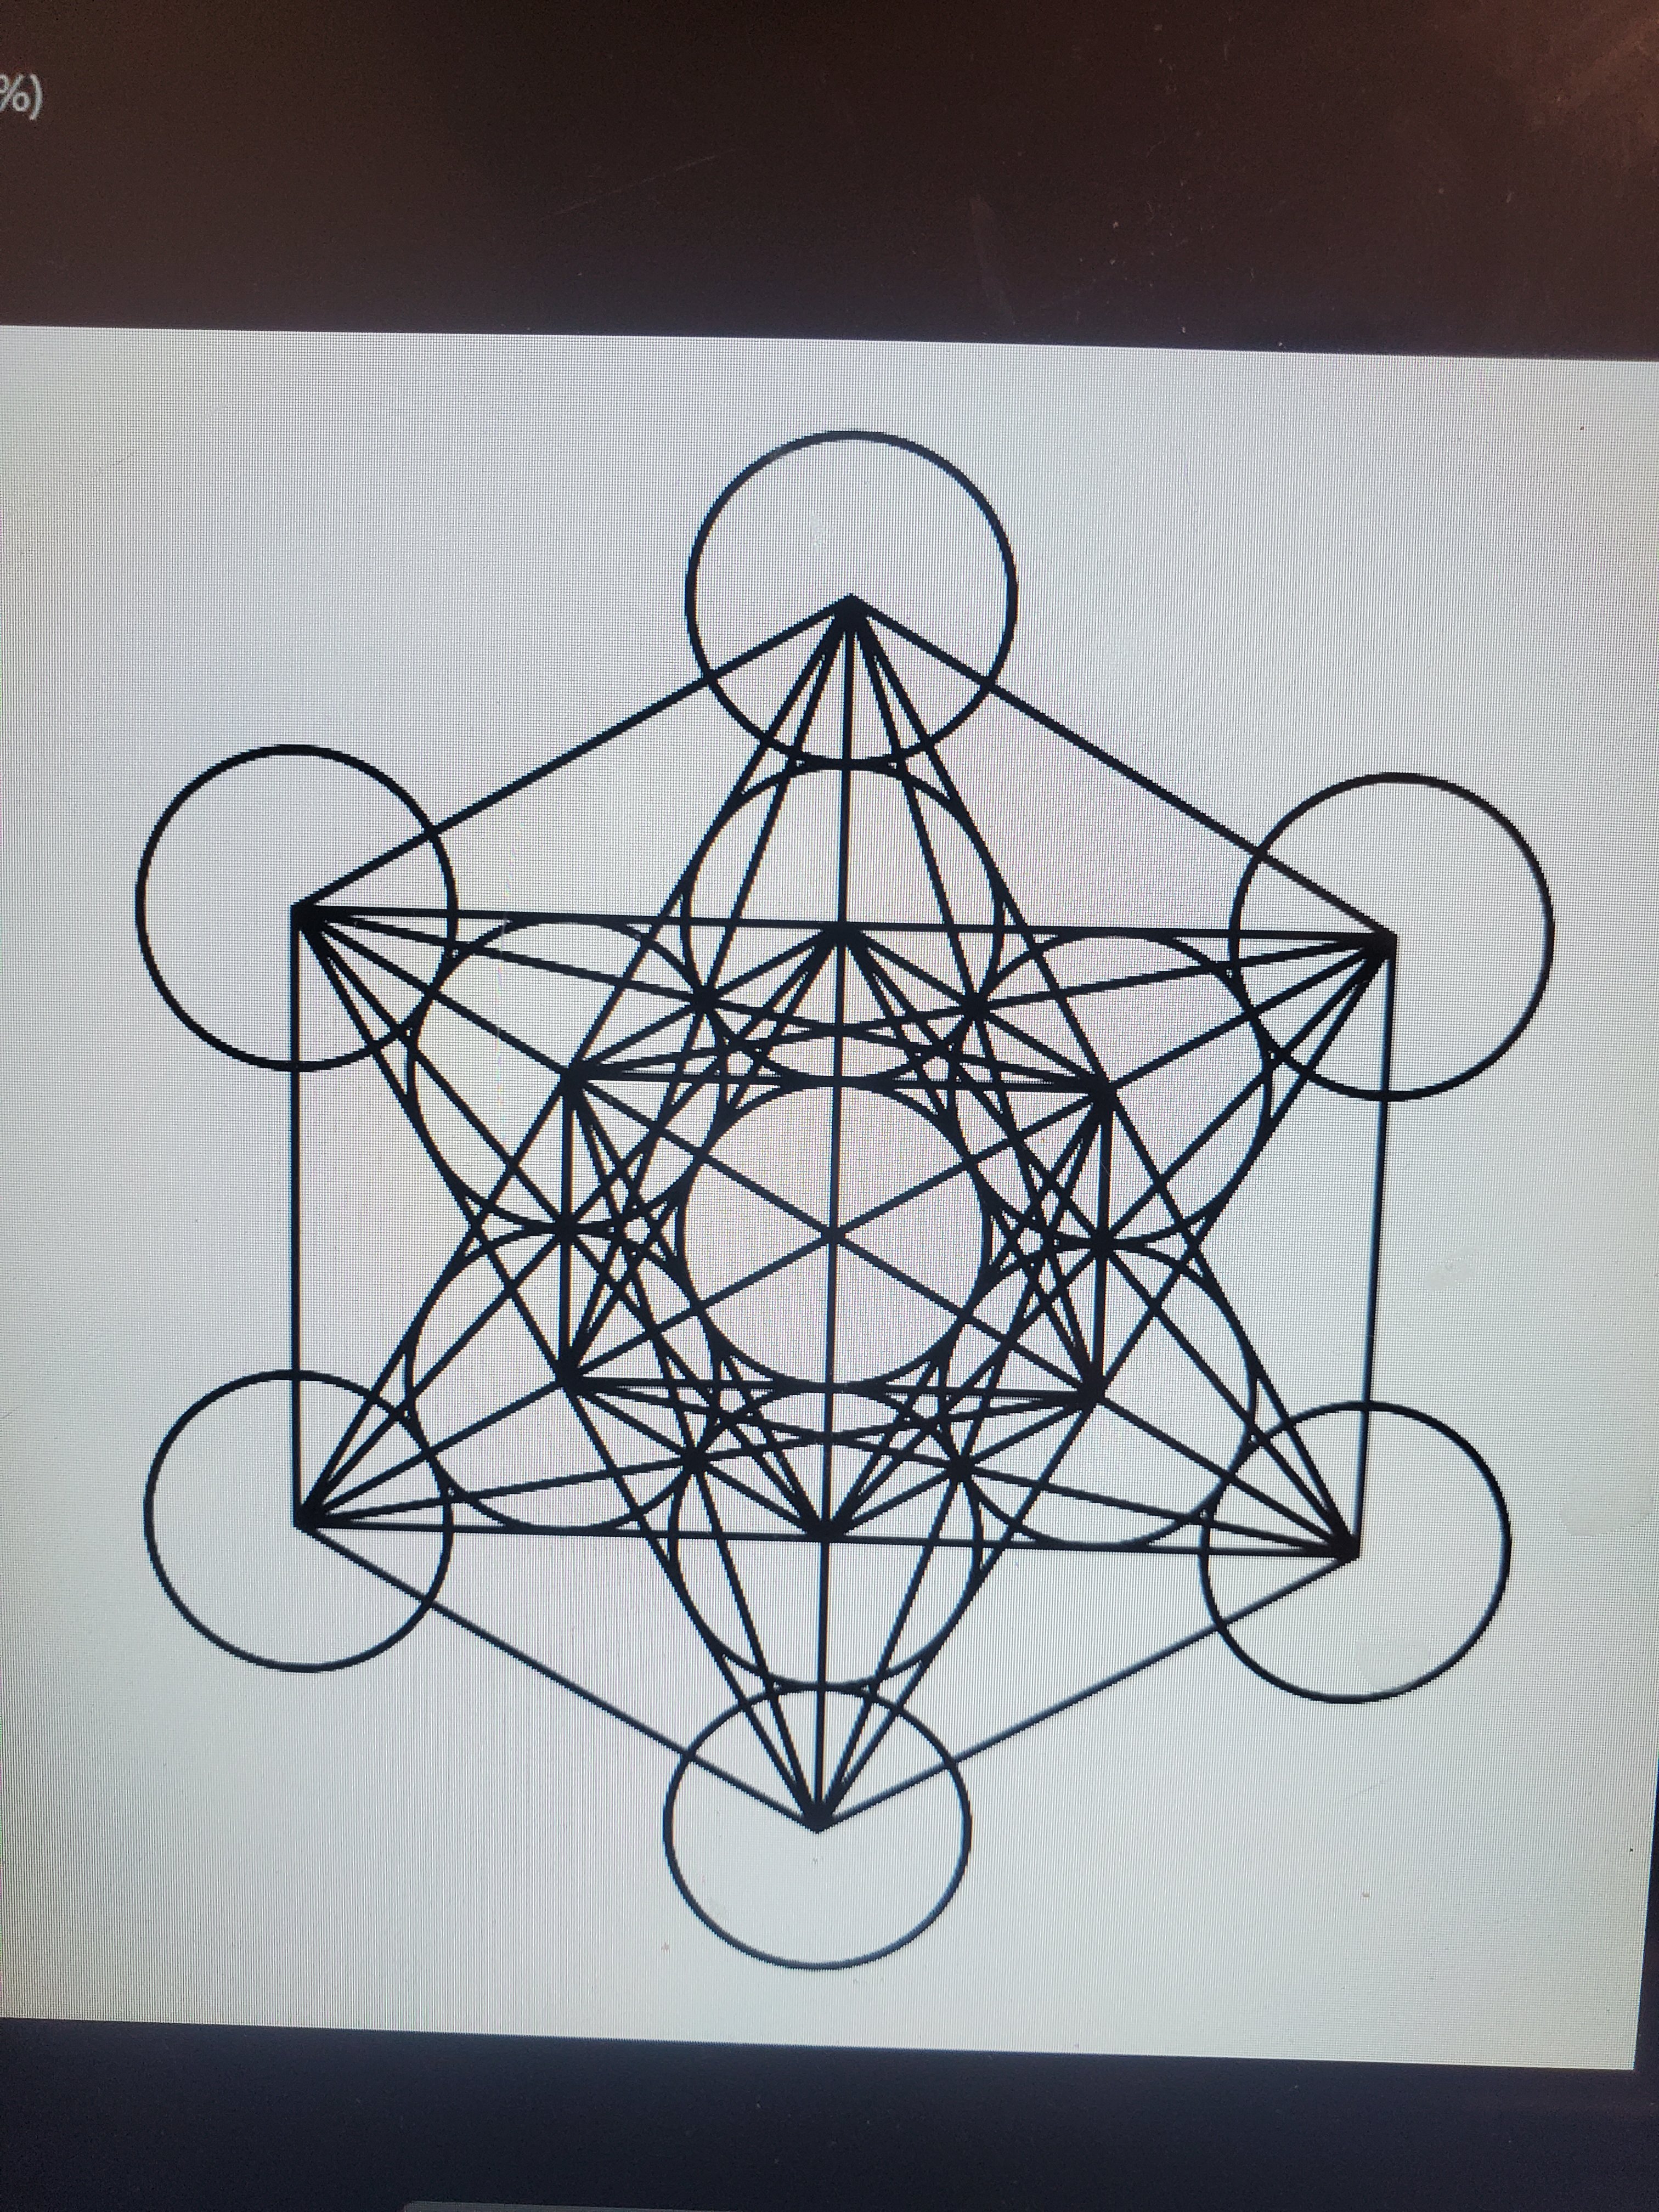
 Good day, so im working with a complex shape in afinity designer that I'm going to be sending off to a 3rd party company to have cut out onto copper sheets. The shape is called metatron's cube. (See attached image.) It has lines all over the design and the company isn't able to work with this file because it doesnt contain auctual shaped geometry. I played around with it myself ( See attached image) and I was able to get it close to how they would need it for their machine, but the part im now stuck at is getting the rest of the lines to look like the image I made. What I was able to do on my own is select every circle and turn them into a donut shape then make the hole 90%. I then duplicated the smaller hexagon in the center and shrunk it then subtracted it from the bigger hexagon. I did that to both the center and outer hexagons in the image and then I Sellected everything and hit the add button in the top right corner so that it created the shape in the image. Here are my questions I currently have. How to I make the distance between the hexagons the same distance as the circle that has a dognut hole of 90% I need to make sure that when their machine cuts it all out that all the line thickness is exactly the same. My next question is how do I make the rest of the lines look how I made this shape so far? I know I'm making progress, but I've hit a brick wall. Thanks in advance, Randallrbaker
-
 Please add an option that let us select a text/line unit other than Point in the Preferences>UI. If possible, I would like you to add Q unit.
 -
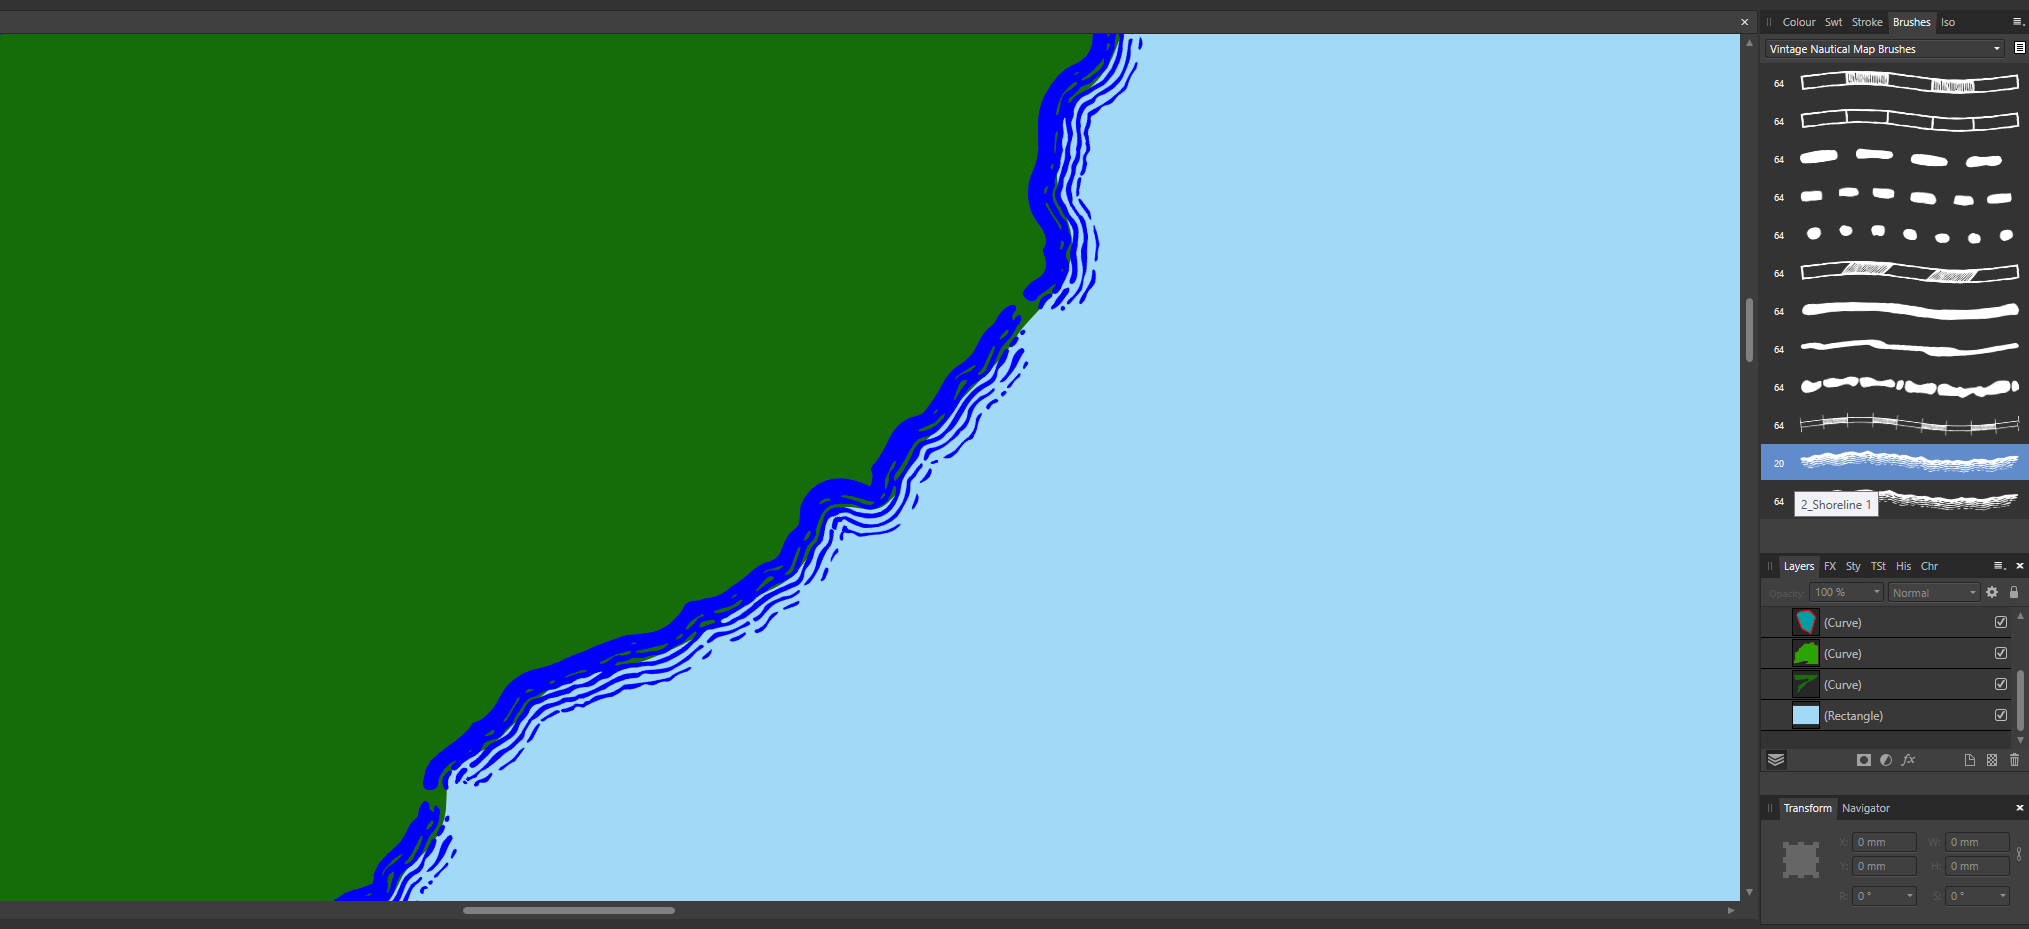
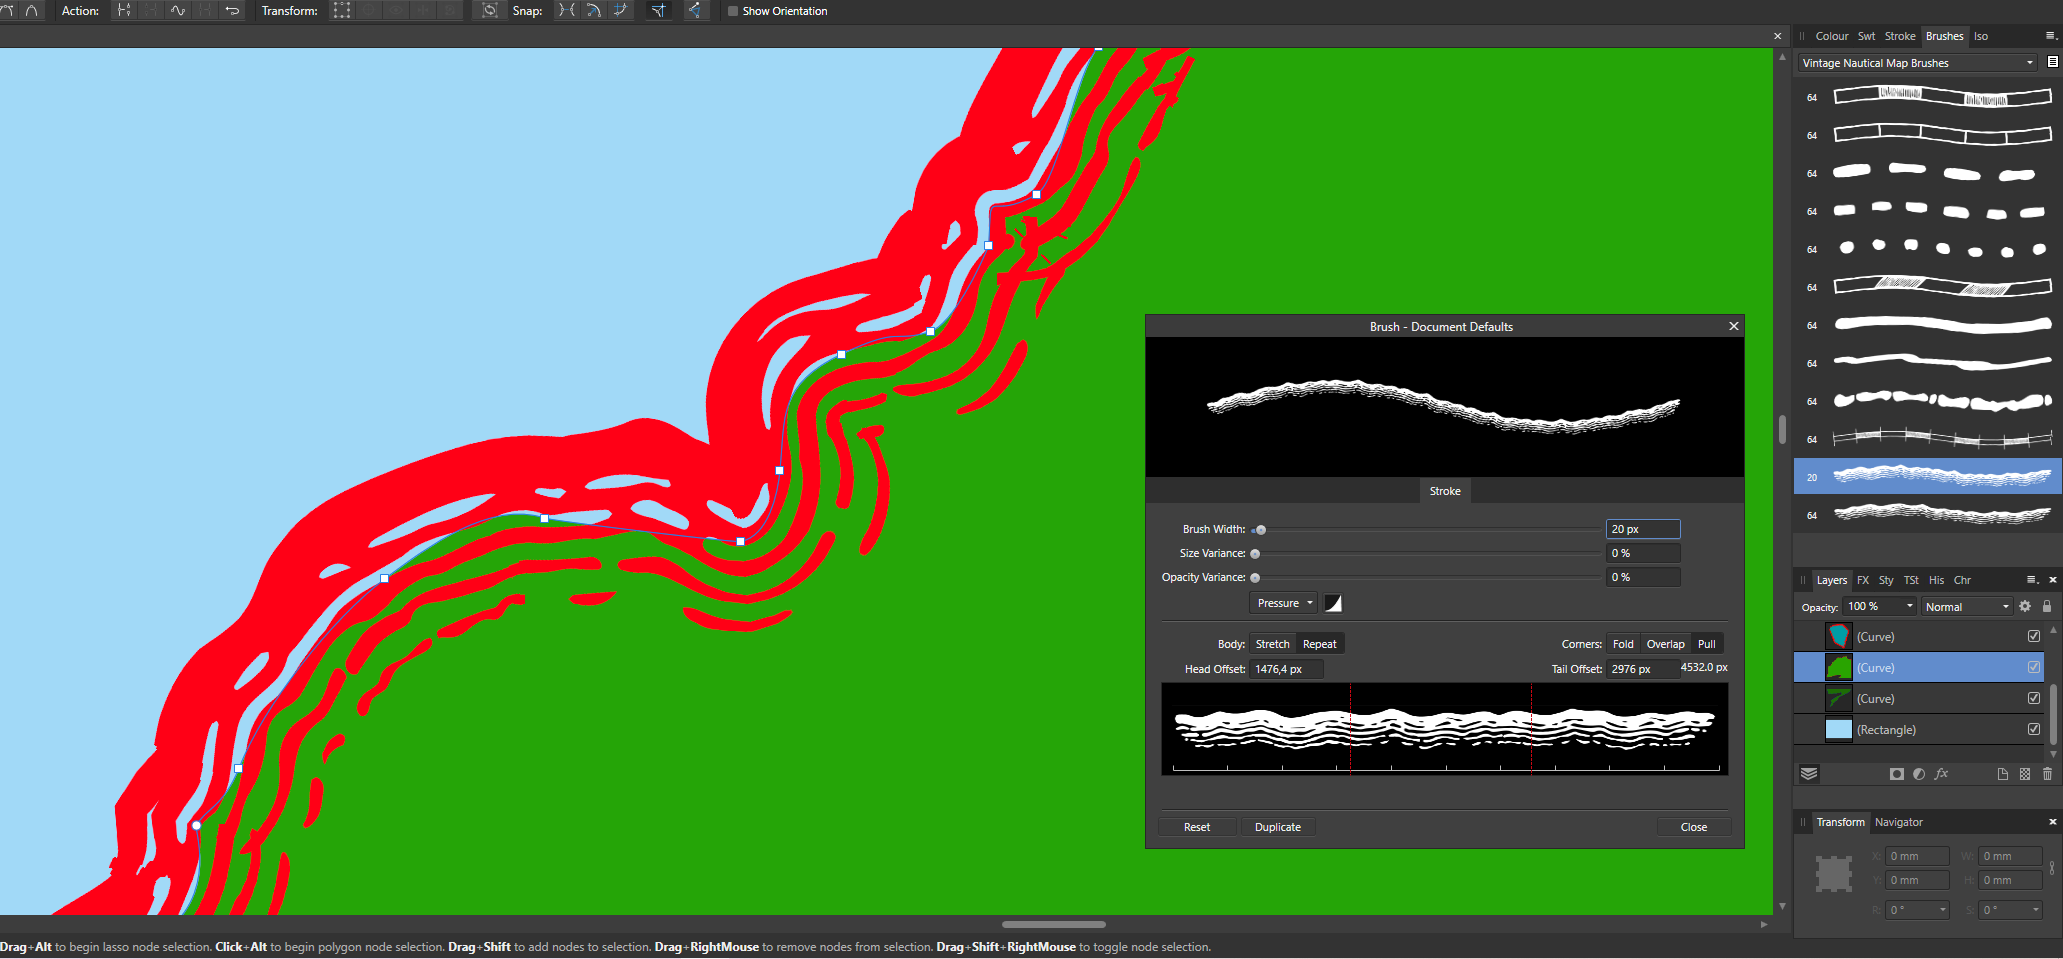
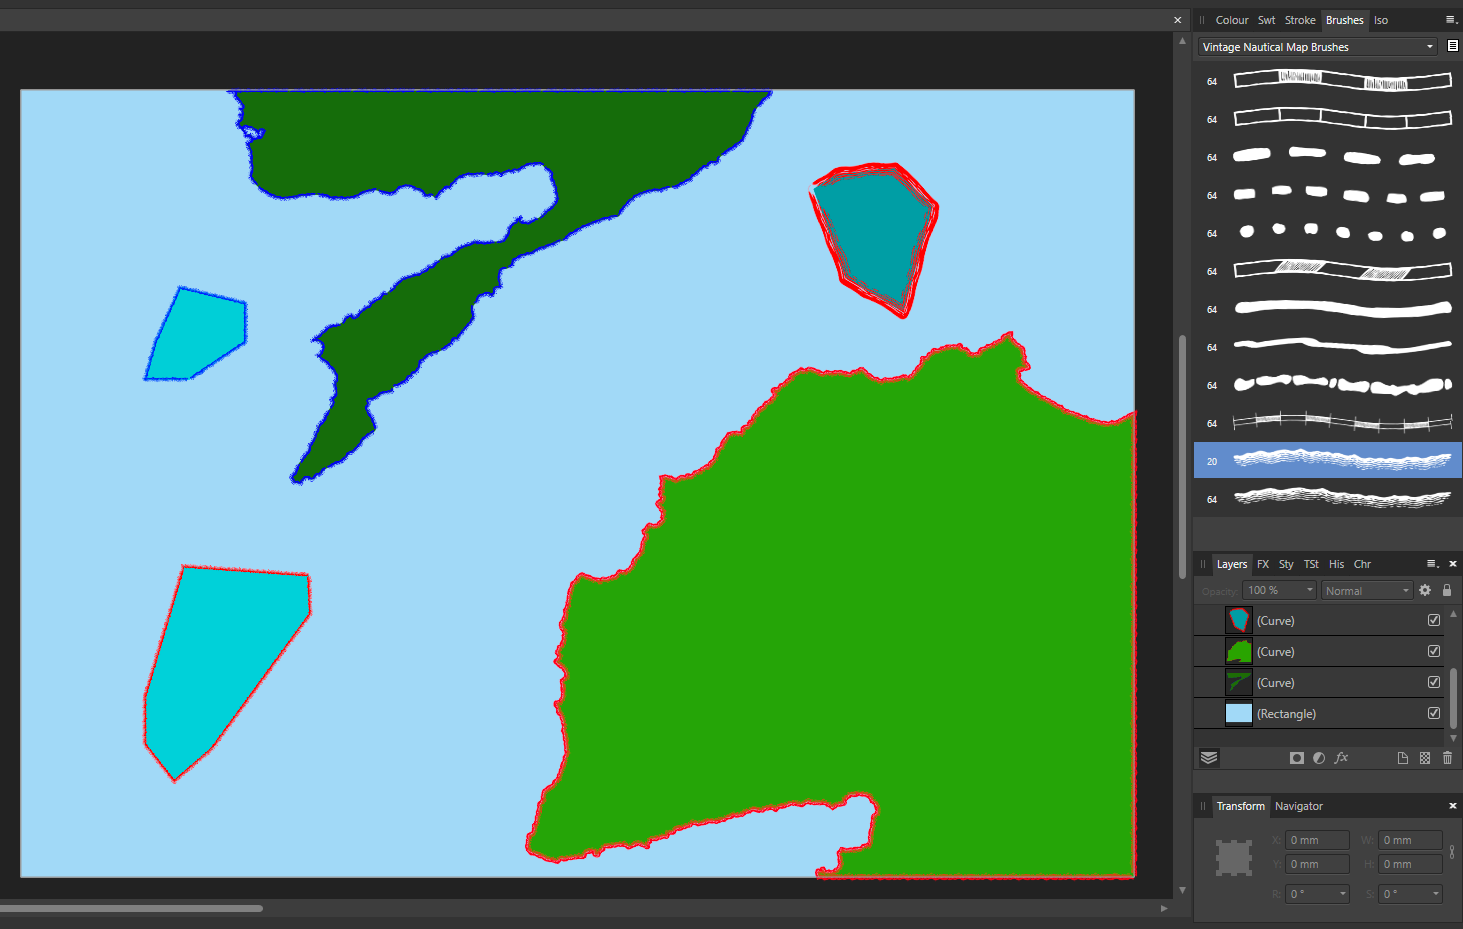
 I made some islands and edited the 'coastlines' with a brush I bought called 'vintage nautical map brushes'. So these are brushes that can be used as boundary lines and coastlines to make maps. As you can see on some of the coastlines (the blue ones) these brushes are, as they should be, neatly from thick to thin. While with other objects (the red ones) they are the other way around, so from thin to thick. Not how it's meant to be. What exactly am I doing wrong or how can I change this? In other words: how can I control the inside and outside of a brush for a line? The originale file: islands - kopie.afdesign
-
 With the brush tool, you can't currently use angle constraint lines while holding shift. Please add this (like in Photo's pixel brush) although click dragging + holding down shift should constrain to straight lines at 15 degree angles.
-
- 1
-

-
- straight line
- straight
- (and 4 more)
-
 I've searched for other forum posts first but couldn't find anything so I've listed it here. I'd like to be able to split any stroke of any shape into a specified number of anchor points. In addition, some manipulation of this would be useful such as having different gaps between certain anchor points. Thank you!
 -
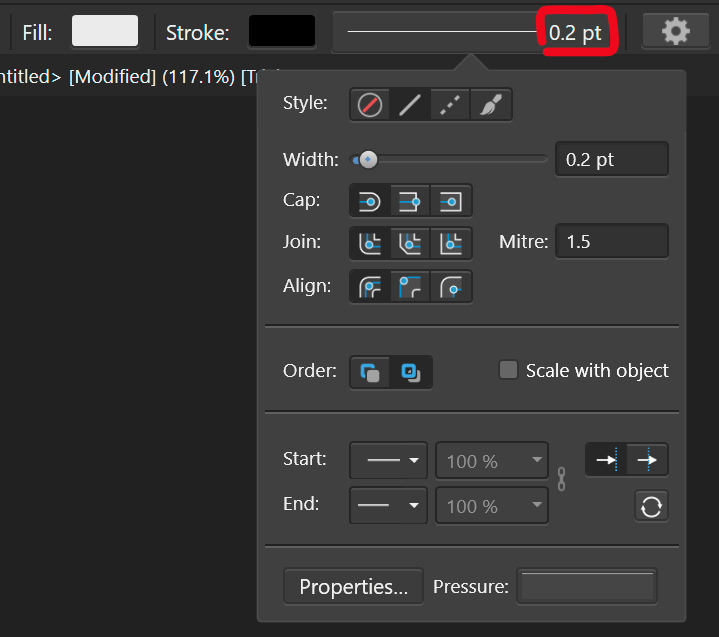
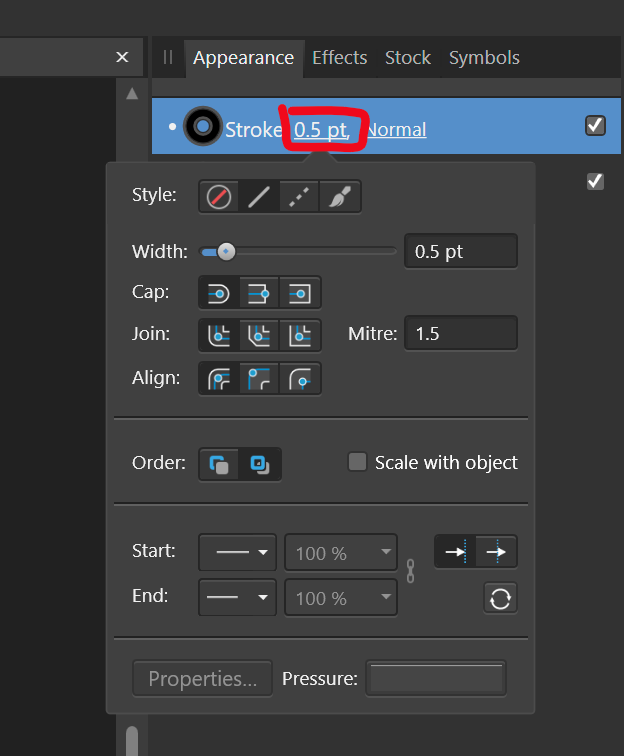
Problem Currently, changing the stroke weight is a two step process, where you first have to click to activate the dropdown to actually change the settings. There is plenty of space in the UI to access the stroke paramter directly, see below: Stroke settings.mp4 Proposal Therefore, I propose to make the parts of the UI that display the stroke size (highlighted in red) a value box. That way, it takes one click to change the settings. When doing so, the dropdown should still be displayed to get access to the additional settings. I could even see the stroke preview box becoming a slider (just like you can click drag on top of text boxes for feather and opacity in the pixel persona), because it wouldn't hamper its ability to serve as preview pane: Stroke settings slider.mp4 The stroke weight settings need to be accessed more than the other stroke settings and it is much quicker to input the size directly and avoids mousing over to the other input box. I also find it annoying to see the value that I want to change being displayed, with no immediate access to it.
-
 How is a pixel persona straight line done on an iPad?
 -
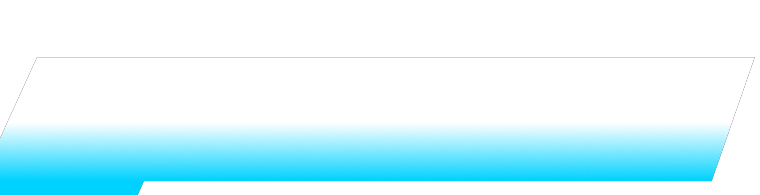
 When applying a gradient I'm noticing these dark lines within the inner white border of a shape. I have no styles or effects set. When I use a regular fill I still see it to some degree, but it isn't as noticeable. I thought maybe it was a rendering issue that would resolve itself out when I zoom out or export, but that's not the case. Any way to get rid of it ? GRADIENT FILL REGULAR FILL
-
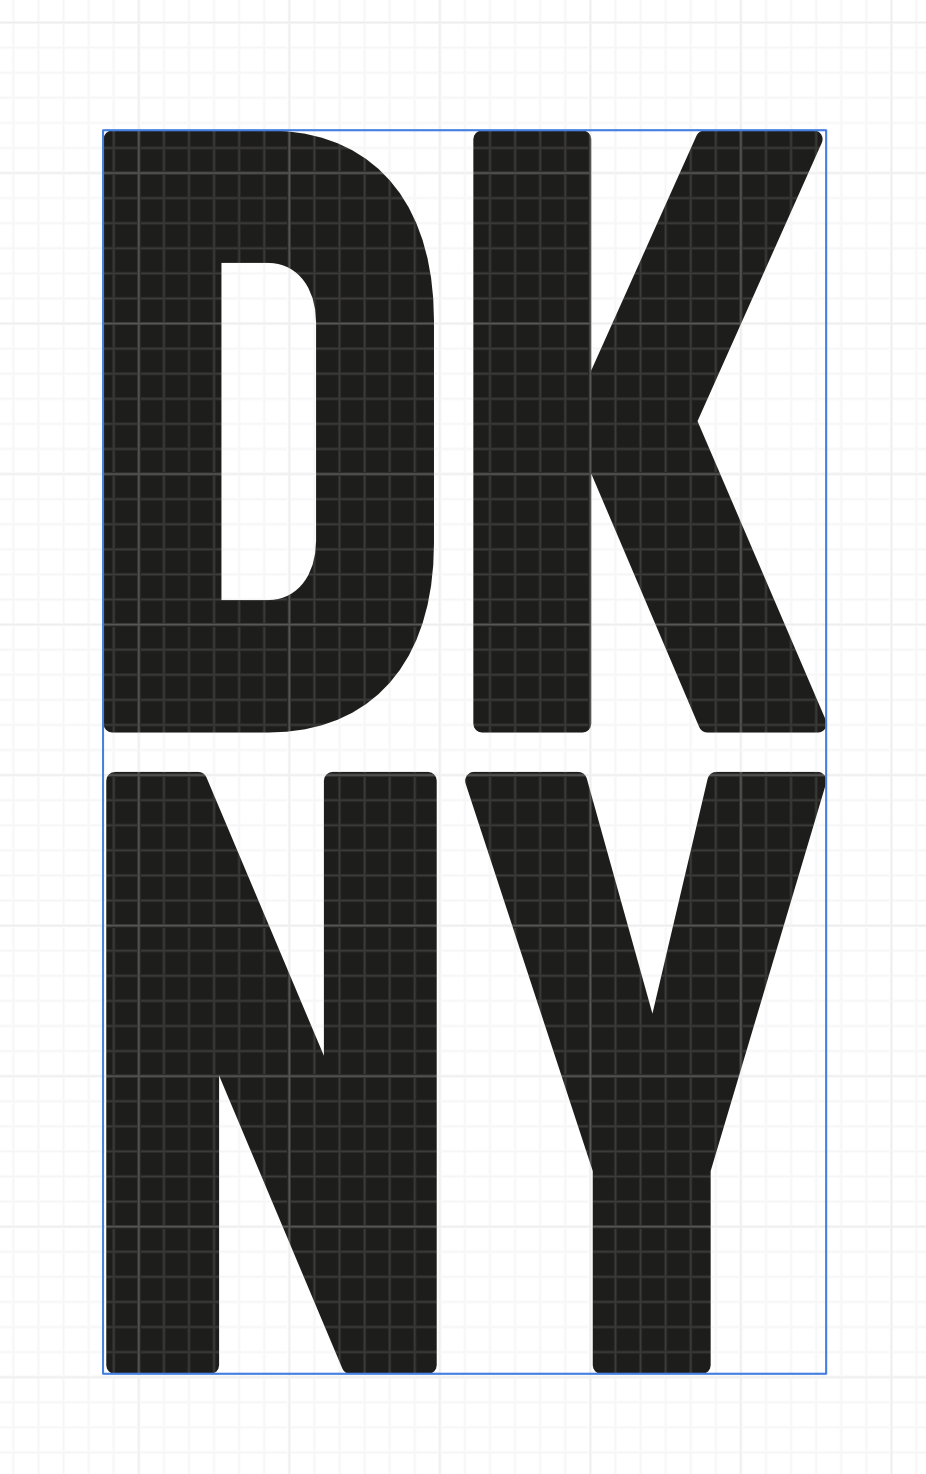
 How can I get the blue line as the outline of the type, that it surrounds the D, K, N and Y separately
-
 Is it possible to draw a line with a fixed length? I want to draw a line of 53mm in length, then another of (say) 65mm in length. I am using the pen tool, and have seen the "dimension" indicators as the line is drawn, but they vanish very quickly. I have searched for tutorials on the subject, but they all say, "click the pen tool where you want to start and again to finish the line". Not much help at all. I use a CAD programme at the moment, but it cannot deal with gradients and transferring the lines from CAD to Designer has proved problematical.
 -
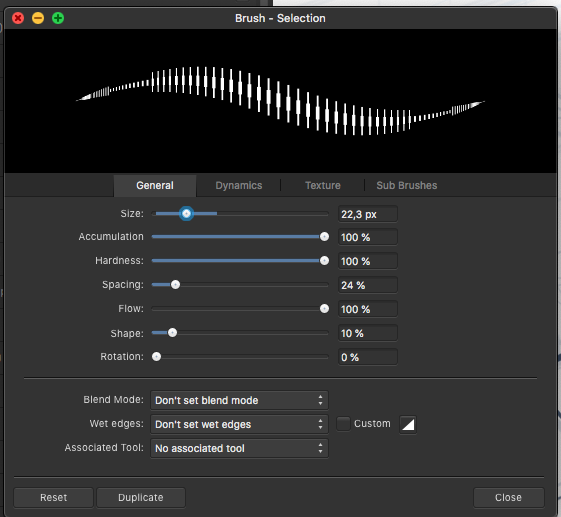
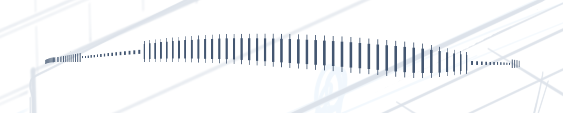
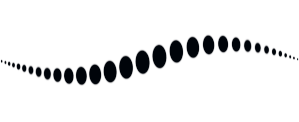
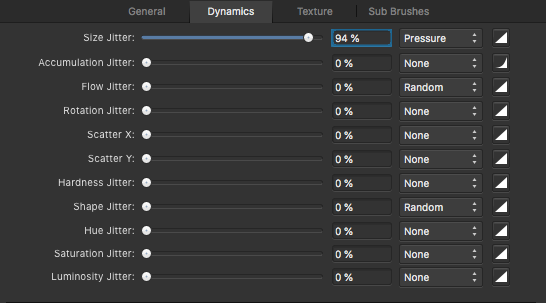
 I've had a hard time adjusting the brush to act in a natural way for drawing. I've compared with mainly photoshop and sketchbook pro and posted numerous reports about this. There are a few issues like jagged lines on low zoom levels and general inconsistent behaviour of hardness and size. Things you only notice when drawing or writing by hand on a tablet or Cintiq. Now I think I found what causes the latter! I was able to isolate what is going on by setting the shape to a narrow ellipse and the stroke to large spacing. Look what the preview shows. There are 2 things going on here: 1 Inconsistent size toward the beginning/ending of the stroke, causing a sort of 'arrow head' effect 2 The increase of the amount of dots towards the ending is too steep. Meaning the spacing between the dots in the end is near zero and in the middle pretty large. Some decay in spacing is useful since the relative spacing between dots should stay the same. But it seems that AP does not take the dot size into account and at certain settings the decay is much to steep, causing too many dots to overlap. I noticed that in photoshop and sketchbook pro this decay is far less and generally in better balance with the shape size. This presumably results in their smoother line behaviour. One result of this steep decay in AP is that soft lines are much harder in the endings than in the middle and pressure sensitivity feels a bit 'off'. All in all this explains the strange behaviour I was experiencing. This arrowhead effect is nearly invisible in the preview when the shapes are rounder, but in practice I always notice the inconsistent line behaviour because of this. Affinity photo: A drawn line to show it's not just the preview: photoshop: sketchbook lastly look at this soft line and how hard it gets near the endings. The steep decrease of dot spacing is what causes this. In all examples these are the dynamics settings: In my opinion two things need to change: 1 The arrow head behaviour is just off and needs to be fixed. 2 The spacing between the dots needs to be rebalanced in order to have a consistent line behaviour throughout different settings of spacing, dynamics, hardness etc. Generally speaking the dot SPACING needs to be in balance with the dot SIZE and SHAPE. E.g. the thinner part of a pressure sensitive line should be equally soft as the broader part of the line. Also when pressure sensitivity is set to linear, the line thickness change should also be linear. This is currently not the case and my guess is the inconsistent dot spacing causes this. I hope this helps refine the brush behaviour for AP!
- 18 replies
-
- 14
-

-
-
Did someone figure out that on iPad? On Mac/PC, it's possible when Cmd/Ctrl + left click with node tool in 1.9.
-
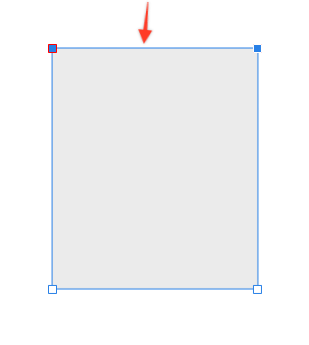
 I was wondering if Affinity Designer could add a feature that makes the ends of lines rounded. I looked for a post on how to create rounded edges, but I wasn't able to find a post on how to round the edge of the line drawn below. Is there a way to make the edge of the line below rounded in Affinity Designer? If not, could it be added as a feature? Thank you for considering this!
-
 I have attached a photo where I replaced a bland sky with one more dramatic. I followed Affinity's Sky replacement tutorial. The problem is when in enlarged, there is a white line between the foreground and sky. A second issue is when I zoom in and refine some of the rocks and bushes will not take the refinement. How do I avoid this? What am I doing wrong? Thanks,
-
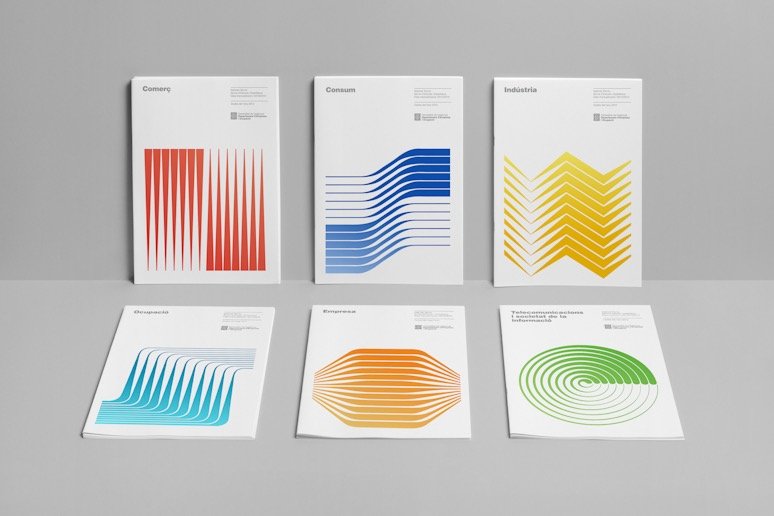
 Hello everyone. I think how i can make something like this in AF Designer? Anyone have idea?
 -
Hey! im trying to figure out how to make this kind of graphic without pulling my hair out and going nuts. I’ve tried with illustrator but can’t make it perfect. Anyone have any quick help to offer? The “E” image is the most relevant in this case, but I will have to try and make illustrations such as the colorful image. kind regards, gmann
-
Would be nice if you cloud add modifier key to delete line(s) between selected nodes instead of deleting selected nodes when press the Delete key without using "Break Curve" and select separated curve before delete. Lot of users from Illustrator are confused with current workflow, so this could make easier for them to adapt to Affinity
-
 I know there is an archived theme. Confirming that this problem persists in the newest version 1.8.3. Moreover we can observe these damn lines in Xnview picture viewer also, when viewing images, that were edited in Affinity Photo. So this is a real bug or not? I don't get it.
 -
 Hello! First and foremost, I'm new to the forums so apologies if this has already been suggested, I didn't quite see it at a first glance. I'm also not currently aware of this being a feature, but if it is, fantastic! I would like to suggest the ability to set the stroke width of an object to a variable, rather than inputting the actual width. This would make it a lot easier to adjust the line width on MANY objects if you're working on a project where you may not know what to set the line width at, or if you unknowingly used a line width too small. The variables could even hold other types of data, like color, opacity, etc. There could be a variables panel where you can add a variable, select what kind it is, and input the current value of the variable. Maybe it could even be based upon other variables if you always wanted to make sure VarA was always twice as big as VarB, in terms of sizing. If something doesn't quite make sense, feel free to ask questions as sometimes I can miss details. Thank you for taking your time to read this!
 -
Hey, developers. There is a suggestion to improve one function in the program. I think that many others who draw on iPad and use the symmetry function lack accurate positioning on canvas. The symmetry guides have no anchorage and there is no way to change the angle accurately or go back to the previous position. Please add either the snap or the possibility to position the symmetry guides by numerical values. Thank you very much.