Search the Community
Showing results for tags 'layers'.
-
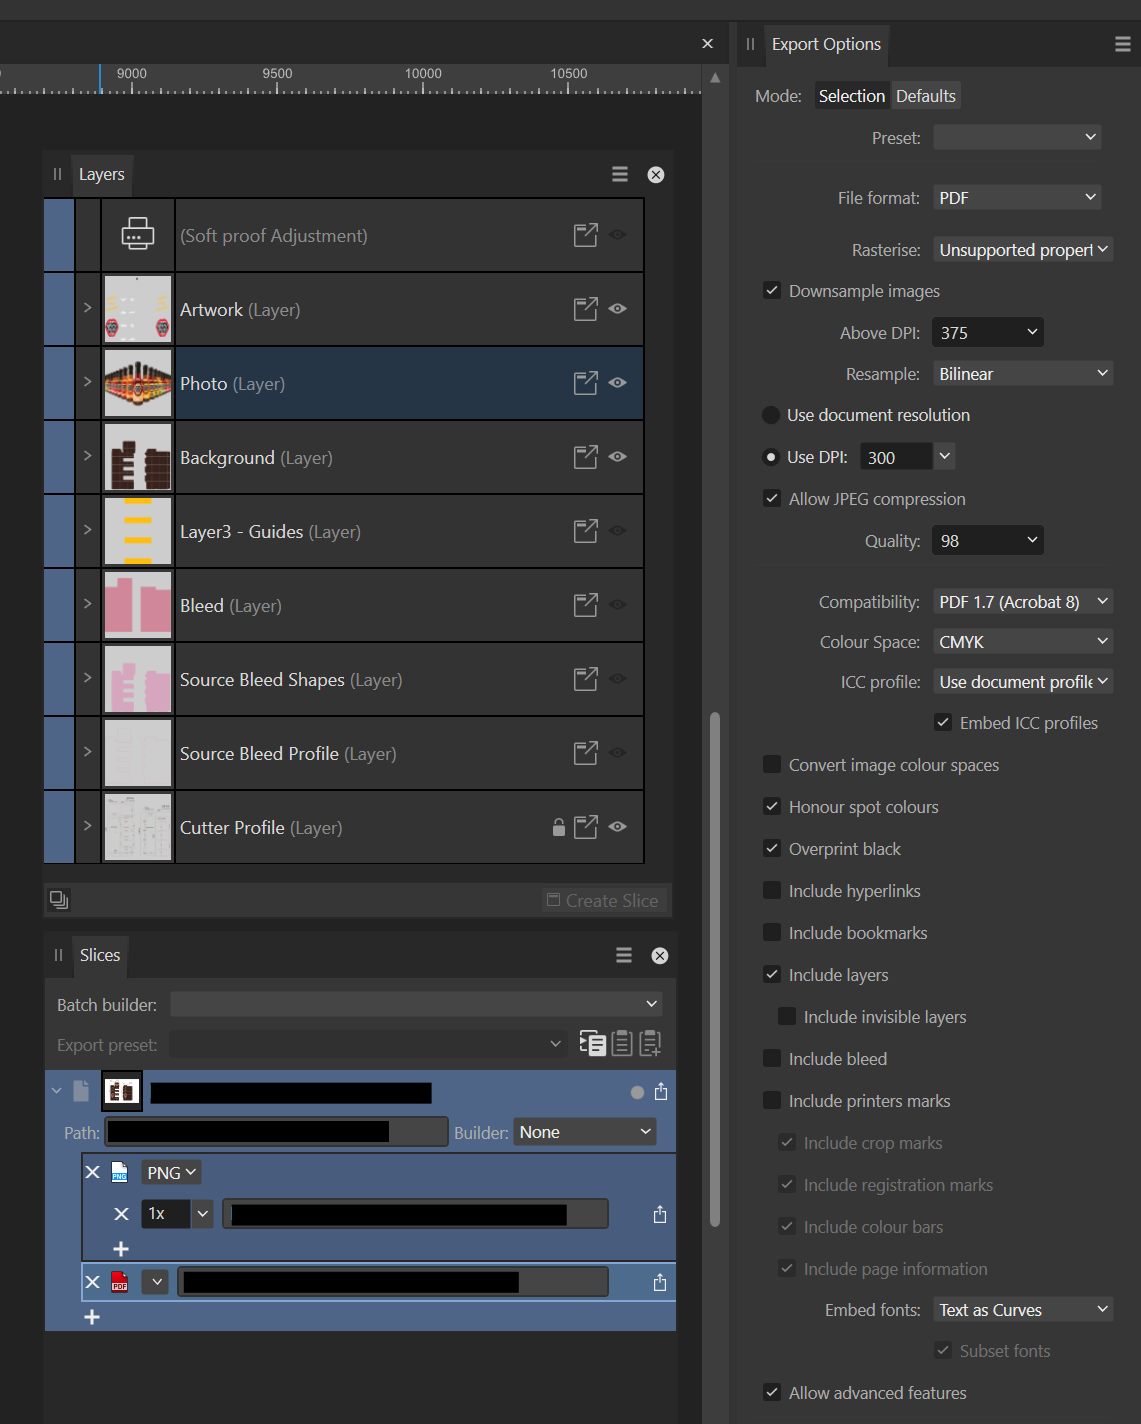
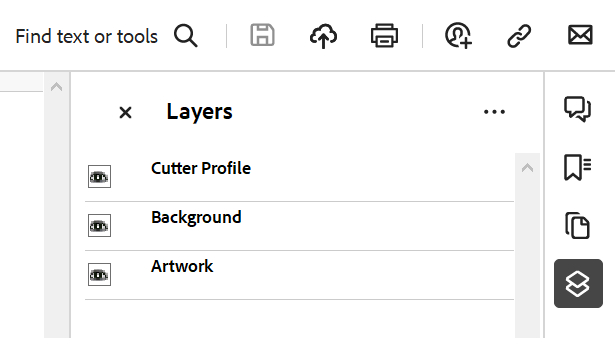
 Hi everyone, I'm exporting some artwork to PDF and I'm unable to export one layer as a layer. The results is that all but one layer export as expected and the contents of one layer appear at the top level and not as a layer. Here's the setup in Designer: And here is the result when opened in Acrobat Reader: The Photo layer is missing. The Photo Layer contents appear at the top level so this might not be a showstopper but I'm curious as to why it didn't export. Any thoughts?
-
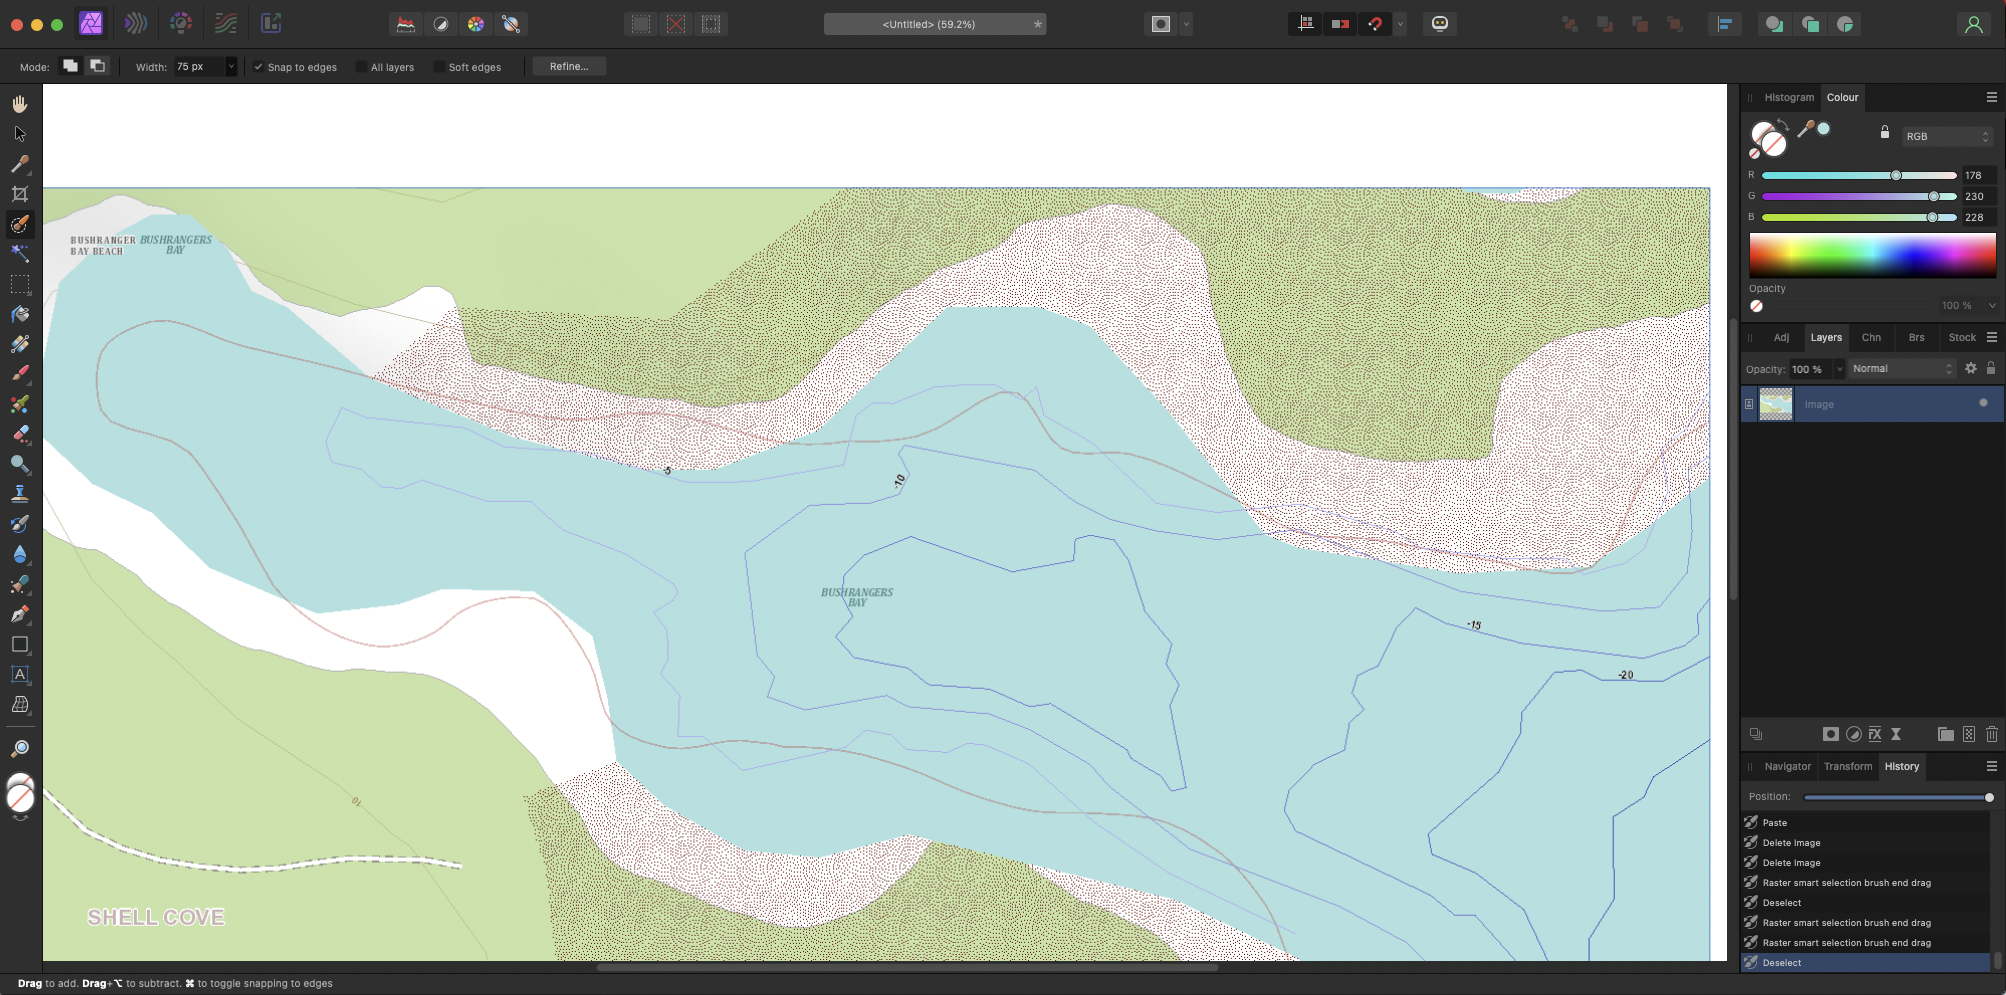
 Hi, I've tried creating a new layer from selection as explained in this video but it doesn't work for me. I have the latest version of Affinity (2.4) for Mac. Attached a photo of my interface prior to making a selection.
-
 🇬🇧 The current version (v2.4) of AD does not allow you to rename a selection of several layers: if you run the command, it is ONLY the first (at the top of the list in the Layers palette) which is renamed (?!). Too bad, it seems so obvious, this impossibility is very frustrating... but perhaps the extended function will be implemented in the future... In the case where you ONLY have curves to rename and you accept that after this manipulation they become only simple curves, select them all, launch the “Merge curves” command, rename the object of this merger , then run the “Separate curves” command. Each curve resulting from this last command will have the name given above. @GarryP: This is a workaround to rename multiple curve layers with the same properties under the same name. Disclaimer: This won't work with everything. 🇫🇷 La version actuelle (v2.4) d'AD ne permet pas de renommer une sélection de plusieurs calques : si l'on lance la commande, ce n'est QUE le premier (en haut de la liste dans la palette Calques) qui est renommé (?!). Dommage, cela paraît tellement évident, cette impossibilité est très frustrante… mais peut-être que la fonction étendue sera implémentée par la suite… Dans le cas où vous n'avez QUE des courbes à renommer et que vous acceptiez qu'elles deviennent après cette manip que de simples courbes, sélectionner-les toutes, lancer la commande “Fusionner les courbes”, renommez l'objet de cette fusion, puis lancer la commande “Séparer les courbes”. Chaque courbes résultant de cette dernière commande portera le nom donné plus haut. @GarryP : ceci est une Solution de contournement pour renommer plusieurs calques de courbes avec les mêmes propriétés sous le même nom ». Clause de non-responsabilité : cela ne fonctionnera pas avec tout.
 -
 I want to be able to clip an adjustment layer to another, so I can localise the effect. A typical example is clipping a HSL layer to Curves for dodging and burning. However, this doesn't look like it's possible in the typical way you would in Photoshop. Can AP2 do this as other apps can, and if not, how can it be achieved here? I want to be able to clip an adjustment layer to another, so I can localise the effect. A typical example is clipping a HSL layer to Curves for dodging and burning. However, this doesn't look like it's possible. Can AP2 do this as other apps can, and if not, how can it be achieved here? Also, I have a perhaps related problem. All of a sudden, adjustment layers within a group won't activate regardless of visibility. The only exception is if there is a filled layer underneath. See the video for a better showcase. group-layer-error.mp4
 -
 Hi, I don't know if this is an available option already, but if not, I would be practical to directly create shapes in a group of layers, by that I mean, let's say for example I'm creating a 3d object on the isometric grid, and I would like to put all the top shapes directly in a group of layers as I create them, so, just imagining here, I go on Window, select Group Layer, now every time I create a shape it goes directly in that group and when I've finished i can rename it Top Shapes for example and I I have the option of locking them all at once or hide them, do the usual stuff you can do on groups of layers, now I can create a new Group Layer and put all my side shapes or front shapes etc. I hope that was clear enough 🤣
 -
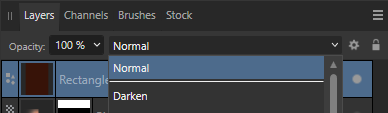
A small but frequently encountered issue that is quite annoying: A very common way to try various blend options (in both photoshop and Affinity) is to click the dropdown, select an option (so the dropdown menu becomes the active element in focus) and then use the mousewheel to flick through the options while looking at the results Quite often in affinity Photo (i think after an update) the dropdown box looses focus after selecting a mode in the dropdown list and you can no longer use the mousewheel to flip through the layer blend options. the dropdown element simply looses focus after an option is selected to get the dropdown to be active again, you have to click the dropdown box, then click the dropdown box again (open and close it, not selecting any of the options in the menu), then you can see the element gets a blue outline, and the mousewheel works again to flip through
- 7 replies
-
- 1
-

-
- mousewheel
- layers
- (and 2 more)
-
 What I'm thinking of is an alternative to the classic layers: a node editor, where each layer would now be a node, with a mask and before input, so that you can reuse layer groups. What I'm thinking of: Each node has inputs and outputs depending on the type (example blur: input=image, radius form=type, radius, output=image) Creating groups and naming them storing created groups as global templates (like macros, but as components that can be stored) adding custom inputs to groups with custom labels maybe sharing groups online? (like as a marketplace for quick templates) As an orientation for how it would work, I would like something like Blender 3Ds node editor. As for how it's integrated into the UI, either it's a separate editor that you need to toggle on/off on a per-project basis, or it's a layer (like a node layer or something) that then opens a UI
- 1 reply
-
- 1
-
-
- affinity photo
- affinity designer
- (and 7 more)
-
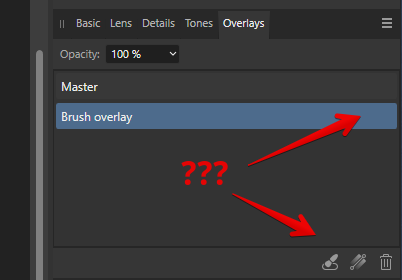
 Why am I seeing the icon to the left of "White Balance Adjustment". I've never seen this before and there seems no explanation as to what it is (seems to only affect the layer below I think) or how to get rid of it. Normally I expect adjustment layers to affect ALL layers below which is what I want. Not sure how to look this up in a FAQ as I don't know what it is called. I assume I did something to make this appear.
-
 I often want to compare two different versions of a shape in two layers. Is there a way to do that with one keyboard shortcut without having to perform three actions (hide layer => show other layer => press spacebare to hide bounding boxes)? -thx Dave
 -
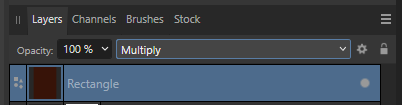
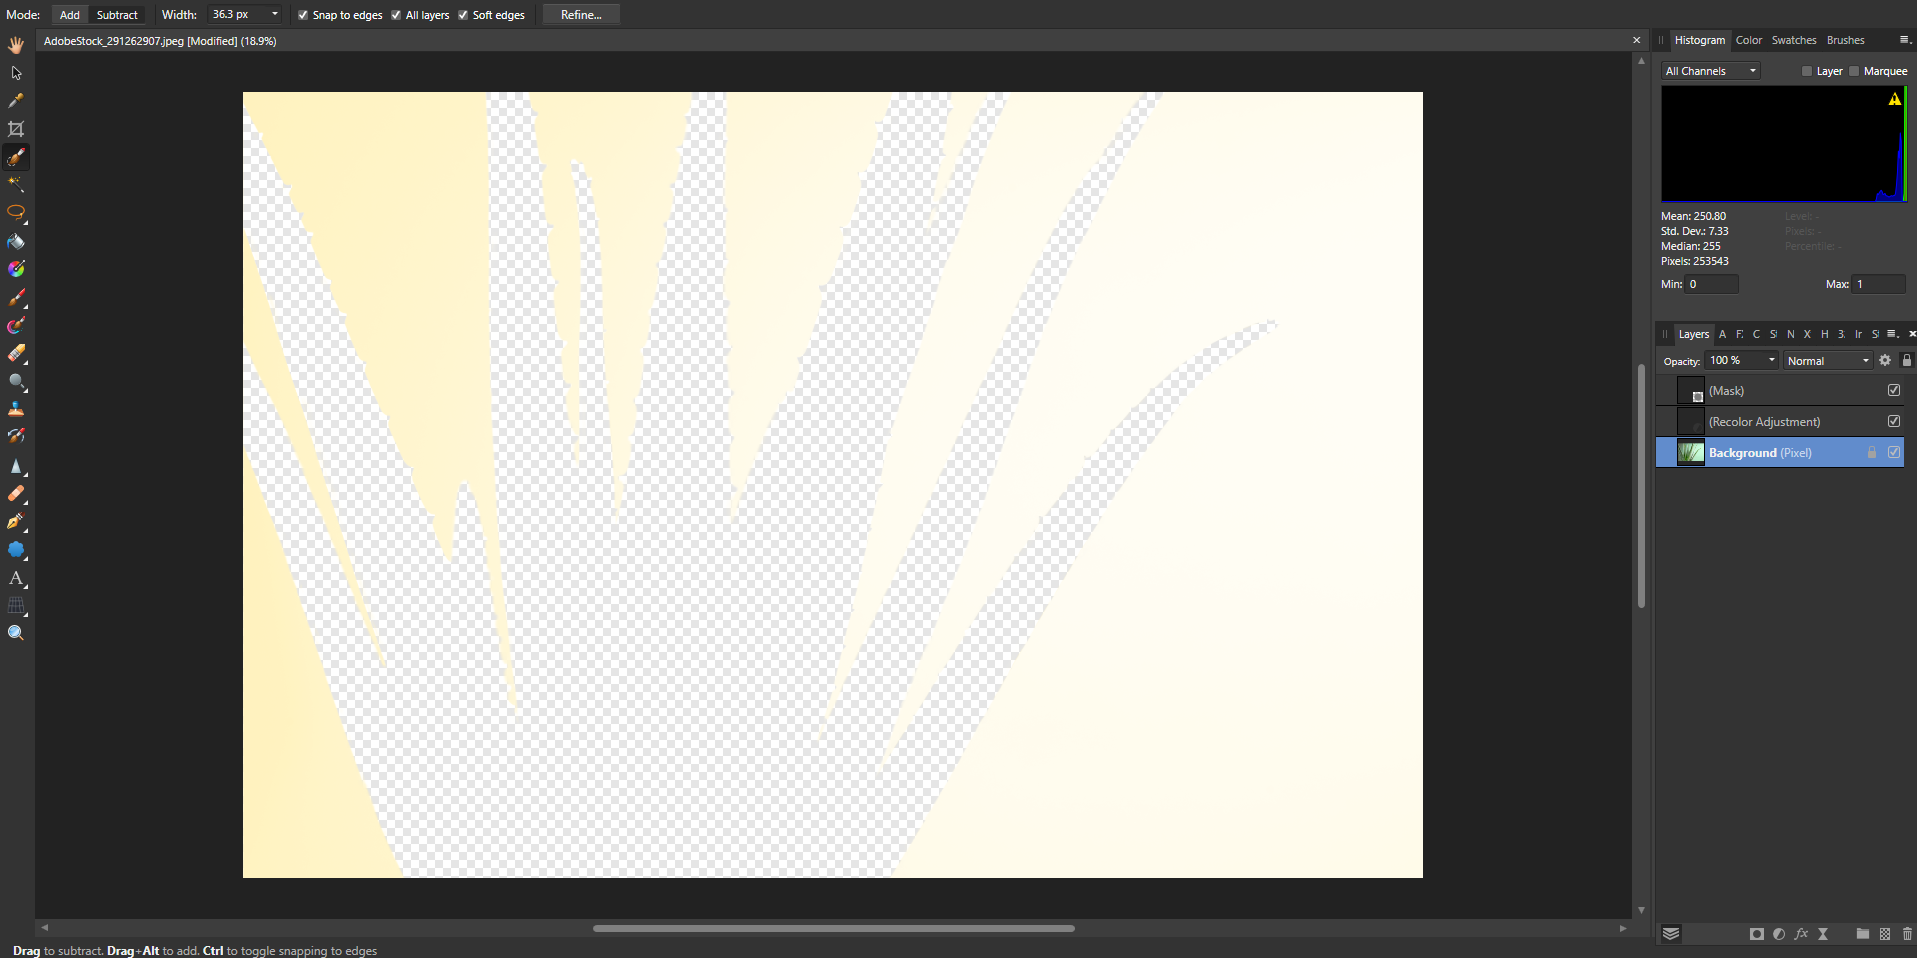
 Hey, I'm in the position showed on the screen. I wanted to change colour of the background. I already did, but how to merge it all together to have green plant and creamy background?
-
 When you have many layers that includes different adjustments or effects I feel that the layers panel gets very cluttered, and it's hard to find the layer I am looking for even though I try to be thorough with naming the layers. I think it would be much easier to overview the layers if the name sticked to the same position regardless anything else happening within the layer. I've added a screenshot with a suggested solution (the suggestion probably have a lot of challenges that I have not thought about, but I thought it might at least be a good way to explain the clutter I am experience today, and how much simpler it would be with a consistent title placement). Finally, just want to state that I truly love Affinity and all the great work you do!
-
 This is so necessary for keeping objects in register for things such as animation.
 -
 I cannot preview the grouped layers in the layer panel in V2, but no such bug existed in V1 on the same computer running the same system.
-
 Scenario: I am working on creating a tileset for my game. In order to make my tiles seamless, I need to ensure that each side is able to match up with the opposite. So what I have is a single tile created, and I created copies of that tile on all edges that way I can see what needs changing. What I would like to do is have one 'master layer' per say, and have each of those copies just be representative of the original master layer. I think this is something you can do in photoshop but not sure. Anyways, is there any feature or assistance with this type of workflow?
 -
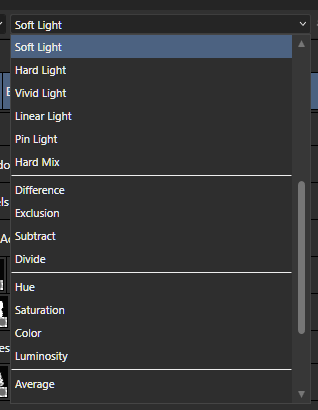
Hello, I tried to search and didn't find any related topic. I have been wondering why the Layer's blend mode's list is short and doesn't display all the modes at once. Is there a setting in the preferences that I might be missing? 🤔 Juan
-
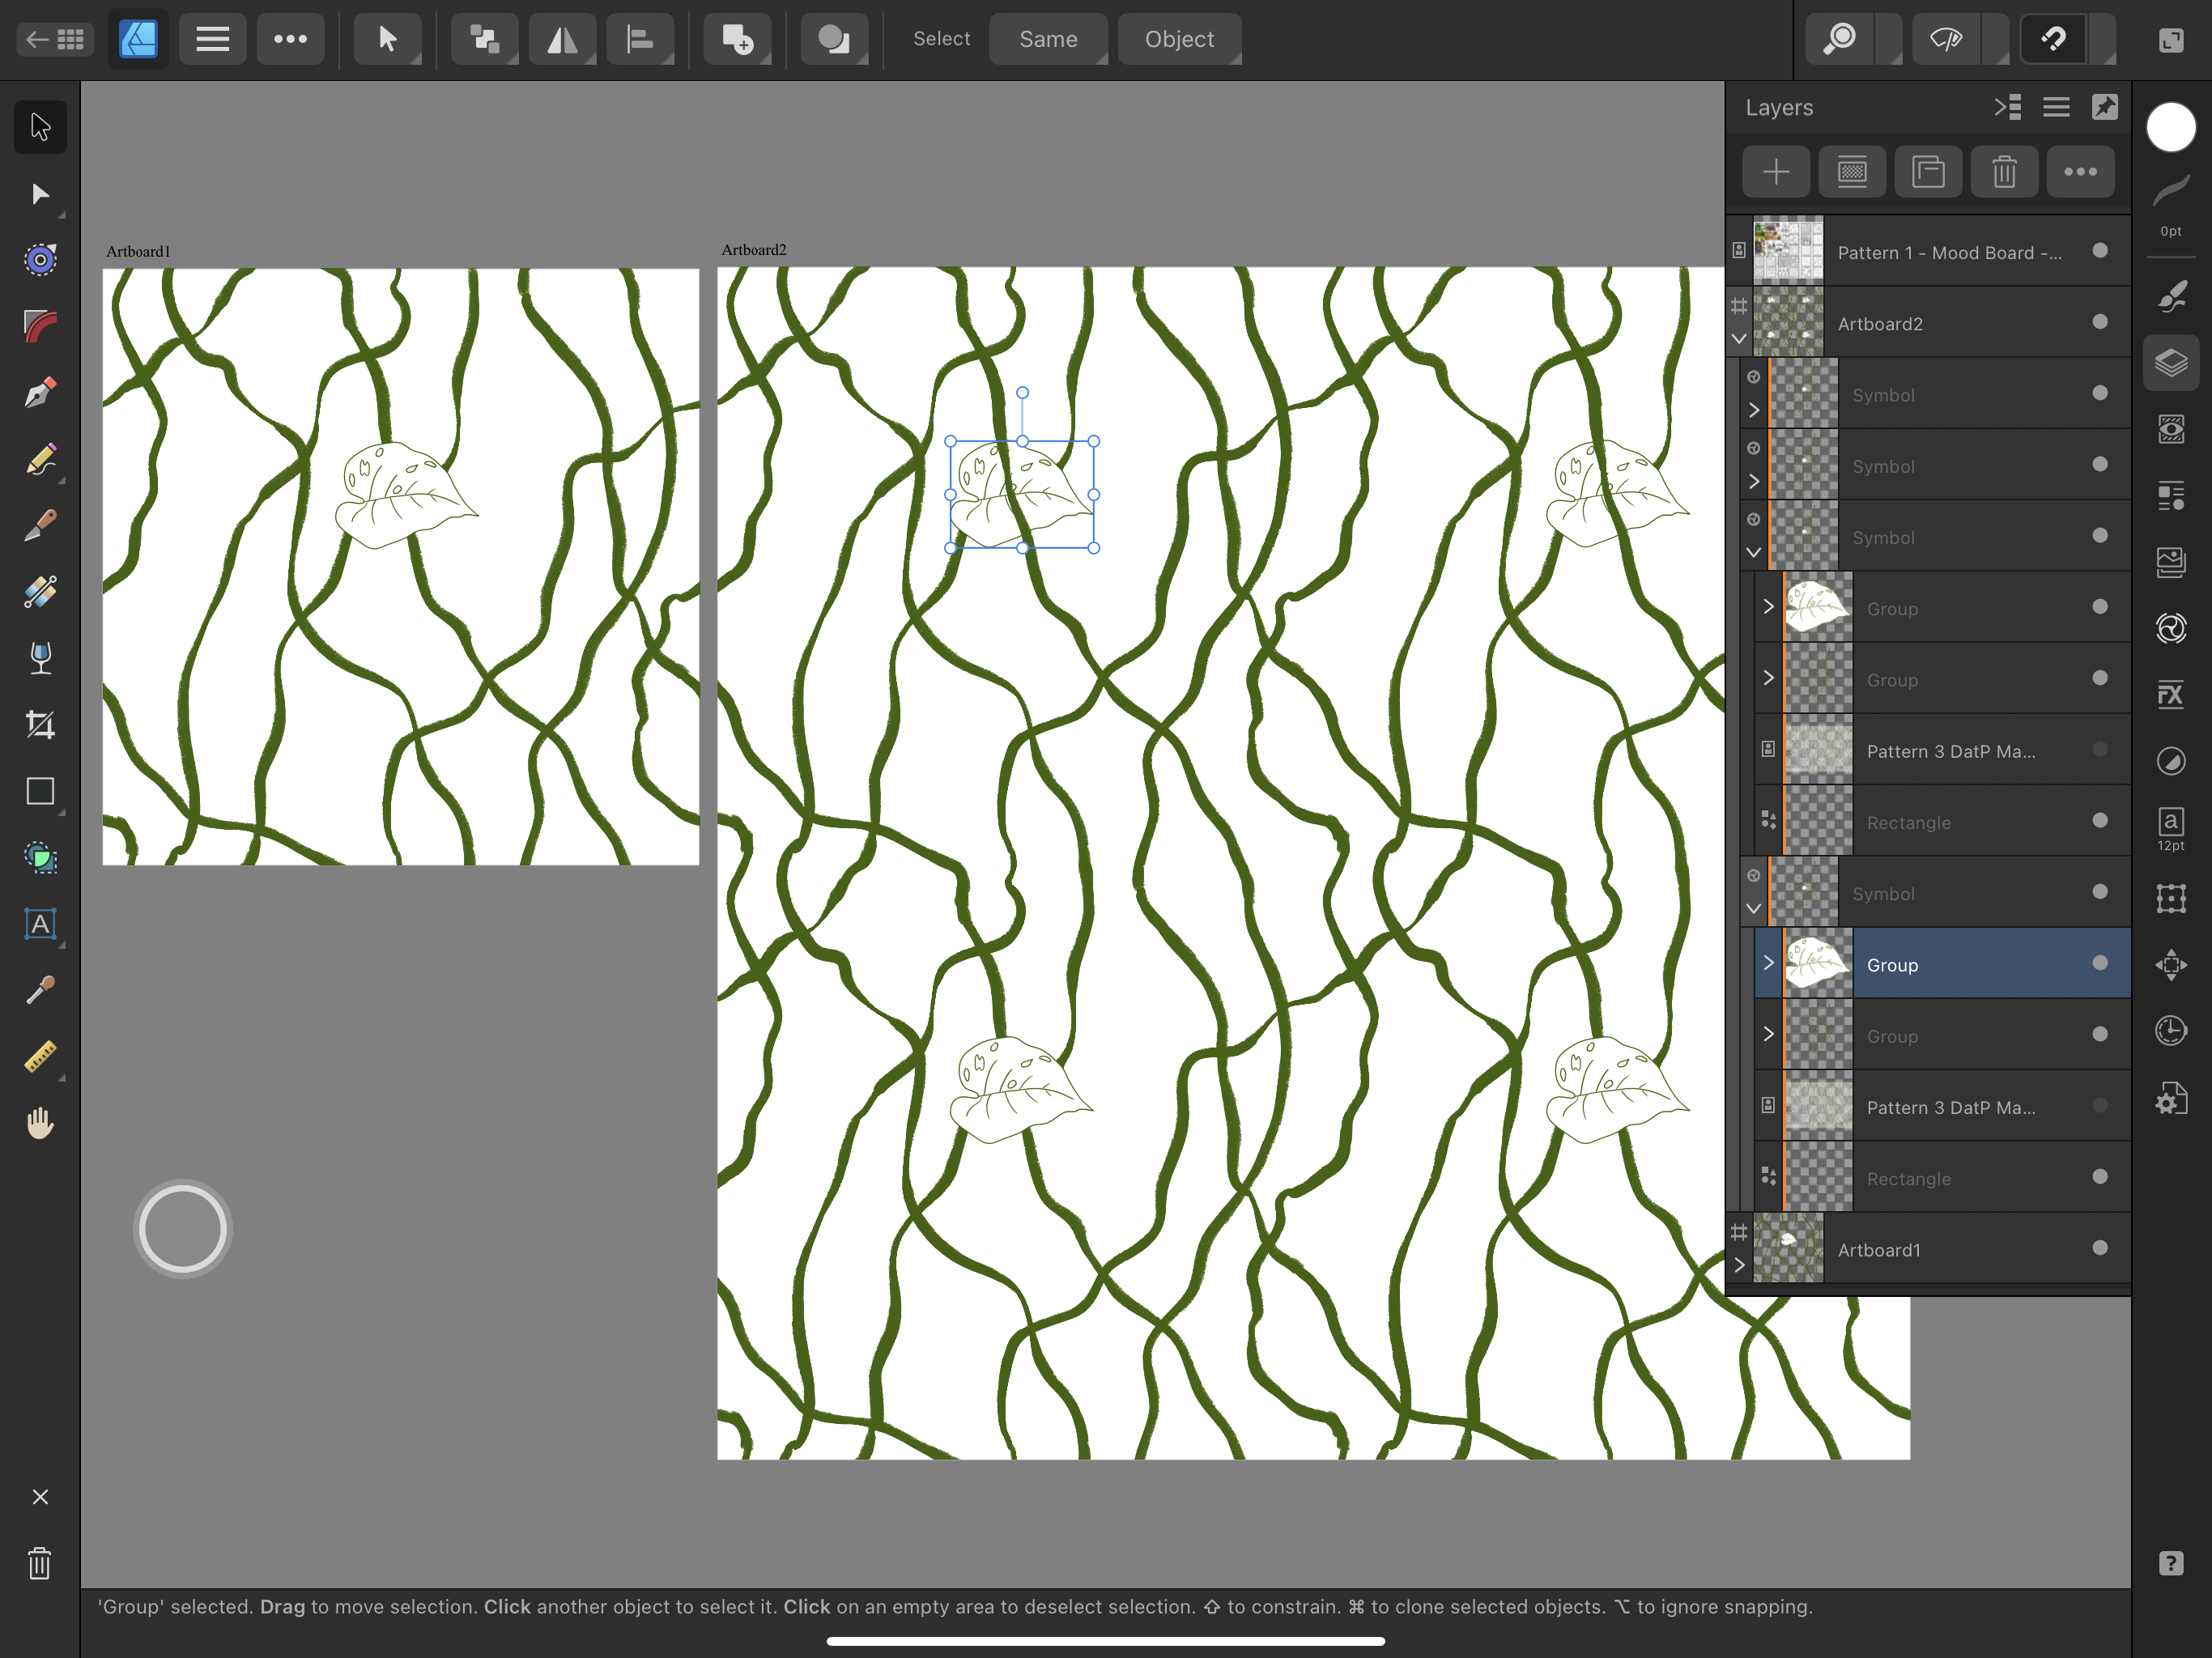
I am working on a repeat pattern utilizing the symbols capability. However, there is an object that is not syncing up properly and no matter what I try, it will not go all the way back or even underneath the symbol that it is crossing over. I am not sure what to do because I've tried sending to the back the initial object on Artboard 1. That did not work. I re-layered the objects so that the selected curve (and its whole group) are underneath the object I want on top, but that does nothing. I have no idea what I am missing or doing incorrectly. Not sure how to fix this. Included is a screen shot of what is happening. I wasn't able to find any FAQ topics that answered or mentioned my question. In the screenshot the object selected is the one I want on top. The vine crossing over it is definitely included in the group that is below that object. I have checked every section, grouping, and layer of each Artboard and every occurrence of that repeating vine. All the other occurrences of that vine are behaving as desired. Not sure what is happening with the top half of the repeat on the right. Hopefully it's an easy fix and that I am simply clueless. Affinity Designer 2, latest update, iPad Pro.
-
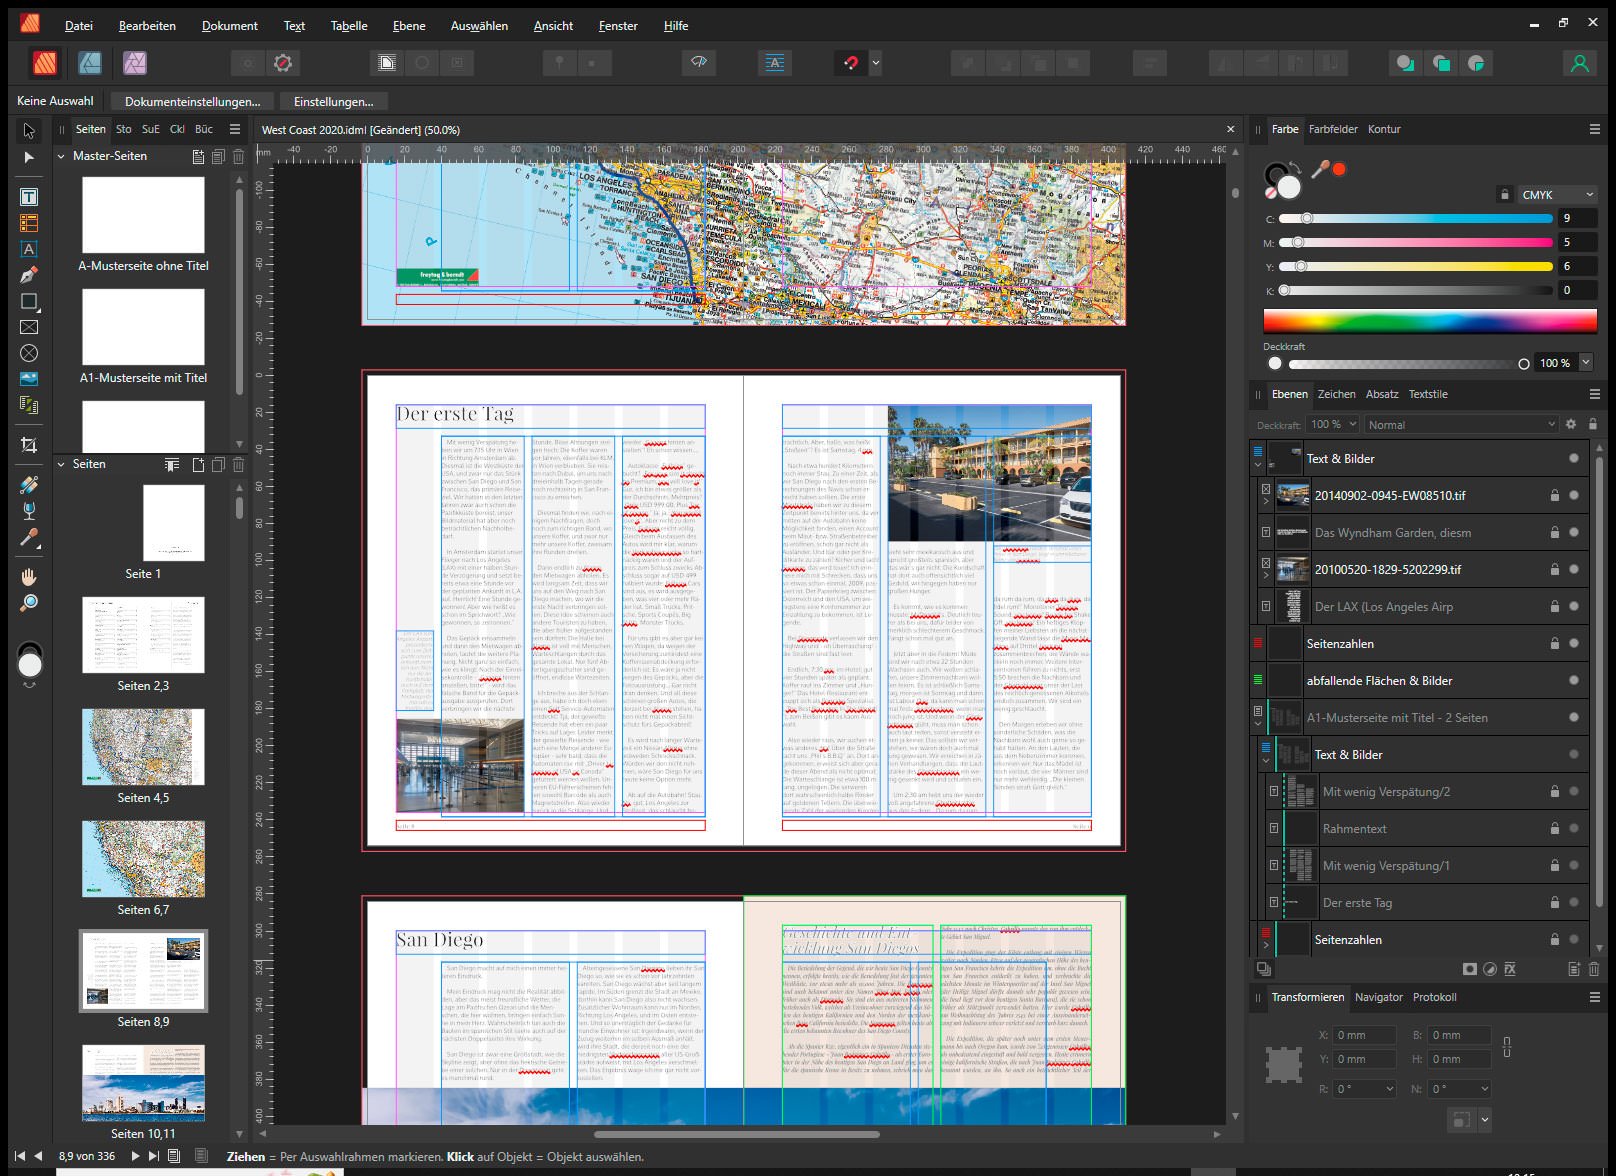
 My main problem at the moment: My documents are/were previously created in Indesign CS6. After having successfully implemented some smaller projects in Affinity Publisher, I wanted to migrate other projects as well. And in doing so, I encountered problems that I a) didn't expect and for which I b) didn't find any explanations or help in the form of tutorials. The tutorials and also the help files probably explain some of the affected details like master pages, layers, frame texts, but without addressing my problem or even touching on it. To migrate documents from InDesign to Affinity Publisher, I created IDML exports and opened them in Affinity Publisher. These are layered documents, with various, even hierarchical, master pages, with basic text frames on them, activated on the effective pages of the document using [SHIFT][CTRL] and then used. For InDesign, these text frames are then editable on the relevant effective page. Affinity Publisher apparently sees this quite differently. After IDML import, I can edit all text frames inserted directly in these pages (e.g. for image texts, info frames, etc.) that are on "regular" layers, but not the text frames that I have brought into the page from the master page. I hope this is understandable for outsiders. These text frames, which in my case contain headings and the main text respectively, I see on a strange layer, which on the one hand is labeled with the name of the master page, but on the other hand is grayed out. My question: How can I move these frame texts to one of the "correct" layer ("Text & Images")? And this in the whole document, not manually page by page; after all, these are documents with 200 to 450 pages, but they should be adapted to new circumstances year by year. Additional question: After using optical kerning in InDesign for text, I feel now like wet-shirted in the wind with Affinity Publisher. I would have to reformat or rewrite to appropriate length every single text on every single page. Is there a solution here? Because it looks like ignoring optical kerning for Sans Serif is almost a matter of faith. Which makes a feature update in this direction not likely. My considerations for switching to Affinity Software were: I could continue to work on these documents with Adobe InDesign until CS6 stops working at the current OS level. I could, but only very theoretically, afford an InDesign subscription from Adobe. But since I don't want to support subscription models at all, and on the other hand I've been financially supporting Sans Serif with the Affinity palette since the first version without using the products in any meaningful way so far, I thought the moment when my first InDesign tool no longer supported version CS6 was the right one to switch completely. This works quite well with Affinity Photo with a few sacrifices and some tedious conversions in terms of operation. Affinity Designer, like Adobe Illustrator, I will hardly use. And with Affinity Publisher, I'm quite far along, although the changeover is much more complex than with Affinity Photo. I'm still a bit behind there.
-
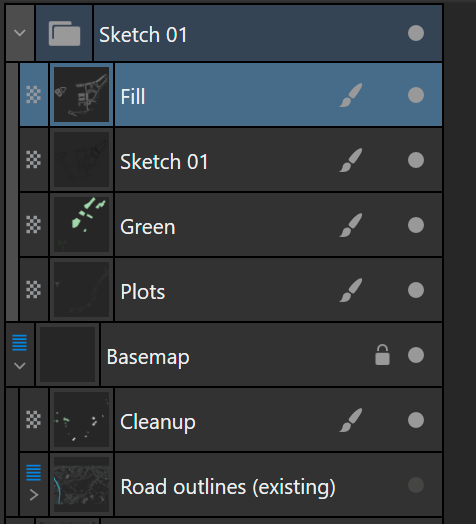
 Usually, I work with multiple layers: one is a trace-over background and then I have a group with design layers (line-work, fills and some other miscellaneous pixel layers). Something like this: I would like to have a 4th option in the Flood fill tool, which is: below, only within current layer/ group. This ensures that my trace-over layer will be discarded when filling, because it is outside of the design layer that I work in.
-
 Hello! When working with the “Develop Persona” section, I was very surprised by the lack of elementary tools for working with mask layers! Namely, what is missing so far: There is no way to show, turn off, hide or fix a layer with a mask. I can't invert the layer mask. I can't copy the mask of one layer to another layer. There is no way to adjust the mask to select dark or light parts of the image for processing the RAW file. All data about layers and masks is deleted after I return back from the "Photo Persona" section to edit the raw file in the "Develop Persona" section. A huge request to developers is to implement in the next updates these elementary tools and functions that are available today in almost every raw editor and converter. Thanks! 😗👍
-
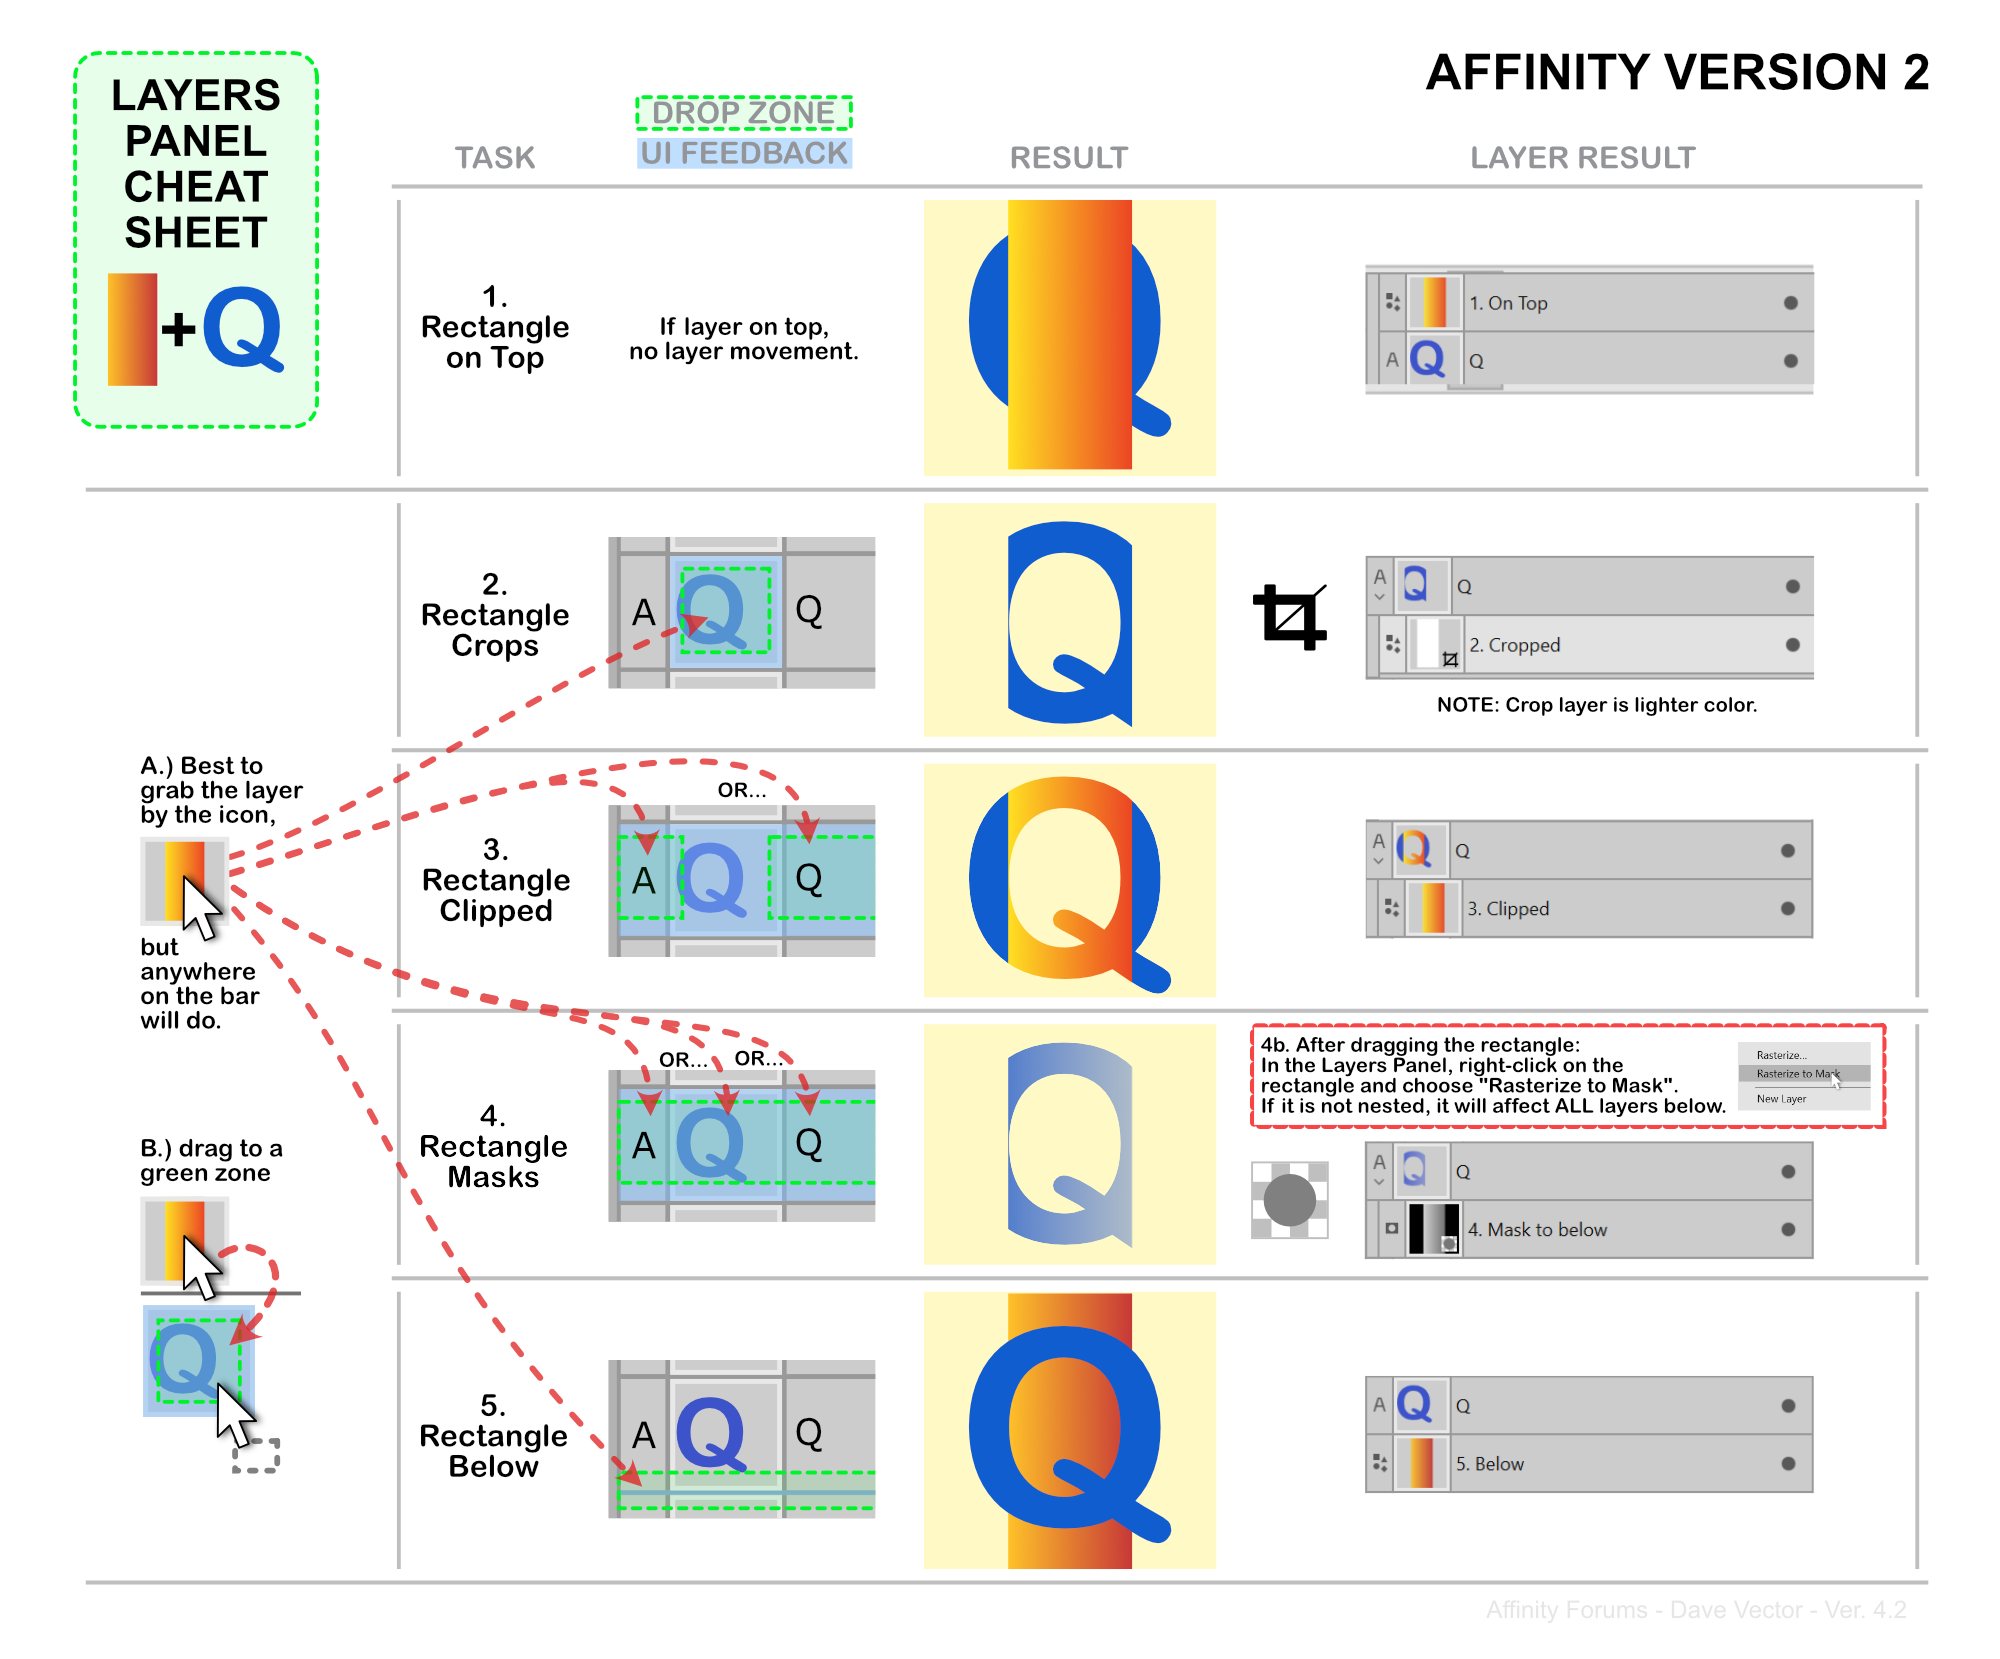
 Hello, With version 2 of the Affinity apps comes with not only new layers interface, but also new layer drop zones and new UI feedback (blue highlights). I updated the cheat sheet to reflect these changes to help anyone who is looking for better understanding on how layers behave when dragged within the layers panel. Original post for version 1 of the cheat sheet here. This is a basic guide. It does not address all the possibilities of non-destructive masks, multi-nested layers, etc. There are many complex possibilities. I hope it serves to get you on the right track to understanding the foundations of layers in the Affinity Apps. Here is a PDF version: Layers Panel Cheat Sheet v4.2.pdf Note that my example uses the light UI. I did not create one for the dark UI, but the principles and feedback are the same.
-
 After I have filled several objects with styles that I have created, how can I later click on an object and reveal which style fills that object? I can reveal which layer it is on, but can't find the style that was applied to that object/layer.
 -
Platform: MacOS 12.6, Apple M1 Max processor, 32 GB memory. To reproduce: Open an image (stock image is fine). Add live adjustment layer - exposure. Add live mask layer (Luminosity). All works fine to this point, changing mask and exposure. Now, try sliding mask layer down (click, drag downwards, blue line appears between exposure and base levels). Result - crash. Reproducible. Every time. crash-report.txt
-
 In Design 2 can the color of multiple layers, in a group, be changed without changing each layer individually?
 -
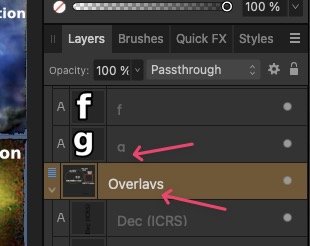
 First of all, congrats on the release of the new version. I got excellent value from Designer v1, so was happy to pay again. I am looking forward to playing with the new features. I noticed a minor glitch in text display in the Layers pane. Descenders get chopped off at the baseline. See the "g" and the "y" in this screenshot: Hopefully it won't be too hard to fix Best wishes Will
-
 Just revitalizing this huge thread from the 1.x version since this crucial (but rather complex) feature still has not made it into Publisher. 😢 The original discussion is here.
- 10 replies
-
- 7
-
-
- layers
- feature request
- (and 1 more)