Search the Community
Showing results for tags 'invert'.
Found 21 results
-
 Some initial background info: #1 - I work on Mac and am preparing to update to a new Mac Mini. #2 - I have been an Adobe Photoshop (plus Adobe Illustrator and InDesign) user for a little over 20 years (but trying to decide if switching to Affinity products would be a good alternative). #3 - Have been watching a lot of YouTube tutorials to find out more about Affinity Photo but for some reason, either people are not fully understanding my question or they are simply not familiar enough with Adobe Photoshop. #4 - And most importantly, I need answers from someone who is totally knowledgeable with both: Adobe Photoshop and Affinity Photo..............and a person who knows and understands the difference between creating a Selection and creating a Mask. There is a distinction albeit, both Selections and Masks are commonly called "masks". Now my question: Does Affinity Photo allow one to activate the "Quick Mask mode", and be given the choice to choose between "Mask area" and "Selected area"? (and then allow the user to select a paint brush (NOT the Selection or Mask brush), but rather, a paint brush (with black selected as the foreground color) and then commence to "paint" a translucent red (or any color of choice) "Selection" on the areas of your image that you wish to be "Selected" (NOT masked, but rather, "Selected"? And taking this a step further, Does Affinity Photo allow the user to exit Quick Mask by pressing the "Q" key (on a Mac)..............and does Affinity Photo allow the user to "invert" the "selection" to a "mask" and visa versa? (CMD+Shift+I) on a Mac If you don't follow my questions, then you probably don't have that much knowledge of Adobe Photoshop. I would greatly appreciate getting the answers to my question from some kind folk or folks.......... Thanks, Roger
 -
 this is happening in all v2 programs but right now, i'm having difficulty in publisher. attached are screenshots of the problem. first shot is choosing the top grunge overlay layer to invert. second shot is ALL THE LAYERS getting inverted. can't figure out how to invert ONLY that which i've chosen. thank you.
-
 I select my thing using Flood Select Tool then click Invert Pixel Selection and it shifts. Happens every time but not for a new document. OS Name Microsoft Windows 11 Pro Version 10.0.22000 Build 22000 CPU AMD Ryzen 7 3700X 8-Core Processor, 3593 Mhz, 8 Core(s), 16 Logical Processor(s) GPU NVIDIA GeForce RTX 3060 Hardware acceleration = ON I do have a 3D Spacemouse plugged in
-
Hi everyone; Not sure if posting in the right folder, but I searched for someone having the same trouble and I didn't find this error: Whenever I try to make a pixel selection with the lace tool (or any other tool) in Photo, just as quick as I finish selecting, the selection made displaces a bit to the top left corner: It also happens whenever I try to select it and then press comm+⬆︎+I for making the invert selection. This is very unconfortable to work with because I lose all the precision and effort taken in selecting carefully, and I usually have to set it back by hand. I tried this both in Affinity Photo for Mac and Publisher with the Photo Persona, and still having the same trouble. Note that I also tried unselecting autosnapping, move by whole pixels and force pixel alignment but still doesn't work. Anyone know what possibly I'm doing wrong or badly set? Also, If i keep repeating the invert selection, the selection area keeps moving upwards in a progressive scale: Thank you all in advance for taking the effort in reading this lines (EDIT: i'm currently using the latest OS in Mac, Monterrey 12.2.1)
-
I am applying a bilateral blur filter for sharpening and the process requires blending one of the duplicated layers to vivid light and then inverting it. How does this translate to Affinity iPad i.e. how does one invert a blend without the desktop shortcut of Ctl-I?
-
 I would like to : • draw an ellipse outline over a photo (no fill in the ellipse) • select the pixels under (within) the ellipse • invert the selected pixels • darken the inverted pixels • Or, copy the pixels under the ellipse (or any other selection) and paste them on a new layer. I've been doing this for 30 years in Photoshop and GIMP but cannot do it in AFF Photo. The photograph is a pixel layer. In fact, I cannot even copy what's under the ellipse and paste in on a new layer. What's the secret?
 -
Hi. I have a lot of old 35mm negatives and wanted to find out if there is a way to print them using Affiniti and a Flat Bed Scanner. When I scan they are very dark, but that may be recoverable. When I try to invert Brown negatives they go very blue. I wondered if there were any Plug Ins or Presets that would invert correctly. Regards Mike
-
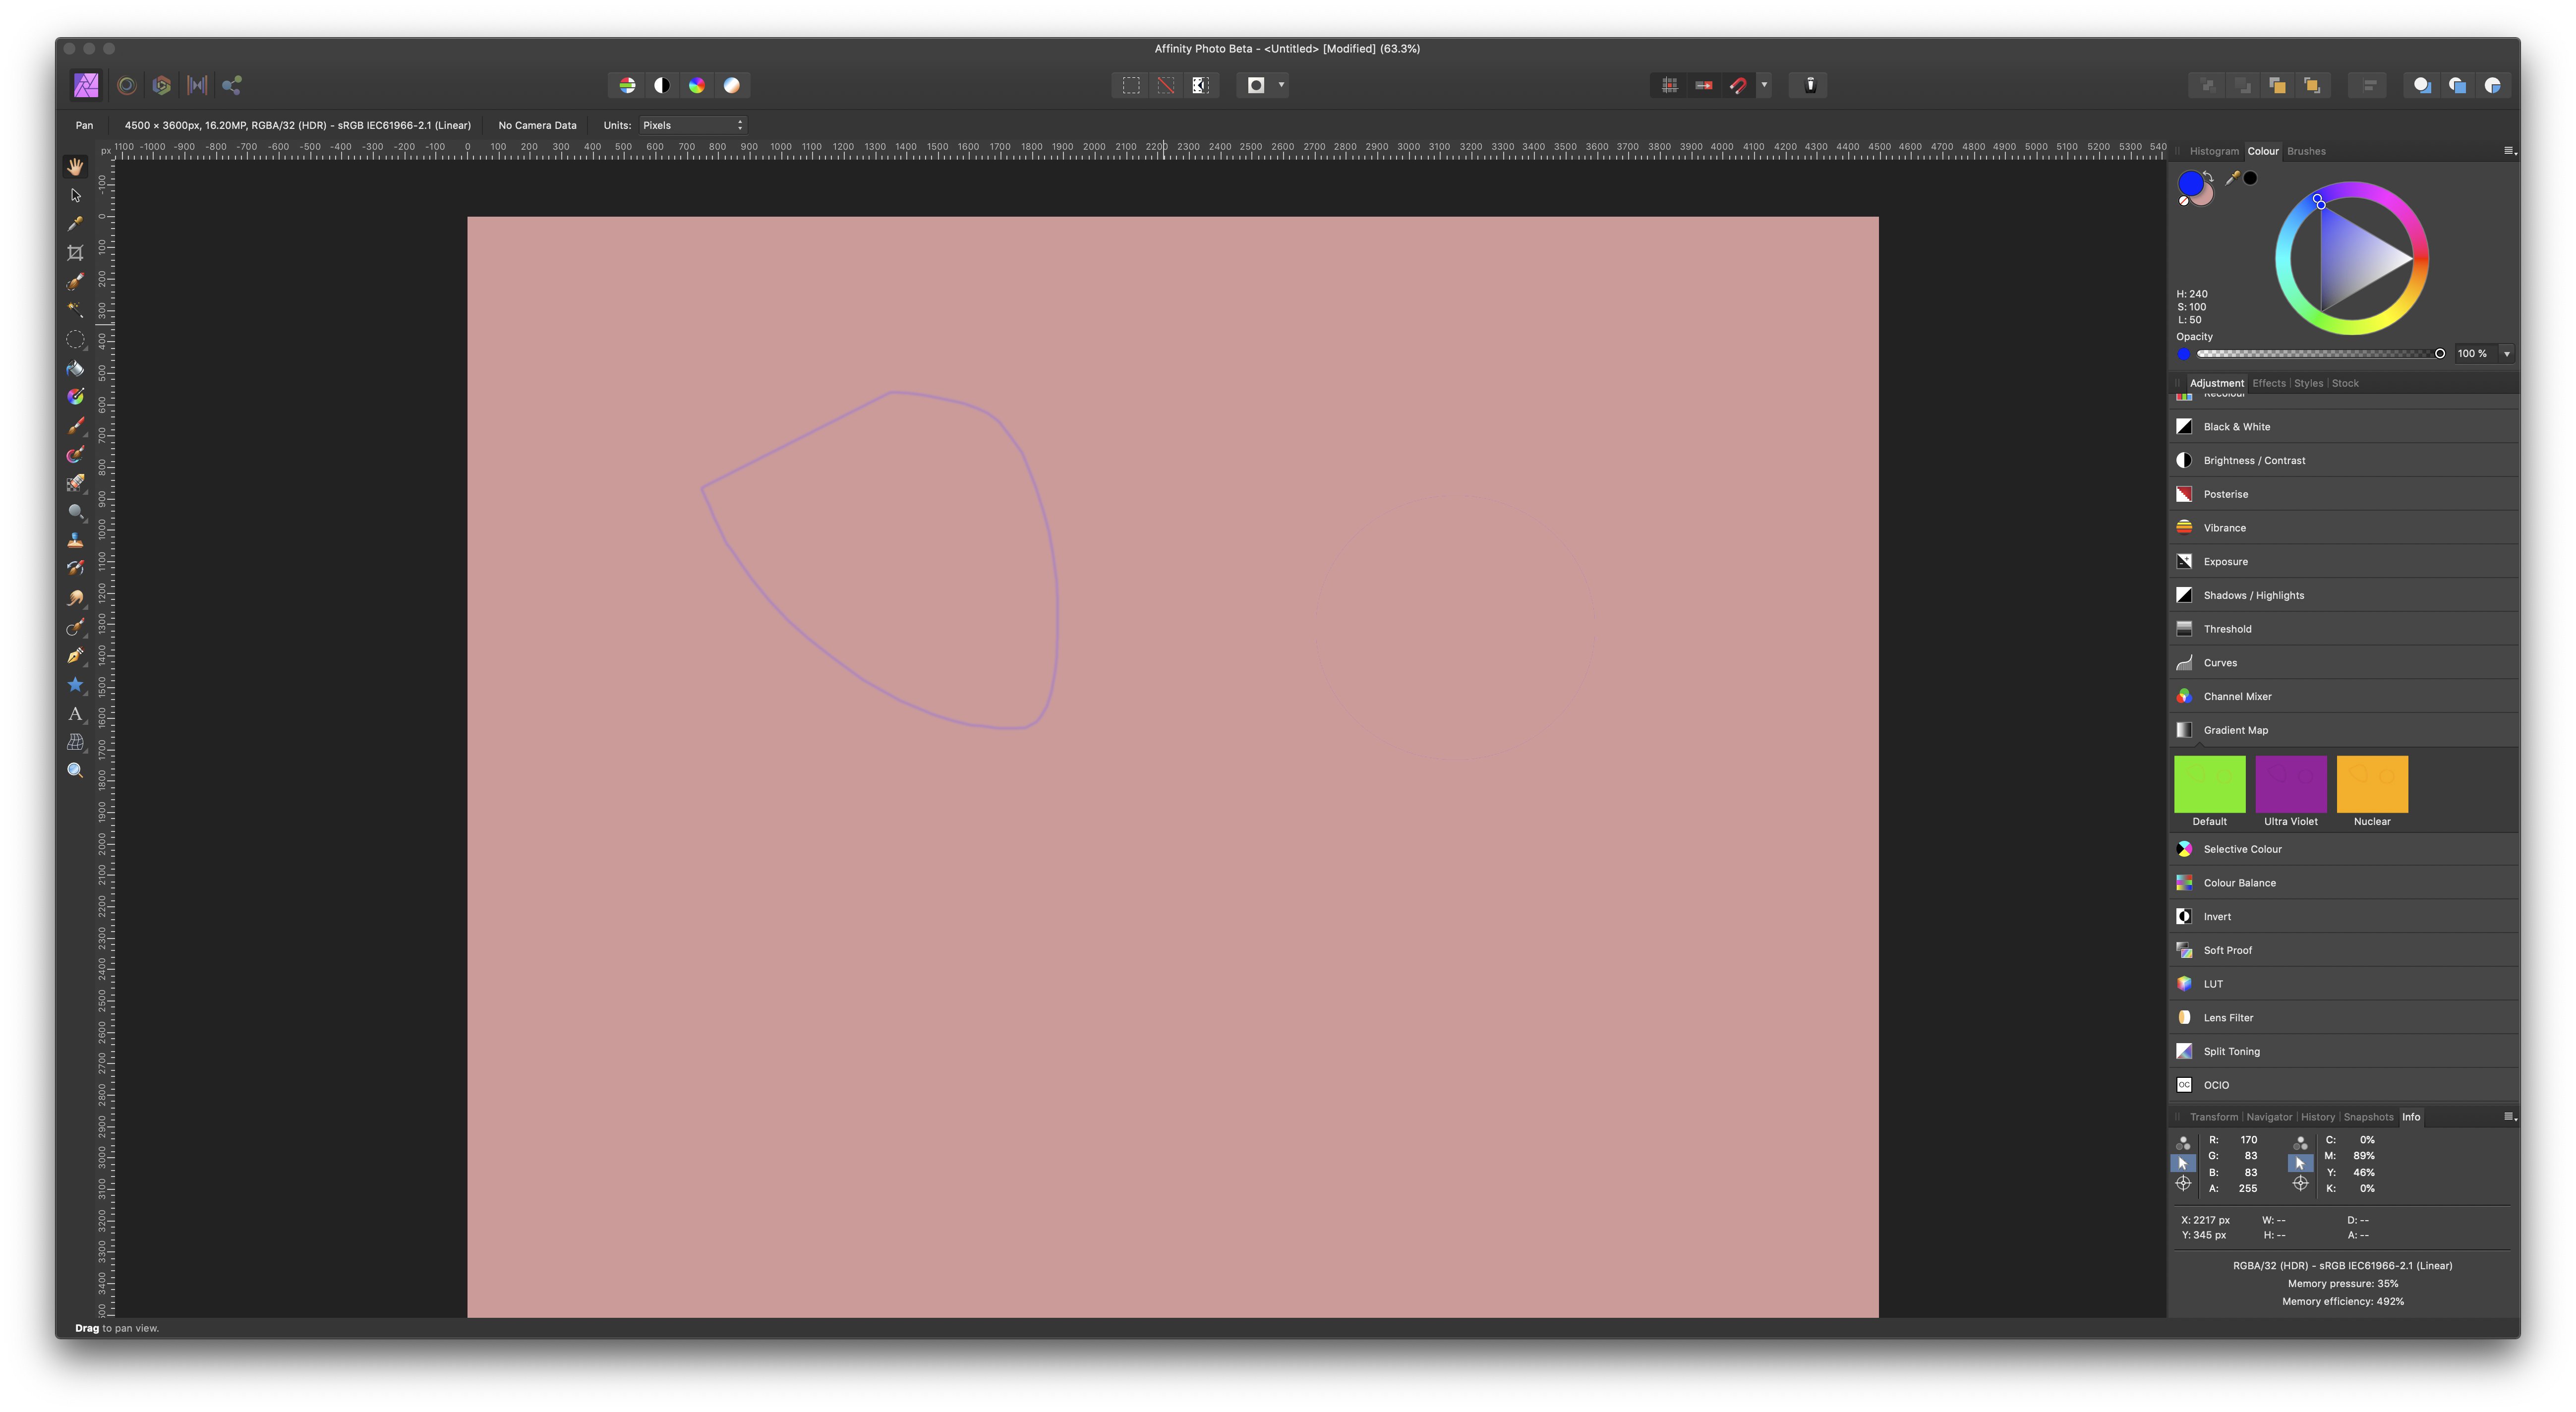
 I was initially trying to colorize the logo like I would a 1 bit tiff in Indesign. However, that doesn't work in Affinity. So I used the tool called rasterize to mask and set the document to 1200 DPI and added a gold background to simulate the color through the mask. I was actually impressed with it until I realized the logo was actually inverted. So i thought I would just invert the logo before rasterizing to mask. Unfortunately I found the invert doesn't work right. I must be doing something wrong. Here is the course I'm taking: 1. the vector logo I use the raster function when I right click. 2. I go the layer selection and choose the layer selection and choose invert. I would think that what was black and would be white and what is white would be black. but that doesn't work. It turns it to a dark gray background. See here: The image on the right is told to be inverted, but clearly it is not. The image on the left is the normal logo that I want to be inverted. they both are sitting on the gray pasteboard.
-
 Hello, I recently purchased Serif Affinity Photo. I noticed that the layer mask is not working properly. Whenever I try to paint with black, no effect is seen. When I invert the mask and try to paint with white, nothing happens. I have NOT ticked " protect alpha" in the context bar, and there seems to be some effect only when mask is revealed by pressing 'alt' and blending mode is changed to 'soft light'. Obviously the image is not seen and mask cannot be accurate. Please help. I am using widows 10 home eddition and latest version of Affinity Photo, 1.7
 -
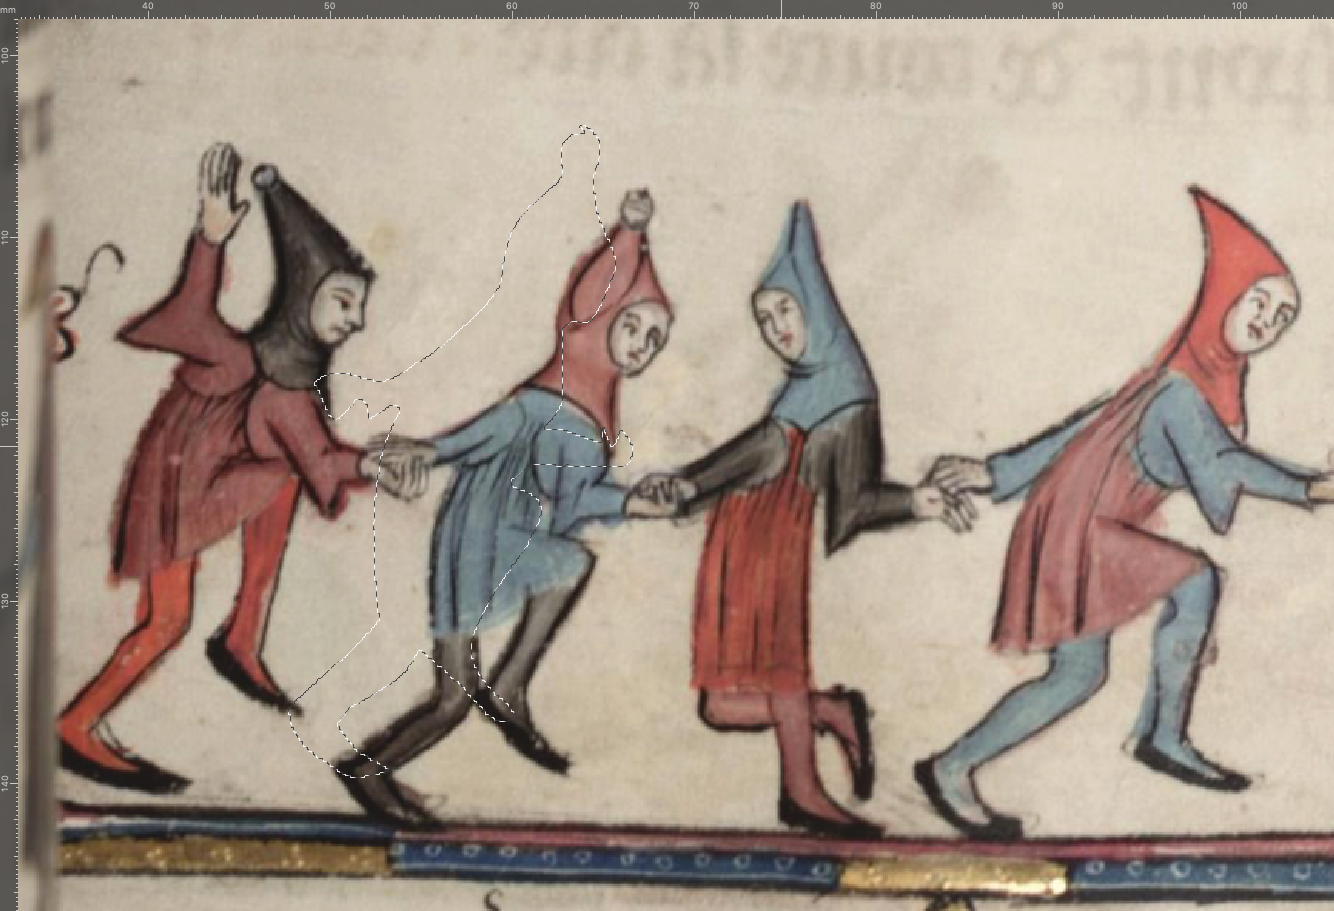
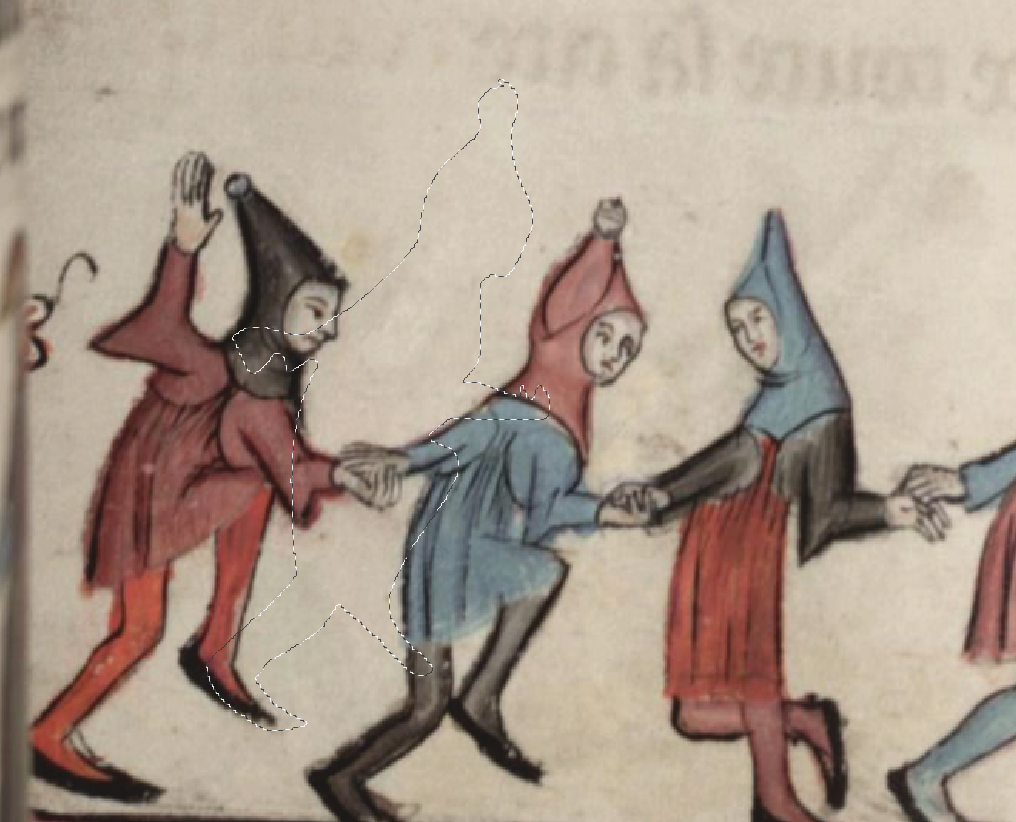
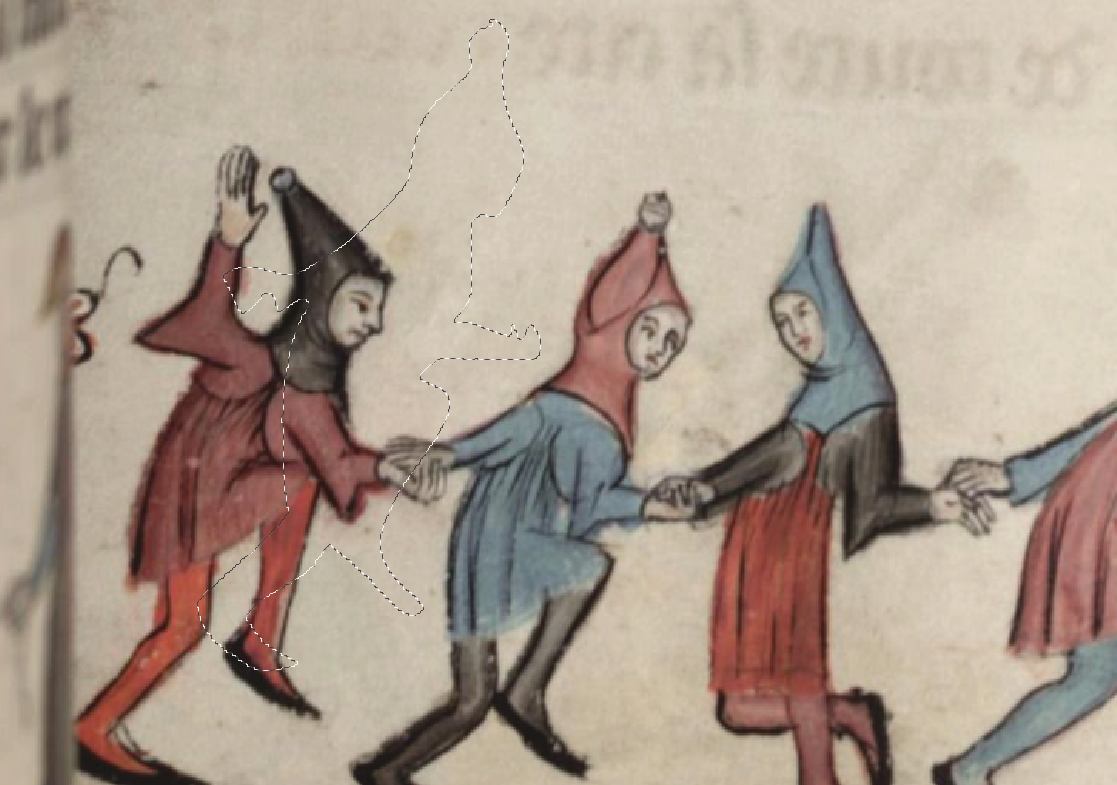
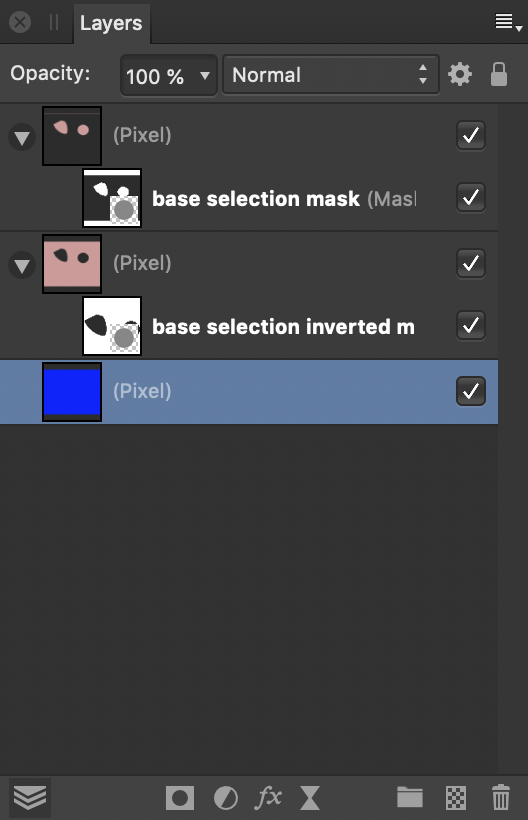
 I am trying to understand what is going on under the hood when I invert a selection. Situation: I have an image with a selection. The selection consists of two parts, one (at the left hand side) done with the freehand selection tool, the other (to the right) with the elliptical marquee tool. The freehand part has a blurry boundary, the elliptical part has a sharp boundary. I now want to create two layer masks, one from the selection and the other from whatever is outside of it. I use Invert Selection for that. The idea is to stack two layers with the original image, with one of the masks applied to each of them. Hopefully, each mask will let through just enough so that together they will blend into the original image. I expect normal blending mode should do the trick. My way of working is the following: - the original selection I save into a channel that I call "base selection". - I then invert the selection, and save the result in a channel called "base selection inverted". - I create a pixel layer and fill it with pink colour. - I duplicate that layer. - For each of the two layers I create a mask. The "base selection" channel I load into alpha of the first mask, the "base selection inverted" channel into alpha of the second mask. - I stack the two layers with normal blending mode. - I activate both layers and their masks. - Finally, to see clearly what is happening I create an extra blue pixel layer that I use as background. This is the resulting layer panel: I would now expect, perhaps naively, that I would see the original pink image back, since the masks are complementary and both let their own part of the original through. Instead, I see the following: Whereas the elliptical selection to the right is invisible, the blurry freehand selection to the left lets part of the blue background shine through. I now have the following questions: - how exactly is the selection converted into a mask through the channel? As I understand it, a mask is a mapping that tells what opacity to assign to each pixel of the (pixel) layer it is assigned to. White has 100% opacity, black is fully transparant. Fine. For black and white positions in the mask, this works. But if there is a position in the mask with "grey tonal value", an opacity between 0 and 1 is assigned. What is the formula for that? How is this "gray tonal value" determined, and once you have it, how does it translate to an opacity number? - How do the opacity numbers relate between a mask derived from a selection, and a mask derived from its inverse? Are they complementary, i.e., add up to 1 in every case? - From what I am seeing, it looks like inverting a selection does not necessarily lead to masks that are complementary in the sense that they can work together to restore a full image. They may leave spots with less than full opacity, if selections have blurry edges. This leads to the following question: is there a way to achieve what I am aiming for? Or am I missing the obvious here? Thanks to everyone who read through all this. I do hope you can shed some light. For reference, I attach the project (done with AP 1.7.0.128). Jeroen. selection inversion test.afphoto
-
 I'm trying to stack two photos one on top of the other and use a rectangle to mask a hole in the top photo to reveal the underneath photo. I am creating a rectangle above my top photo and dragging it down to create a mask on the top photo. but then I need to invert this so that the center is masked out and the top photo is visible around the edges. I have tried ctrl+i to invert and nothing happens I have tried to set the alpha channel and all I wind up doing is making the whole thing transparent
 -
I often use geometry layer to mask (clip) other layers. Unfortunately there seems to be no possibility to mask/clip everything inside the geometry. It would be great to be able to invert geometry layers without rasterizing them.
-
 Hi, I'm an analogue photographer, so one of the first steps in my work process is inverting the negatives I scanned. I can see an invert tab in adjustments panel, though nothing to click, or at least nothing happening. (Same for OCIO and select colors tab). Any help would be appreciated.
-
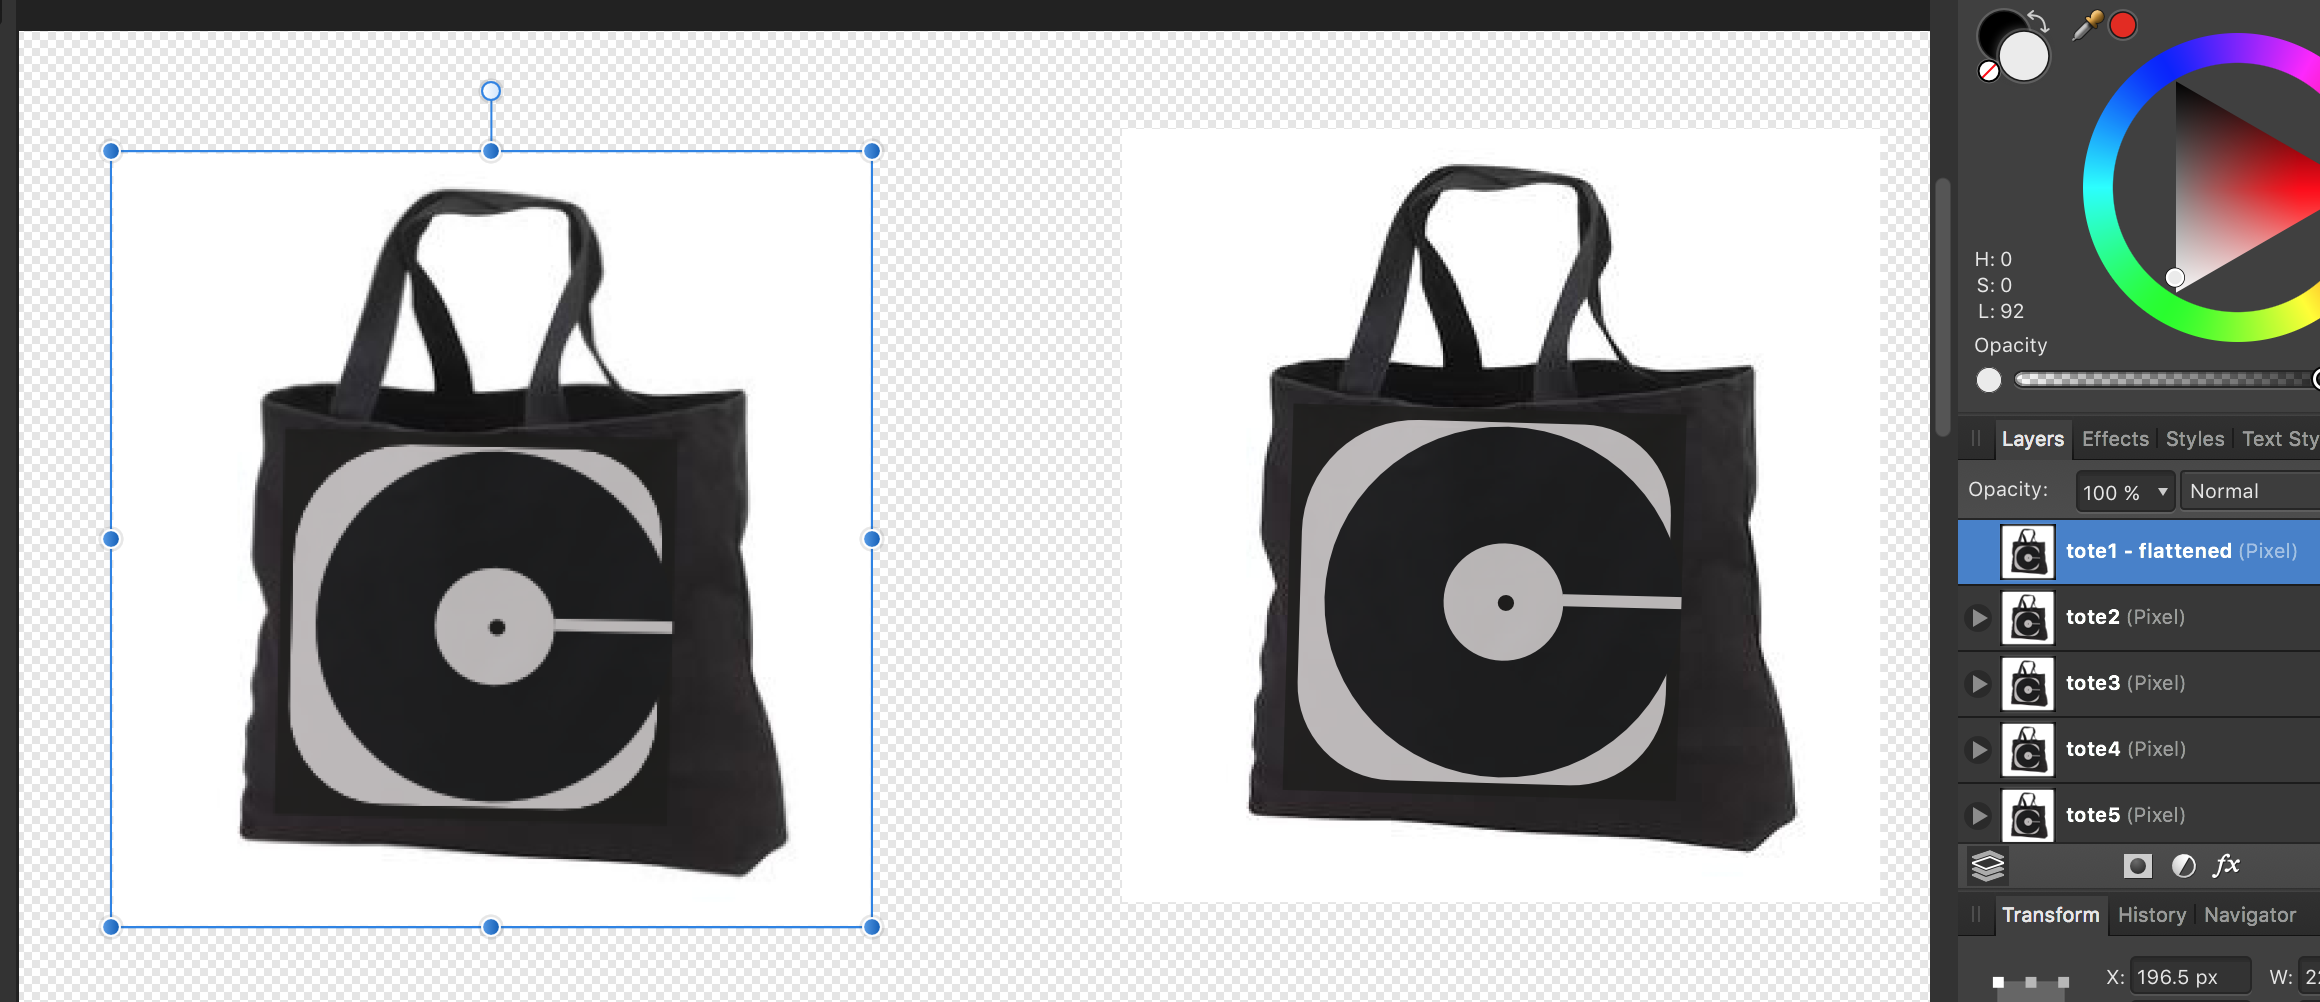
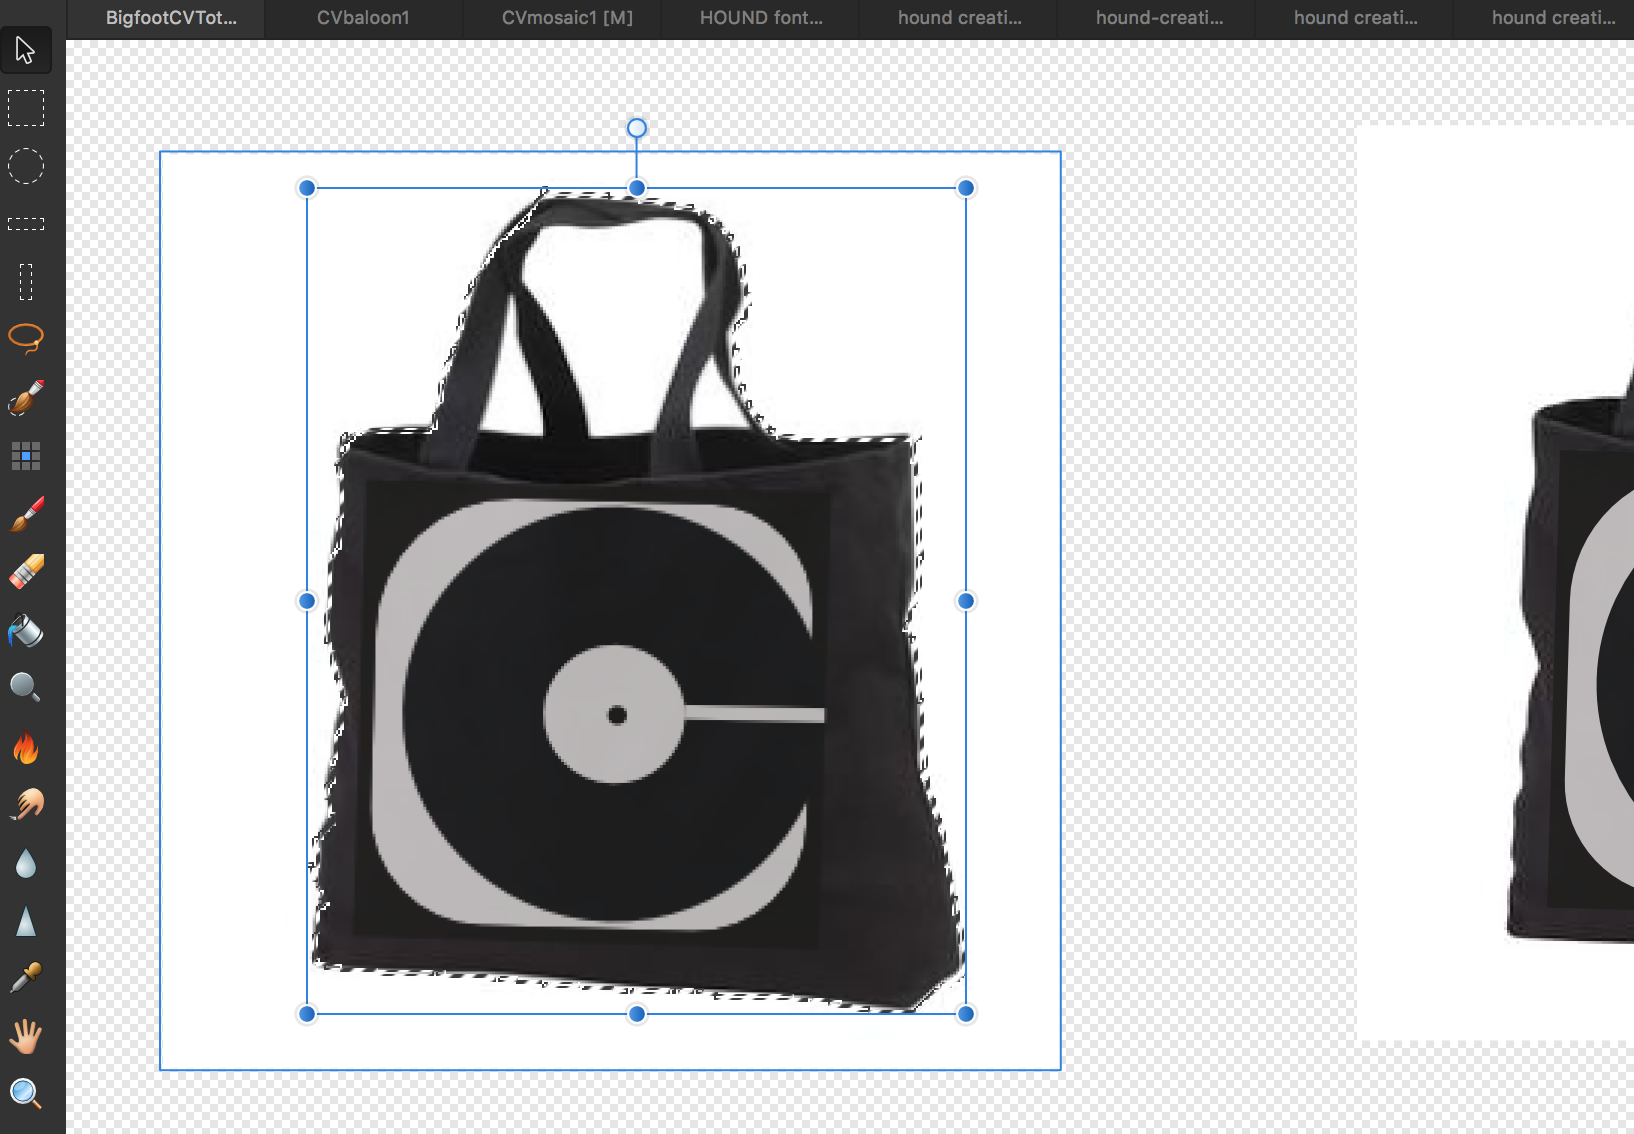
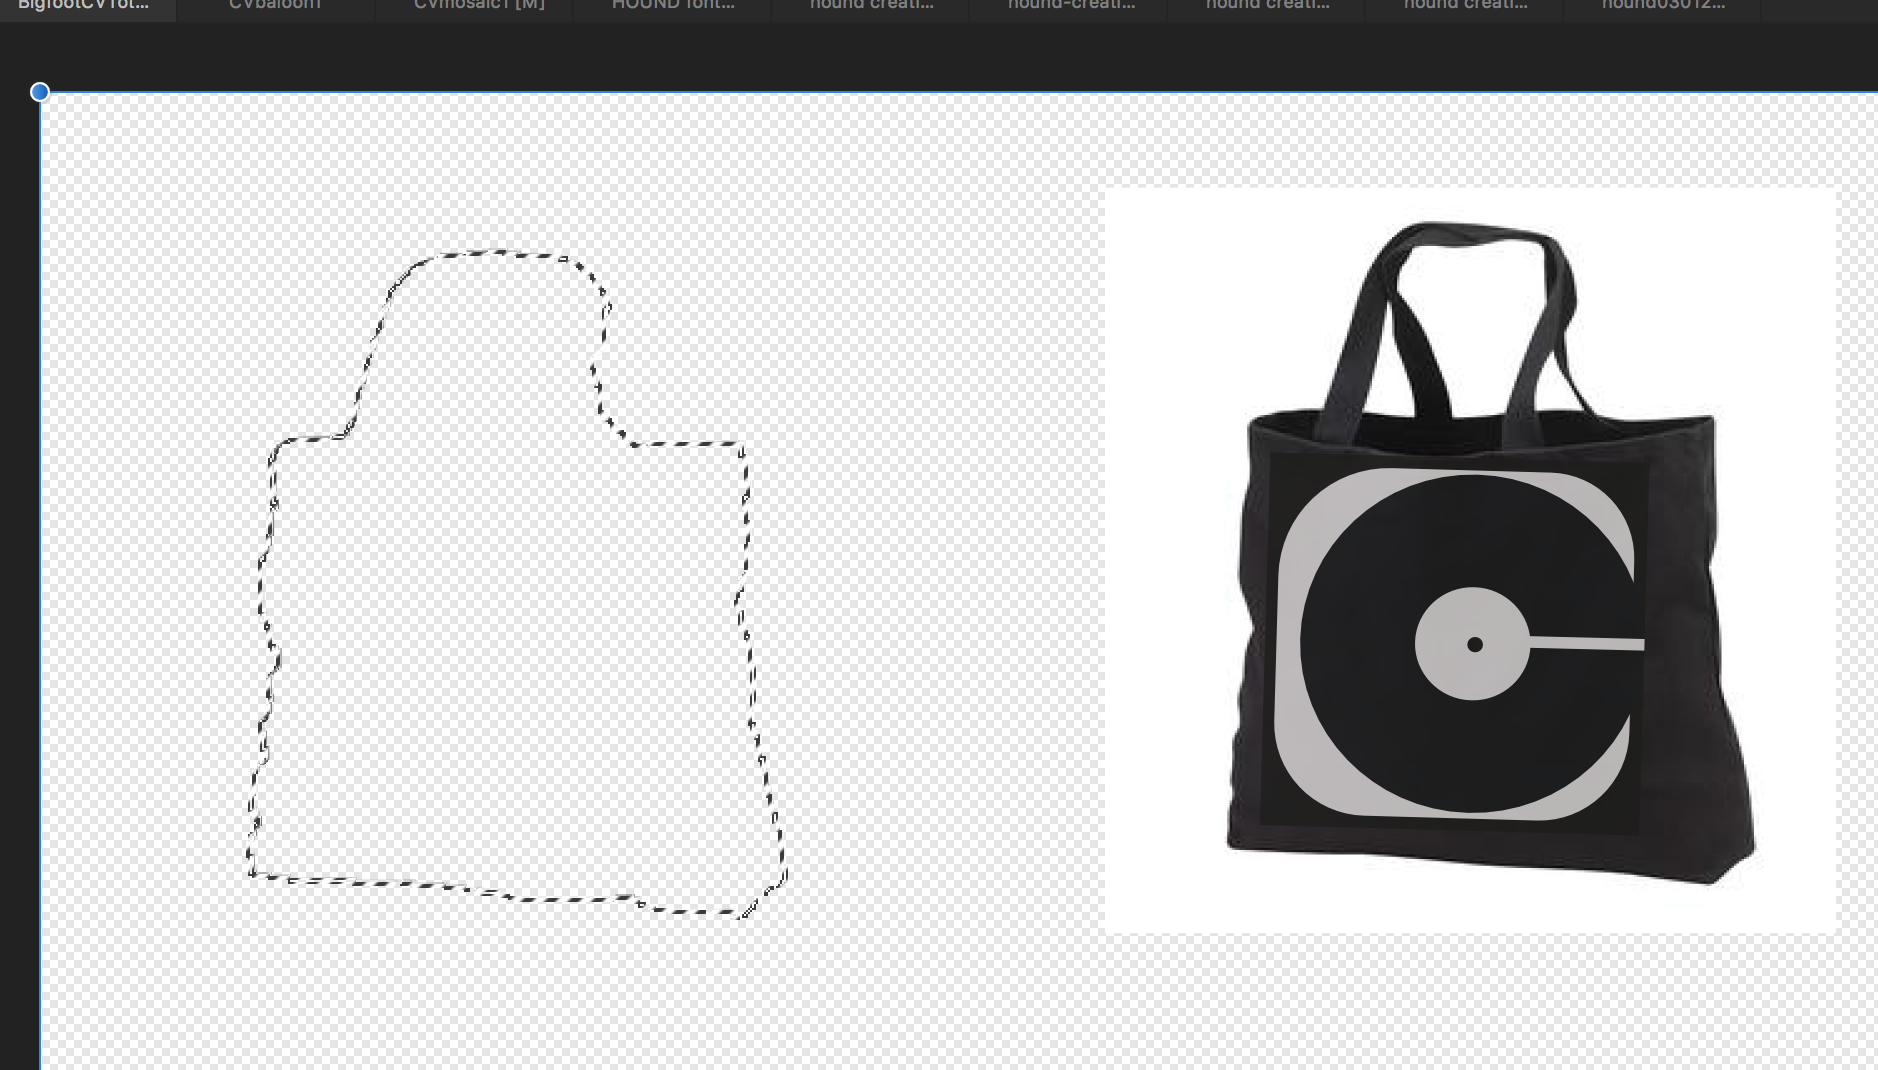
 Dudes/Dudettes, a little help please... Missing something obvious and simple again, I'm sure - and I've sincerely tried to research the forums myself, doing my own leg-work but am just stuck on this one. This time I brought along some visual aides. Working on a MacBook Pro with AD 1.5, all I am trying to do is remove the white background behind this black tote back (see images below). After surveying the forums, I understood that in order to accomplish this I needed to do the following (please point out my error): 1) add new Pixel layer over image 2) outline the image wanting to kept using Selection tools (I used the Brush selection tool)...pardon the crudely traced selection line, I'm just practicing 3) Invert the Pixel selection (I used the Ctrl+Shift+I keyboard shortcut)... **this is where I'm stuck - a post in the forum says to now 'paint in the selected area'. Would I not used the In-Fill tool by selecting a color then clicking on the selected area? This is what I tried, yet was unable to paint-in the selection. Feel like a major dork here guys - what am I missing? -Thanks as always AD Fam, --Christo
-
 Hello everyone! I've got another feature request: Could you enhance "Set Fill to Black and White"'s (in Preferences -> Keyboard shortcuts -> Miscellaneous) functionality? Right now, it just sets the colors to black and white. If I remember correctly, in Photoshop, it also automatically sets the currently selected color to the default one, which is black. This can be very useful, especially when all the UI is hidden. Because then you always know what color will be selected when you press the shortcut for "Set Fill to Black and White". So if you need white, you can just click D (my shortcut for "Set Fill to Black and White"), then X. Best wishes, Shu
 -
 I have been trying to find the way to invert a vector in Affinity Designer and have had no luck. From what I understand you can do this in Adobe Illustrator. This is a tutorial that I found for illustrator that does this but I can find no way to apply it to Designer: If anyone knows how to do this or if it is even possible in Designer I would really appreciate your help :)
 -
 Hello, I'm quite puzzled by this: I want to create luminosity selections/masks. 1) I Ctrl-Shift-click the Background layer thumbnail and save the selection as a separate Lights channel; then 2) I invert the created luminosity selection and save it as a separate Darks channel. Then I do a similar thing in Photoshop Elements and make masks from the selections to compare if I get the same thing in PSE and Photo. The Lights (luminosity) mask is the same, but the Darks masks are different -- Affinity makes it more muted, the inverted black patches are more muted/greyish, and 50% grey patches are considerably darker than in PS. Can anybody reproduce this? Is this a bug in the Invert selection command? When I compare the inversion of a normal pixel layer, the results are the same in both applications.
 -
 When I try and invert my pixel selection on a document, it deselects everything instead. This is happening on lots of documents including the one in the video here: https://www.dropbox.com/s/wm65gkiik5sjmop/Invert%20Pixel%20Selection.m4v?dl=0
 -
I'm trying to invert a rasterized type layer, but i'm getting wrong colors. Check it out: This is before invert: This is after invert (both filter and adjustment layer produce the same results):
-
 Hi, I am new here and bought the Affinity Designer two days ago :) Using Text on a path in Affinity Designer, I have this result: Ok. In this case I can use the text on a path inside the circle and outside. Ok, I want outside. Done. Just great but I have now a problem!! Problem: I need the words "rbfigueira.com"be inverted to be readable. I need that the "R" start on left and not in right. I need that we can read "rbfigueira.com" from left to right and not from right to left. - How to invert the text (typing) ? Note: I think we should have one other big important way to do the alignment. In this case I am using one circle path. In this case I can align the text inside or outside of the circle ... is the same of saying that I am alignment the text from bottom or top of the text. Will be better to have the possibility to align using in center of the text and not only (top or bottom) !! In that case the path will be exactly in the center of each letter and not align in top or bottom but in center. The spaces and curve will be more perfect. Is that possible using this version ? Thanks Best regards, Ricardo Figueira
 -
 Would like to be able to zoom the other way around on the mouse wheel. I have all my other design apps setup the other way around, but can't seem to do that with this one.
.jpg.9c0d03ad7972f1f45a98ee05b4fb6883.jpg)
.jpg.c02672879b7f887755f86573ebf35929.jpg)