Search the Community
Showing results for tags 'histogram'.
-
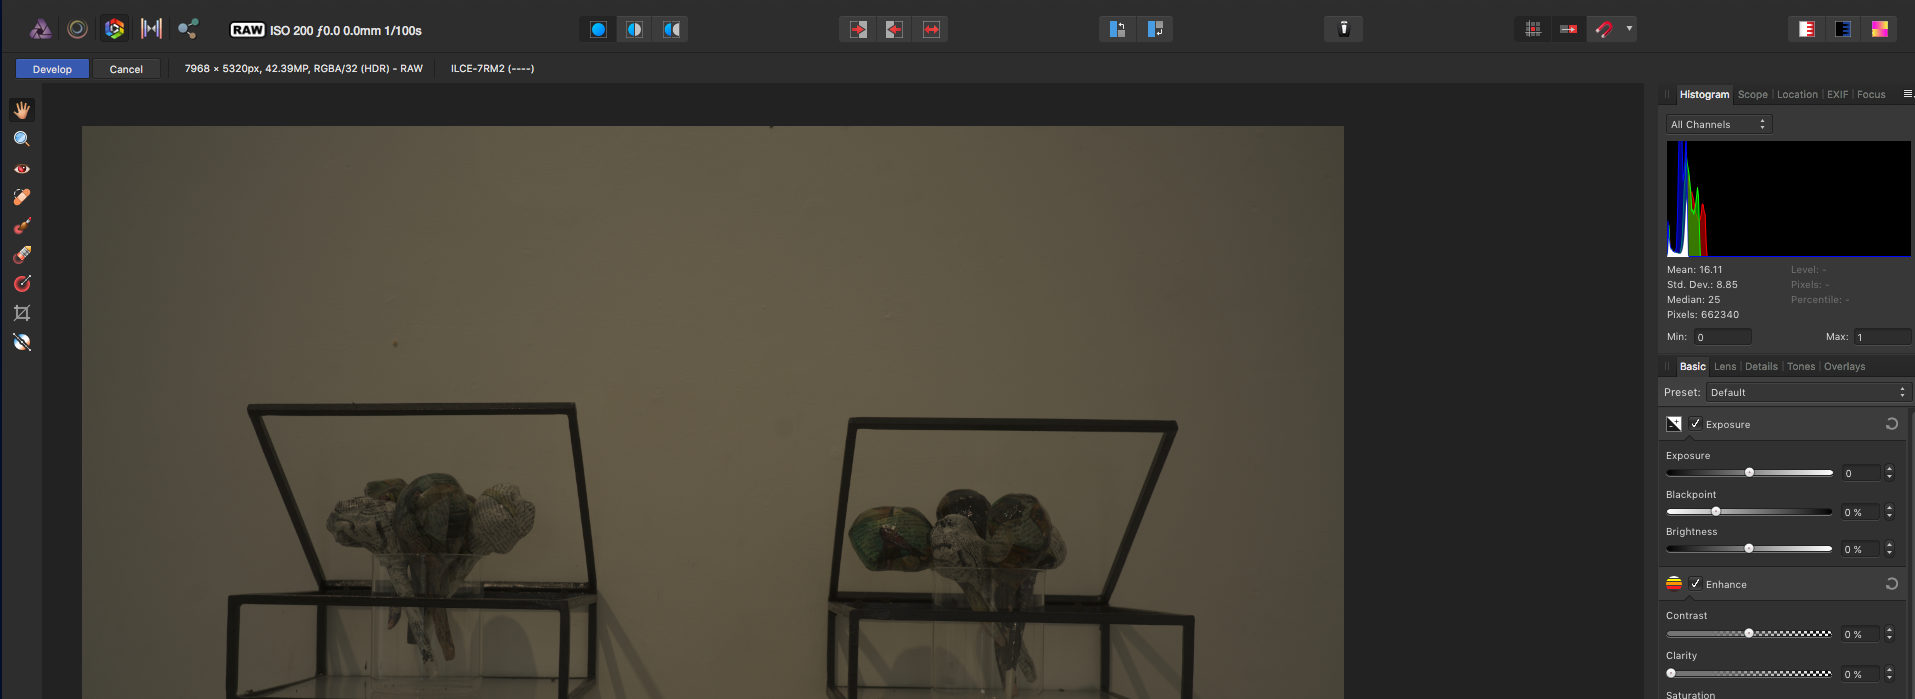
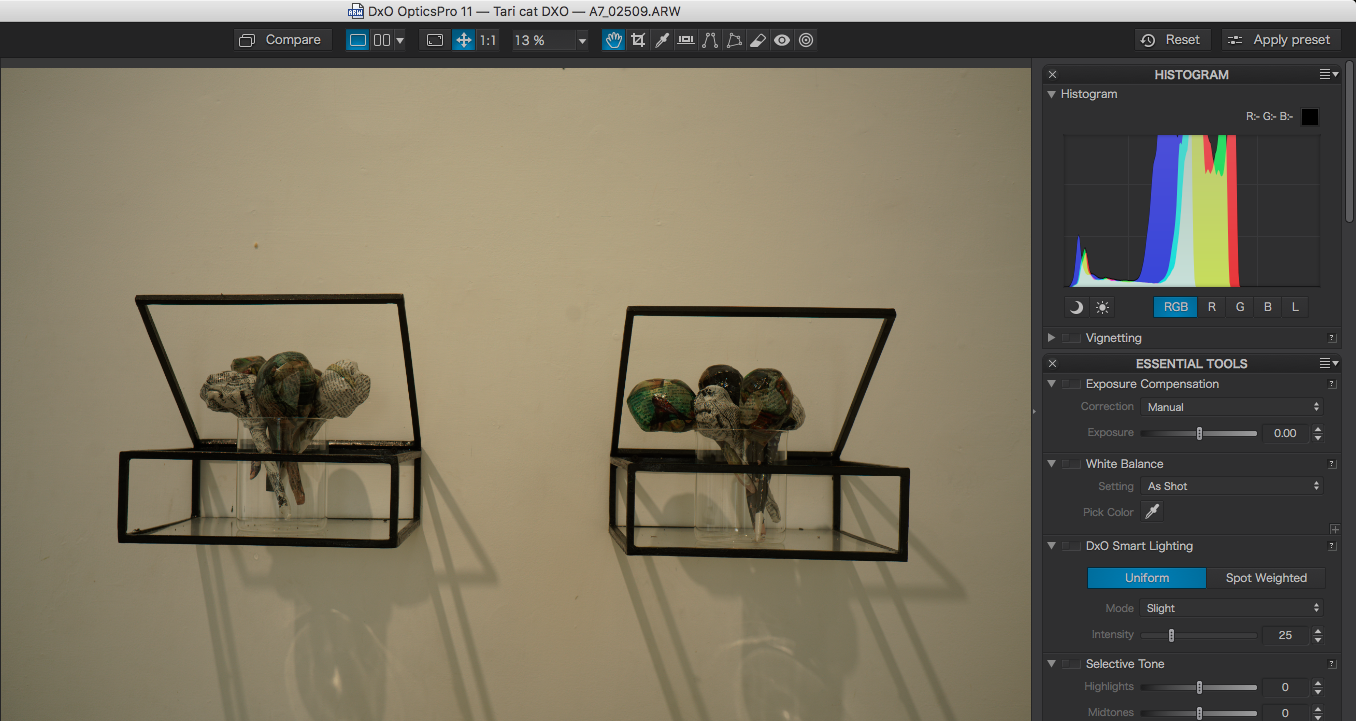
 Hi there, I had my first professional project that I wanted to edit etc with Affinity Photo. I exposed in my camera Sony A7RII all photos with an average of -.03 to -.07 with a close look on highlights (zebra display). - To my big dismay ALL shots appear massively underexposed in Affinity photo, the large majority of the images required a 2 stops exposure gain, the white balance was _totally_ off. So after spending a frustrating long evening on it. After seeing the impossible results this morning I quickly returned to the photo application that I used before, DxO Optics Pro. And there the images look ok, the colors look correct ands the expose is slightly under as expected. Was is happening? From the online tutorials for Affinity photo I disabled all "automatic" corrections for raw files, I do exactly the same in DxO by the way. As an illustration I attach 2 screenshots of the same image opened in the software, one Affinity Photo the other in DxO Optics. Any help would be largely appreciated! Best regards Jurgen
-
 Unable to find the Histogram feature on the Windows program. Please advise.
 -
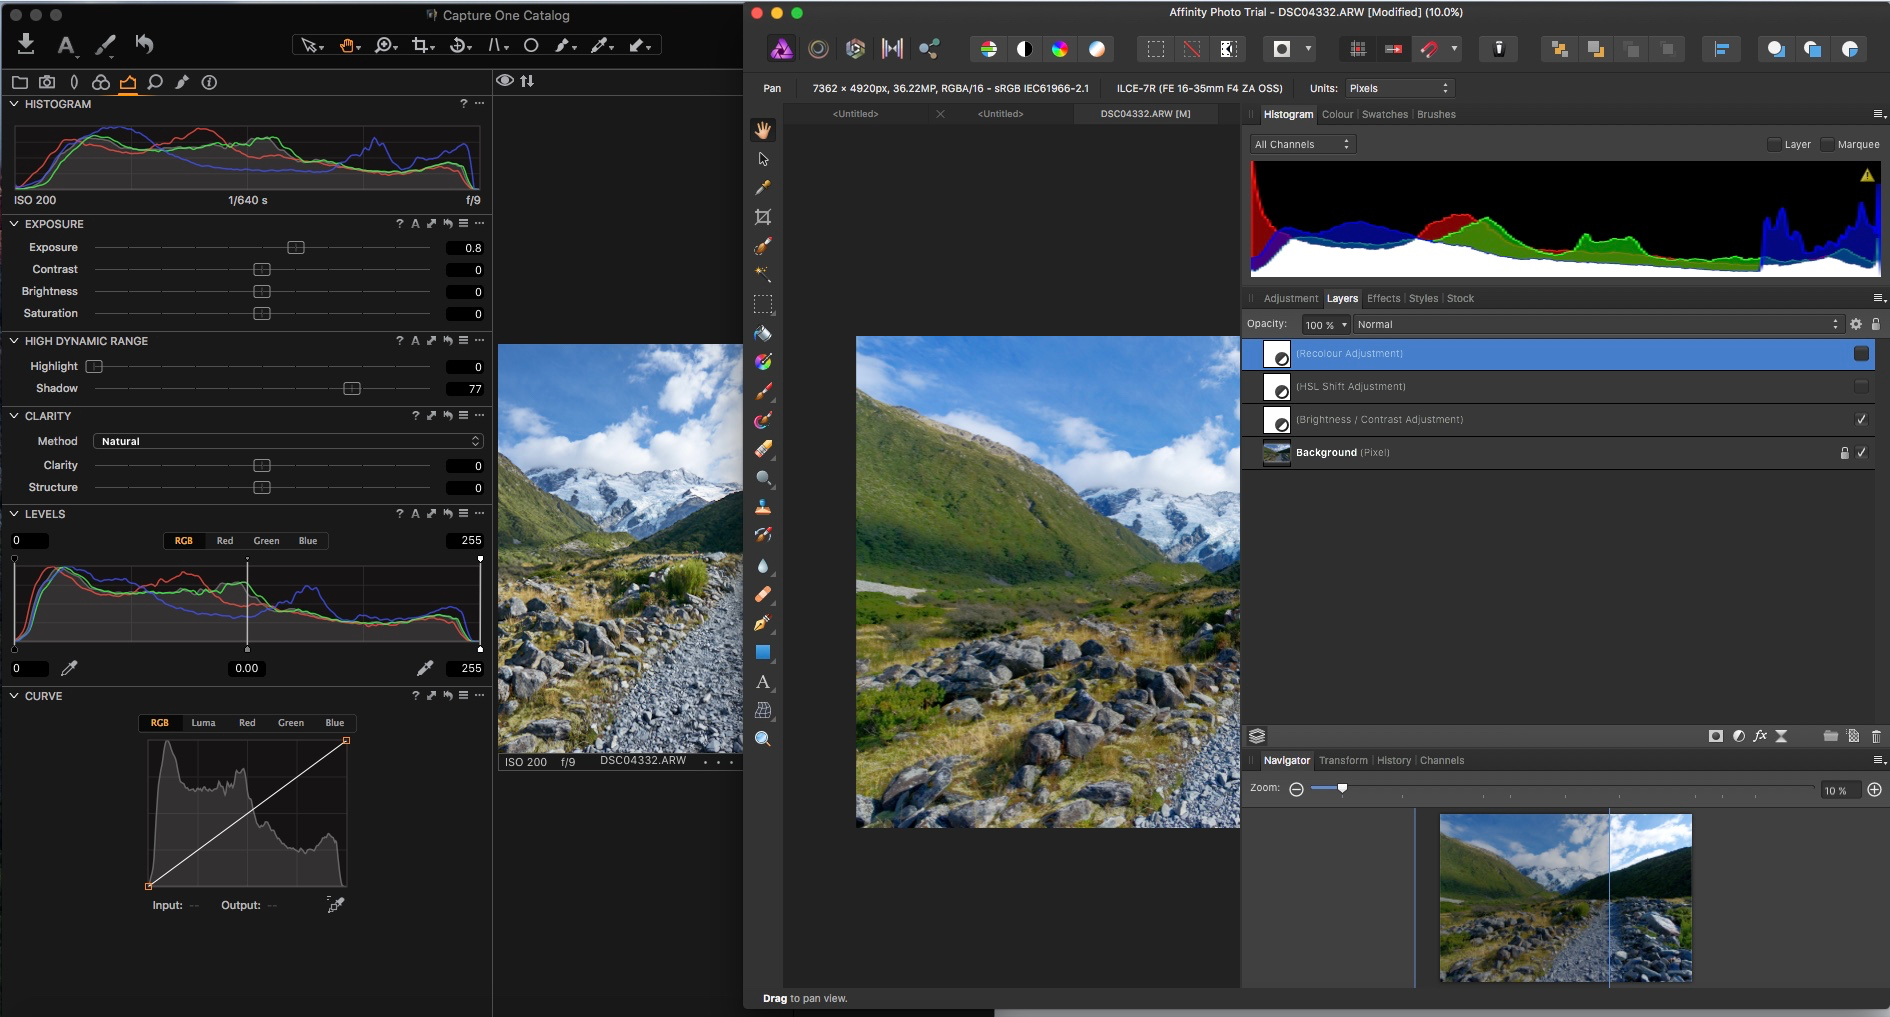
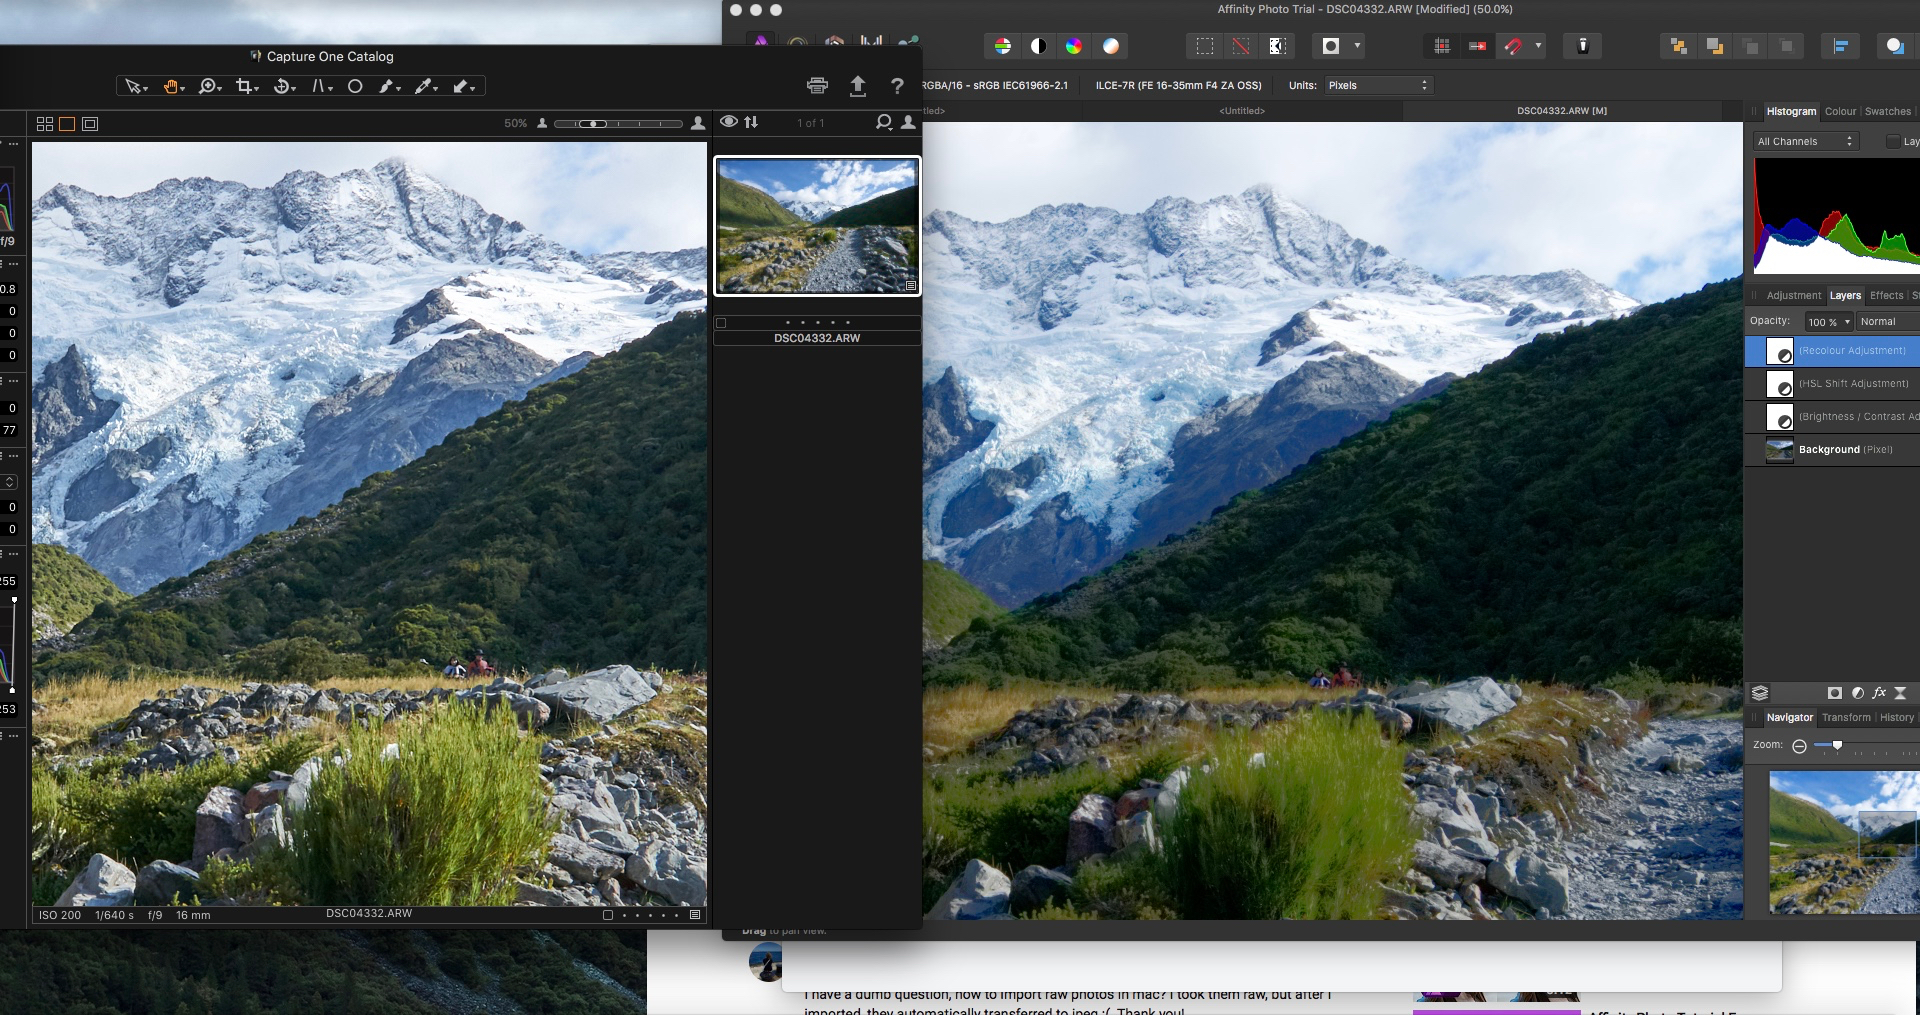
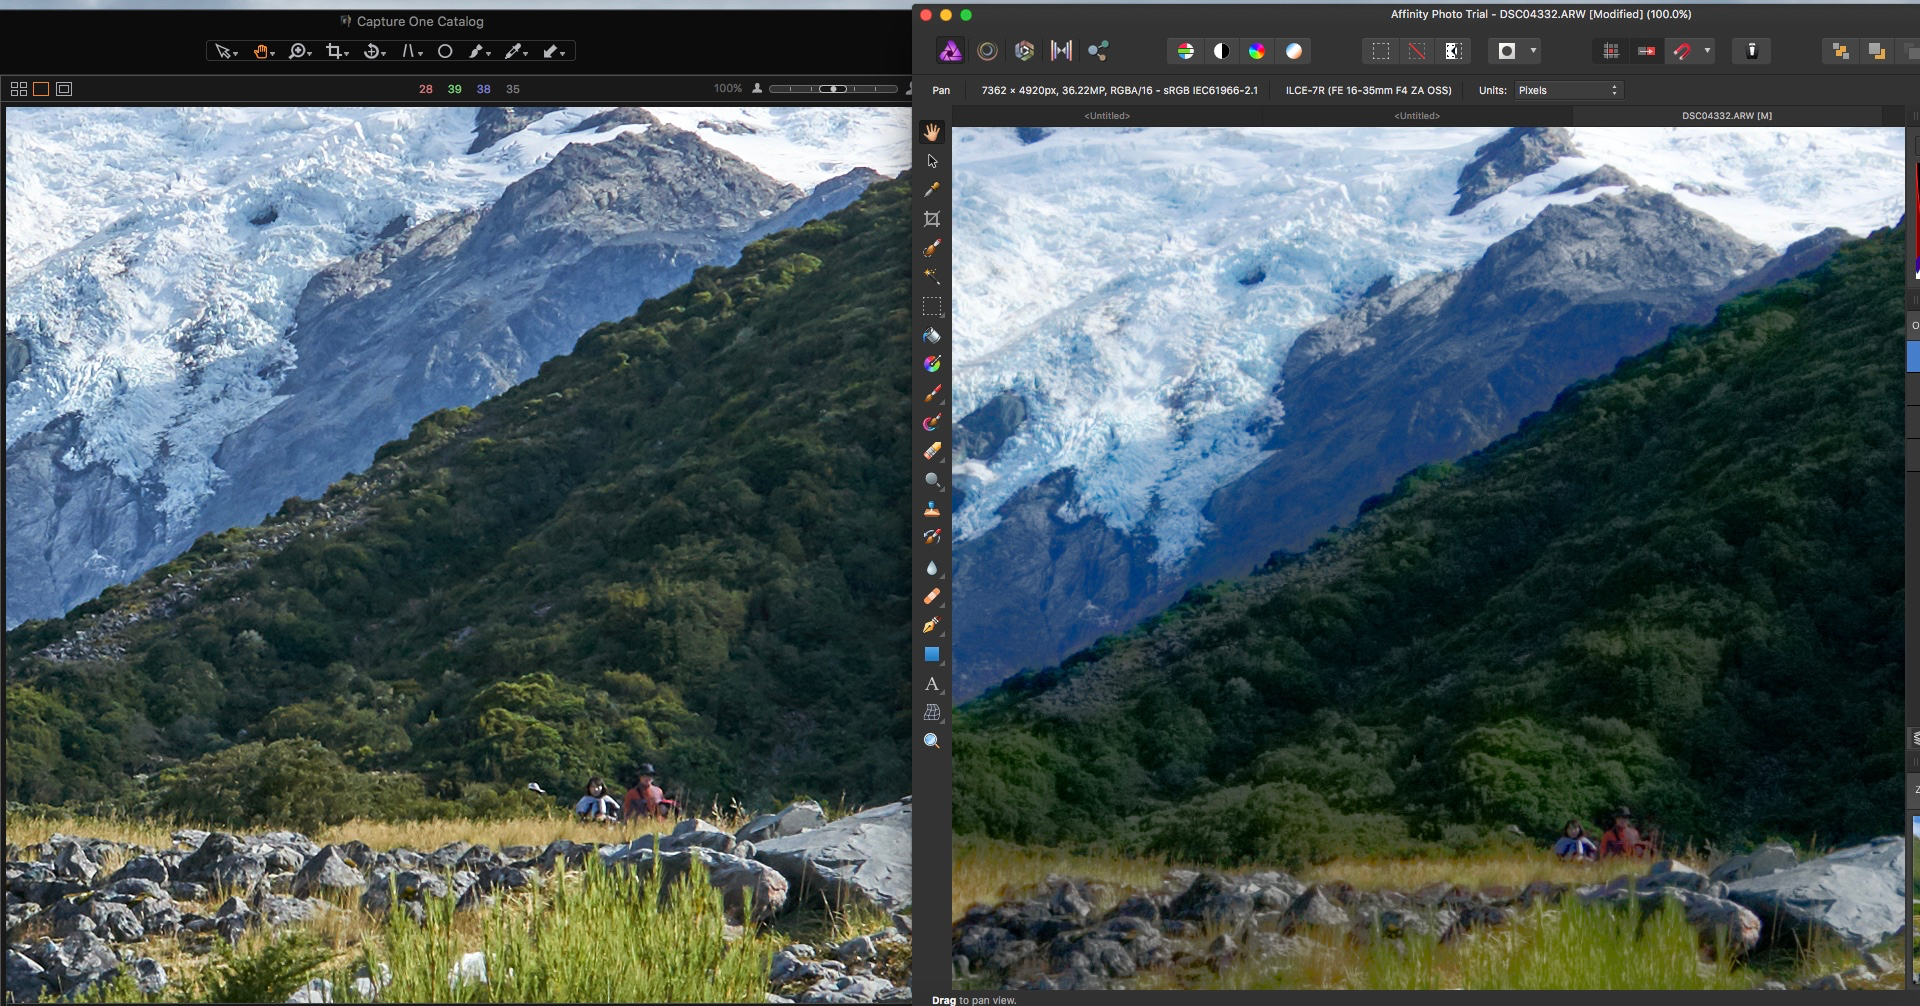
 Hi, I have opened a Sony RAW file in AP and also opened the same RAW file in CaptureOne. They present compeletly different on the same screen (see attached screen shots). As you can see the detail i.e. green bush mid foreground in the AP software is very very poor compared to capture one software at both 50% and 100% zoom. Also I note that the histogram in the develop persona is completely different to that shown in CaptureOne. The histogram changes when I "develop" the photo and become are more aligned. However, the detail in AP is still very very poor compared to CaptureOne, am I doing something wrong in the initial "document set up" stage of the AP process? Attached images are: Screen Shot 50% Zoom. Screen Shot 100% Zoom. Screen Shot Histograms Compared.
-
 Hi, I love the software, but miss some crutches I often use in other software. Rawtherapee has a really neat feature where the gray and rgb brightness values for the pixel you are hovering over are indicated in the histogram. I find this very useful for quickly checking my work. Once I start adjusting curves, levels, etc. it's easy to lose track of the desired brightness and color (e.g. Glowing eyes, reddening skin, etc.) and this really helps remaining in the proper ball-park, by providing a quick and easy check. I would love to have this! thanks! Wouter
 -
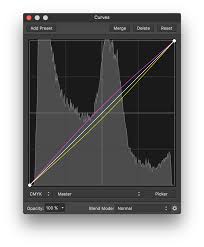
 Hi there, first of all, congratullations for the app. Do you have plans to implement in curves, the option to see the image in background, of the histogram for every color chanel (I dont know i writing it right in english, see the attached image). I think that is imprescindible for a profesional retouching photo soft. Thanks.
-
Hi there, first of all, congratullations for the app. Do you have plans to implement in curves, the option to see the image in background, of the histogram for every color chanel (I dont know i writing it right in english, see the attached image). I think that is imprescindible for a profesional retouching photo app. Thanks.
-
Would be possible to see a live histogram using the crop tool like in lightroom in Develop Persona? Example: Min 0:30 https://www.youtube.com/watch?v=1tqJeAqxxcY Thanks !
-
Wouldn't it be nice if... I could see the whole histogram from my raw / stacked image. There were vertical lines to show the colour space limit. I could grab and drag any part of the histogram (sideways, and maybe up/down too). I could mark 'anchors' that would not move. I could do this for Master, RGB, CMYK, etc. Yes, I know Levels, Curves and some other sliders do some of this, but directly working on the histogram would be so nice! Thank you for watching!
-
 I am a beginner and starting self-tuition via tutorials. But I have lost the display that shows the Histogram, etc, and the layers of the image. Could you advise how I recover this?
 -
 I have recently installed the trial version for Affinity and was trying to understand the basics of the program. When I launch the program and open any photograph, histogram is not shown on the right side. I am also unable to see the Filters menu on the top. Even simple tools like sharpening are not visible to me. Can anyone guide me in this interface with these three things - How do I see the histogram on the right side? Where is the filters menu? How do I start the sharpening tool? I am also attaching a screenshot of the freshly installed program on Windows 7 professional.
-
 I am a new Affinity user (purchased about 3 weeks ago) and am trying to learn how to use it for processing raw files from my Pentax K-70 which has a 14 bit A/D. My files are created as DNG in the camera and I have no trouble opening them with Affinity Photo. I watched the basic Raw Processing tutorials (maybe 3 or 4 of them). One of my questions is whether it is possible to have the histogram display the full 14 bit range of my pixels, rather than just 8 bit range? What does the histogram represent? Is it really the 14 bit data scaled down by 64 (The 6 bit shift between 14 and 8 bits)? If there is a video or earlier discussion of this topic could someone please refer me to it? This is so basic that I suspect these questions are answered elsewhere. Thanks in advance.
 -
While using various adjustment panels I noticed that the histogram is not responding in real time. There is a significant delay between movement of a slider and the corresponding change on the histogram. In fact, I have to stop movement of the slider to allow the histogram to catch up. Is this a bug? I'm pretty sure it is not my system that is slowing it down. Is there a way to adjust the response time in preferences, or in some other manner? I'm running AP beta 1.5.2. Please let me know if there is a more recent version available. Thanks.
-
Sometimes the historgram in the "Levels" panel does not show up (area remains empty/black). After closing the panel and re-opening it the histogram is available again. This behaviour occours sometimes, but is not reliable reproducable. Known bug?
-
 Affinity Photo has a very nice Histogram so far, I can switch between each channel All, R, G + B All, C, M, Y + K All, L, A + B and I can activate layers and selections optional which is totally great! Thanks for that feature. But I think a luminance channel or option is needed in RGB and CMYK too, for minimum of two reasons: - I could only see and use the white and black tone spreading over the whole image - I could work without colors (incl. greyscaled icons) which confusing the eyes at work
 -
 For Affinity Photo, add a histogram that pertains to only localized adjustments. For example, when I add a levels adjustment layer and paint that adjustment by unmasking an area after adding a black fill layer, I want to see a histogram of just the part of the photo I unmasked. A check box option to show only the local adjustment on the histogram would work as well. If this already exists in Photo or if there is a work-around please let me know. Thank you for considering this useful feature and the hard work that goes into Affinity Photo. Michael
 -
The histogram offers checkboxes for layer and marquee. I've tried searching for an explanation of what these checkboxes do but could not find one. When I have a layer selected (such as a levels adjustment), checking layer causes the histogram to disappear. Please explain what each does and how to properly use it. Thank you for your time. Michael
-
Hi, I often have problems to read the histogram with overlapping curves. Its hard to see which channel is responsible for the white curves. I think Apple Photos is doing it better as it always shows the curve outlines in the channel color.
-
 It would be great to have global clipping warnings inside of the regular Photo persona. Photoshop has implemented clipping warning overlays as part of a few tools, such as Levels and Curves, but it won't for instance help you when you are trying to use the dodge and burn tools to get a pure white or pure black background and other workflows. Since I assume that this is already planned as part of the Curves and Levels improvements on the roadmap, I would suggest to make it a view option, accessible either from the View menu or in the Histogram/Scopes panels that can be used at any time, with any of the tools available instead of adding it only to two or meticulously adding it to all sorts of adjustments manually. Holding Option inside Levels/Curves and on the Luminosity slider in HSL adjustments, Black&White etc. would then temporary toggle that option to the opposite of its current setting (i.e. on when it's off and off when it's on). Video cameras often implement the overlay as a zebra pattern, and you can customize the threshold at which it shows up. That's actually a useful workflow for other areas as well. For instance, you could have your clipping warnings at 95% if you wanted to see which areas are reaching a range that while they might not be clipped, would not show detail when offset printing the image. A preference to animate a zebra pattern inside the clipping warning, like the marching ants of selections do, would also make it help stand out when the image is visually very similar to the overlay pattern.
- 2 replies
-
- 1
-

-
- Clipping Warning
- Photo Persona
- (and 3 more)
-
Suggestions: - While using the Levels adjustment, why not have the histogram react to changes in real time. It isn't much use without reflecting change. This is one of the most used features in any photo editor. - Cmd/Opt key click on layer, to create marquee selection based on visible/masked pixels - Pen tool needs ability to subtract nodes with Cmd or Opt keys - Maybe incorporate the Color/Tonal Range Selection into the Wand - option click between layers to identify/assign which adjustments are attached to which layer. Currently, You have to drag the adjustment just below the layer to have it packed in a folder in the layers list. -One strange thing I noticed, when you add a gaussian blur with before after shown… In the radius amount box, "Shift-up arrow" gives you increments by 10px. "option-up arrow" gives you 0.1px increments. But if you drag the slider slightly using the mouse you can get a very, very subtle blur less than 0.1px, but no amount is shown. Having the even finer adjustment is great, but difficult to do using the mouse. Maybe an extra modifier key for finer than 0.1px would be nice. Like: - The Speed! This program is quick. - Live modes - Before and after view slider.