Search the Community
Showing results for tags 'highlight'.
Found 23 results
-
 Hello, I have been working on a pdf, and noticed that some objects keep being highlighted with the purplish outline eventhough they are not selected: When I select the text, there is no line set: I'm on Win10. Juan
-
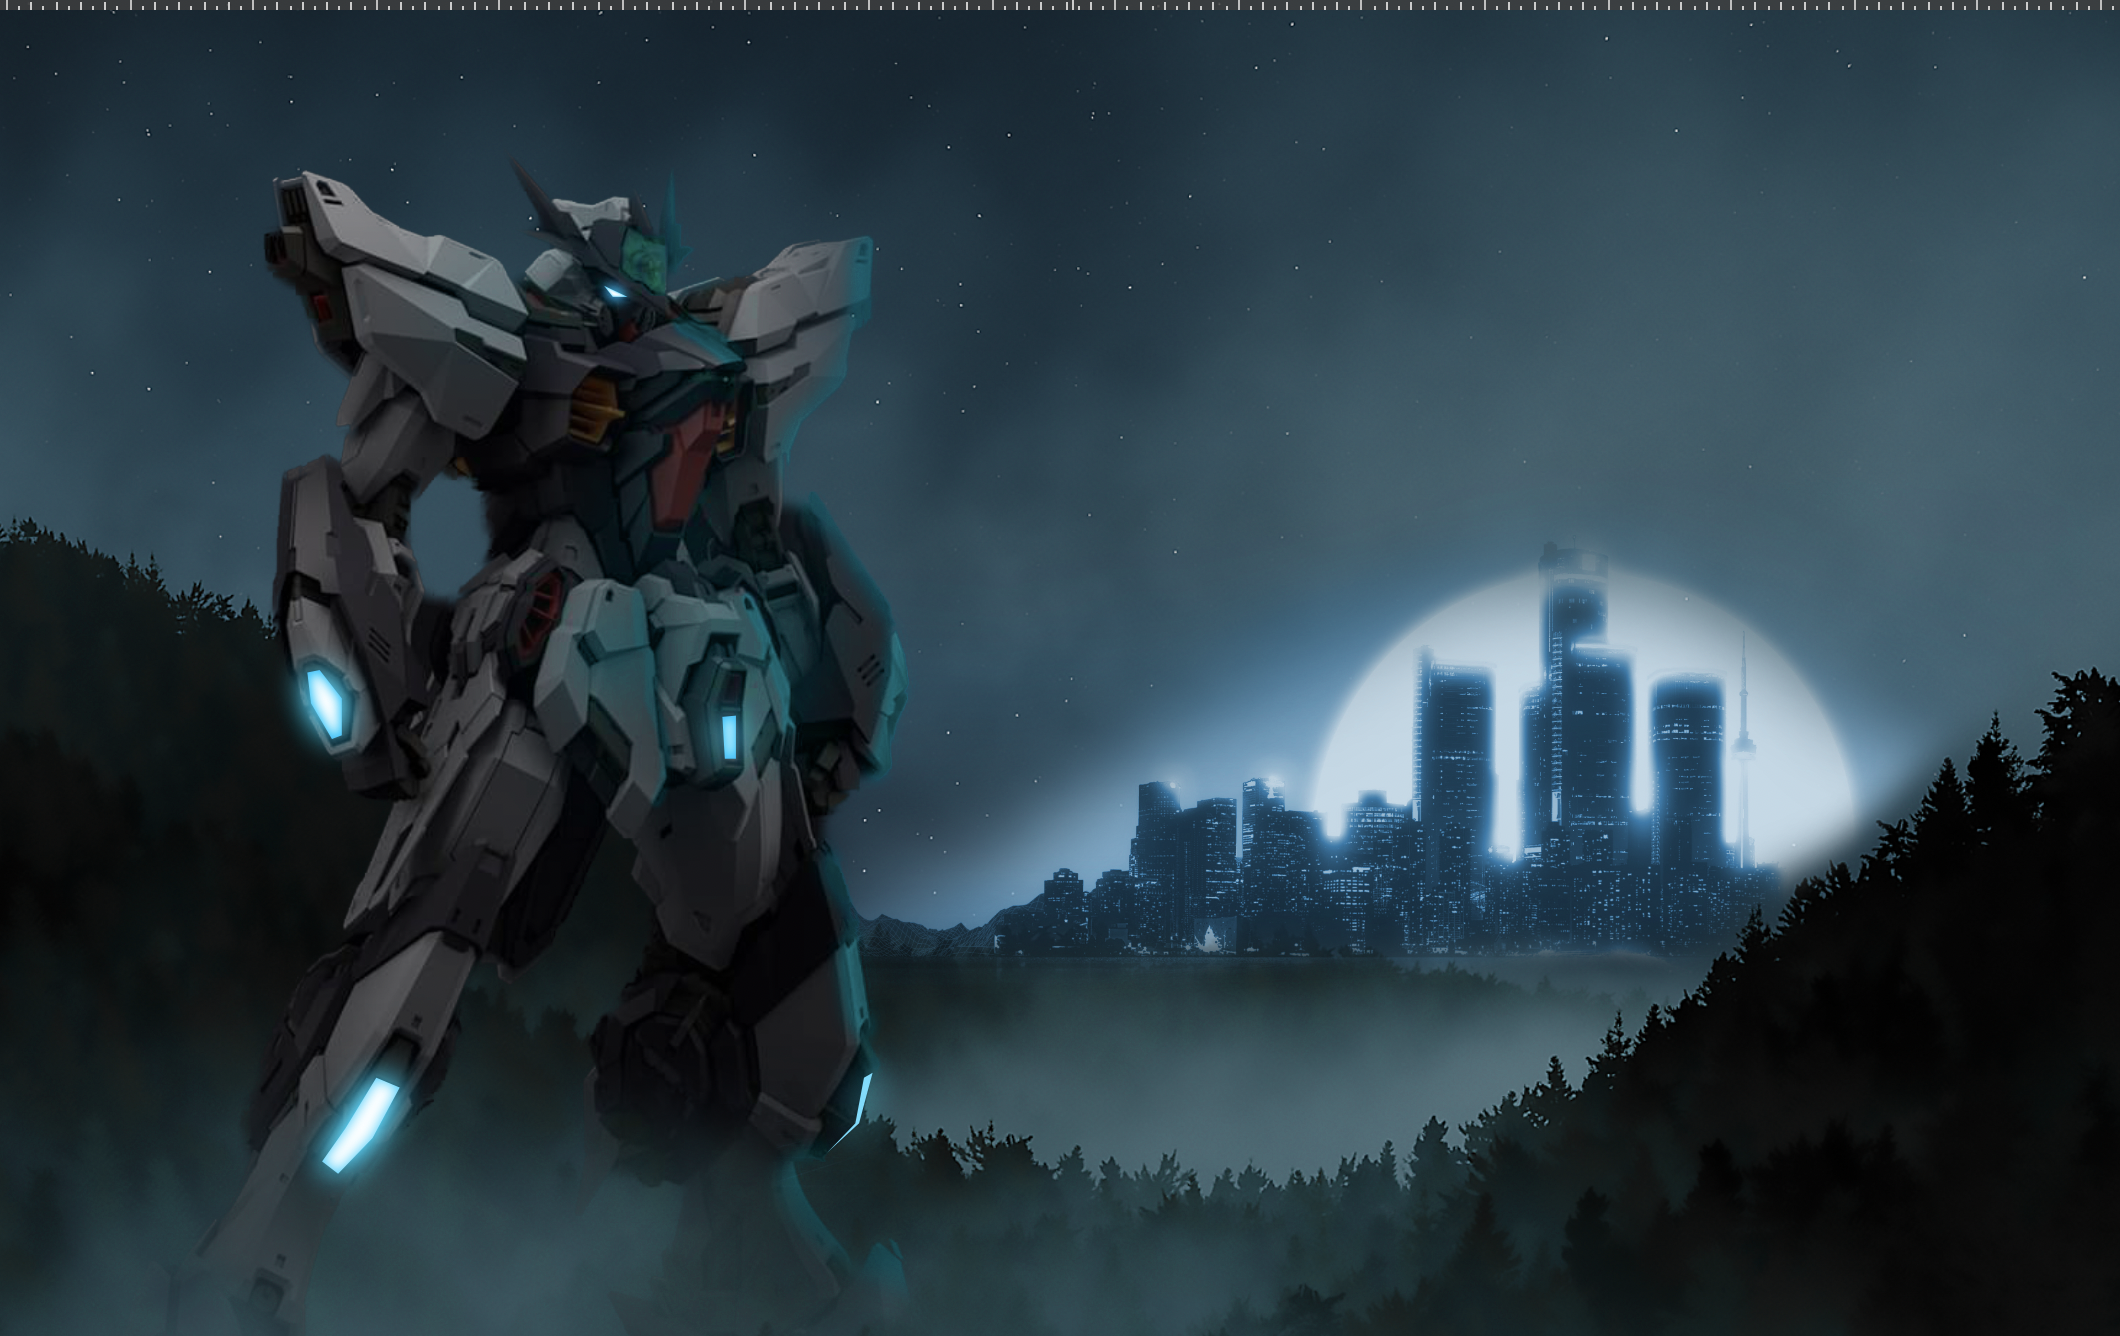
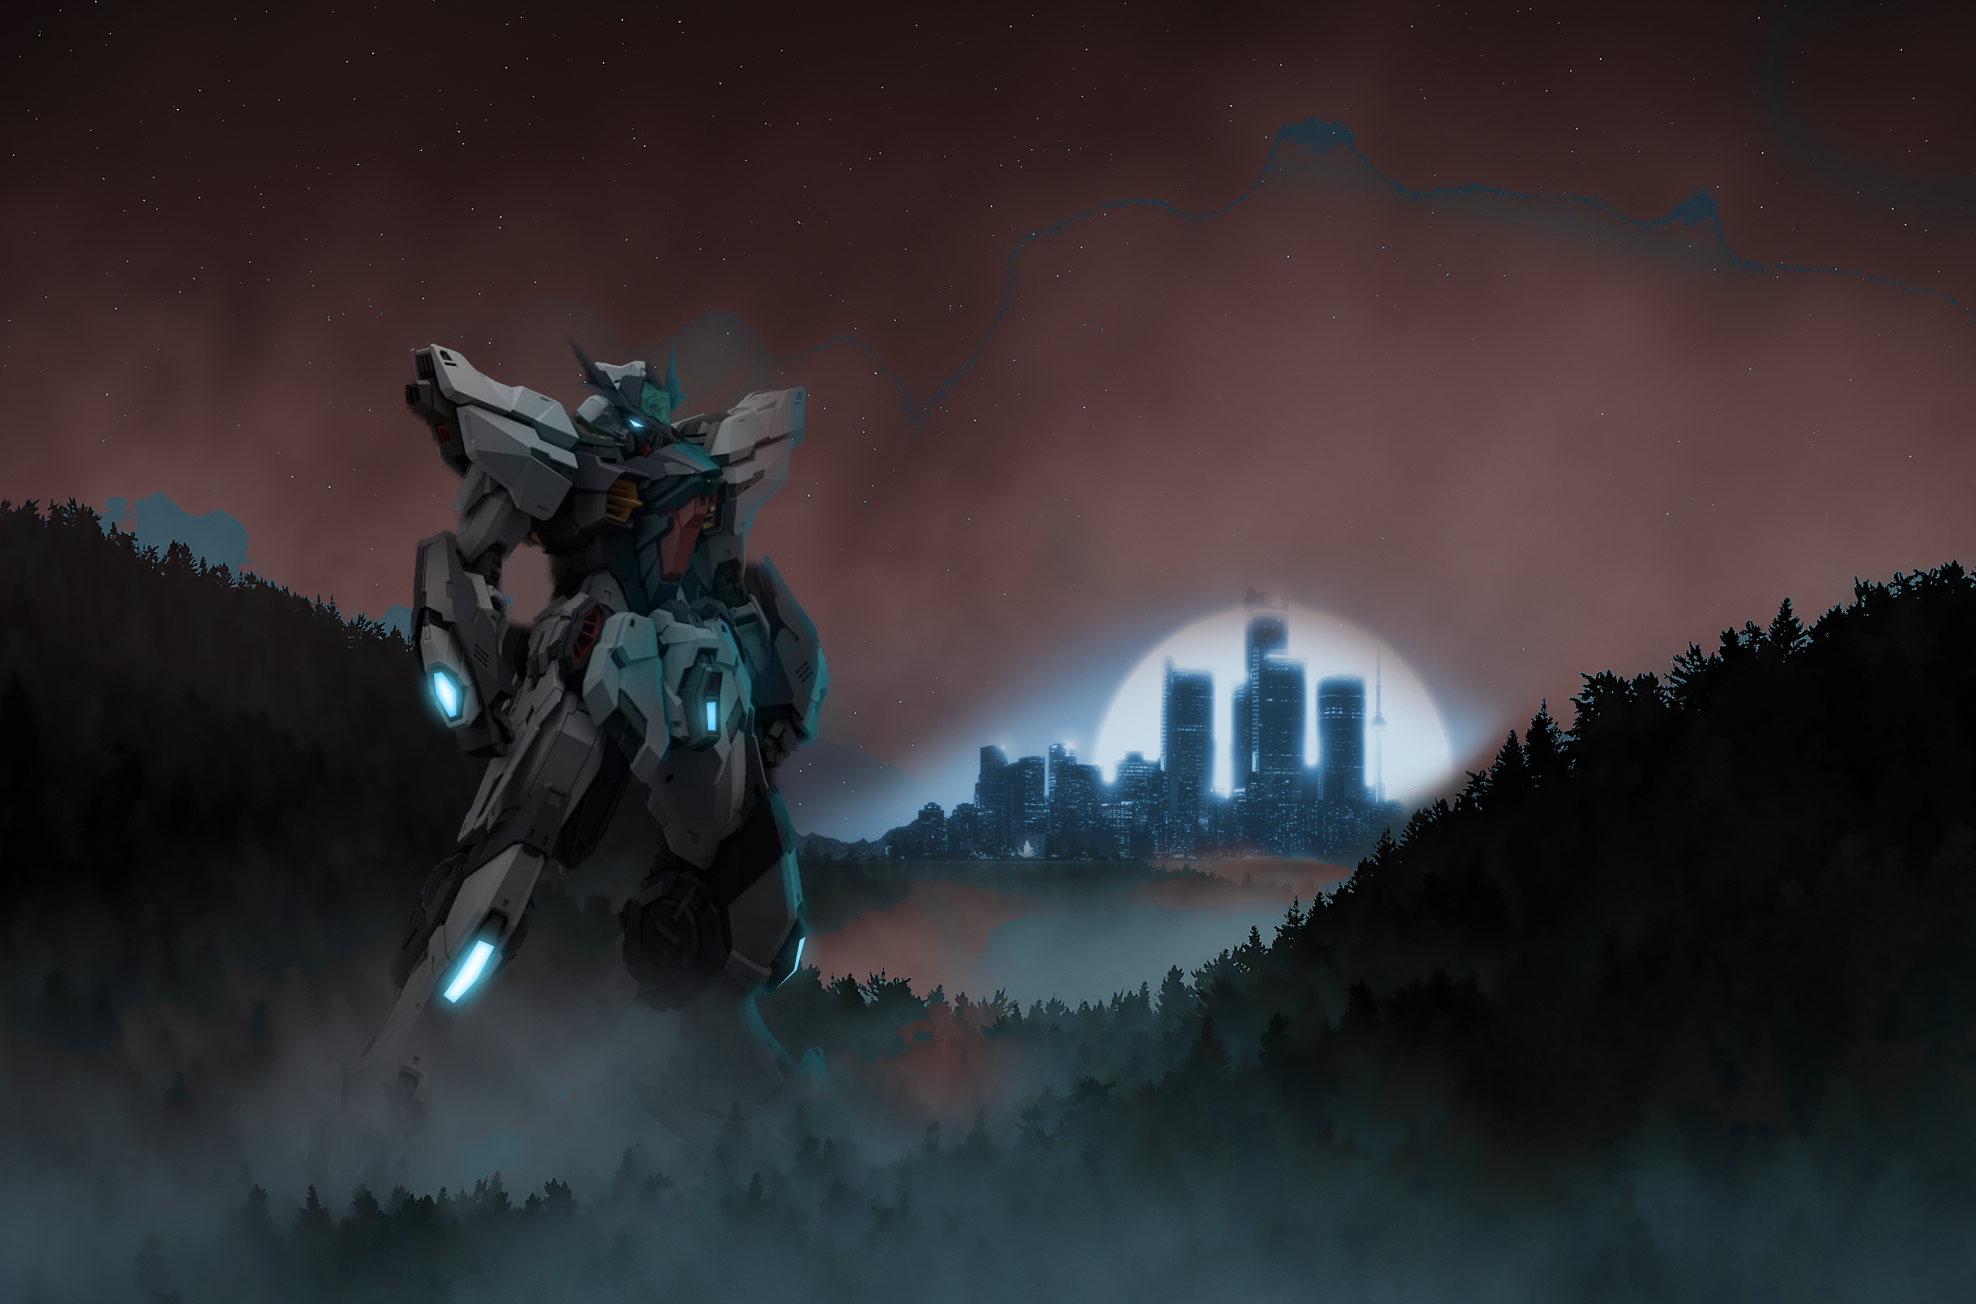
 Hi! After 3 years I finally decided to open up Affinity Photo and start to practice (I mainly use Designer and Publisher). There are a couple of road bumps that I cant seem to find the answer too. I am familiar with the brush tool and the basics such as keeping the colours black and white when you are blending to remove or add. My issues come when I am trying to add artificial light or highlights using the brush tool. In the example below, I have a Mech in a forest with the city in the back. I was able to blend them in, but I am having troubles adding the highlights from the city onto the edges of the mech and trees. It allows me to paint with any colour but they seem to be very dark. I have no control over the vibrance of the highlight or the contrast. I only have control over colour and opacity. Could it because whatever i am paining on a mech that already has adjustment? I usually add highlights at the end in Photoshop! Q1: If I wanted to add a very thin or thick glow / highlight on the mech from the city, how would I do that? Q2: Recolouring seems to have this obvious separation where the blends happened. How to fix? (blue shows through red) Q3: When I am changing the exposure, shadows or light on the mech it selects the entire project even though I specifically click the single masked mech. I then have to copy the adjustment and paste to group only the mech. Is there a fast way of only selecting mech and not the forest? Hope someone has an answer! Also, great community and great software. I've been more than satisfied for the last 3 years and I rarely have to come on here to look for solutions. :)
-
 Within the Develop Persona, there are particularly little keyboard shortcuts that can be configured. While most of the action occurs within the studio panels, the toolbar items are the ones that need to be mapped to keyboard shortcuts the most. Nevertheless, there are no options for me to assign show highlight clipping (O in Camera Raw), blackpoint clipping (U in Camera Raw) or clipped tones, Single view, Split view or Mirror view, neither for Sync before/ after or swap. I am also missing a toggle to toggle between the original, non-modified version of the image and the developed image, because once I synced before/ after, I cannot go back to the non-modified image.
-
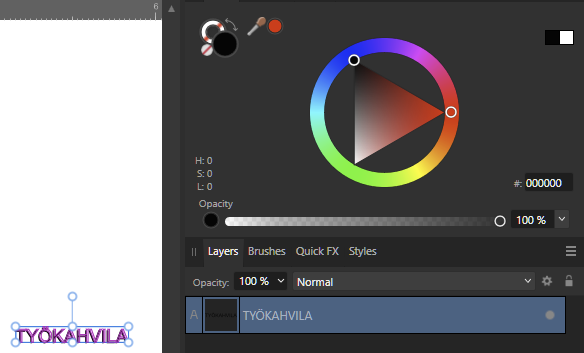
 Only two months into using Affinity Designer here. Starting at some point through the progress of my project, any time I create and type new Artistic Text, a purple highlight appears behind it. I don't remember messing with any settings to make it appear. I've tried to look very carefully at the color options on the Artistic Text object but I can't find anything. What am I missing? This hasn't happened to me during other projects until after the 1.9 update, so there's the possibility of a bug or new feature/setting that I'm not aware of yet. I also attached what the problem looks like in Affinity Designer. The text color was intended to be white, and the color shows as white in the Color tab.
-
After typing some text using the artistic text tool, I wanted to highlight a couple of the characters to make them Superscript but I noticed that the text was not highlighting. I restarted Affinity Designer and tried again, same issue. I just happened to zoom out while I was trying to figure out what was going on and then the text appeared highlighted. I zoomed back in and the highlighting went away again, zoomed out and highlight returned. So it's whenever I reach a specific point of zooming in that the highlight disappears. Even though it doesn't show the highlight, it still acts as though the highlight is there, I was able to apply the superscript effect even when I couldn't see the highlight. 2020.06.04-07.35.mp4 2020_06_06-15_53.mp4
-

Select linked text frames with image wrap cosmetic
thetasig posted a topic in V1 Bugs found on macOS
Using AFPUB 1.8.3, OS X 10.15.3. Cosmetic? Please see screenshot. The 4 text frames are linked for text flow. The images within all have wrap settings of "jump" with 3mm spacing. If you select all of the text in frame 1 with CTRL-A, the selected text is ghosted in the wrong places. You can see, for example, the bottom 2 text frames have "shadow" highlights that precisely match the actual text in shape, but are somehow shifted down below the actual text. This seems to be related to the size (spacing) of wrapped images and perhaps the flow link to a new spread/page as I have just started using the "wrap" feature and have never seen the problem before. It's a cosmetic thing, I suspect, but the highlighted "shadow" boxes should be exactly overlaying the actual text.
-
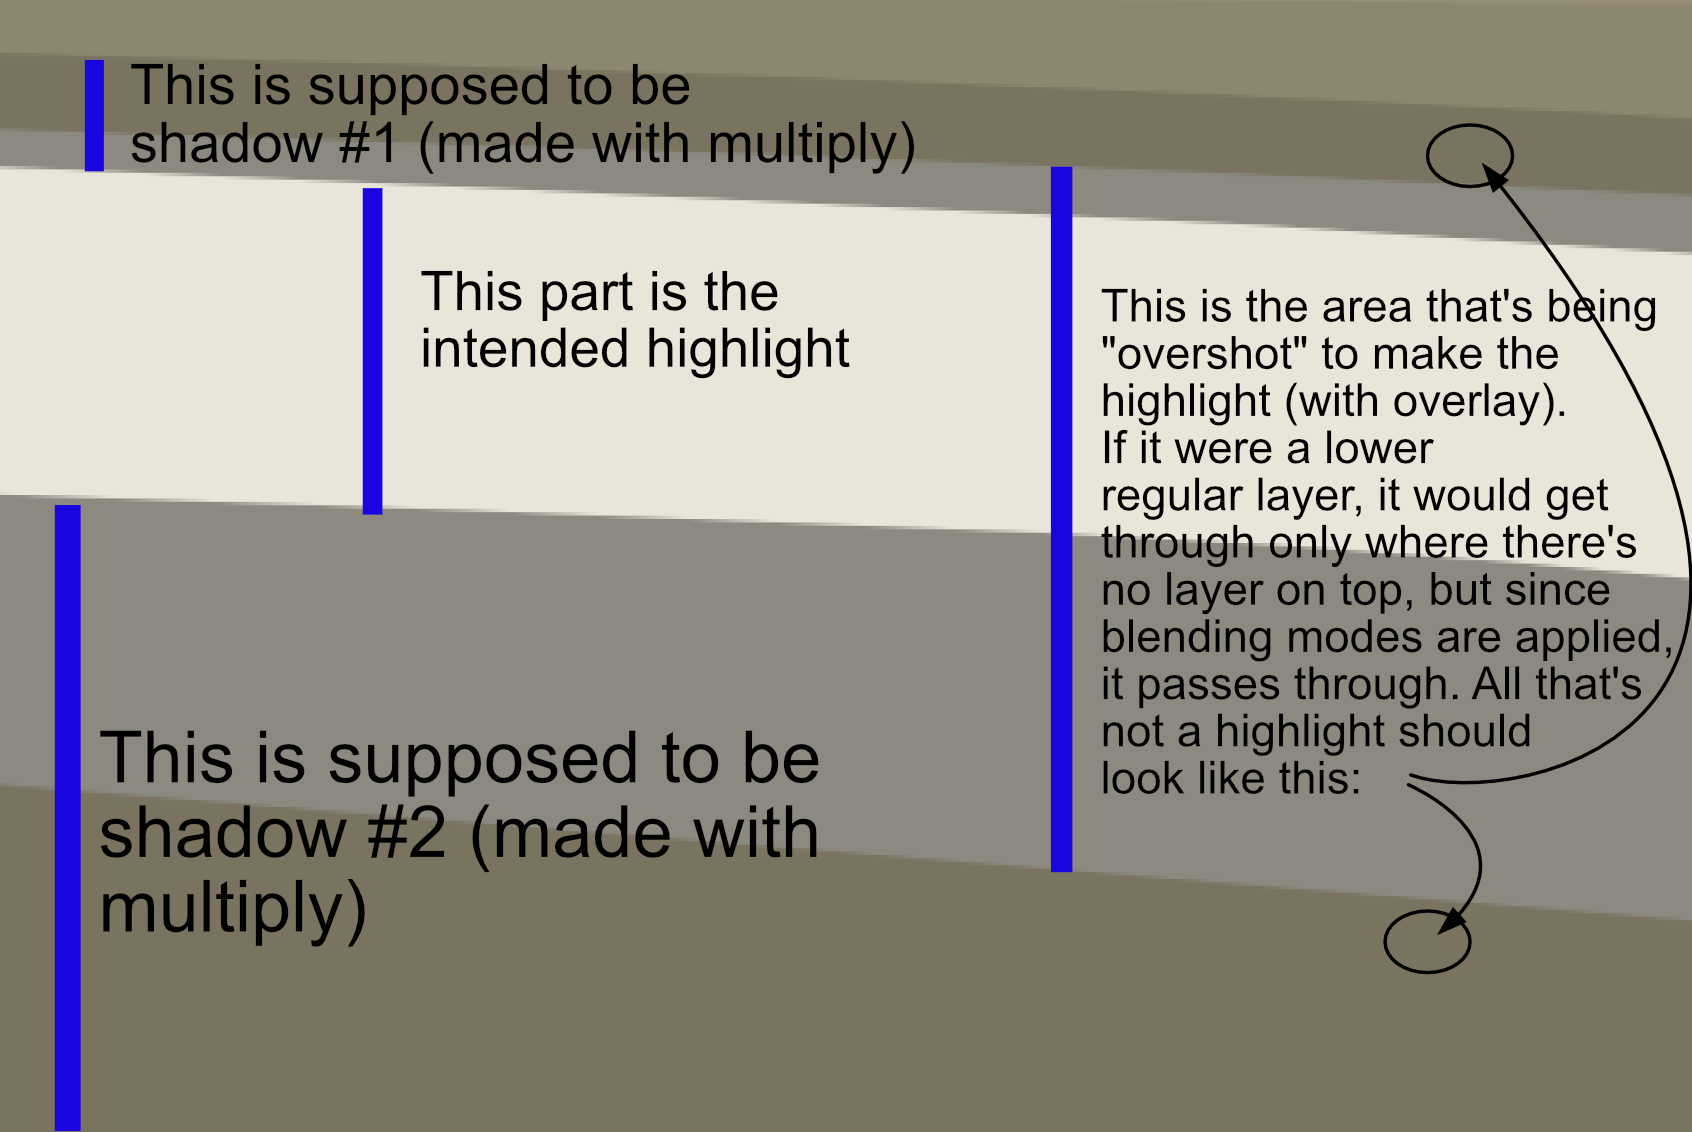
 Hello everyone! I'm having a hard time with something I'd like to do in Affinity Designer and don't know if it's because I don't know how to do it, or because I'm understanding things the wrong way. Is there a way to use multiple blending modes but that between them they don't affect each other? I have a base layer (flat colour). On top, I have a shadow layer and a highlight layer with multiply and overlay blending modes respectively, but because of how I stack my layers, it's easier for me to do one layer and the other below it, instead of making them precise. In 100% opacity normal layers, this works because the top one hides the one below, but with blending modes they, well, blend. Is there a way for me to make them not apply to anything but the "base layer"? I tried masking a copy of the base layer but the blending mode wouldn't apply, and in any other way, undesired interaction between layers was happening. I'm adding an image to make myself more clear The layer panel at this time looks like this: - (Stuff) - Shadow group (with multiply) - Highlight group (with overlay) - Base colour layer Thanks a lot for your time!
-
 Dear developers, Please add an option what show No Break character as highlighted text. I used on a few word this Option for better hyphenation, but when text will move, I cannot see where applied this option. If can you add a highlight to these words, texts, this will great help in future. This highlight feature can show or hidden like Special Characters or Fields.
 -
 Hi everyone! I’m relatively new to Publisher and I am pretty happy that it functions somewhat similar to InDesign, which I’m used to especially the pre-CC versions. So I've been trying to tweak the look of my title below that is in highlighted in green below. Is there any way to customize the highlight’s position in relation to the text currently? I haven’t found any such options or am I missing something? Any help is highly appreciated! Thanks all
-
I have a large document. I was trying to find a way to add an accented "e" to a word so I used the Text/Show Special Characters menu choice. Wrong! At that point all text objects in the entire document were highlighted with rectangles around them. Apparently, even picture frames are also highlighted. Undo didn't work. I went back to the same "Text/Show Special Characters" menu and unchecked that. I can't get rid of the rectangles now. "Select All" doesn't change anything as all objects are selected. "Deselect" is greyed out and Command-D does not function in this case, and the "Text/Show Special Characters" is not checked. Note that the purpose of "Show Special Characters" turned itself off (not showing paragraph markers, etc.), but the highlighted rectangles are still present. Any ideas? Is this a bug or there some way to "deselect" everything? Thanks.
-
 Please consider writing into your next forum website functions, the ability to use colored text and colored backgrounds & highlights.
-
 Hi guys, For instance I have an image, and above it I have a shape/curve. Even if the image layer is locked, if I click on the image on the stage/canvas, its margins still show as highlighted. Is there an option not to show that? Thank you
 -
 I have a problem by using the Shadow and Highlight sliders of the Develop Persona. Please compare the two results. The only thing I tweaked have been the Highlight slider to -100% and the Shadow slider to +100%. All other switches set to OFF/Unchecked, in Camera Raw and also in Develop Persona. The only exception was the usage of the Camera Colour Profile "Neutral" the RAW file offers (not available in Develop Persona), but this only affects subtle the colours. Camera Raw also applied the automatic lens correction profile, which is also not recognised by Develop Persona. Everything else was disabled (sharpening, denoise, etc.). Please see attached results. The one on Develop Persona is unfortunately much worse than the one of Camera Raw/Lightroom. I also attach the RAW file. I am very keen on your reply to this, and I really appreciate in advance. Hey guys, there is a problem on upload of Lightroom/Camera Raw generated JPGs to Affinity Forum sites, this error only occurs if I want to upload the Adobe generated JPG sample: Best regards, Roland RAW File: DSC00644.ARW Camera Raw Output attached as Zip: DSC00644-CameraRaw.jpg.zip
-
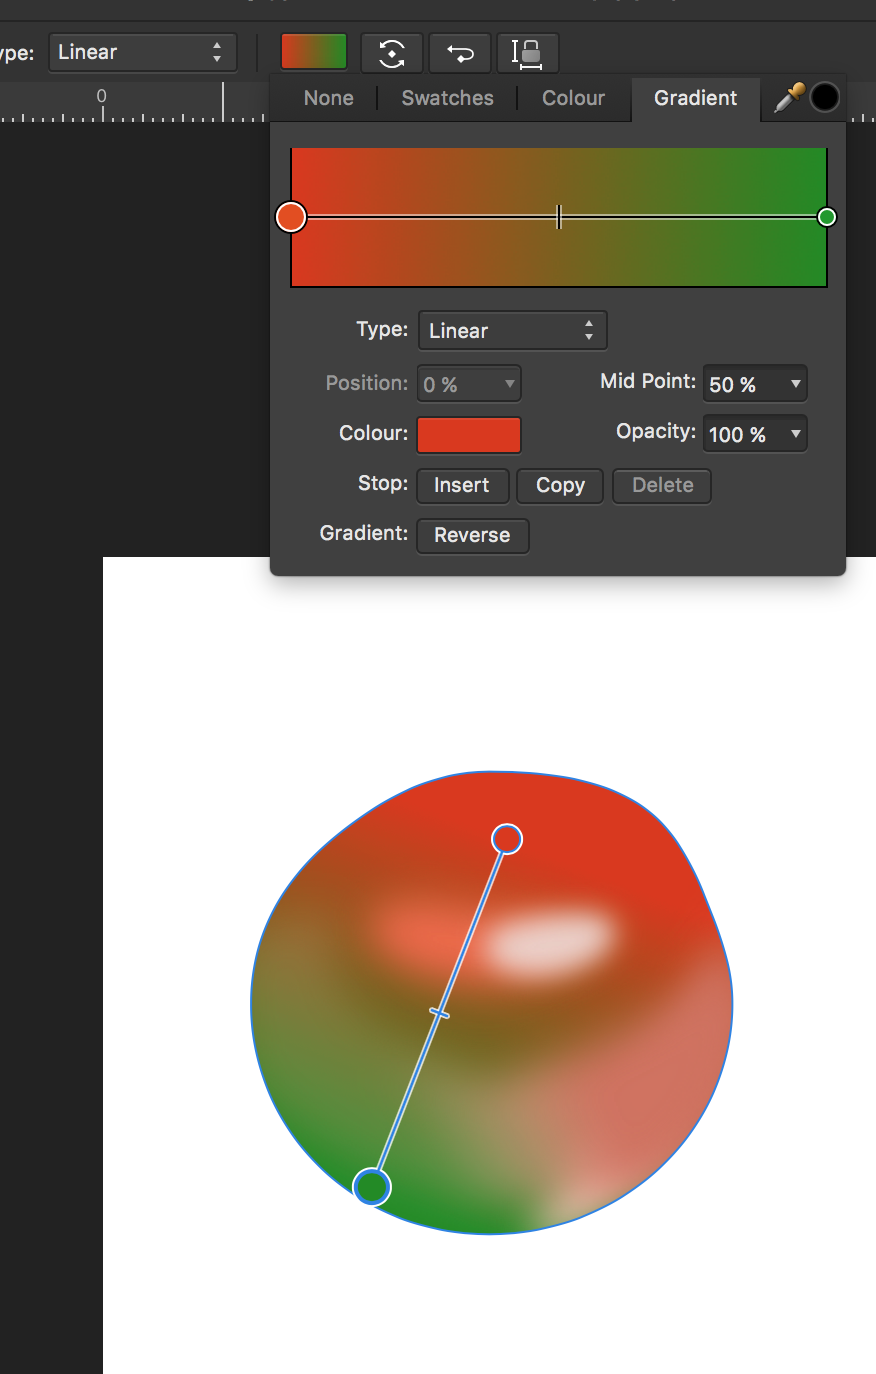
 Hi all, Is there a good reason that I might not see but someone else could make sense out of on why the stops for the gradient handlers are not highlighted equally in the gradient dialog and the gradient tool applied to an object? In the pic I attach, it's easy to know which is which, but when the gradient is more complex and has similar colours, it's quite hard to know which stop is which in the gradient dialog, so I have to trial error until I find it. As you can see, in the canvas, the green stop is selected, while in the dialog is always the leftmost one, the red in this case, to be highlighted. Wouldn't it make sense that, if I have a stop selected in my object gradient, it would show as such in the dialog window where I'm to make colour changes? Thanks.
-
 I've noticed an counter-intuitive result when editing text in Affinity. If I highlight a section of text, then type over it, I expect the resulting text to maintain the styles of the previously highlighted text. However in Affinity, only the first typed character keeps the style, the following characters use the styles of the text AFTER the insertion point. Example: I type two lines of text. I make the first line bold I highlight the whole first line (triple click) I type to replace this line with new text. The resulting text has a bold first character, but regular thickness for the rest. I'm not sure if this is by design, but it's really annoying!
 -
 Hi, if I'm working with designs that have a lot of layers it's sometimes quite hard to identify the active layer in the layers list as it may not be in view and will thus require scrolling up and down before you can find the highlight. Is there a way to quickly jump to the highlight in the layer list, or (even better) some sort of option that allows the active one to be scrolled into in view? I accept the latter might not work when working with multiple selections, but when creating this would be quite handy because you don't always have to mine the relevant layer out of a long list.. Cheers!
 -
Hello, I very useful feature in Aperture (and other applications) is that it was able to show me areas of highlight clipping of a photo that were slightly blown out (as well as cold areas that were blacked out) In Aperture, there was a way to "recover" some of the details within these hot areas. I can't seem to find the equivalent feature in Affinity Photo (other that the highlight slider, but somehow does not provide me with the same results) Any suggestions/tips? Thanks
-
 I need to put a thin black border around white lettering - meaning that each letter has its own border, to highlight it against an image. How is this done? Thanks
 -
 Hello, I've a photo with a very clear sky in Lightroom I can recover all the details on that sky but with AP (I love this app) I can't recovder as much details. Do you have an idea how to do it in AP? Here are the exemples (I can give you the original but it's a 43 Mb NEF file...) PS: sorry for my bad english 01-Original.pdf 02-Lightroom development.pdf
 -
 I'm trying to highlight a finely selected area of an image. I tried in multiple ways and I'm hitting the same problem so maybe I'm not going the right way or missing something. I tried creating a new layer with soft light blend mode and using a brush I can highlight some areas. The problem is that whenever I paint over an older stroke I get more highlight. How can I deal with the overlapping areas? Same thing if I try to create a Quick Mask and paint the selection. If I try to fill the selection with a solid color, I see the overlapping strokes that I made in Quick Mask mode. Any suggestions about how I can make the strokes not overlap, but create one area?
-
 Hi there ! I didn't find the way to apply highlight recovery in Affinity Develop Persona.. Did I miss something ? Where is the function to be found ? Cheers !
 -
Inside the Layers tab, when I drag a layer onto the Trash icon, please make something happen (like a Hover state on the web). Right now it works -- if I drag atop the trash and release, it gets deleted with feedback of a little cloud -- but I want feedback BEFORE I release the mouse button. Photoshop gives feedback. Drag a layer atop the trash icon and the background of the trash icon gets darker. It's a small thing but one that will be noticed by everyone and LIKED tremendously. Thanks.
-
This should work in both Designer and Photo. When you click on a layer to have the layers panel scroll to, and highlight, the selected layer. It's very inconvenient to scroll up and down looking for the object you've selected especially with more complex documents.