Search the Community
Showing results for tags 'gradient'.
-
 I am trying to use the gradient tool on a mask layer to fade either side of a photo I'm compositing. I create a gradient on one side, and switch tools to commit it, then when I make another gradient on the other side, it removes/resets the previous gradient and overwrites it with the new one. Where is the commit gradient button? How to save and get out of the live gradient tool mode? Also for extra credit, how to make radial gradients?
 -
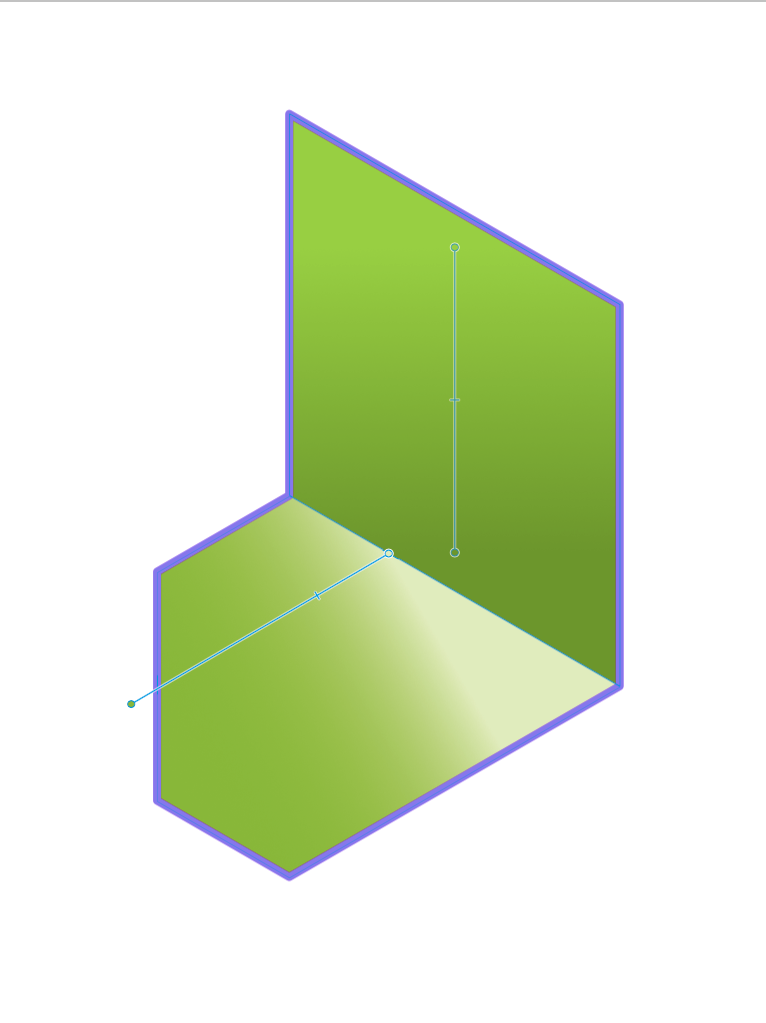
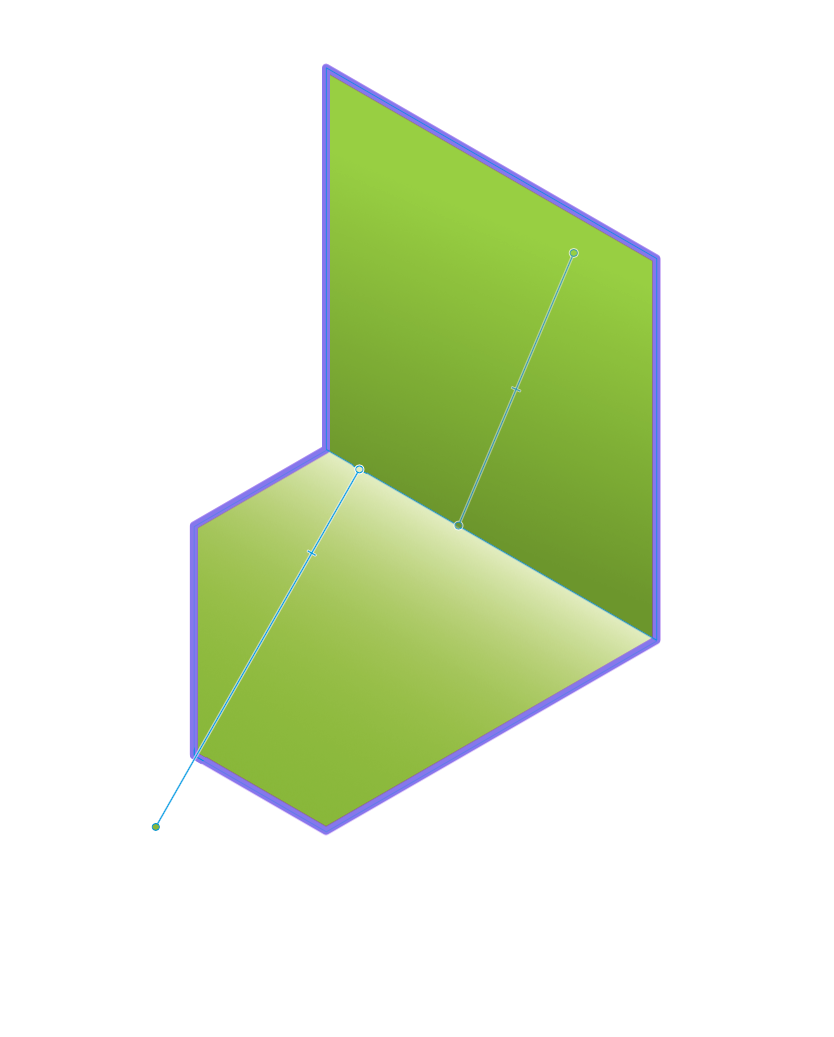
Would love to see some sort of "right angled" snap enabled gradient tool feature (perhaps with a modifier key). When dragging out the gradient tool often I need to drag it 90 degrees perpendicular from an edge to get a nice even gradient that isn't angled. See attached. Second image is the desired behaviour, 90 degrees perpendicular to the centre edge. Illustrator sort of handles this with a dashed line box as you drag the gradient tool but it doesn't snap. A snap would be helpful to ensure it's at 90.

-
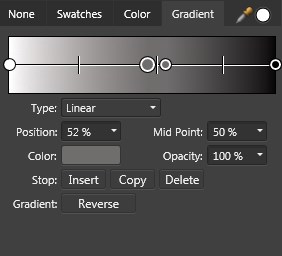
 Do you use the gradient tool? It appears in all sorts of places in AP. Are you a bit irritated with the default white-to-grey gradient? Would you prefer it to be white-to-black without having to click nodes and colour settings? Here's how I do this. I don't know why it happens, but it's jolly handy. In the gradient tool context toolbar, change Type to your choice, eg. Elliptical. Click on colour box. Drop-down box appears. Clicking on Gradient shows the default white to grey gradient line. Here's the magic: Click on the 'None' tab and then the 'Gradient' tab. Ole! White to black gradient.
 -
 1) Create an object. 2) Give the object a color gradient and apply a global color to each end. 3) With the object selected, go the Context toolbar and change the color one or both ends of the gradient. Deselect the object. 4) In the swatches panel, change the color of the global swatch. The object's gradient will disappear and revert to the global color.
 -
 I don't quite understand the behavior of the Gradient tool. I know what it is for and how to use. The problem I have with it is that if I click outside the image or on another layer before I have finished working with the Gradient, there is no way to bring it back so that I can continue making adjustments. Which means I have to be very careful when I use it. At least with some other destructive adjustments, you have to click on Apply before the changes become final, but in this case there is no such a thing. Am I missing something? Is there a way that i am not aware of to bring back the gradient tool if I happen to click outside the image or on another layer by mistake before I am done with it? Thanks!
 -
 Either I am overlooking an obvious step (as I've been known to do) or Overlays in the Develop persona are not working on the AirPad 2. Bring in a RAW image, click on Overlays, select Brush Overlay, and in the context toolbar select Show Overlay. When I brush on an area of the canvas with the paintbrush, I expected to paint in a red overlay like in the RAW: Overlays on Vimeo video but I don't see any change whatsoever. No red glow where I've brushed. No indication that I have marked the canvas at all. If I go to the next step in the Help instructions and select an adjustment, there is no change in the image. What am I doing wrong?
 -
 Hello the A-Team! :) Ok, I'll be straight forward on this one: I'll find attached a video record made on Photoshop. The technique shown on a boring solid fill is in fact an insanely productive method when mate painting, photo retouching, etc. Here's the challenge: Make me this in Affinity (Photo or Designer, choose the one you want). Made in Photoshop in 5 clicks. The gradient tool is set from solid black to 0% black. MakeMeThisOnAffinity.mov I've not been able yet to find any method to match the productivity of Photoshop on this point. (Trust me, combining both words “productivity” & “Photoshop” in a sentence is a serious pain I would like to avoid…). Also, when selecting the Gradient Tool: Why is it always defaulted to "None"? (If I pick the gradient tool, chances are quite high for me to make something else than "none", I even guess linear could be my favorite pick…). Why I cannot set the default colors for my gradient tool? (When starting to draw a gradient, colors are —always— white to grey, and I —always— have to change them afterward… Can't wait to ear from you guys :wub:
-
 Hey, here's another one of my Affinity Designer tutorials. In this one you will learn how to add gradients to objects using the fill tool. If you like this video, give it a thumbs up and don't be scared to leave a comment :)
 -
 It just struck me how handy it would be to be able to set a transparency or gradient vector on an object, and then go to the Transform window to specify the angle and position of the vector. Could be especially interesting when Ctrl-J'ing (new phrase :) )
 -
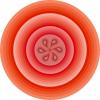
 Hey Affinity Designer Experts, i have a Question, i cant handle those gradients. those are not 100 clean and it looks like errors. How can i fix it? i need to make it 100% Smooth.
 -
 Hi guys! Unfortunately I didn't find any clue how to remove a color stop with the gradient tool. Adding and moving additional colors is no problem, but how do I get rid of them? I tried to tap and hold the circles, double tap and hold them and dragging them out. But neither of that works. The context menu deletes the whole gradient. I had a look at almost every studio and menu - I hope - but I found nothing. The unofficial manual ( https://forum.affinity.serif.com/index.php?/topic/34556-affinity-photo-pdf-manual-for-your-enjoyment/) didn't help, neither the tutorial videos. May I have missed something? Thanks in advance.
 -
 I've made a nice world map with AD and applied a gradient to it. When I export this as a pdf file, it will be rasterized. However, other shapes on that world map such as an arrow (line) won't be rasterized on export. I changed the filling to a solid color and exported again. Now my map won't be rasterized anymore, but I've lost my gradient. How can I export a shape filled with a gradient without rasterizing it?
 -
 Hi here, I've created a donut and I'm trying to make a linear gradient that would follow the shape of the circle/donut. I've tried all the gradient options in AD without success. As a solution, I'm thinking about making a rectangle with the linear gradient I want and tranforming the rectangle into the donut I want. If anyone has a better solution, please let me know. - hoping I was clear enough. Cheers,
 -
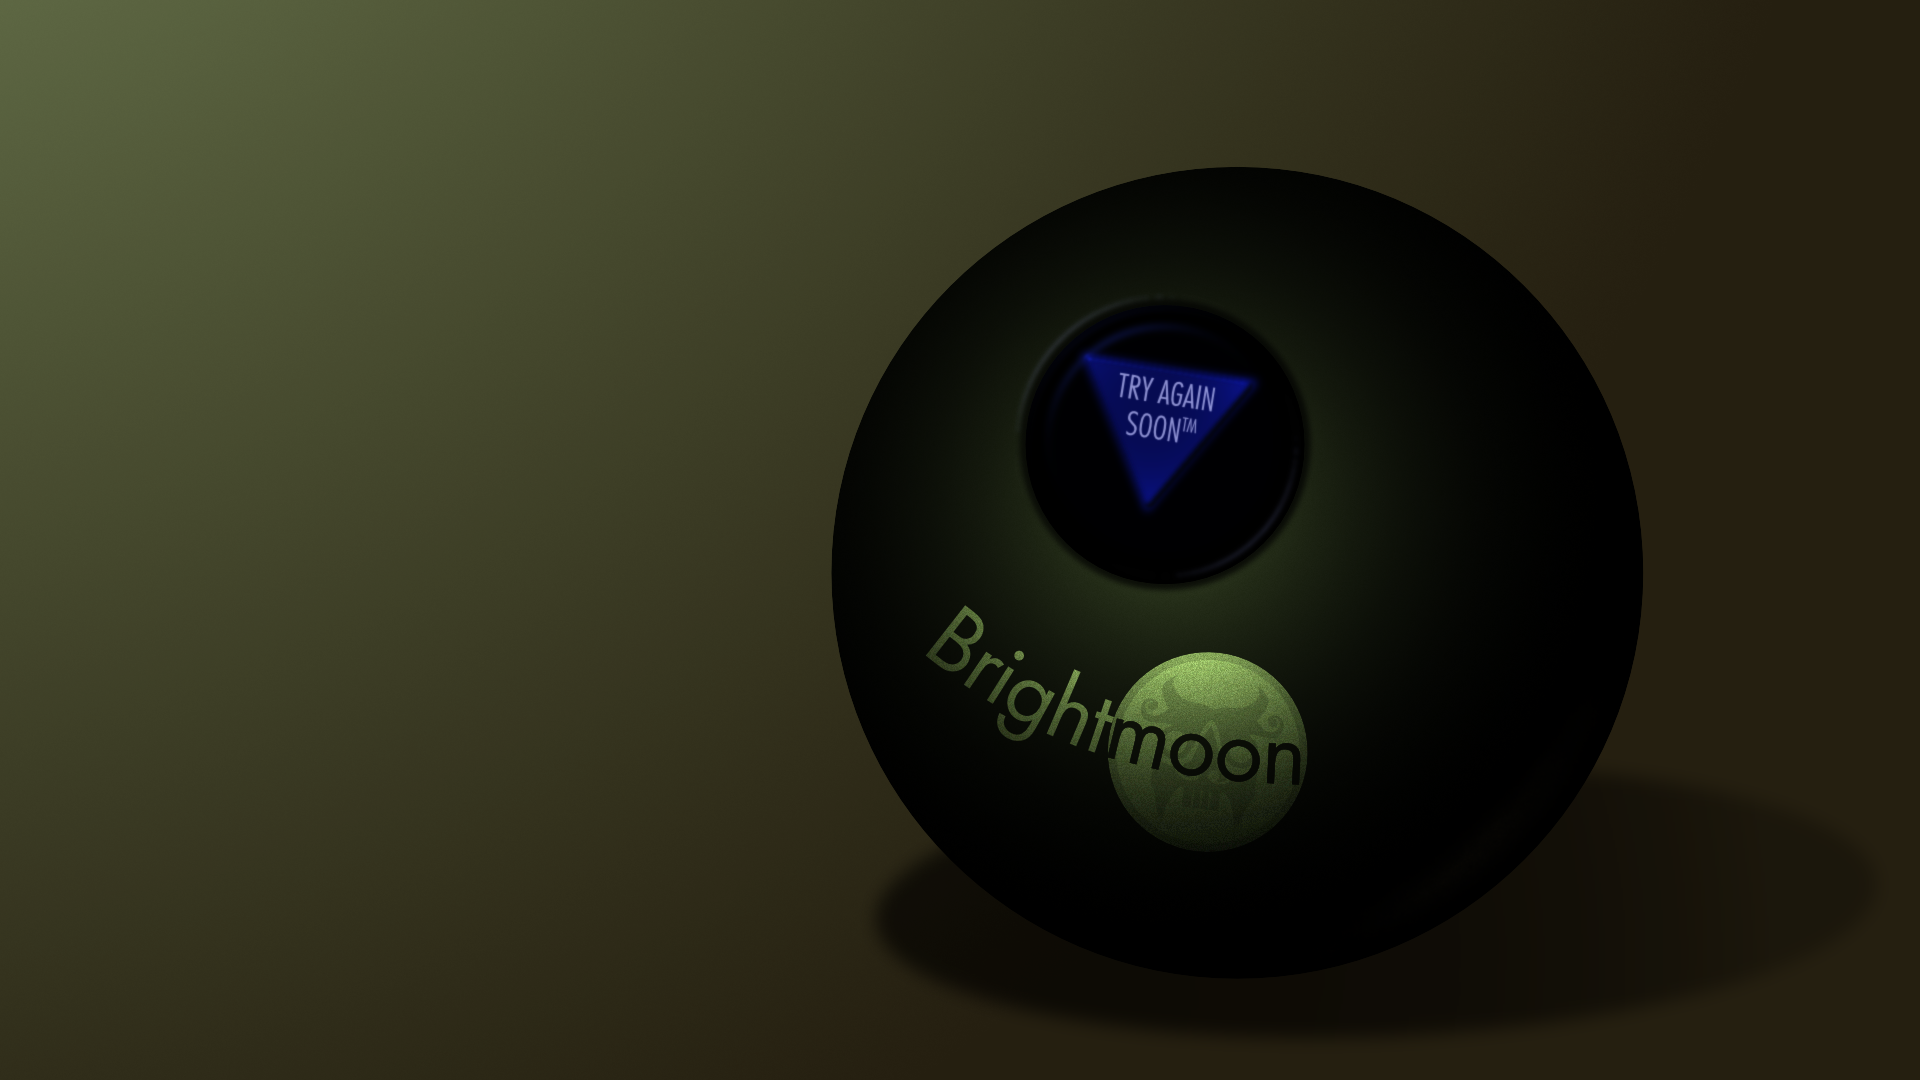
 Twice now I've run into an issue where trying to export a png with Affinity Designer results in a posterized reduction of colors, and I cannot find a setting to avoid this. In my current piece, it resulted in obvious banding of the gradients, and the reflected light being lost entirely. However, if I save the file as psd, then open that in Clip Studio Paint and save as png there, I get accurate colors and no banding. The first file is the png as saved from AD, the second is the png from CSP, and the third is the original afd so you can check and see if there's anything weird about it. Brightmoon 8-ball.afdesign Is there something I'm missing on export to prevent this issue, or is it a bug? Also, I've tried copy-pasting layer styles a few times, but it's prone to changing the values on paste--generally about double or half (i.e., 7px gaussian blur becomes 13.8px). Is there a way to prevent that, as well?
-
 I am presently trying to make the switch to Affinity. After twenty years of working with the competitor's products, I am finding this a little difficult. Please forgive me if I'm putting too many questions under one topic. I am starting to embrace the differences, as much as possible. However, the export function does not appear to be my friend. I am starting to get the gist of it, but I am confused as to why my images dimensions get resized when working with jpegs and tiffs when I export. With the jpegs it appears that no matter what size I am working, it defaults back to 72 dpi and changes the dimensions accordingly. My cmyk tiffs appear to be changing the dpi to 180 with the dimensions shifting as well. Is it supposed to work like that? Also, how is it best to work between Photo and Designer for printing? Do I need to export a tiff or eps to place in Designer or just use the native file? I initially had some trouble with parts of the images going grey when I tried to print a Designer layout with a Photo image. Does this have something to do with the embedded profile? I would really appreciate a video, or some sort of instructions, on best practices to place an image from Photo to add to a Designer layout for printing purposes. Lastly, I am struggling with the gradient tool. Is there anyway to go from a solid color to transparent? I just can't figure that one out. Thank you.
 -
Letter to Santa Claus : (i) make the gradient tool operation closer to the brush tool, so that it no longer erases the initial content of the layer when applied with a reduced opacity. (ii) Make it reminiscent of the previous color choice. (iii) Allow for a few useful presets (such as Black to White, Foreground to Transparent, etc.) or allow to save and reload various adjustments.
-
 Hello, In Photo (Win10) is there a way to set a bitmap fill to be exactly 100% of the original size of the file that you use? For example: I'm using a pattern file that is 100x100px. When I use that as a bitmap fill in a Photo document I want the base pattern to be exactly 100x100 px as well. Is there an exact way or a way to put in a numerical scale value for the bitmap pattern file? Thanks, Jeff
 -
 Hi, I am new with Photo for Mac and need to adjust the colour balance differentially along an edge of a photo. It is a scan of a very old colour negative with substantial colour shifts close to the negative edges. I have looked into gradients, feathered regions, but neither seems to be either right or easy or I am not yet skilled enough. Can someone suggest an approach for tackling this? Thank you in advance for any advice. Ron
 -
 EDIT: The post mentioned below has been moved to the feature request forum, so this topic is not needed anymore. Can a moderator delete it? Improving the PDF output so that objects filled with gradients can remain as vectors. Currently they are rasterized or converted to non-native art. As discussed in this topic: https://forum.affinity.serif.com/index.php?/topic/35820-some-areas-will-be-rasterized-until-when/ Thanks!
 -
 Ich möchte ein Verlauf über mein leeres Farbdokument legen.Mein Verlaufswerkzeug lässt sich klicken aber in der Auswahl erscheint nichts zum auswählen nur "ohne" Was kann der Grund sein?
 -
 Hi guys, I'm using Affinity Photo for Windows and can't seem to find how to adjust the direction of a gradient stroke added to text, all I'm presented with is the attached? The Fill isn't a problem as that's controlled by clicking the Gradient icon. Thanks in advance Neil
-
 Dear Affinity Team, I´d wish for a solution where I can select colors from my picture (f.e. with the eyedropper) and make a gradient out of it. When I try it now, I can only select one color and the gradient is then applied automatically. I´d be glad if you could implement that <3
 -
 I have a gradient with various opacities on the colors within a closed curve (a region within a geology map). To place a pattern above the same area I duplicated the gradient curve, unchecked the gradient in this duplicated curve and then tried to place my pattern within this duplicated curve by dragging the pattern over the duplicated curve and then dragging the pattern within (sublayer under) this duplicated curve. I have done this hundreds of times and it works beautifully. However, this time the pattern disappears. Then I tried to apply a fill or a stroke color on this duplicated curve and found that it would not take either one. I have checked all of the opacities, putting them at 100% if they were less, all within this duplicated curve. Nothing helps. What am I missing? Is there a hangover from the gradient that is doing this? Must I redraw the curve to create an "empty" curve? Thanks.
 -
 Does the design loose some of it's effect like gradient/shadows when it is exported to EPS or SVG? I exported a design to EPS and SVG. I had a gradient button. I can't edit the features.
 -
 Hi eveyone I can create and edit gradients, but am unable to go back and redit. Reselecting the gradient tool doesn't show exiting nodes and clicking on the layer clear the exiting gradient and creates a new one. Am I missing something?