Search the Community
Showing results for tags 'gradient'.
-
 I like to proppose anadditional feature for Affinity Photo, which I was missing: appling stored gradient fills from the color swatches panel in the fx-panel dialog.
 -
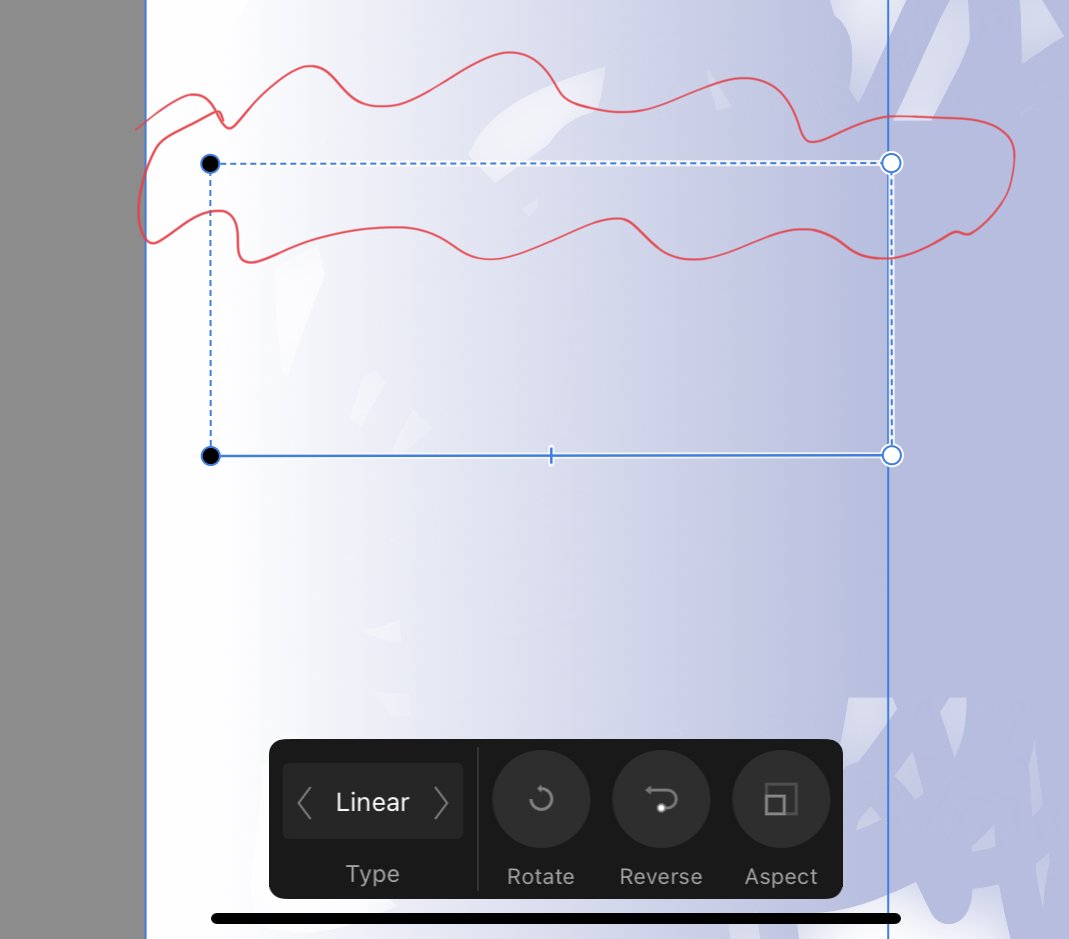
 I’m encountering this extra gradient line a lot. I believe it’s when an object with a gradient applied is scaled or transformed in any way. Then when I decide to tweak the gradient and choose the gradient tool -> this (attached) is what I see. Feels like the moment I do anything with an object with a gradient, this is added. 1) Is there an easy, quick, no-faff way to get rid of it, please? 2) Am I doing something when first applying the gradient that invites this? Put another way: can I apply a gradient and set something that prevents this? Thank you - all help appreciated, always.
-
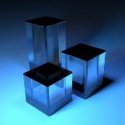
Greetings Team So I was making a nice glow behind some text by creating a gradient in a circle and then making it oval by scaling it down on the vertical axis. It looks great in app but when I export it forces the gradient back to a round shape which looks odd. I understand PDF may not support distorted or oval gradients but then it should be rasterized properly before it exports. In app... in PDF (CMYK conversion so the colour is different)... Thanks for your review on this.
-
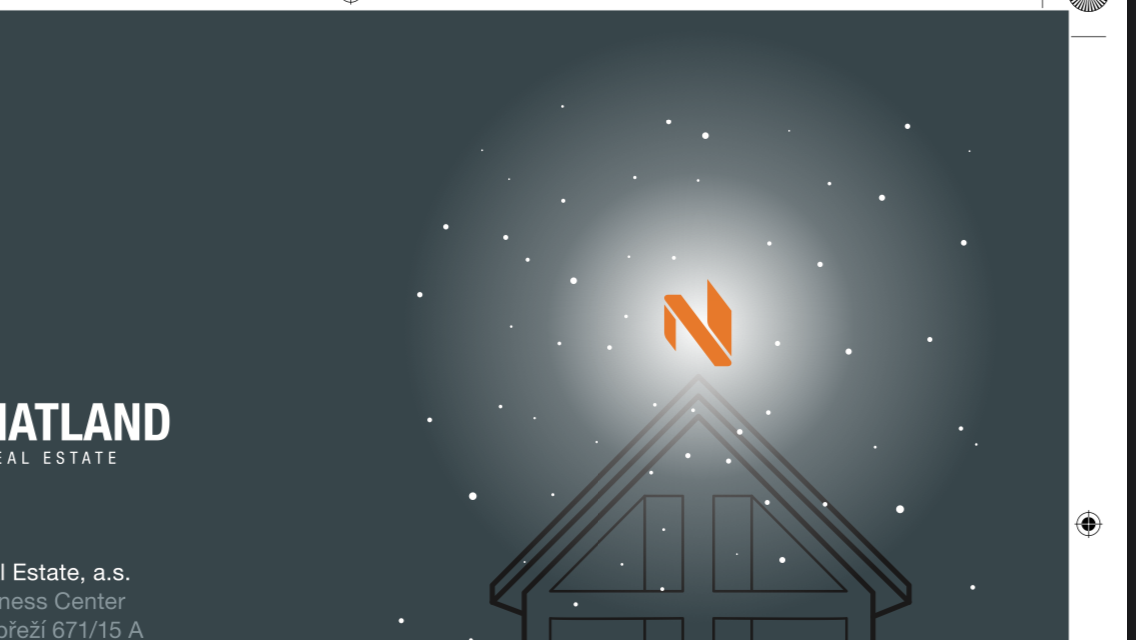
 Hi guys, First time I tried to use gradient for print and cannot figure out what's wrong. ;) Check the screenshots. On the display the gradient looks perfect. In the exported PDF it looks awful. I've tried circle with radial transparency 0-100% added, and also white circle with white to transparent gradient. Same result. Midpoint is at 40% and I even tried different transparency/color values for this midpoint but it's still the same. is there a simple way how to achieve this gradient for print? Thanks.
-
Hi guys, It would be great if when using gradient colors, we could use the COLOR PICKER tool. For example, I have an object that has a gradient color. When I click on one of the handlers, to change one of the colors, if I use the color picker tool, the shape loses its gradient color and turns into the color chosen by the color picker, regardless of the fact that I first clicked on one of the gradient handlers. It would be great if when clicking on a gradient handler, and afterwards selecting the color picker tool and selecting a color, only the color of the gradient linked to the handler I clicked on, will be changed. I was actually surprised it doesn't work like this by default Thank you, Chris
- 10 replies
-
- 2
-

-
- gradient
- eye dropper
- (and 1 more)
-
 I feel it’s not possible in AD, but just to be sure, is there a way I can apply a gradient to the stroke width? I mean, I know I can apply a gradient to the length of a stroke, but can I do it also to the width, so that gradient would follow the path of the stroke? My first thought that it maybe could be done via layer effects, but I couldn’t figure it out.
 -
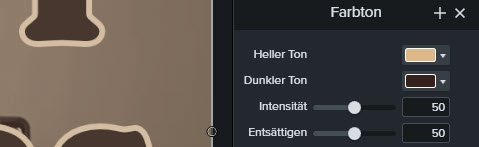
 Hi there, I have 3 branding colors (1 main accent, one near white and one near black). In my video editor I found an option to set a different color for the light and the dark tone independently. So I set 2 of my colors, set the saturation and the intensity each to 50% - voila, loved the result. Now I want to do the same to my photos for branding reasons. So I tried all the options I could find (including the colorize function with the 2 sepia presets) but didn't get really close. How can I do this in Affinity Photo? Thanky ou for your help, Andi PS: My exact colors are vintage white: #FCF9F2 / 252 249 242 (instead of plain white) beige: #DEB887 / 222 184 135 dark brown (instead of plain black): #35211D / 53 33 29.
-
 Hi Using Gradients, or shadow effects dramatically increases the exported SVG file size. Do anyone have any tips/tricks for how to use gradients in a way that does not affect the file size? This is important for use on webdesign etc. By example, a file was 4kb, without gradient. Introducing 1 gradient and 1 shadow effect resulted in a 60kb SVG file. Anders
 -
 In the Develop Persona in the Overlay area: 1. Click on the gradient tool icon. 2. Create a gradient by dragging from top to bottom. Result: Gradient appears as coming across from the right edge of the image. Re-tested and this time drew a gradient from the left edge into the image and the result was a gradient was created from top to bottom. Windows 10 Version 2004 OS Build 19041.450
 -
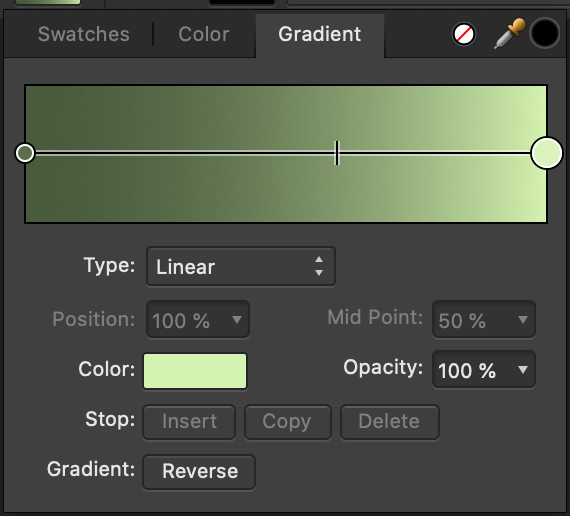
 I don’t normally use HSL colours so this is a new area for me. In my attached image I have two rectangles, each with a horizontal linear gradient fill. The top rectangle gradient goes from RGB 0, 0, 0 on the left to RGB 255, 0, 0 on the right and that looks as I would expect (the colour at the middle point is RGB 128, 0, 0, as can be seen in the little square below it). However, the bottom rectangle gradient goes from HSL 0, 100, 50 on the left to HSL 360, 100, 50 on the right but I don’t get the colours in-between the two as I can see in the “H” slider of the Colour Chooser. I would have expected – possibly naively – that the middle point of the gradient would be coloured as can be seen in the little square underneath (manually chosen colour), and I would get all of the other colours too, but it’s not. Am I doing something wrong? Is there some fundamental thing which I’m not understanding about HSL? I did a little searching in the forums but didn’t notice anything relevant. Some related questions but no answers that explained it (to me). (I’ve also attached the document for people to experiment with.) HSL-on-gradient.afdesign
-
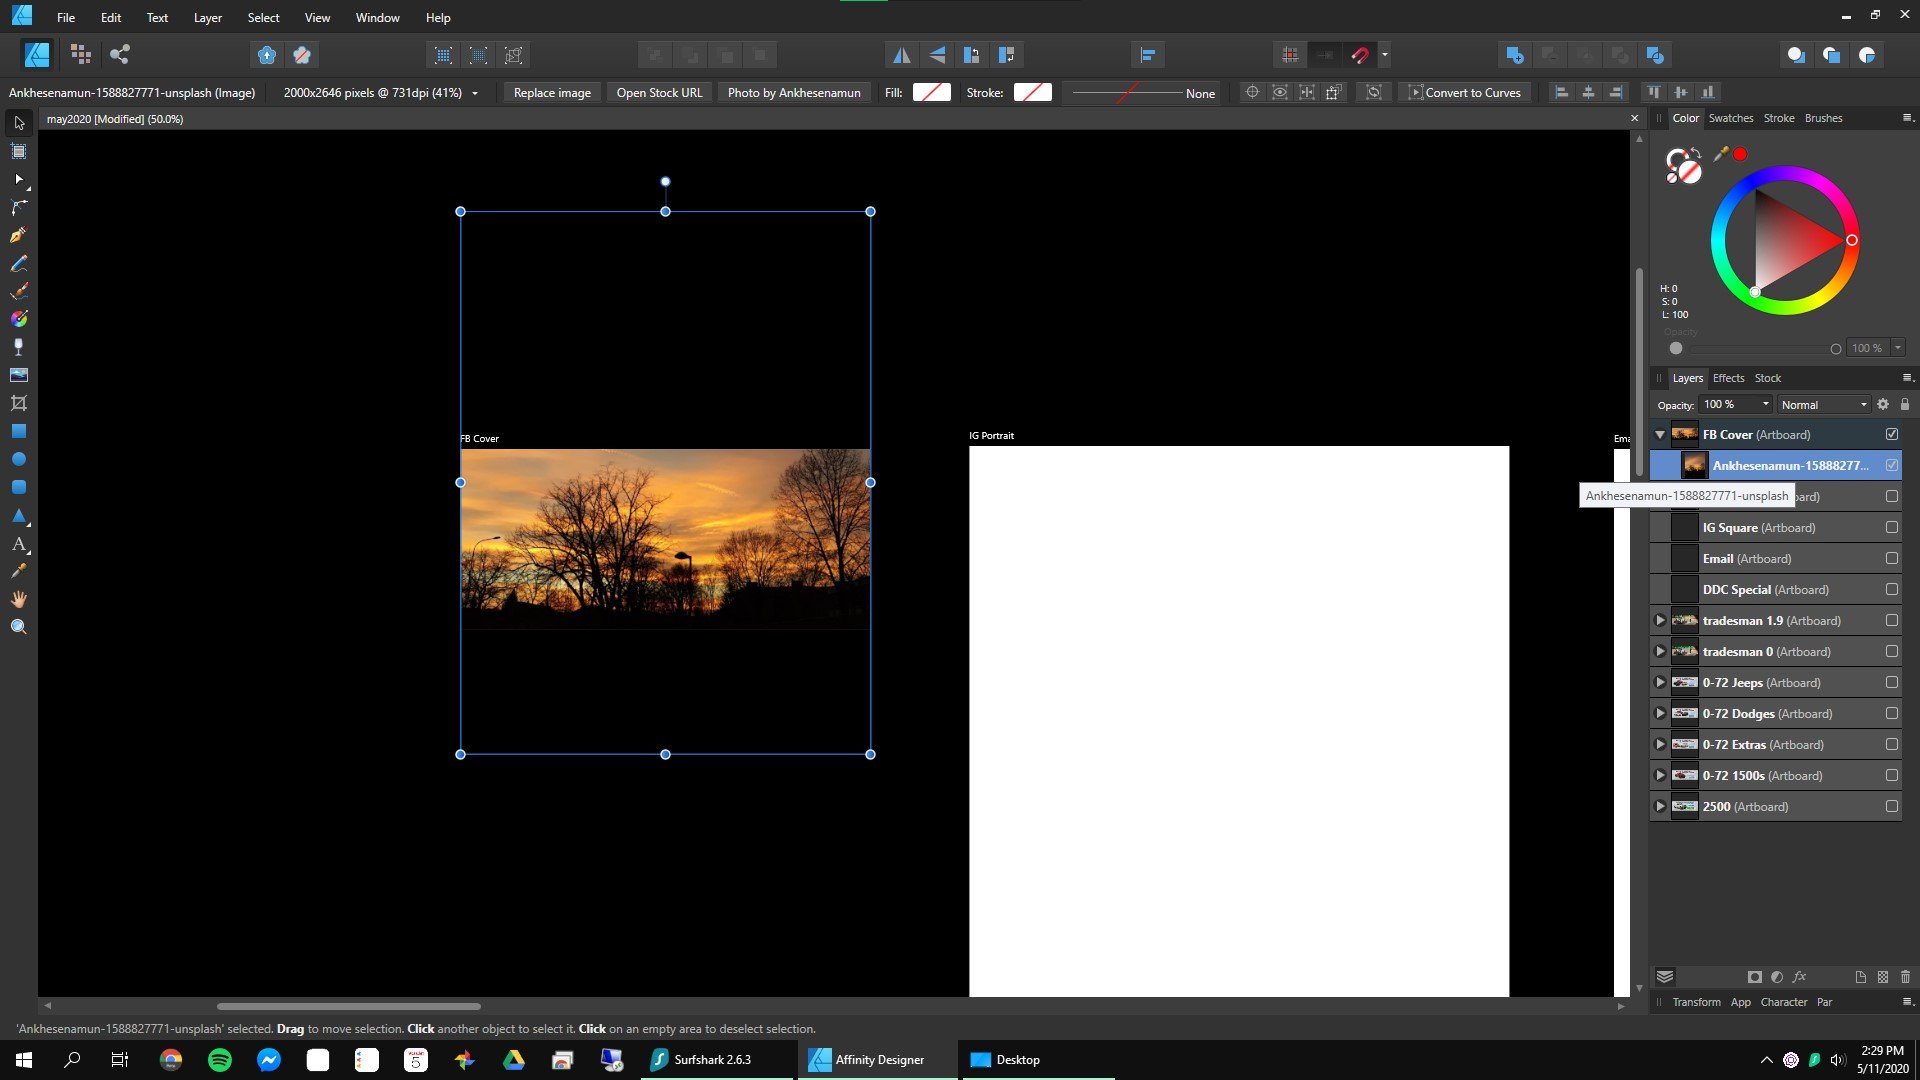
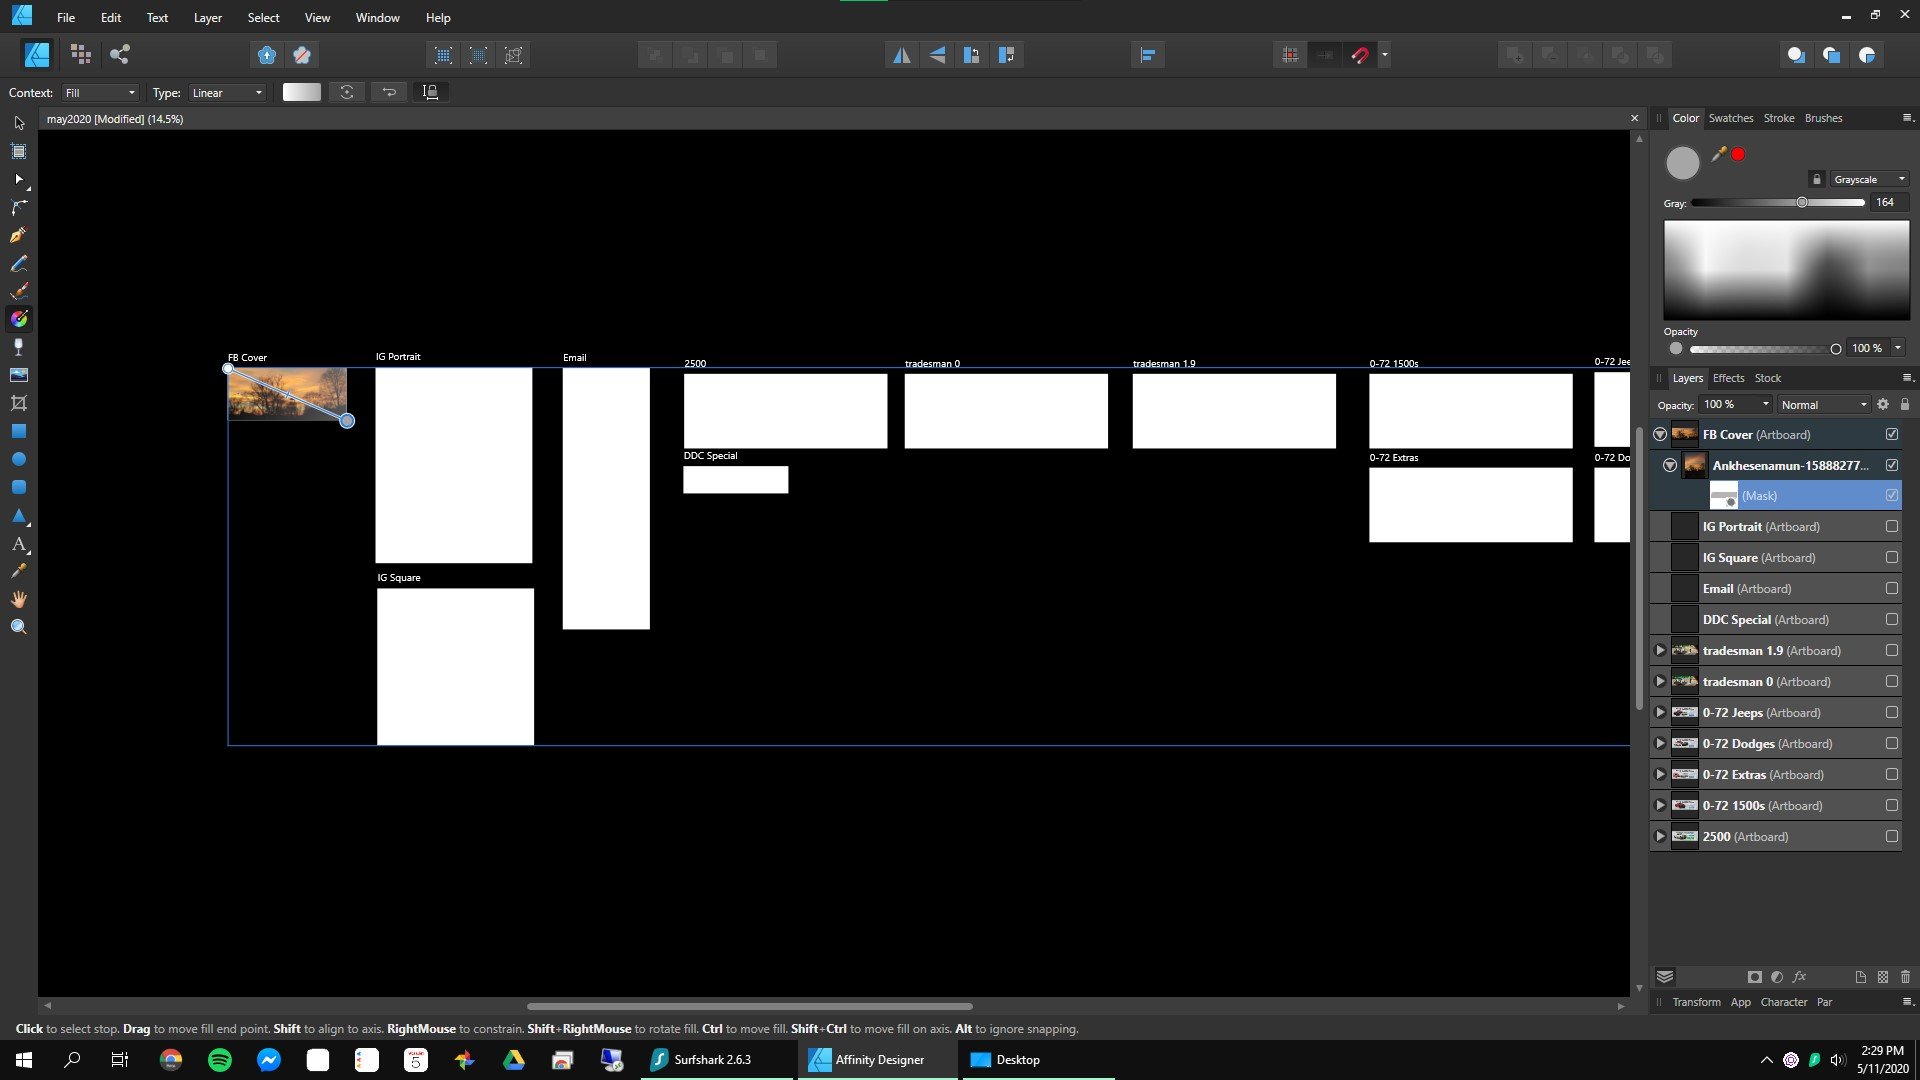
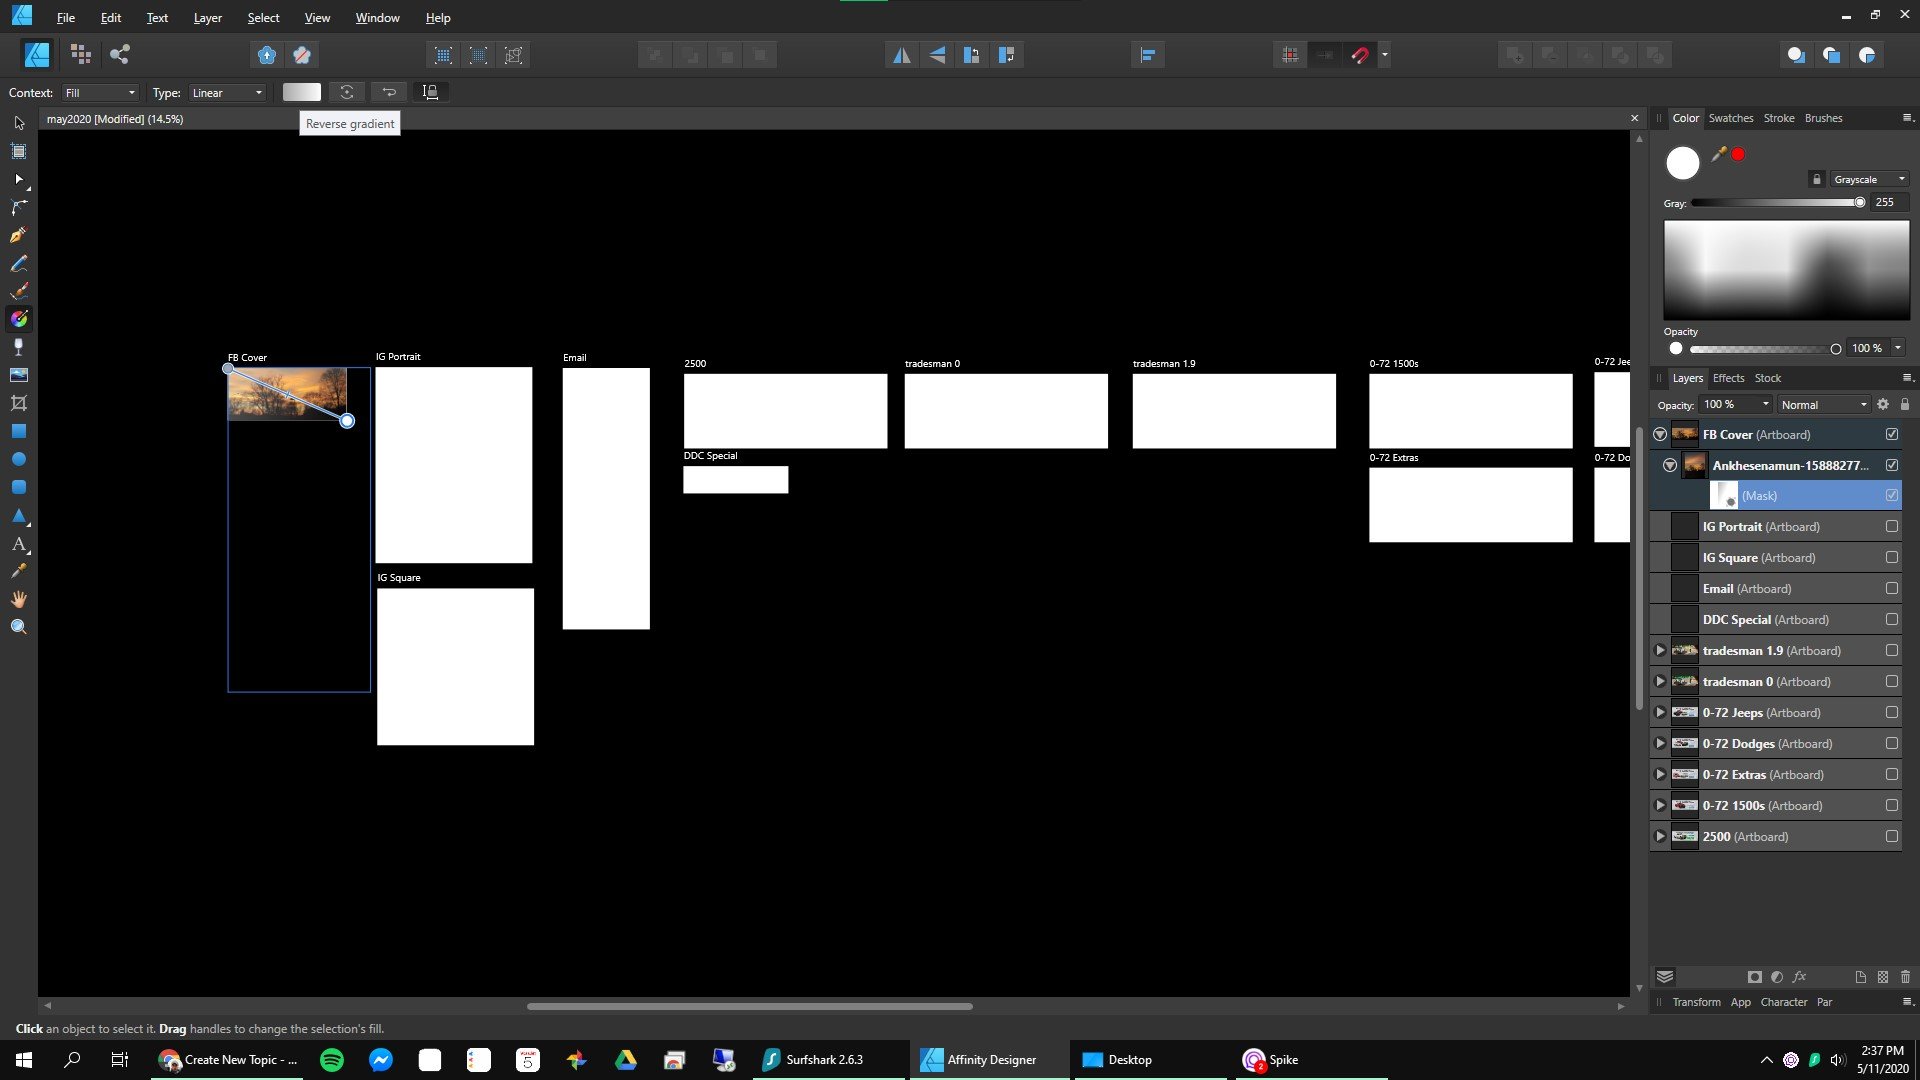
Windows 10 build 19603 Designer v 1.8.3.641 edit: also present on 1.8.4.650 beta Steps to reproduce: 1. Document created with multiple artboards. 2. Image applied to one single artboard. 3. Image selected, create mask. Works as expected. 4. Apply fill gradient to mask. Bug: Size of gradient mask applies to size of whole document. Expected behavior: Size of gradient mask should size according to parent image the mask is applied to. Images attached for evidence. Additional related bugs: 1. Click "Reverse Gradient" button in toolbar 2. Mask size changes to an unrelated size.
-
 I could do this in Photoshop with the gradient tool, but I can't find a way to do it in AP. I want to have a photo in a full-page ad at the top of a page to gradually fade into the copy block below it. In Photoshop, I could apply a gradient affect that would melt into transparent space at its bottom edge (or any age, for that matter). It was great for doing collages. Anyone been able to do this in AP?
 -
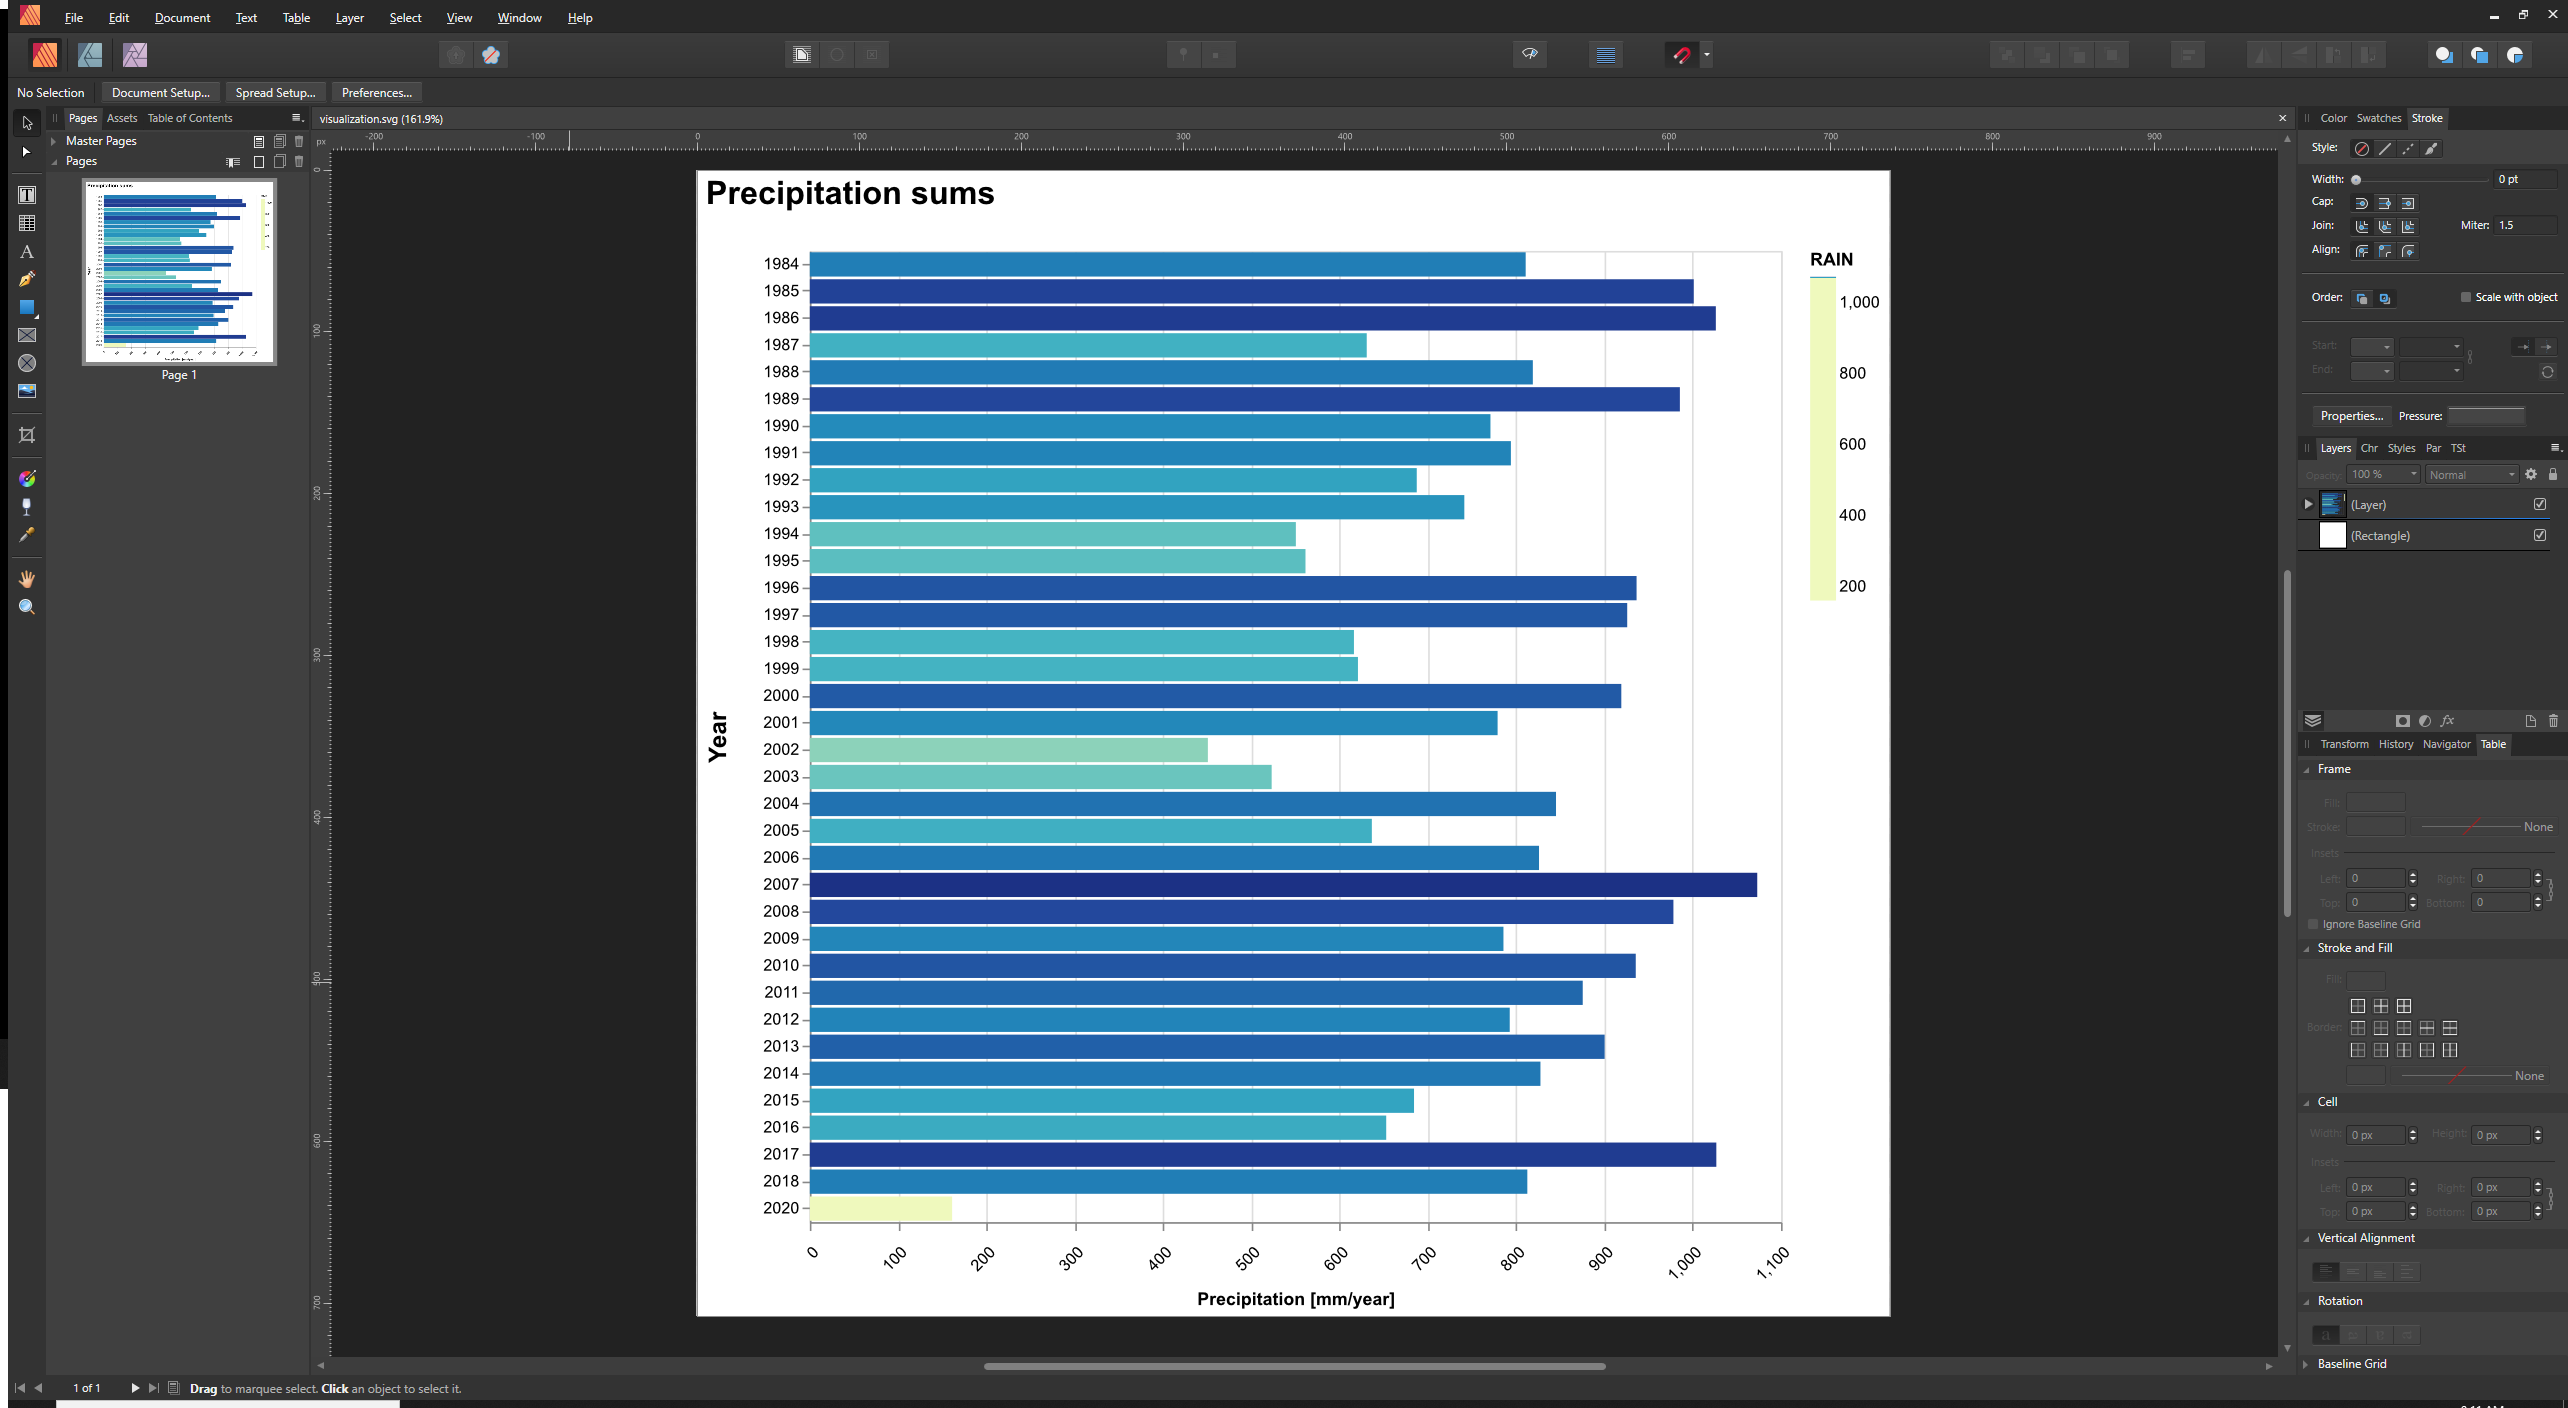
Hello, I have this issue. Not properly visualized gradient Affinity (Publisher; Designer) Google Chrome visualization.svg
-
Hello, As a dataviz designer I often create the base of my works with SVGs on the web, so I can program the visual elements to be based on the data, then to import them into a vector tool for other adjustments. I've noticed that Affinity Designer doesn't import any SVG linearGradient / radialGradient nor patterns, which I do often use, so for now I can't rely solely on Affinity Designer sadly enough. (I copy the SVG element from the "Elements" section from the devTools in Chrome) I've attached a document that shows the import of the link below. All the inner curves that have a gradient in the online version are invisible (have no fill) in the import: https://bl.ocks.org/nbremer/raw/4de6f0a9d9d06373fc639e32e9c346cc/ For a radial gradient, you can try this: https://bl.ocks.org/nbremer/raw/e944485869ac8fd57413a158e9d8aae0/ which results in a no-fill circle being placed in Affinity Designer For pattern examples, you can try the following links that all are imported seemingly remaining invisible: https://bl.ocks.org/veltman/raw/57fbb830ba7e62caa46a82891168bc29/ https://bl.ocks.org/1wheel/raw/a8f39c8a96b71735488bf280d34bd765/ https://bl.ocks.org/veltman/raw/50a350e86de82278ffb2df248499d3e2/ I'm using Affinity Designer 1.7.1 on macOS Thank you! SVG_import_No_gradients.afdesign
-
 I have 2 separate curve layers that overlap. At a certain point for these two curves(between the two black arrows) I want the gradients to merge or blend together more. Is there a way to do this without converting these layers to pixel layers or doing something destructive?
-
 This feature is unparalleled and extremely powerful. redefines vector coloring. Affinity should do everything in its power to support this feature. @TonyB Learn more: https://helpx.adobe.com/illustrator/using/gradients.html#create_apply_freeform_gradient
- 13 replies
-
- 6
-
-
- adobe
- illustrator
- (and 5 more)
-
When applying a gradient, it is quite hard to predict what the impact of the default gradient will be. The new node will have changes in HSL, but these changes are inconsistent and not always desired. It would be great if we could have a way to toggle impact of gradient to be: H [decrease][do not change][increase] S [decrease][do not change][increase] L [decrease][do not change][increase] Imagine I only want to decrease luminosity across a large number of objects, then I can select decrease luminosity and do not change hue and saturation. This way I can productively stroke every object in the desired direction and model objects with a predictable effect.
-
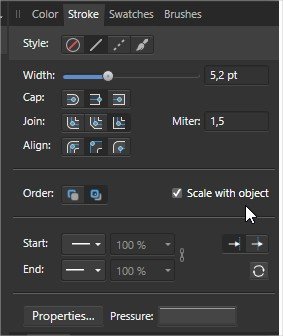
 On thing that I lke the most of using Affinity Designer is the Gradient Tool. Is by far one of the most satisfying tool to use, However, I think one minor change on it's behavior could greatly improve the workflow of using the tool. The gradient tool don't suport the color picker tool. That's very anoying when coloring, because some times I want to pick a color from a place and this reset the Gradient Tool. Other minor changes would be related to the Splash Screen. Why not have a open Document here too? And make the open Document or recent documents listed here, also having bigger buttons as well. Finally my last suggestion would be having a option to turn "Scale with object" default.
-
 Look like the gradient tool can't use document swatches for choose color and instead only use blended colors. Is there a way to use the document swatches? I did something wrong?
 -
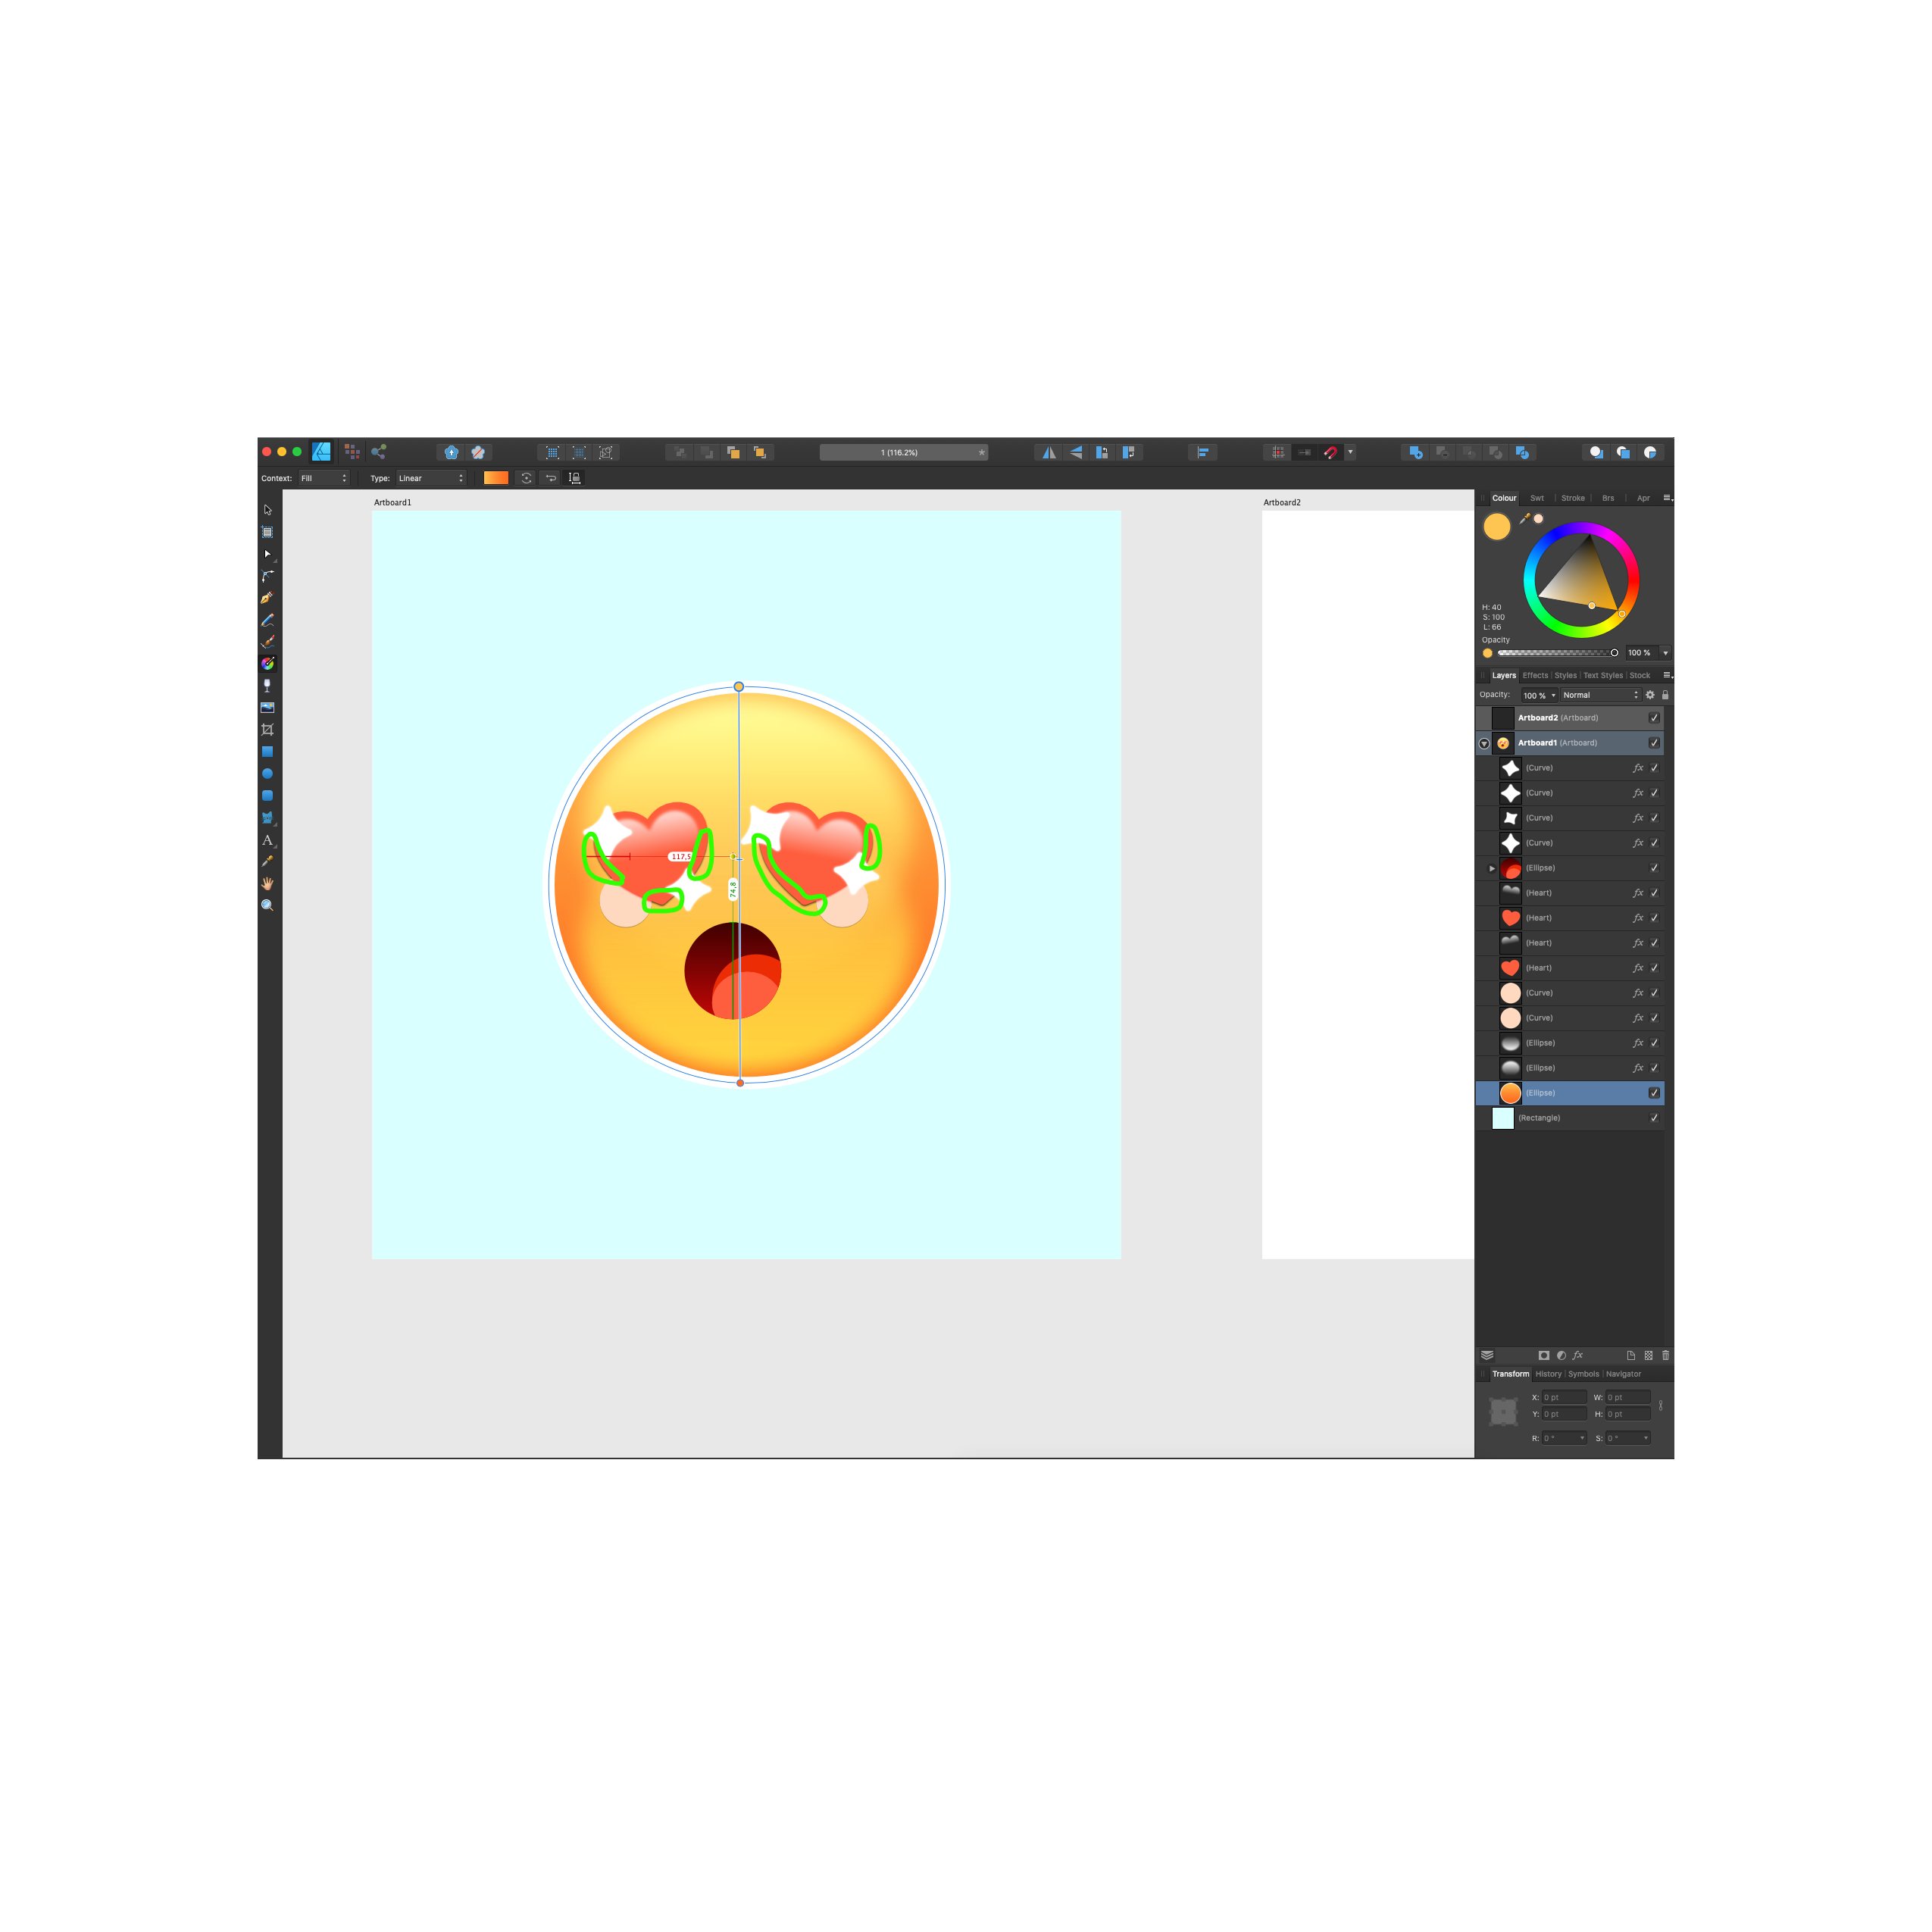
Hi, The gradient tool creates a black outline on shapes that are placed over a shape that has a gradient. See picture attached. The orange circle under the emoji has a gradient. A black outline appears under the red heart eyes. When I move the gradient, I can see the black outline moving around. The black outlines created by the bug are circled in green in picture 1. The outline disappeared in picture 2 when I lowered the gradient. Please note that the glitch only seems to affect shapes that have a shadow under them (hearts and pink patches) but not the white star and the mouth. This is the latest version of affinity designer and I work on a macbook pro (catalina). Thank you for your help, Lauriane
-
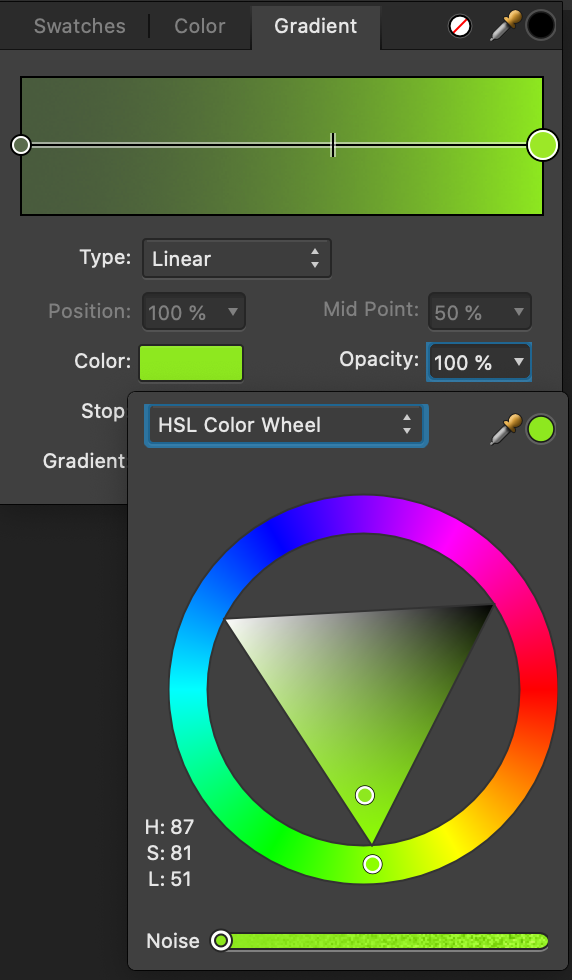
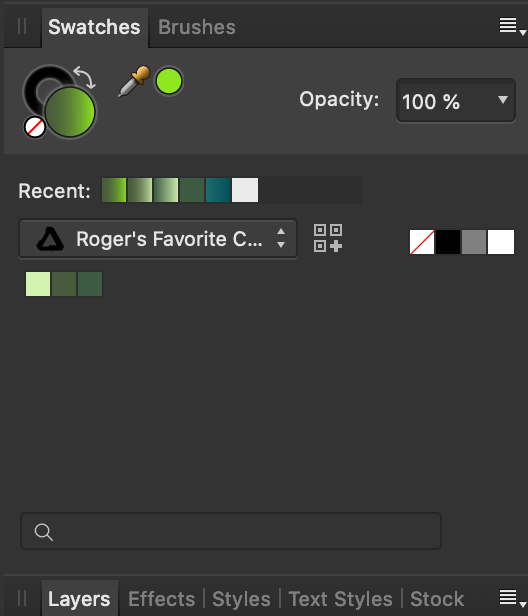
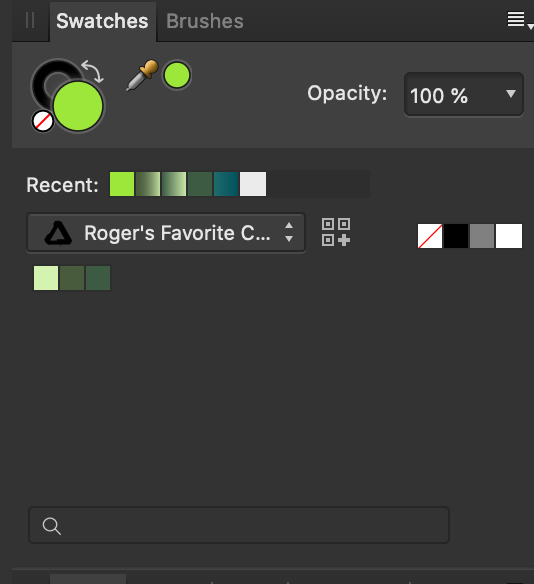
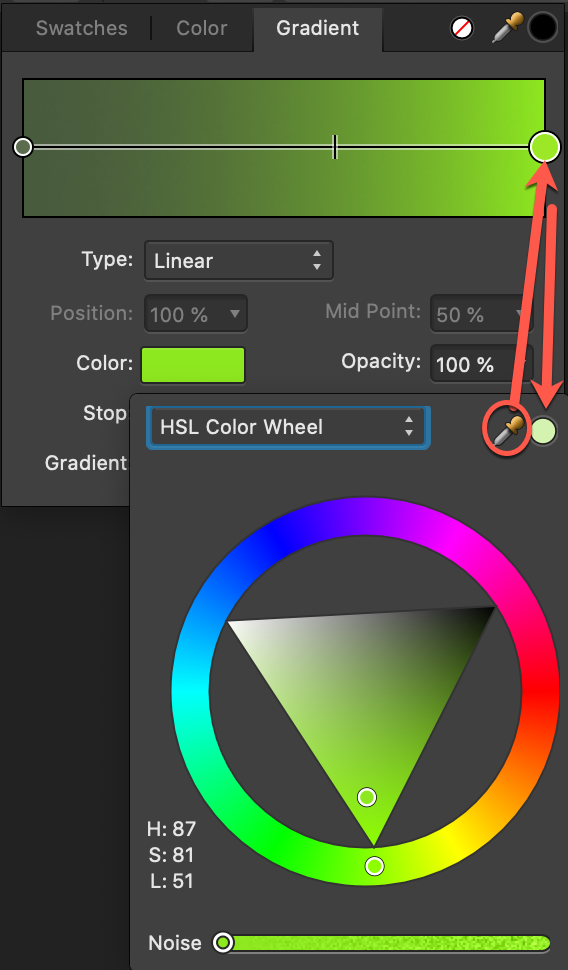
 When working with gradients you may wish to save one of the colors as a swatch but there are quite a few steps to do to make this happen, and doing so will affect the current gradient scheme ie. its object. I explain further below. My suggestion is to add the Swatch Add button to the Node of the gradient, which saves you all the steps explained further below. Now I will explain how taking the extra steps to add this color to a palette changes the current gradient scheme. 1. To best explain, I begin with showing the previous color in the gradient scheme so you can see the full workflow. 2. I will now alter the color. You will see that the color picker in the HSL popup is the previous color. To make the color picker the new color, I can either drag the color picker to the Node in the gradient scheme, OR I close and reopen the HSL popup (which is faster). 3. After closing and reopening the HSL popup, the color picker is now my desired color to save to a palette. Now that the color picker has been changed.... 4. The swatches panel shows the color picker has the new color, but the current gradient scheme will be changed as soon as I click the color picker. 5. I click the color picker, and the gradient has changed which allows me to proceed to saving the swatch, but the current object color is also changed. This workflow greatly reduces the ability to both experiment with colors in a gradient by impeding my ability to develop a set of preferred color in swatches palette. • It forces me to save a gradient prior to saving a node color. • It forces me to think whether I should finalize my gradient scheme so I'm not creating unwanted swatches in my color palette. • It abruptly changes the color of my object in the process of saving a desired color in the gradient scheme. • It stifles creative development as I may encounter other experimentation phases with other objects and not seek to go through all the steps to save a color node as a swatch. thank you
-
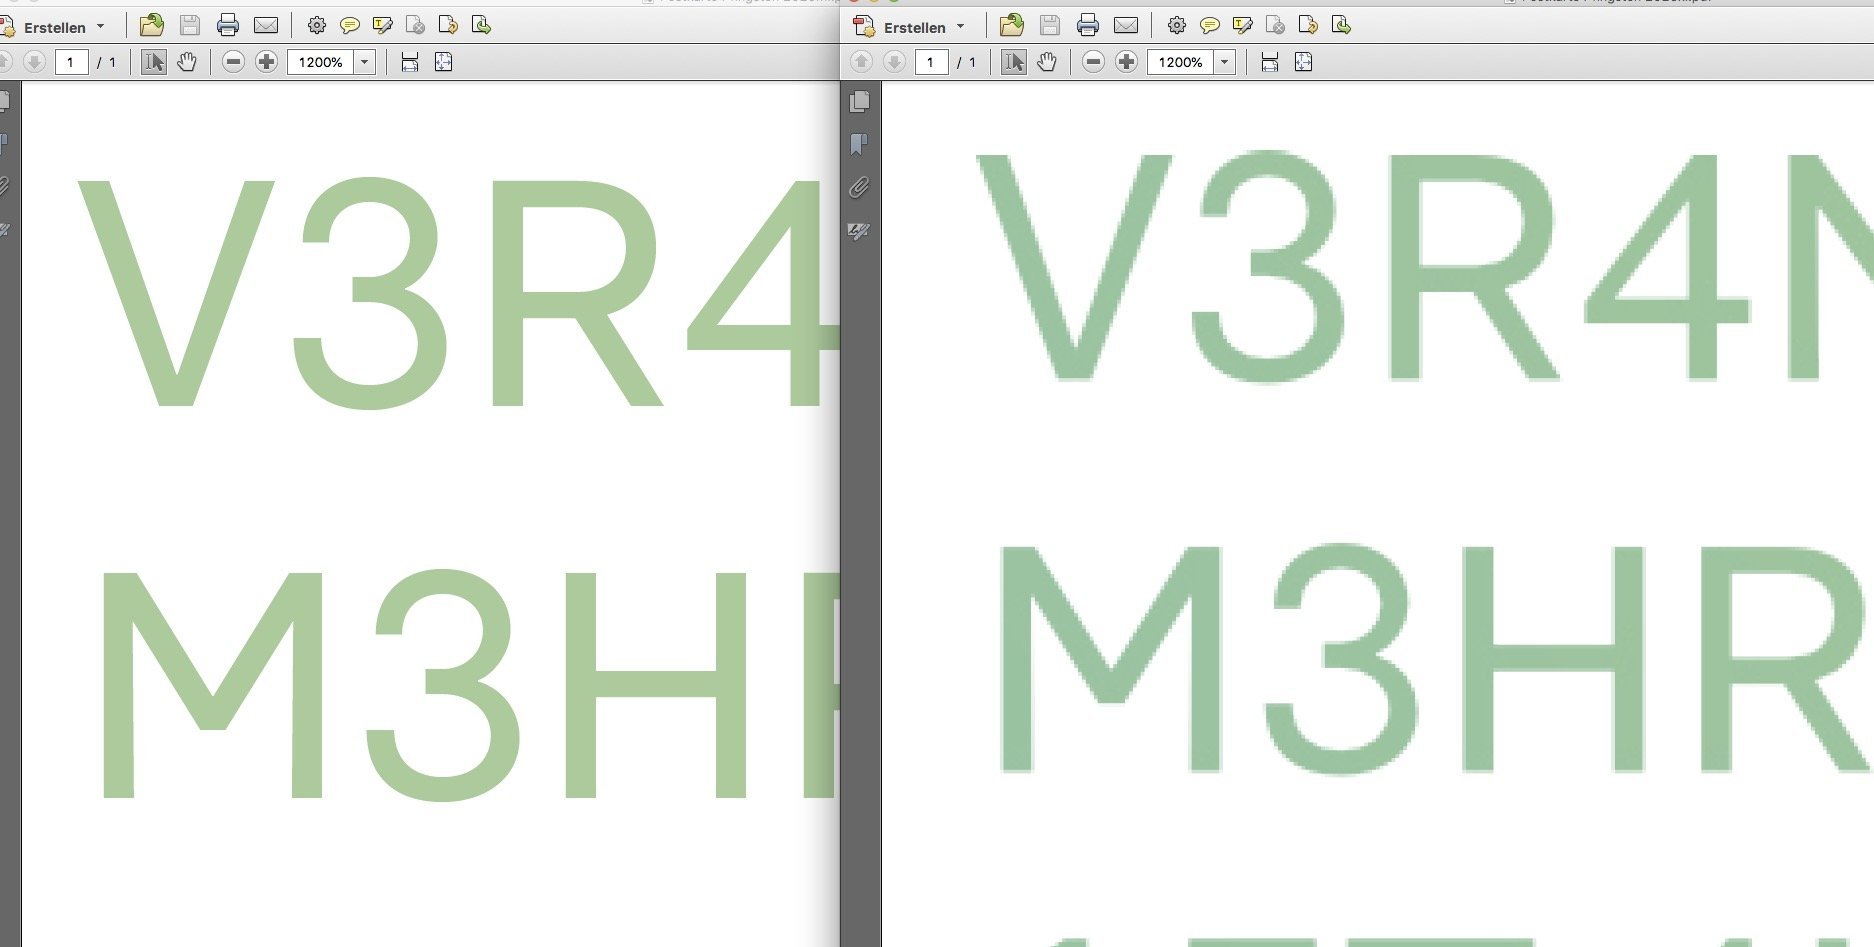
 Dear Affinity staff, maybe its a but, but when I apply a gradient effect overlay to text, the text is then rendered as pixels, not as a vector (like it should be). It is clearly visible in a low-res PDF export and still visible in print-res when zoomed in. See file attached (left: single color, right: gradient). I’m aware that the gradient tool would be the tool to go for in this case—but why is the effect causing the text to be rendered as pixels? Best, Johannes
-
Hi, Just bought my Affinity Designer recently. At start, all seems to be normal until i substracted a circle shape and try to add gradient to it and suddenly i can't drag my mouse to Zoom. I can olny click to zoom in and push Alt key to zoom out. And also, my Gradient node when i want to edit it, it lag so bad. So the only way to stop the bugs is to close and re-open Affinity, but then it happen again. Please help, i just bought it and it's so unpleasant to have this bugs. Iam using Win 10, i5 9th gen, GTX 1050, 8GB RAM Thank You
-
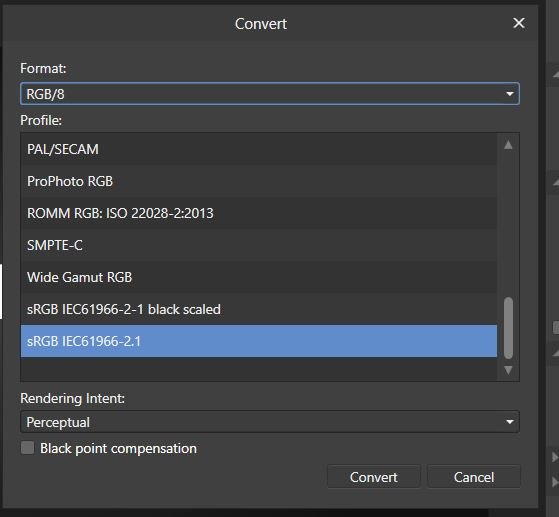
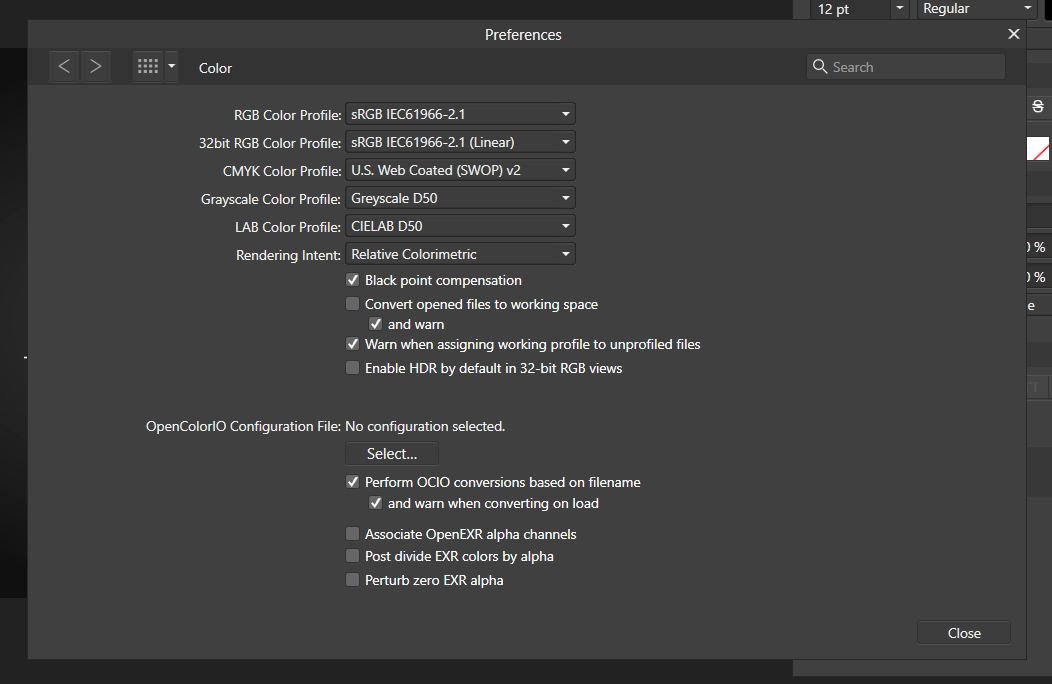
 Hello, I created a background with a gradient in Affinity Photo. In the doc and when exported, I and someone on a separate computer I shared the image to can also see the banding on the image. I tried: exporting as a JPEG, PNG, PNG-8, and converting the file format to RGB/16 and RGB/32 (HDR). RGB/16 seemed to smooth the image more but there were still bands in the image. I also tried remaking the background in RGB/32 but the background did not turn out. The image is 1920 x 1080 300 DPI How can I remove the bands or export the image without the bands?


.png.7df7b214f467cc89742d1225854137cf.png)